French Hellcat- 1/48 Hasegawa F6F-5
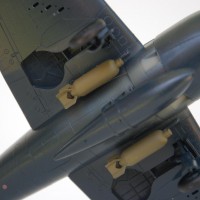
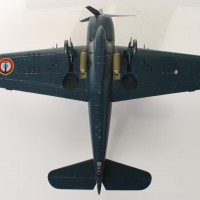
I have always wanted to build a French Hellcat, and years ago when i was able to get hold of some Model Art decals I set aside a Hasegawa 1/48 F6F-5 for this build. After some research, I noticed that the drop tank on French Hellcats and late service USN Hellcats did not have the typical "post" type mount as seen in WW2 photographs. I modified a drop tank from a Hasegawa 1/48 F4U-5 kit with the straps, braces and pipe as seen in the photos I found.
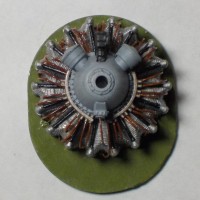
I wired the kit engine, which i find looks convincing once sealed in the cowl. I used a True Details cockpit in this build. I swapped the kit cowl for a resin cast of an Otaki Hellcat cowl that I made quite a while ago, back when you could order casting resin through the mail from the US to Bermuda. It is considered "hazardous" to ship in the mail nowadays!
I used bombs from an Eduard Profipack Hellcat kit which comes with an etch fret that supplies fins for the plastic bombs in the kit- the "weekend edition" supplies the bombs but no etch fins.
I used Testors enamel for the USN GSB and then coated with Future for decal application. After the decals were applied I brushed clear flat to seal them in and dull the finish. After this, I sprayed some exhaust staining on the fuselage. One day, i will go a bit further with chips and other staining and fading- but for this time i was a bit leery to try that as I have been happy to get quite a few kits done this summer, and didn't want to prolong completing the kit.
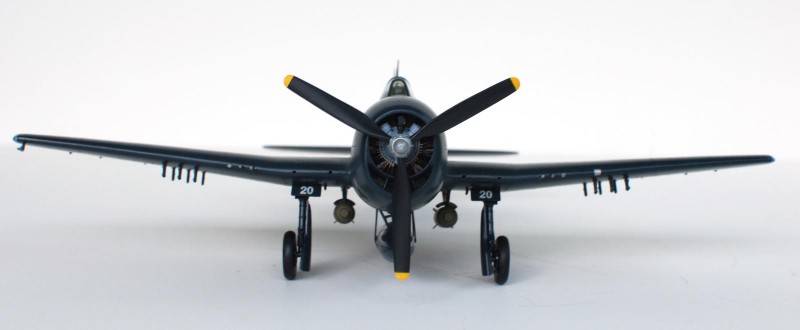
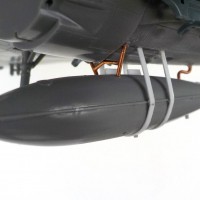
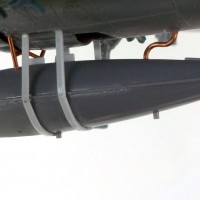
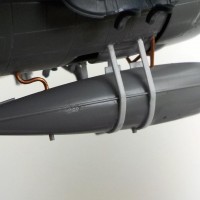
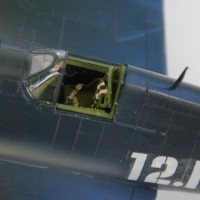
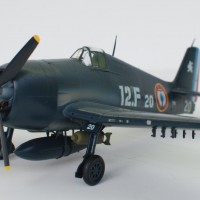
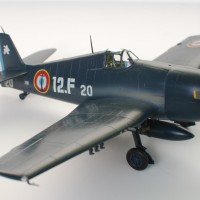
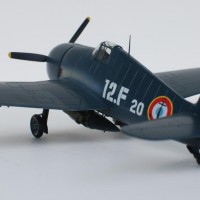
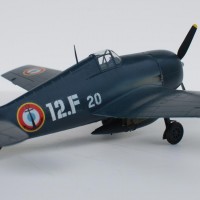

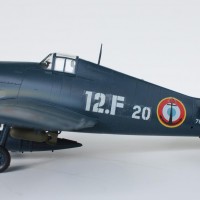
Looks pretty good from here, Dan...nice work. BTW, since when is it considered "hazardous" to ship resin parts by mail? It's done on a regular basis all the time, isn't it?
Hi Craig, thanks for the kind words. Casting resin- in its raw form- the two parts- resin and catalyst can no longer be shipped airmail- just like tins or bottles of enamel or "flammable" model paints or products. Never heard of any airliner in the history of aviation brought down by model paints or casting resin...
Oh...I misread it - I thought you meant "resin parts" - not the mix itself. My bad. 🙁
Very nice and oddbally Dan. I love out of the norm schemes
Thanks George, I have a French AU-1, and F4U-7 next in line.
Awaiting the builds. I did the Hobbyboss -7 which needs some corrections
Hasegawa -all the way for me.
Terrific work, Dan! I've built two 1/48 Hasegawa Hellcats, and I think it's the best kit in that scale.
Thanks Drew, Now having built two Eduard Hellcats (and a few more in the stash- but not as many as Hasegawa kits) there is something about the finesse of the Hasegawa kit compared to the Eduard, but there are some detail aspects on the Eduard that make them "kinda" equal,although my scales tip more to Hasegawa...(in spite of the kit cowl)... for me.
Yes, I agree - the last Hellcat I built was an Eduard kit, and it does have a few advantages over the Hasegawa kit, such as open and closed canopies, and more accurate rockets and cowl, but overall, I think Hasegawa's kit is better fitting and detailed.
Great precision work Dan !
The Aeronavale is grateful and sends its congratulations to you
Thanks Kloster! There was talk about a trip to Paris for a medal...:-)
The plane tickets are on their way to your adress
Again an amazing model on show! Thanks for sharing this one!
Much appreciated support from you Morne!
You just have to like this ... it has everything going for it. It's a Hellcat, it has markings that you normally don't see. I really like it !
Thanks Louis- your kind words are appreciated.
Great build!, love the tank detail.
Tanks Robert! 🙂
I will be doing the same for my F6F drone controller build!
Beautiful, Dan! I agree with Louis & Robert - & the others ... and I love the tank detail myself. The whole thing is well made & wonderfully painted & detailed. As Lou said - what's not to like!
And the photography is excellent, too. Bravo!
Thanks Jeffry- I greatly appreciate your support.
There's an easy way to get rid of the decal silvering even at this stage. Take a nice sharp #11 blade and criss-cross the areas of silvering to slice the decal in smaller bits, then slather on decal solvent. It can get under there and get rid of the trapped air and your very nice Hellcat will be perfect.
Ah ha! nice tip.
Thanks very much Tom. Decal solvent - doesn't that wrinkle the decal up? I have testors decal set- would that do the same? I was considering using a brand new #11 and carefully trimming out the large clear bits. I would have done that before application, but I was concerned they would all break apart if I stressed them on the paper with a knife before soaking. I usually use a drop of future under the decal, but it didn't have any "bedding" (elimination of silvering and helping to get decal to stick to future overcoat on model before decalling) effect on the Model Art decals!
Nice job Dan, I love those Hasegawa Hellcats too.
Thanks Jim- yep Hasegawa is definitely less fiddly in my estimation, but God bless Eduard for doing a quality kit of a USN subject amidst all the (very popular and lucrative) Luftwaffe types!
Nice work, Dan. I'm a fan of that Eduard Hellcat because of the open canopy option and the wing fit. I just got some Berna decals from Hannants to do a French -5 just like yours!
Thanks John, don't get me wrong- I think there are a lot of good aspects of the Eduard kit- I wish more manufacturers would provide a wide sit canopy part for sliding hood type canopies for an open option.
Hello Dan,
Always good to see the French Naval Air Arm represented in models.
Fine job on this model and its accessorizes.
Regards. Dirk / The Netherlands.
Thanks Dirk. I appreciate your kind comments. I have some more french navy in the pipeline...
Dan, that is a fine looking Hellcat, early Viet Nam markings. Both Eduard and Hasagawa have their respective merits. I don't see Aeronavale markings on Hellcats often, makes a nice change.
Thanks very much Bernard, I was originally interested in building the kit as a French F6F-5N, but the images I found (one photo and two profiles) were not clear enough and convincing enough for me to go ahead with it. Plus, I already had the markings I eventually used sitting on a sheet in the stash!
Very nice. Great work on the drop tank.
Thanks Greg. I appreciate it.