"Bare-Metal Foil" 1/32 Kitty hawk SNJ/Texan Project: A 1st Attempt

I am a private pilot an a huge WW2 Naval Aviation Buff. Much of this is due to my Dad being a Navy Aviation Crewman during the war. He spent a lot of time in the Navy Aviation Training Command logging a lot of hours in the back seat of the Navy version of the famed AT-6 Texan advanced trainer, the SNJ. So a few years ago my family brought me the best Birthday present. It was 2 hrs of flight time flying a fully restored USMC marked SNJ. What a day that was and I could not wait to share this adventure with my dad, who at that time, was in his mid 80's. Comparing flying notes with my dad was a memory I will never forget.
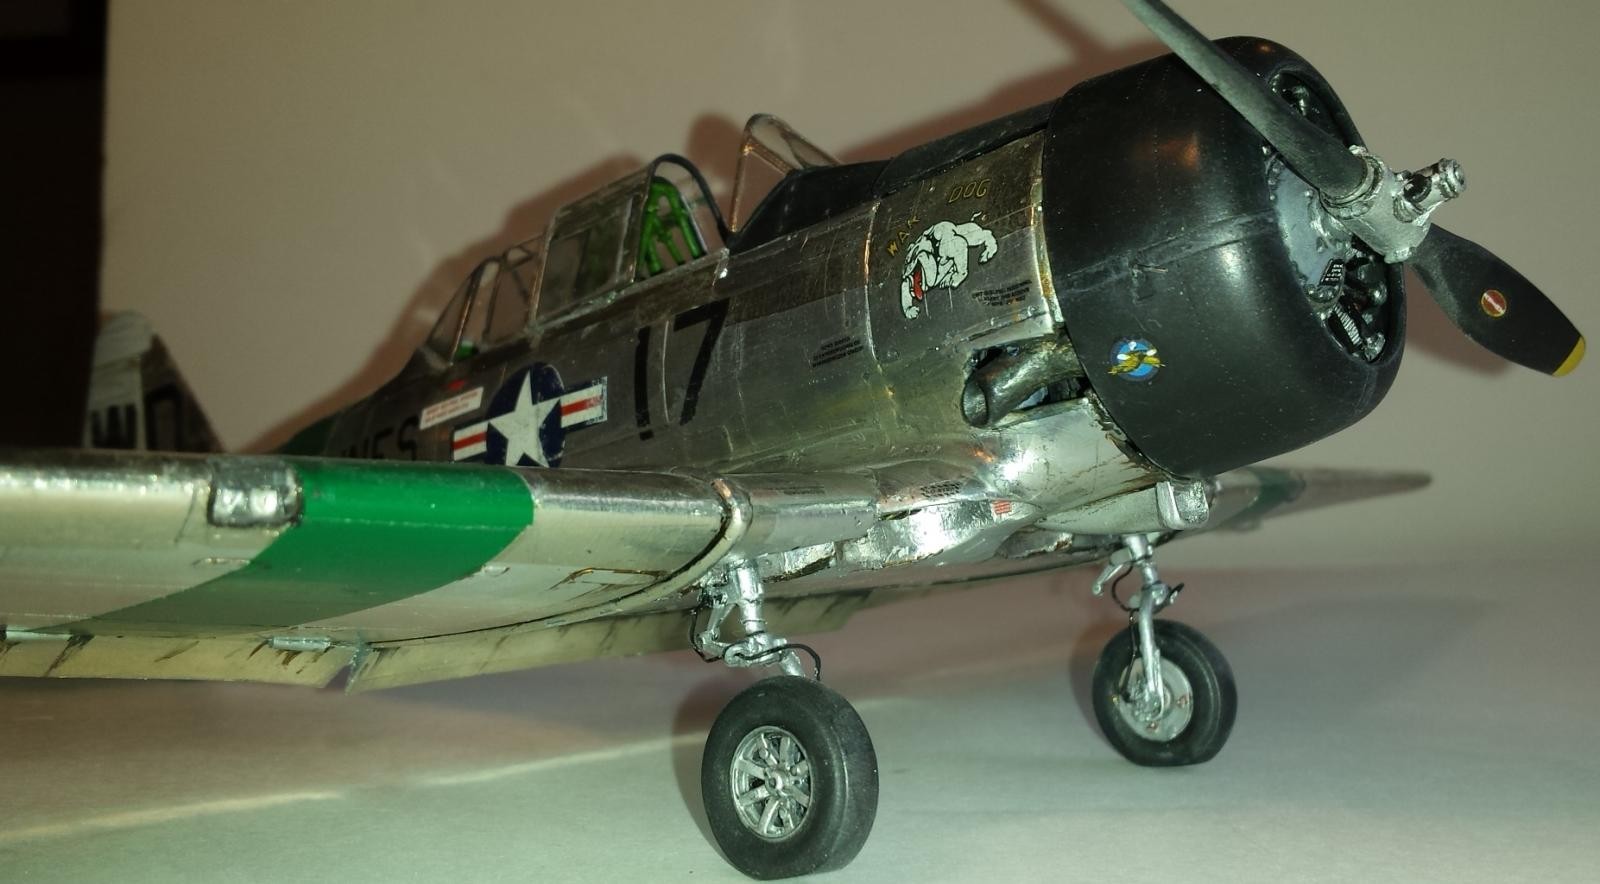
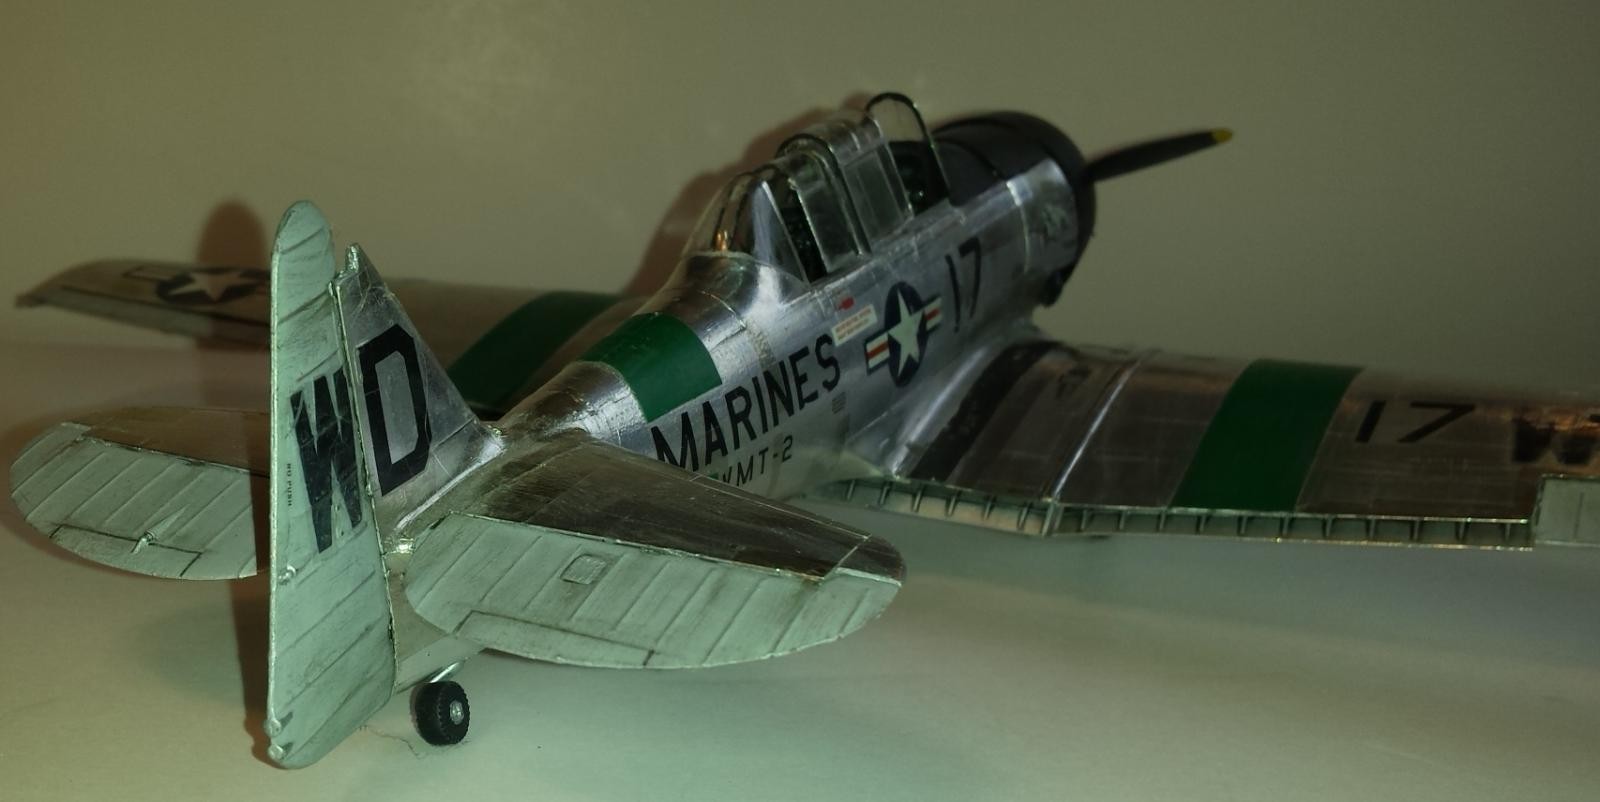
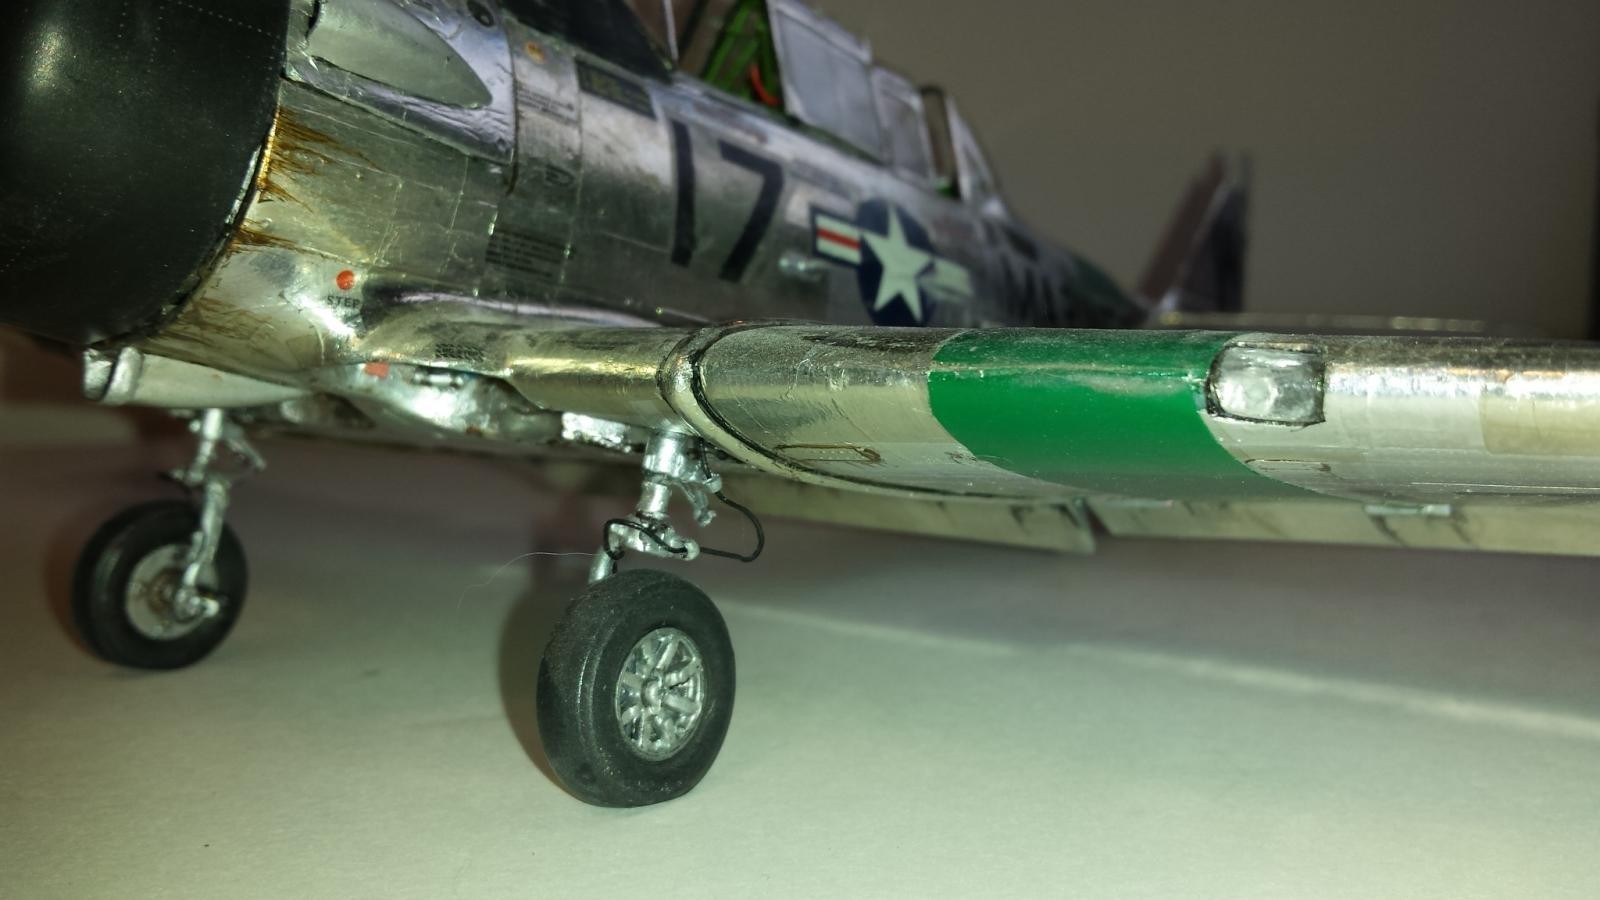
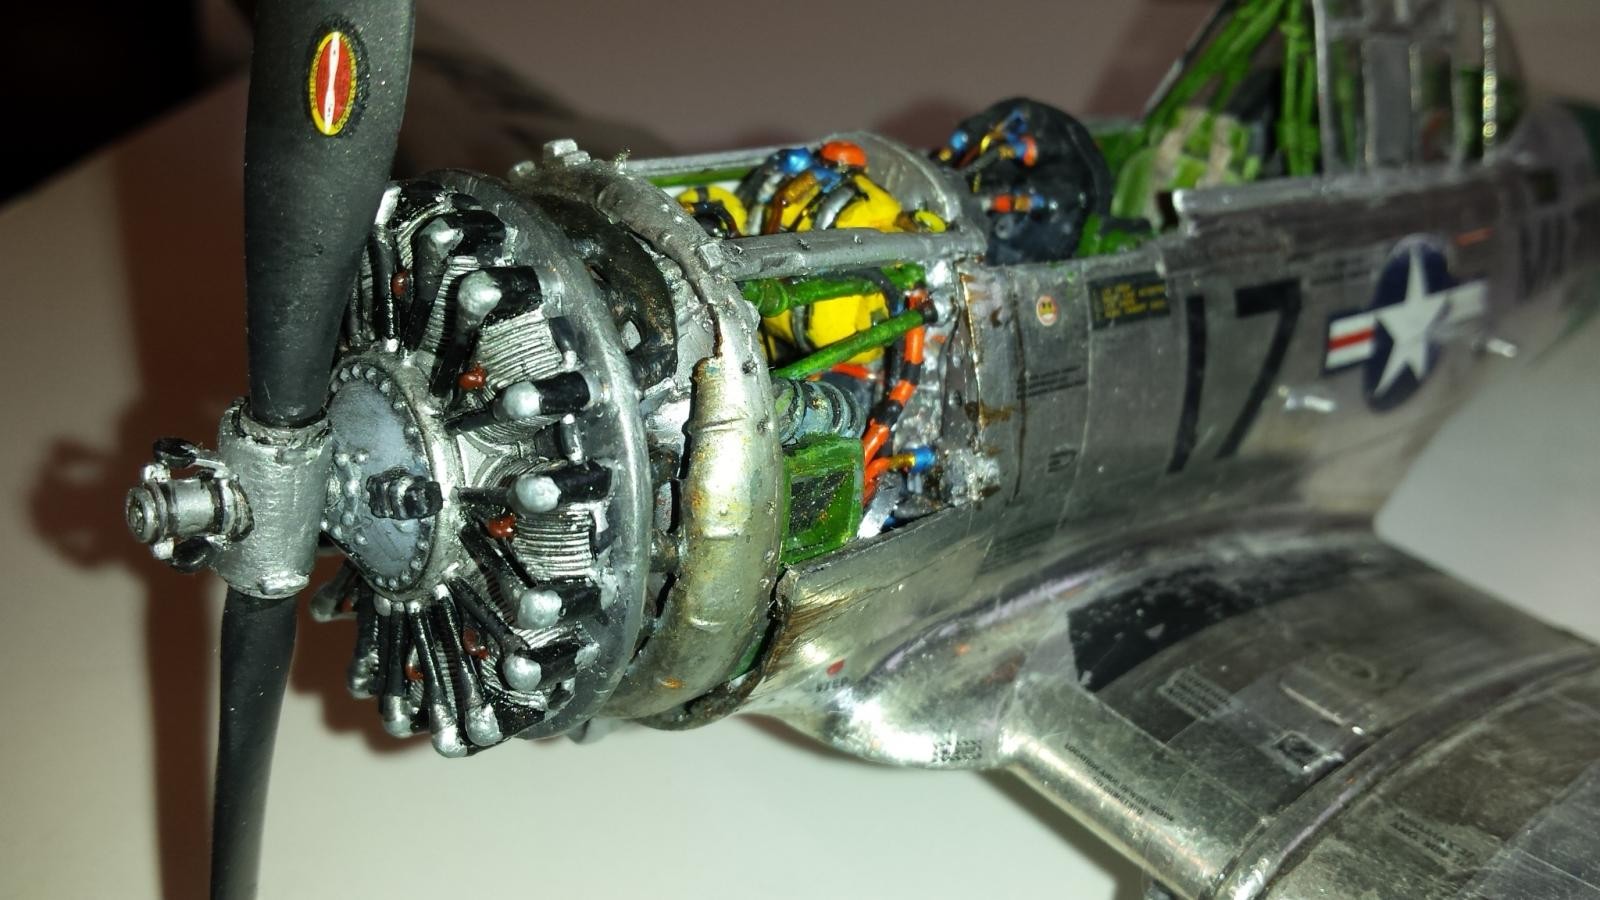
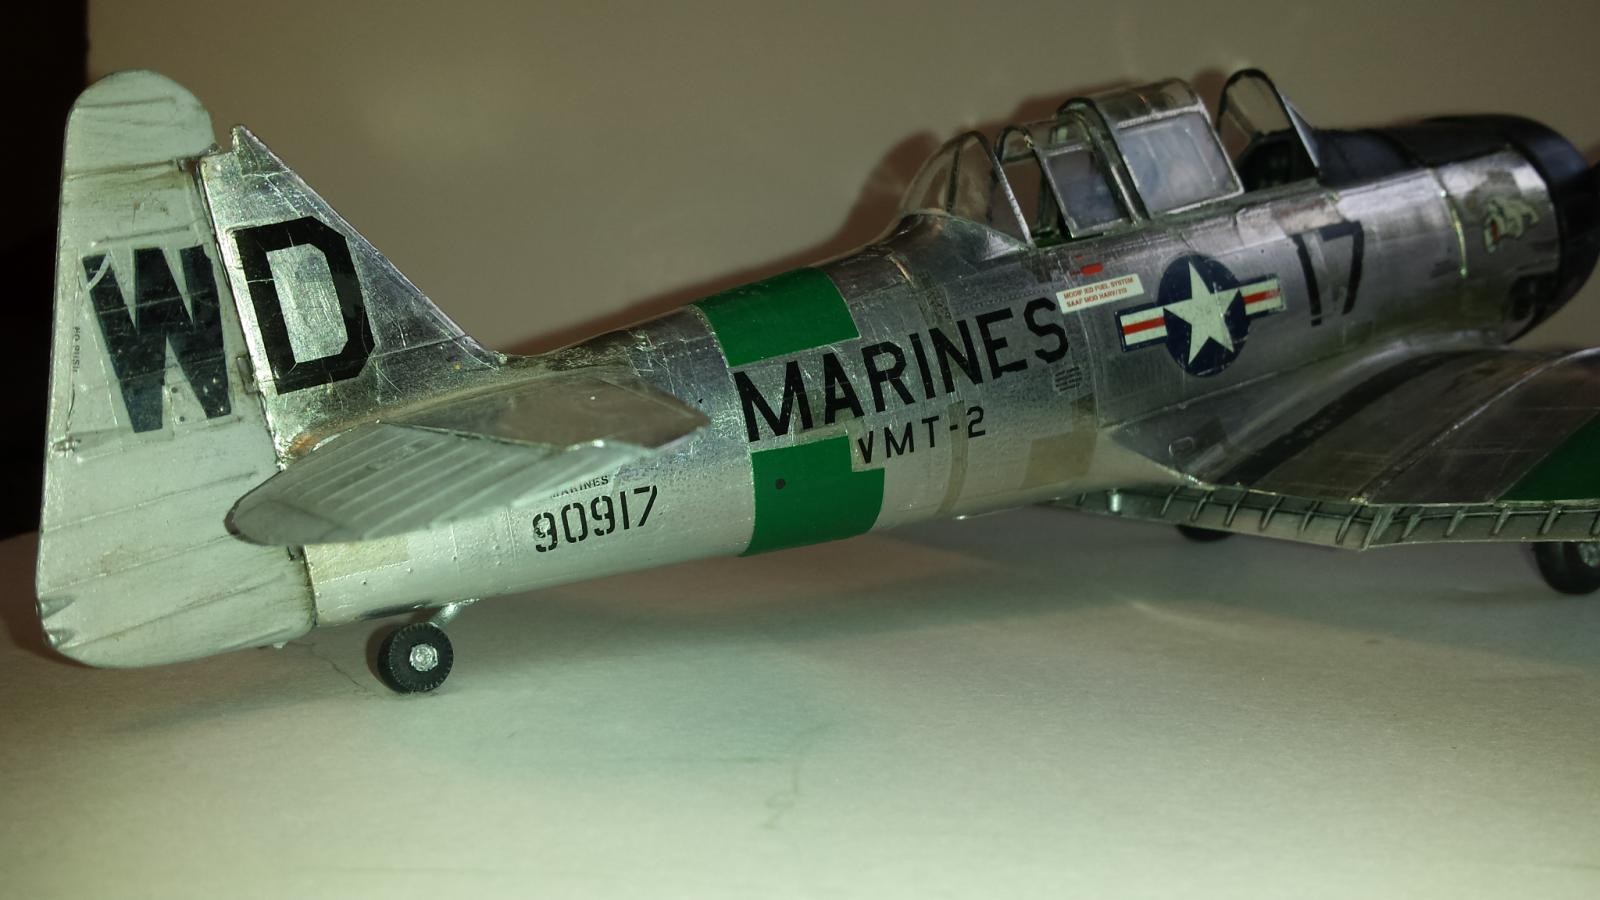
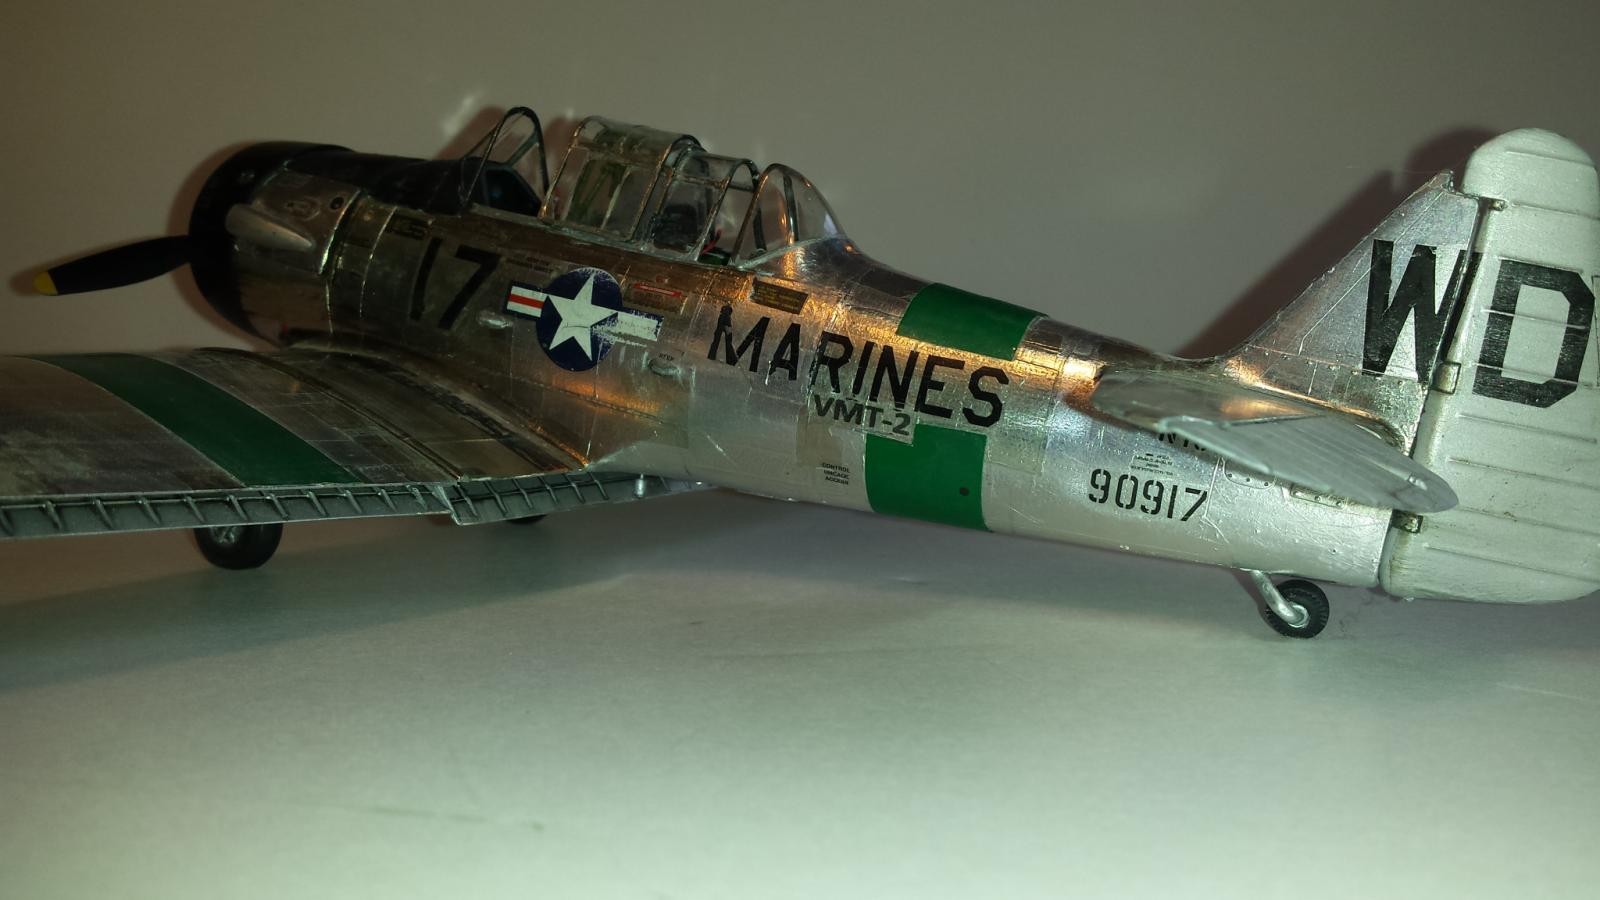
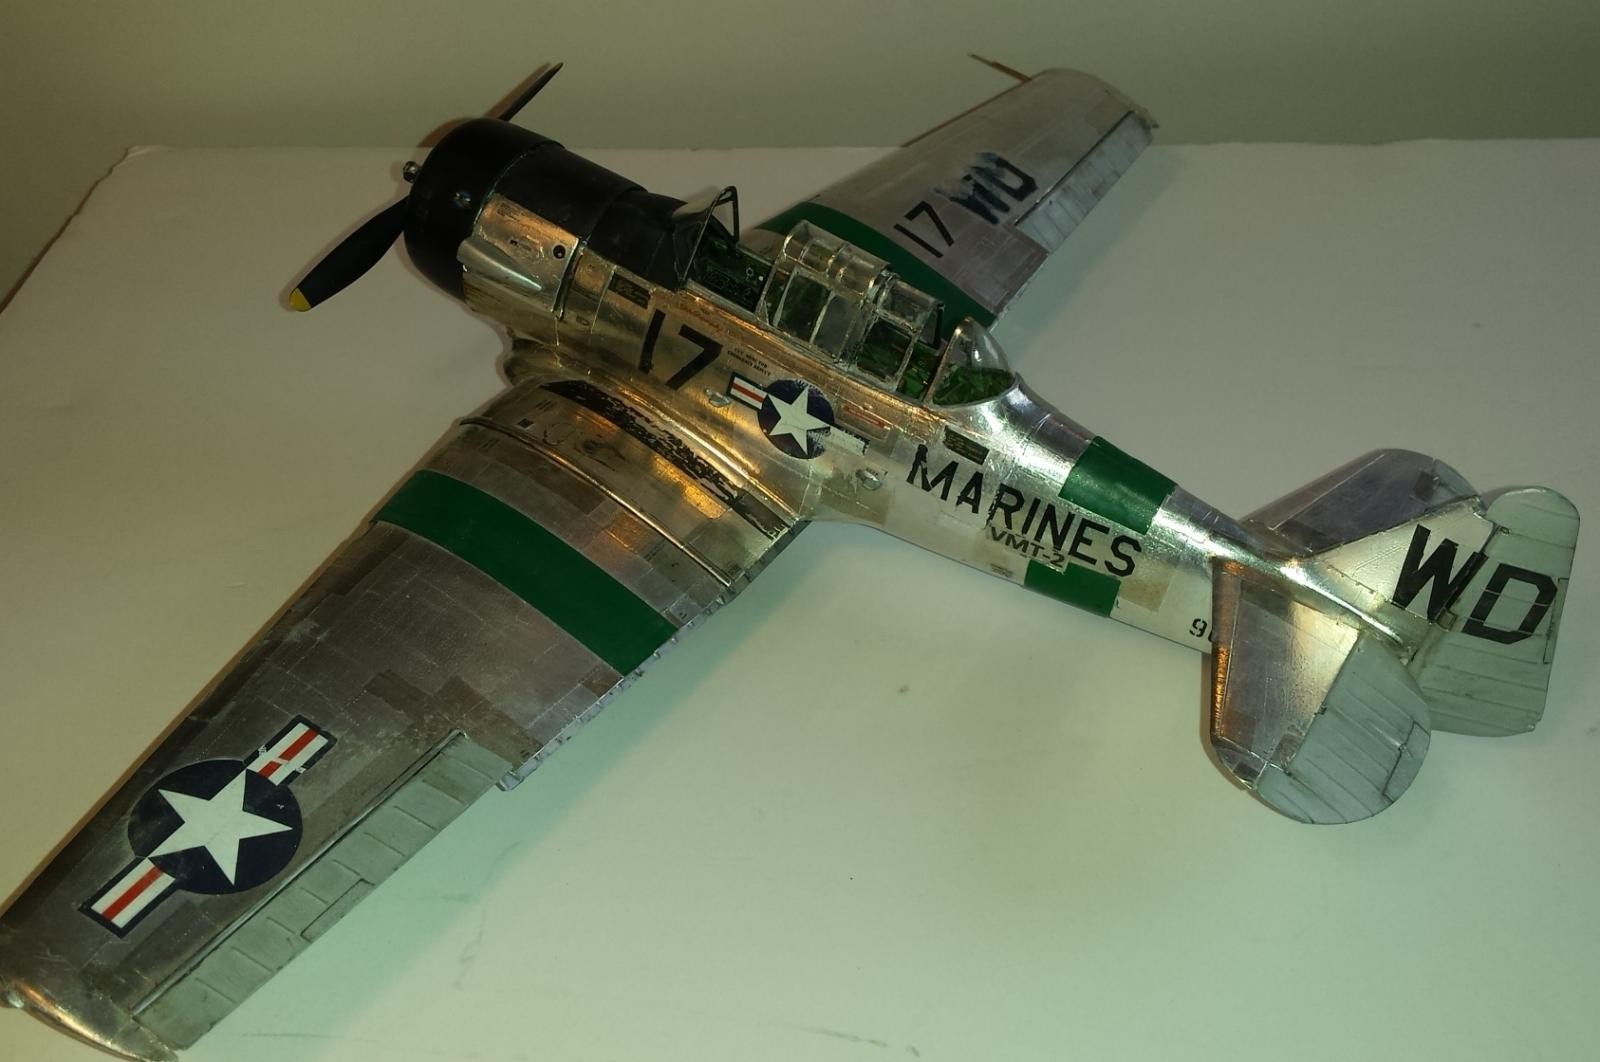
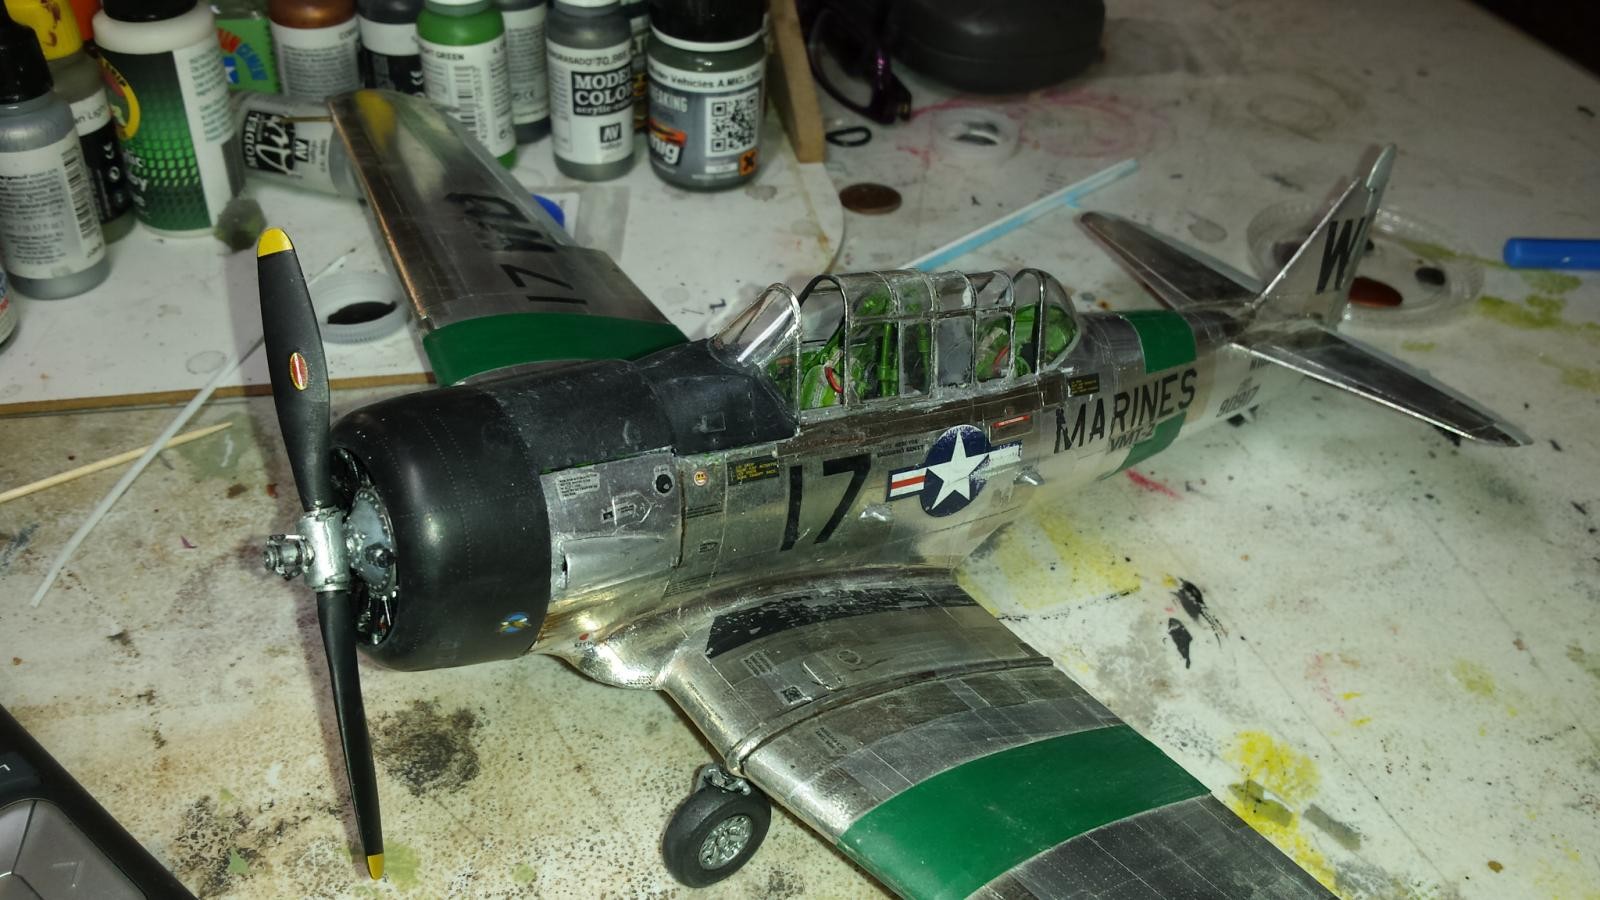
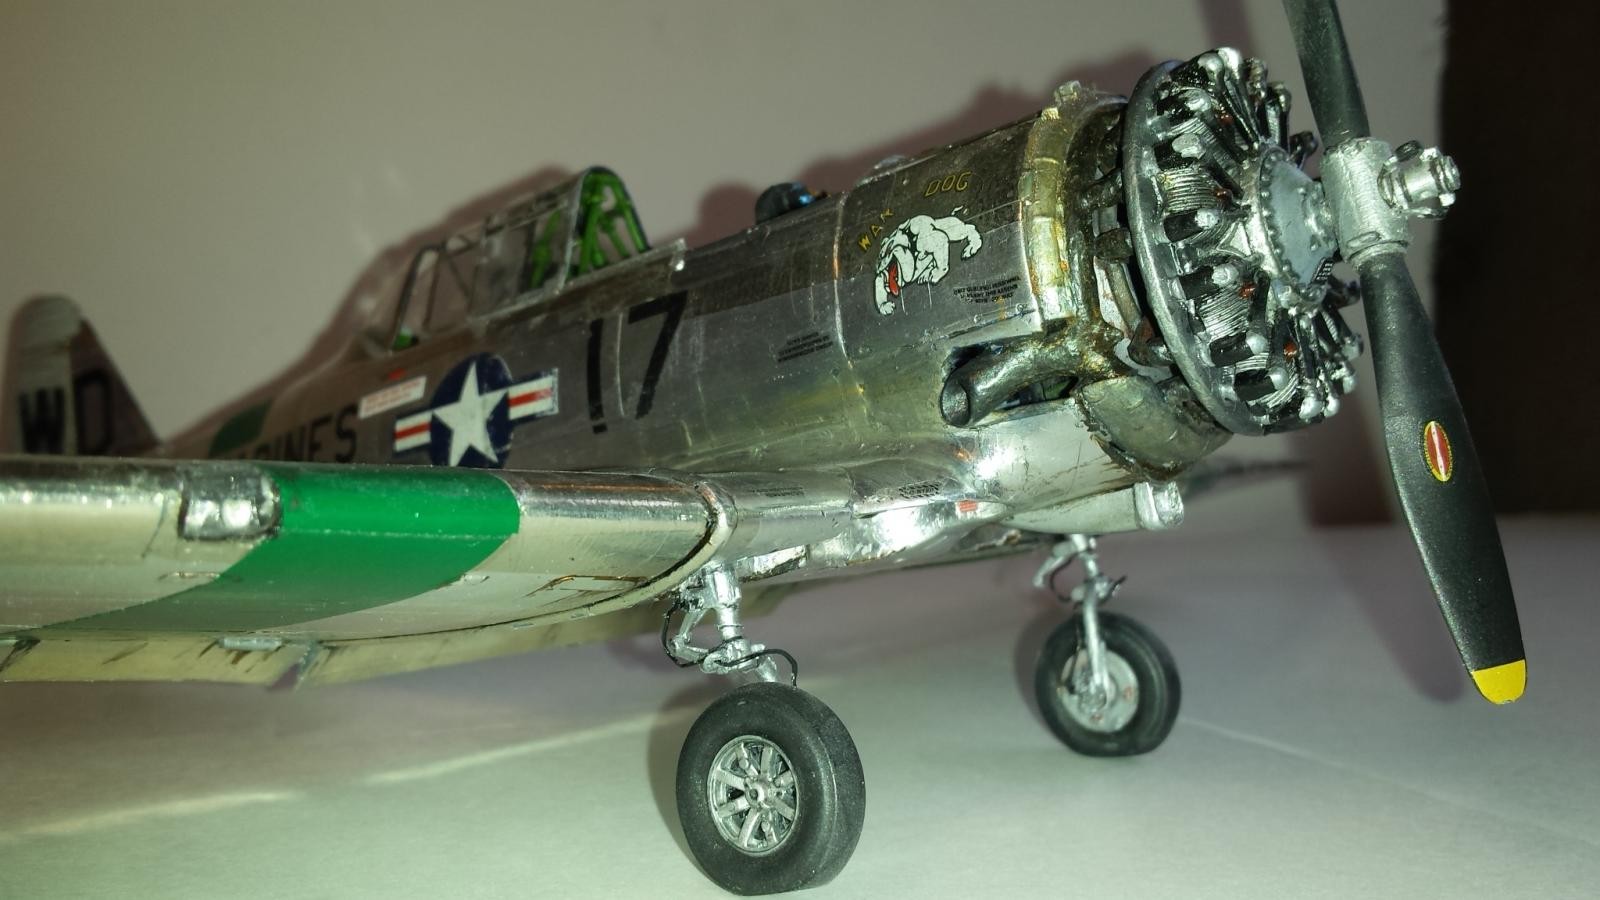
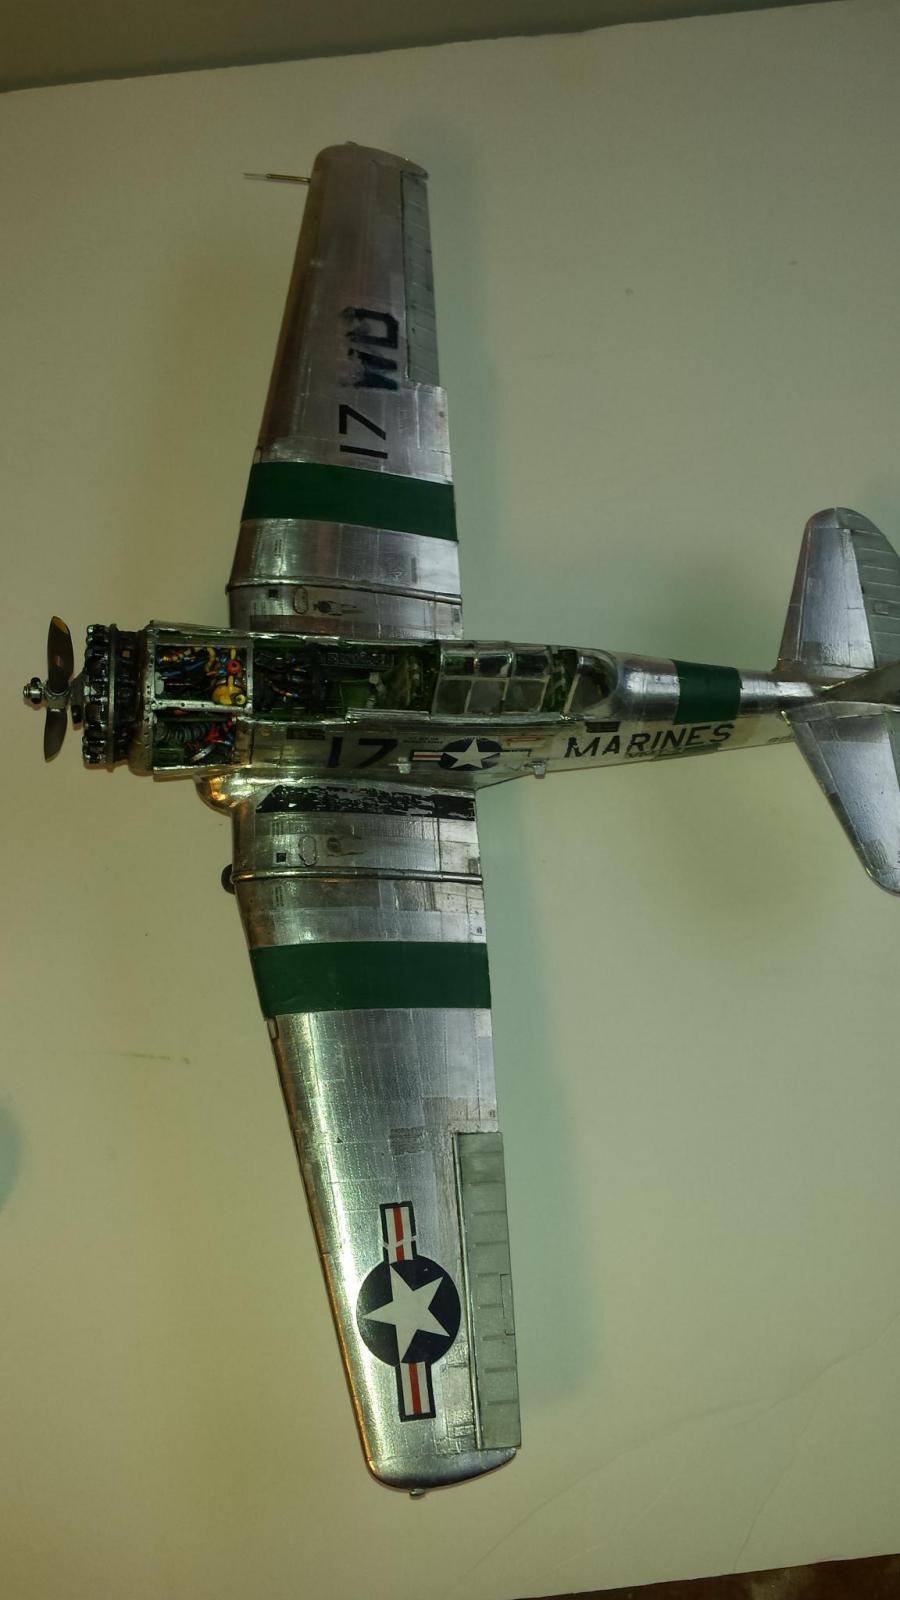
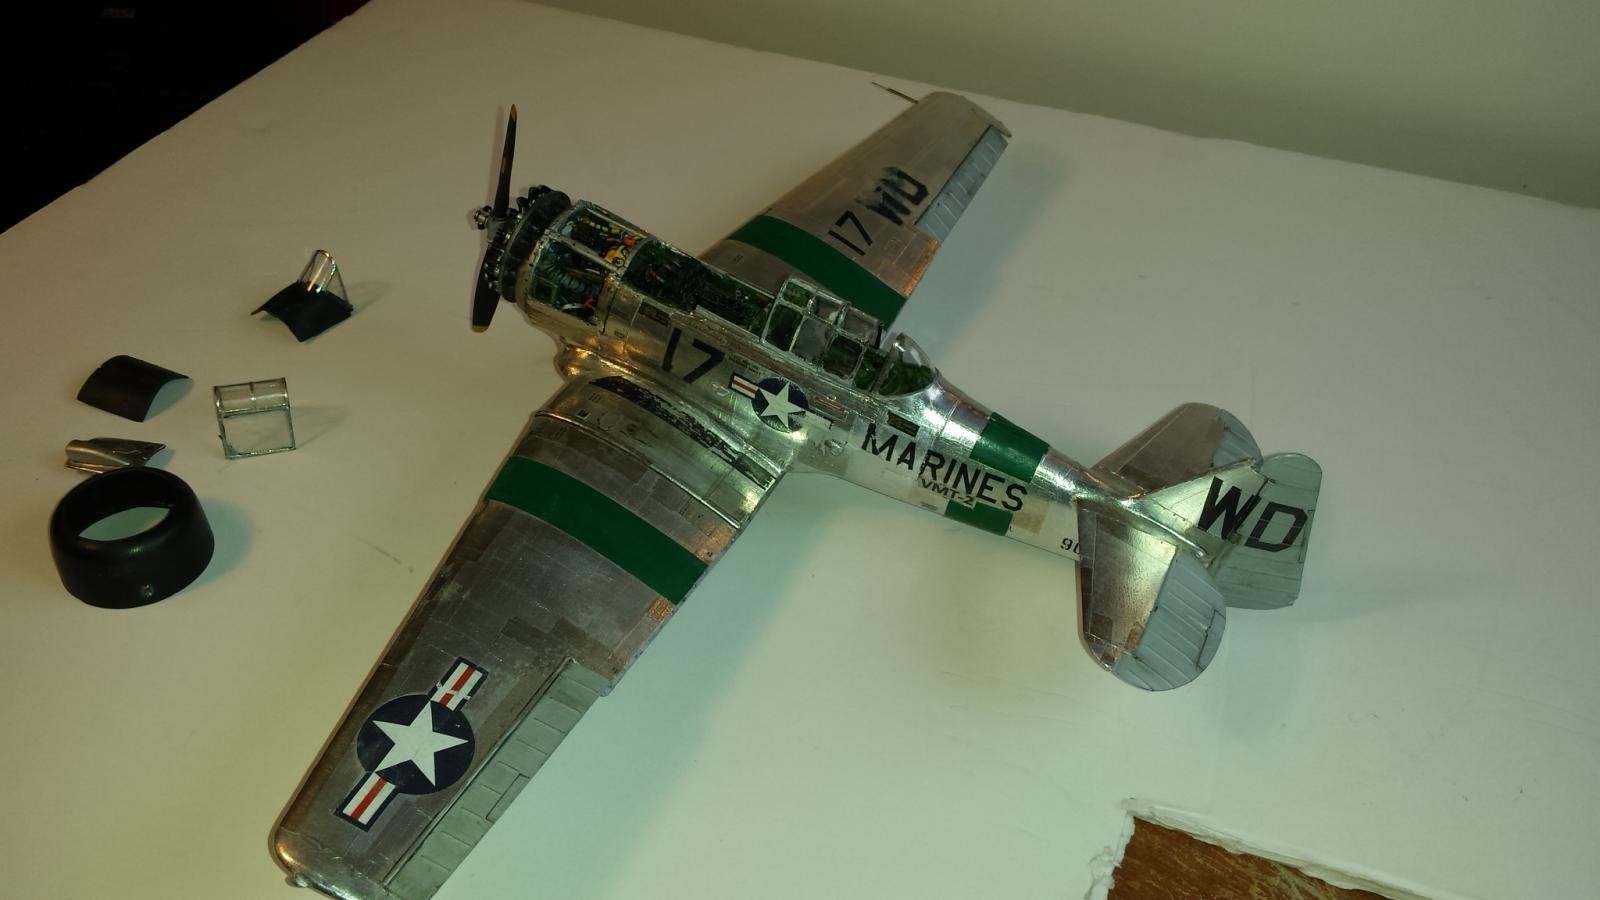
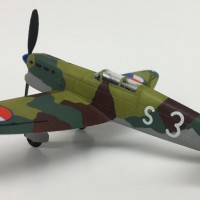
So eventually Kittyhawk released a 1/32 version of the this famed trainer aircraft with marking for both the AT-6 and SNJ variants. To my surprise one of the schemes provided on the decal sheet was makings for an exact copy of the exact SNJ I flew. It was a bare-metal variant with USMC marking and Green wing and fuselage strips. WOW, I needed to build this using those markings.
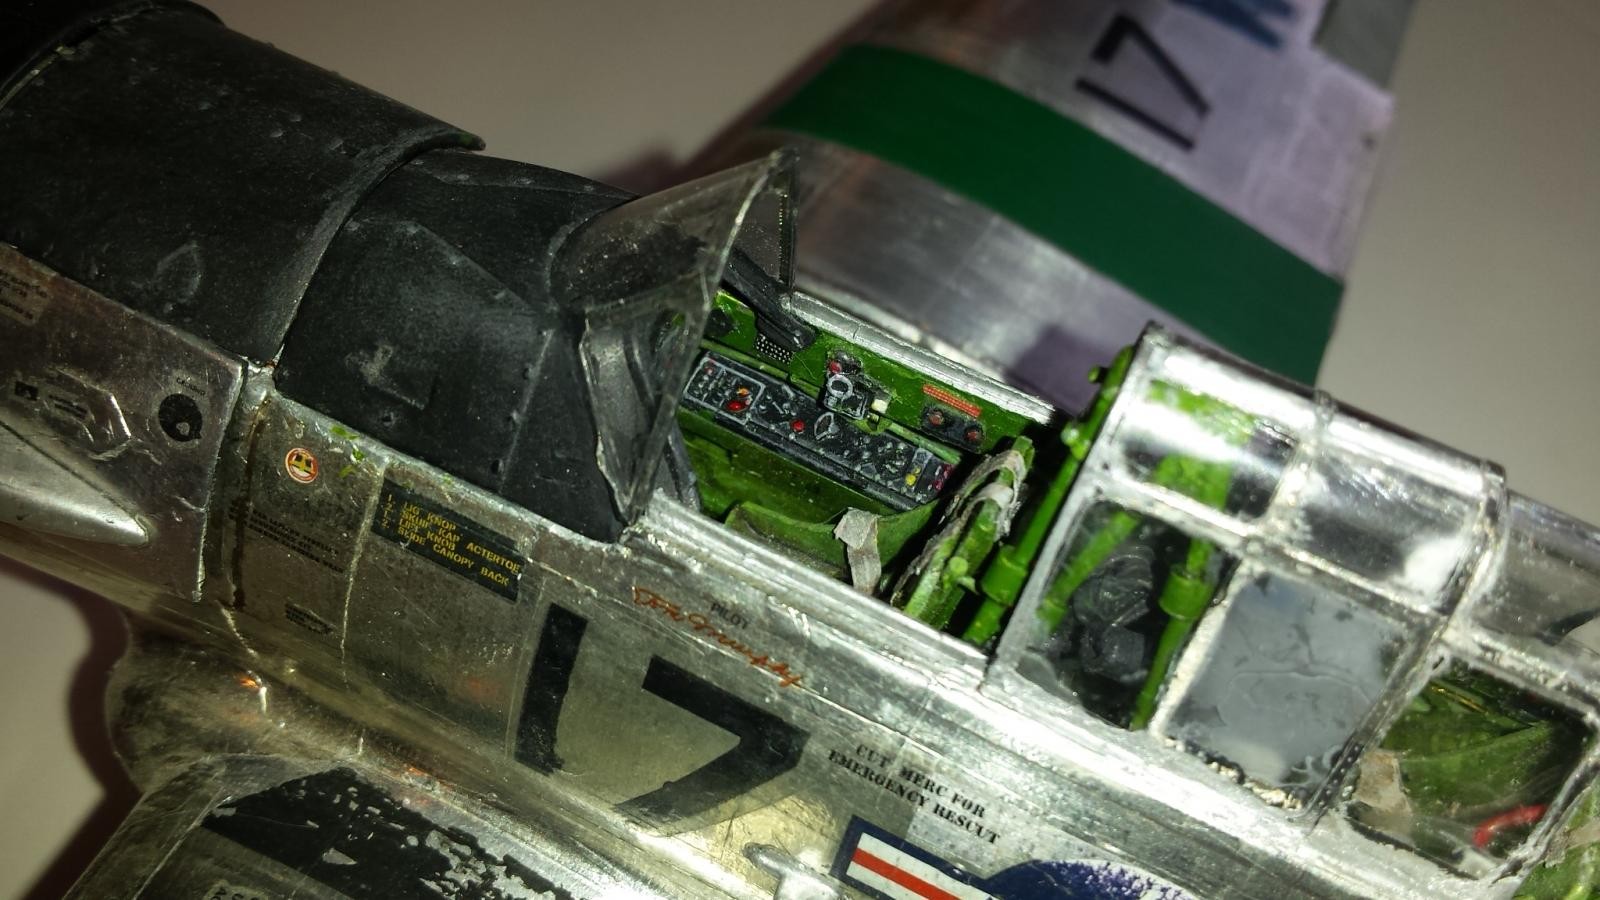
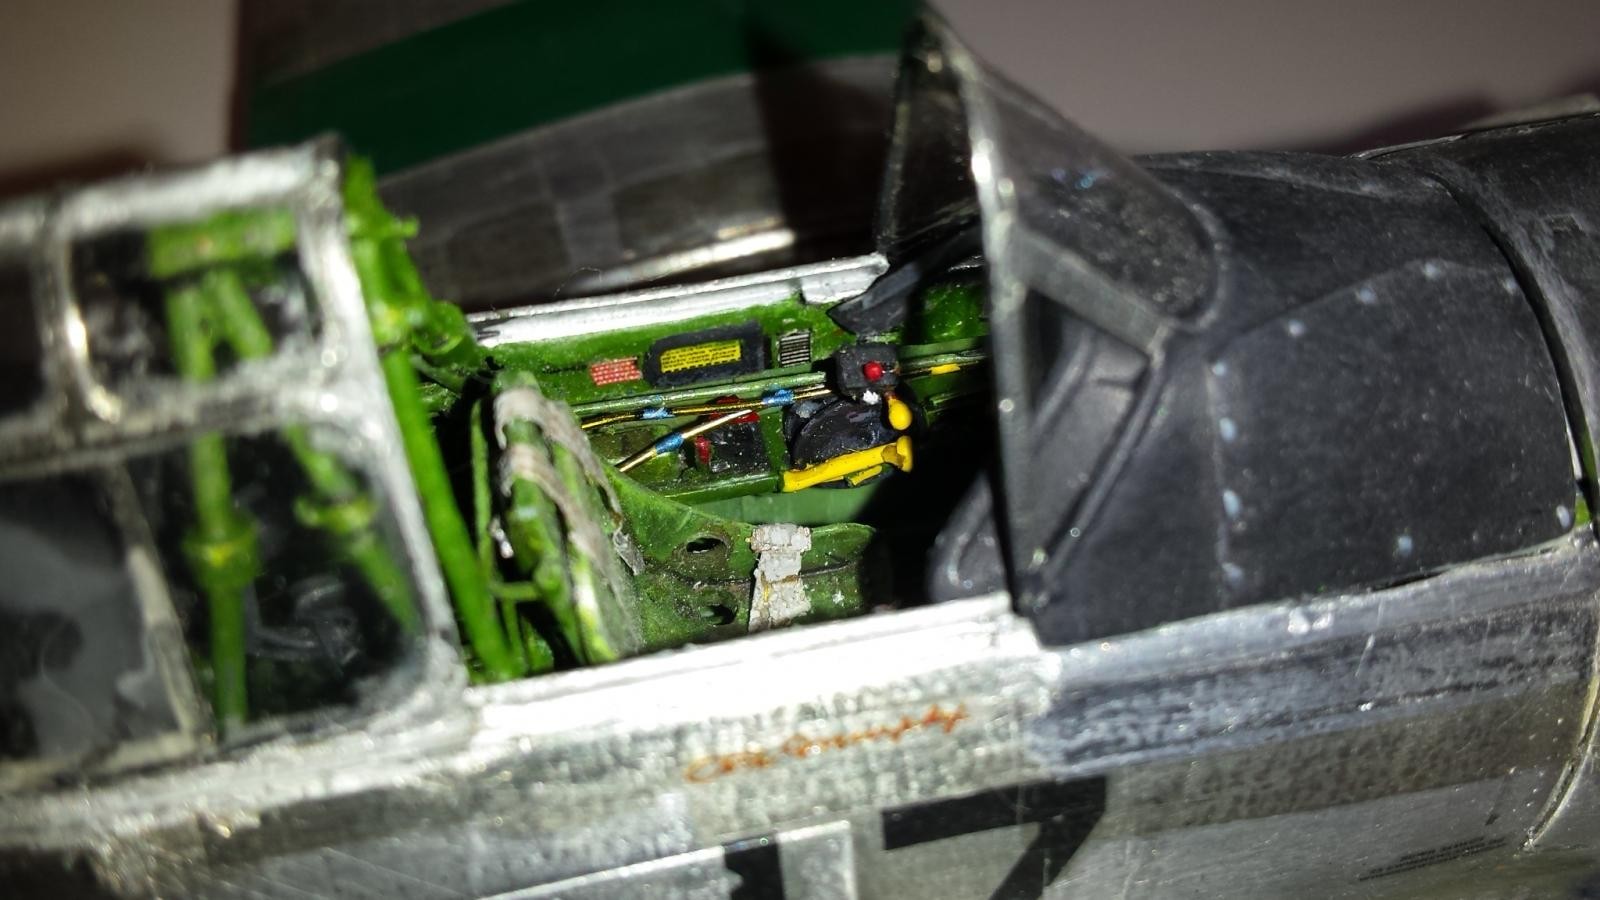
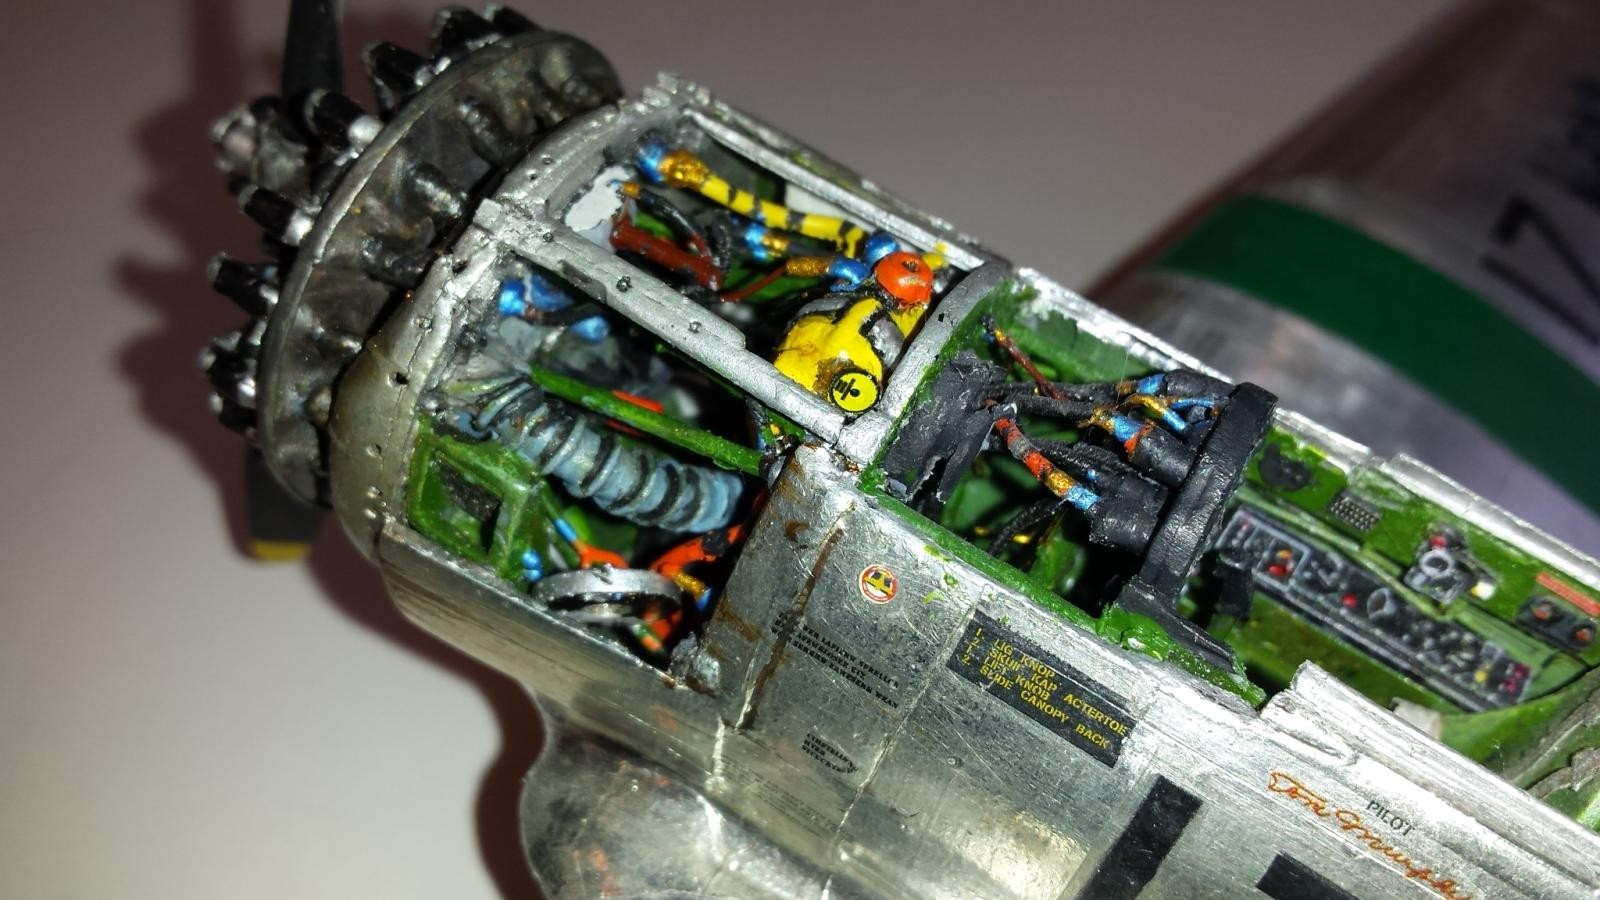
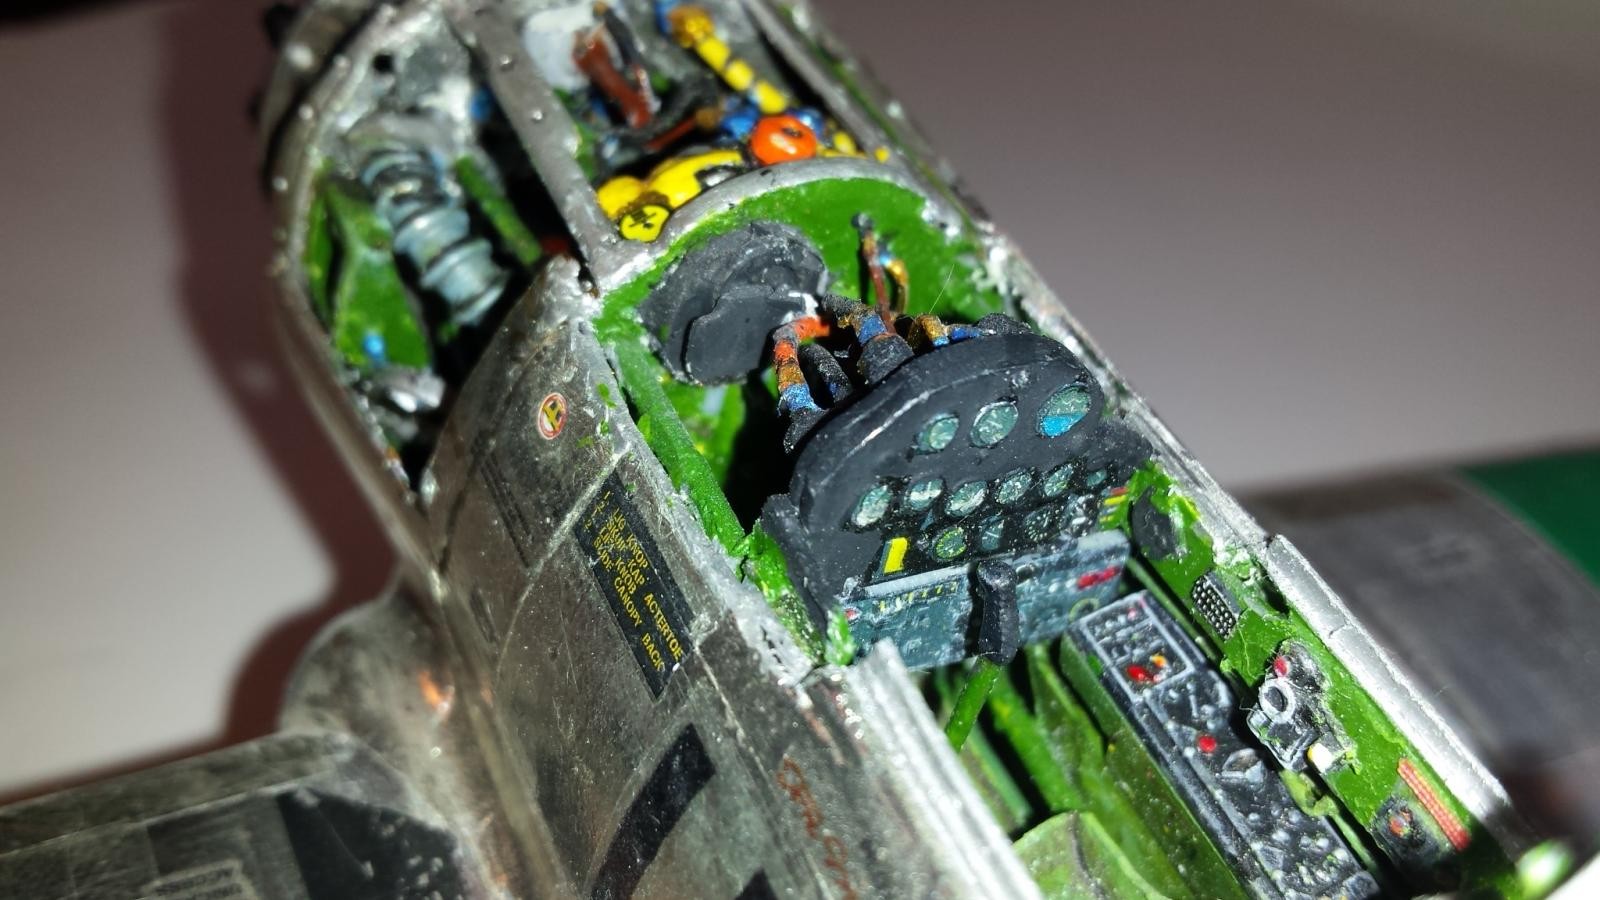
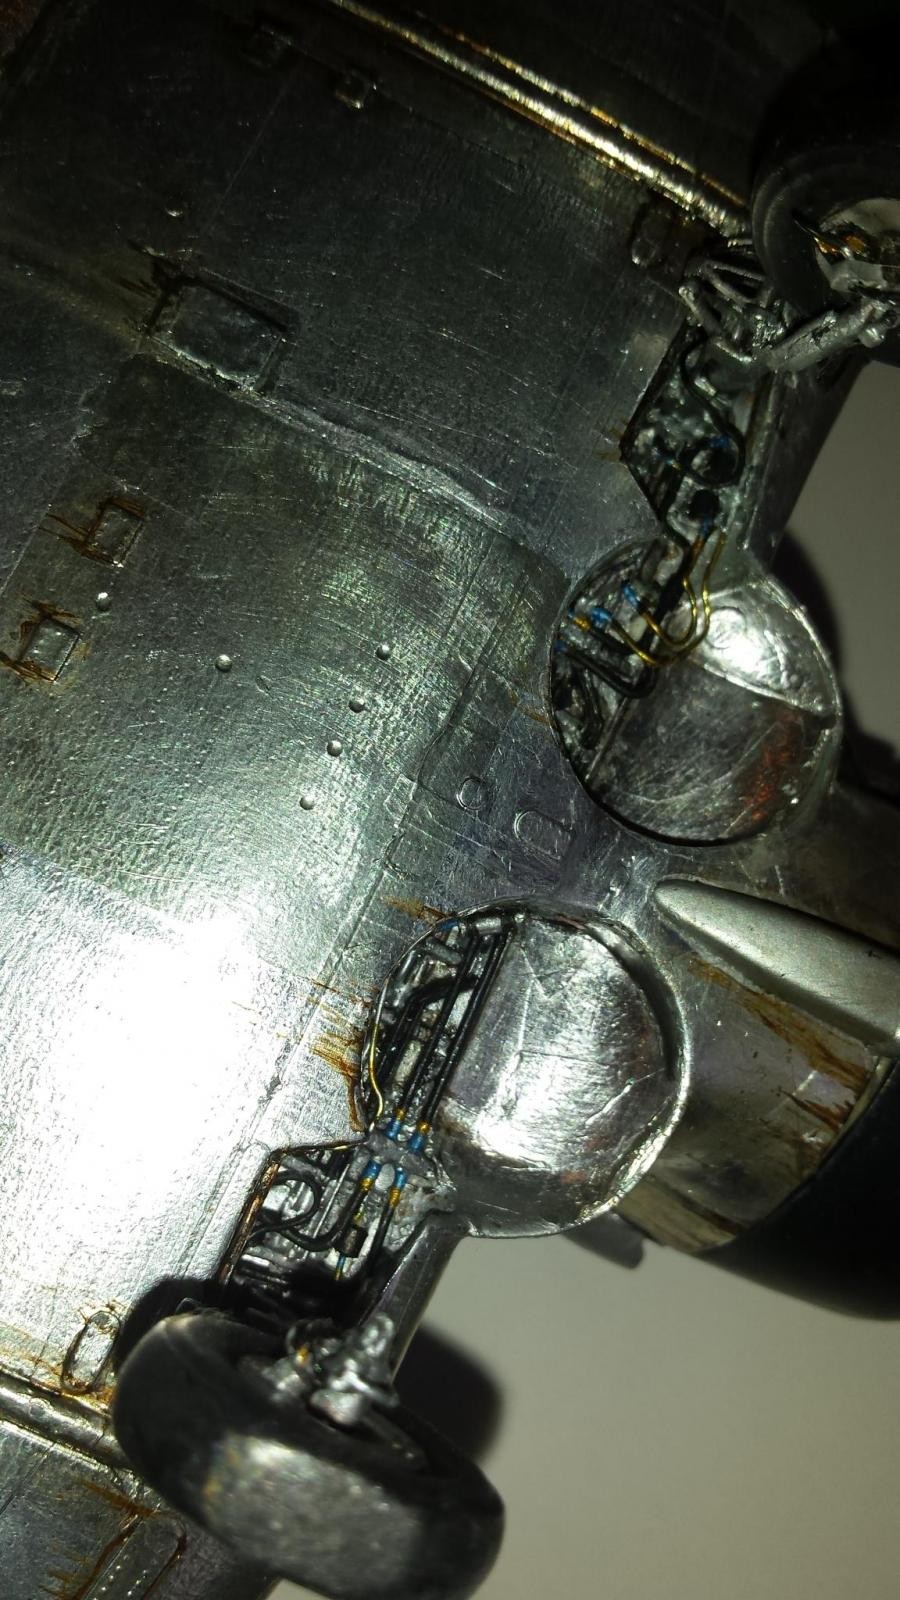
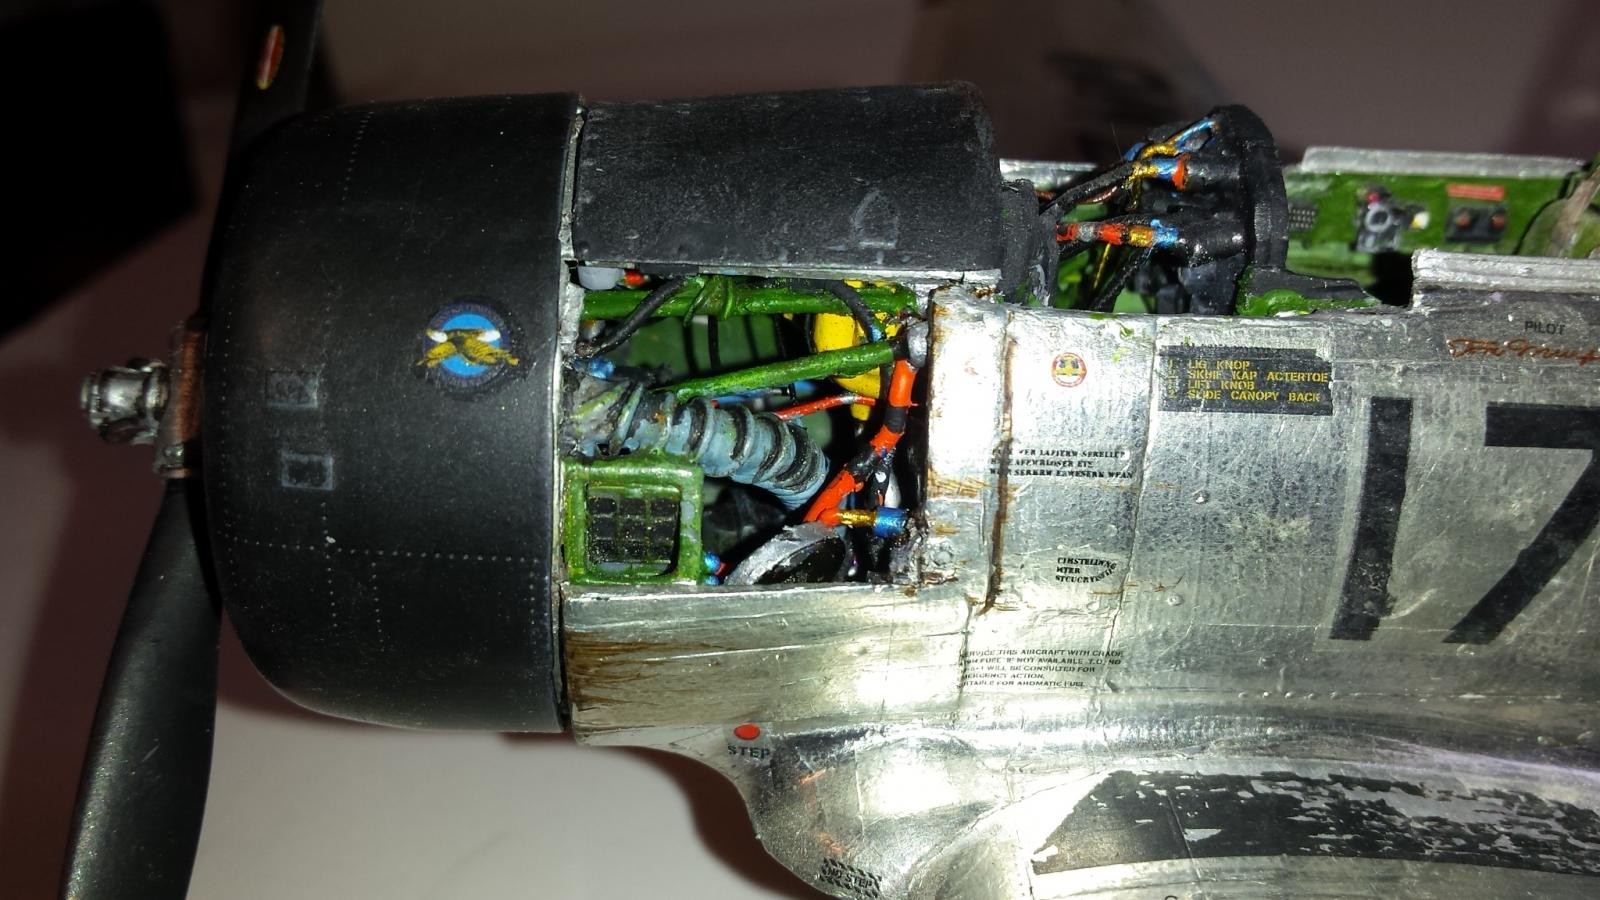
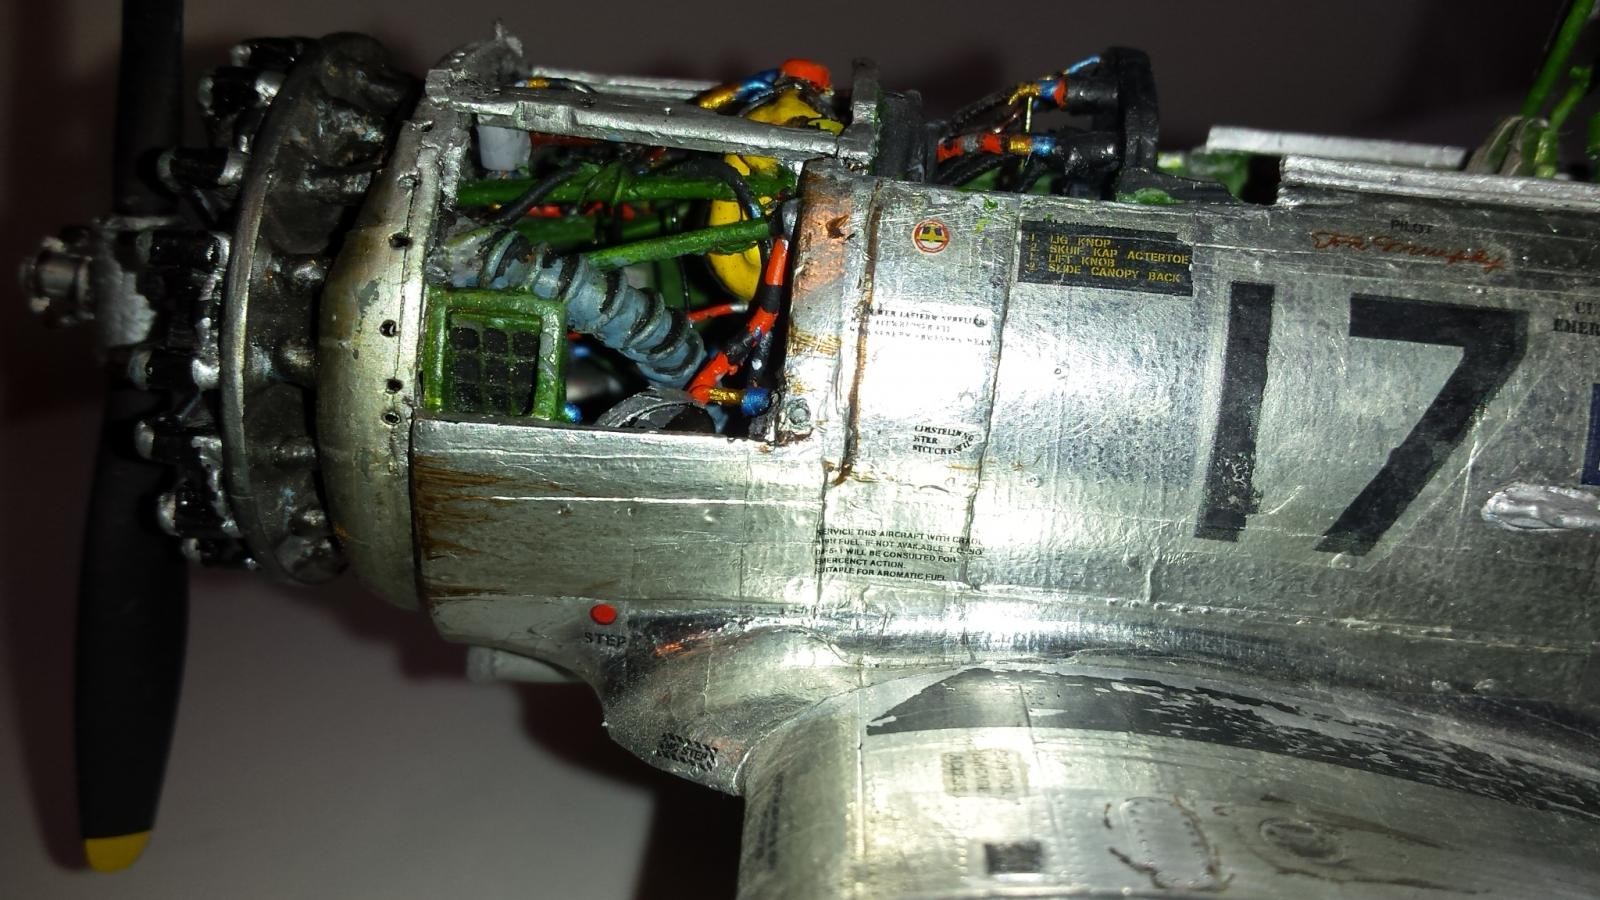
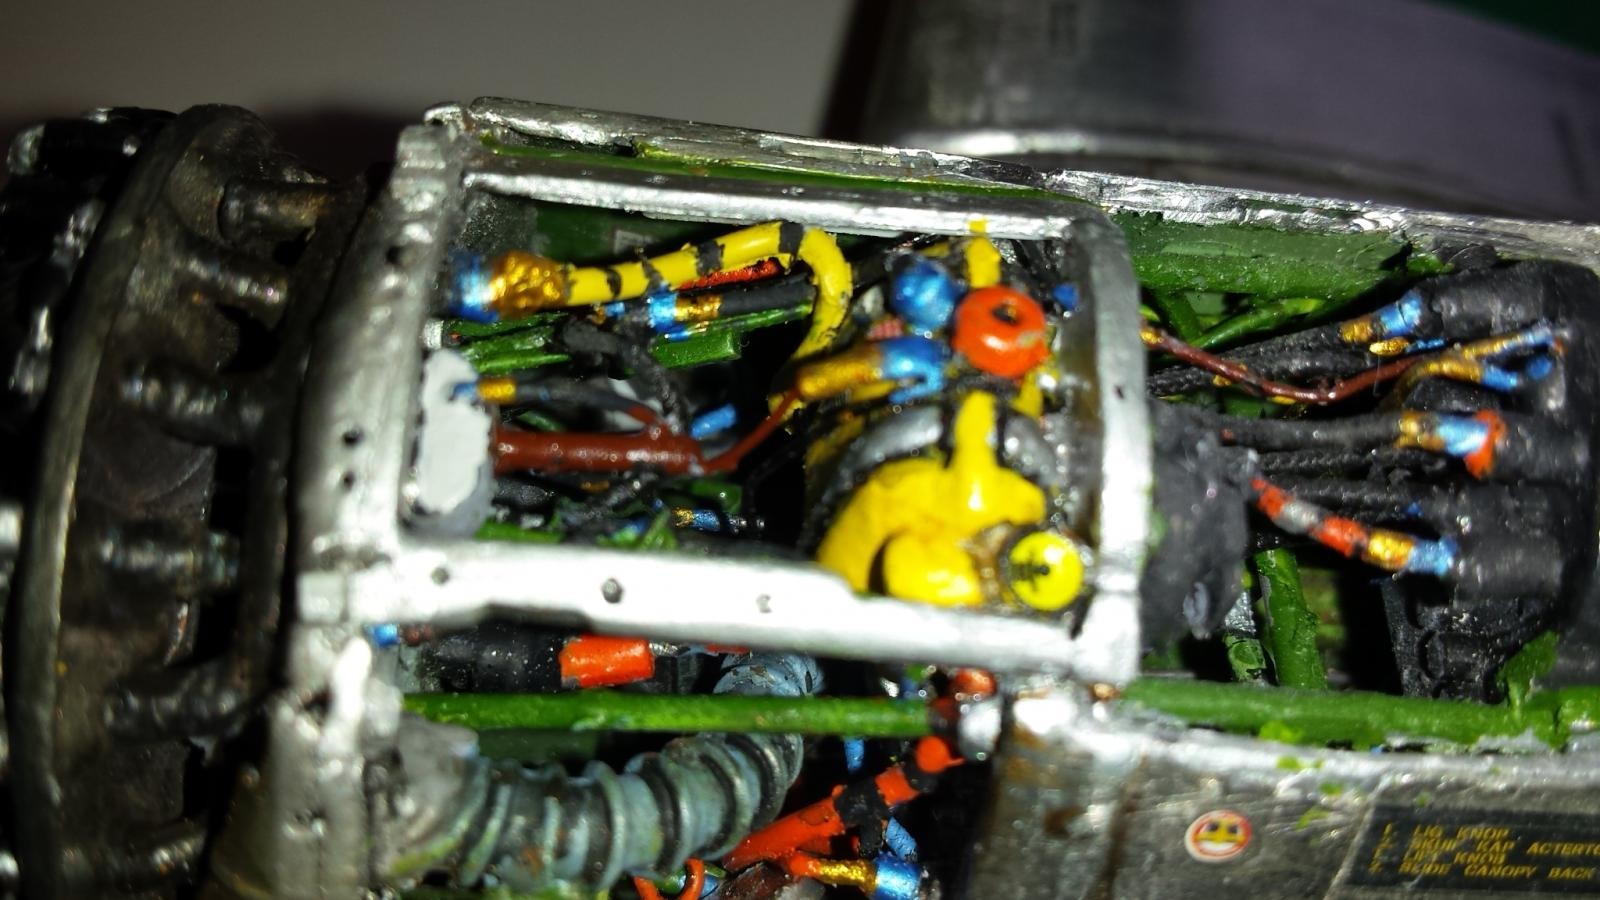
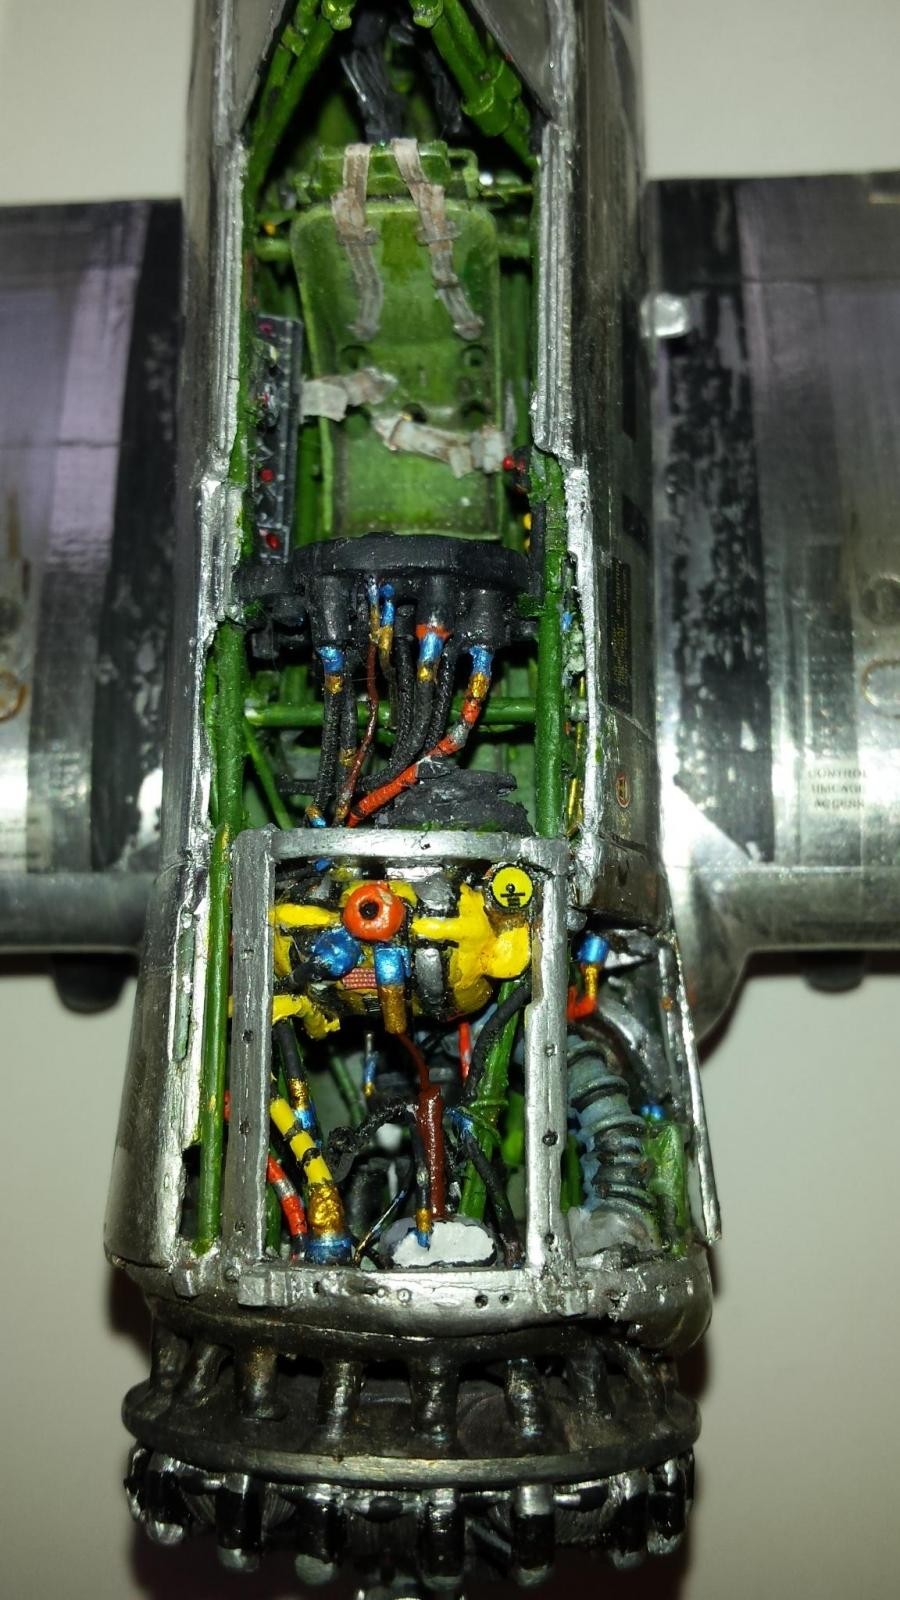
Because this aircraft had special meaning to me I needed to turn it into a real project, super detailing the heck out of it, and trying something very different for the final finish. I did not purchase any after-market accessories b/c there were none available when the kit 1st came out. So I scratch built everything that I wanted to include that was not included as part of the base kit.
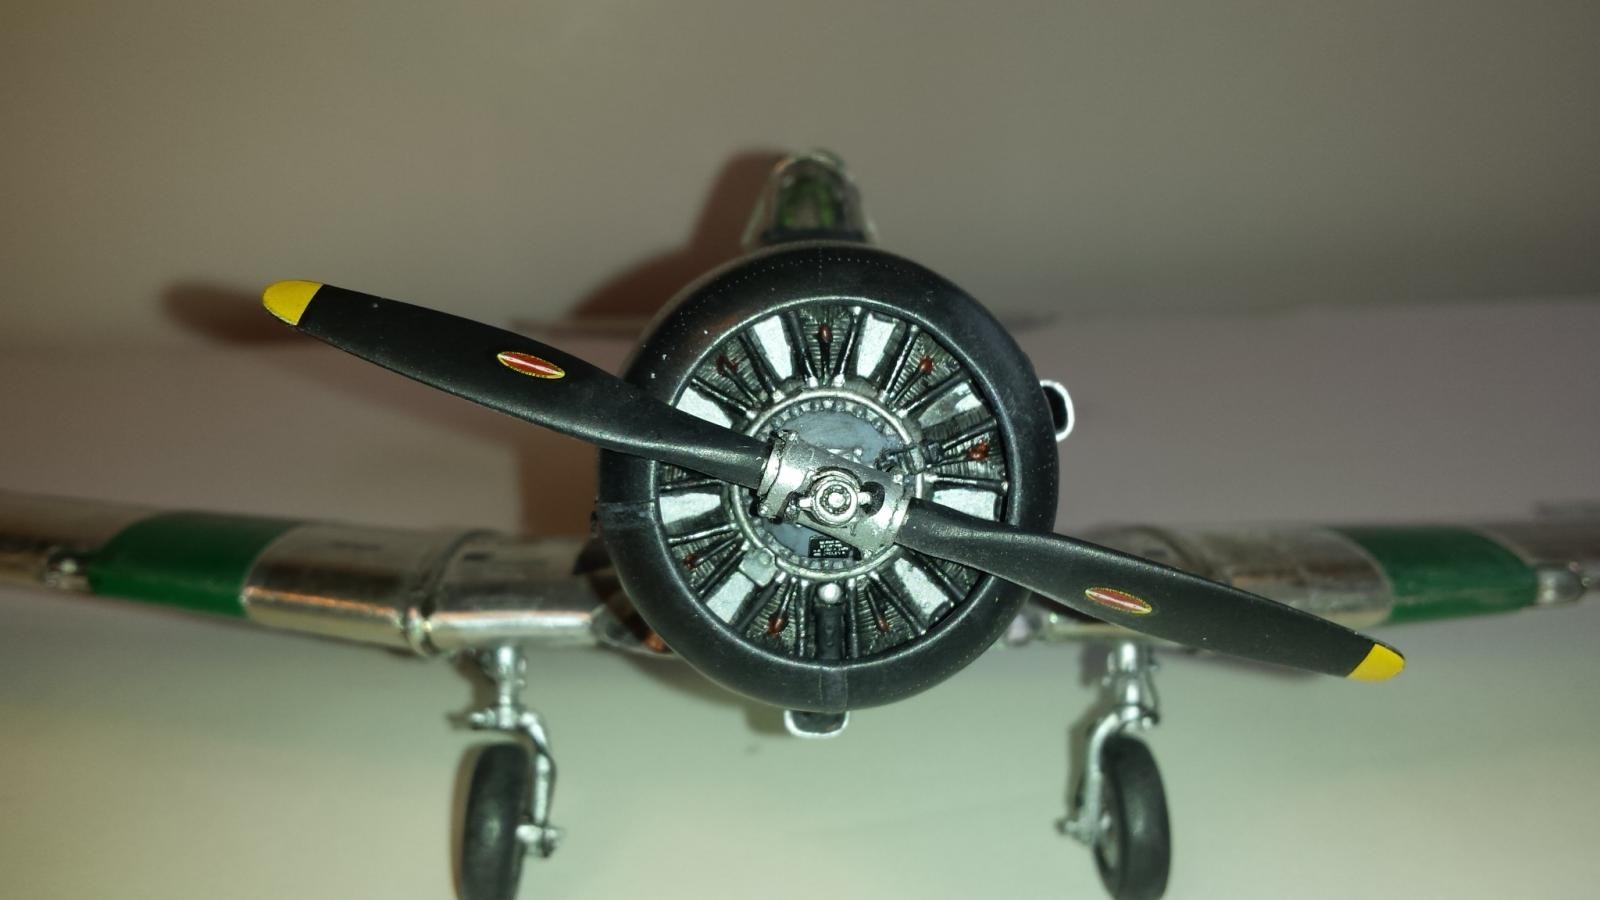
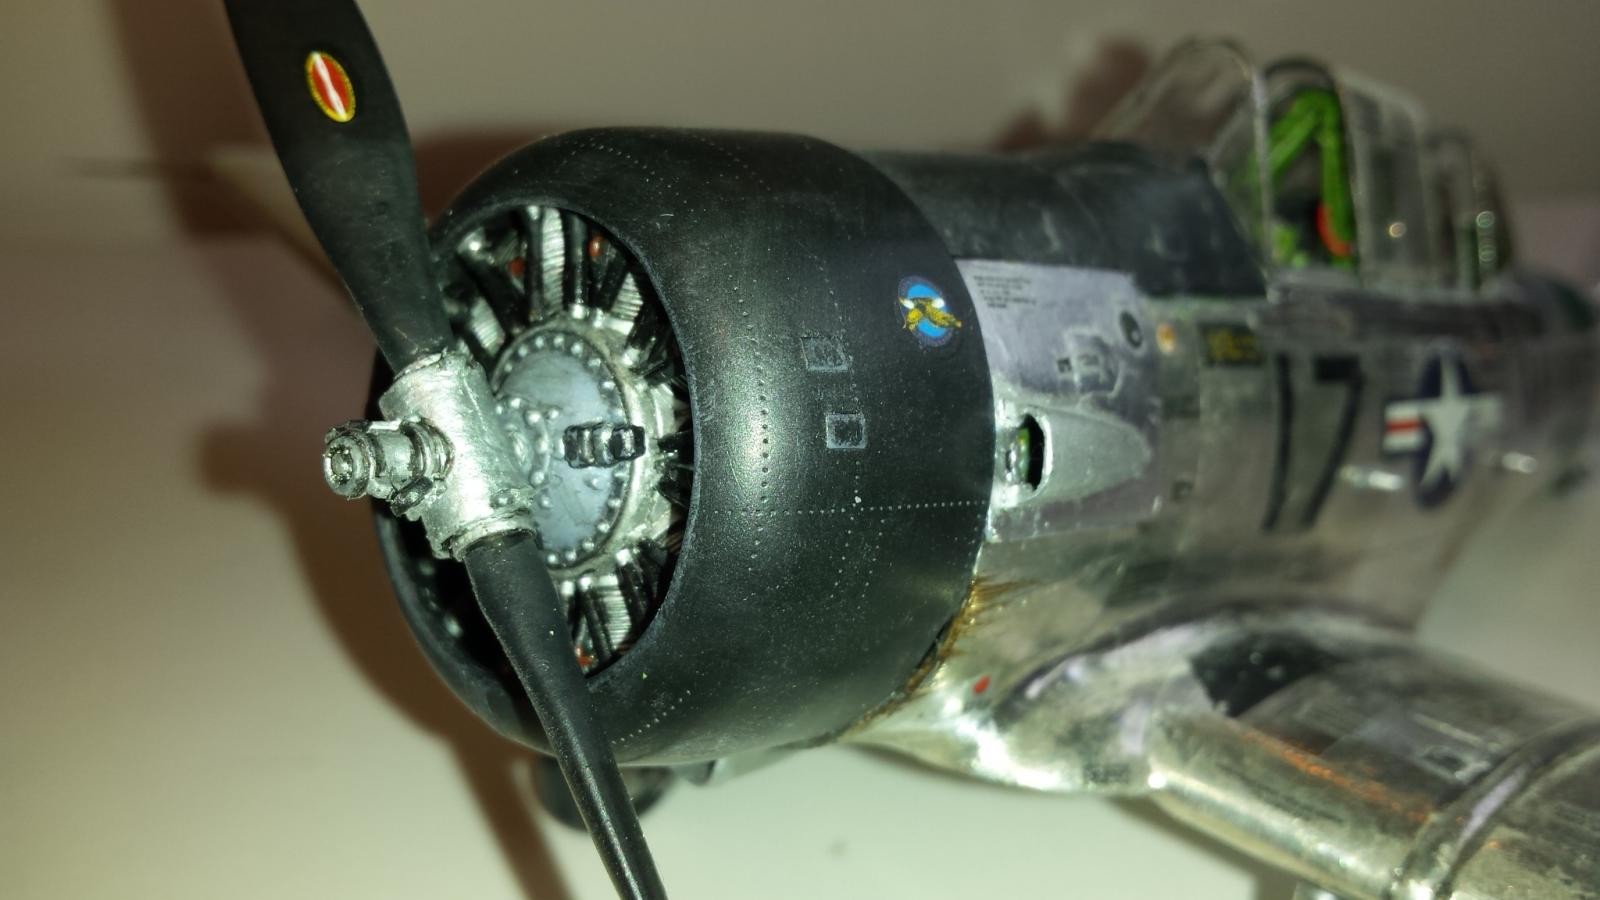
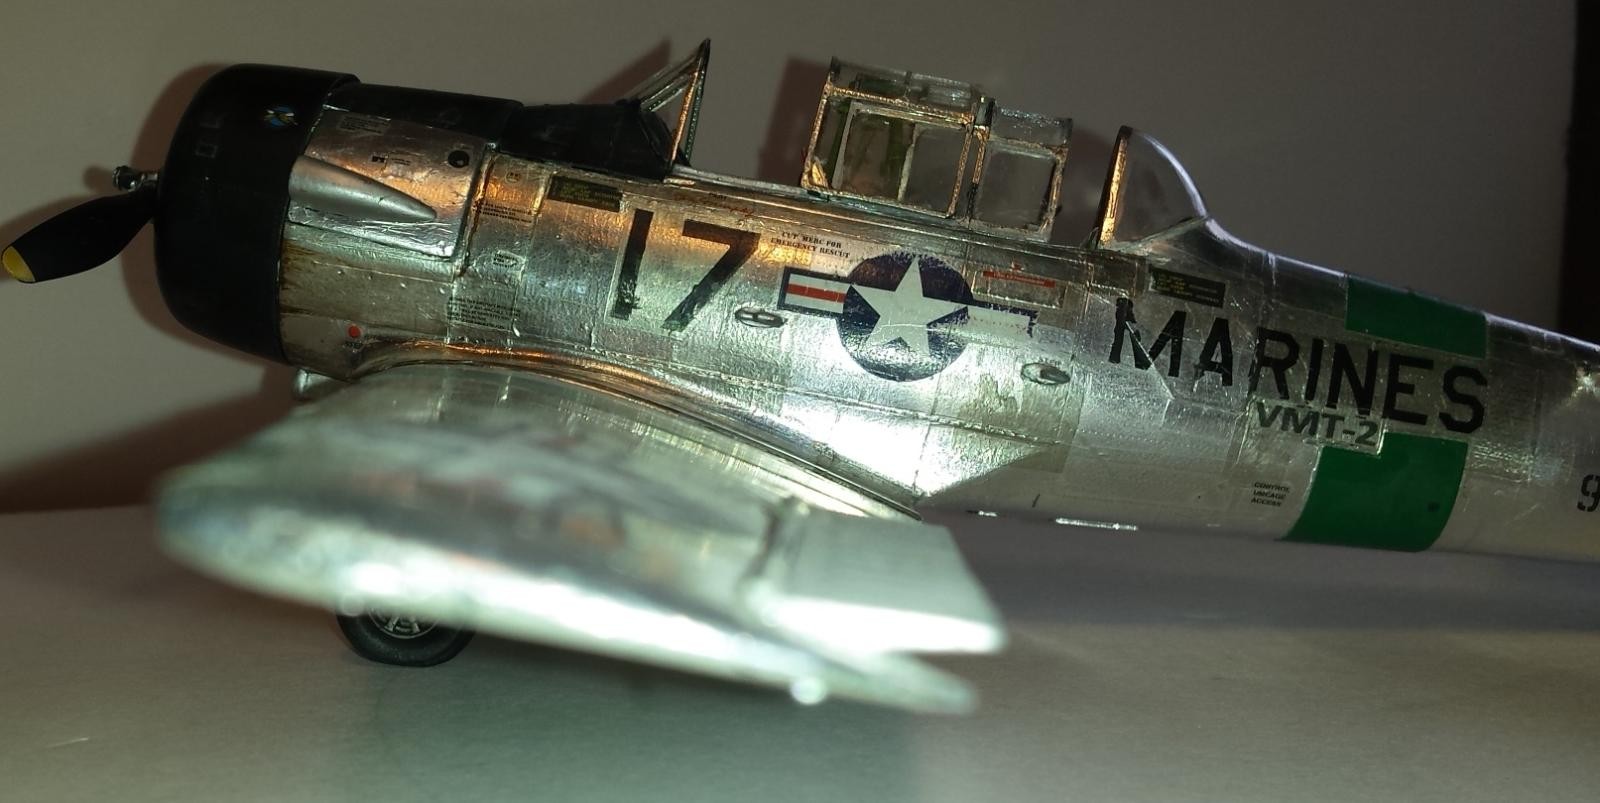
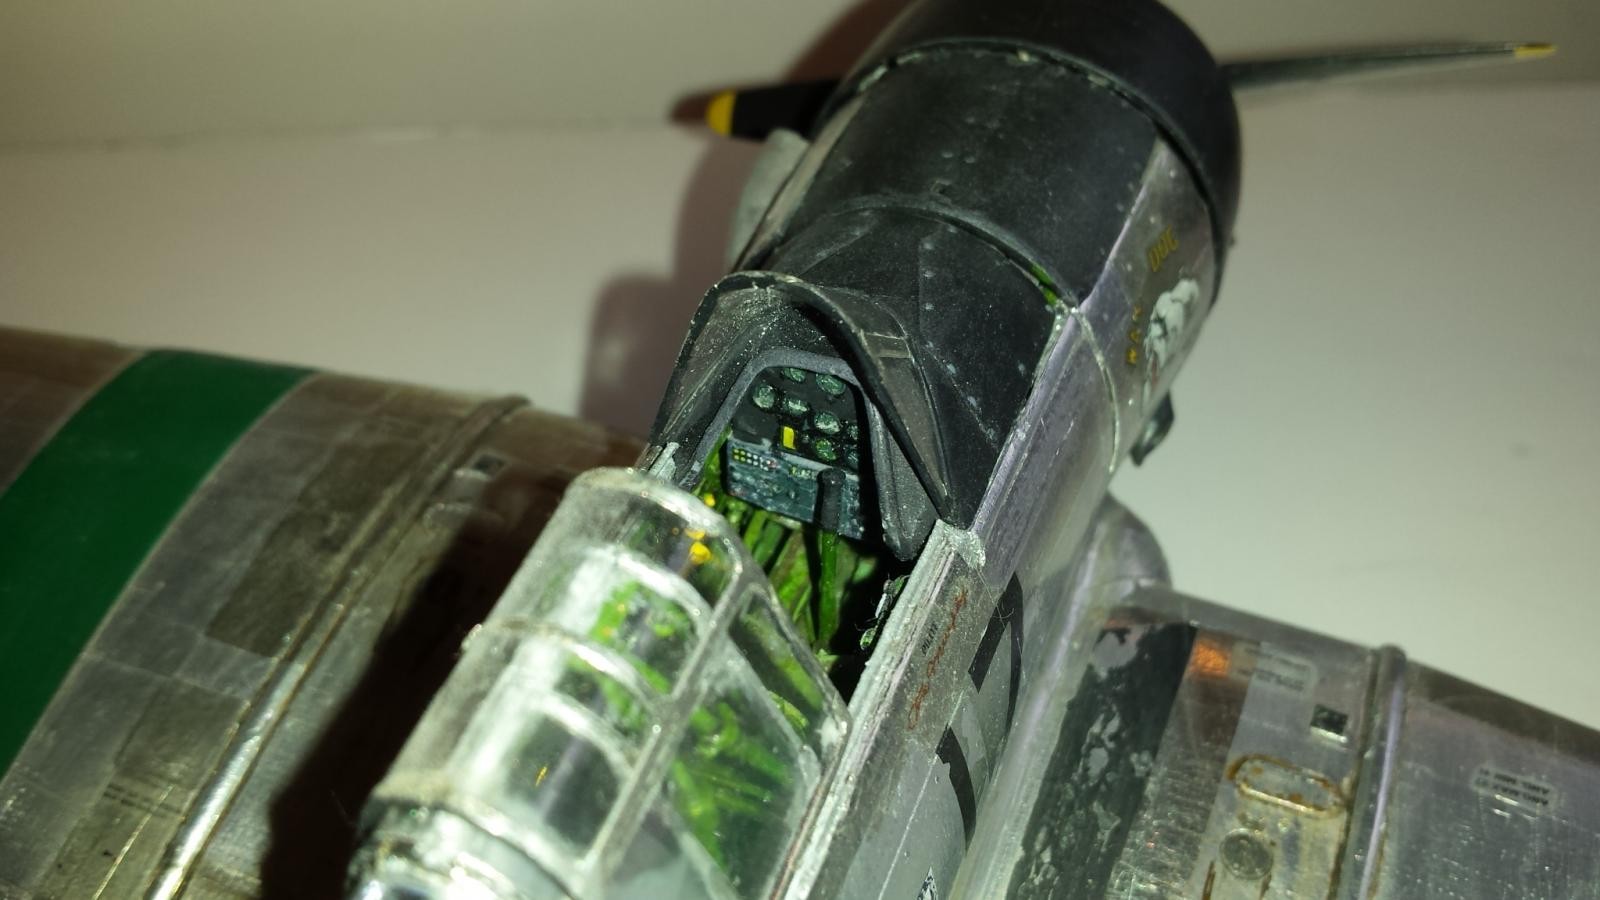
I had seen a few articles in which the model builder finished an entire model using "Bare Metal Foil" brand adhesive aluminium foil. I thought this was the perfect project to duplicate that process. Bare in mind (no pun intended) I had no experience using this product in the past. So I went for it! I covered this entire aircraft in this foil using multiple metal tones. I won't lie, it was tough and I questioned my choice of technique many times. I finally finished the project and it was far from perfect. It has many errors and blemishes in the final finish but I was happy I tried and learned a lot about this process during the attempt. It was also an expensive project b/c in addition to the cost of the kit I cannot tell you how many packages of this foil I went through before I got it right.
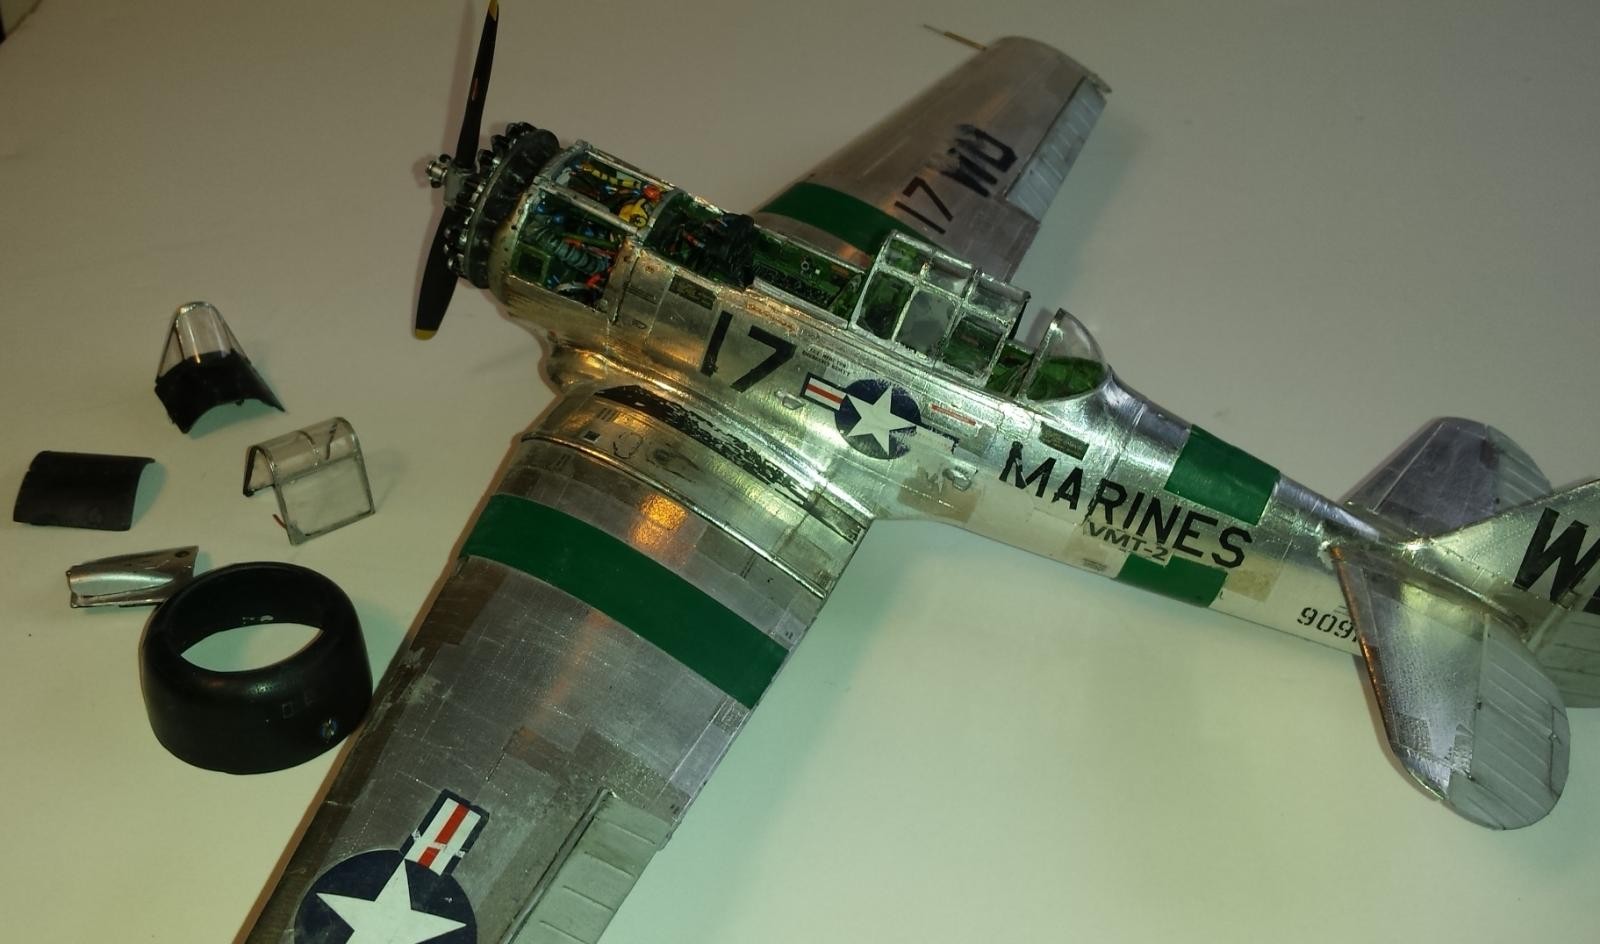
Besides the imperfect finish I made another significant error. A dirty finger with wet glue on it smeared the side of the canopy. I tried to fix it but my clear plastic repair skills were not up to the task and I feared I made it worst. My goal was to ask KittyHawk for a replacement Canopy but I think I was a bit cooked on this project and never followed-up.
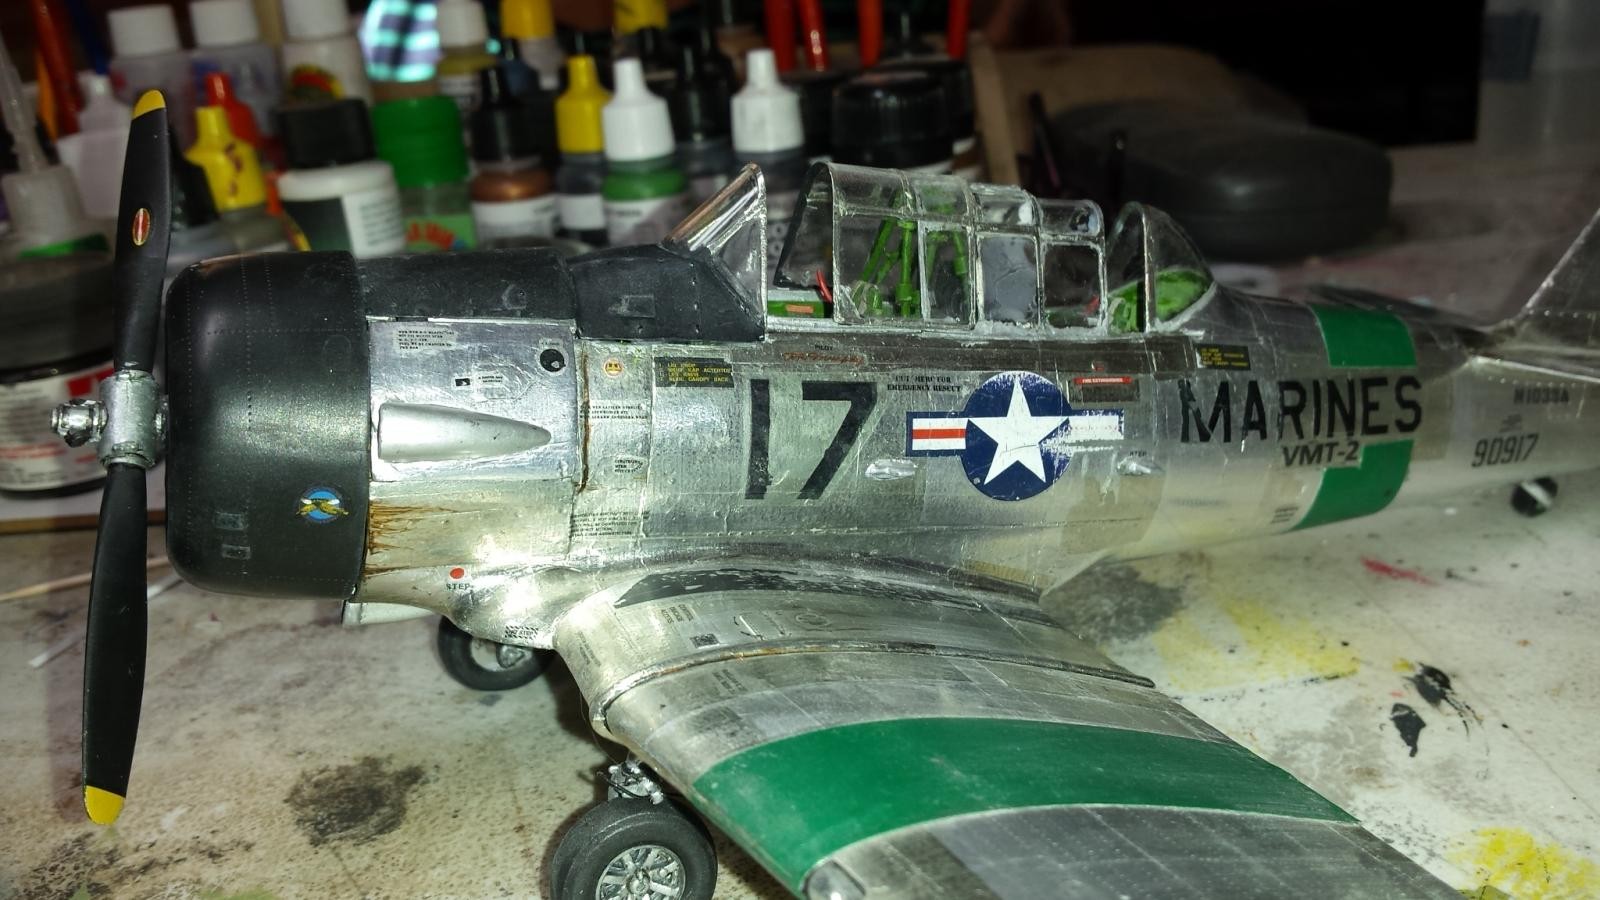
Recently I pulled her out of storage and decided to take some pictures. I felt, despite its flaws, it was still worth sharing the pictures with other modelers. So I decided to do this article and post the pictures. Overall I am about 85% satisfied with the outcome and really want to do another one someday soon. I am not sure I would do it again in Bare-Metal Foil. Maybe I would do a partial foil job mixed with some metallic paints, especially my favorite Dull-Aluminium Metallic Paint produced by Vallejo. That color would capture the look of the aircraft I flew perfectly. A lot of different techniques and strategies were used in this build. I could fill a few pages with the details but I will leave it up to the readers to ask questions if anyone is interested in more detail about this build. In conclusion I do feel that covering an entire aircraft in metal foil is "do-able", and can be worth the effort. But I think getting some practice 1st on a small scale would insure better success then I had. Comments are welcomed.


Amazing work, looks very much like the real thing!
Stunning work, Paul...a real "eye-catcher" - I like it a lot!
We’ve seen one or two foil projects here from time to time, and yours is certainly up there in terms of interest and execution.
That is a grand undertaking with an outstanding result. Great job.
Paul,
Beautifully done. A lot of extra work but it has really paid off in a great looking model.
Paul, ambitious undertaking in 32nd. It looks good with the foil, it being a NMF aircraft. Is the instrument panel rear wiring with the kit, or your additions?
No, not with kit. All extra parts added. Thanx.
Paul, what great memories this must bring! Great job. That would be so cool to be able to share a flying experience with your Dad! My Dad died in 1977 and I wasn't able to "share" many flying experiences with him. He was a Naval enlisted pilot during WWII, flying fighter escort, dive bombing, and torpedo bombing as both pilot and / or crew / gunner. The one really cool experience I had with Dad was that I was able to take him with me on my last (I never finished) pilot's lesson. I was in a Piper Cherokee 140 and I was allowed one "rider" per lesson. Sadly, he passed away not long after that.
This SNJ of yours is quite nicely done, despite what you describe as problematic. The Bare Metal Foil is something I have recently decided to try, so I paid great attention to your narrative and photos. Well done, Paul !
Thanx for sharing your story. really miss those days. Dad passed about 12 years ago. I never took him flying with me and dont really remember why but I rec'd a cool 1hr video from the flight in the SNJ with me in command front seat doing loops and navy style barrel rolls. He was so proud watching the footage. 3 different camera angles from inside cockpit, wing, and tail cameras. My dad was eventually assigned to patrol bomber aircraft such as the PB4Y2. Flew out of Kanoe Bay, HI 1945. Prior to that he was in a test squadron at Pax River flying as a crewman in experimental aircraft like the big Mars seaplane. He said that was more scary then combat...LOL! God, we are loosing all those men and the memories/stories go with them. Need to keep them alive.
Paul, congrats on the effort. I've wanted to try it, but the curved surfaces freak me out. I like how you varied the finishes to represent the shades of real NMF. You stated that you would probably do something different than BMF. Would that be aluminum foil, or something else? The scratch built parts look great and it sort of hearkens back to the days before aftermarket items were so prevalent. Great job! Thanks for posting these photos.
No, if i was to do a foil aircraft I would use bare-metal brand. What i meant was I would use a metallic paint, with little pieces of foil to break up look. Dont be nervous of the curved surface. That really was not hard at all. Actually most of the time the process and product works fantastic. Problem is the following: 1. Takes much longer then painting. 2. Material is super delicate and rips often as u pull off the backing paper so that takes practice and patience 3. You will complete a whole section perfectly and then after all that work a small nick is easy to produce, then it peels up, need to cut it out and replace then it becomes patchy. 4. sometimes it pulls up if worked to much like on a corner, needs to be replaced again and effects pieces next to it. But overall it really lays down nice and shows off all the surface detail and mistakes underneath. It takes a lot of material to cover whole plane. But like I said dont be afraid of the curves..really works well on all surfaces and shapes. Just cut the right size piece that works for you. Gary I saw that albatross u made and if u can do that with skills u used u will have no problem with the bare metal foil...i am sure of that.
Fantastic work, Paul and lovely narrative. Thanks for sharing this.
Looks very nice! I've never used foil, and not sure I ever will, but it sure makes a nicely realistic shiny NMF! Great job!
Great looking model with that foil effect, Paul, well worth the effort.