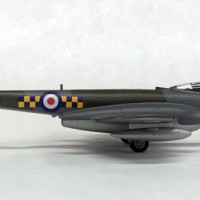
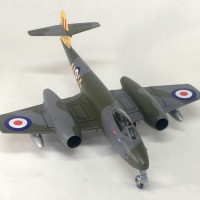
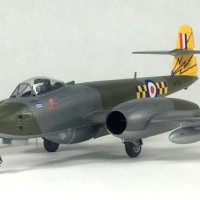
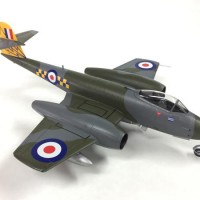
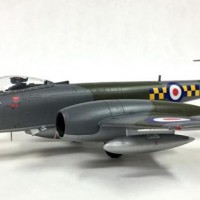
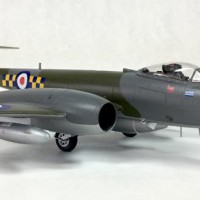
1/48 Airfix Gloster Meteor F.8
I've had a great time building the last few years' worth of 1/48th Airfix new tools, so I figured why not give their 2016 issue Gloster Meteor F.8 a go. I assumed this kit would live up to the ease of Airfix's recent Spitfires, P-51D, Defiant, Hurricane, etc., but no, this is a bit of a bear and requires a fair amount modeling know-how to get it just right.
The fit on some of the parts is extremely finicky, particularly the “next to impossible” 2 piece nose - which should have been molded as one. The main landing gear are a pain as well and their post locators require a bit of shaving and a lot of test fitting to press them into their proper place. Can't say anything nice about the lack of proper fit for the nose gear flaps either. There are a few other “Caution: Bad Fit Ahead” warnings that can be easily fixed if you follow Tom Cleaver's valuable build tips - http://modelingmadness.com/review/korean/cleaver/gb/tcf8.htm - and then read what Frank Reynolds has to say - http://modelingmadness.com/review/korean/gb/fighters/reyf8.htm -before you start this kit.
Be sure to assemble in order following Airfix's sequenced instructions. You can work on other assembly sections while you're waiting for that glue to dry but attach all the sub assemblies when the instructions tell you to. Test fit everything more than once and be prepared to make a few minor adjustments along the way.
I built this strictly out of the box except for adding a set of Eduard Brassin wheels which required a bit of Xacto magic on the kit strut keys to make them rotate to the correct position as per Brassin's illustrations. I also cut off the Airfix wheel mud fenders on each gear, oh so carefully, so as not to break the u shaped bottom brackets and then glued the gear halves together. After some careful touchup sanding, I attached the excellent Brassin seamless resin fenders that came with the aforementioned wheel set, a huge improvement over the kit parts, and well worth the money.
I buried the engines inside the nacelles.
The decals are a combo of the Airfix kit supplied and XtraDecals. The Airfix decals are really thick, especially the roundels, requiring a lot of soaking time and after all that, adhered so poorly, they needed more than usual applications of Micro Sol to set properly in the recessed panel lines, etc. There seems like a “million” kit supplied air frame stencils that will drive you insane if you so choose to use all of them. I used about 70% of them before pooping out. A couple of tiny ones came off after a thorough drying and post sealing coat. The rest of the markings came from the XtraDecal sheet 48-043, with enough left over to make 8 more Meteors! No problemas with these whatsoever.
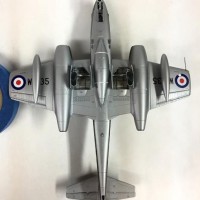
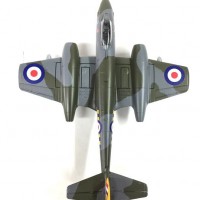
Paint shop: I'm a big fan of Alclad ll primer, so I started off by spraying everything with grey, touching up what needed fixing and sprayed it again. Next came Alclad II High Speed Silver for the undersides etc but the auxiliary tanks were finished with Alclad II aluminum, all followed by a coat of future for protection before flipping the model over to apply the topside camo after masking. First a couple of sprays of Tamiya Dark Sea grey followed by Tamiya RAF Dark Green camo and another topcoat of Future prior to decaling. I decided not to apply any weathering other than around the wheel wells and finished the Meteor with a couple of light coats of Alclad II Matte Klear Kote.
Airfix's Gloster Meteor F.8 2016 edition is not an easy kit… but it's still a lot of fun and rewarding when all was said and done. Best of all, I finally added a Meteor F8 to my display cabinet and scratched another kit off my “must build” bucket list and put another dent in my ever increasing stash.

Outstanding job, Eric. Your build comments are great, and will definitely help me when I attempt to build this same kit.
Very sharp looking. A shame about the fit issues though
I nice-looking Meteor! Very clean, sharp build.
I like it, Eric...nice presentation.
A masterful Meteor! Looks great!
Nice one.
A beautiful model, Eric. I don't recall having quite as many problems as you report, although I didn't use any after market items, but I certainly did have a few; mainly nose & wing fillets. I was very happy with mine & I agree that it results in a great model. I have another to build, so I'll watch out for the problems you encountered. I particularly like your photographs; nice & clear.
Thanks for the compliments Tony. I have read that Airfix is now producing all their kits in the UK and that the quality of the styrene is much improved. I think they were previously molded in India . Word has it that the new Korean version of the F.8 just released by Airfix is way less fiddly but I'm sure it has that darned two piece nose.
Hello Eric,
I agree, a beautiful model coming out of the Airfix factory.
Regards, Dirk / The Netherlands.
Great looking scheme.
Good looking Meteor Eric, worth all the trouble I say.
Beautifully done Eric, one of the nicest builds I’ve seen.
Very well done especially for such a challenging kit. SHe looks beautiful and great overall look and finish! Thanx for some of the warnings and tips b/c I really want to build thius kit myself. I have been told that the Korean War Version of this kit is British Molded and much higher quality eliminating most defects. I will most likely try that version.
Glad to be of help, Eric. You obviously read all the warnings. Beautiful result.
The recent "Korean War" release is far superior in terms of molding and overall quality control.