ICM Krupp L3H163 Kfz. 72 Radio Truck in 1:35 (#35462), Work in Progress
This article is part of a series:
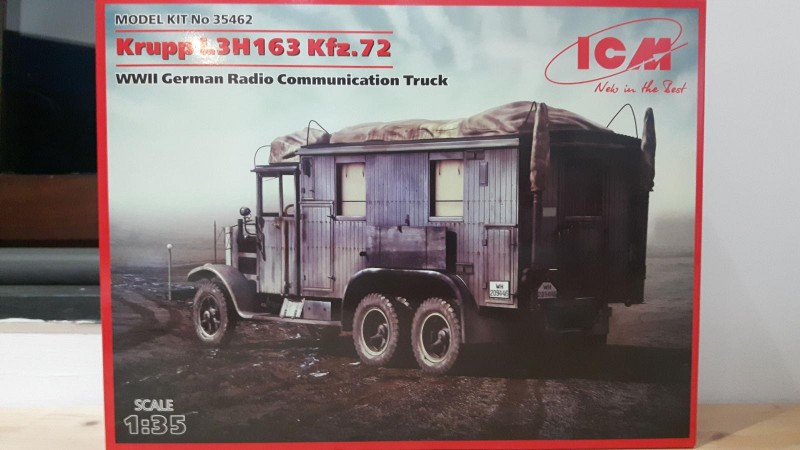
Radio communication was not new when WWII broke out but the Germans made it an integral part of their military doctrine. ICM released this marvel of a kit in 2012 so given my historical interests I decided to build it in honor of those men who provide communications between units then and now.
The kit:
For those of you who are following my Air Ministry build, you may have noticed ICM is a favorite soft skin vehicle manufacturer of mine. No guns this time around (well, apart from the obligatory pair of XK 98 carabines) but the crew of these trucks were for the workings of the German military was concerned what DJs are for today's youth!
http://imodeler.com/2018/05/from-model-to-diorama-a-days-work-at-the-german-air-ministry-1941/
This kit has crisp moldings and virtually no flash. It comes with complete, highly detailed chassis and engine, most of it is invisible when finished. The basic vehicle was available in many different versions and in this case, a radio cabin was mounted on the rear of the chassis offering cutting-edge communications equipment with short and medium range to its crew.
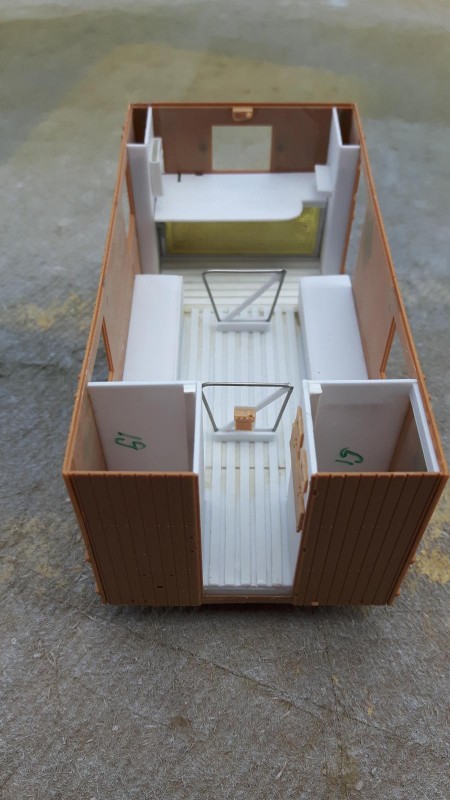
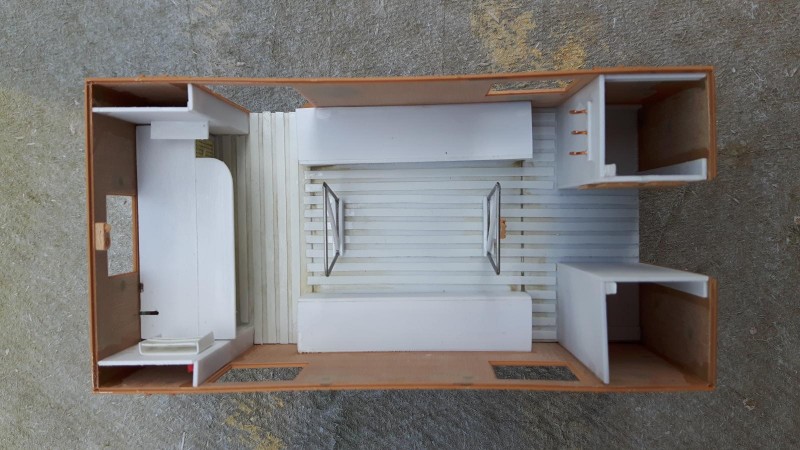
The kit itself does not offer the interior of the cabin. Understandably, this is in fact a kit to be researched on its own and in normal conditions you would not see much of it anyway after the cabin is closed-up... But that was not good enough for me scratch builder!
Scratch built interior:
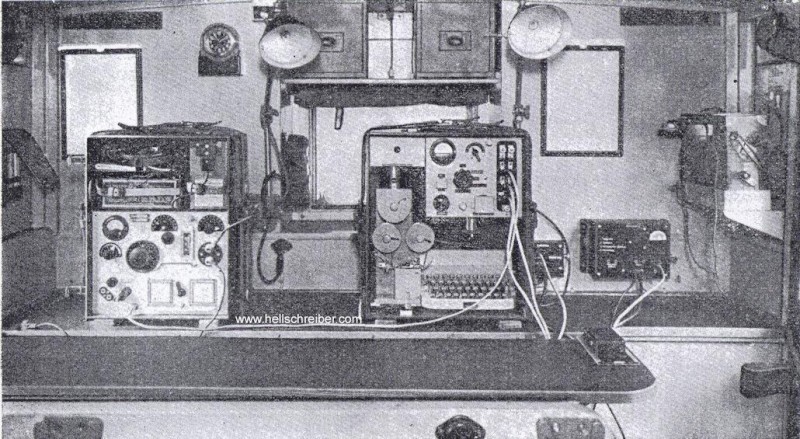
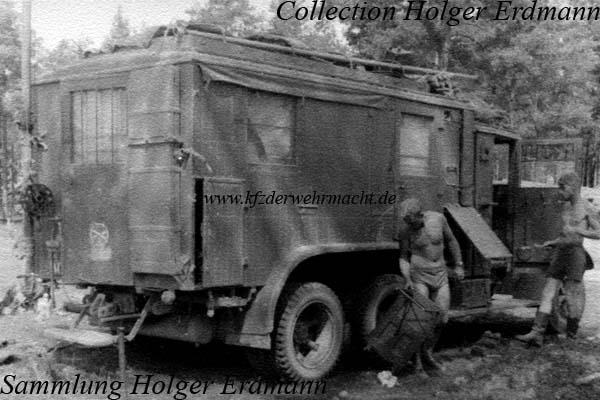
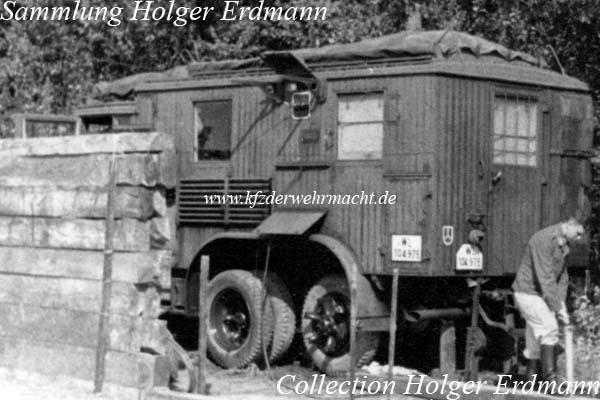
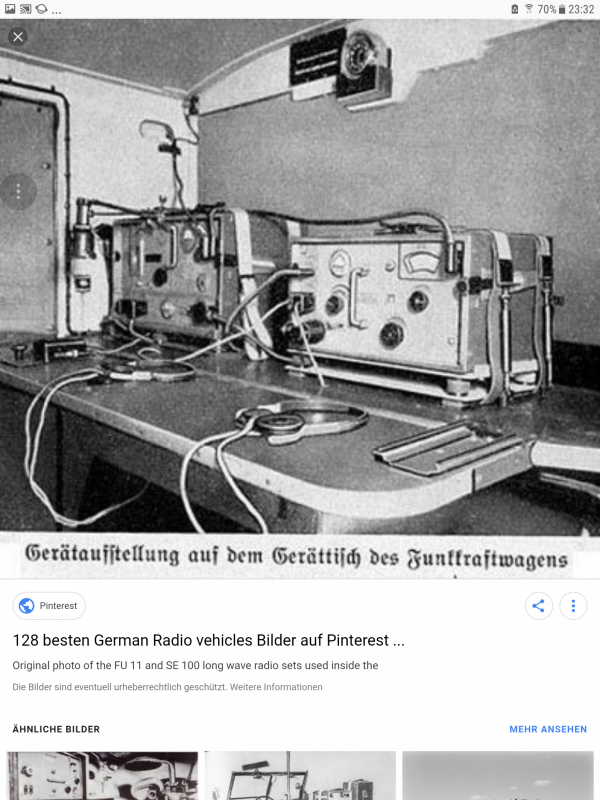
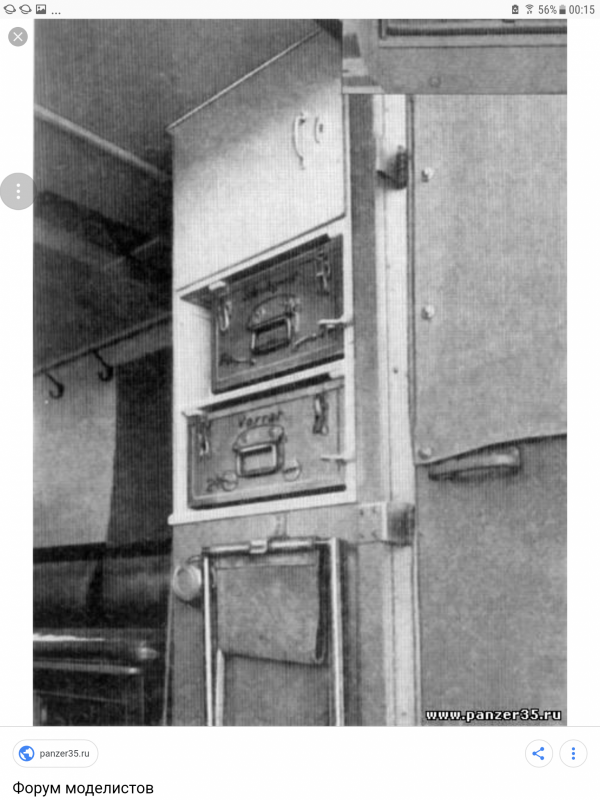
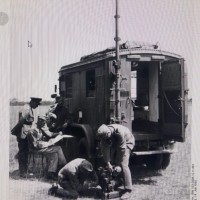
I researched this vehicle in numerous internet resources, books and magazines. I had a lot of time in trains and airplanes, which helped! I added some pictures here of the interior as I could discover them here and there. There seems not to be a standard interior layout as many of these trucks were "field-pimped" by the crew itself depending on the radio sets and services they connected to.
The build:
You can follow the progress on this thread. I used styrene sheet of various thickness as well as PE and tiny detail elements from my spares box based on these pictures. I will also add the areal extended, given ICM only allows for the retracted antennas on the rear of the vehicle. I will also add a LED or two to the interior in order to highlight its details even after the cabin roff is closed.
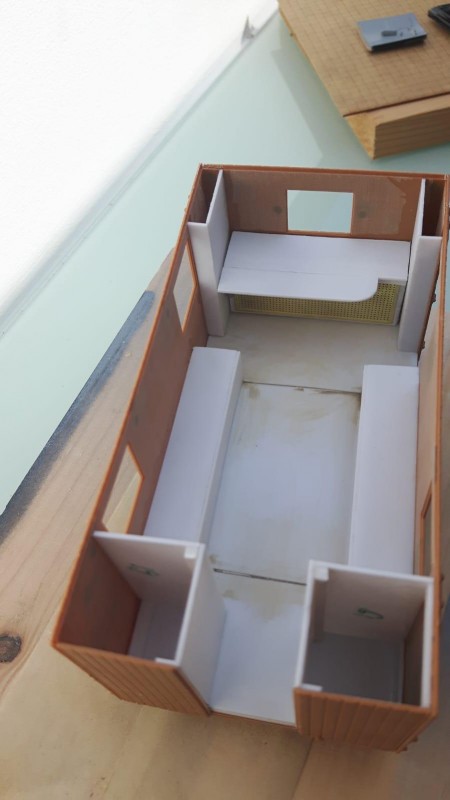
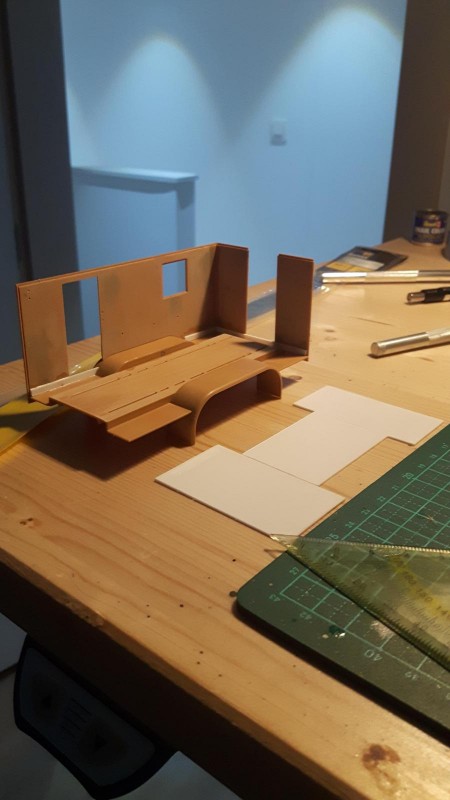
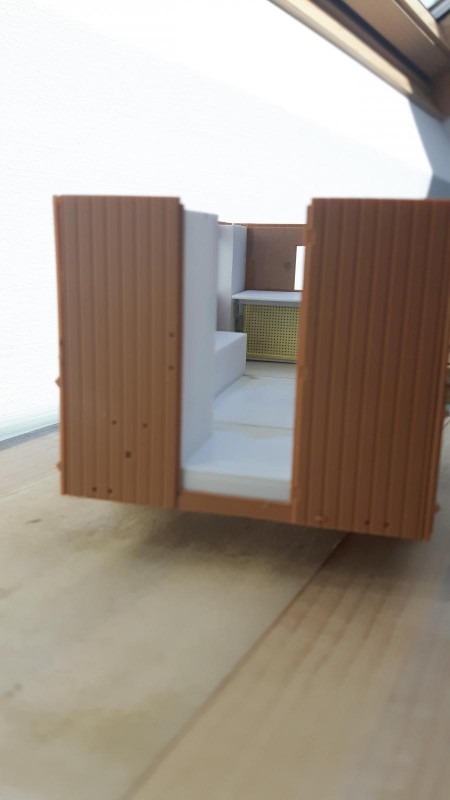
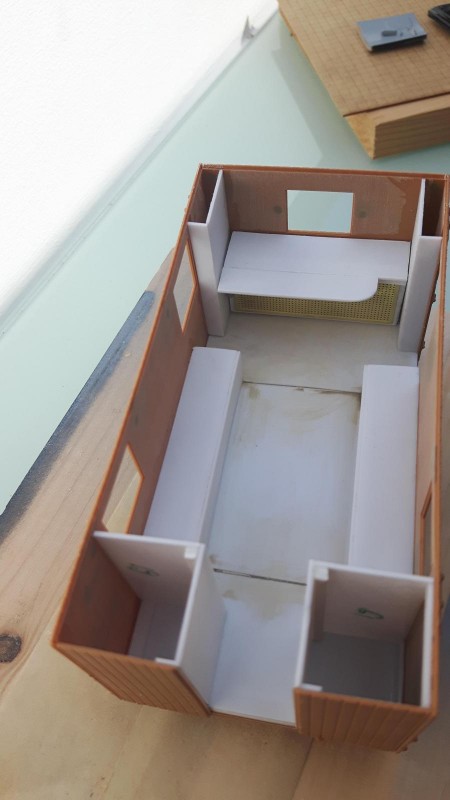
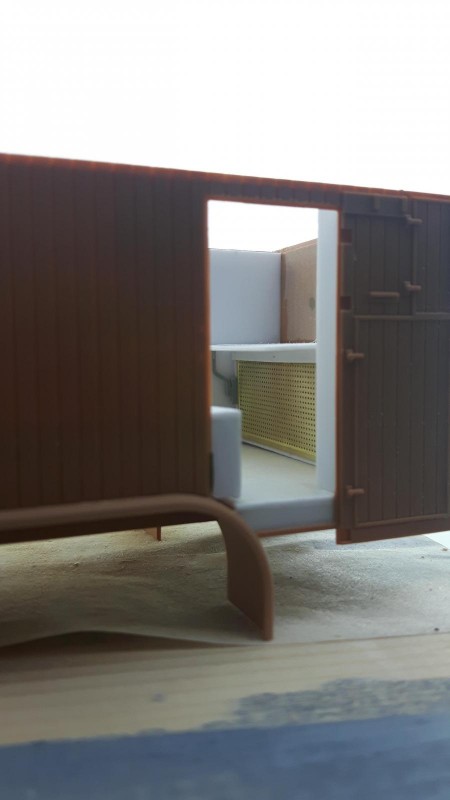
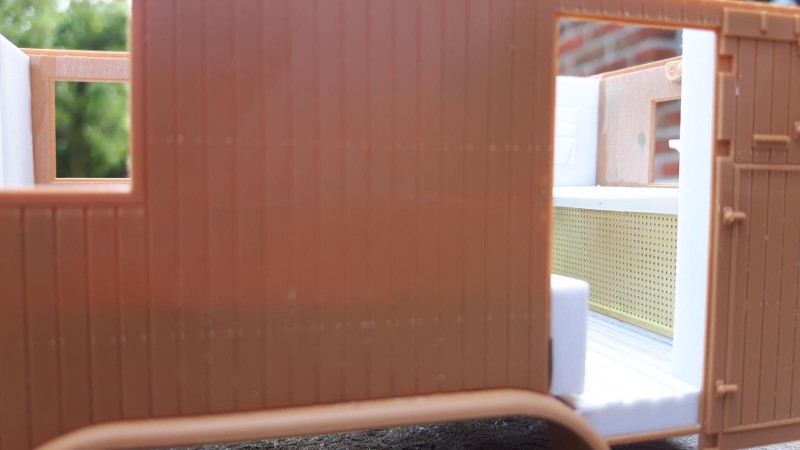
Current status is that I gave the interior a coat of primer. Just before primering, I took these pics of the interior so you can tell detail and materials from their texture:
Hope to have some bench-time soon again!
I hope you like it!
Looks like you are off to a great start!
"Modeling" at it's best, sir...gonna be a beauty, I can tell.
Michel, these type of vehicles really interest me. Though I do have a few tanks in my armor stash, less than 20, but 1/2 of them are soft skins, wheeled light or heavy duty vehicles that support those armored and infantry divisions. More and more of these utility vehicles are being produced lately. We have noted the great influx of aircraft from new and old manufacturers but the armor and ground units have as well just not as much fanfare as the aircraft kits. Looking forward to the progress on this truck. Thanks for sharing. Happy Fathers day.
What a project! Really great work so far with good photo references. Cant wait to see more. Love the subject matter, unique and interesting!
You have definitely made some great progress here ! It's something that I have never seen built up before. Are you going to include this in your Luftwaffe RLM building diorama ? Installing the LED light will help to show off the inner workings nicely.
Hi Louis, no it's no addition to the RLM. This build also progresses with the vehicles. There is a long setting time for current work so I took on this side track!
You can follow the progress on RLM here:
Well done, Michel! These "soft-skin" vehicles were so very important in their day, but like you and others have said, they didn't get much fanfare.
Outstanding, my friend!
I am following your work with great interest Michel! The subject alone is worth all attention it deserves, but I have additional motivation to this, I have an Sd.Anh 473 communication wagon in airplane scale, 1/48, that needs all interior scratchbuild something that has scared me ever since. Perhaps your fantastic work here gives me a confidence boost and some useful tips.
Welcome to the show Pedro! If you need more details let me know!
Excellent detail work! I look forward to seeing this progress.
An interesting subject. Looking great1
Think I missed this post earlier- really interesting work, and no doubt will be equally interesting in the Air Minustry project.
For some reason I missed this post, too. Great start, as has been said, and the customary attention to detail and historical accuracy will make this a stand out project, Michel. Really interesting weathering choices ahead, too. Great work...as usual!
Fantastic work Michel! You made a very good start with the scratch build interior. I 've got an interest is these and other soft skin vehicles as well, and ICM has some very nice items in their range. I'll keep following your progress.
Ok, so today, I worked on the Opel Admiral and the Krupp chassis.
I painted the interior of the radio cabin flat white, matching the original as far I could find references on the web. I think white is the best color given the LED light is to make the most of the interior with the roof closed. Should work fine, the electronics is also finished.
Then I worked on the chassis of the radio car. It is very detailed and - as far as I could check from pictures - very precise. This is not the kit for a beginner, but with some effort it builds into a great model!
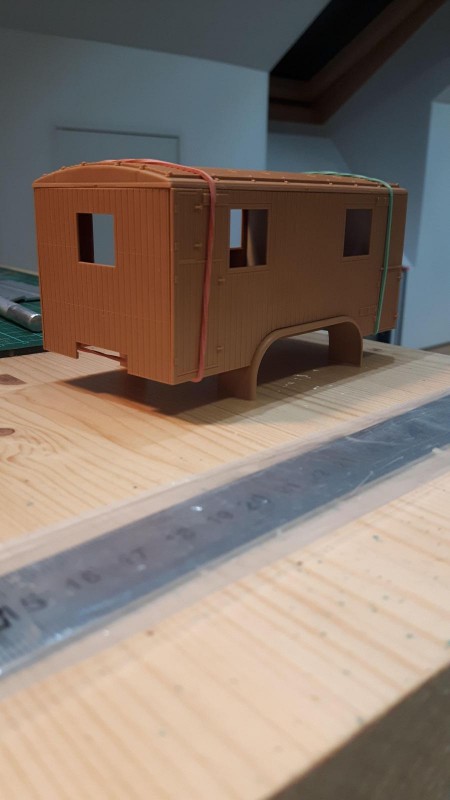
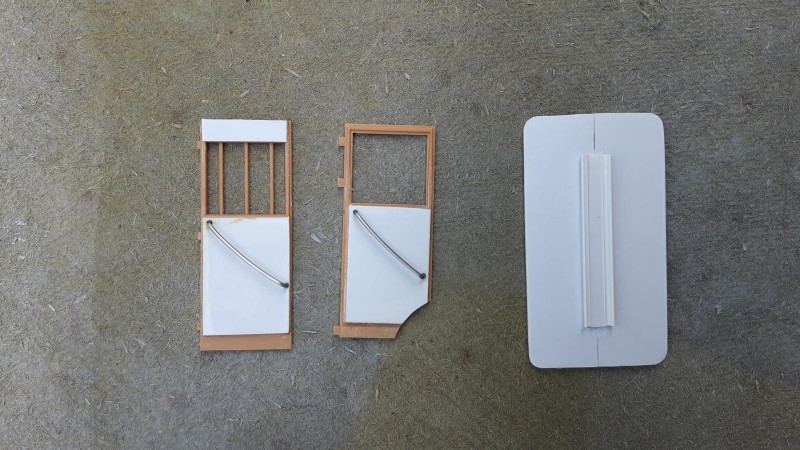
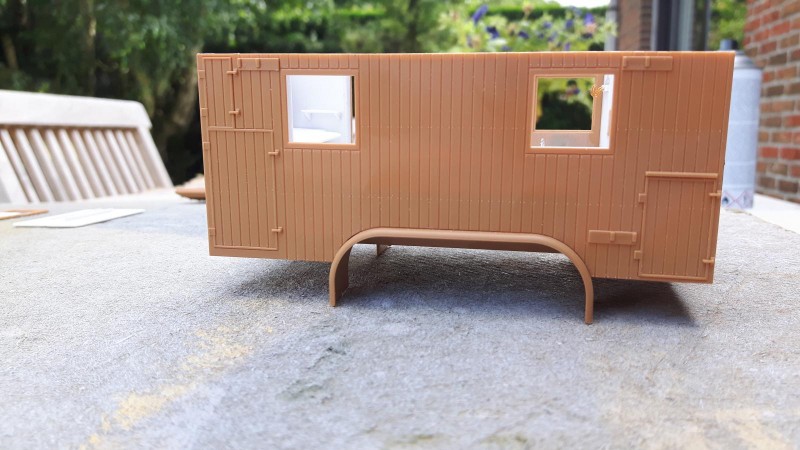
I also prepared the seat cushions for the interior cabin using Milliput epoxy. With some baby powder, I could roll-out to about 2 mm thickness easily. The uneven surface will build into a great cushion I think. You can see them setting in front of the Opel which has now been featured of windows on the left side of the cabin. The right side must be done still but the doors are ready.
Hope you enjoy!
Happy modeling!
Today I continued the work on the chassis of the Krupp truck.
Main emphasis was on the drivetrain for the 2x2 system in the back. There are some very brittle parts involved here, notably parts #A98 and #A102 representing the 4-wheel-drive break levers of this machine. These need to be attached to both cardan boxes supporting the rear double wheels of the truck.
In step 13 of the instruction booklet, you are invited to take the completed cardan boxes out of step 12 and then attach the brake levers #A98 and #A101 to it. As I was sure that you could never align all elements correctly in this way, I decided to install the cardan boxes out of step 12 first, after which the mechanism could be fitted "in-situ". Installing the cardan boxes required me to drill-out the holes on the outside of the wheel support beams #A60 as the inside attachments #A61 do not have the holes on #A60 extended. Installing the brake levers worked fine but care still had to be taken not to break the intricate levers #A98 and #A101 in the process. You can see a picture of the assembled rear drive train and chassis here:
Another "kit-in-the-kit" is the highly detailed engine. If you think of it, it's a real shame this piece of art is later hidden completely unless you work towards opening the hatch. I still need to think what I will do regarding that; Maybe I'll think of a dio that fits with an open engine cover...
The next thing I'll do now is work the interior of the radio cabin whilst the chassis sets firm for a night. Here you see the current status of this part (roof removed).
I think I will first proceed with part of the paintjob inside and then start fitting some auxiliary elements (chairs, radio's, seats and wiring).
Hope you like it! Happy modeling!
Michel.
Wow! Hard work appreciated! It reminds me of the Rat Rig I lived in for days/weeks at a time.
Finished the chassis just now!
This kit is a real treasure. Takes you a lot of time and careful handling of intricate parts, but look at the level of detail in this thing! I added two close-ups here, one for the Engine and another one for the rear drive train:
and another one for the brake mechanism on the rear drive train (x2):
You can tell the complexity from these shots, sadly not much will be visible when the cabin is fixed. As you know, I plan to feature the interior of the radio cab in detal, womplete with radio sets, wiring and figurines. I also soldered a little piece of electronics together so the enterior can be lit using an LED from a 5.2V USB port. A real marvel this kit!
On another note, a colleague of mine was in Milan the other day and so I sent him this postcard:
He was near the cathedral that day but when I asked him whether the Pz. IV was still there, he said no... Well... after 75 years... things definitely change...
Any ideas where it might have gone?
Happy modeling!
Looking good Michel!
Hang on a minute, why is a kit being called " Scratchbuilt"
@radish1us: The kit is the kit, the scratchbuilt part is the interior and of course the dio that goes with it. For another radio truck, a Henschel there was an IBG resin interior but not for this ICM kit so I looked up references and started to scratchbuild the interior using mainly styrene and other bits of wiring. The cabin is also lit by a self-made LED cirquit. I'm currently in the painting stage of the exterior. Will post more progress very soon! Cheers, Michel.
Status update:
So happy to have found some time on the bench a few eves now. Did the final construction and the parts-bookkeeping for the painting. Since I prefer to feature the model of the add-on tools after the latter have been properly painted on the frame, I needed to make sure everything was accounted for before applying the first main layer of paint. These ICM kits offer a lot of detail so there was some work to do!
The first color applied was light wood enamel, but only in places where there is wood involved, such as the cabin exterior and the drivers' compartment. I then applied a generous layer of hairspray (actually two) in support of the later weathering process. After that set for a few days, I added the first layer of German grey (enamel Revell #78). I plan to give the model a 'sun-bleached' overcoat in places lighter than this Revell #78 tone but the latter will be ideal to add shade to the final result I think.
I scratch built the antenna in extended position because I want to make an 'action' dio for these signal-troops, including a Generator they used to power the cabin when the truck was in static operation.
I added some pictures for you to see where I'm at now. I assembled the main parts of the truck 'dry'. It's starts to look really good I think, what do you folks think?
Happy modeling! Michel.
Glad to see you get some bench time. Looking forward to the next update Michel.
Today I finished the assembly and paint job.
I applied color modulation to mimic the 'worn' look of the paint after the vehicle had been exposed to the elements for substantial period. I think that the final weathering will make this build look real nice. The surface detail on the wooden cabin is exquisite. The individual planking is visible, so are the rivets holding the cabin and drivers' compartment together.
I used enamel paints, in three applications, from darkest Revell Matt 78 German grey diluting with blue and mainly white following each layer. The lightest tone was only applied to exposed surfaces on the vehicle such as to model the discoloration by sunlight while employing the first Matt 78 layer as shadow.
I'm quite happy by this result! What do you think? You can also see the leftmost antenna in the extended position. This part was scratch built from brass tubing and steel wire, adding clamps from paper strengthened by superglue. This is a nice feature to the model I think!
Next comes the finishing, fixing the wheels and final parts here and there, such as the tools. I will also start to construct the kit which comes on top of the vehicle. The main shape will be defined by layers of Balsa wood which are then covered in 'lead' canvas foil. Then I need to paint it, but this method worked great on the Opel Blitz I finished earlier in the year.
Stay tuned for more! Happy modeling!
Michel.
Today I worked the weathering on the Krupp radio truck. The drivers' cabin and radio cab were made of wood so I first applied a wood finish enamel color after which I covered it with two generous layers of hairspray. After painting the vehicle in German grey, it was time to 'chip' part of the paint to expose the 'wood' again.
I tried hard not to overdo it, so I first used hot water with a drop of detergent and scrubbed with an old brush. This worked out OK, but here and there I used a kitchen sponge to get some more German grey out of the way. After the cab had dried, I painted the remaining details such as headlights, fenders (white), canvas and rear light.
I will now let dry the whole vehicle and then apply the decals. A satin varnish layer will then seal everything in so I can focus on the washes next.
I hope you like the result so far. I also started doing the dio base plate, more on that later.
Happy modeling, Michel.
Michel @michel-verschuere, I am really liking the wood weathering here. Well done!
Added the wheels! This truck looks gorgeous, almost real
What do you guys think?
Today I continued a bit on the bench. I also started to paint about ten different figures I need in the dioramas I built this year.
The base was prepared using wood, cardboard and ready-made plaster. On top, I smeared a dark brown mixture of earth, PVA glue, water and acrylic paint and added static grass (6 mm). I added a willow tree I constructed from some branches from my apple tree as well. The fencing was completed using satay-sticks and thin gauge copper wire.
The truck changed not much, I worked mainly on the kit to be fitted on top of the vehicle. I think it really starts to look the part! What do you think?
Here are some sneak-preview pics for you guys to enjoy!
Left to do now is the figure painting and constructing figures and radio sets for the interior!
I hope you like this one so far, happy modeling!
Michel.
Michel @michel-verschuere, looking very good!
Brilliant, I last saw and ‘liked’ this some time ago and don’t know how I missed the updates. Fantastic work, Michel!
Lovely work Michel - great subject too.
Michel, I am assuming the coms truck will be stationary and operating, or people getting it ready for coms work. If so, are you going to show some aerials, such as a direction finder, or radar, or a large LF antenna array?
My old friend (amateur radio buff) would love this diorama, but not as much as me.
Hi Peter,
Yes I plan the dio as an action type where there is both life inside and outside the vehicle. Inside, frantic comms are ongoing while some "black men" (Schwarze Männer) repair a live genset powering the comms. Inside I want to depict the typical medium range radio comms setup with field telephones and 100 W transmitters and enigma encoding machines. Most of the figurines are ICM and Dragon. The cabin is lit from the inside with an USB powered LED.
Stay "tuned"!
M.
Here are all the figures, both for the Air ministry and the Krupp truck (exterior). Painting them was a 30 min job per piece, times 10 figures... You get the idea!
Still some minor assemblies and retouches, otherwise this one can be revealed!
Stay tuned!
Been a while since my last update. As the year is almost done with, so is this model. I can look back to a fruitful year 2018 with lots of positive developments on the 1-1 scale but also in my hobby.
I managed to deliver on David Thomas' Kasserine GB (Tiger I) and finish a Vietnam era M107 artillery piece. Then followed an extended scratch build on the Air Ministry (Reichsluftfahrtministerium, RLM) with two vehicles. I started this project, a Krupp radio truck LH 163 (Kfz. 72) in between, couldn't wait. My next visit will likely to Poland 1939 as an 80th anniversary of the campaign is due next year.
The challenge on this one was the interior on the radio cabin and the diorama around. The cabin was researched on numerous picture-, book- and internet resources. The radio sets were taken from a Dragon kit. Today I managed to connect all wiring for headsets, intercom, receivers and radios and prepare the final weathering with some pigments. The dio depicts the vehicle in France during the May 1940 campaign.
Soon this one will be reported in the main channel, but here are some pictures already for you to enjoy. I will take the final pics in daylight.
Hope you like it, happy modeling!
Michel.
A stunning piece of research and skill. Tell me...does the radio work? Wouldn’t surprise me knowing your work.
Love the detail, the scenery is terrific, and the figures are very convincing. Look forward to seeing more photos in the headlines.
Hi David! @dirtylittlefokker
Yes you would almost think the radio sets work... Working on this one recently, I thought the only thing missing is petrol for the engine. This ICM kit is so detailed you would think it could drive away...
For this kit, unfortunately there was no aftermarket set on cabin interior. So that was both the main challenge and enjoyment here.
In order to light-up the cabin interior, I did install a white LED fixture (visible in the first picture). The power source is built underneath the front telephone desk (simple serial resistor) and this definitely works when connecting to USB.
Thanks for your reply, this one is for Bernie.
It’s a great project, Michel. There are so many impressive elements - a feast for the eyes.
Ok, so I finally managed to organize the 'marriage' between chassis and radio cabin. This required me to pull the USB wires through the diorama base plate and connect on the outside to a standard USB 2.0 cable. Just before soldering the connections, I tested the LED for the last time and was happy to see all was well!
You can get a feel for the dio on the rear side of the truck: Two technicians repairing the necessary generator outside, powering the entire truck as batteries were not able to keep the 100W gear up for a very longtime...
In the dark, this looks quite good already:
I will make some finishing touches later in the week and then the modeling year 2018 can come to an end for me!
Happy modeling, Michel.