U-Boot Type IXA – HobbyBoss 1/350
Greetings fellow modelers!
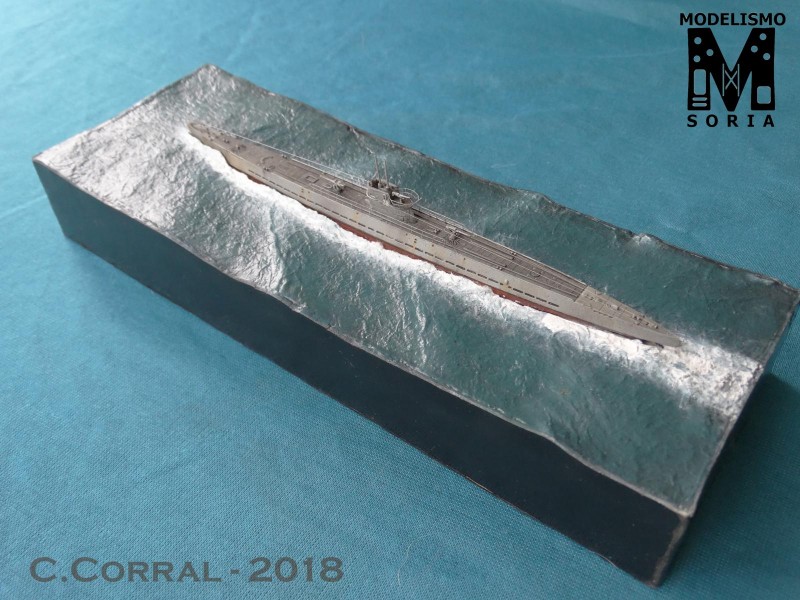
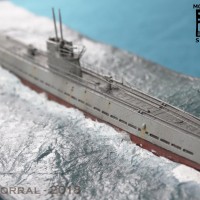
This time I brought to you this little U-Boot from HobbyBoss. I got it at the Leganés Expo 2018 (Spain) for a reasonable price, and it was in my stash for some time until I decided what to do with it.
So one day I woke up really inspired and started it.
The kit is really simple: the hull is split into two with a really good union between pieces (however, some putty is required, but nothing too serious), and one sprue with the other pieces such as the tower.
It also comes with a full set of photo-etched parts for the guardrails and some other details.
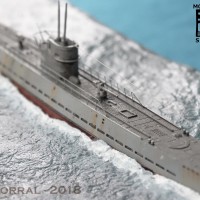
Since I planned something special for it, I decided not to build the lower parts of the submarine. I painted it as it comes, in red hull and cold grey from Vallejo. For the weathering I used oils, mainly rust and black.
After searching for some techniques to make a realistic water for the submarine, I decided to go on free, and use old-school techniques...
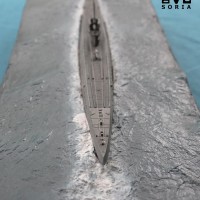
First, I get a nice foam sheet for the base, in which I cut the place where the submarine goes. After that, I used the classic white glue (the glue used for wood I mean) diluted with water and tissue paper.
I will try to explain it as best as I can:
First, with a stick I created the major sea waves by pressing the foam hard. Then, a first layer of tissue paper with the mix was applied. This layer retained the foam details, so another was needed, but with the tissue paper in diagonal position. After that, a third layer like the second but in inverse diagonal. It sounds weird, but after the third layer you can achive a more or less flat surface.
After one day of drying, I applied again tissue paper with the mix only in the places where the texture was more rough than desired. Of course, the final texture was too rough to be considered water, so I applied a highly diluted layer of glue among all the surface. I will look useless, but wait until it dries and you will see a really good surface with the waves in the right places.
After two days of drying, it was painting time for the base. I started with a black coat, and then different tones of blue from dark to clear, all with drybrush (this is really important!). Then, I did the same but with blue mixed with clear green. The result was a really nice sea, with a lot of different tones.
But after all this work, the sea didn't look real at all. So I used future (the cheap version of future, some kind of floor wax) to get the final sea bright effect. As you can see, it looks really nice!
This time it's not a comission, meaning that it will be in my own shelf.
About the model, it's a really nice one from HobbyBoss full of details. I totally recommend it for anyone who wants a good U-Boot model.
About the water, I know there's a lot of ways to do the same thing (most of them involving resin or special products), but it's worth mentioning that I've spent on it about 5 euros, so it's a good method to make something beautiful without spending a lot of money.
I hope you like it!
C.Corral



Excellent presentation, Claudio.
Exactly what I was going to say. 🙂
Thank you both Rob and Craig!
Bellissimo! I prefer this (old, but better) technique. A great job!
Many thanks Paolo!
Claudio, this looks really nice, Your water work is especially nice. You have illustrated a very realistic scene here. Well done!
Thank you for commenting Terry!
Great little sub with very nice presentation! Thanx for Tips on making the water. Well written.
It's always a pleasure to make these reviews for everyone to read. In this case, I didn't need to explain the sub, but this water technique.
Thank you for commenting Paul!
U boat and sea scape are both great!
Many thanks Robert!
Looks good. To achieve similar with resin would be pretty pricey.
I've studied the possibilities, and everything went beyond 30-40€, too expensive for me. Anyway, with some home-made materials, and a bit of inspiration, you can do marvels
Thank you for commenting Anthony!
Like it a lot, model and sea base. Enhorabuena!
Thank you Pedro!
Very nice - and the water effect looks perfect for the scale.
I made some 1/700 water for the classic tamiya waterline destroyers, and I have improved the technique enough to represent a more or less realistic water. I guess the hard work has paid off!
Many thanks Greg!
Very nice work, Claudio. Putting her on the the water base elevates the look to whole new level.
It did came with a photoetched base for display, but I think that it's not good for the sub.
Many thanks for commenting Sebastijan!
I built a motorized, diving version of this boat. I installed working navigation lights. Interesting we used the same paint scheme, although it is debatable red iron bottom paint was actually used on these boats. The wave action is great I am still trying to make realistic water but have met with little success.
10 attached images. Click to enlarge.
Hi Claudio, I got sucked into this group having found your posting some what randomly whilst searching Model Sub info and was fascinated to learn how you achieved the finish for your Sea. As a returning modeller some of the materials available today are a million miles away from what was available to me 40 years ago so it was reassuring to see an 'old school' approach was so effective. If you get a chance it would be great to see a step by step tutorial as i suspect there more to your work than you have told us! Thanks for sharing.