1/48 Kitty Hawk F-35B
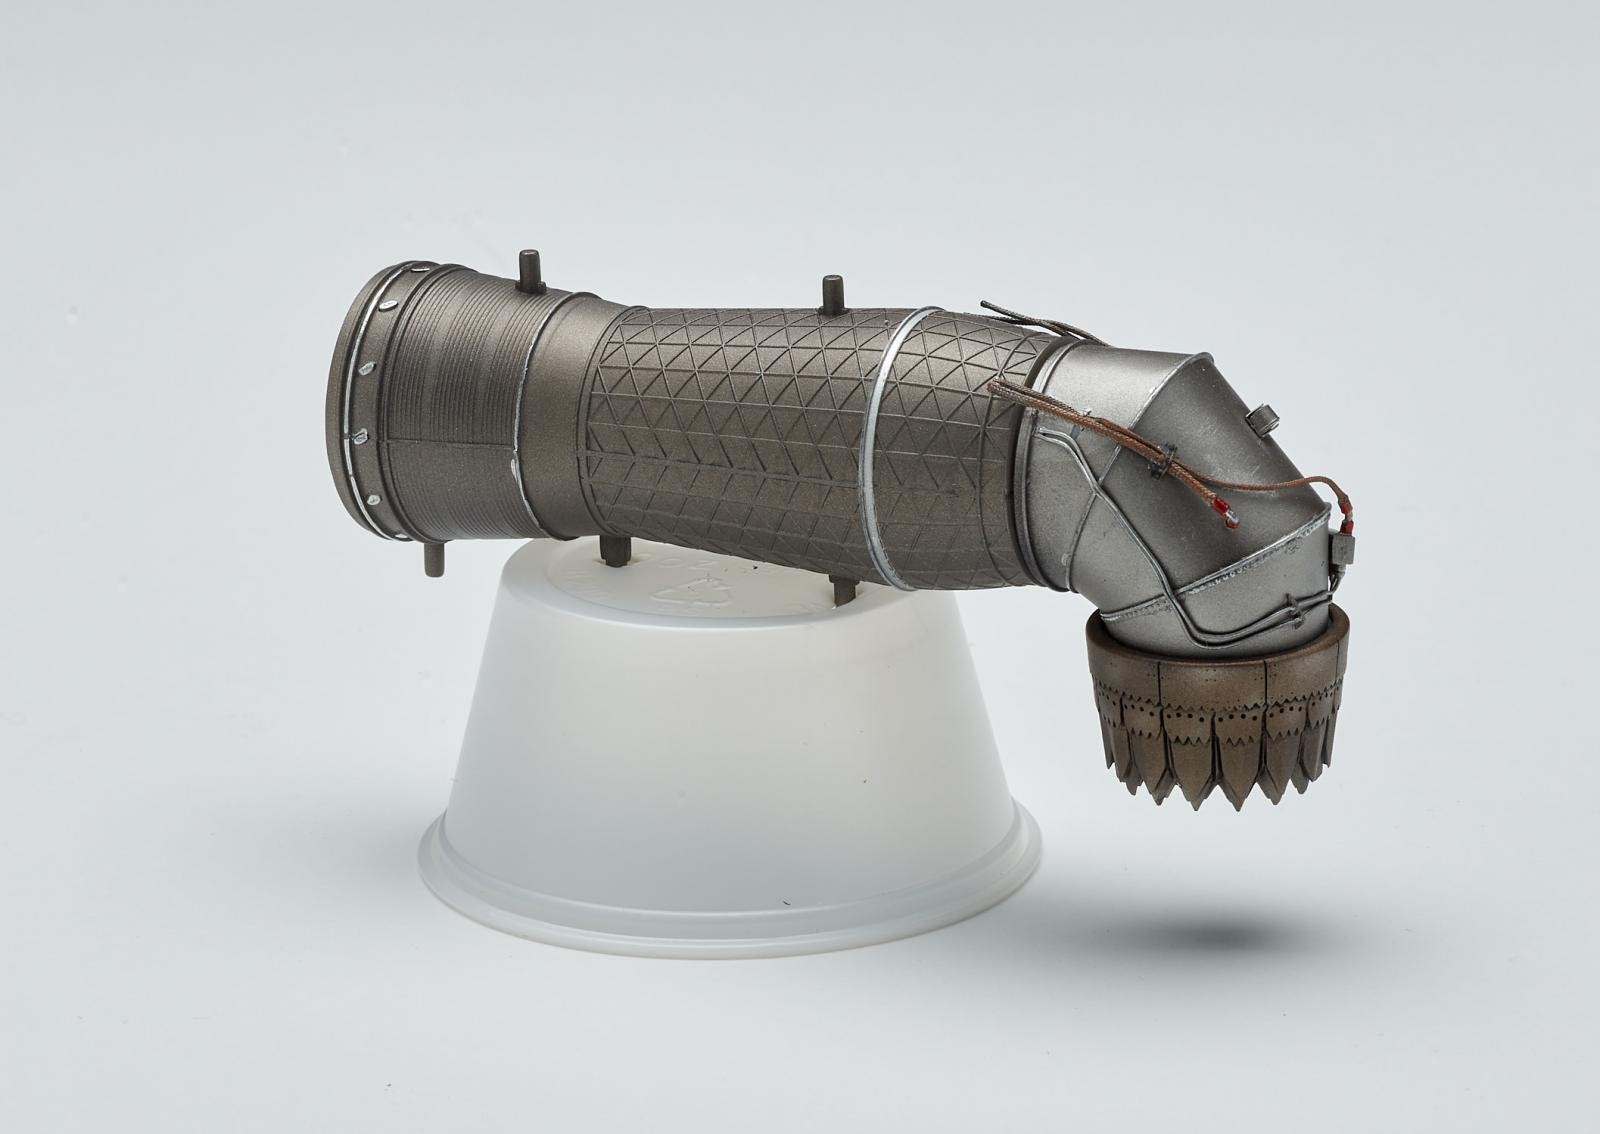
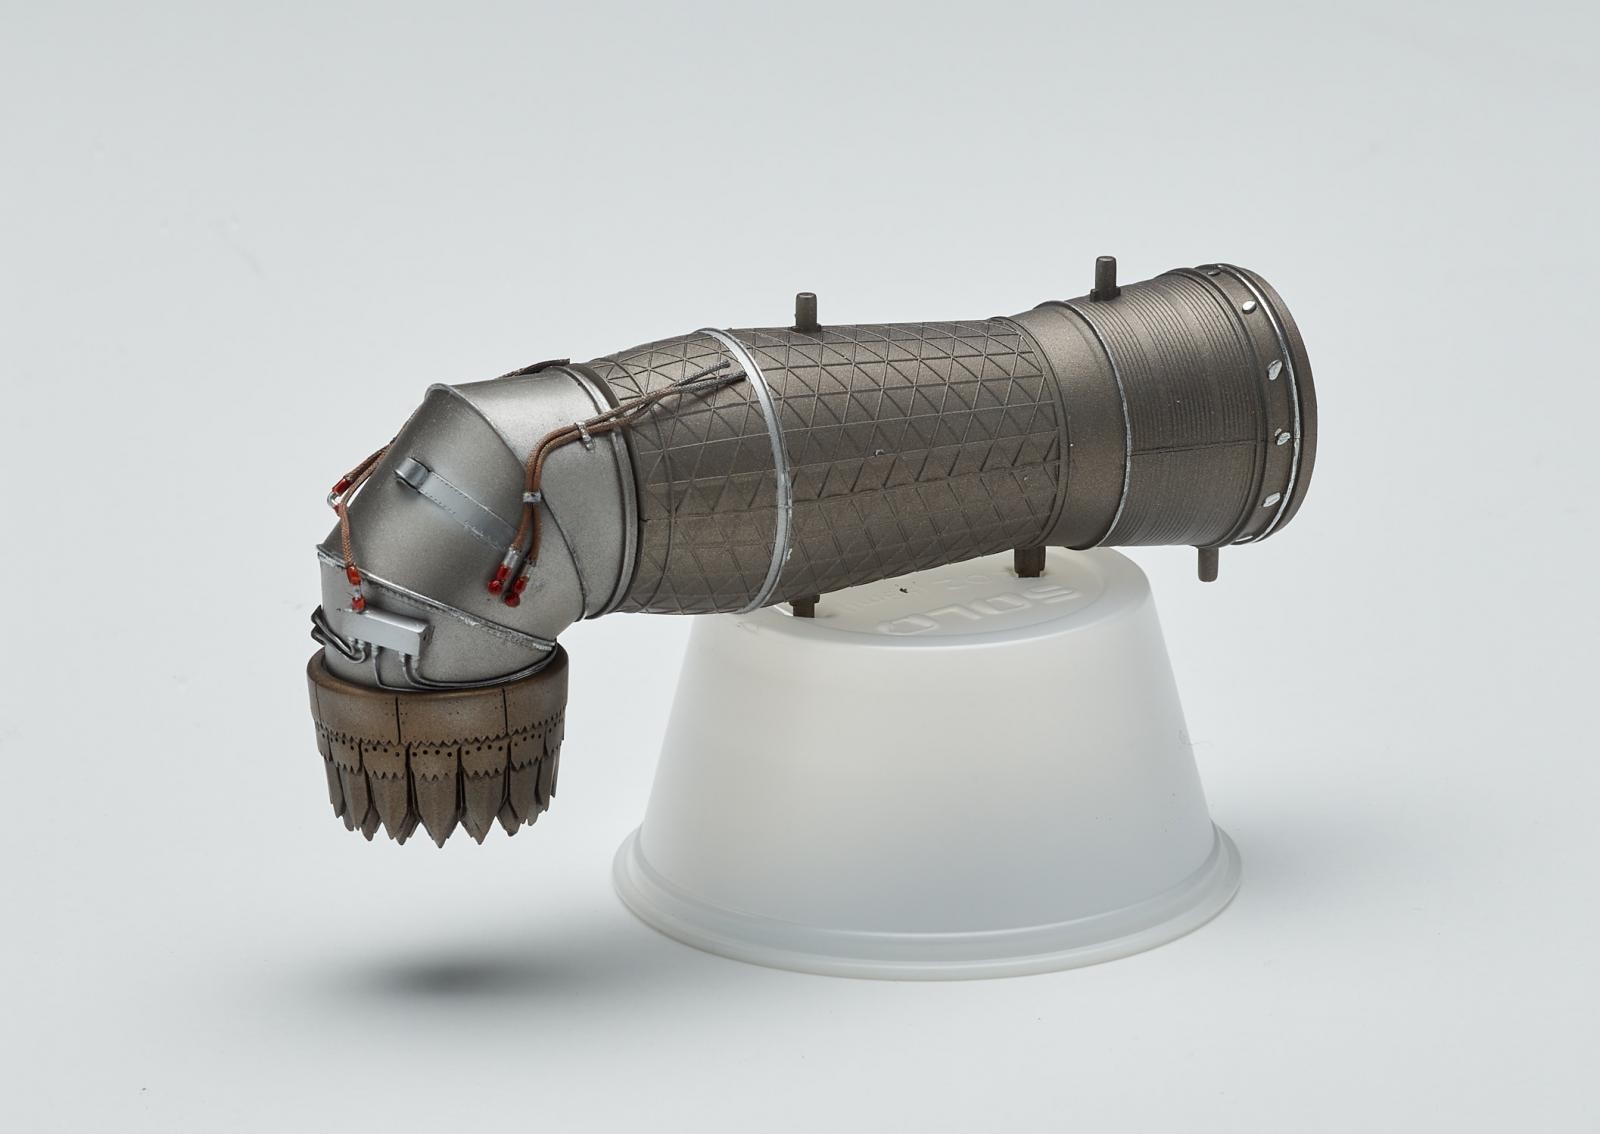
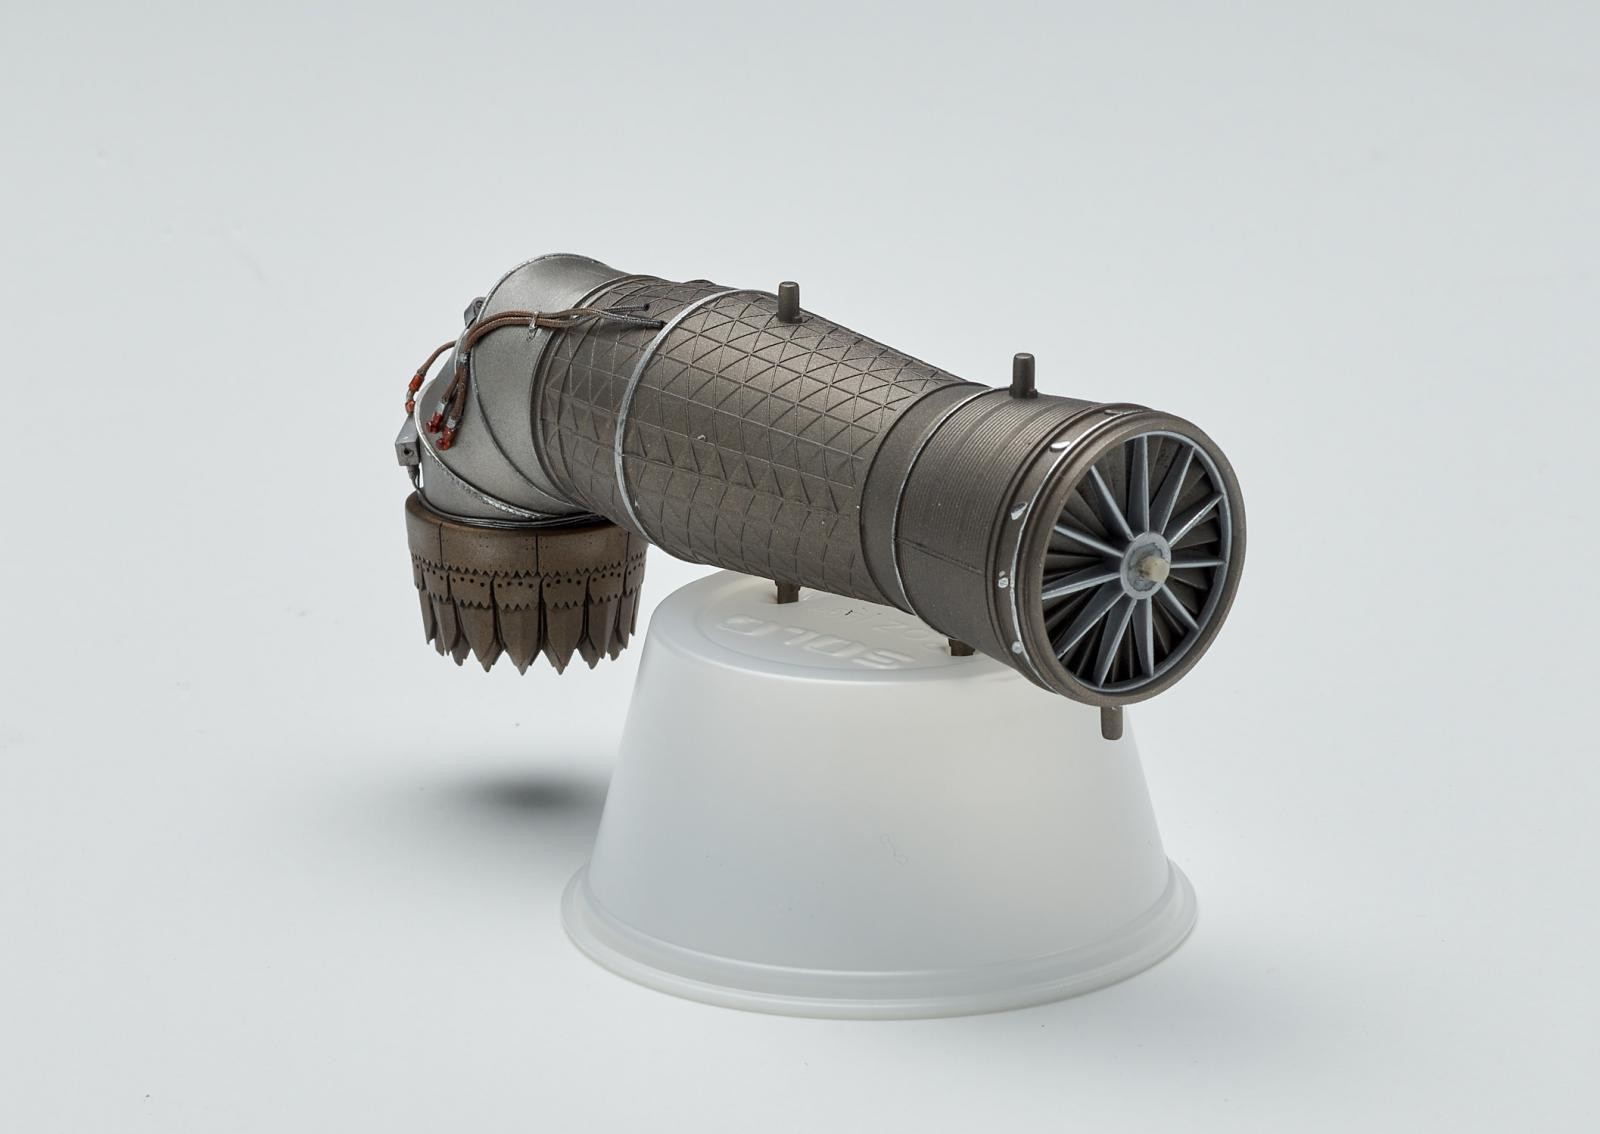
I was getting ready for a contest here in Portland so I didn't have a chance to get around to working on my Kitty Hawk F-35B. Here's a shot of some additional progress I made on the engine this weekend. The kit is a contradiction of really precise fit and detail, and reallly awful fit and poor molding quality.


George, I’m not sure how you turn an exhaust unit into a complete model that you can admire and drool over, but you’ve done it. Your signature precision and realism had me thinking, “how does he DO that?” Over morning coffee.
Inspirational.
Hey David. Thanks! I found the inspiration for the engine when I saw some after market car accessories at IPMS. I thought the hose connectors would be ideal for this model.
Excellent!
David-enjoy your cuppa joe!
Maybe leave the exhaust out of the model, it really looks the part and it would be a shame to hide it in the model. Well done!
I'd like to, but unfortunately, the model is just a huge cavernous shell without it. It would take a lot of scratch building to get it to look decent. I'm going to build up parts of the interior of the fuselage so that it doesn't look toy-like.
George, I could look at this all day! David LS is right - just stunning!
I read that they have updated this kit - and that it has improved? Can you confirm, or is this the original? I have been tempted to make one up in RAF colours.
The engine looks superb, George. Unfortunately, I can't say the same for the kit itself. At least the B-model from KH that I got when it first came out - practically nothing fit. However, after seeing your talent(s) in the past, I'm sure you'll create the proverbial 'silk purse'.
Thanks, Craig. You know, I'm not sure if this kit is one they've revamped or not. The shaft that connects the engine to the forward fan was only half molded and luckily, I bought the Kasl resin set that contained a much better version. There are some other issues with it,too. The fuselage halves go together pretty well, but it's split up into multiple pieces. There are huge openings in the back that have to be closed up around the engine, too. We'll see how this thing goes.
Thank you, gentlemen. As always, you are too kind.
I think you'll find we are not being too kind. You're just too good.
George, what paints are you using? Or are you just using fairy dust?
Thanks, David. I'm using Alclad metallics and gray microfiller primer diluted with a butyrate thinner on this one. The nozzle is a mixture of various shades to get a coppery color and to be honest, I don't remember the paints I used. The body of the engine is a 50/50 mixture of magnesium and pale burnt metal followed by a dusting of magnesium and a flat clear coat from Mr Paint that I added Tamiya flatener to. I used a chrome pen for the shiny stuff.
By the way, this plane will be painted in the turquoise epoxy primer color that's in the photo.
1 attached image. Click to enlarge.
I knew it! Fairy dust.
Yep. Agreed, Doc!
Nice looking engine...cant wait to see the aircraft it is placed in!
Looks great!
Beautiful work so far - looking forward to seeing it take shape, "issues" or not!
that's amazing
Looks good. I agree with your comment about, the KH F-35 kits are real oxymoron's when it comes to quality and fit.
Nice engine! I'm looking forward to the final build. I hear this kit is hard work...
Hi Richard. Thanks. Yeah, it definitely has it's issues, but nothing that can't be fixed, but I guess we'll see about that.