In Progress: A very early Panzer III
This article is part of a series:
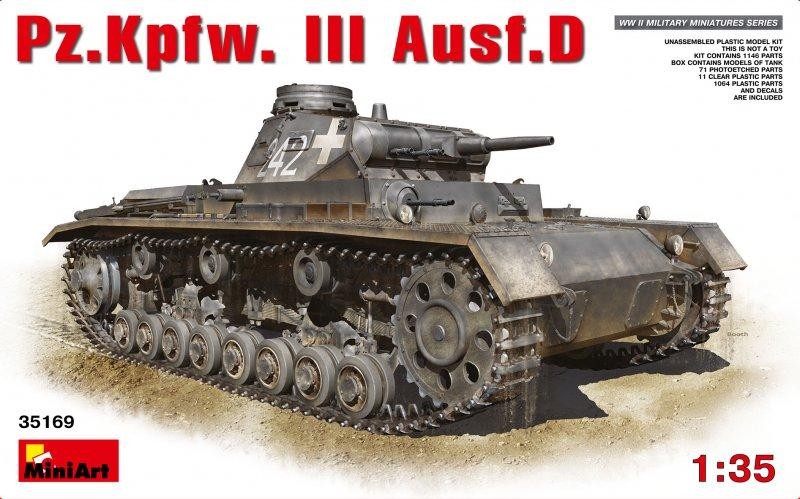
Here is a progress report of my crack on MiniArt's kit #35169 of the Panzer III Ausf. D (Pz. Kpfw. III Ausf. D, Sd. Kfz. 141)
Some history:
The Panzer III was the first real Main Battle Tank of the German Army and an industrial answer to Generaloberst Heinz Guderian specifications for a fast medium tank designed for mobile tank warfare. The tank was developed by MAN, Daimler-Benz, Rheinmetall-Borsig and Friedrich Krupp AG. Early in the 1930'ies torsion bars were still in early development and therefore, early Panzer II's were always fitted with several types of leaf-based suspensions. This feature offers the main visual distinction between the early Panzer III's from version A up to D. The D-version in this build had an 16-road wheel chassis with 3 leaf spring assemblies, balancing 4 bogies of two road wheels per side. The early hand-cranked turret had a 3.7 cm main gun, able to penetrate most armor available around the mid-1930'ies and three MG34-based machine guns (two co-axial in the turret and one ball-beared MG15 in the front glacis plate). The vehicle had Waffen Amt reference Sd. Kfz. 141. They saw some action in Poland and France but soon became obsolete because of the limited armor protection and firepower but also due to the complicated suspension type requiring complex maintenance procedures.
An excellent reference on the Panzer III is Spielberger's book, where I got most of my knowledge on - what is in fact - my favorite German tank of WWII.
The kit:
This kit is by MiniArt of Ukraine and was released around 2015. MiniArt seems to have an virtual monopoly on early Panzer IIIs and the D-type is the last in the series before the first torsion-bar suspension based E-version appeared. As most of you know, the market for Panzer III's of type E or later is VERY well served... I personally like MiniArt very much because it's one of those alternative brands offering 'the-other-model' at democratic prices. Also, they have a decent range of diorama material in their offering as well as some very nice soft skin vehicles and railcars. Generally, MiniArt is known for its high level of detail, great engineering although this comes at a higher parts count compaired to some of the mainstream kit-makers like DML or Tamiya.
The build:
I started this kit last Summer, in July 2018. Since I took the Krupp Radio car project on the side, I had it on the side for about 6 months. Because I try to maintain the rule: No new kit is started before the unfinished one is dealt with, I placed it on the bench again beginning January this year, after my Krupp L3 H163, Kfz. 72 project was finished.
https://imodeler.com/2018/12/somewhere-in-france-may-1940/
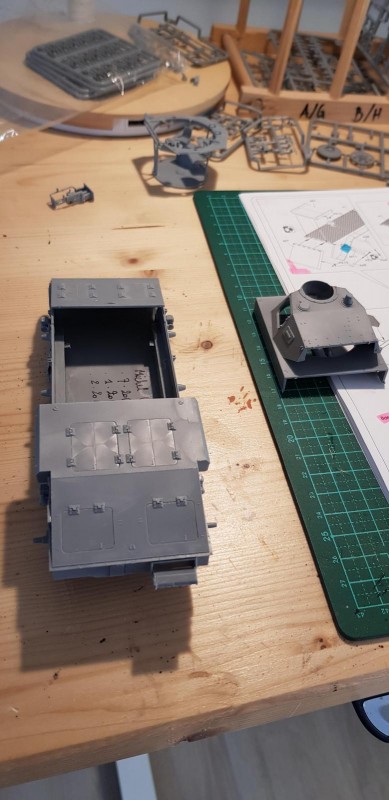
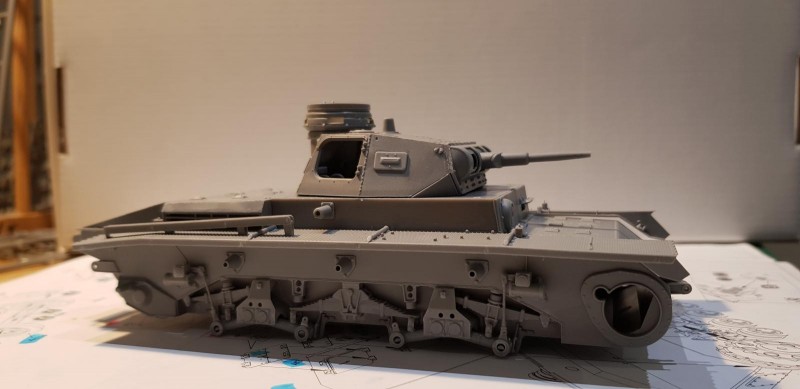
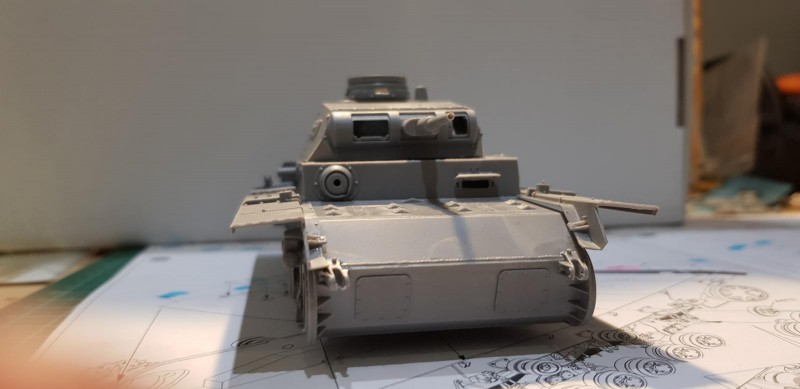
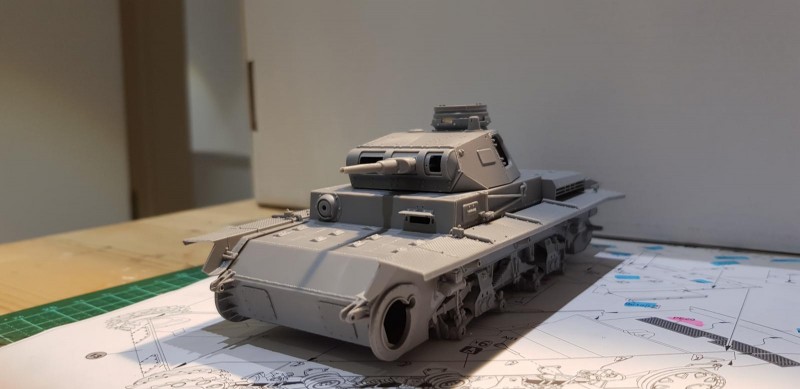
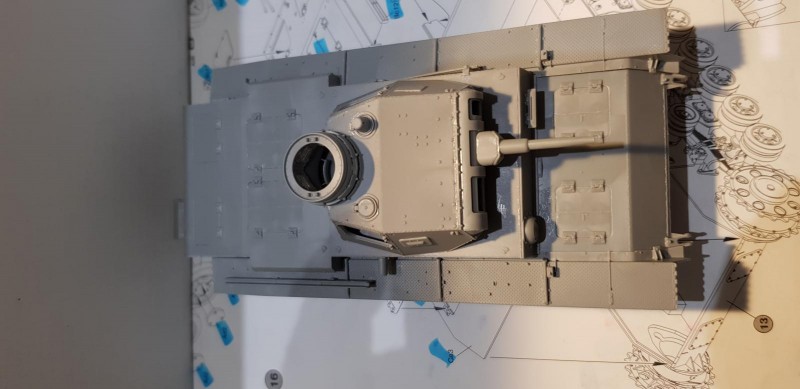
I am currently finishing the plastic build phase. There is a lot of parts and detail to this kit but the many hours do pay off. I'm sure this will be a great model when finished.
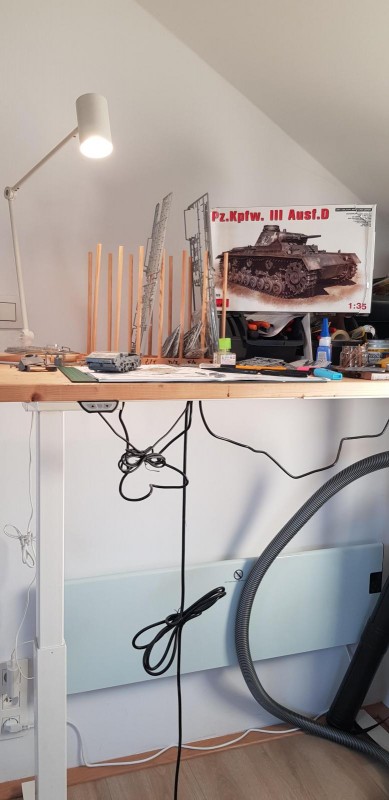
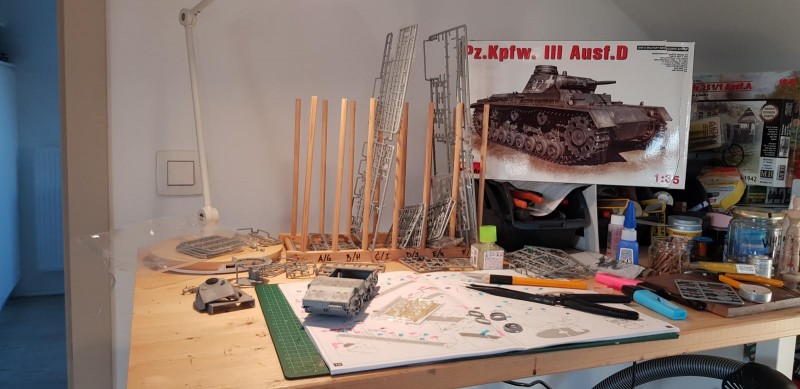
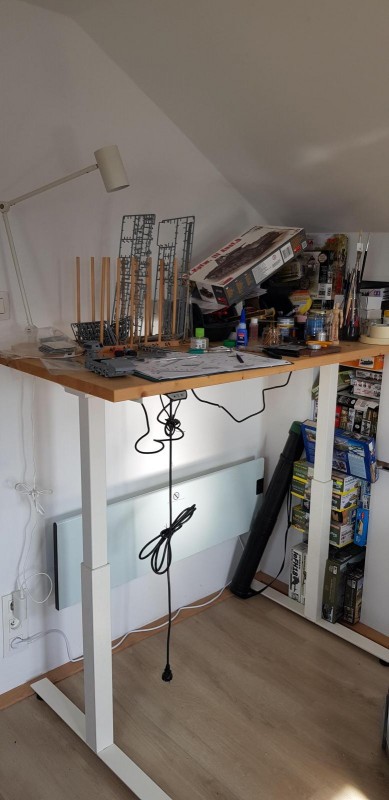
Also, check my setup: Because modelling is a rather static hobby whereby we spend many hours on the bench, I decided to install a standing modelling desk last year. I build most of my models standing upright. The desk is in my home-office, so it's always accessible for me. I'm quite pleased about this decision on the standing desk and would recommend it to anyone looking for alternative pose than seated. It's healthier too as far as I know and given I already have a predominantly seated day-time job, this offers some other options...
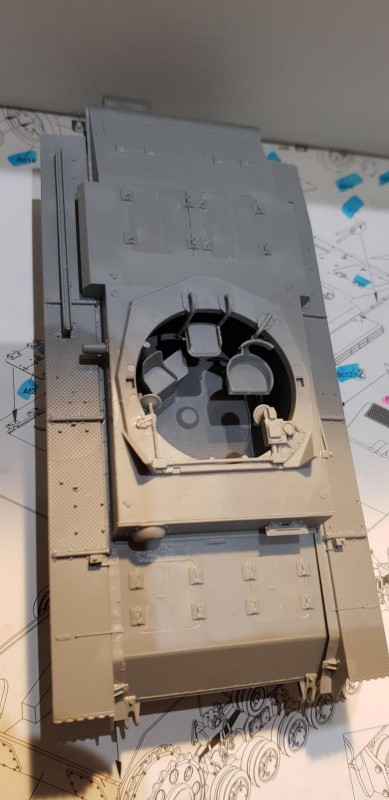
The plastic build job is almost finished, I now will turn to adding the PhotoEtch that is in the kit. There are some very tiny parts to add here and there and this MiniArt kit comes with all detail you would want. I only found one (small) drawback to the kit: The plastic is rather brittle. Otherwise, very much thumbs up on this art, keep 'em coming MiniArt!
The interior is great although I read some reviews mentioning these early Panzer III's did not have the turret basket featured. I can't tell for the pictures I have seen either refer to later III's or do not show the interior that clearly...
Ok, I will keep you posted on any progress! I hope you all like it already.
I have not spent too much time on the bench in 2019 because of tremendous workload in scale 1:1, but also because I will become dad very soon again, so lot's of preps for the baby-boy to come (maybe he will become a modeler too, who knows).
Stay tuned...
Happy modelling!

Michel, let me first congratulate you upon becoming a Father to a baby boy! I'm sure you & your wife will have much to be proud about! My Father got me interested in modeling, so hopefully your interests in the hobby will be echoed in him.
I too like the Pz.Kpfw.III series very much. I didn't know what the differences were, besides the various guns.
I look forward to more from you!
Thanks Jeff, we look forward welcoming the baby in April! I'll keep you posted on the Panzer!
Congrats future Dad!
Thanks Robert, you can be sure I'll teach him about models and imodeler!
Standing desk look very unusual
Congratulations on the newest addition to the family. I'll bet you will get some great bonding time with your new son. You can get him interested into building models too and be just like Dad.
The Panzer is coming right along and it looks fantastic.
Please keep us informed about the progress and thanks for sharing pictures of your work space.
"Liked"
Hi all,
Yesterday I managed to apply the base primer coat on the Panzer. I used rattle-can based acrylic primer in red-brown color in order to mimic the oxide base paint used on vehicles to render them more corrosion resistant.
As you can see, I also applied some negative pre-shading to bring in some color-modulation later when the top coat (german grey) is applied.
Nice to see this Panzer III Ausf. D coming along nicely.
Happy modeling.
Michel.
Today, I added color modulation to the German Grey base tone. I also painted some of the detail on various parts not yet attached to the Panzer III hull (tools, towing cables, etc.). I also started working the tracks. These are the best single-link-tracks I've ever seen for a Panzer III model, better than DML. However, the track links in the kit come in strips of twelve and eacht have 5 attachments to the sprues. This means a lot of cleanup is required:
1. Single track links as removed from the sprues
2. Cleaned track links
3. Jar with finished track links, ready to assemble...
I need about one minute to clean one of the individual track links, once they have been removed from the sprue... The tank had about 96 links per side... That means cleaning for one side only takes the duration of the better movie...
Anyway, I needed a break from cleaning individual track links, so I thought updating you guys would be time well spent!
@editor, this note-feat on the pictures is fantastic!
I can imagine how tedious that would be as you build those tracks. Like masking a WWII bomber window panels. Do a few and take a break and work on something else.
How did I miss this?
1. inconceivable
Hey, mazel tov on the news of the baby Michel. Soon you'll be model building at 4am...good news for us followers.
Nice desk also. I have a standing desk at work, never thought about it for modeling - I see yours can also be raised and lowered, perfect.
Nice to see the Panzer developing, now that I've found it, I'll be a 'regular' -
Congrats again!
Sign me up as a regular too... What a novel idea with storing the prepped track links in a small jar... It beats leaving them loose in the box.
Today, I continued the chassis of the Panzer III. There are many parts involved, but this time, I assembled the road wheels. Each one consists of 4 parts (both wheel sides, cover and axle) and I assembled them only after painting them German grey, like the rest of the tank needs to be.
1. Eye-balled T-rollers
2. Assembled road wheels
3. Panzer III Ausf. D body
I then attached the swing arms. I thought for a while how best to align them, unfortunately, the "Tiger Trick" did not work because this time, the bogies have a T-shape and therefore must be aligned on both wheels per bogie. I therefore eye-balled it, which in fact works fine...
Hope you like the progress, next are the return rollers and track assembly for one of the sides.
Happy modeling!
It's been too long since I made another update here. Only last week, I started spending time on the bench again. I took up a long-time unfinished project since I prefer to limit the number of running projects to two at any given time. The stray project is a Russian tank T-34/85 I had on the shelf for a while. I actually bought it second hand from another modeler, it's an old Tamiya kit #35138 but it's a nice build and went together like a charm. I assembled the turret for the diorama showing a Nashorn tank destroyer but in the end, I added a KV-1 turret that fitted the late 1943 setting better.
Soon more on this!
Turning back to the Early Pz. III, I continued the track assembly. This type of track is probably the best I ever encountered. In my opinion, it is surpassed only by metal tracks, but of course, the latter can easily cost as much as the kit itself.
The track links are slide-molded and come in bands of styrene and require individual removal from the frame. Cleanup of the track links is quite a job, but the resulting assembly using fine track pins inserted on the side yields a length of track that is workable in essence. Although the instructions foresee in gluing the track links, friction suffices to bind them together. In this way, the track "sag" can be perfectly represented on road wheels, return rollers, idler wheel and sprocket.
1. Finished length of track
2. Jig for 8 link length
3. Track pins
4. Cleaned track links
The result looks fab, although this is definitely the first model I completed where assembly of the tracks took almost the building time of the remainder of the kit itself. When I looked at the roll of assembled track in this picture, I could not help but think of this picture taken at the Alkett factory during WWI, the place where most Pz. III's were build.
I hope you like it, I will post more when the track work is done!
Happy modeling!
Today I continued further on the Pz. III. I assembled the tracks gradually over the past month. These MiniArt tracks have plastic track pins, two per track shoe. I did not glue the tracks so to essentially end up with workable tracks.
I first painted the tracks anthracite black firs using my airbrush. After that was dry, I mixed pastels to obtain a rusty color grade. Then I applied a mixture of this pigment basis with water-diluted PVA glue (white glue) between the shoes. After that set, I dry brushed the underside of the tracks light grey so to imitate the bare metal there where the shoes rub onto the soil.
I also made a towing cable from garment thread doped in a thinned mixture of enamel. This worked out great, the thread remained solid. To bend it, I measured a jig to the PE fixture on the rear of the vehicle. Carefully bending the wire according to the pattern indicated in the instructions followed and the finished assembly was then doped in water-thinned PVA glue.
The next thin I did was mounting the tracks onto the tank, as well as the fenders and tools. Here and there, I corrected the paint as well. To finish, I applied an acrylic semigloss cote to the vehicle to prepare for the weathering steps.
Here are some pictures for you to enjoy, hope you like!
Happy modeling!
Fantastic skills. Great to see you on the boards more, Michel. The place is not the same without you. I know you have other priorities (Hi, Laurent!) and I really appreciate you taking the time to share your work.
The Pazer looks mean and moody, just as she should.
@dirtylittlefokker
Indeed David, Laurent doing fine, growing and growing! I hope this Panzer III can soon go on the main billboard, after that, I'll join your movie studios at Arnhem! Can't wait!
Michel @michel-verschuere, Sorry I've been slow to catch up, but this looks great. Happy Father's Day! I hope that you enjoy many more in the future.
@jamesb Thanks my friend! You meant many more Father's days or many more kids? Have a great day!
LOL...take your pick Michel @michel-verschuere, but be careful, you might have to get a bigger car!
1 attached image. Click to enlarge.
Good one!
Hi guys, the Panzer is now nearly finished. Steps today were as follows:
Completed assembly with some PE and started the weathering process. I gave the vehicle a brown umber and black oil paint wash thinned with mineral spirits. This worked out well and blended the German grey into a more interesting finish.
I also assembled the figures to go with it and started the diorama base. This one will play in Poland, September 1939 where about 90 of these early Panzer III's had their baptism of fire.
Here are some pictures and close-ups.
Happy modeling!
The only thing better than watching a great build unfold is knowing that it’s a friend’s work.
You can tell the photos are from an engineer, plan, profile, 3/4. Excellent work.
@dirtylittlefokker, you are indeed a professional! In fact, I'm a Physics Ph. D. but always regarded this field of Science as the ultimate kind of engineering...
Michel, a PhD in neurological sciences, teach at Imperial College, London, and a lifetime studying what makes people tick, I can see why we click. Physics and Psychology together makes so much sense - the behavioural and the quantum.
Model building is, in its essence, a fight against entropy.
@dirtylittlefokker it sure does. Modeling to me is a 3D scale exercise in realism the same way physics models the 1-1 scale real world we live in.
I can't play God but try hard to mimic his work in plastic...
Gdnite mate!
The omnipotence of the scale modeler. There’s a paper in there...
Goodnight, Michel
@dirtylittlefokker
Haha, happy to write that paper together!
“Exponential entropic energy transfer in miniature world building; the dark truth behind modeling”
Abstract to follow...
@dirtylittlefokker
This could also work maybe:
Three dimensional static physics: On the psychology of the scale modeler and the fundamental scientific reality behind the hobby
'Man's Drive Toward Omnipotence; An Existential Investigation into the Essence of (Re)Creating the World in Miniature'
Oh, there's a rich seam of material here...
@dirtylittlefokker
In my honest opinion, it is a totally new and unexplored field of behavioural psychology. Books could be written on the subject. You can probably sell them on e-bay, like model kits.
Short update, worked mainly on the dio today. I painted the undercoat in sandy yellow, where the bottom layer consisted of mixed acrylics and water-thinned PVA glue (dark brown base color). This works as the best contrast layer for the static grass applied next as you can see.
I then turned to the telegraph pole (MiniArt), painted it and bend the insulator supports from copper wire. I plan to add a place mark referring to Litzmannstadt (Lodz) in central Poland, where the 1st Panzer Division passed by around September 13, 1939 during the final thrust on the Polish capital Warsaw. Enjoy.
Continued with the dio. This is now finished but still figuring whether to add a road sign on the power pole. Also, I added some remaining PE detail to the vehicle. Next is figure painting, a labour of love. Here are some pics, happy modeling!
PS: Watch the bird...
Finished! Well, some minor retouches to be made on the figures, but looking great this far.
I started to paint the figures two days ago. After a coat of primer, I painted them with basic acrylics. I only use a basic acrylic color set and then mix the colors myself. In 1939, the standard panzer uniform was black, the shoulder pads had pink lining. The details such as buttons, belts and silver wire were painted with Revell enamels. I used some shading techniques to give the figures somewhat more depth.
The setup was based - as always for my dios - on an old B/W picture:
There were more than just this one, but I'll save them for the main article.
Looks great this little dio. I will post in the main flow one of the next days, after I've taken better pics.
Happy modeling!
As Tom C always says, each element of a diorama has to be of equal quality to hit the Goldilocks zone, and this certainly qualifies. The base, figures, and the creepy crawly thing look as great as each other.
Love that ‘headless Nazi boy band’ look.
Looking forward to seeing the build on the headlines, Michel.