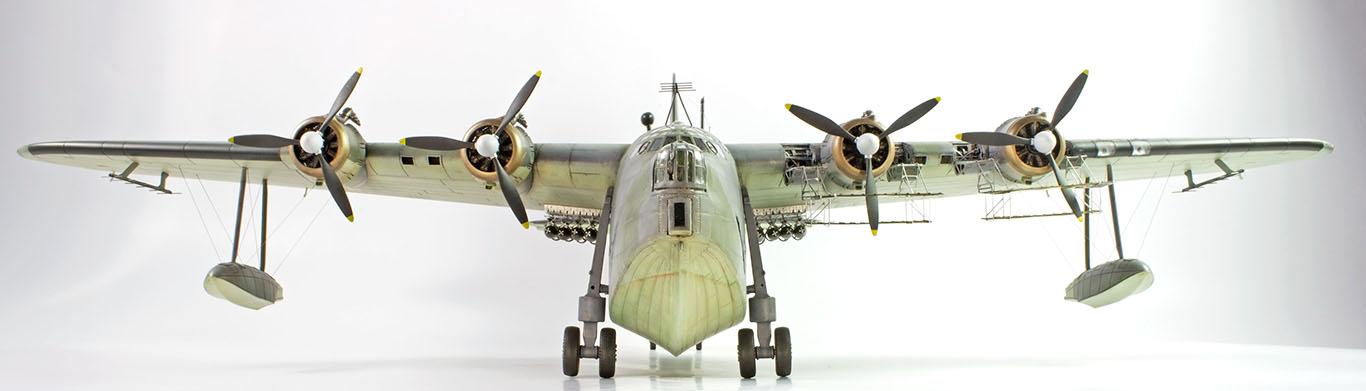
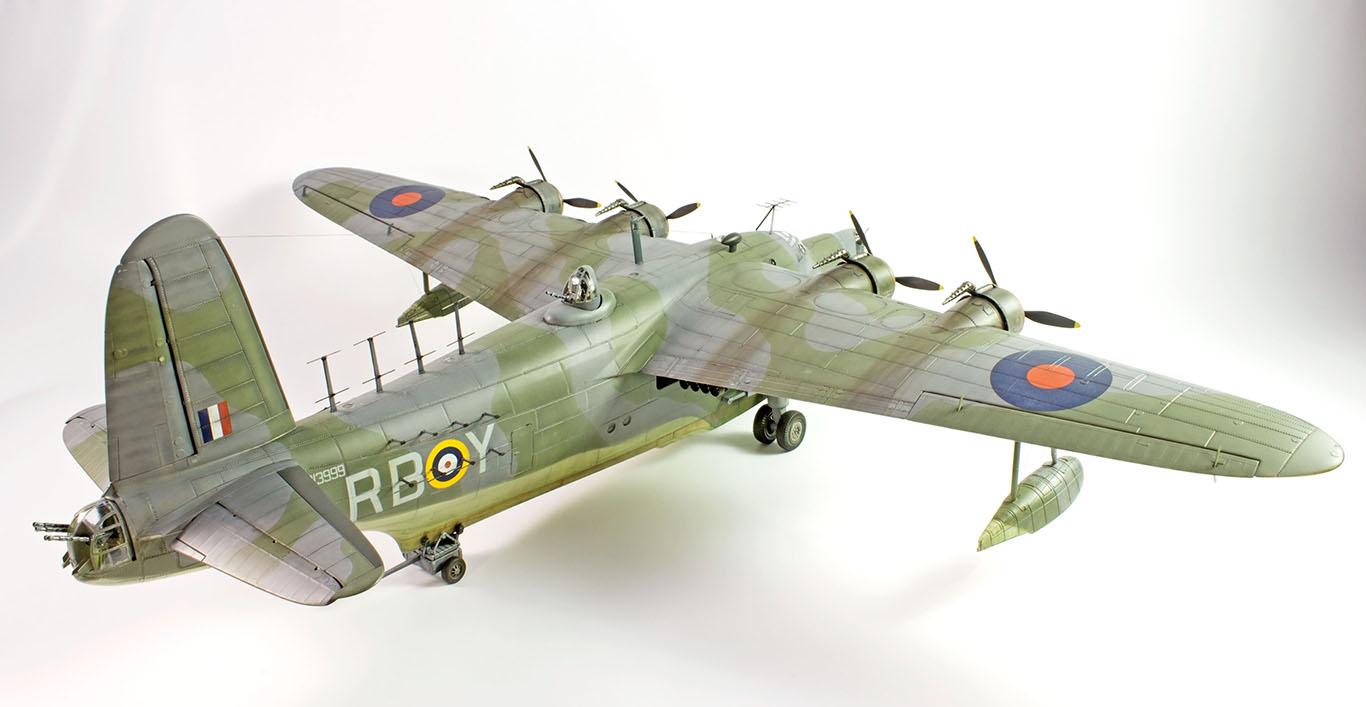
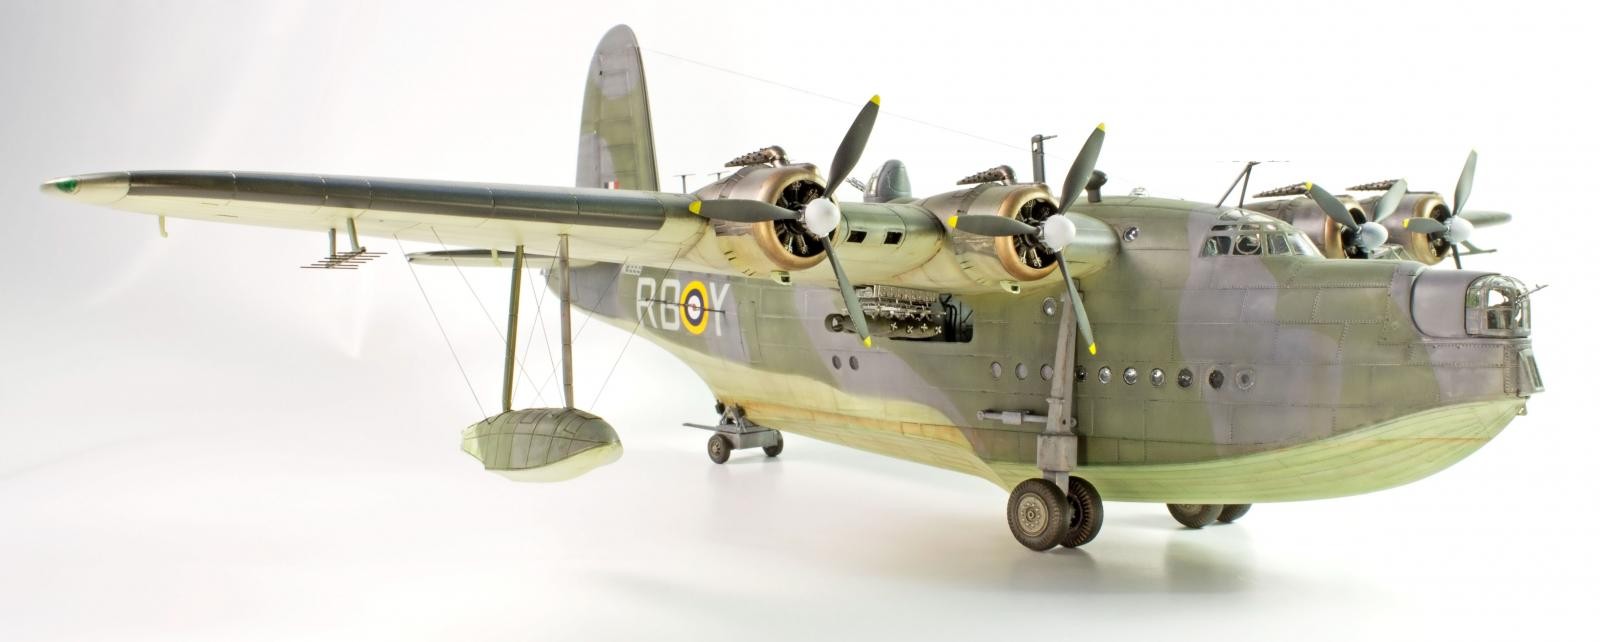
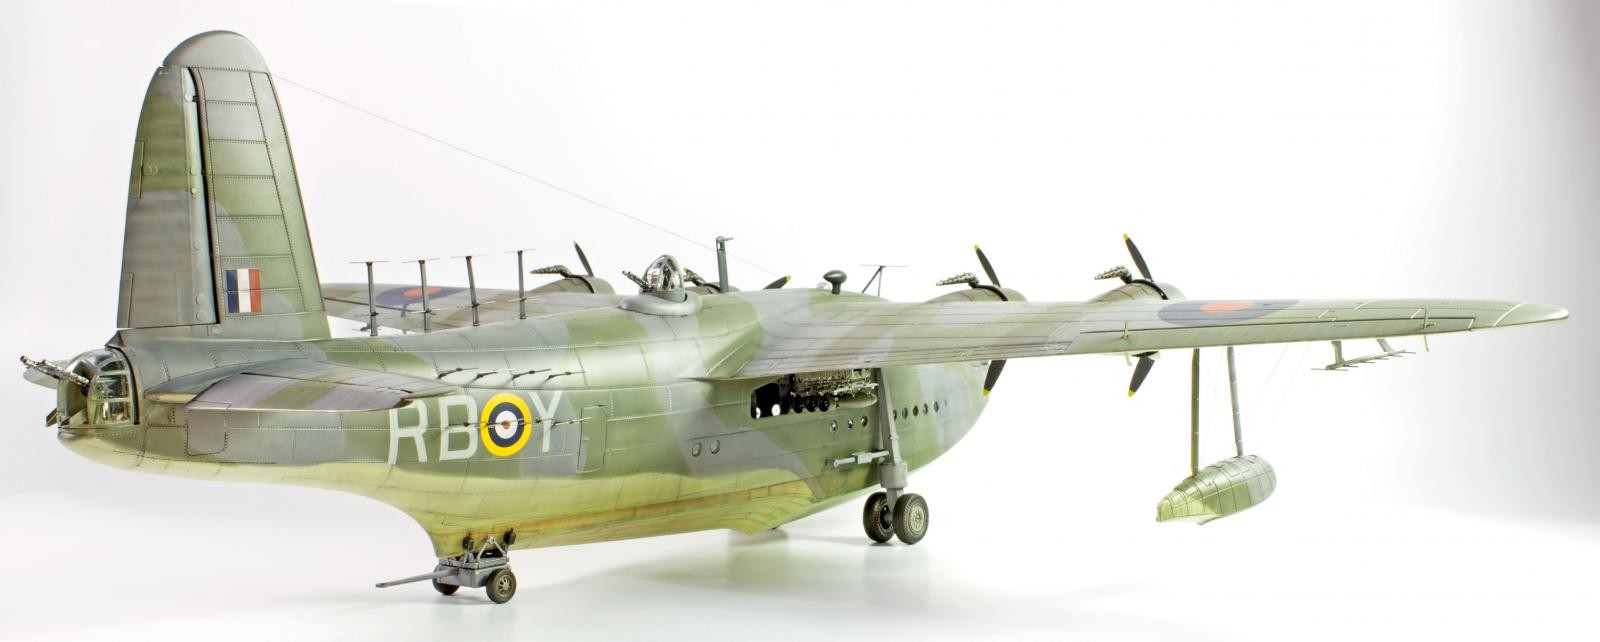
1/72 Italeri – Short Sunderland MKIII “The Flying Porcupine”
Representing a significant advance in aircraft design, the Short Sunderland was the backbone of the Coastal Command convoy escort units during WWII. It proved a fierce opponent to the U-boat threat, being credited with circa thirty submarine kills.
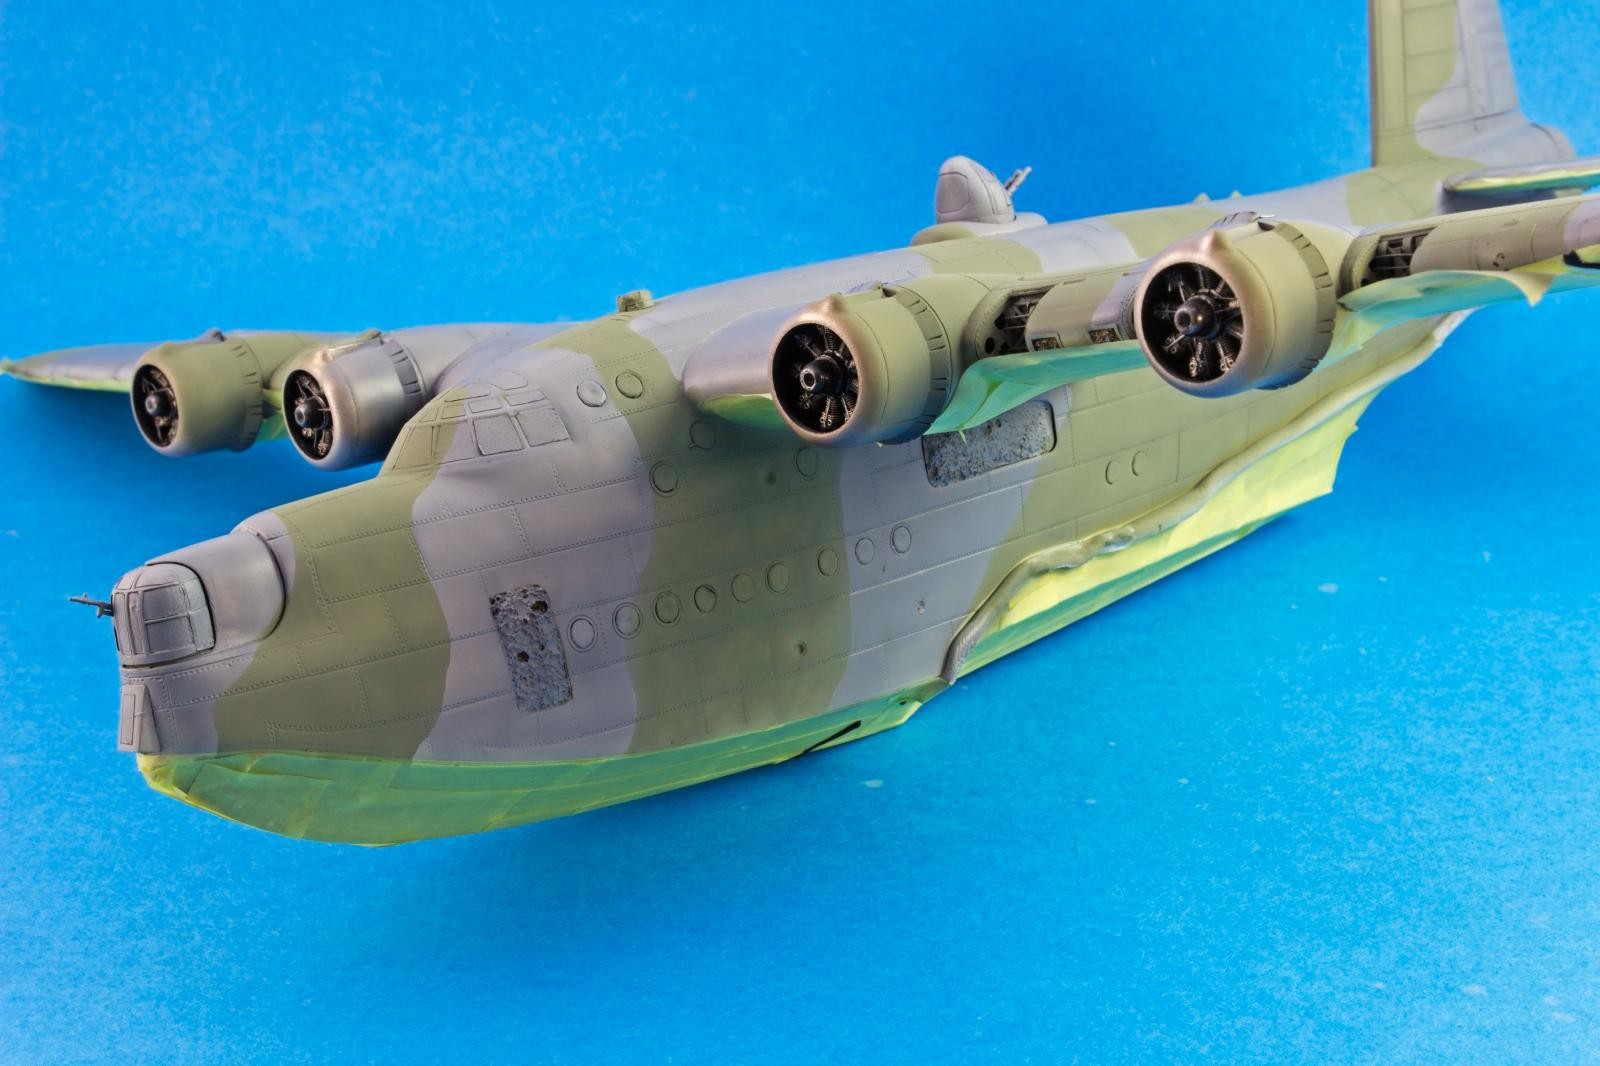
In the same way, it sufficed himself against aerial opposition, with several descriptions of air victories against bigger formations of enemy aircraft. Therefore, it was known amongst the axis as the flying porcupine. The Sunderland MK.III was powered by four Bristol Pegasus XVIII and included the last major alteration to the airframe, in the form of a revised planning hull. This alteration gave the airframe a cleaner aerodynamic profile, but a dirtier hydrodynamic performance.
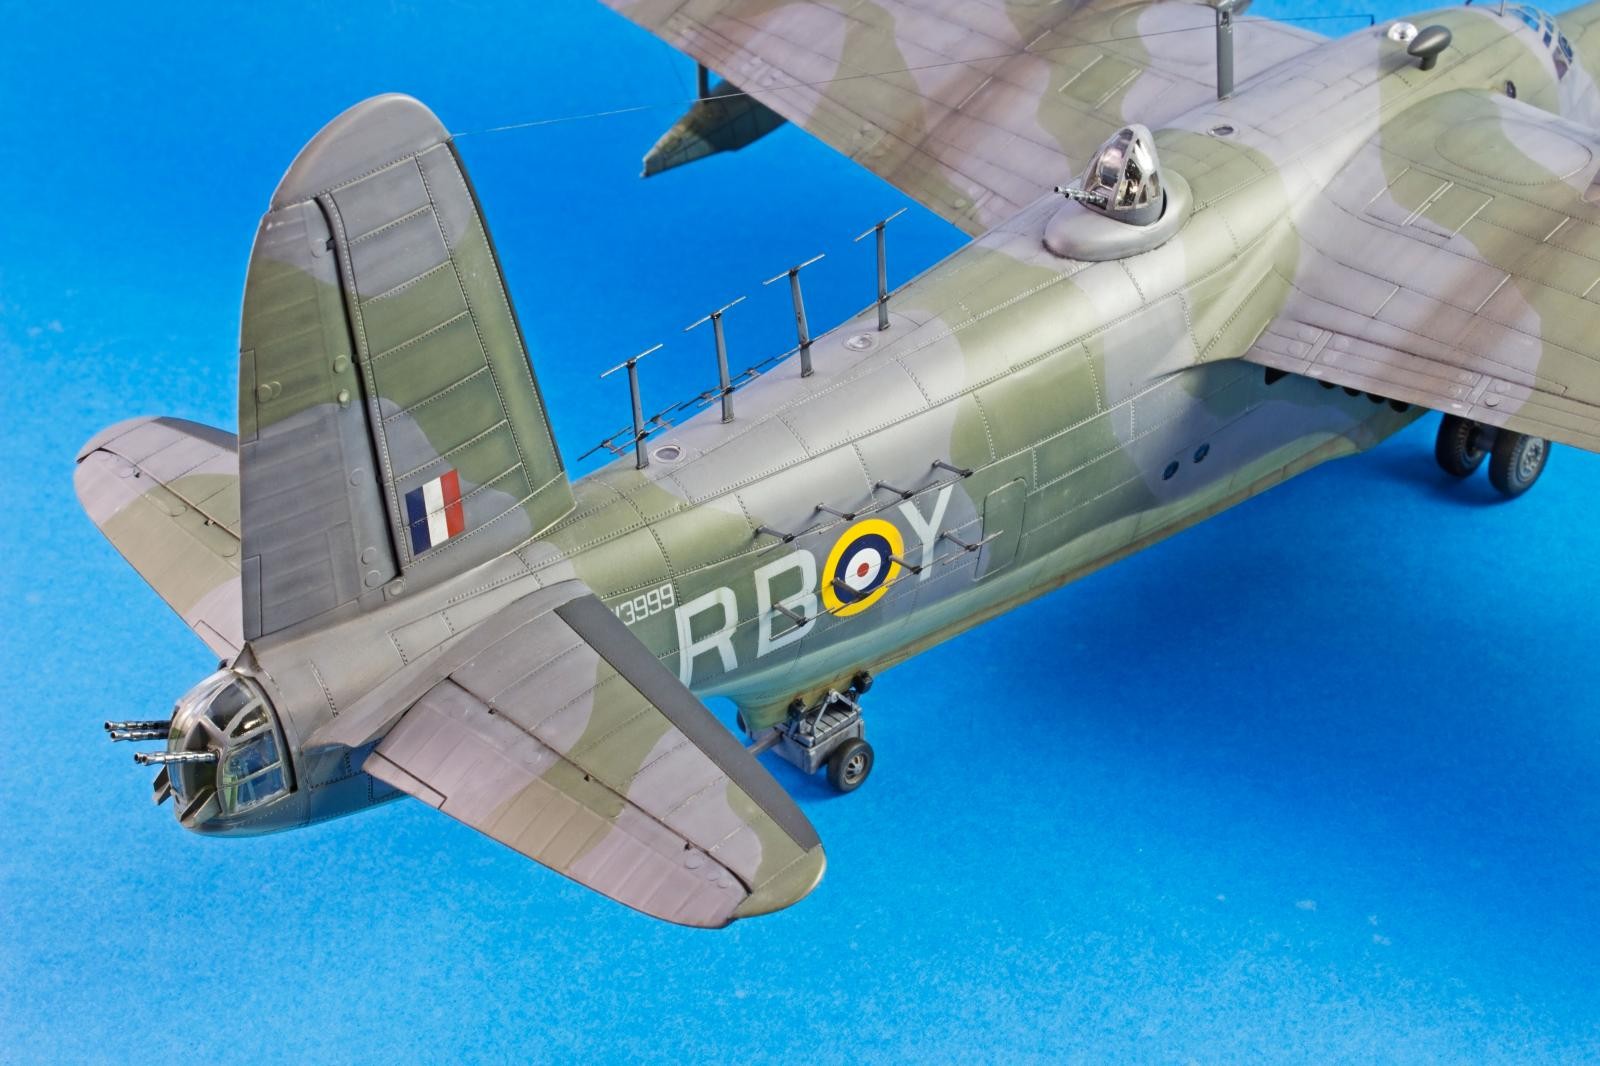
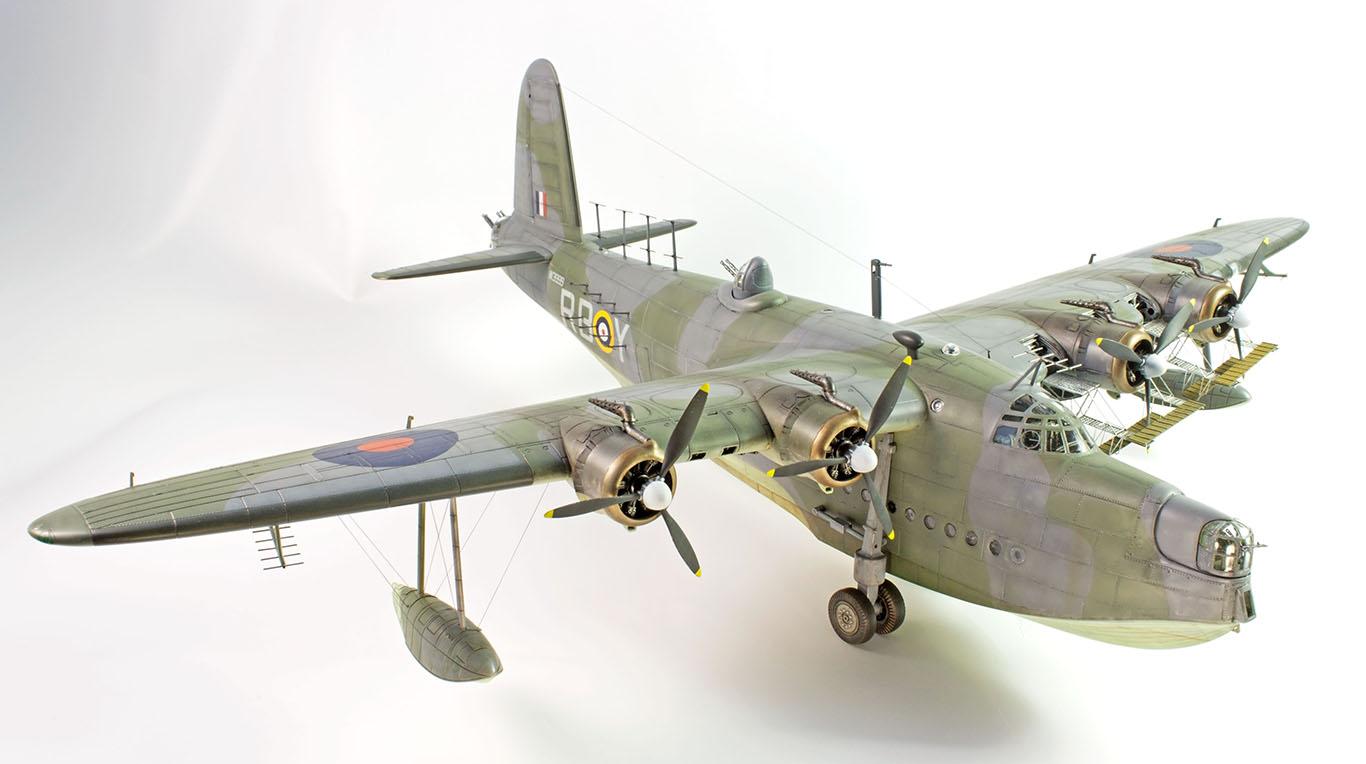
The MK III also saw the introduction of the ASV MKII 1.5m radar, with its characteristic array of antennae, which created a very characteristic silhouette for the fuselage.
What`s in the box?
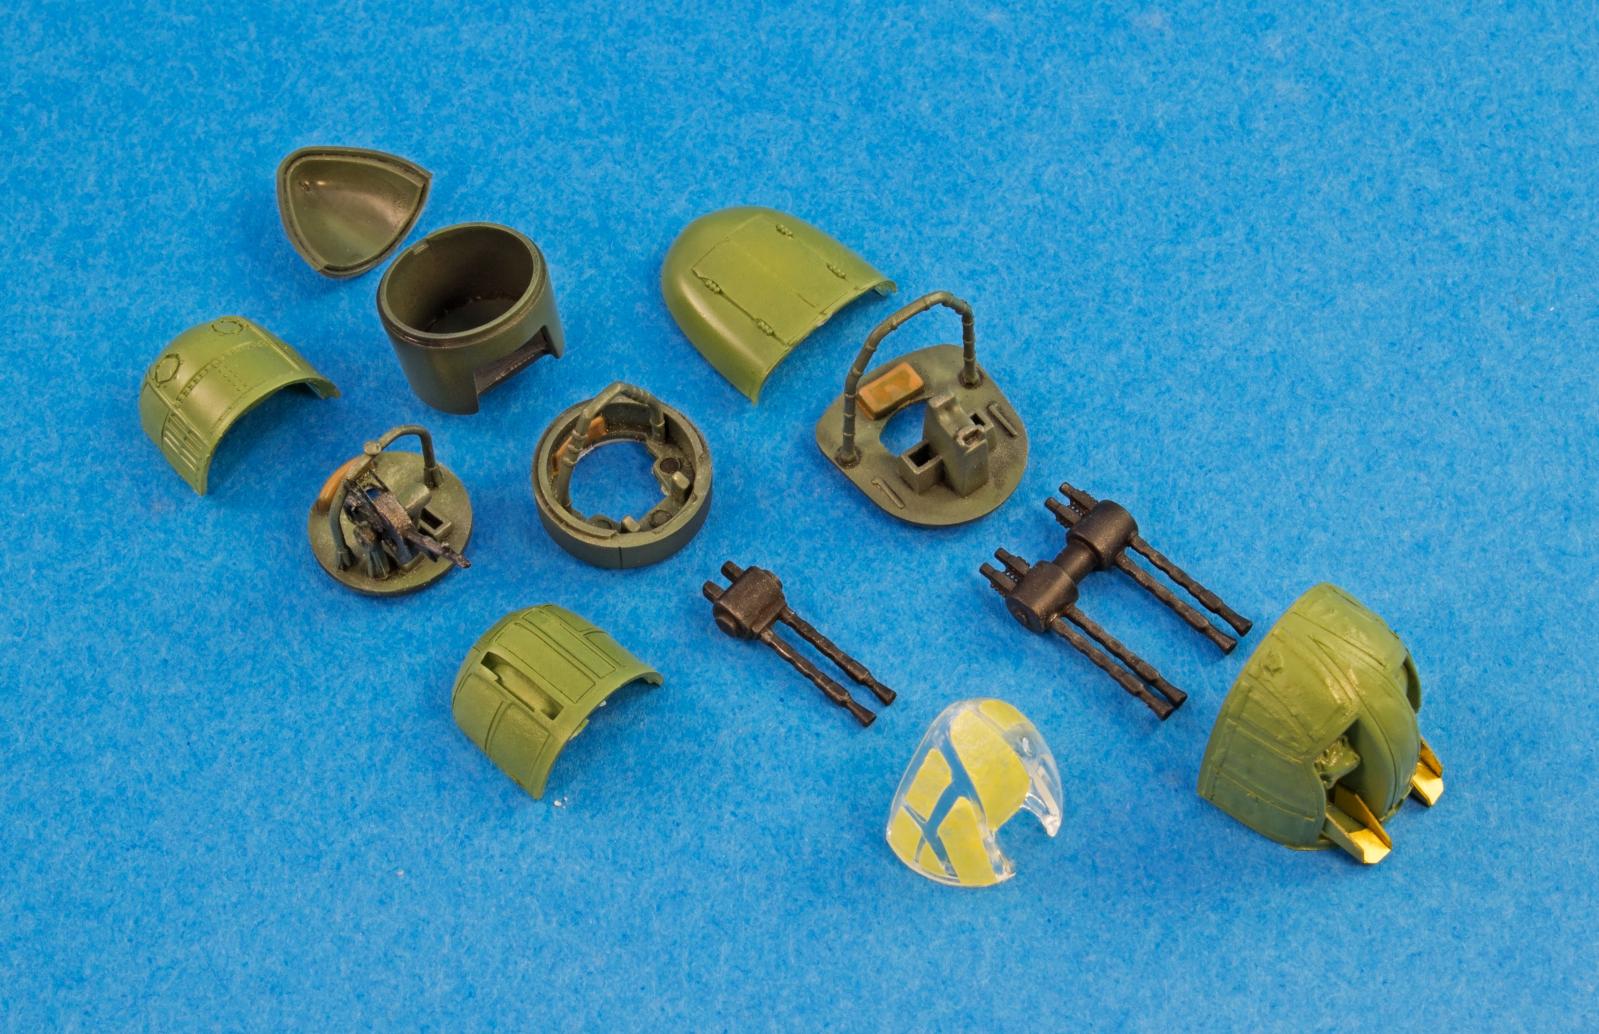
Packed inside a large, lid opening box, adorned with a stunning painting of a Sunderland rescuing several victims on a dingy, were five mid grey sprues containing a an assortment of well formed, flash free plastic pieces.
The plastic presented itself quite soft, being easy to work with. Present on the main interior parts and fuselage halves were a myriad on ejection pin marks (more on that latter). The clear parts were packed separately inside their own plastic bag. Nevertheless, the main canopy and nose gun turret clear parts were marred with heavy stress marks, which rendered them unusable.
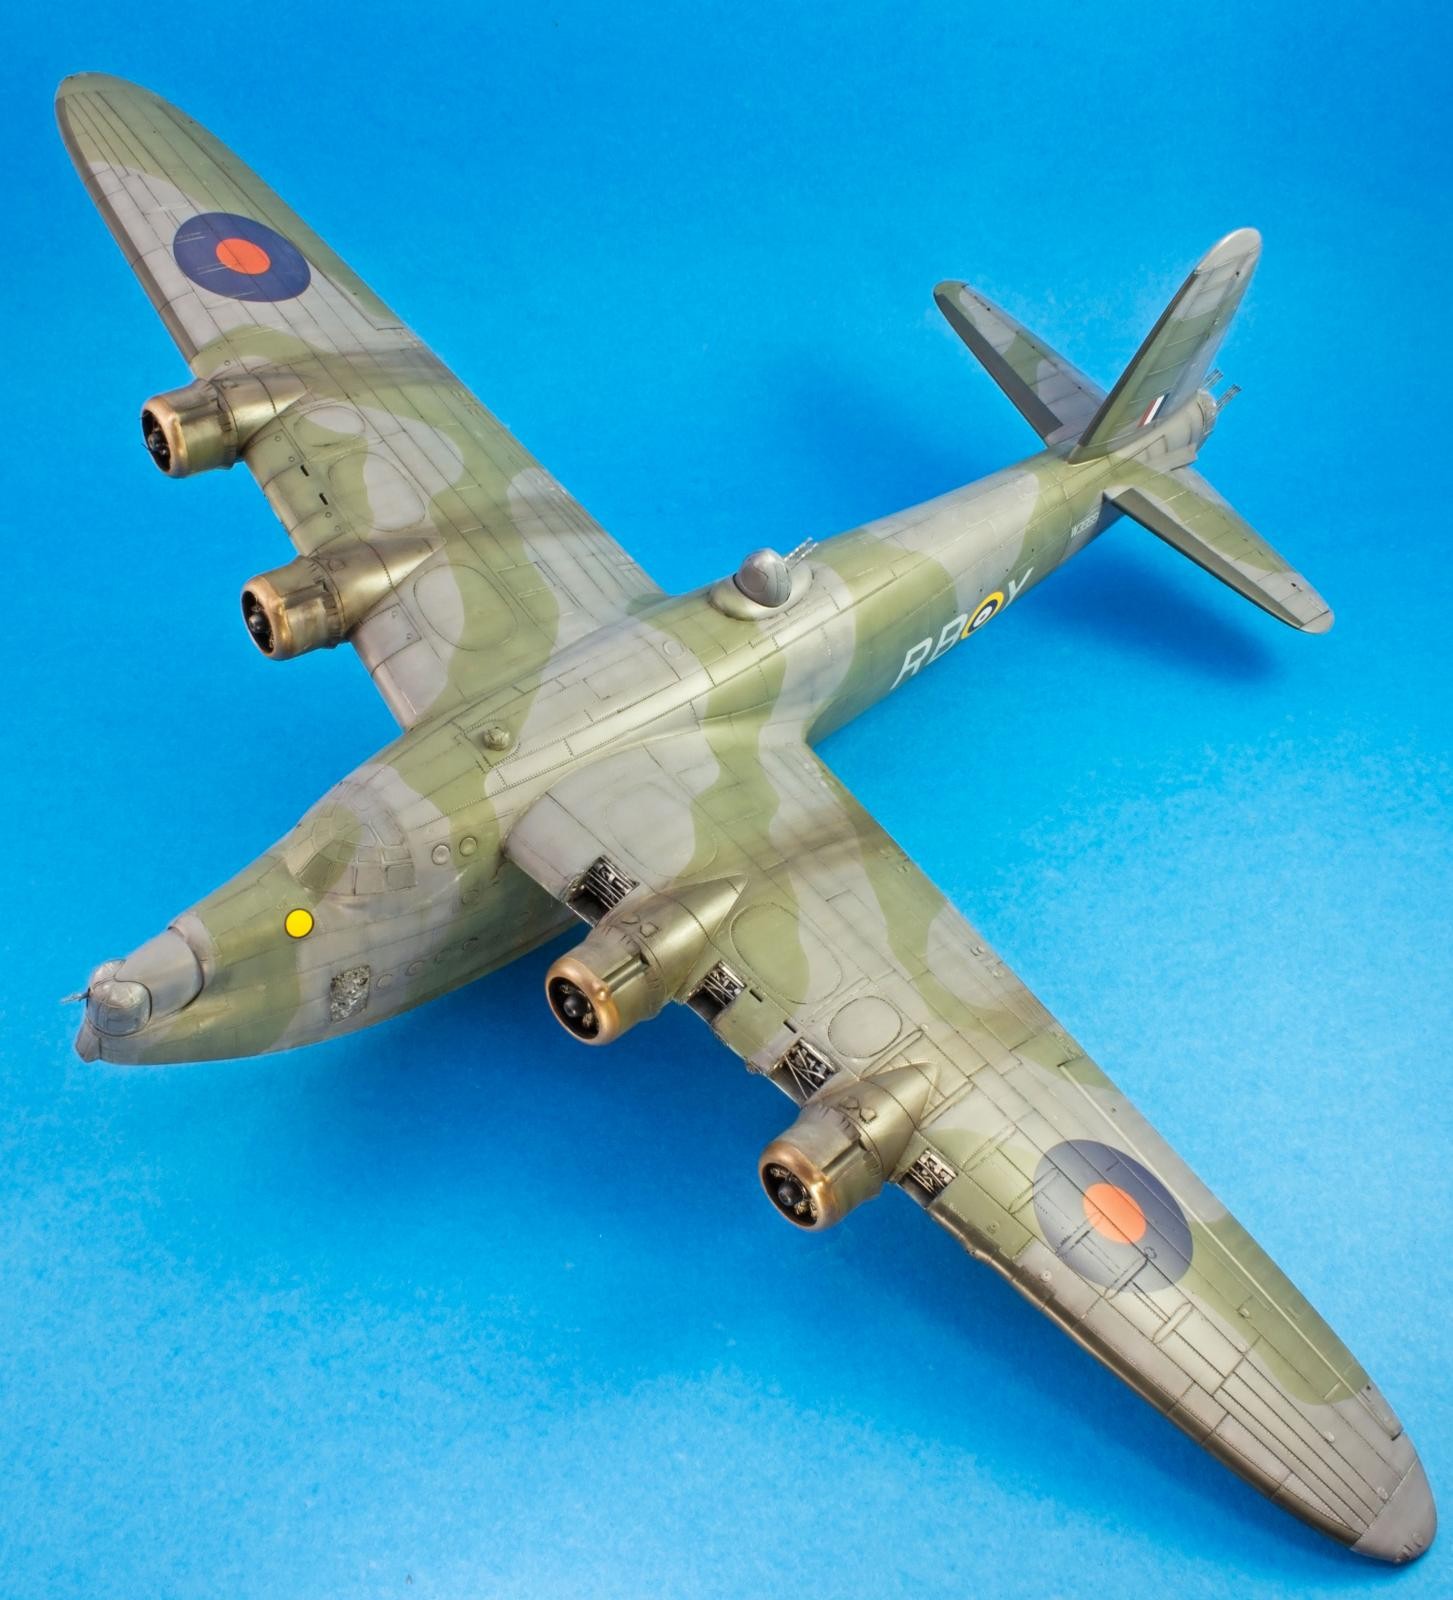
The decal sheet provided six options for the modeller to choose from and provided markings for three RAF machines, one SEAC, one French and one RAAF. Some finer details were represented with photo etched metal parts, such as the ASV MKII radar dipoles, seat belts, instrument panel and other interior details. These were etched in a thick brass sheet, which needed annealing in order to conform to the plastic parts.
The instructions featured clear diagrams in the form of CAD drawings, with colour callouts referring to Italeri`s own range of acrylic paints.
For this build, several Eduard etched sets were employed

Opening the Hostilities
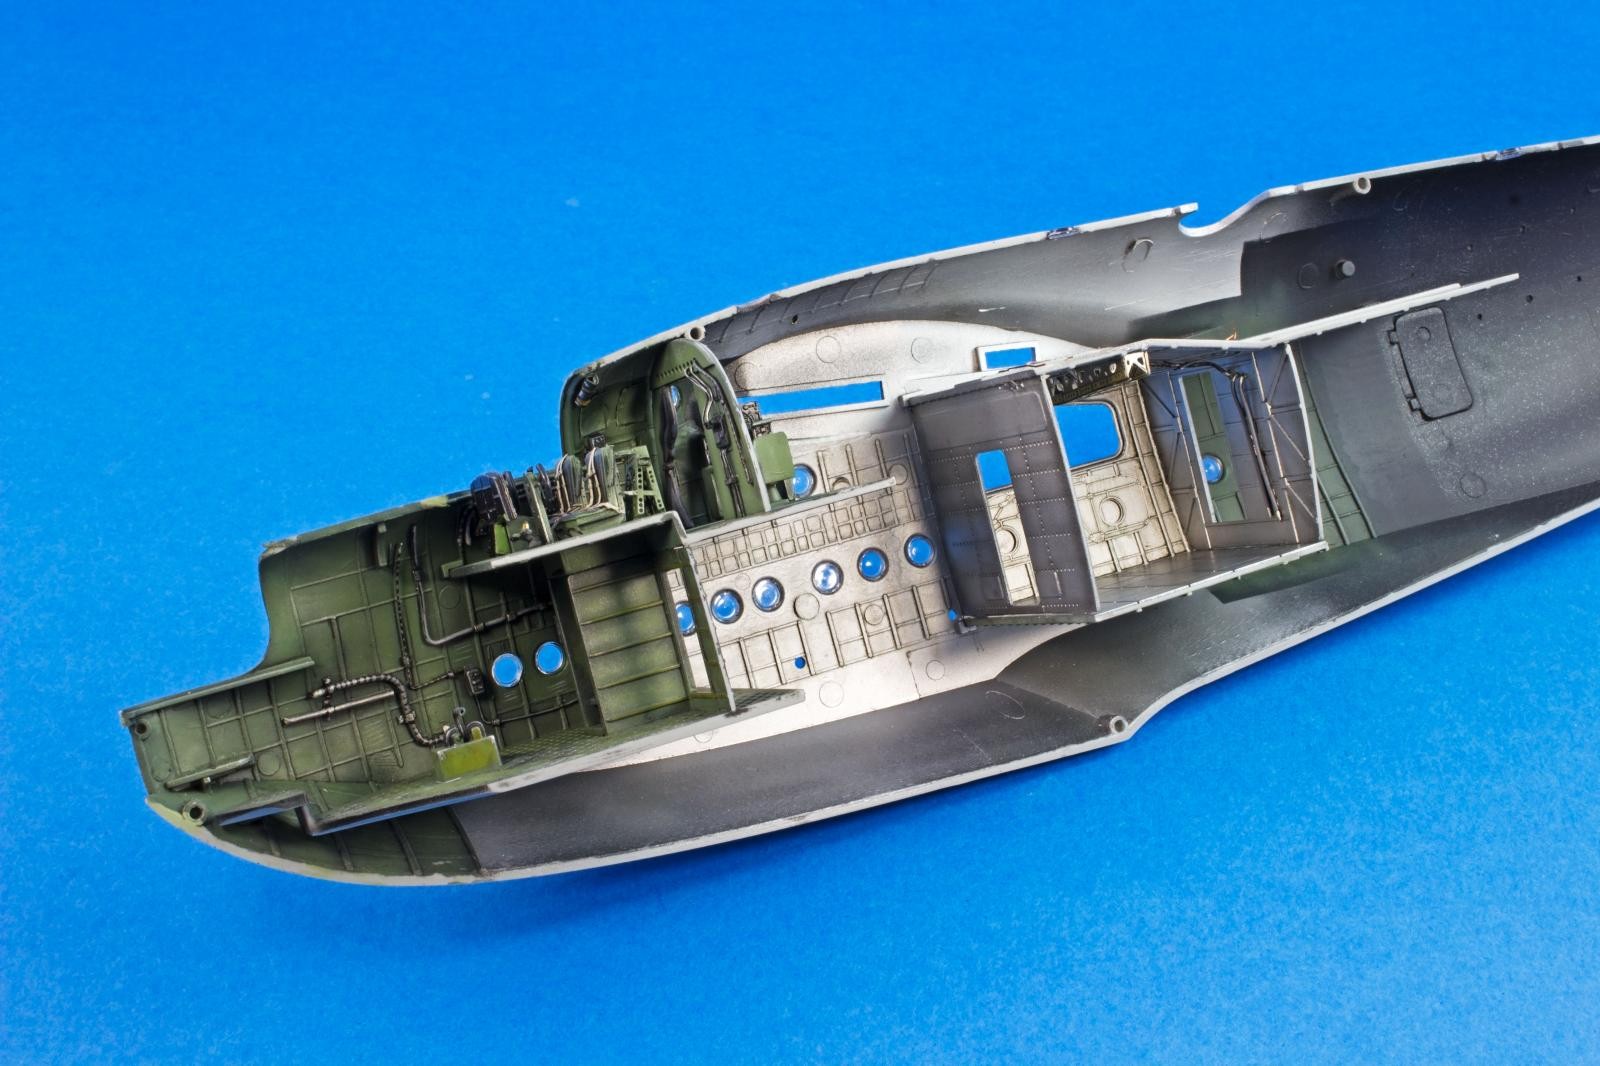
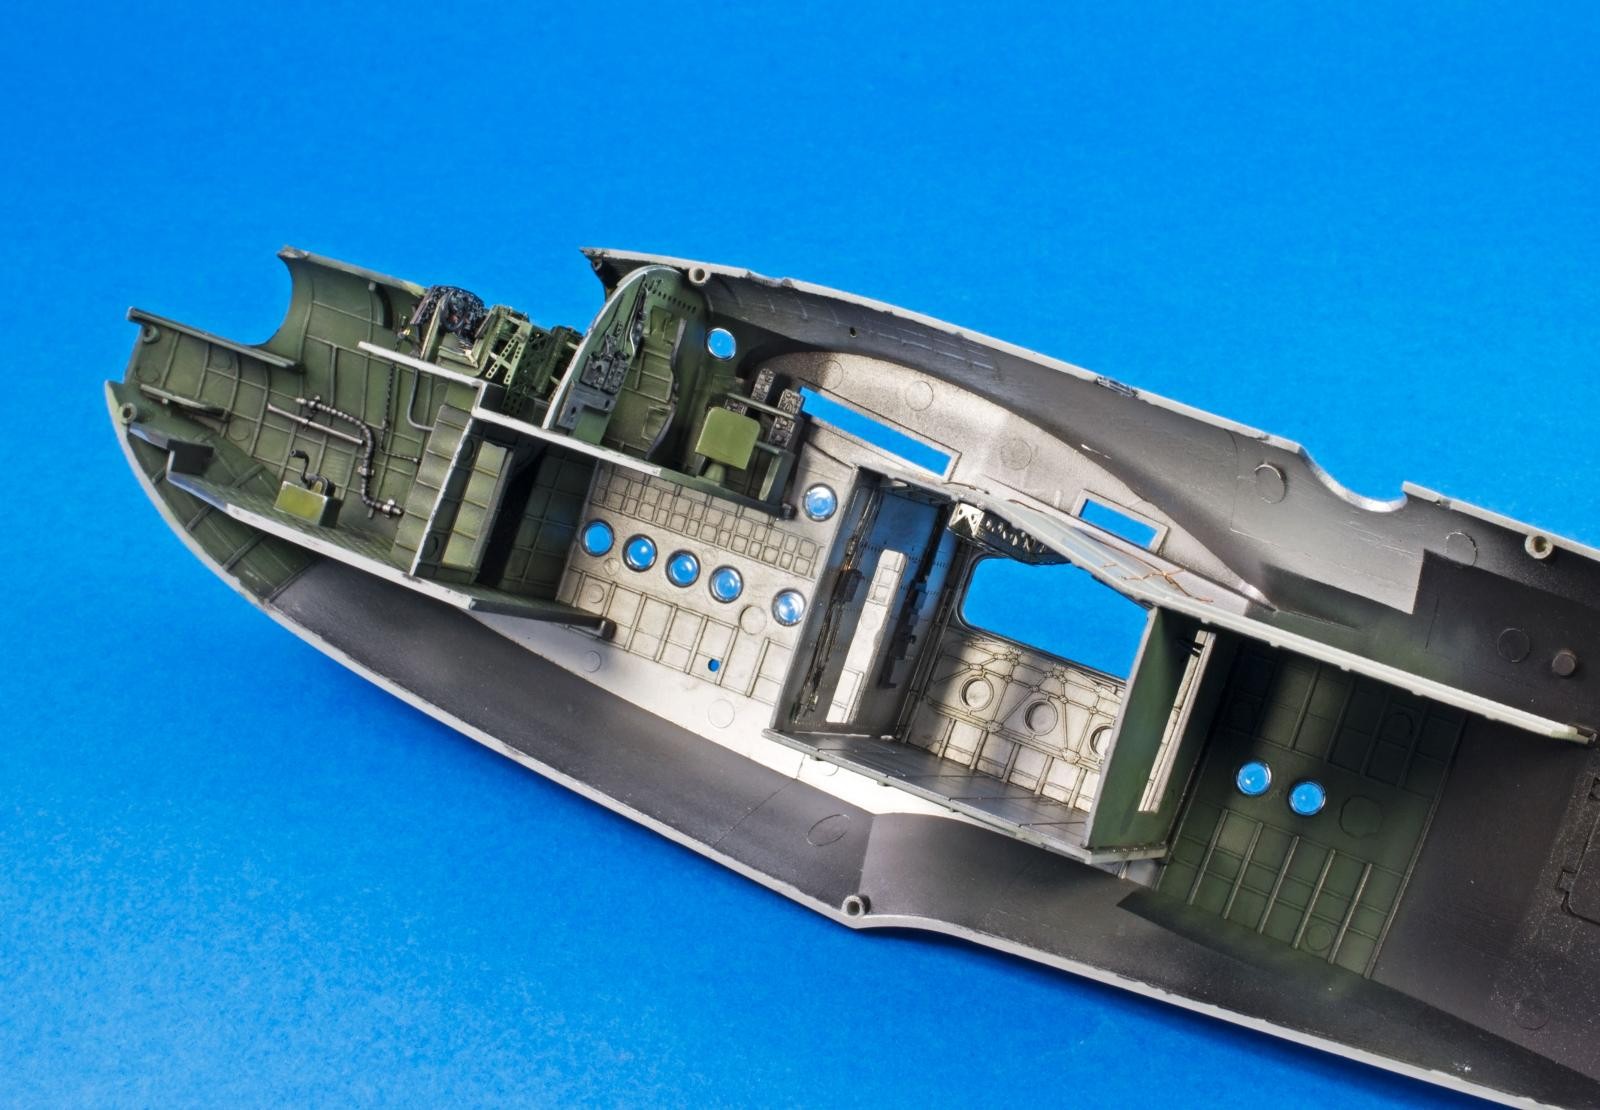
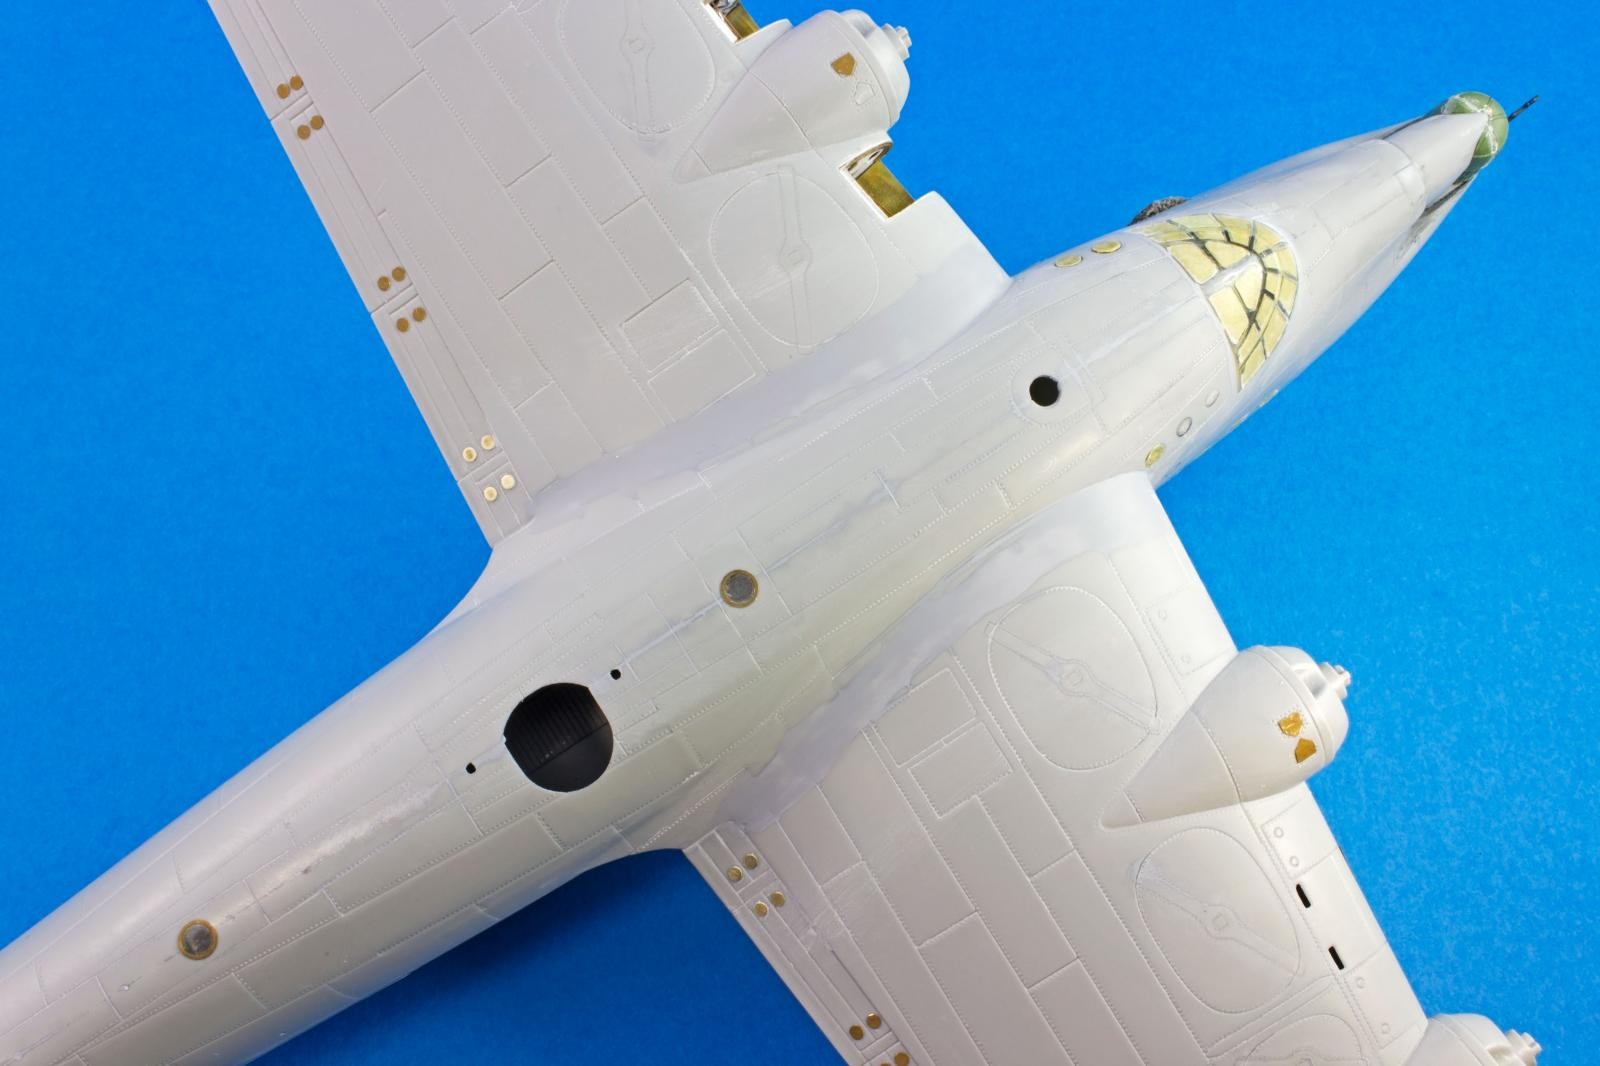
The first task undertaken was to correct the number of portholes present on the fuselage on the Sunderland. While the number on the port side of the fuselage is correct, in the starboard side there should have been ten portholes instead of the nine present. Following several references gathered online, a tenth porthole was opened up with a drill bit on the bow end of the line of portholes. Also following the same references, this modeller decided to fill the panel lines that surrounded the non-opening portholes with superglue.
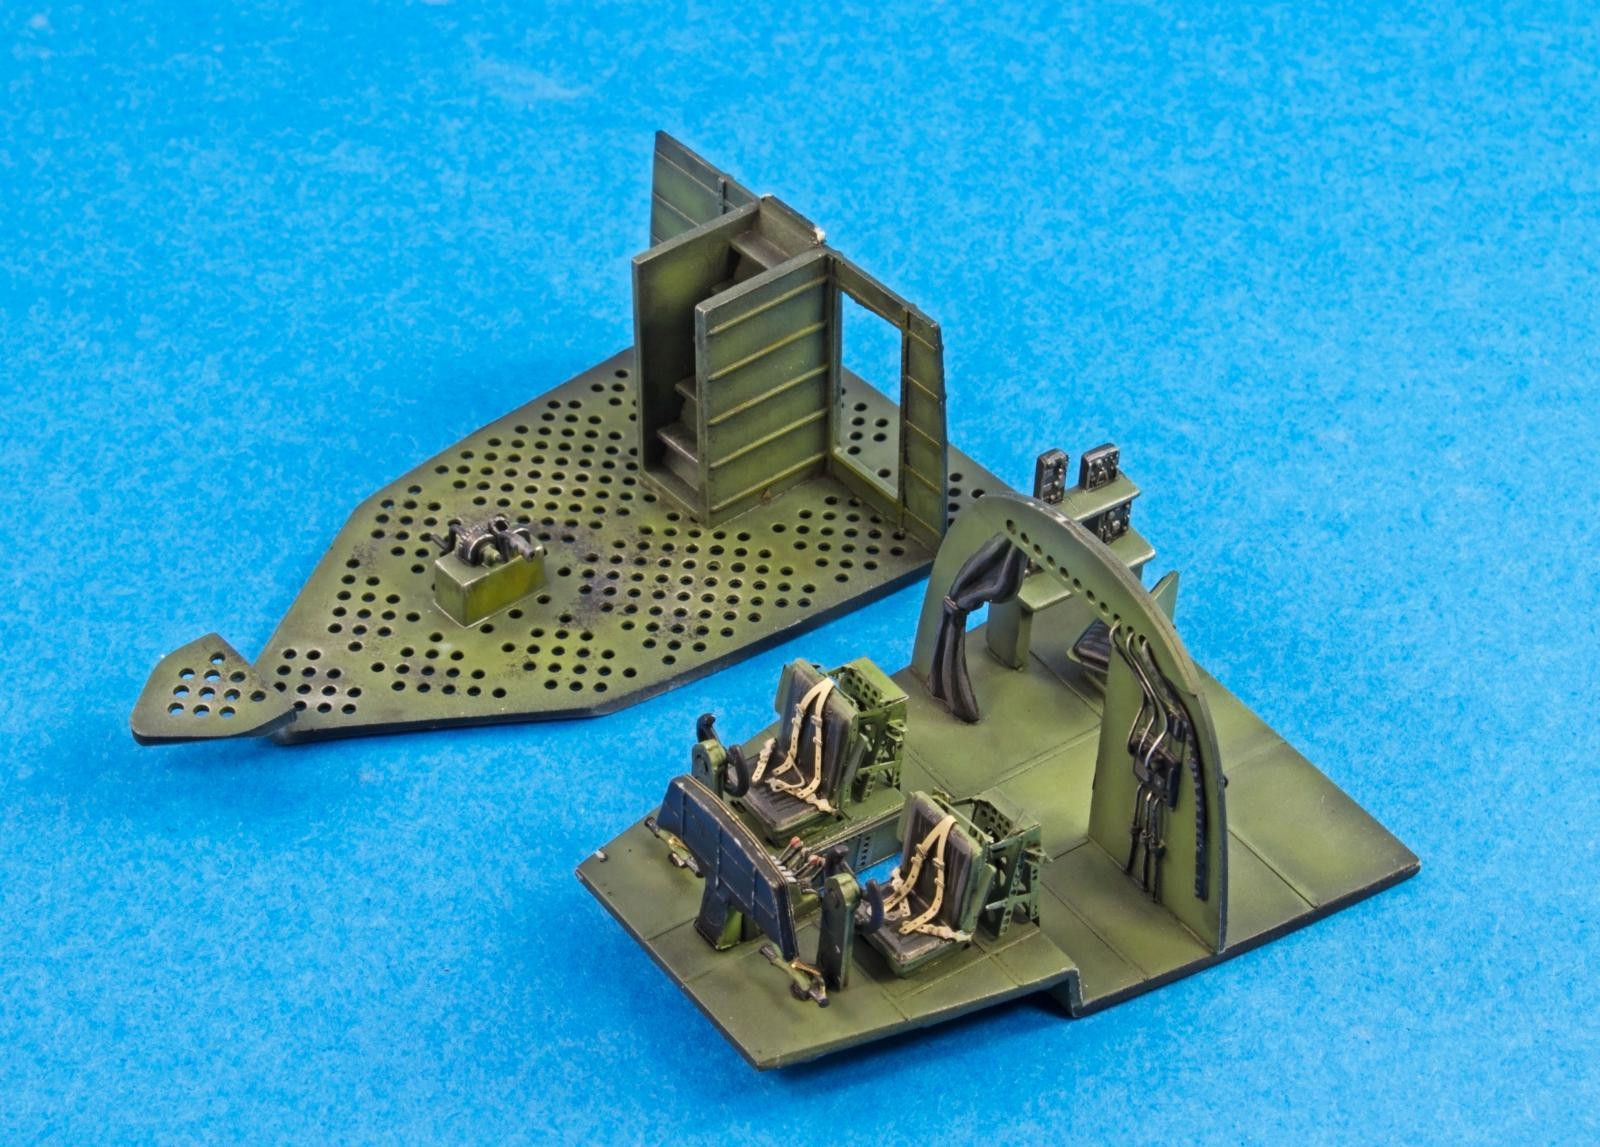
Interior Green or Silver?
Italeri suggested interior green for all the interior areas. However, reference pointed out that several areas were protected with silver paint. The entire interior was primed in black and the cockpit, front galley and the area behind the bomb bay was airbrushed with Tamiya XF-71 Interior Green. In order to attain volume, Tamiya X-8 Lemon Yellow was mixed with the previous colour, and sprayed in selected areas where it made sense to have more light.
The detail parts such as chairs, electrical boxes and assorted piping were picked up with Vallejo Model Color acrylics. After allowing the paint to dry, both the green and aluminium surfaces received a dark oil wash fashioned out of Lamp Black and Burnt Sienna oil paints from the Windsor and Newton range highly diluted with odourless turpentine. As usual, the dry brush technique was put in action and really made the structural detail pop. The last step was to enhance the moulded detail with ComArt 20021 Transparent Smoke airbrushed in areas of possible shadow.
Building the Beast
The main components of the fuselage were assembled at this stage. Despite the care taken, several problems aroused with the portholes and windows on the both the fuselage sides and spine. On the spine, superglue was used in order to fill up several gaps and polished up to clarity with the micromesh system. The fuselage halves were glued in small sections, which allowed better control of the resulting seams. In the end, just a few smears of putty were needed in order to fine tune the fuselage seam.
The canopy was dipped in Future, and after allowing 48 hours for it to fully cure, Tamiya tape was used in order to mask the windows. It was then coupled to the fuselage, and blended in with Vallejo plastic putty.
The vertical and horizontal tail components fitted perfectly, without the need of putty.
Italeri provided the wings in the traditional form of upper and lower halves. These were assembled with no fuss, and the Eduard set 72 584 Surface Panels was put through its paces, and provided a myriad of fine surface detail, on both the fuselage and wings.
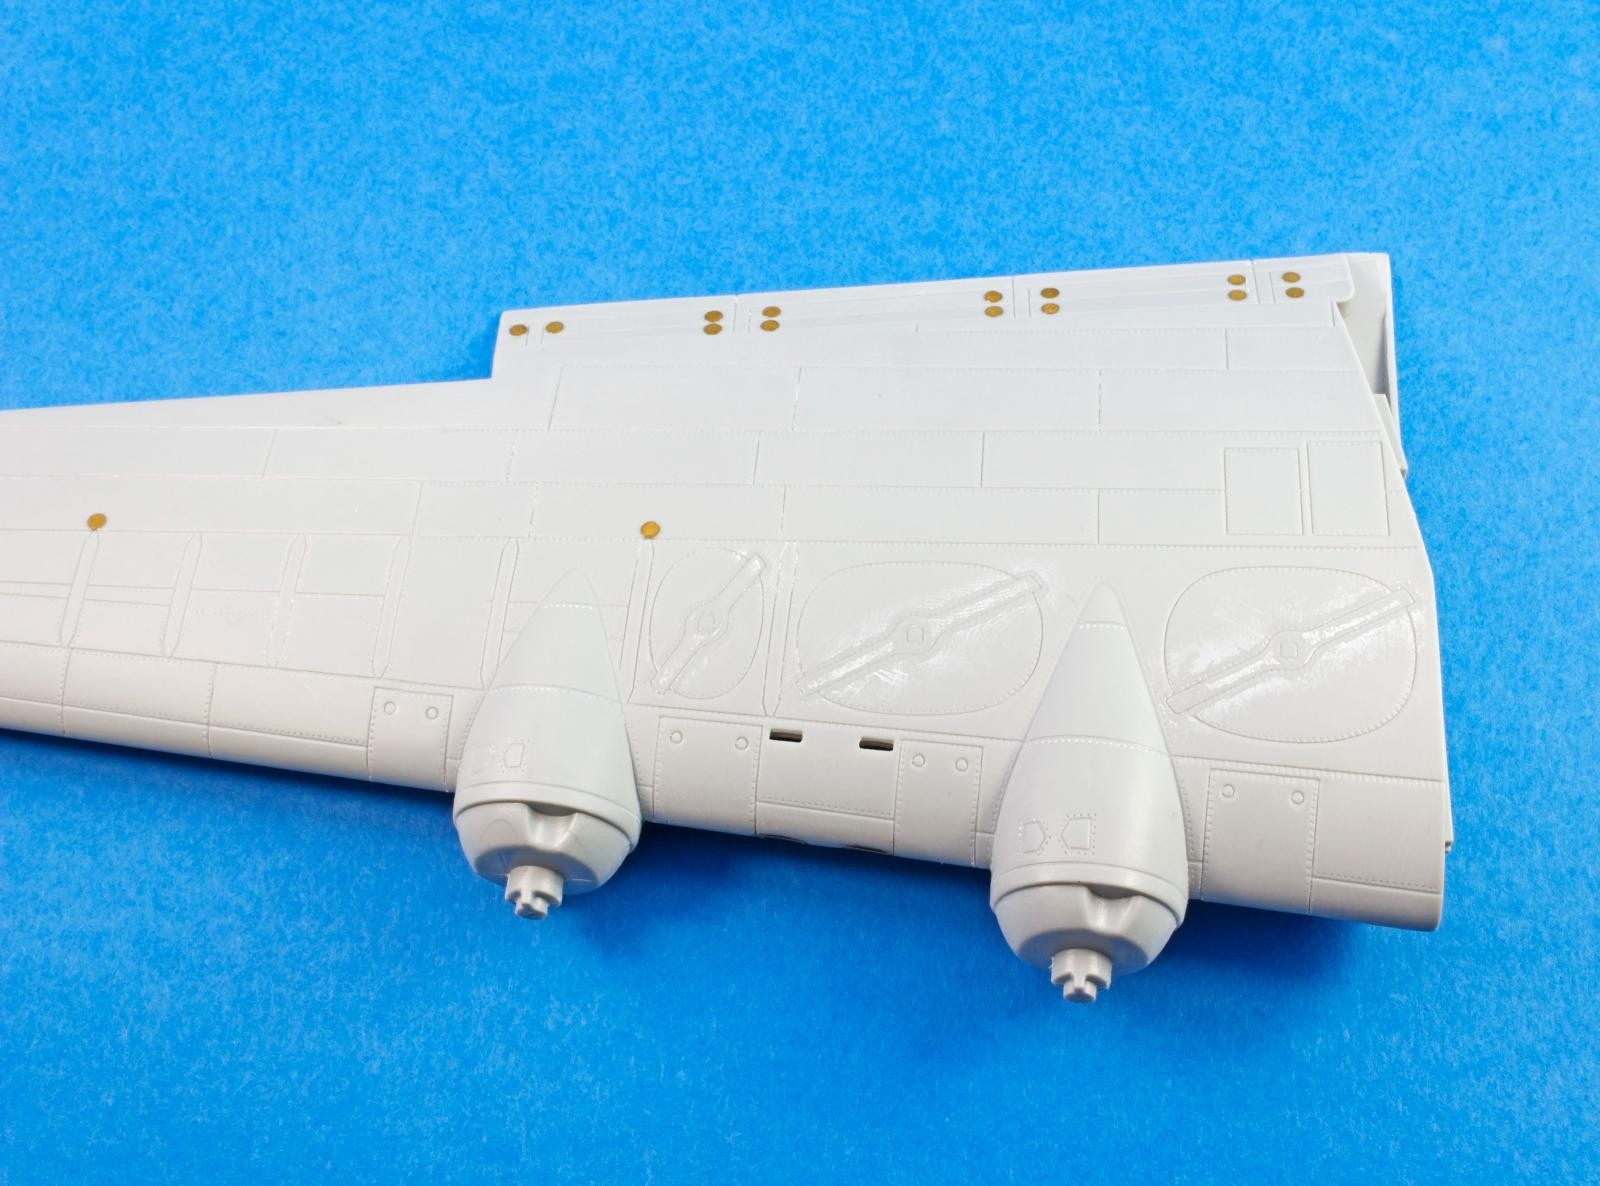

This modeller chose not to apply the fuel tank covers, as these present the characteristic crossbars, which were not present on the MK.III. Therefore, the detail on the plastic parts was filled with superglue and sanded smooth.
The wing to fuselage attachment came next. Despite several efforts in order to get things as right as possible, a slight step resulted between the fuselage and the wings. This was filled with several layers of Mr. Dissolved Putty. Care was taken in order to let the filler the shrinkage time it needed, therefore avoiding the dreading ghost seams latter on the build. In retrospective, i will be better off using epoxy putty on this operation.
The painting process started, as usual, with the ubiquitous grey primer coat. This was mixed from Black and white polyurethane primers, from the Vallejo range. Several seams demanded more attention and were treated accordingly.
When satisfied with the seam work, the pre-shading stage started. The entire airframe was painted with both black and white paint. This allowed the panel lines to be strongly accentuated, as well as the centre areas of the fuselage panels.

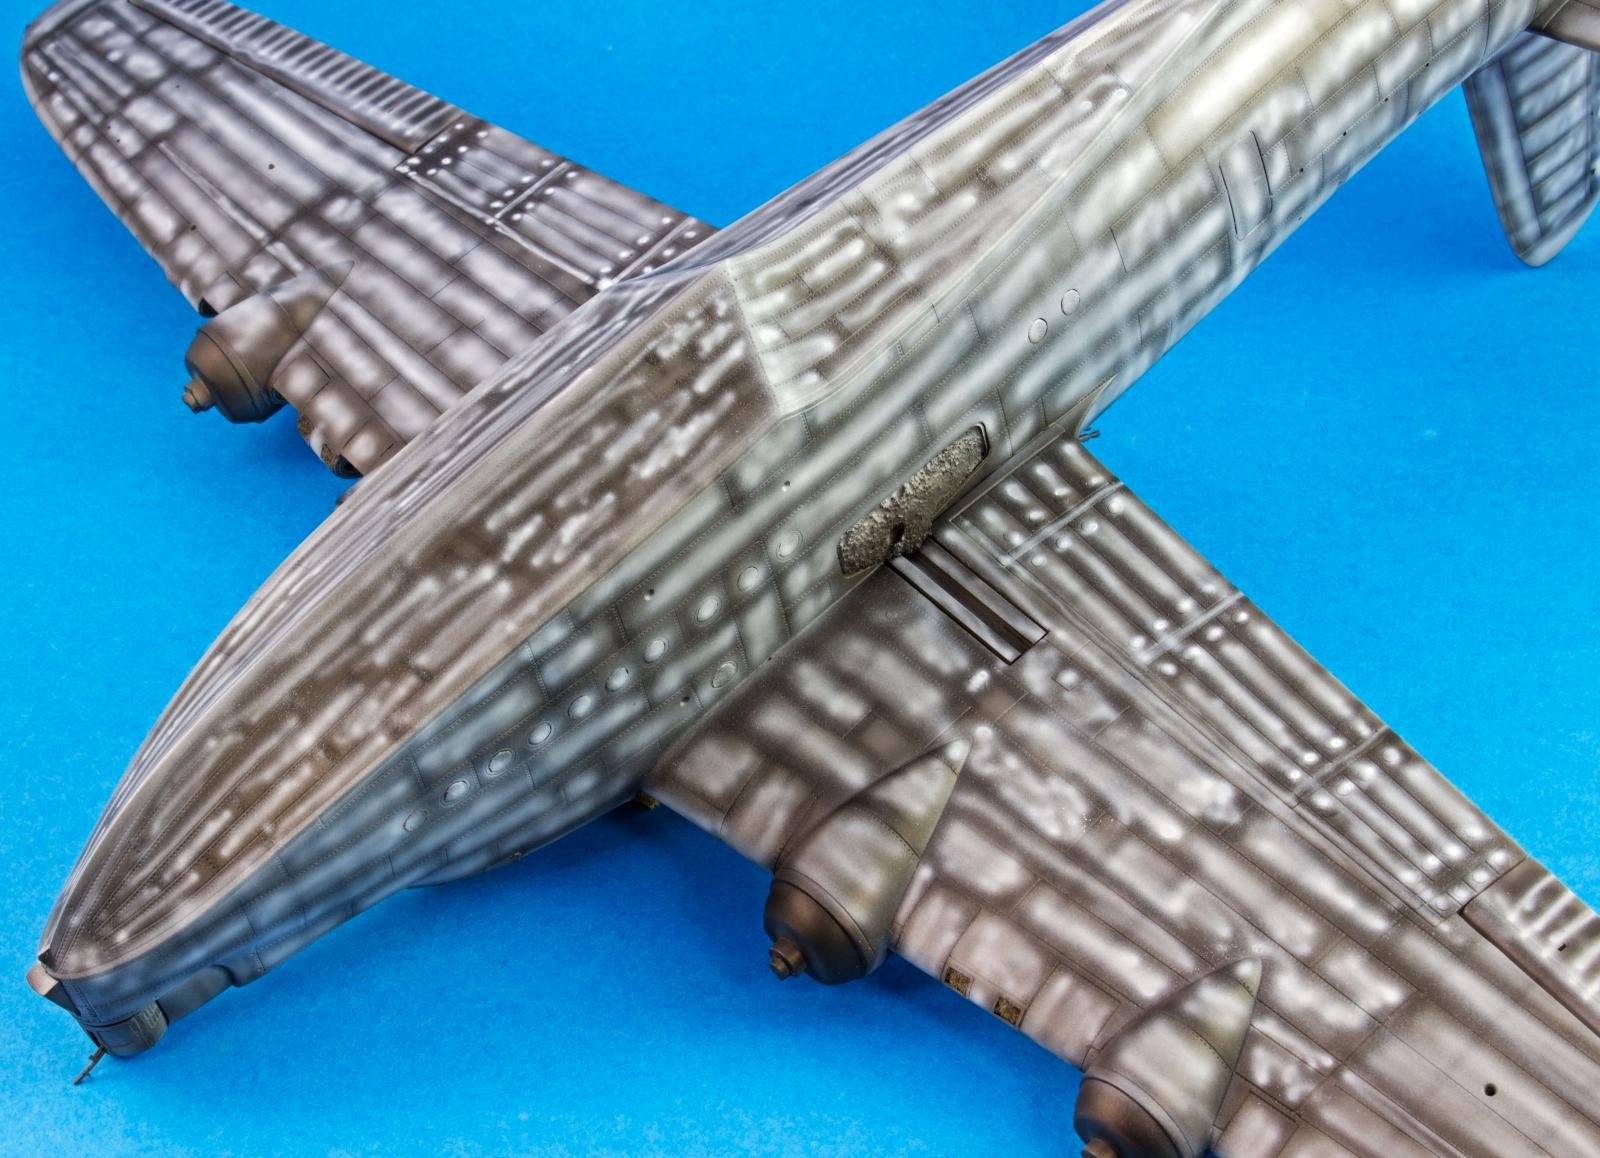
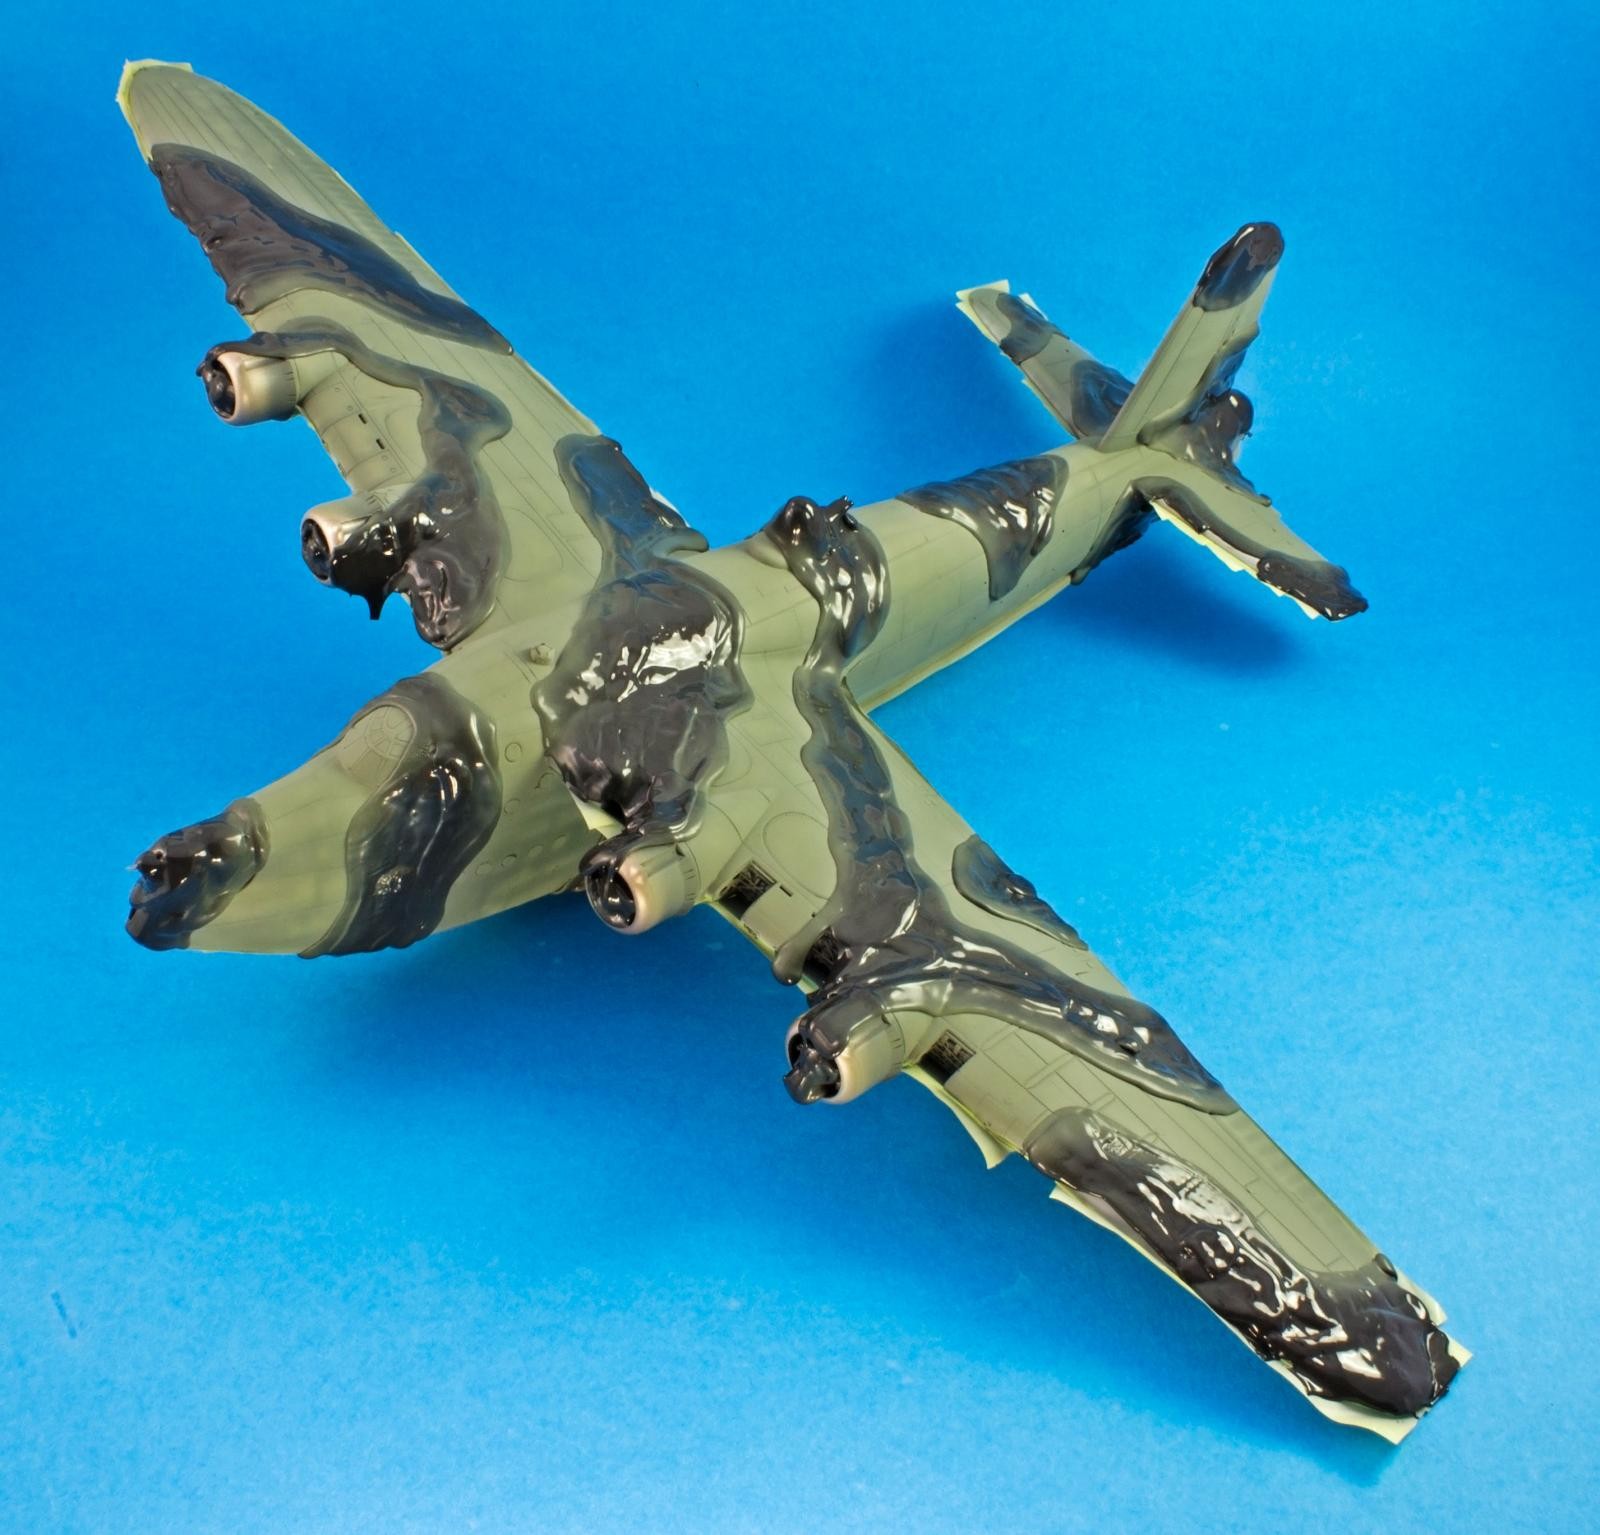
The lower fuselage areas were then painted with several light layers of Gunze Sangyo Mr. Hobby Colour H-74 Sky. Care was taken in order to preserve the subtleness of the pre-shading. After allowing 48 hours of drying time, the under-surface border was masked with Blu-tack rolls, and protected with masking tape.
The second colour applied was the Extra Dark Sea Grey. In this case, this shade was represented with H-305 Grey. The application method was the same as described above.
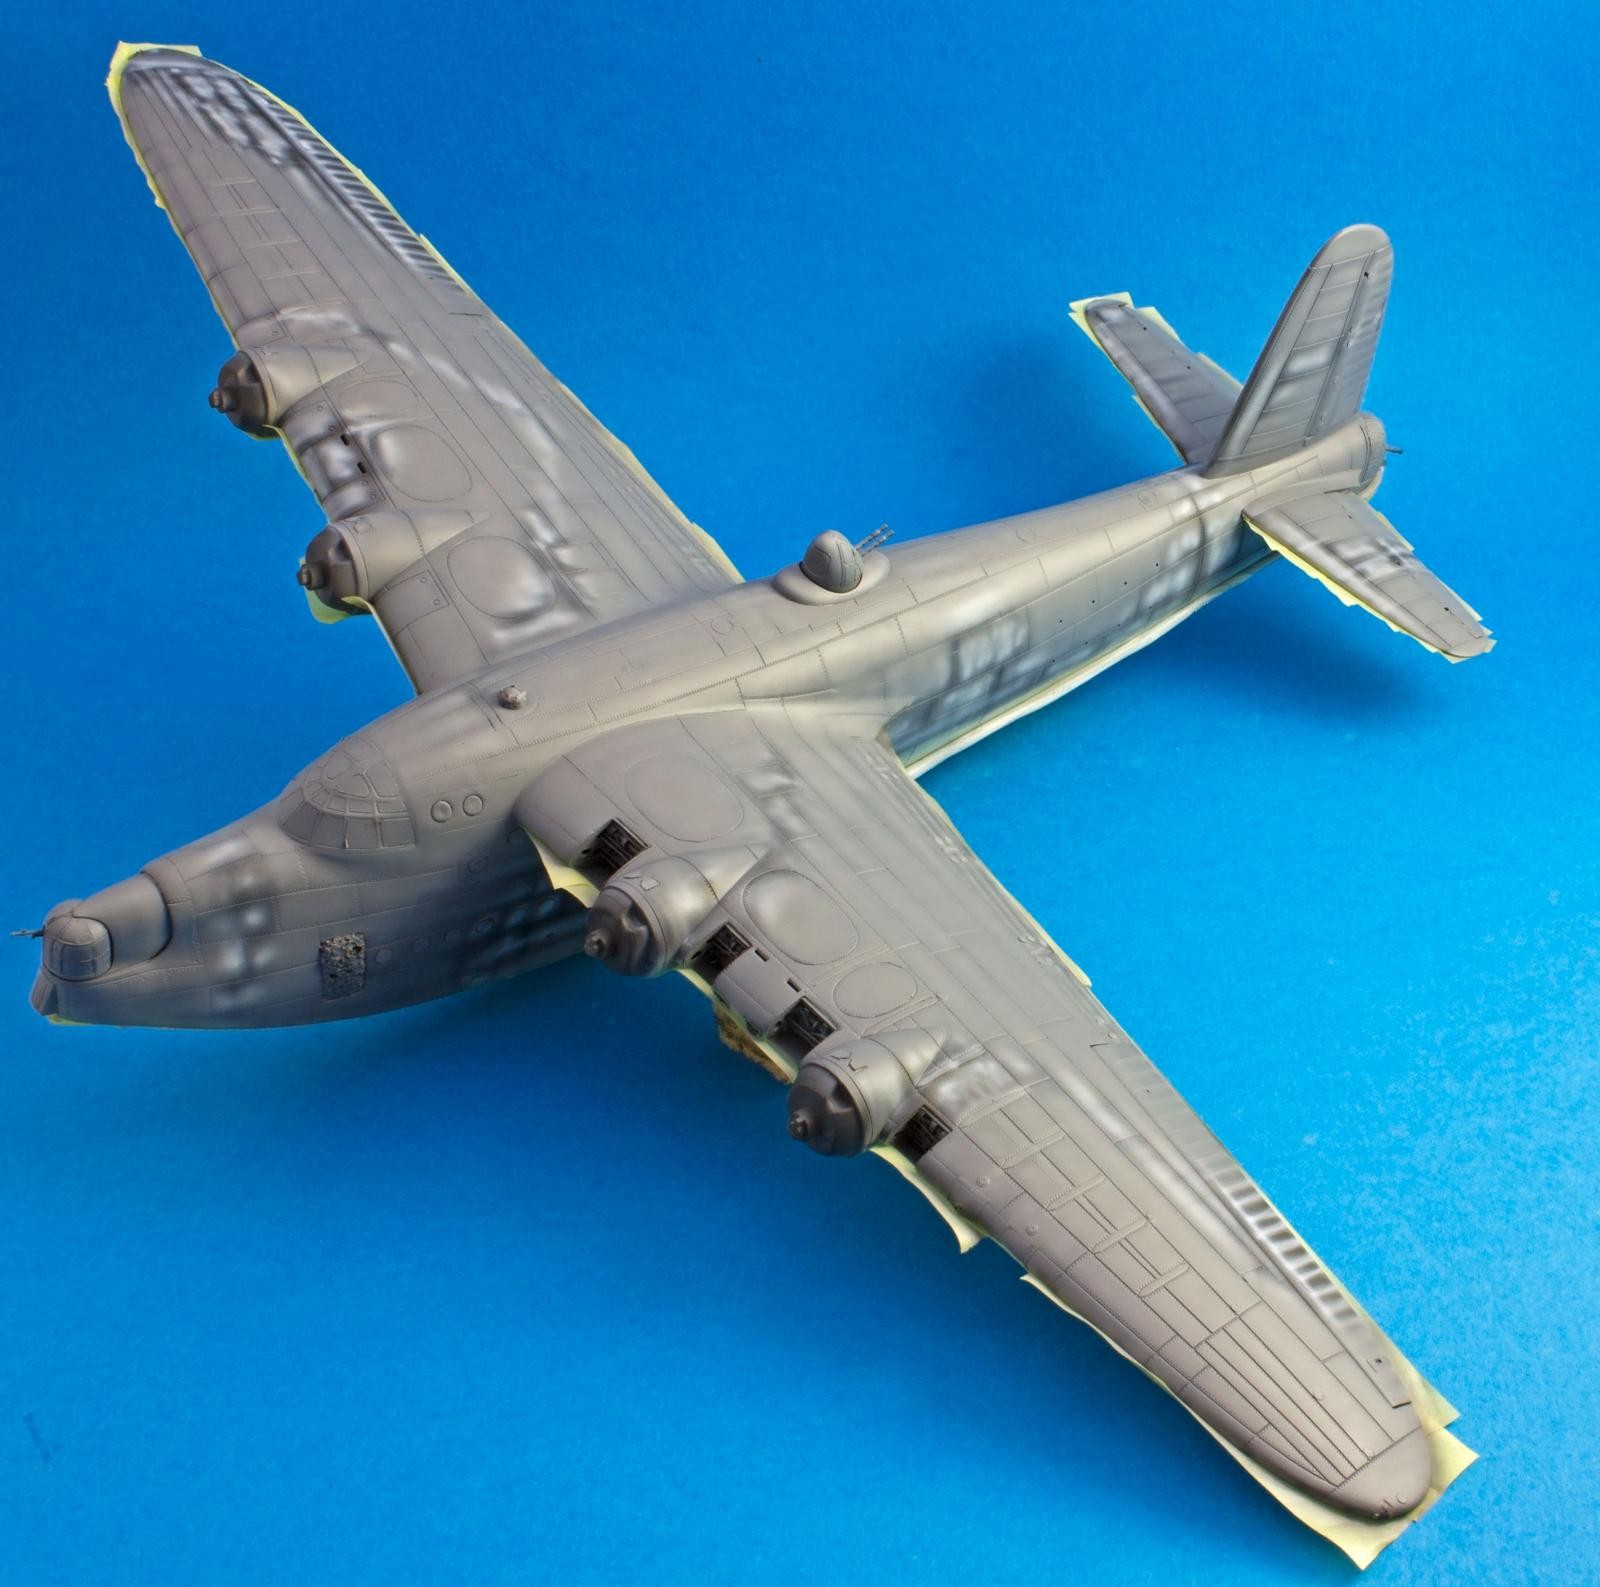
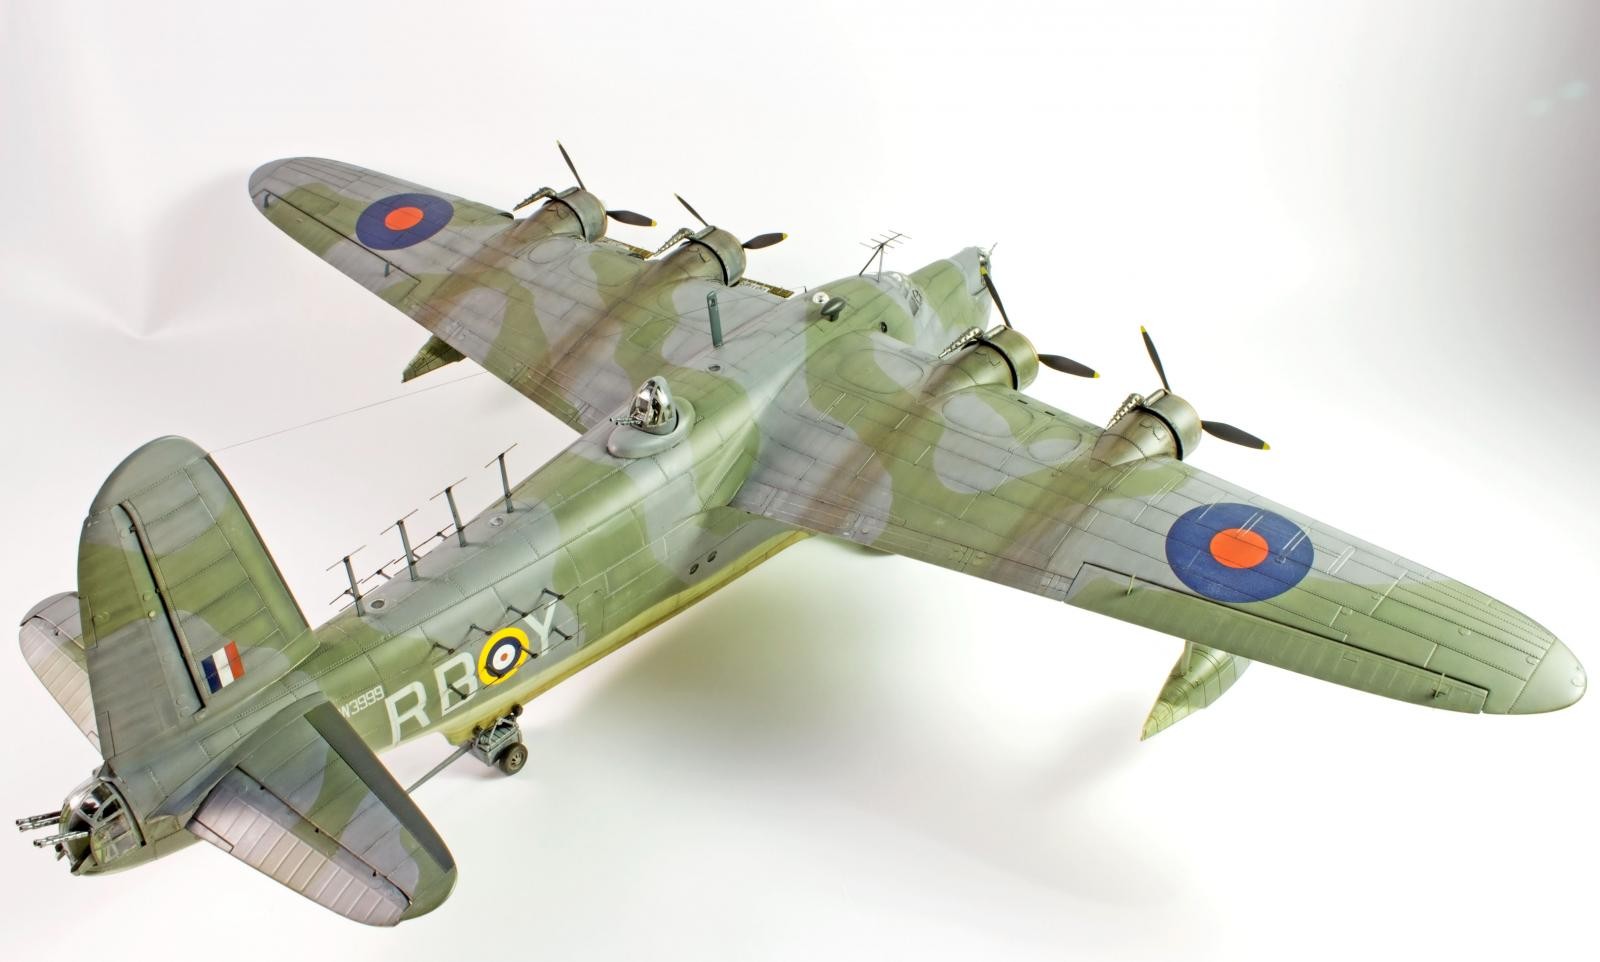
Finally, the grey areas were masked off with Panzer Putty, which needed a learning curve, but delivered stunning results. The Dark Slate grey was achieved through the use of Tamiya XF- 73 JGSDF Dark Green. I really fell in love with this shade, and as usual, the density of the paint applied varied between several areas, in order to break up uniformity.
As a final step, the entire model received a couple of Humbrol Clear layers, in preparation for the decal stage.
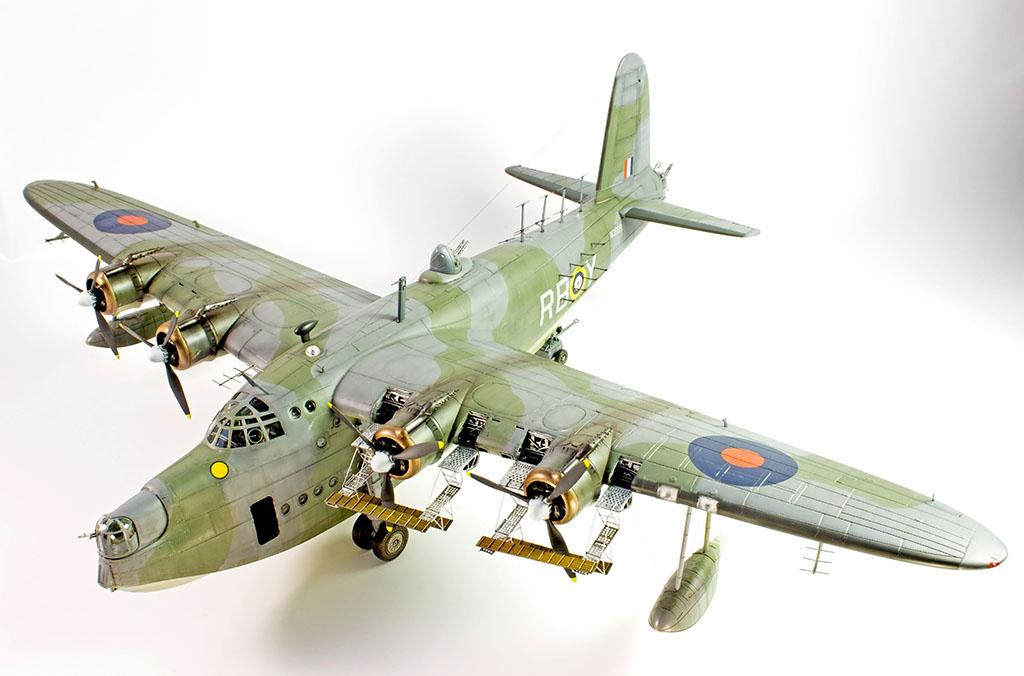
Drag and algae
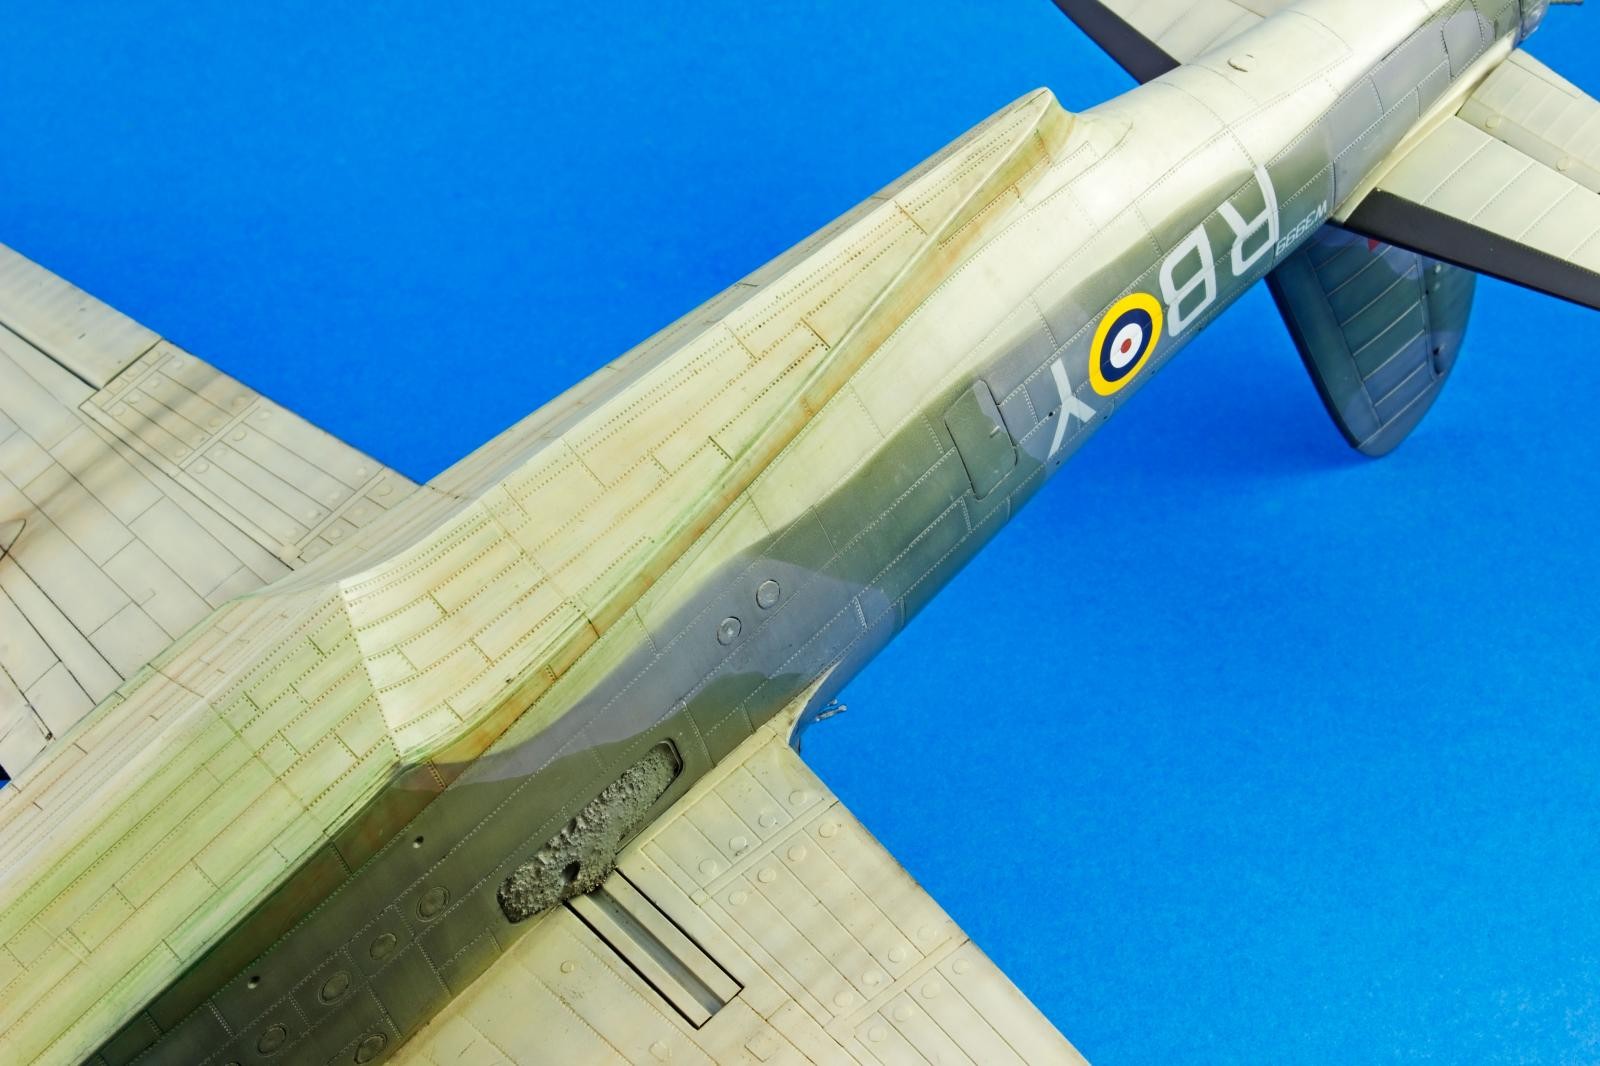
The weathering process started with an overall dark filter, mixed from Black and Burnt Sienna oil paints, highly diluted with odourless mineral spirits. This filter was replied in several areas, imparting extra depth to the main paintjob.

A pin wash was also employed, which allowed for great control on the panels to be highly detached. When satisfied, several panel lines and structural detail were enhanced with Com.Art 2002 1 Transparent Smoke. This process was backed up with several period photos. These showed heavy drag marks, soot and grime on the flying surfaces and especially on the engine cowlings and nacelles. Several pigments such as black and track rust were used in order to achieve this effect.
The watermark on the Sunderland floating surfaces was masked and airbrushed with the use of 21051 Light Rust, 21061 Dark Rust and 21021 Fertile Soil from Com.Art.
Then, several filters of Sap Green and English Green oil paints were mixed, and repeatedly applied on the watermark and on selected panels. The goal was to give the impression of the salt water effect, without being too stark.
As a final touch, the airbrush was loaded with the camouflage paint, straight from the jar, and several patches and streaks were created, imparting some tonal richness to the overall finish.
When satisfied, all this work was sealed under two light coats of Vallejo Model Air 71059 Matt Varnish.
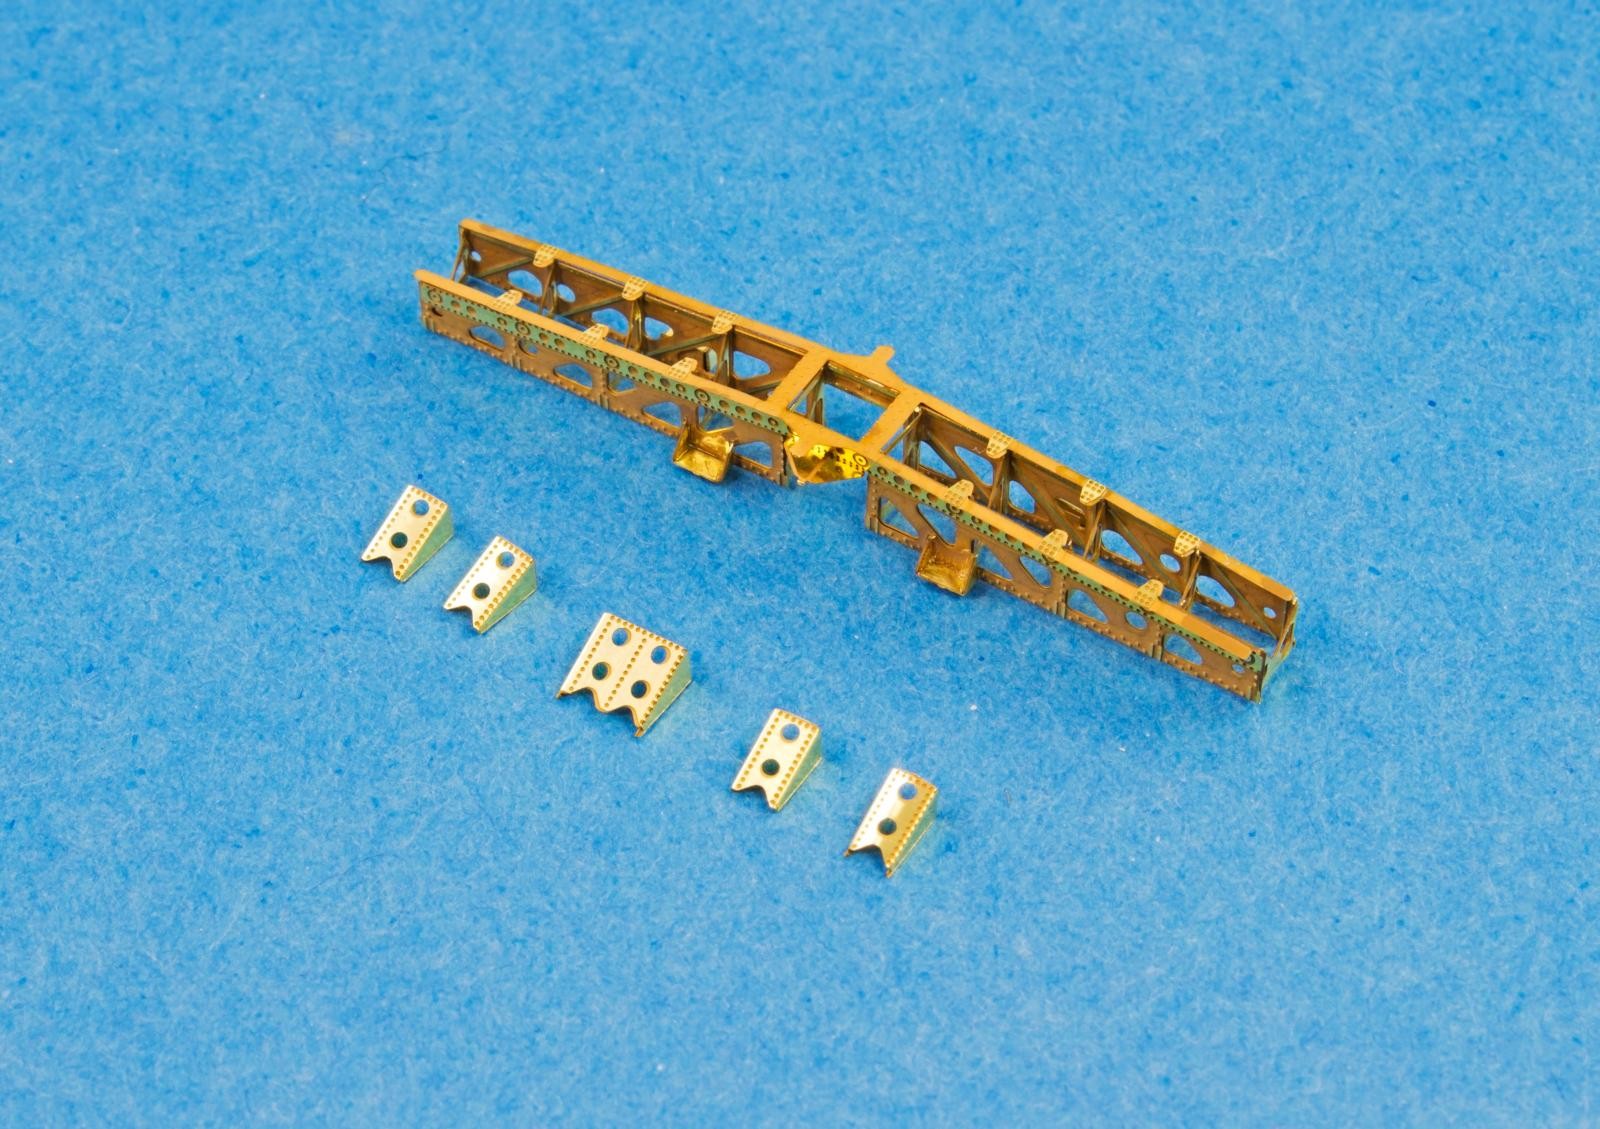
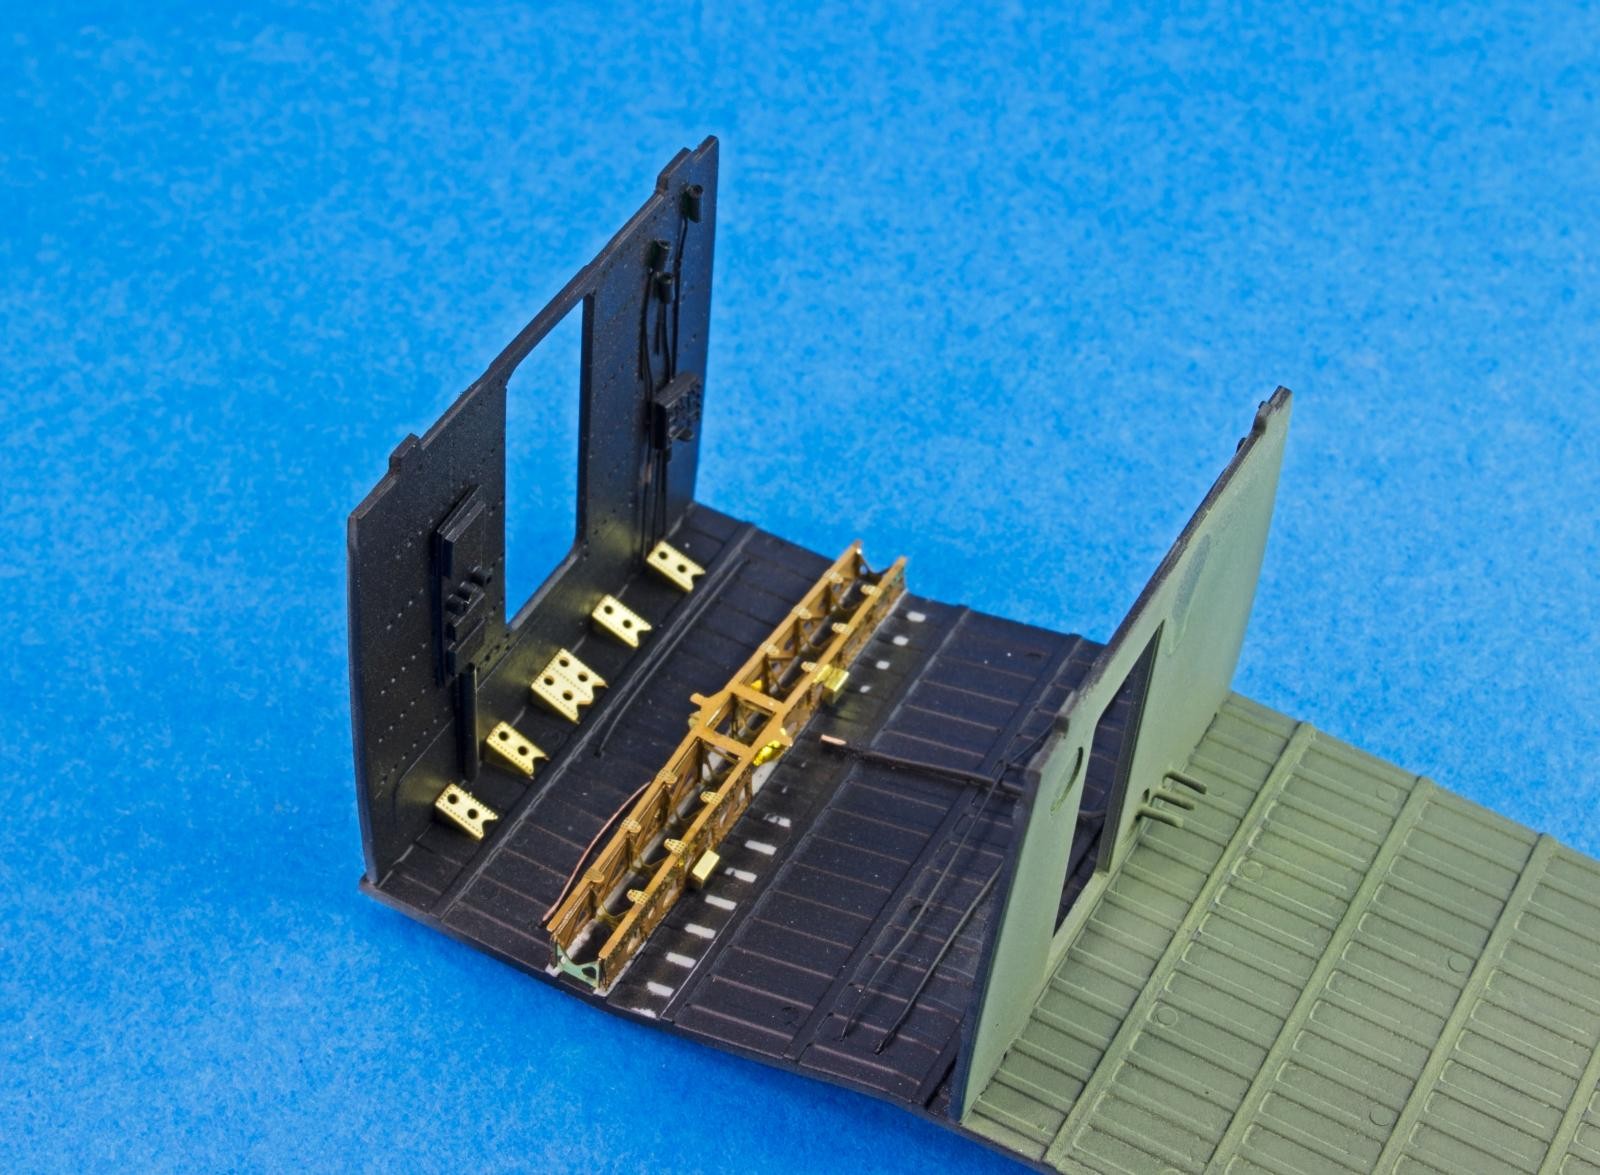
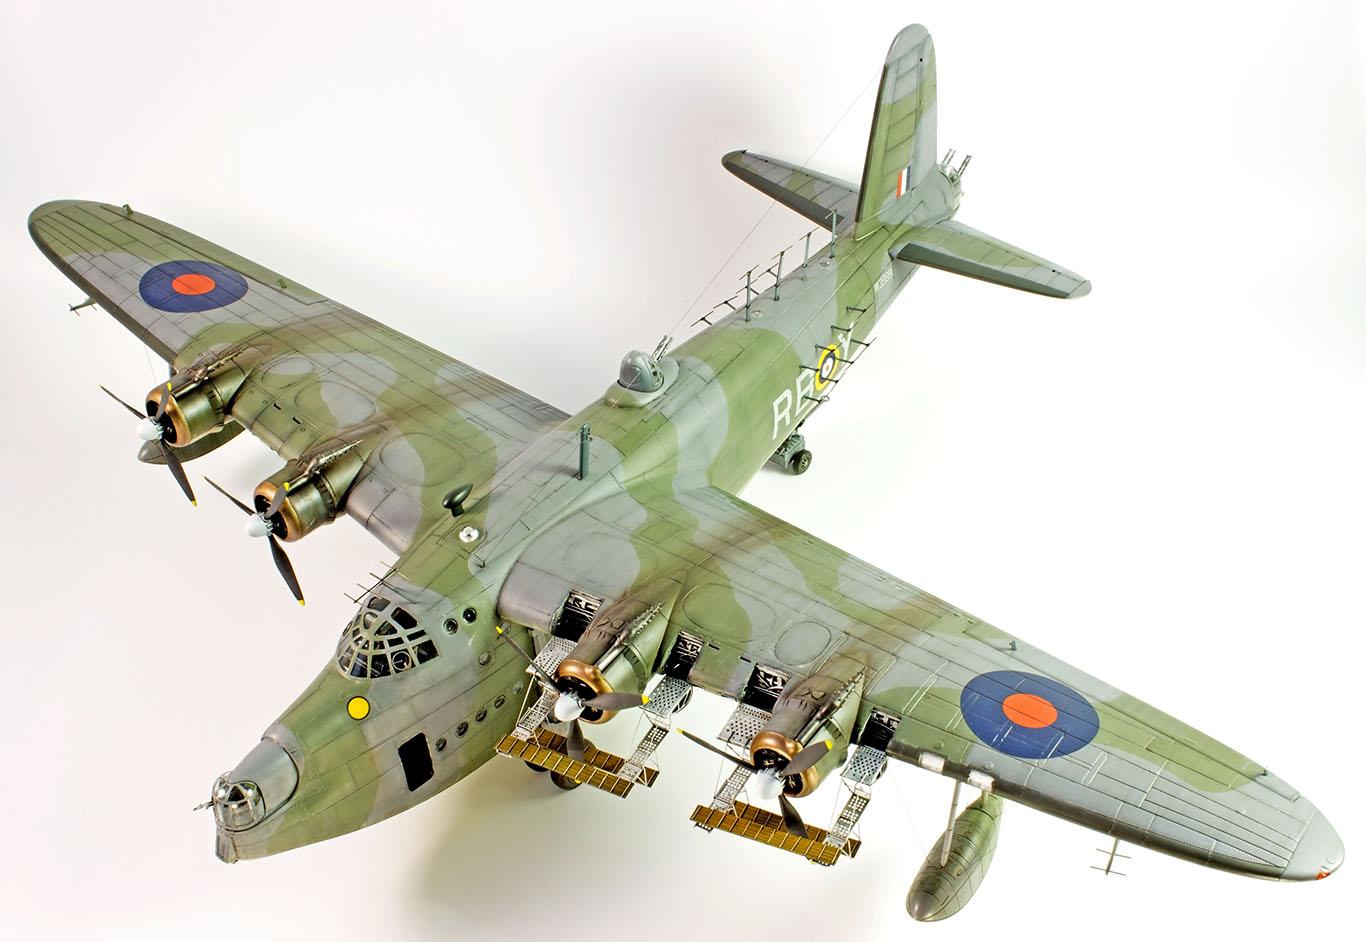
Maintenance Platforms
This prominent feature was provided by Eduard 72 586 Detail set. The parts that formed the platforms were annealed, and bent to shape using the inner structure as a guide. These were then secured in place with thin superglue. The stairs and outer structures were also bent, and assembled with thin superglue.
When dry, everything was sprayed with Vallejo Model Air 71062 Aluminium. Grim and shadows were created with a black oil paint pin wash.
The wood planks were brush painted with 71077 wood from the same range. The traverse planks were picked up with a lighter version of the base colour. Finally, everything received a burnt umber oil wash, which revealed to good effect the grain detail present on the photo etched parts.

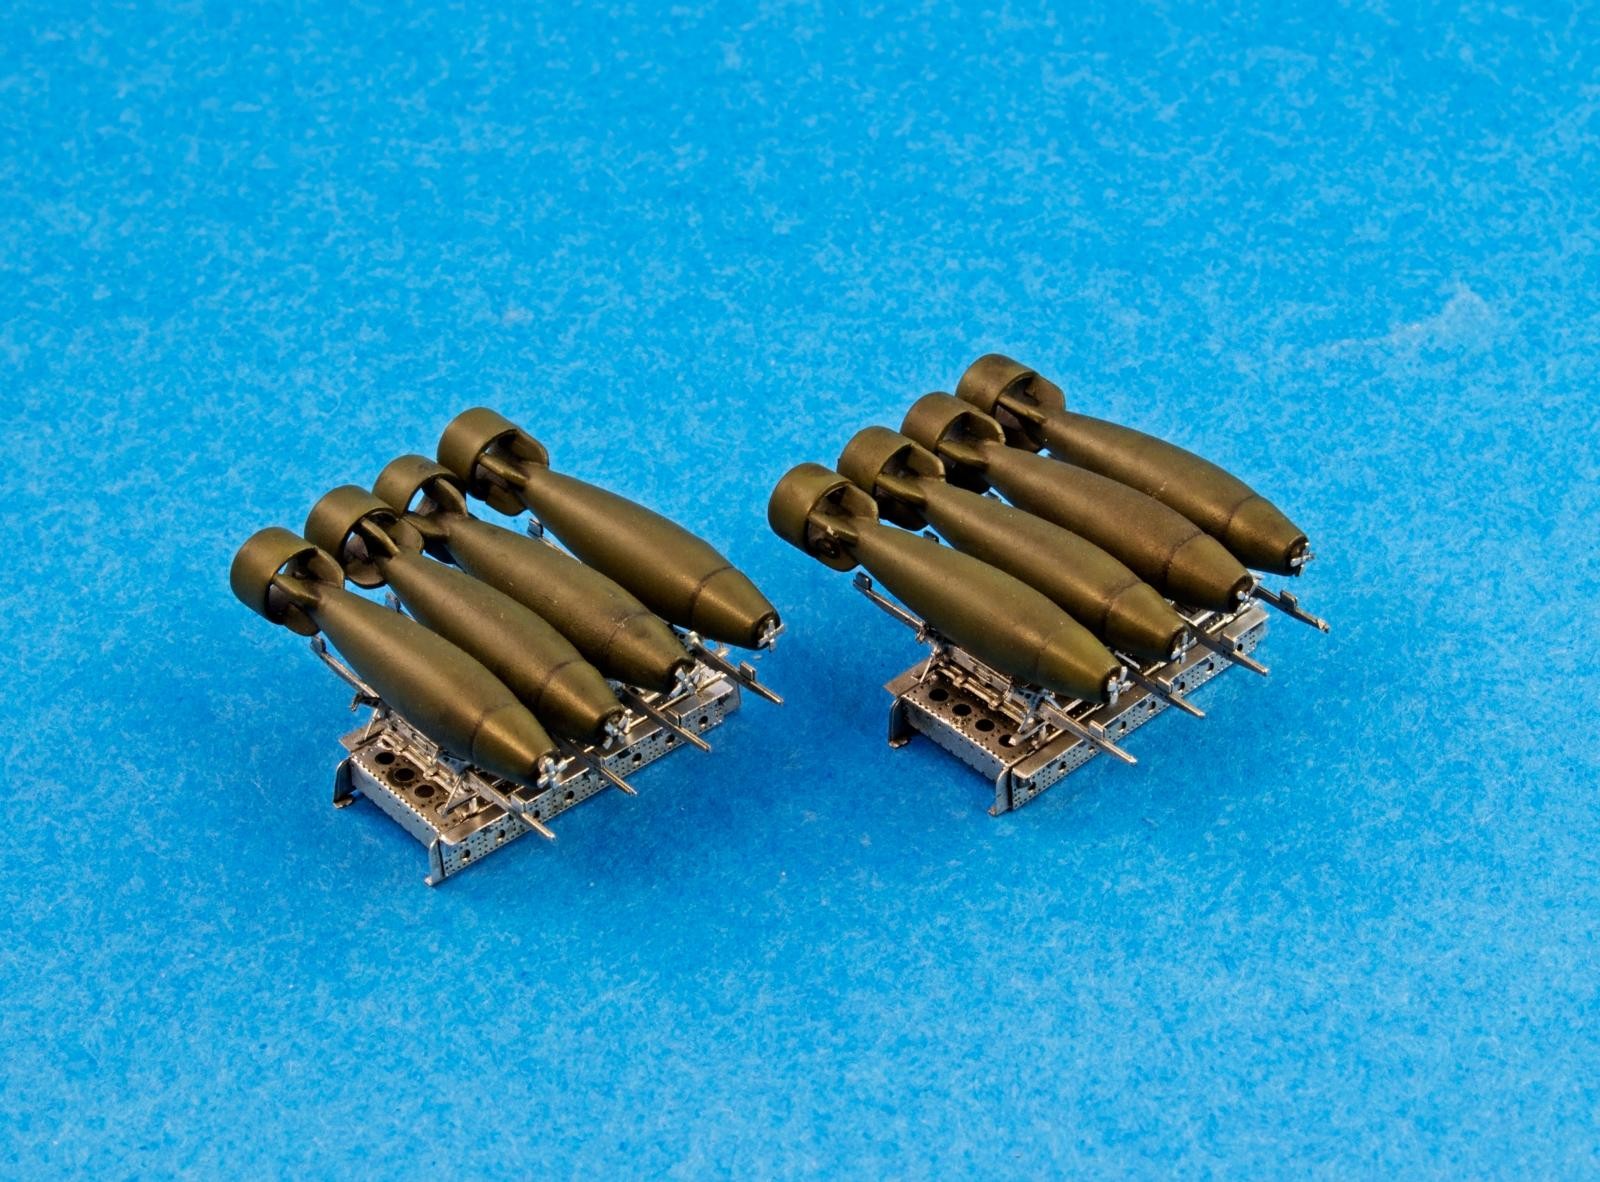
The Punch
The bombs were assembled, and the edges of the bomb fin circles were thinned down with sandpaper until an acceptable thinness was achieved. After priming with black, Vallejo Model Air 71016 US Dark Green was airbrush in several light coats. Several highlights were applied through the use of highly diluted 71010 Interior Green. When dry, they received a wash with MIG 1618 Deep Brown panel line wash.
The bomb brackets and delivery system were assembled from the Eduard 72 583 PE set, and primed in black. The metallic finish was done with Vallejo Model Air 71062 Aluminium, followed by a dark oil wash mixed from Windsor and Newton oil paints.

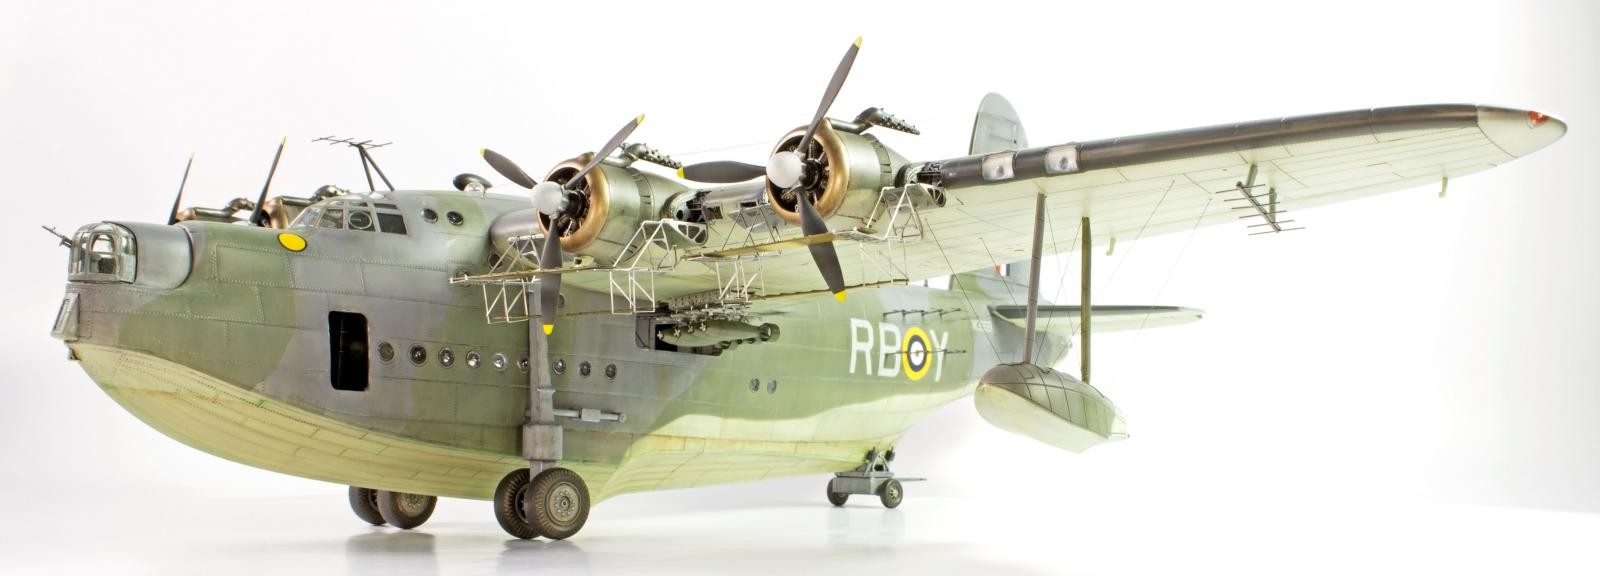
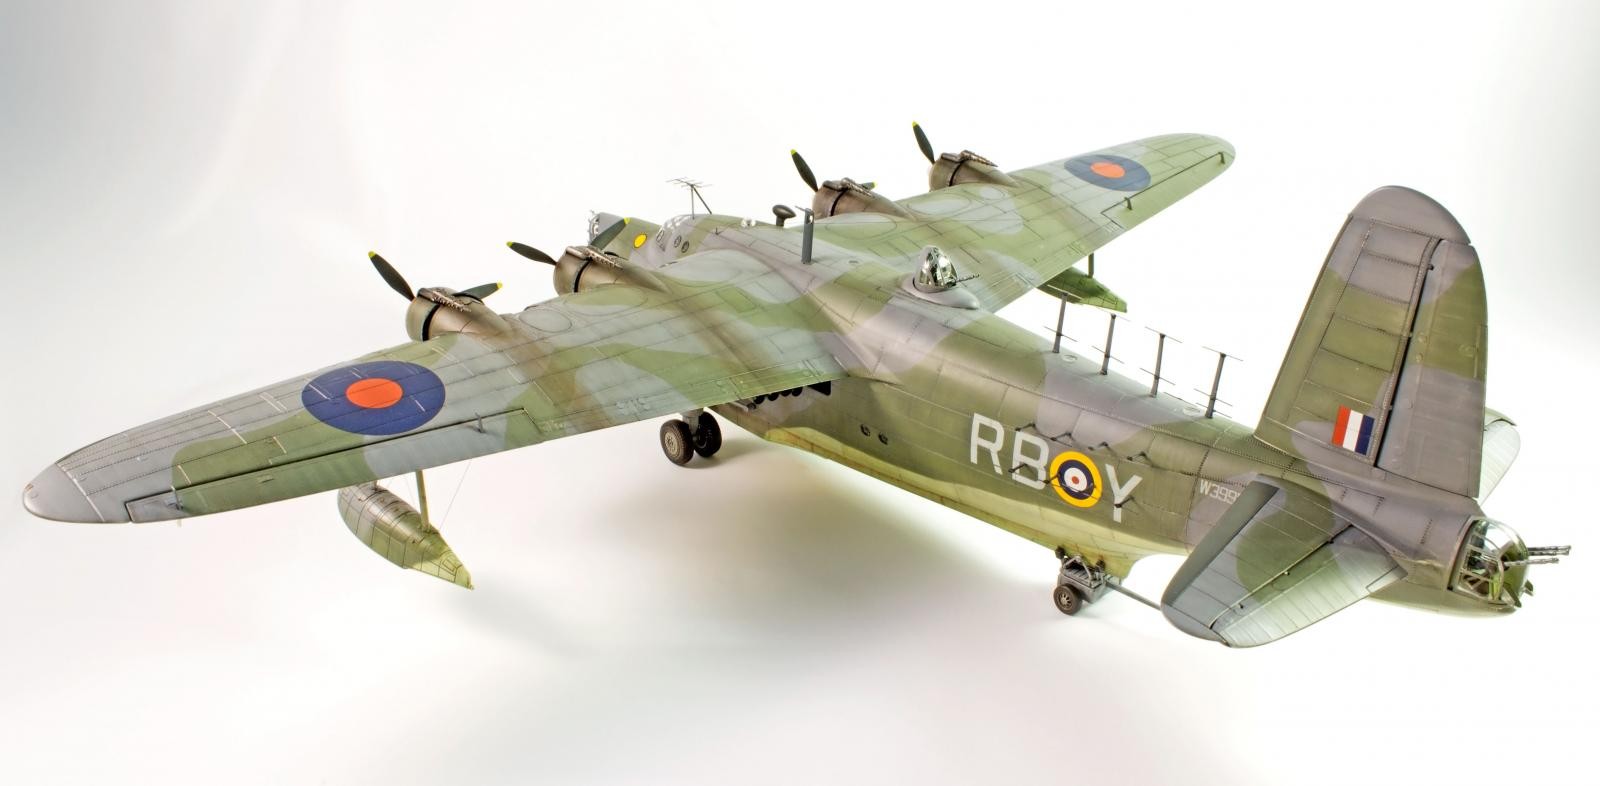
So… How is it?
The Italeri Sunderland MKIII is a commitment. It is a real leap forward when compared with the Vintage Airfix kit, and despite the need for some corrections, all pretty easy to perform once the information is gathered, the final result is well worth the extra work.
The detail sets offered by Eduard are real improvements, especially the surface detail and the maintenance platforms. As a final line, the result is really impressive.

Impressive!
Congratulations
Thanks for the feedback!
A very interesting job and a great detail to be 1:72 congratulations
Thanks for the feedback!
Top !
Thanks!
A 1:72 masterwork. Seriously well done
Thanks a lot for the feedback.
Cheers!
Smashing build ! The IP photos are impressive.
Thanks for the feedback and for the comment on the photography.
Cheers!
Stunning looking build, sir...the PE work is outstanding. Great job on this..!
Thanks! The PE was a real patiente test, but really lifted the detail level on the kit.
Cheers!
That noise you might have heard was my jaw dropping to the floor. Excellent!
Thanks a lot!
Cheers!
That is quite the impressive model. Excellent work!
Thanks Dan!
Cheers!
Your painting and photography skills really impart a sense of the Sunderland's scale. Great build report too.
Thanks for the feedback on the build and text! It is much appreciated.
Cheers!
Fantastic work overall, but the PE and the weathering is simply putting outstanding. A masterpiece here José 🙂 congratulations my friend
Thanks a lot for the feedback. When we met I told you that rarely used Mr. Hobby Colour paints. In this case, they were the main staple beeing used.
Muito obrigado!
Jose, this is excellent. I really enjoy seeing things I'd never seen before like the maintenance platforms and the use of the Panzer putty (I'll be checking that stuff out !). Very well done !
Thanks! I rarely build in 1/72, but this was a build made for Airfix Model World. I really enjoyed it.
As for the Panzer putty, it's a great product, but needs a learning curve. It has a behavior related to gravity that you must learn how to control.
Cheers!
José Pedro
In every respect: just great!
Thanks for the feedback!
magnificent
Thanks!
Certainly an excellent presentation today of all days, with David's "On This Day" post.
Fantastic work on this model.
Thanks a lot! It's a humble complement to the excellent article by David!
Uhh! Wonderful!
Thanks a lot for the feedback!
Cheers!
Absolutely fantastic work. And thank you for your extensive information on the build proces.
Thanks! I think that it is very important to share info about our builds. It a great way to learn with each other or to at least share different ideas to solve the same problems.
Thanks!
Great job!
You got it all together, the build, the paint job, the detailing ant the weathering.
Very convincing.
Thanks a lot!
Love it! An absolute cracker! Rarely seen and beautifully done!
Thanks Paul!
Magnificent Jose !
Perfect timed post too !
Thanks for the feedback!
Well done!
Agreed, once you learn how to use it, panzer putty is great stuff.
Don’t know that stuff, so it’s an easily removable putty?
Not sure if PP is still available but I believe AK Interactive has a similar product:
Uau, thanks Gary?! This product really shows tremendous potencial for just about any kind of masking patterns. How on earth did this slip under my radar until now?
Pedro, if you can, get a tin can of this. It's really useful!
Excellent work, just outstanding in all aspects. Job well done Jose.
Thanks Tom!
WOW, this is a fantastic job, makes me want to go out and buy all of the stuff you've shown! Amazing
Thanks Ian! Although this kit received some flak due to the panel lines, it's worth it's value.
Outrageously great build! Love the maintenance platforms!
Thanks a lot for the feedback!
She is beautiful. Just beautiful.
‘Liked’
Thanks David! And thanks for the articles you post!
Cheers!
A real beauty! Love everything about it.
Pretty much what everyone else said.
Amazing.
This is first class. Great job with the photo-etch and extra detailing.
I read that you added a porthole on the starboard side. May I ask, did you remove one behind the canopy? I ask because I am about to make the same kit and Italeri would have you add portholes everywhere, but reference photos for that exact area on the Mkiii are hard to find.
Cheers!
Superb modelling! I've just received this one as a surprise gift from my sisters, and your excellent build report and photos are going to be a very valuable source. Thank you!