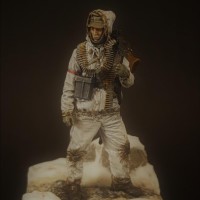
My First Vacuform Kit
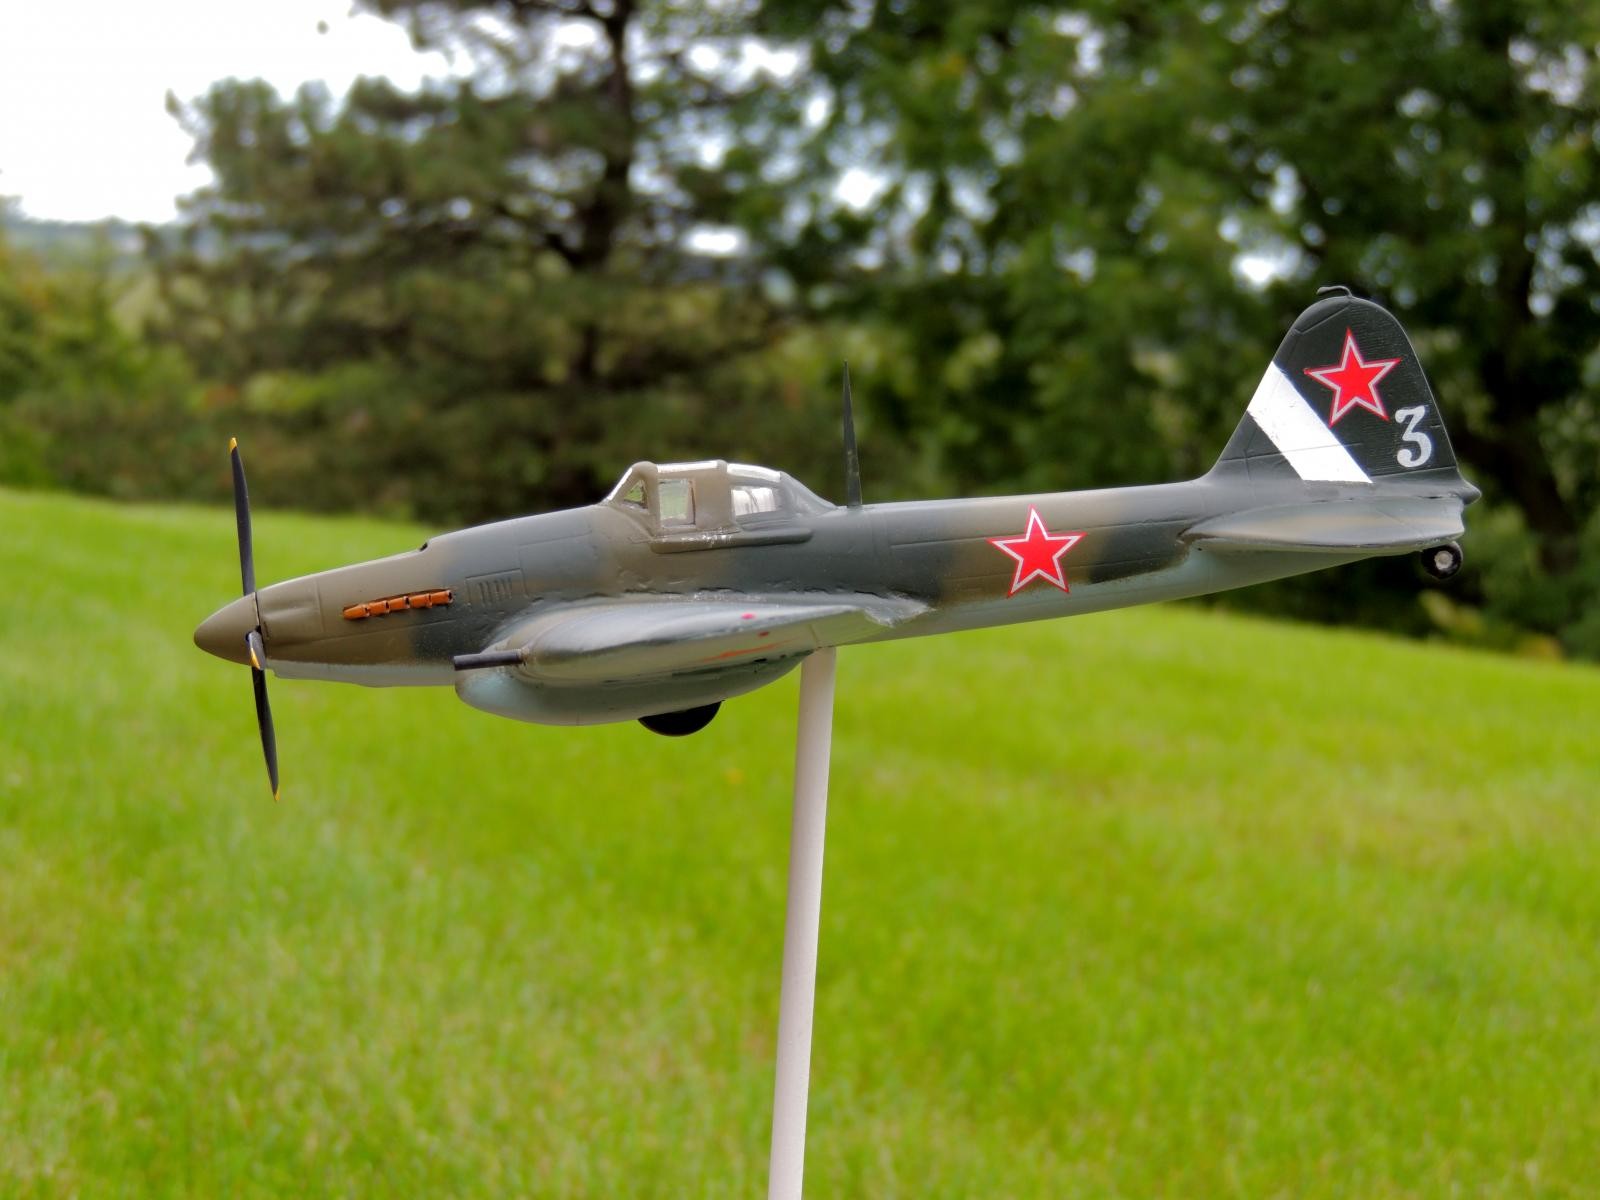
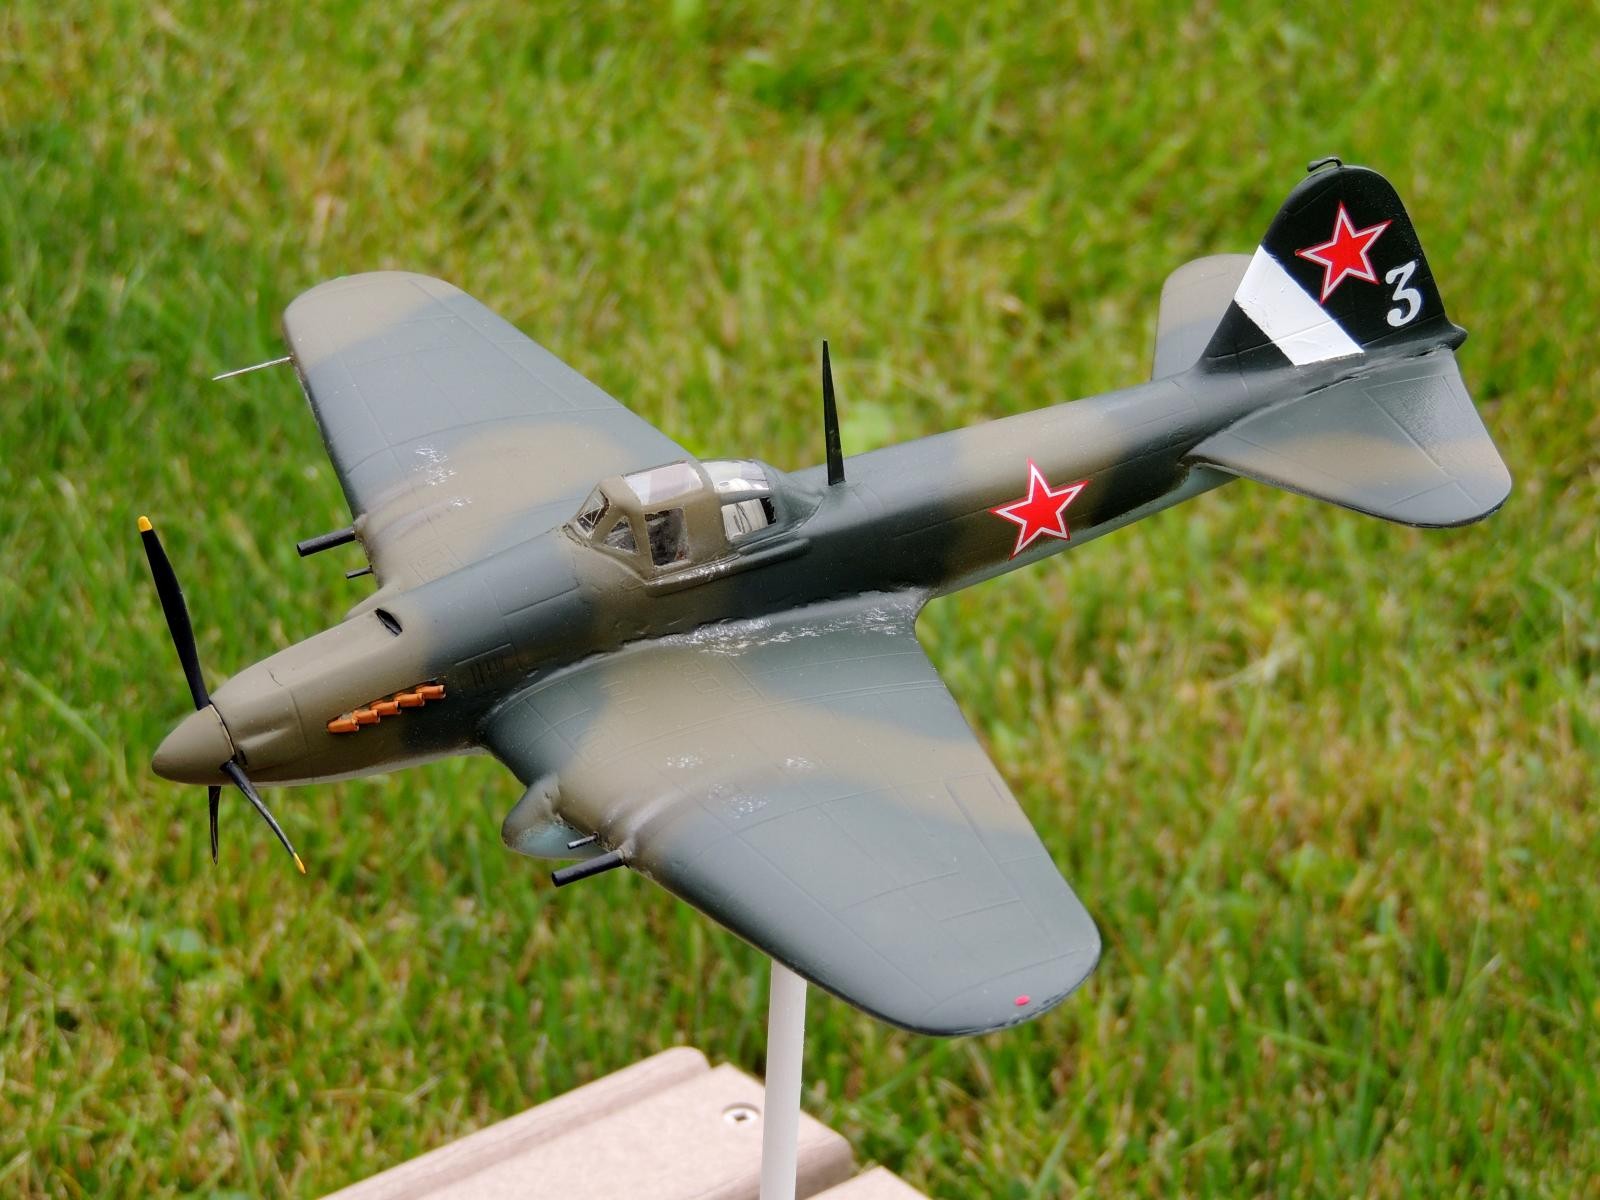
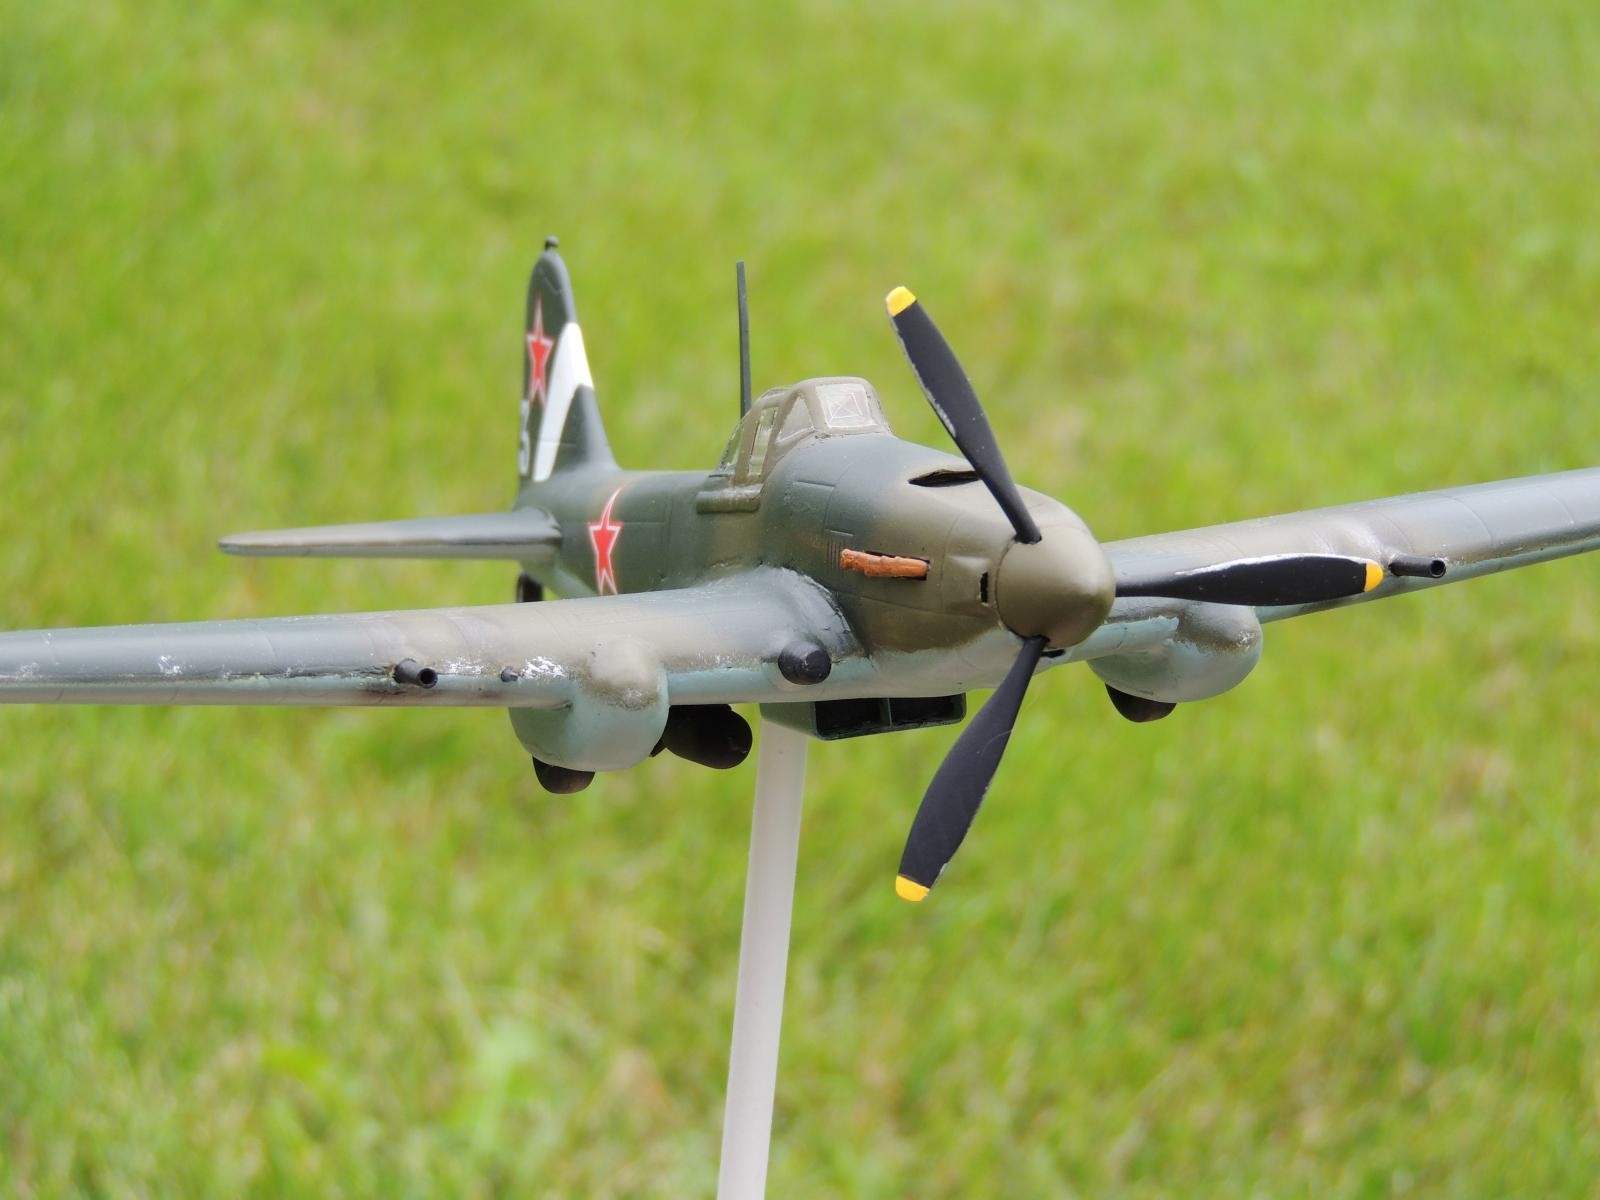
I'm hoping some day to snag a Vac Wings O2U Corsair to fill out my growing collection of dive bombers (as well as my collection of Corsairs), but since I've never done a vacuform kit before, I figured I should practice first. So I bought this Vac Wings IL-2 Sturmovik off of oldmodelkits.com to get some experience building vacform kits. Up until now I have had absolutely zero Russian aircraft in my collection, so I wasn't too concerned whether it came out OK.
It took me a bit to catch on to the scoring-and-breaking method of releasing the kit from the mold panels, but it turned out to be pretty easy once I got on to it. The plastic was soft and easy to sand, but a LOT of gap filling was needed, especially between the wing root and fuselage. In fact, getting the wing assembly mated to the fuselage was a major challenge on this kit.
The cockpit in the kit was practically non-existent, so I bought a Czech Masters resin kit and used the cockpit and engine exhausts. The after-market cockpit added to the already difficult challenge of getting the wing attached. The landing gear was also nearly non-existent, so I went with a wheels-up option to avoid scratch-building, which I have little experience with, either. I used a propeller from an other kit to avoid having to put together the vacuformed halves of the kit propeller.
I added brass tubing for cannon barrels (they're oversize, but that was the smallest my local hobby dealer had in stock), bits of wire for the machine guns, and a straight pin for the pitot tube. Lower surfaces are Vallejo light blue RLM65, upper surfaces are Testers light olive and Vallejo black green. Decals are a mix of Yak-3 on top, and a generic mask for the lower starts.
Once I got to building and reading up on the aircraft, I discovered that the Sturmovik was the most-produced aircraft of WWII - 42,000 units between the IL-2 and IL-10. It had an armored shell around the cockpit and engine that weighed 1500 lbs. It was referred to as the "flying tank" and wreaked considerable damage on German armor on the Eastern Front.
Overall it was a rewarding experience and I like the result. I hope you all do too!


that's nice...did you forget the buccaneer...Bermuda to the British
https://www.scalemates.com/kits/vac-wings-vw4821-brewster-sb2a-buccaneer--168300
Brewster SB2A Buccaneer
Vac Wings - No. VW4821 - 1:48
The Buccaneer would be a nice add to the collection, the BT-1 would be even more so!
🙂 … Greetings … 🙂 :
Nice clean and sharp work on that model Robert.
Bravo for jumping in! I have 3 vac kits, but lack the bravery to tackle them just yet. Someday. 🙂
Nice job!
I admire those who dare building vacu kits ...
You did a nice job on this IL-2.
Nicely done, looks great ! I've done two vac kits and more recently a conversion kit, they can be a challenge
Nice result on your first vac-form! Now I might even have a go at one! Thank you for sharing.
Nice work! I have enough trouble with some short-run kits, that I don't every expect to tackle a vac formed one. You've got more moxie than me.
Nice job on the Sturmovic! Alan has a great site and I have gotten a few OOP kits from him. I got my Combat XB-35 from his site (under the RCM label). Tom Probert has a Sanger B-52H WIP (I have the D kit) going here and vac models are a different level of model building. (Which is why I haven't completed one yet!) I am using his WIP for tips on building mine. Congratulations on getting your first one under your belt!
I agree Allan's site is my go-to spot for old model kits. Thanks for the comments!