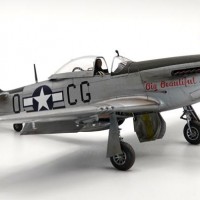
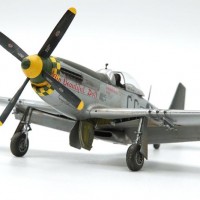
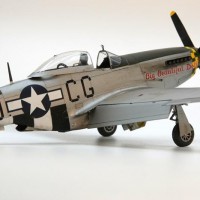
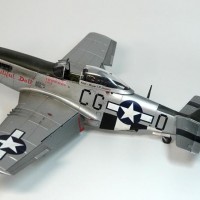
1/48 Eduard P-51D "Doll" Numero Uno.
Here's my first shelter-in-place build:
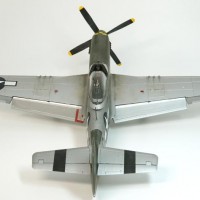
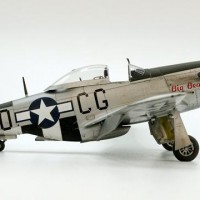
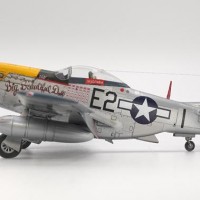
This P-51D (Eduard's “Frenesi” boxing) represents the very first marking of “Big Beautiful Doll”. There were six different “Doll” schemes painted on the two Mustangs flown by Col. John Landers, who transitioned from flying P-38's to this finless P-51D as a Major in July of 1944. Landers flew these “dolled” up ponies in four ETO fighter groups right up to VE Day, May 8, 1945. I've also posted my Airfix version of Landers' final “Big Beautiful Doll” scheme No. 6 that I built in June 2019.
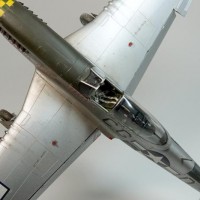
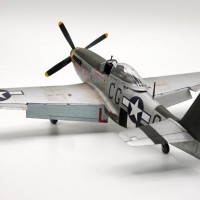
Everything said about this excellent new tool Eduard kit is true – it's a total pleasure to build and the detail is fantastic. They really nailed the proper stance of the landing gear on this one. Like most kits, there are a couple of irritating issues that I will point out shortly.
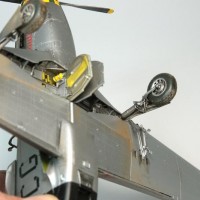
Construction is very straightforward and went smoothly per the excellent instructions. Care and patience is a must as the fit is very exact with no room for error. Make sure to remove every trace of the dainty sprue attachments on each part taking care not to break anything. Pretty much everything you need is included in this Profipack kit. However, I did not use the kit main wheels and swapped them for a set of Eduard's Brassin block treads.
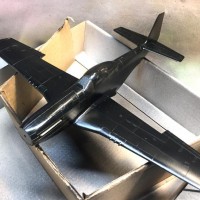
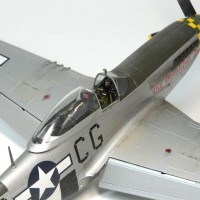
Taking a cue from Tom Cleaver, I first sprayed the entire plane with Tamiya acrylic gloss black thinned 50/50 as a base undercoat. Usually I use a light grey primer for natural metal finishes but I wanted to see if black really does work better for showing depth. Indeed it does! I'm a believer now! After the black dried for a full 24 hrs. , I sprayed “Doll” with various shades of Alclad II lacquer. White aluminum was used to simulate the factory applied aluminum paint that was sprayed on various wing panels top and bottom and the fabric ailerons. I sealed everything with multi light spritzes of various Alclad II Klear Kotes.
Midway through the paint job I discovered a nit-picky mold glitch – there's a couple of surface blems on both upper wings where a tiny panel hole is. I didn't catch this until after applying the aluminum finish however it's not that noticeable when all is said.
Decals: The kit-supplied decals are really terrible. The blue in the stars and bars is transparent so use them only on bare metal as any contrasting color will show through. Unlike the excellent Cartograf sheet included with the Chattanooga release, these Eduard in-house decals are printed ultra thin and most are impossible to position without them folding up or falling apart. Toss ‘em. It's not worth the fight.
That said, I went ahead and used the kit's stars and bars because they look ok over bare aluminum. The rest came from a leftover Lifelike Decals “Beautiful Doll” sheet #015 part 5. But they're not perfect either. I discovered – dare, I say it – a “major” typo. The “r” is missing from the pilot name decal #49 applied to the driver's side canopy frame.
I've now completed four P-51Ds - Airfix, Eduard, Meng and Tamiya. This one's my favorite so far.
Thanks for ogling!


Nicely done Eric, great job on the NMF finish, like it a lot.
Wow. Thanks a lot. I just posted this article two minutes ago.
I like this a lot Eric. Excellent work here. Glad my ideas worked for you.
Thanks for the compliment. Your ideas always work.
Flattery will get you everywhere! 🙂
Sure does.
Beautiful. The aluminum finish looks great. You know I love detail and the bottom view with the landing gear, weathering and dirty tires really shows your attention to detail.
Thanks. I had plenty of reference photos to work with. Here's an example. Landers with his crew:
1 attached image. Click to enlarge.
Very sharp looking with a great metal finish, Eric. I really like this version of Lander's "Doll" series. I don't think Ive seen it represented before. I also like the other version you did with the yellow cowling. Do you have more pics?
I haven't tried Alclad as I use acrylics exclusively. That said, I have not ventured to try the acrylic metal coat I have on hand. Your P-51 is an inspiration and I may try a Mustang first. Thanks for the tip about the undercoat. I believe that adding a few drops of Tamiya acrylic retarder might make it even smoother coming out of the airbrush (not that your finish isn't perfect!).
Believe me, the finish is far from perfect. I will give that retarder a try. Thanks for the tip.
I always use acrylics except for metal finishes. The thing about Alclad is that it tarnishes easily from the natural skin oils on your hands so I always wear white cloth gloves when handling. Otherwise it’s great stuff and easy to use.
You should try the Vallejo metal paints. They go on easy, you can mask over them (with Tamiya Tape or low-tack drafting tape) after an overnight dry. Then once you have an overall color on you can brush paint various smaller panels without getting brushstroke marks.
Great model Eric and a pleasure to see. I also liked Tom's black undercoat idea.
All the best!
It really works! Try it!
Very nice and sharp Mustang. Don’t see any problems with the decals from here. Am currently building two of this kit and I concur, the detail is fantastic. Great job
Thanks Pedro. So the decals in your boxings look ok?
That’s what I thought until I started to use them. I believe TC also slammed when he posted his build of “Frenesi” back in February.
Very nice pony
Thanks!
Airfix、Eduard、Meng、Tamiya,The order of quality from high to low?
Just alphabetical. They all have their good points. I’ll bet Tamiya comes out with a new 1/48 new tool to catch up.
I'd go Eduard, Airfix/Meng (depending on your budget), Tamiya - high to low. From a few feet away, it's very hard to tell the Eduard from the Airfix. The Meng has a problem getting the canopy to sit down right.
That's one pretty Pony! Well done.
Thanks Greg. Next up I'm going to dive into that Modelsvit P-51H. That will complete my pony stable.