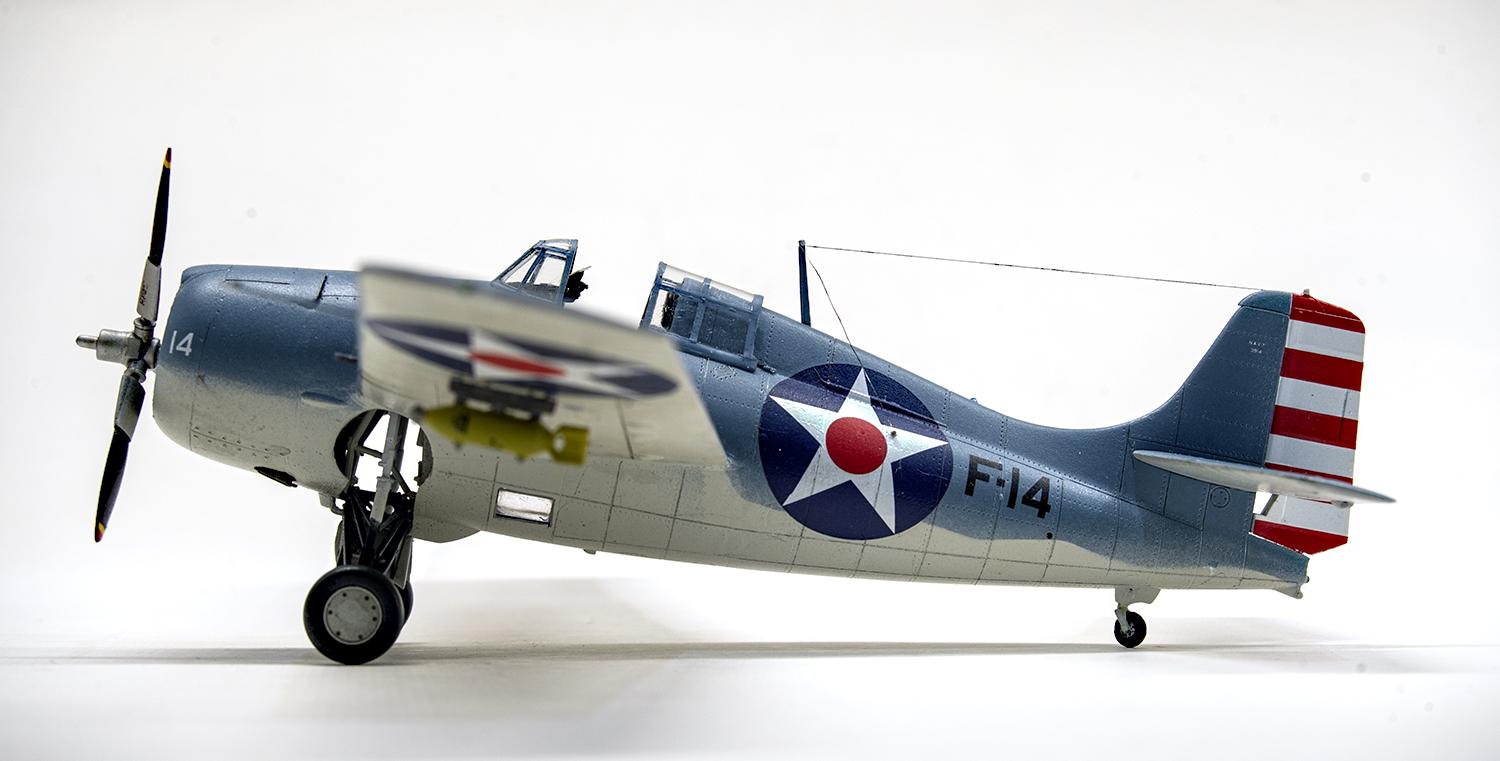
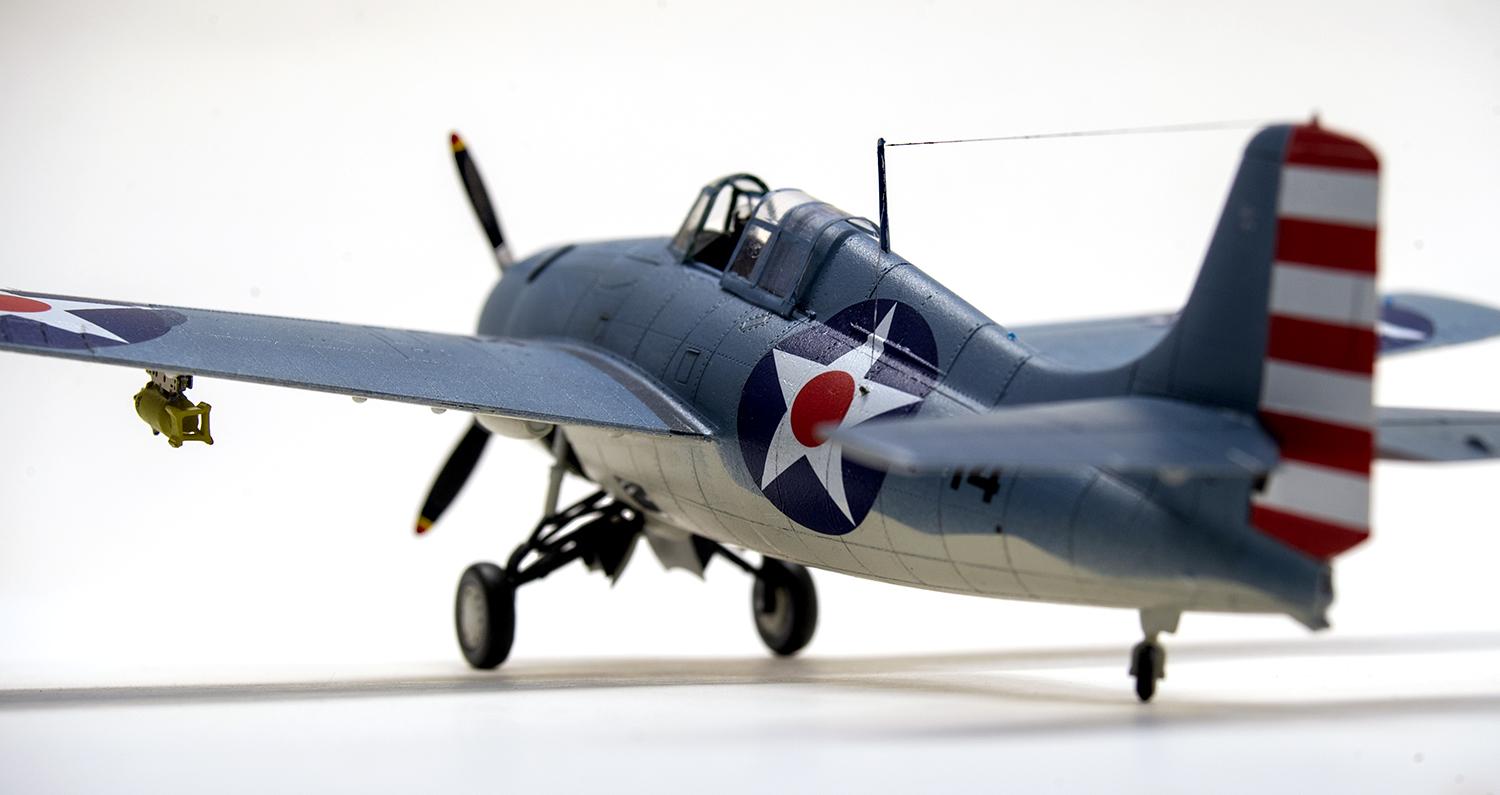
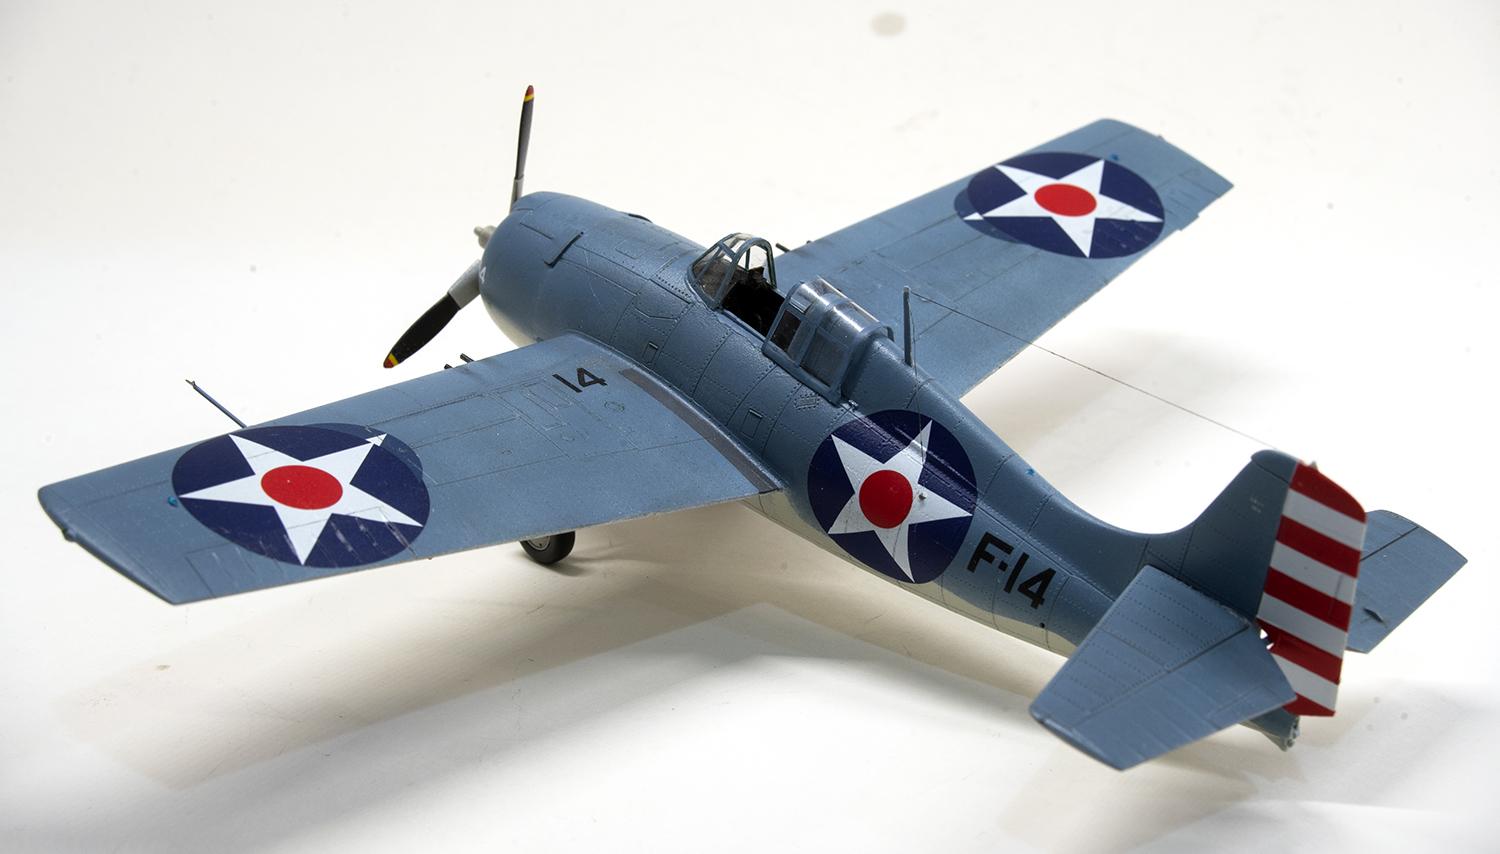
1/48 Hobby Boss F4F-3 Wildcat – the first Navy plane to score a kill in WWII
The Hobby Boss 1/48 F4F Wildcat series are good kits that come close to being great, but don't quite make it. I I built the F4F-3 'early version', which I converted to an F4F-3A.
Highlights are good surface detail, a two-piece canopy, accurate outlines and shapes, beautifully printed decals, and a well-detailed cockpit (with one exception). Parts breakdown closely resembles the Tamiya Wildcat, after which which they obviously patterned their kit. Unlike the Tamiya Wildcat, though, Hobby Boss correctly molded the cockpit with no floor, just foot troughs.
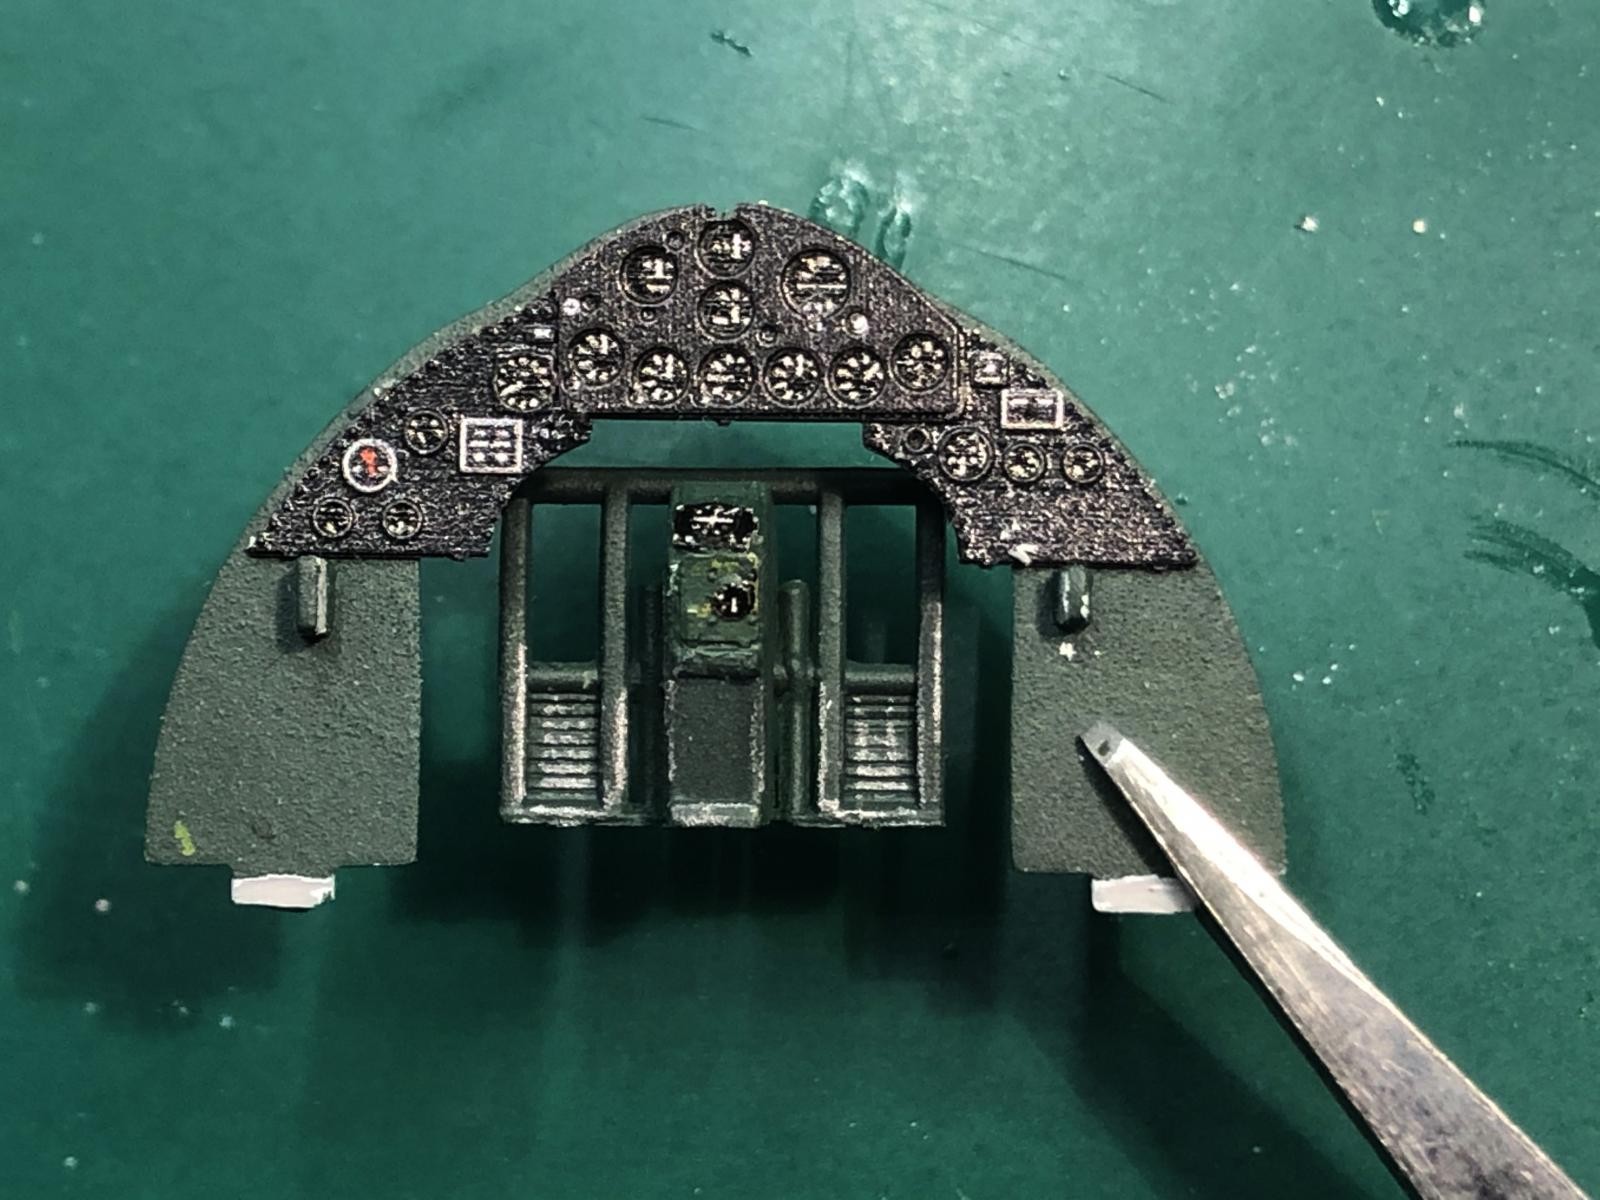
Drawbacks are an instruction sheet that is sometimes vague and confusing, an instrument panel with no engraved dials, and poor fit on the lower fuselage tub and wing roots. At first glance, the engraved panel line and rivet detail looks a little deep, but once coats of primer, paint and clear gloss and flat are applied, it looks fine to me. The kit wheels are treaded, but all the photos I have of F4F-3's show smooth, treadless tires. No belts are provided for the seat, and the landing gear sits a little too high.
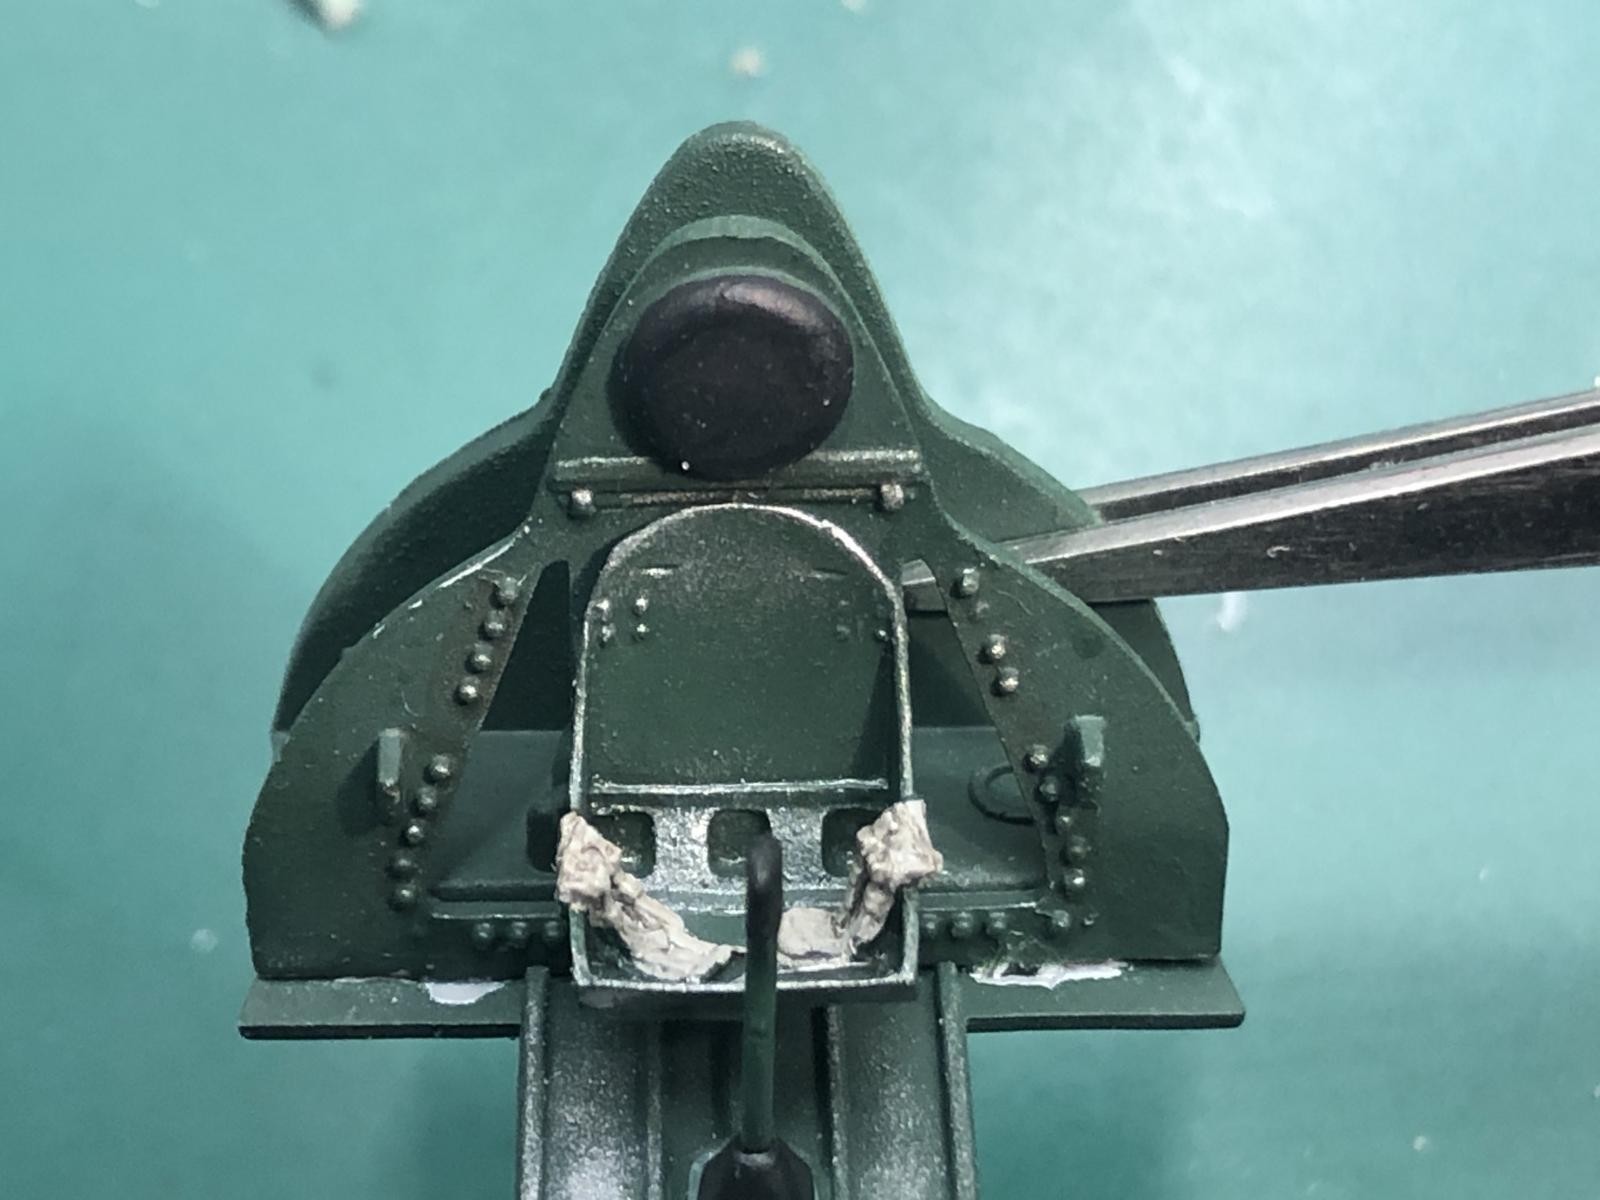
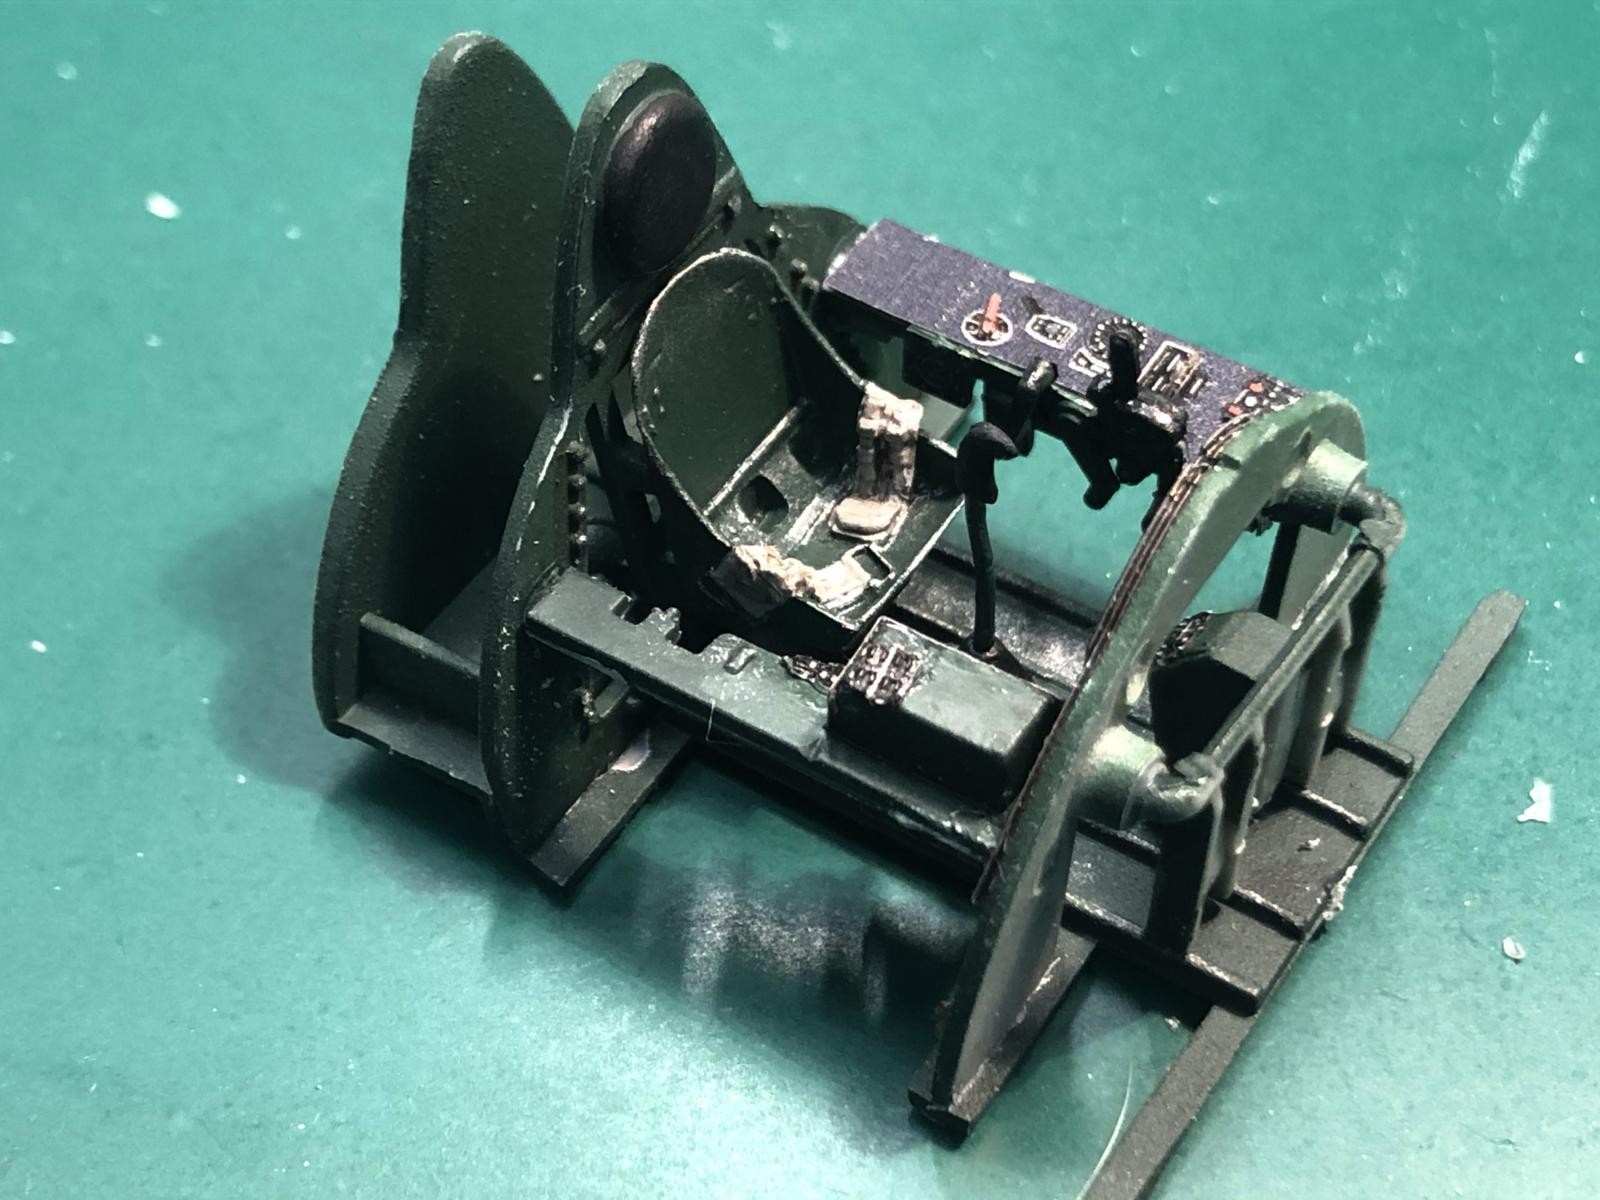
The cockpit goes together with excellent fit. I used an Eduard Zoom set to replace the instrument panel and few other cockpit details. The kit's side panel parts looked great as is. I replaced the kit seat with a resin one from Ultracast with molded-in lap belts. Shoulder harnesses weren't installed until June of '42, and the aircraft I was modeling flew combat in February, on the first offensive strikes of the war. I painted the cockpit and lower fuselage tub Model Master Acryl Euro I Dark Green, which to my eye closely matches photos of the dark bronze green color Grumman used early in Wildcat production. The assembled cockpit fit perfectly into the assembled fuselage halves.
I deviated form the instructions and assembled and installed the landing gear into the lower fuselage piece before closing up the fuselage, so I could assure the gear was seated properly. The Wildcat has very intricate gear mechanisms, and the Hobby Boss kit captures it well, but the assembly and installation instructions were hard for me to follow. I used my finished Tamiya Wildcat kit and the Tamiya instruction sheet as an additional guide to assembly, and it was a big help in getting things built and installed correctly.
The fit of the lower fuselage and wings were the only real trouble I had during assembly. Unlike Tamiya, which molded their Wildcat kit with a single lower wing-fuselage piece, Hobby Boss chose to make the lower wings separate from the lower fuselage tub, and this piece did not ft well. The piece was slightly smaller than the rest of the fuselage, which necessitated lots of filling and sanding. The wings are basically butt-joined to the fuselage, with only a very thin tab to go in a slot in the wing roots. The ill-fitting lower fuselage threw off the fit of the wings, requiring shimming with thin sheet styrene, filling and sanding to get good joints. The work was nothing really major, just annoying and a little time-consuming. Fortunately, after installing the wings, they had the correct dihedral. I left the stabilizers off until after decaling, since the rudder has a large cut-out in it, and it was easier to apply the red and white striped rudder decal without them in the way.
Hobby Boss provides full guns to be installed in the wings, but I didn't use them. The barrels on the guns in F4F's were in metal sleeves, and I used styrene rod with holes drilled in the ends to replicate the guns, which I installed after painting.
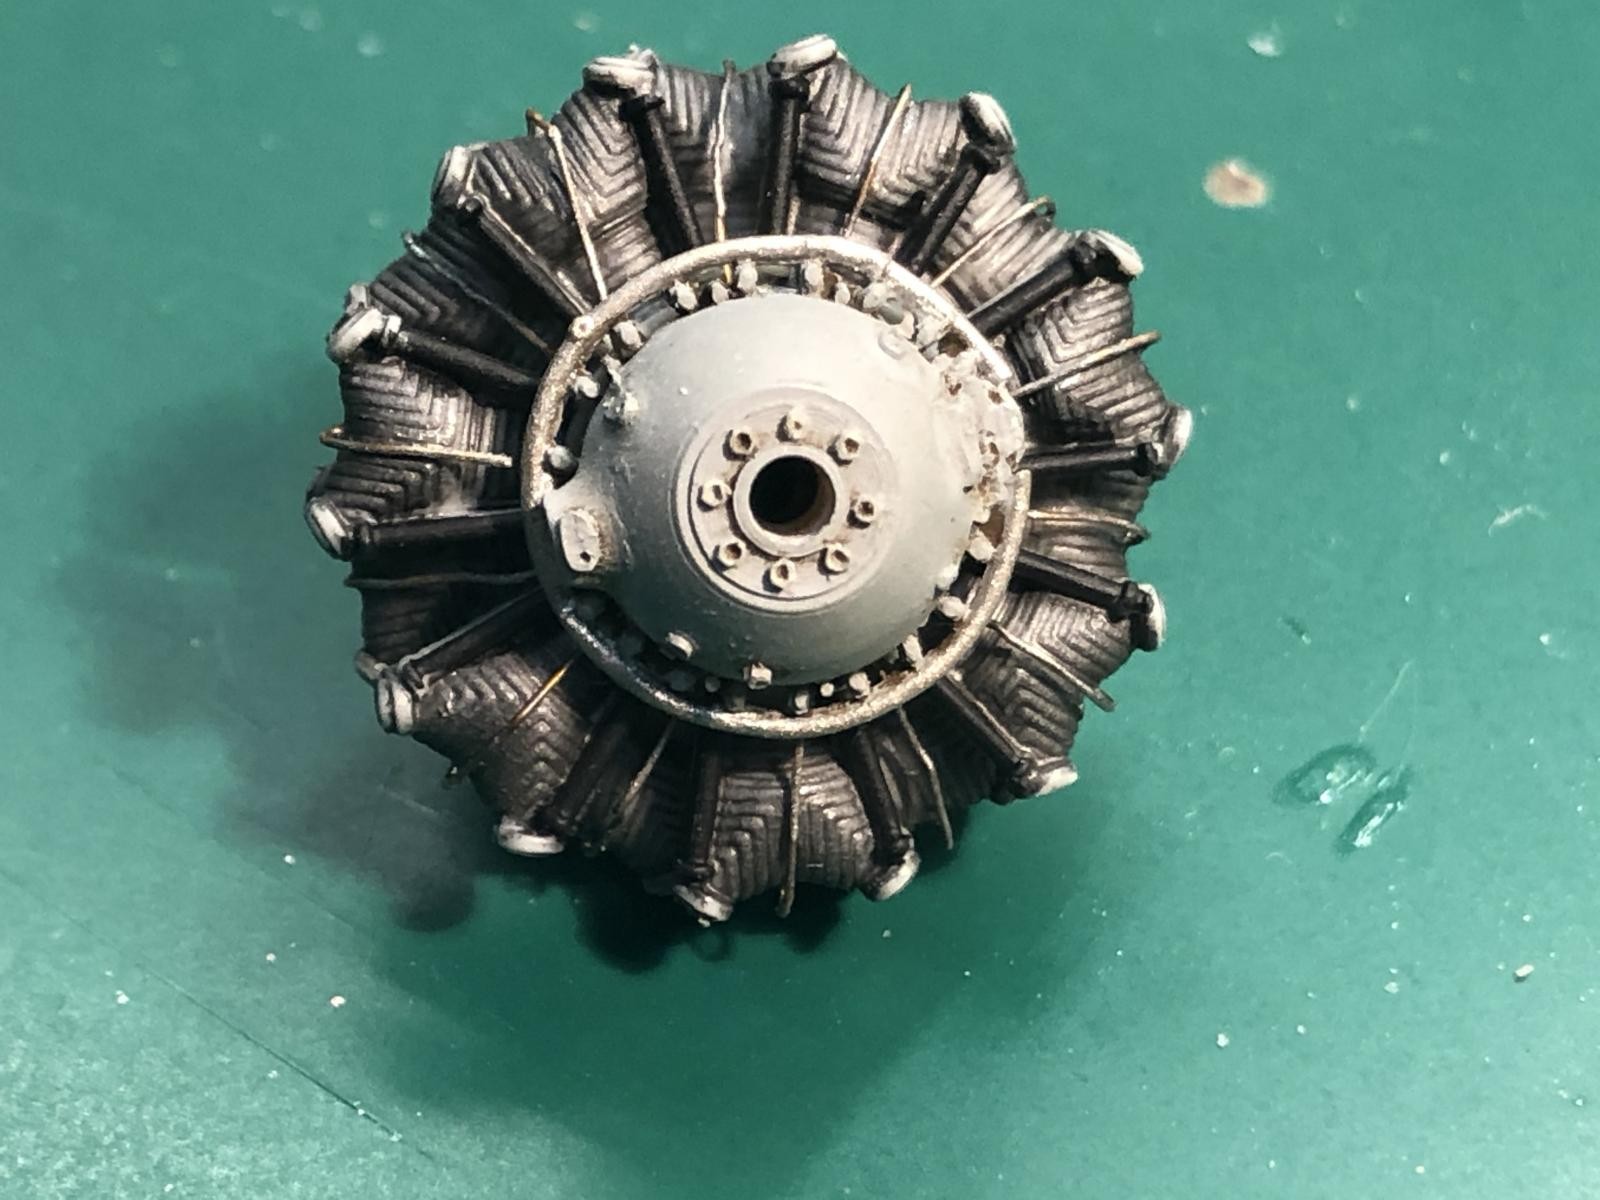
The Wildcat I was modeling was an F4F-3A, which differed from the F4F-3 in several ways. The engine on the -3A had the magnetos on the rear of the engine, instead of the crankcase, so I used a resin replacement engine front without the magnetos. It also lacked inter-coolers in the wheel wells, so I left these off, and also removed the inter-cooler scoops from inside the cowling. The -3A also had an extra brace on each windscreen side panel, and a single formation light on the fuselage spine, instead of two as molded on the kit. The -3A also had one large cowl flap on each side, which the kit correctly provides. To complete the engine, I added thin copper wire to the cylinders for spark plug wiring.
Once I had major assembly complete, I compared the kit to photos, and did a side-by-side comparison with my Tamiya Wildcat, and determined the kit sits about an eighth of an inch too high. I cut the axles off and trimmed a bit off the main struts, then re-attached the axles. On my Tamiya Wildcat, I used resin replacement wheels, so I used the leftover Tamiya kit wheels to replace the inaccurate Hobby Boss examples.
The 'early version' of the Hobby Boss F4F-3 has a windscreen with a hole molded in front to accept a telescopic sight, which is correct for pre-war Wildcats. By early 1942, reflector gun sights were installed in all Navy fighters, so I used a Squadron replacement canopy and windscreen without the hole. The kit provides a gun sight molded in clear plastic, but it's simplified and oversized, so I used a replacement Mk VIII gun sight from Quickboost. I replaced the inaccurate kit exhaust stacks with resin replacements from Quickboost, but they fit poorly and were not any more accurate than the kit pieces. I broke off the tail wheel during construction, so I reattached it at an angle for a more candid apperance.
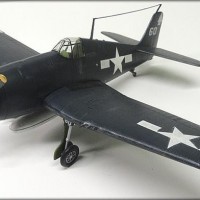
The Wildcat I was modeling was painted in the blue-grey over light-grey scheme, and these colors have no Federal Standard equivalents. I used Model Master Acryl US Navy Blue Grey for the topside color. Based on photos of the Wildcats and TBDs found when the wreck of USS Lexington was discovered, I think this color is a good match. The bottom Light Grey color is more perplexing. All color references today state that the Light Grey camouflage color is the equivalent of Flat Gull Grey, FS 36440. But, according the noted aircraft historian Dana Bell, they are NOT the same color. Flat Gull Grey has a brown tint, and Light Grey was a neutral gray color, which is supported by the few color photos that exist. I wound up using Camouflage Grey, FS 36622 - not correct, but I think it's a closer match than Flat Gull Grey. After priming with Tamiya White Primer, I airbrushed on the Light Grey bottom and Blue Grey topside colors.
The F4F-3A I wanted to model was BuNo 3914, the first Navy aircraft to down an enemy plane in WWII. Flown by Lt. Wilmer Rawie of VF-6 aboard USS Enterprise, he shot down a Mitsubishi A5M4 Type 96 'Claude' fighter over Taroa Atoll in the Marshall Islands on Feb. 1. 1942. All the fighters on that mission carried two 100lb. bombs. I robbed a pair of these small bombs and their racks from an Accurate Mniatures F3F-1 kit. The bombs come molded with the fins in the + rather than X configuration, so I cut them off and reattached them oriented correctly. I painted the bombs Tamiya Yellow Green, since they came from pre-war stocks and were not yet painted grey or green. The decals came from a long out-of-production sheet of famous Wildcats by Three Guys Replicas. The sheet correctly gives the 9 red and white stripes for the rudder instead of the proper 13, and makes provisions for the smaller, painted-over wing stars when VF-6 applied the oversized national insignia to their Wildcats.
Overall, the Hobby Boss F4F-3 kits make fine models, and are great choice to model the first version of the venerabe Wildcat to see combat.


Great write up and great results! What is the story with the wrong number of tail stripes?
Thanks, Andrew! I've never read why they used only nine stripes on the tails of some of VF-6's Wildcats, but my guess is that it was faster and easier to paint and mask fewer stripes, rather than the correct 13.
The stripes were added in early January 1942, and "field applied". Some squadrons just painted them to fit the ribs in the rudder as an easy guide, as was done with VF-6. There was very little standardization of markings between January-May 1942.
That's an excellent model, Drew, nicely researched and executed with attention to detail. Camo looks very "right".
All the best!
Thanks very much, Spiros! For me, doing the research is a big part of the enjoyment of modeling.
That's a pretty looking kitty Drew, the additional work you did was worth it. Nice presentation.
Thanks, Tom - it was an enjoyable build. Since the quarantine began, I've spent a lot more time in my hobby room!
Nicely done! One wild looking Wildcat.
Thank you, Robert!
I concur with all the comments above. Decals look painted on. Nice work!
Thanks, Matt!
Good looking Wildcat. Gotta love this spunky, chunky little fighter - was all we had to take on the best the Japanese could throw at us early in the war!
Thanks, Greg - the Wildcat has always been a favorite of mine, for all the reasons you mentioned.
Very nice Drew!
Thank you, David!
Really excellent work all the way around, Drew. Great research.
Rawie's in my new book "I Will Run Wild: The Pacific War From Pearl Harbor to Midway" coming in September. He had quite a fight with that A5M.
Thanks very much Tom! Really looking forward to your next book - it's another one of your titles I'll be adding to my library.