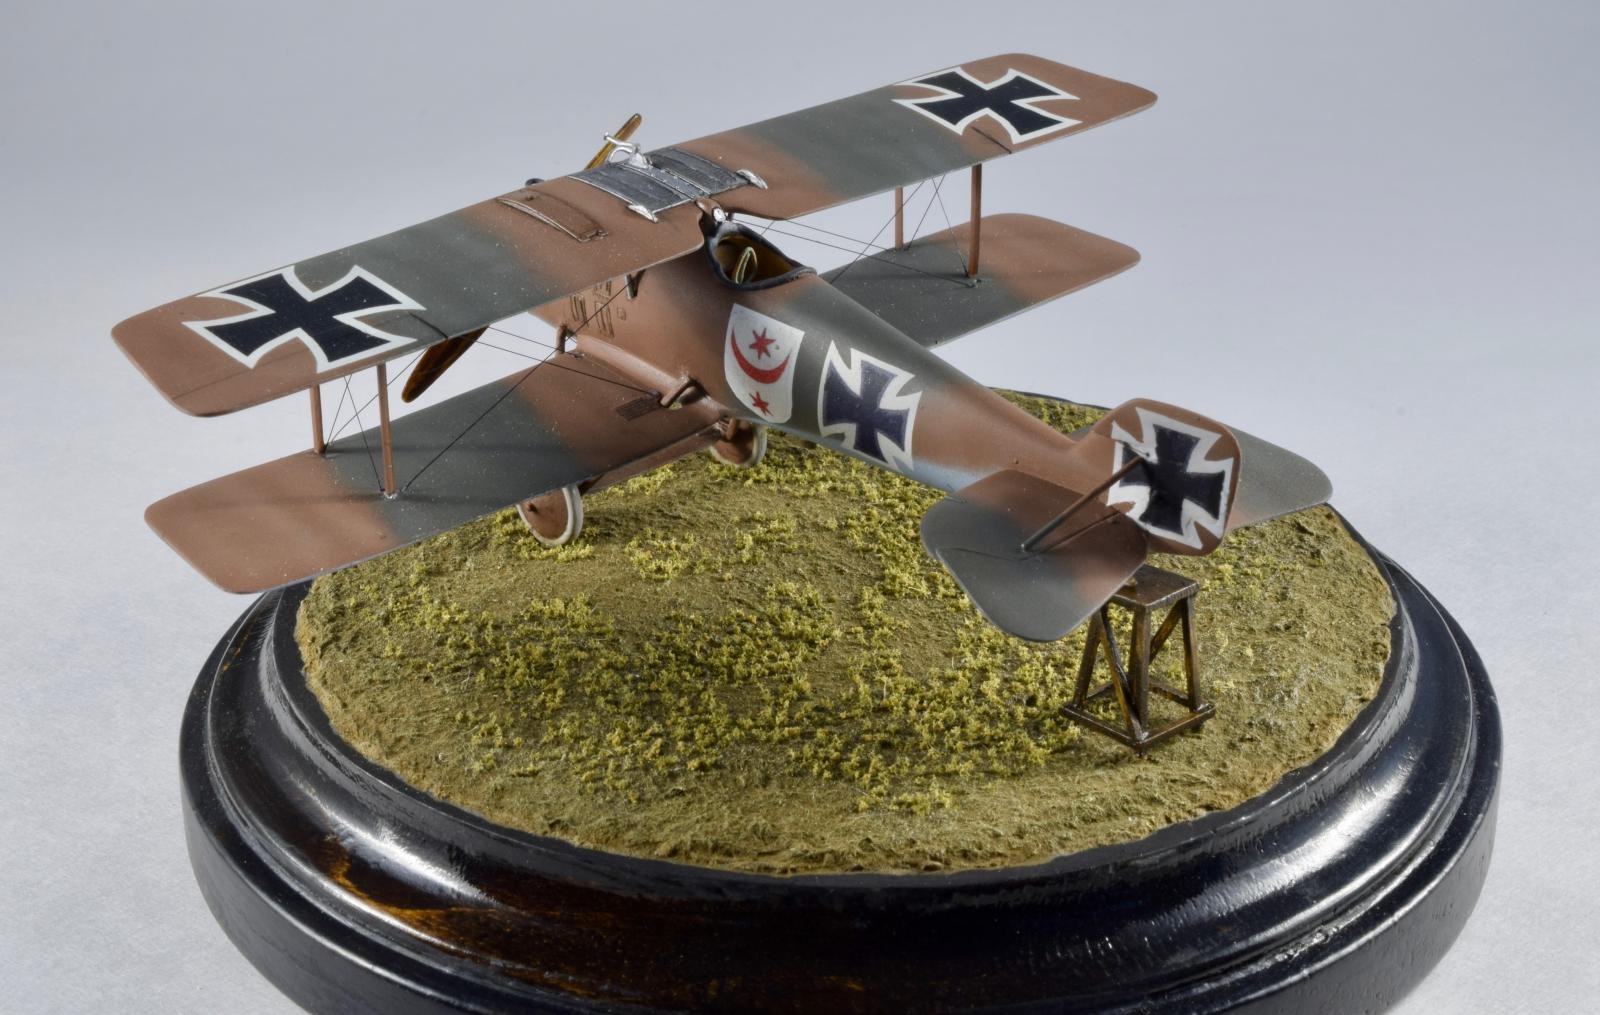
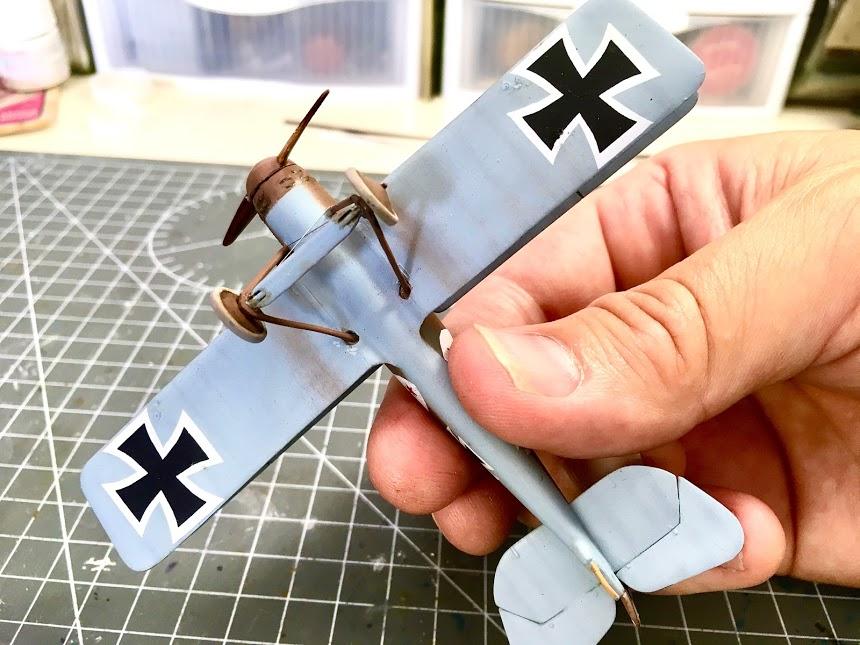
LFG Roland D.II, Pegasus 1/72
I've liked the look of the Roland D.II ever since I first saw it in Kenneth Munson's "Fighters, Attack, and Training Aircraft, 1914-19" back in the late 60s. It wasn't a particularly successful fighter despite its good looks; while fast, it didn't handle particularly well and the just under 500 that were produced in 1917 were gone from squadron service by the end of the year. As a result, it's difficult to find photos of them during their year of service, and there are few that display any individual markings.
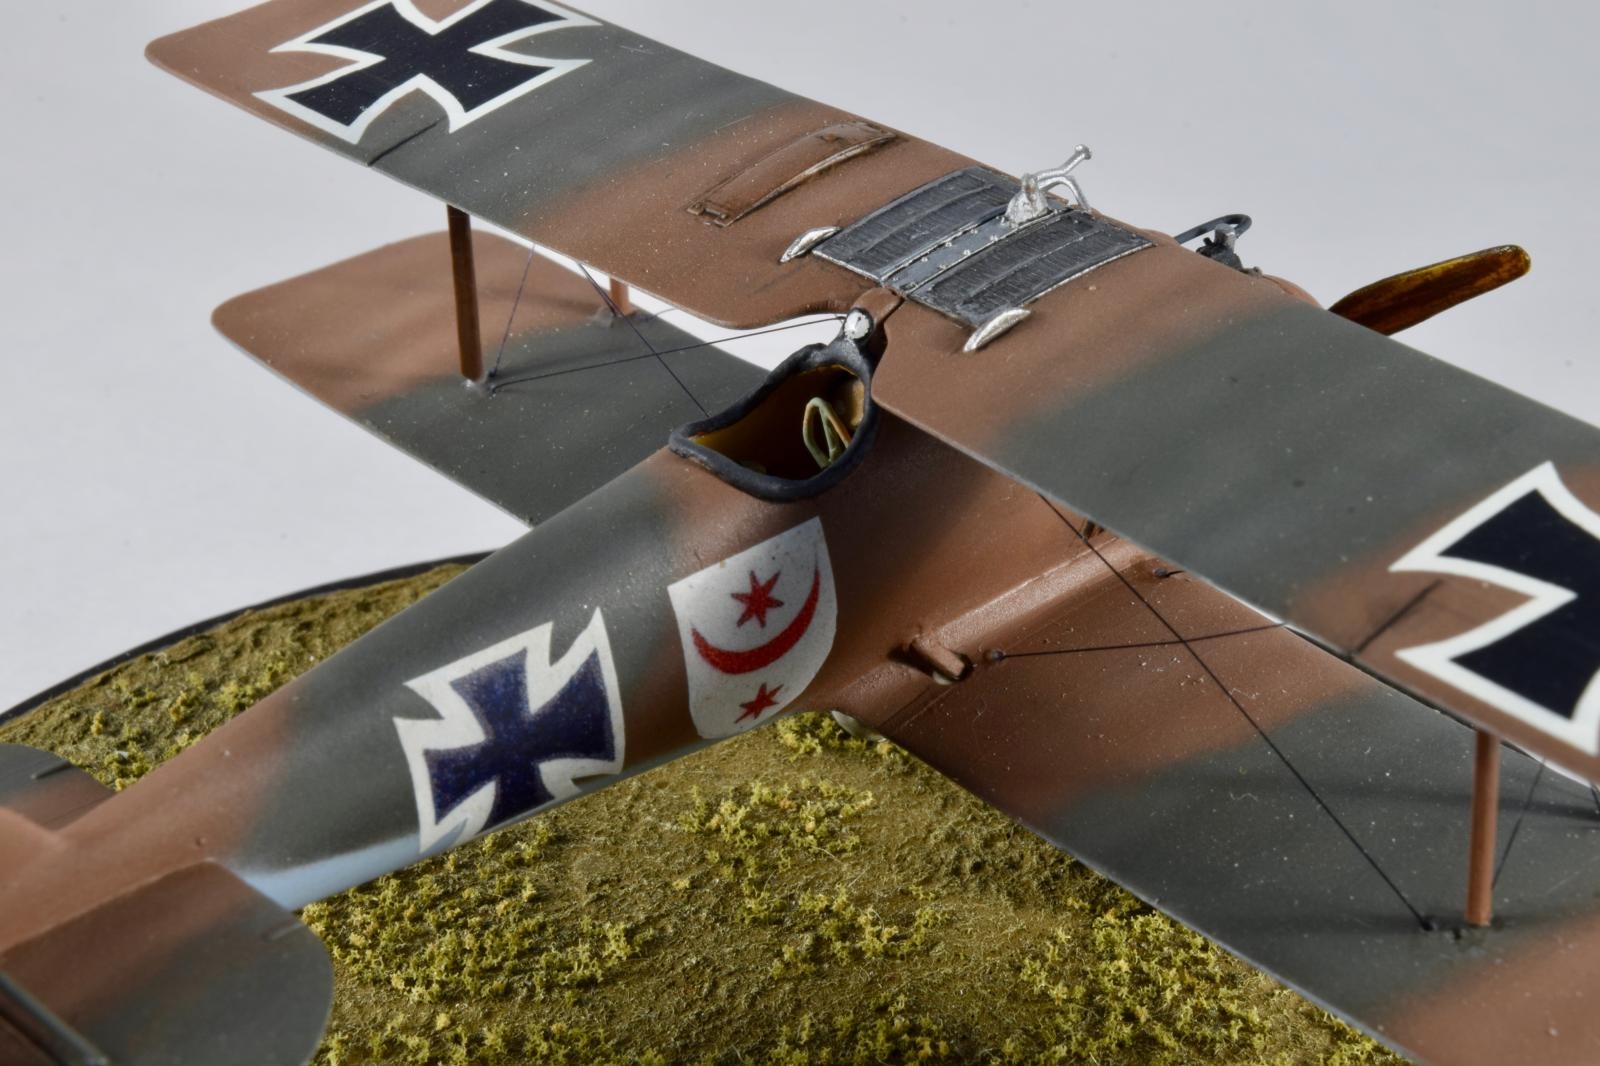
I bought the Pegasus kit back in 1995, and it is a really nice kit, with subtle surface detail and an accurate outline when compared with Ian Stair's drawings in Windsock Datafile #47 (which the kit was probably based on). White metal parts are provided for the engine, exhaust manifold, prop/spinner, landing gear struts, wheels, seat, and joystick. You also get two different widths of Contrail strut stock with which you can fashion the various struts that keep this crate together. Decals are provided for a bird with a white zig-zag on the fuselage photographed on the Eastern Front. Unfortunately, the markings are for a Pfalz-built plane that lacks the fairing for the tailskid. I didn't feel like making this modification, so I started looking for alternatives. I struck gold while thumbing through Ray Rimell's "The German Army Air Service in World War One". There in the middle of page 40 was a full right profile photo of a Roland-built D.II, unit unknown, with a cool shield painted aft of the cockpit, sporting devices of a crescent moon and stars. In addition, it had the “fat” fuselage crosses that are indicative of a Roland machine. I figured these markings would be easy enough to make from scratch. As it turns out, I was wrong; more on that later.
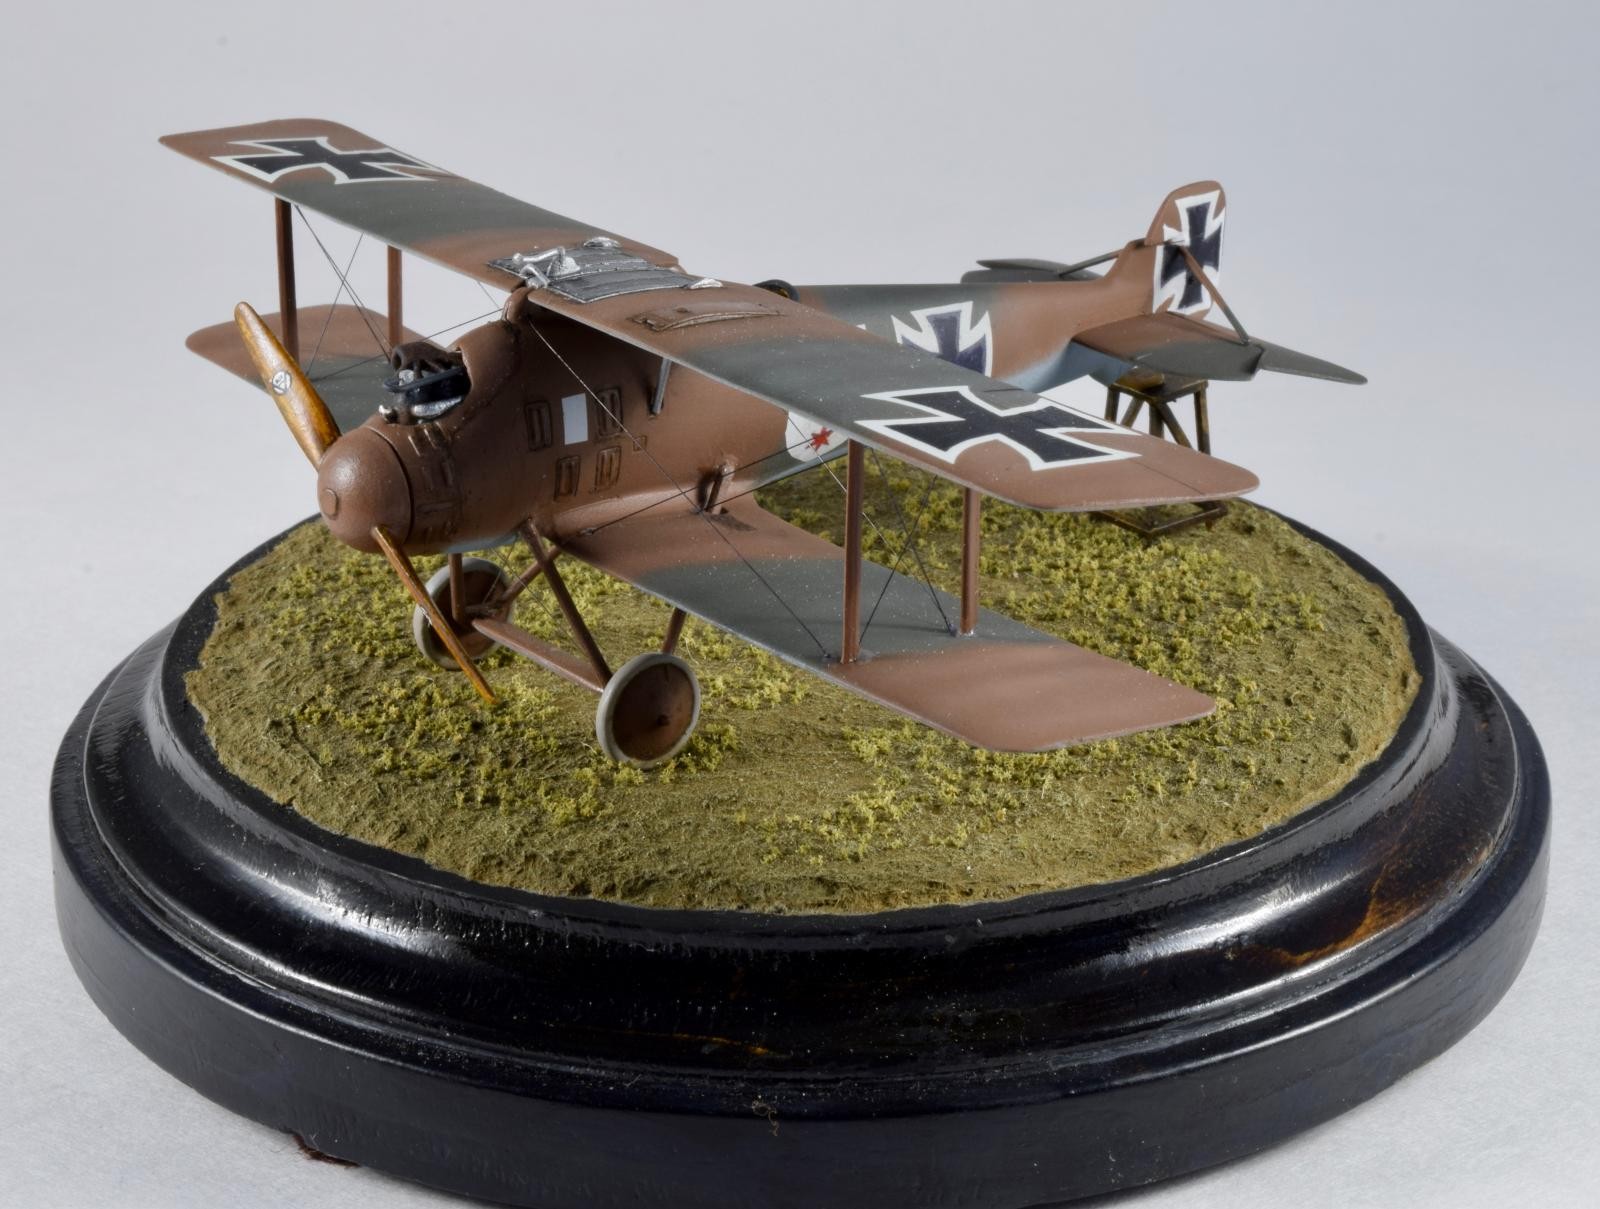
The kit was built straight from the box, with the only modifications being to separate the elevators and reattach them at a more casual angle, and to add some homemade belts to the seat. I also ended up scratch building the control column, as I lost the kit part somewhere during the build. I also made a cockpit coaming using Milliput. No fit issues really, though some putty was needed on the bottom fuselage seam. I needed to take some warp out of the top wing by dunking it in hot water and bending it repeatedly. Once everything was together (minus the top wing), I painted it using the following Tamiya colors:
•Light Blue: XF-2 (10 parts) + XF-18 (1 part)
•Green: XF-61 (lightened with white)
•Red Brown: XF-64 (lightened with white)
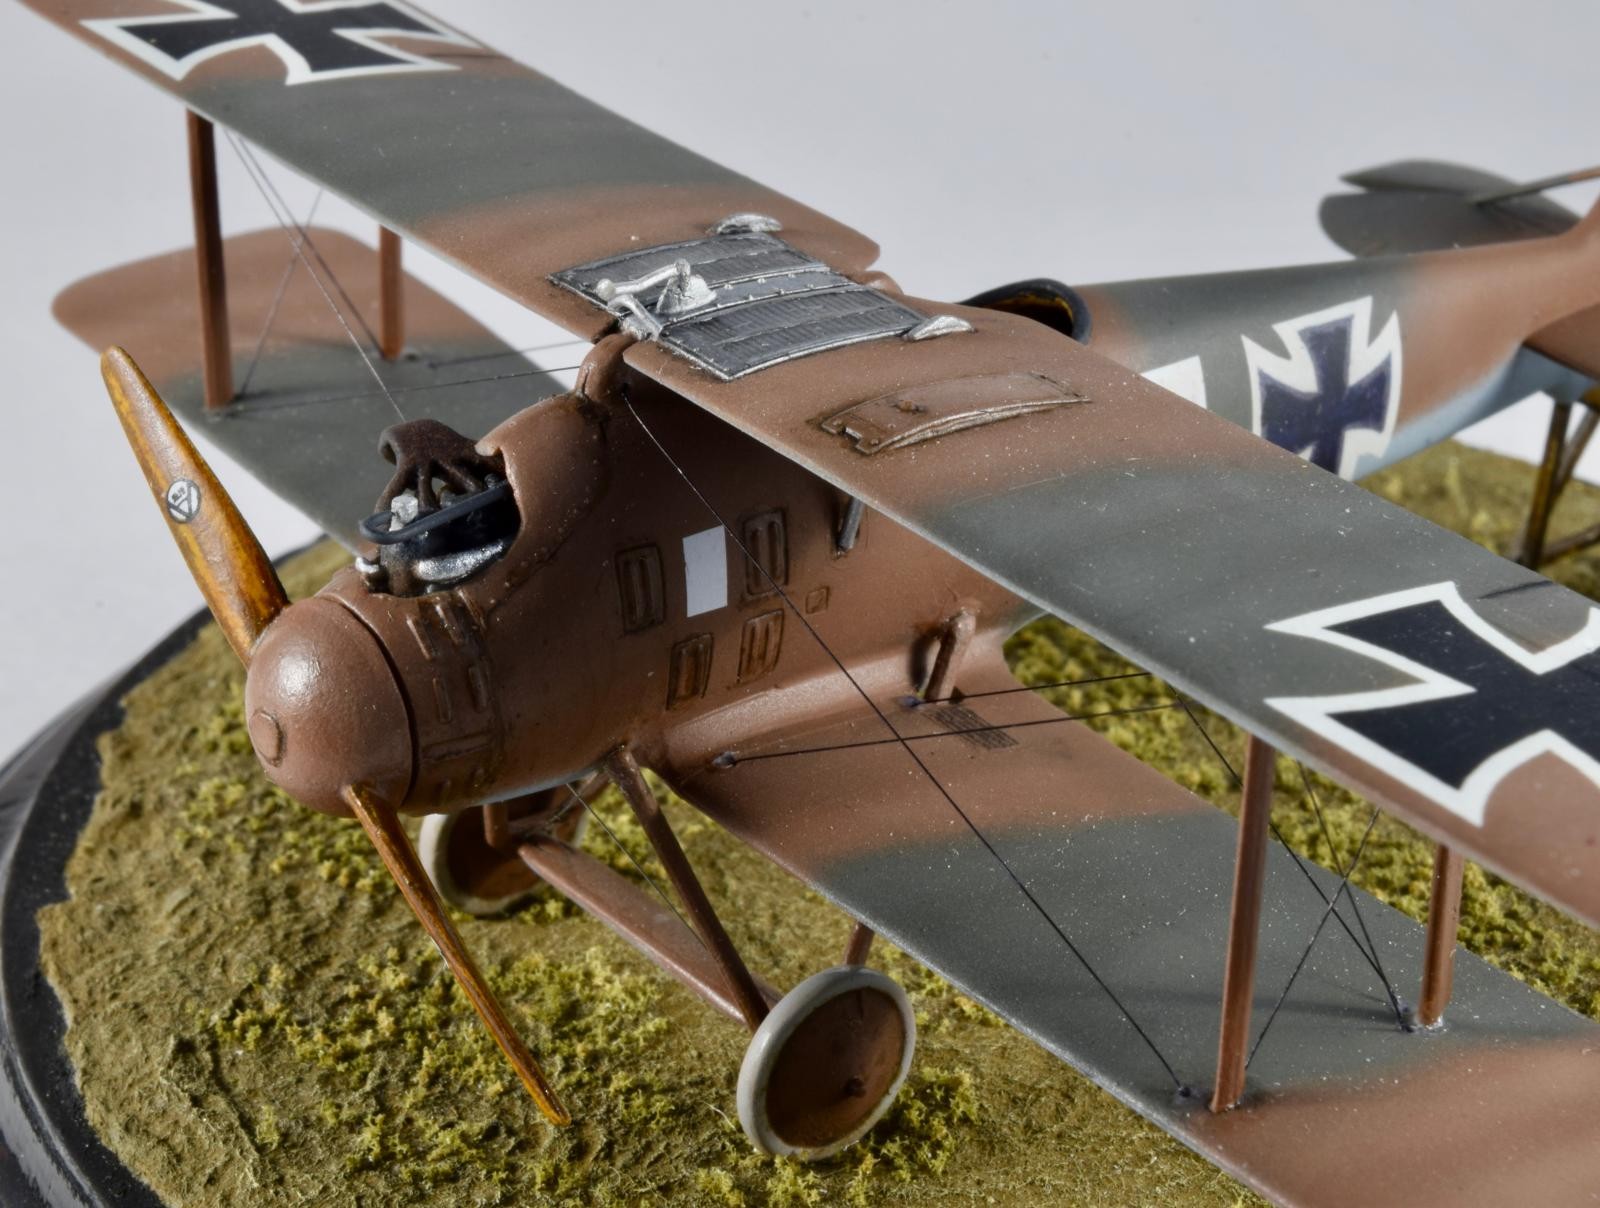
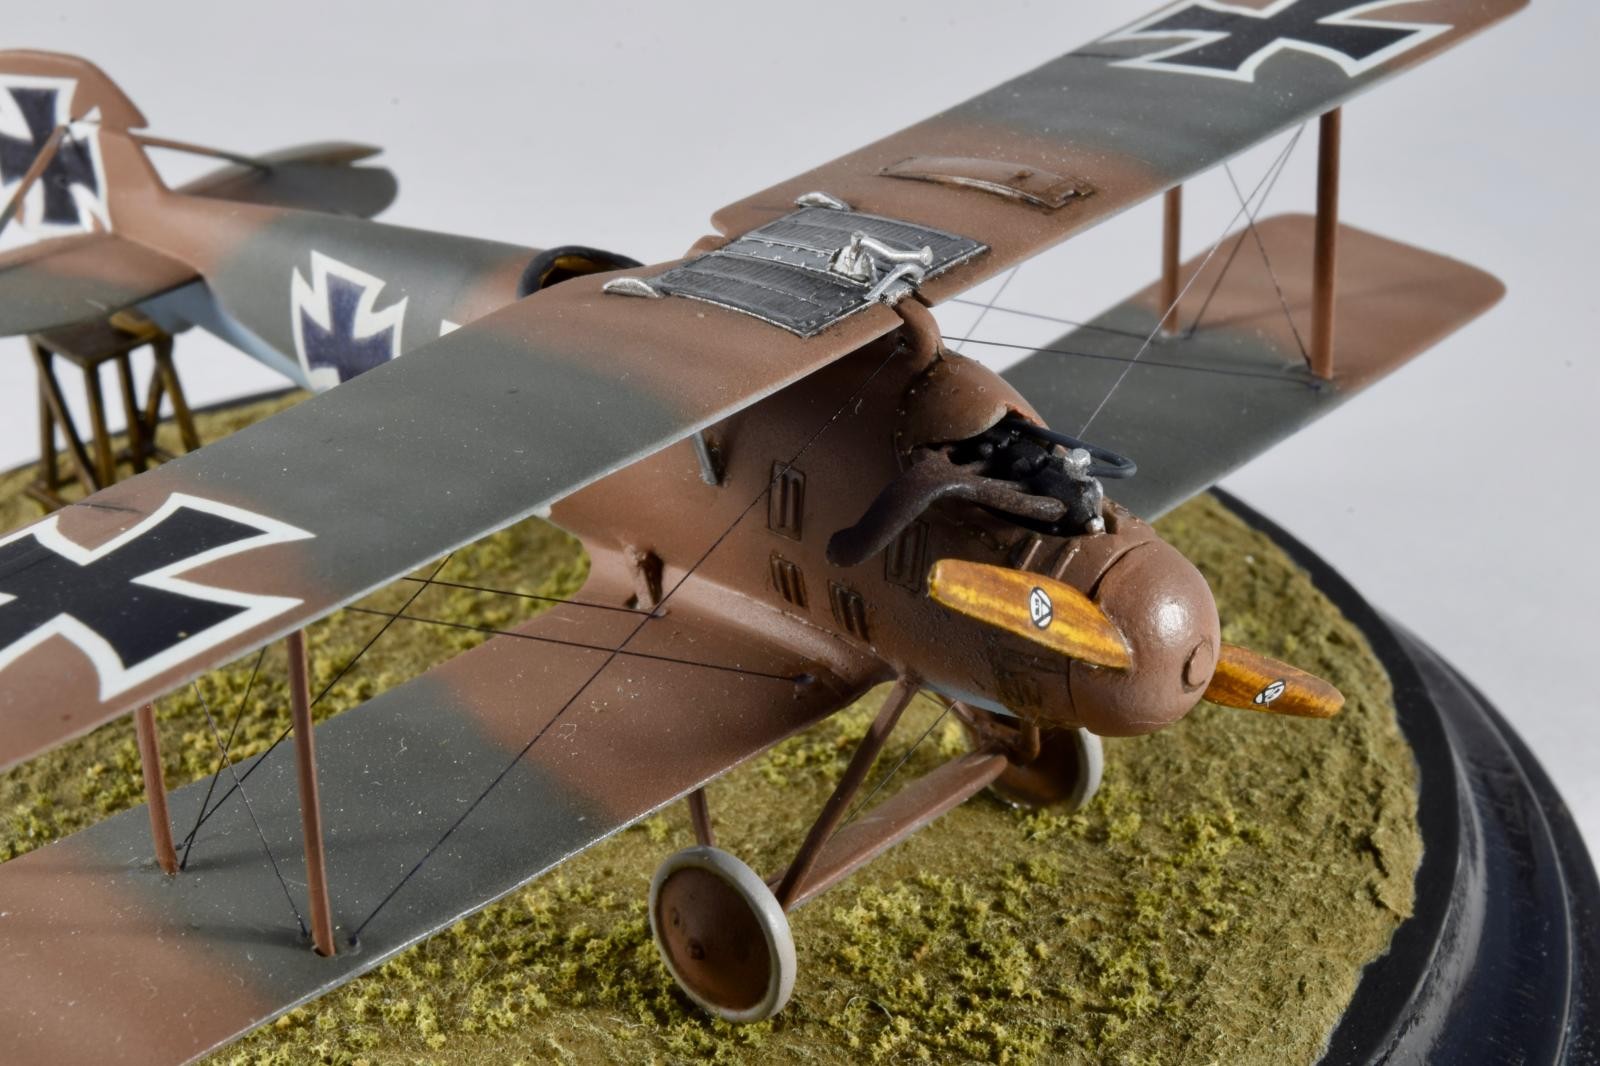
I post-shaded all of these colors with lighter versions of the base colors. The propeller was done in Tamiya Buff, covered in oils, then scraped to reveal the lighter base coat as laminations. Final coat was a mix of Tamiya transparent yellow and orange.
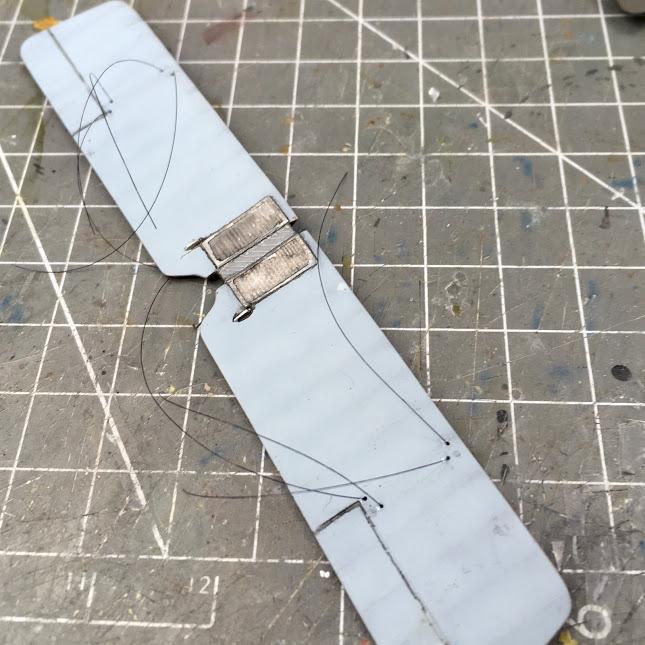
The real fun of this build came with the markings. The wing cross decals had the right proportions, but the lower wings lacked the white outlines. I photocopied the kit wing crosses onto Testors white decal paper and carefully trimmed them to the contour of the white area. The printer ink washed off when they were dipped in water, I then applied my white crosses to the lower wing. After that, I applied the kit black crosses on top of the white outlines. I considered doing the same thing with paint, but thought that having the flexibility to move the decals would be better. The top wing crosses went on perfectly, no setting solution required.
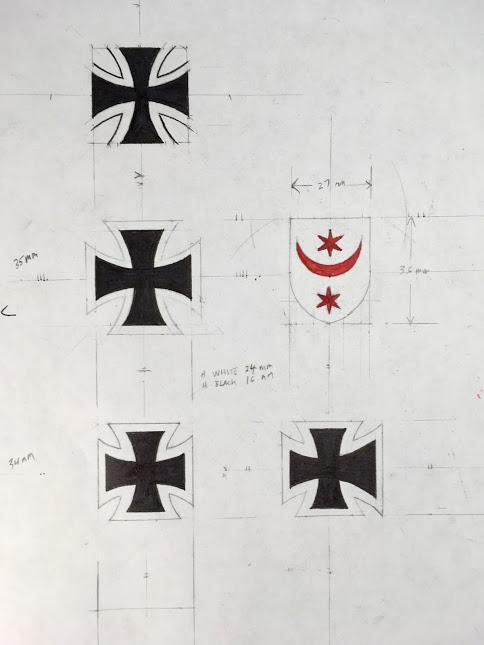
Now the real fun began, making the “fat” Roland fuselage and tail eiserne kreuz. I scoured my decal collection, but found nothing that came close to the chubby proportions and downright funkiness of these markings. The fuselage cross has a much enlarged forward arm, almost trumpet-like in its proportions. I pulled out the trusty compass, and dusted off those old drafting skills that I learned back in high school (yes, we used to do drafting with pencils and paper). Luckily for me, the photo in Ray's book was pretty close to dead-on perpendicular to the fuselage and tail markings, so I was able to take measurements from a photocopy. These measurements helped me to get the proportions accurately. I decided to draw them at twice scale, to make them easier to draw and to help with the final appearance. It took several attempts to get the look right, and I considered cutting my losses and just using the wimpy Pfalz-type cross included in the kit, but the VacRat persevered and in the end stubbornness paid off with a drawing that matched fairly well. The shield and its devices were fairly easy to draw by comparison, the only difficulty being the color interpretation. In the photo the devices are as dark as the crosses, so they might be black, but I went with red, knowing that 1) Red photographed very dark with the orthochromatic film of the day; 2) It would add a much-needed pop of color to this rather plain bird; and 3) Not many eyewitnesses are left to contradict my interpretation. I scanned my drawing, then sized them, making dozens of copies of all in slightly different sizes to make sure I got exactly what I needed to fit (the tail cross in particular needs a very exact fit to look right).
These were printed on white decal paper, sprayed with dullcoat, then trimmed to size and applied. The white decal paper was thick, and I wished I hadn't glued on the rudder at a cocked angle before decalling, as it made things more difficult. Mr. Mark Softer was used to help snuggle them down. A coat of Vallejo clear flat sealed everything in. The metal parts of the fuselage were brushed with Vallejo satin, as they are noticeably shinier than the rest of the wooden fuselage in photographs. Some very light weathering was done with pastels.
Normally in aircraft modeling this is where you pop the champagne and celebrate, but with rigged aircraft the trophy ceremony has to wait until you clear the final hurdle: rigging. Fortunately, the Roland is one of the easier biplanes to finish off, as there are no cabane struts: the upper wing rests on the fuselage. I pre-drilled mounting holes on the underside of the top wing and upperside fuselage locations of the rigging end points, and drilled all the way through the locations in the lower wing, in preparation for the “through wing” method of rigging. Invisible sewing thread was passed through a black Sharpie to add some color, then it was attached to the upper wing and fuselage points using ACC. The upper wing was then attached to the fuselage. The fuselage lines were passed through the lower wing, given a drop of ACC in the hole, and held tight with a hemostat while the glue set.
The interplane struts were cut to size, using a divider to measure them (each one is a little different due to some twist of the wing). They were attached using PVA glue for flexibility. The rest of the rigging was passed through the respective holes and glued in place. These were then trimmed with a brand new blade, and the holes filled with Testors Clear Parts Cement. The attachment points were touched up with a little paint. The aileron control rods and tail struts were made from the included strut stock, as was the radiator hose.
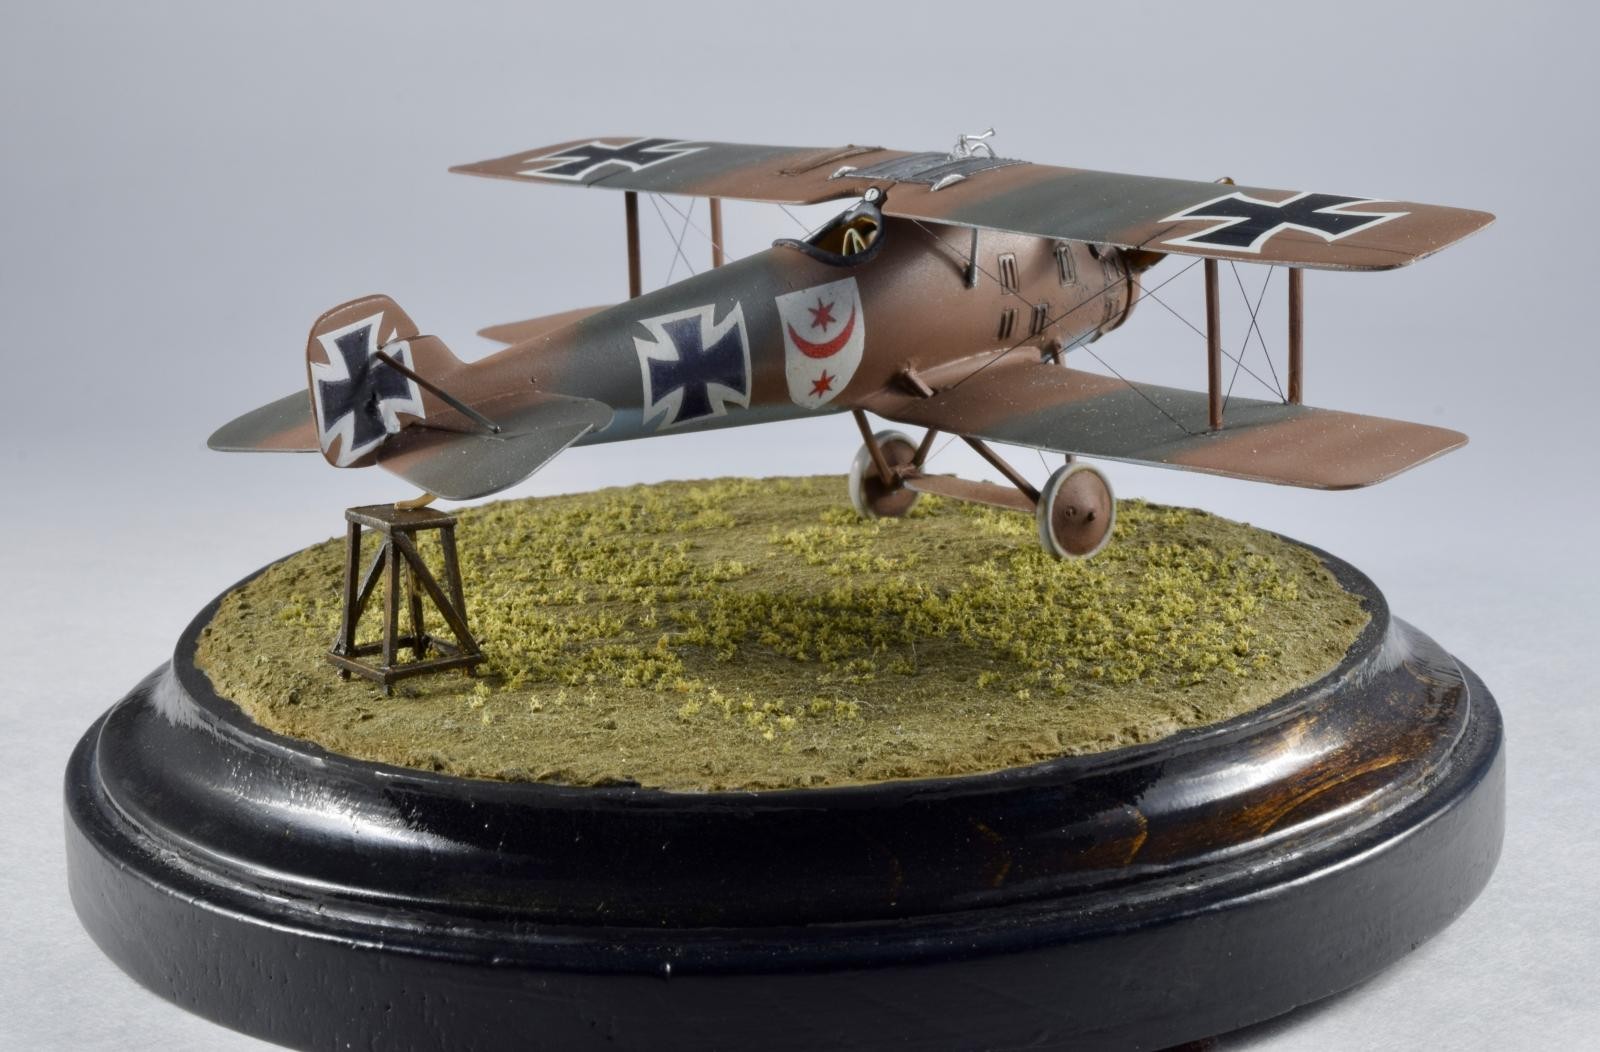
I scratch built a maintenance stand from Evergreen stock, as these Rolands are often seen in photos with their tails in the air. It's painted with Tamiya buff and Winsor & Newton raw umber oil paint. The base is a wooden plaque from the craft store, stained walnut and gloss coated, with groundwork done using Celluclay and static grass.
All in all it was a fun build, and it looks good on my Luftstreitkräfte shelf. I recommend the kit if you can find one on the used market, as it's been out of production for many years.

🙂 … Greetings … 🙂 :
Andrew … thank you very much, I am having a nice time just watching this well done model.
It is small, I give you that … but it packs a big punch. The decal work resulted just fine and the rigging really set's it at a class alone. A very nice work over all.
Thank you very much.
Nicely done Andrew, well decaled !
Thanks, it was the biggest challenge, but I like the results.
Nice work, Andrew. I used to do a lot of 1/72 WW1 back in the ‘80s. Those Pegasus kits were a big deal when they came out.
Nice build indeed, you put this model on a display base because it deserves it. Only when viewing all the photos did I realize the actual size of the build which makes it more impressive.
Great post Andrew.
Thank you so much.
That is such a fantastic build, Andrew!
It is amazing you put all this detail at such a small kit.
Nice article too!
Thanks, Spiros!
I concur, amazing work! The Munson reference book you mention, was that part of a series of hard cover pocket books? I still have a few of those myself.
Thanks, Robert. Yes, the Munson book was part of a series of pocket-sized reference books that really got me hooked on WWI aircraft.
Got me hooked on aircraft in general.
Incredible build, Andrew.
You can only say that it is that small once you have it in your hands.
Beautiful detailing.