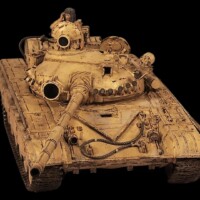
1/35 Academy M163 SPAAG
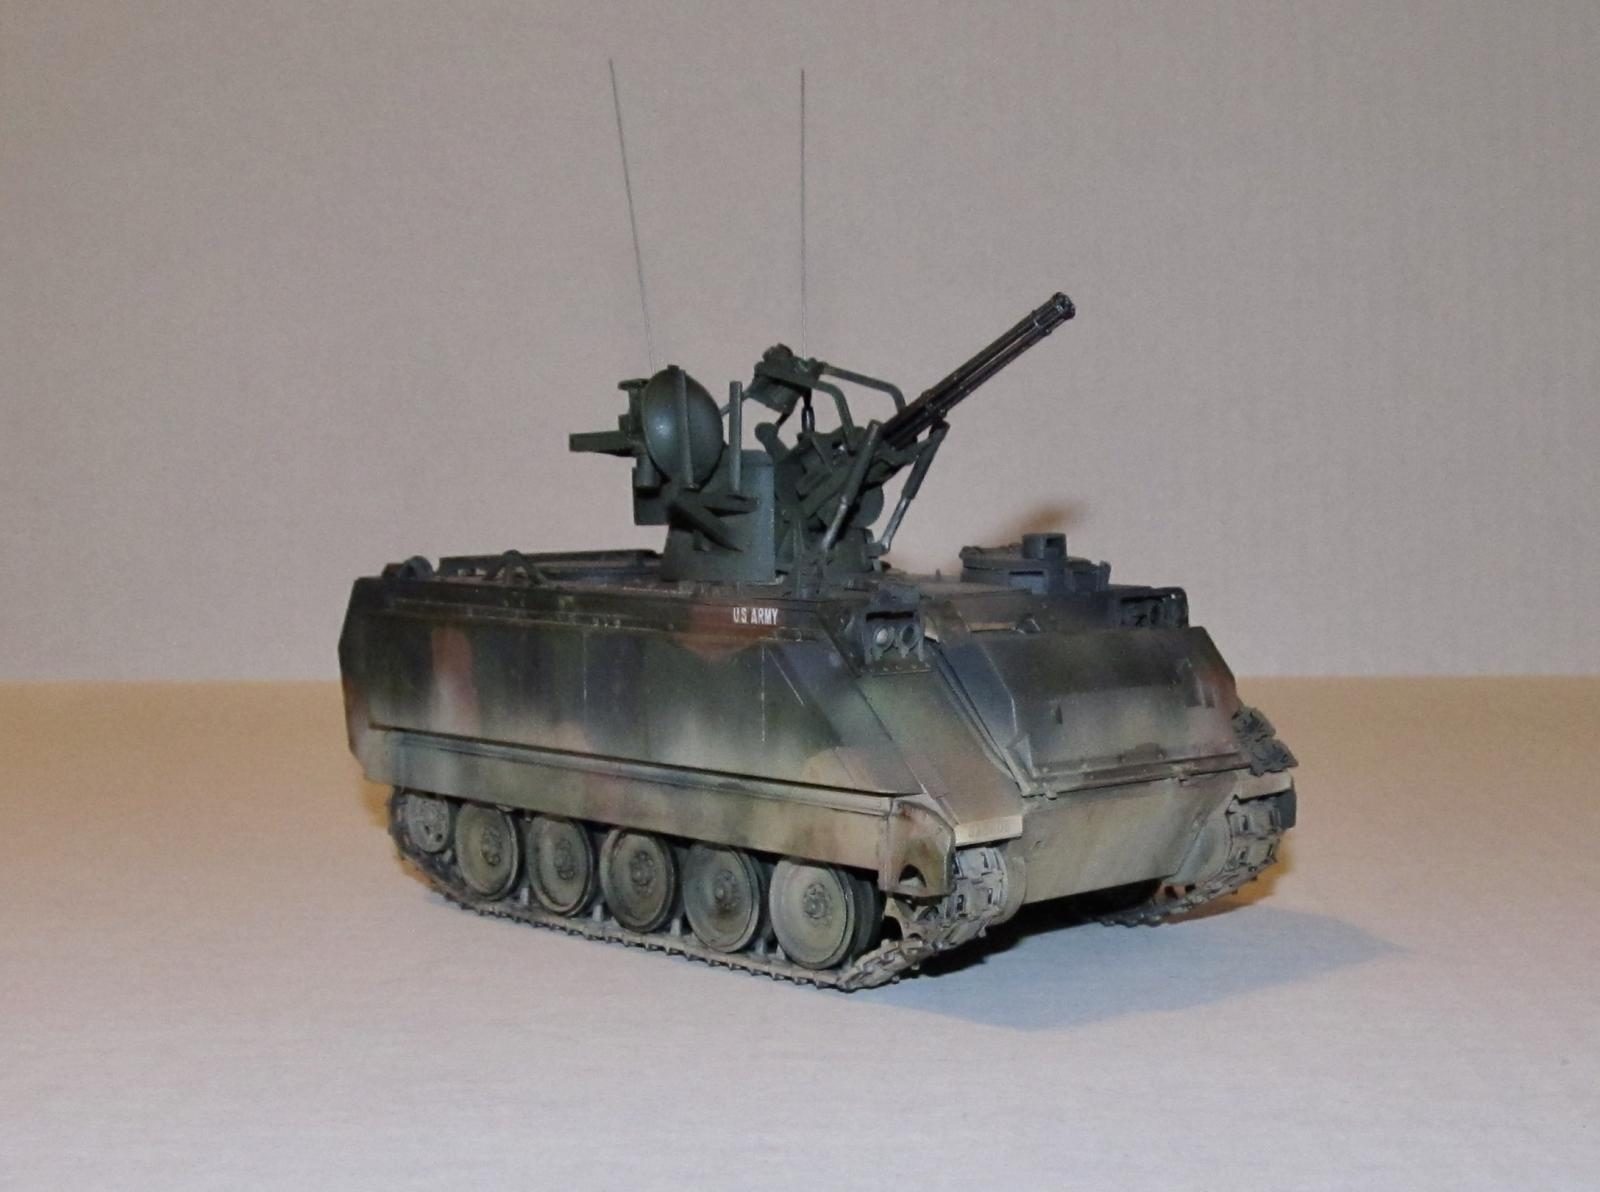
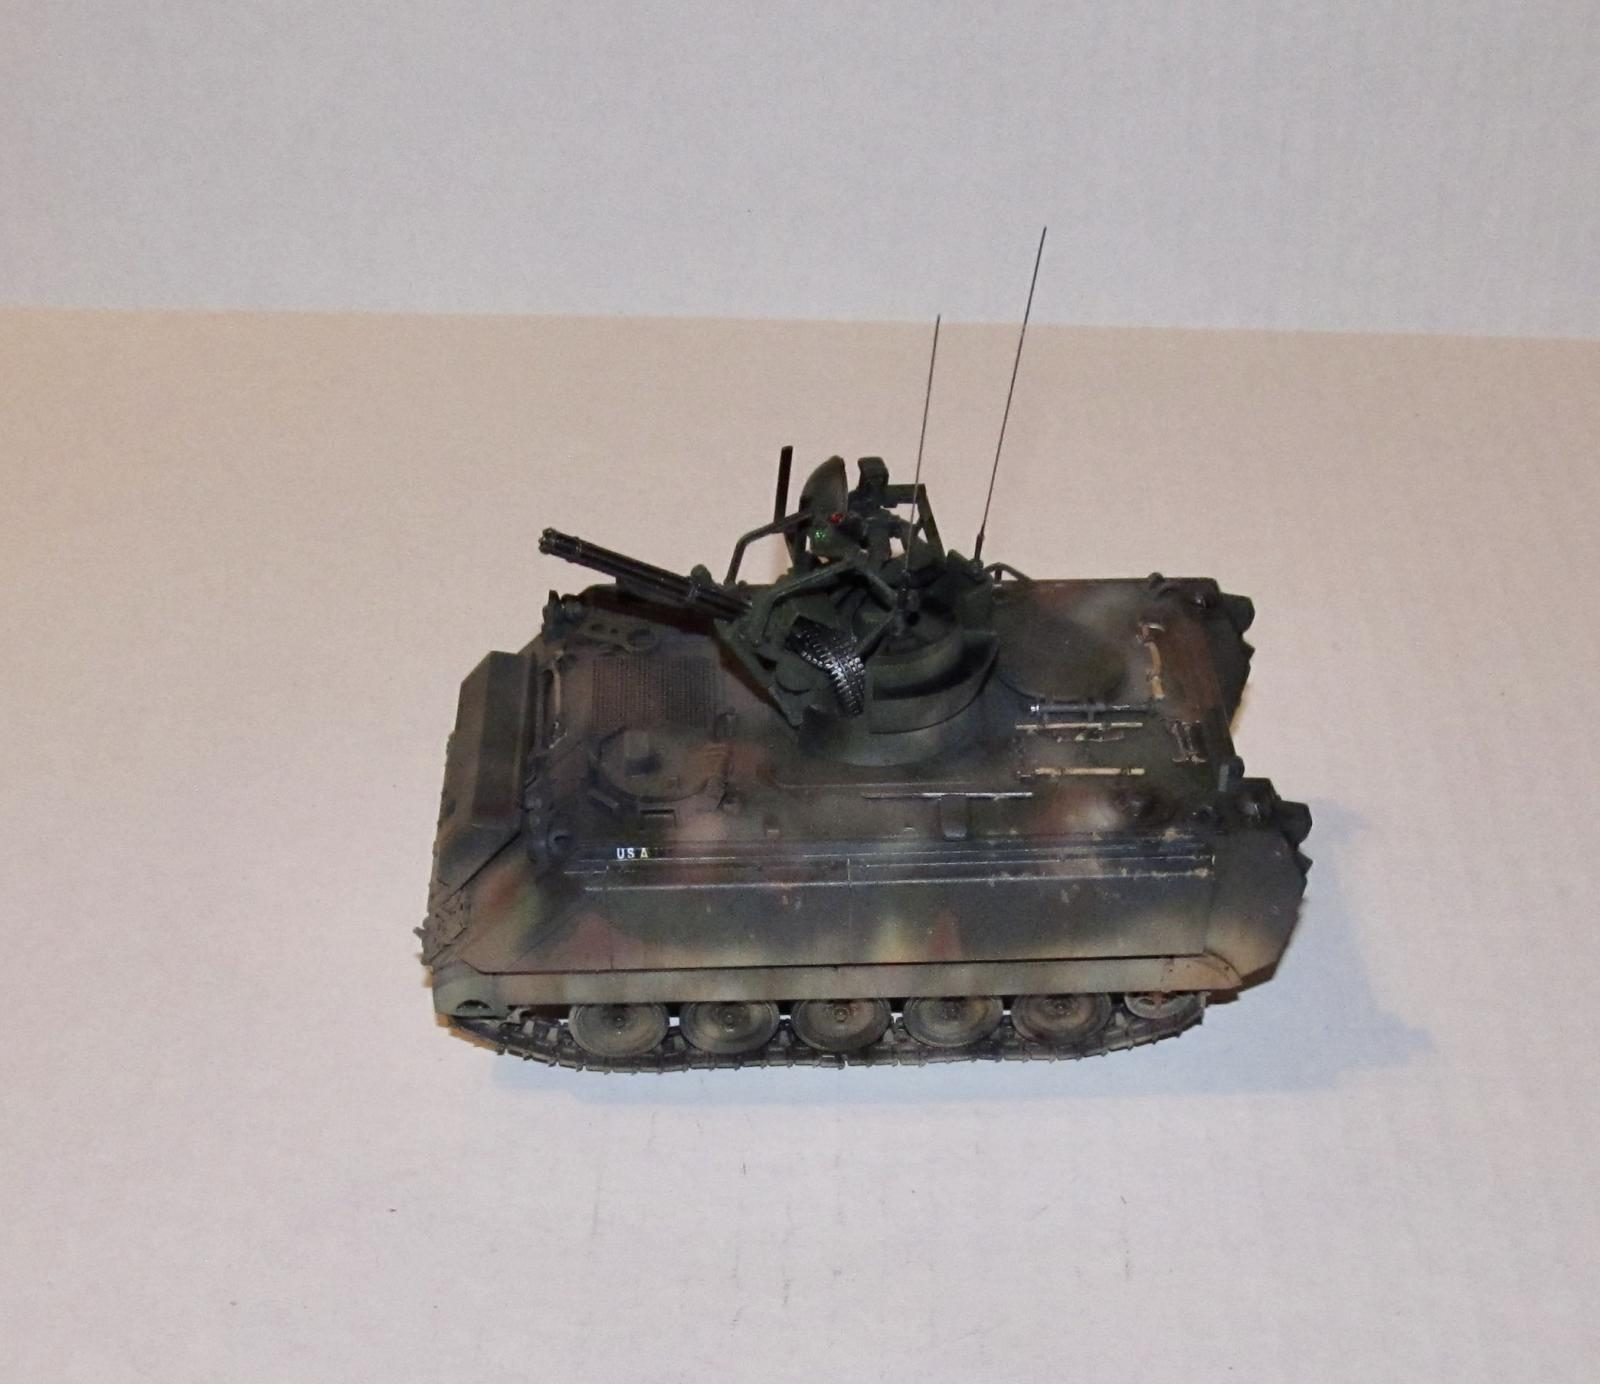
The M113 APC was the principle armored personnel carrier of the US Army, NATO and various allied forces from the 1960s to the 1990s till it was replaced in that role by various infantry fighting vehicles such as the Bradley, FV432 and Marder. Its utilitarian boxy design was adapted to various roles such as a command post, battlefield ambulance, mortar carrier, calvary reconnaissance and other battlefield roles. It was also developed into the M163 VADS. The M163 Vulcan Air Defense System (VADS) was developed by mounting the turret of a M167 towed AA gun turret with range only radar, fire control and power systems added to the M113 chassis. It carried 1100 rounds of 20mm shells of various types.
According to various sources, the M163 has a similar performance to the ZSU-23-4 Shilka, but it suffered from the lack of a search radar and did not have an enclosed turret.
The M48 Chaparral SAM and M163 were to be replaced by the Roland SAM mobile SAM system AND the DIVAD aka the infamous project turd M247 Sgt York in the late 80s. Instead these systems were replaced in the US Army in the early 1990s by the HMVV Avenger system (mobile Stinger SAM launcher) and M6 Linebacker (Stingers mounted on a Bradley IFV chassis.) Other allies such as Egypt, South Korea, Thailand, Chile and Ecuador still use it today.
THE KIT
Academy's M163 kit comes with a lot of options. You can build several different versions including an infantry calvary recon vehicle with the parts from this kit. The parts come in a dark yellow plastic with decent detail and a small amount of flash. It comes with the choice of two rubber band tracks and several sprues of single link track for those who prefer a more realistic sit to their tracks. The kit also has a small photo-etch sprue that contains grills and small detailed parts.
After building this kit you will have a lot of additional parts to throw in the spares box.
I also purchased a Master 1/35 brass 20mm Gatling gun as well as the plastic gun is a bit clunky compared to the brass version.
CONSTRUCTION
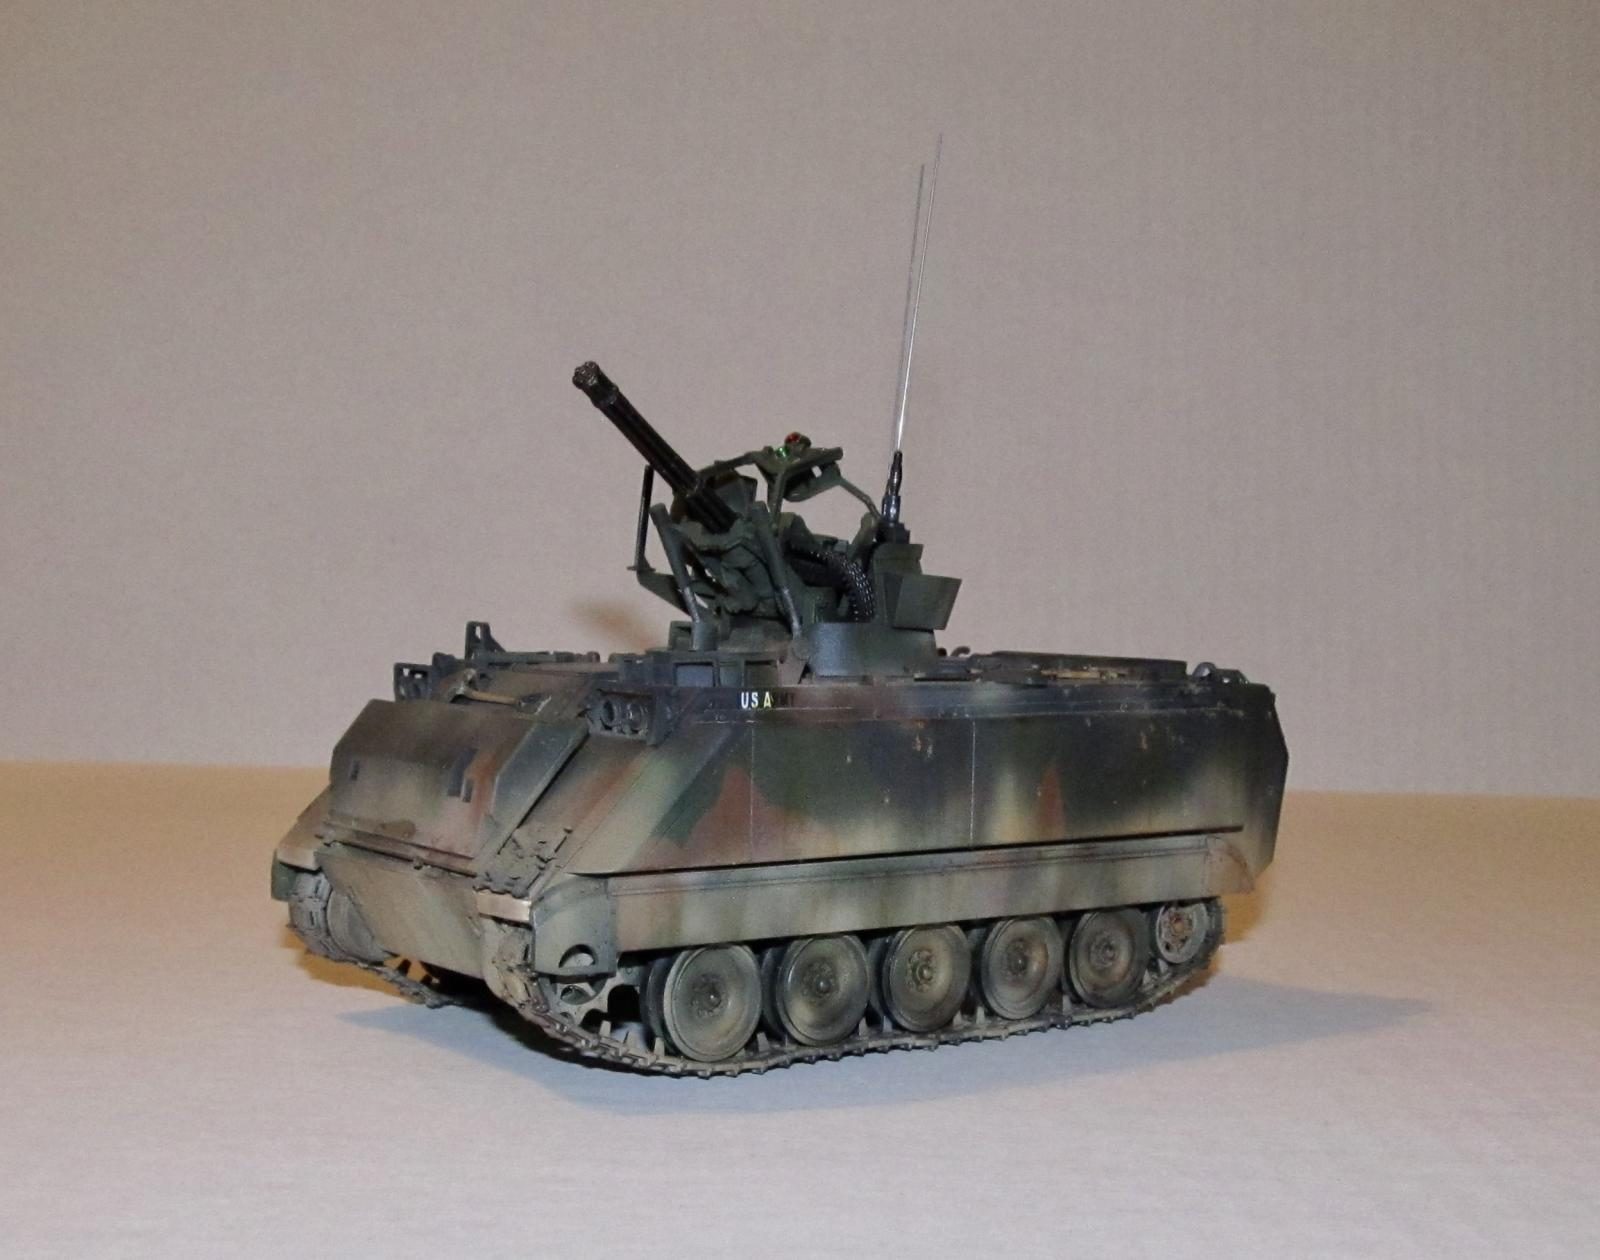
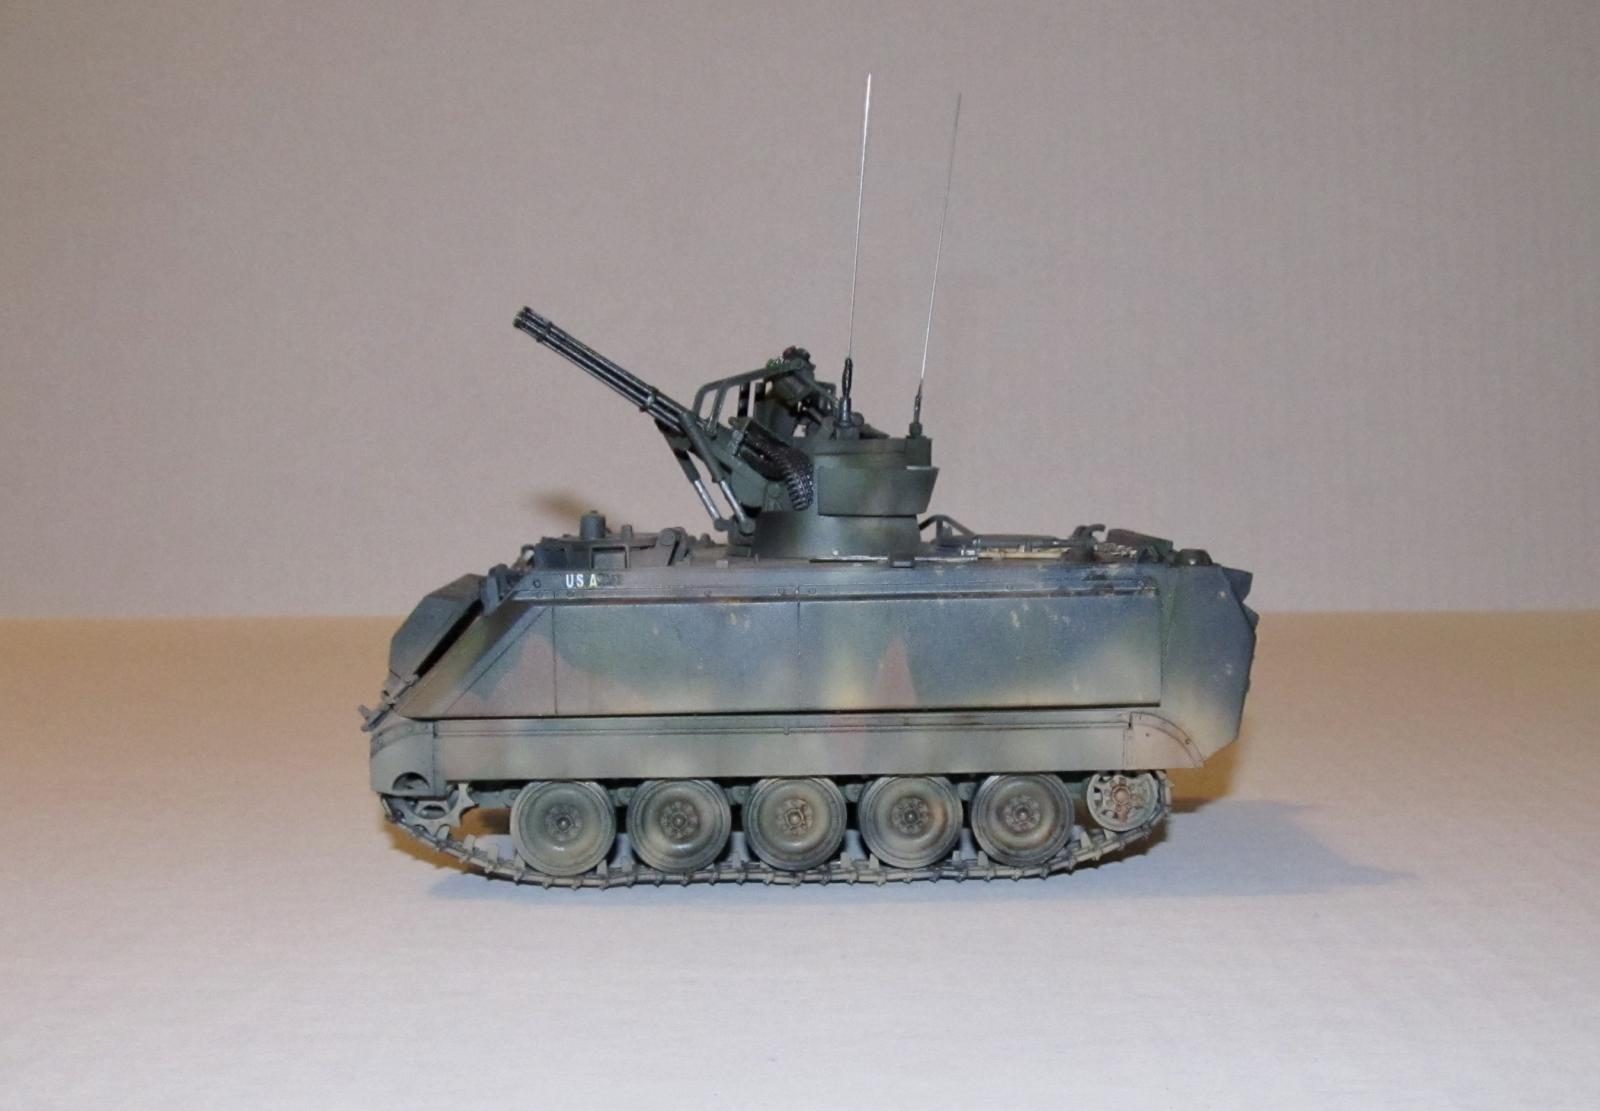
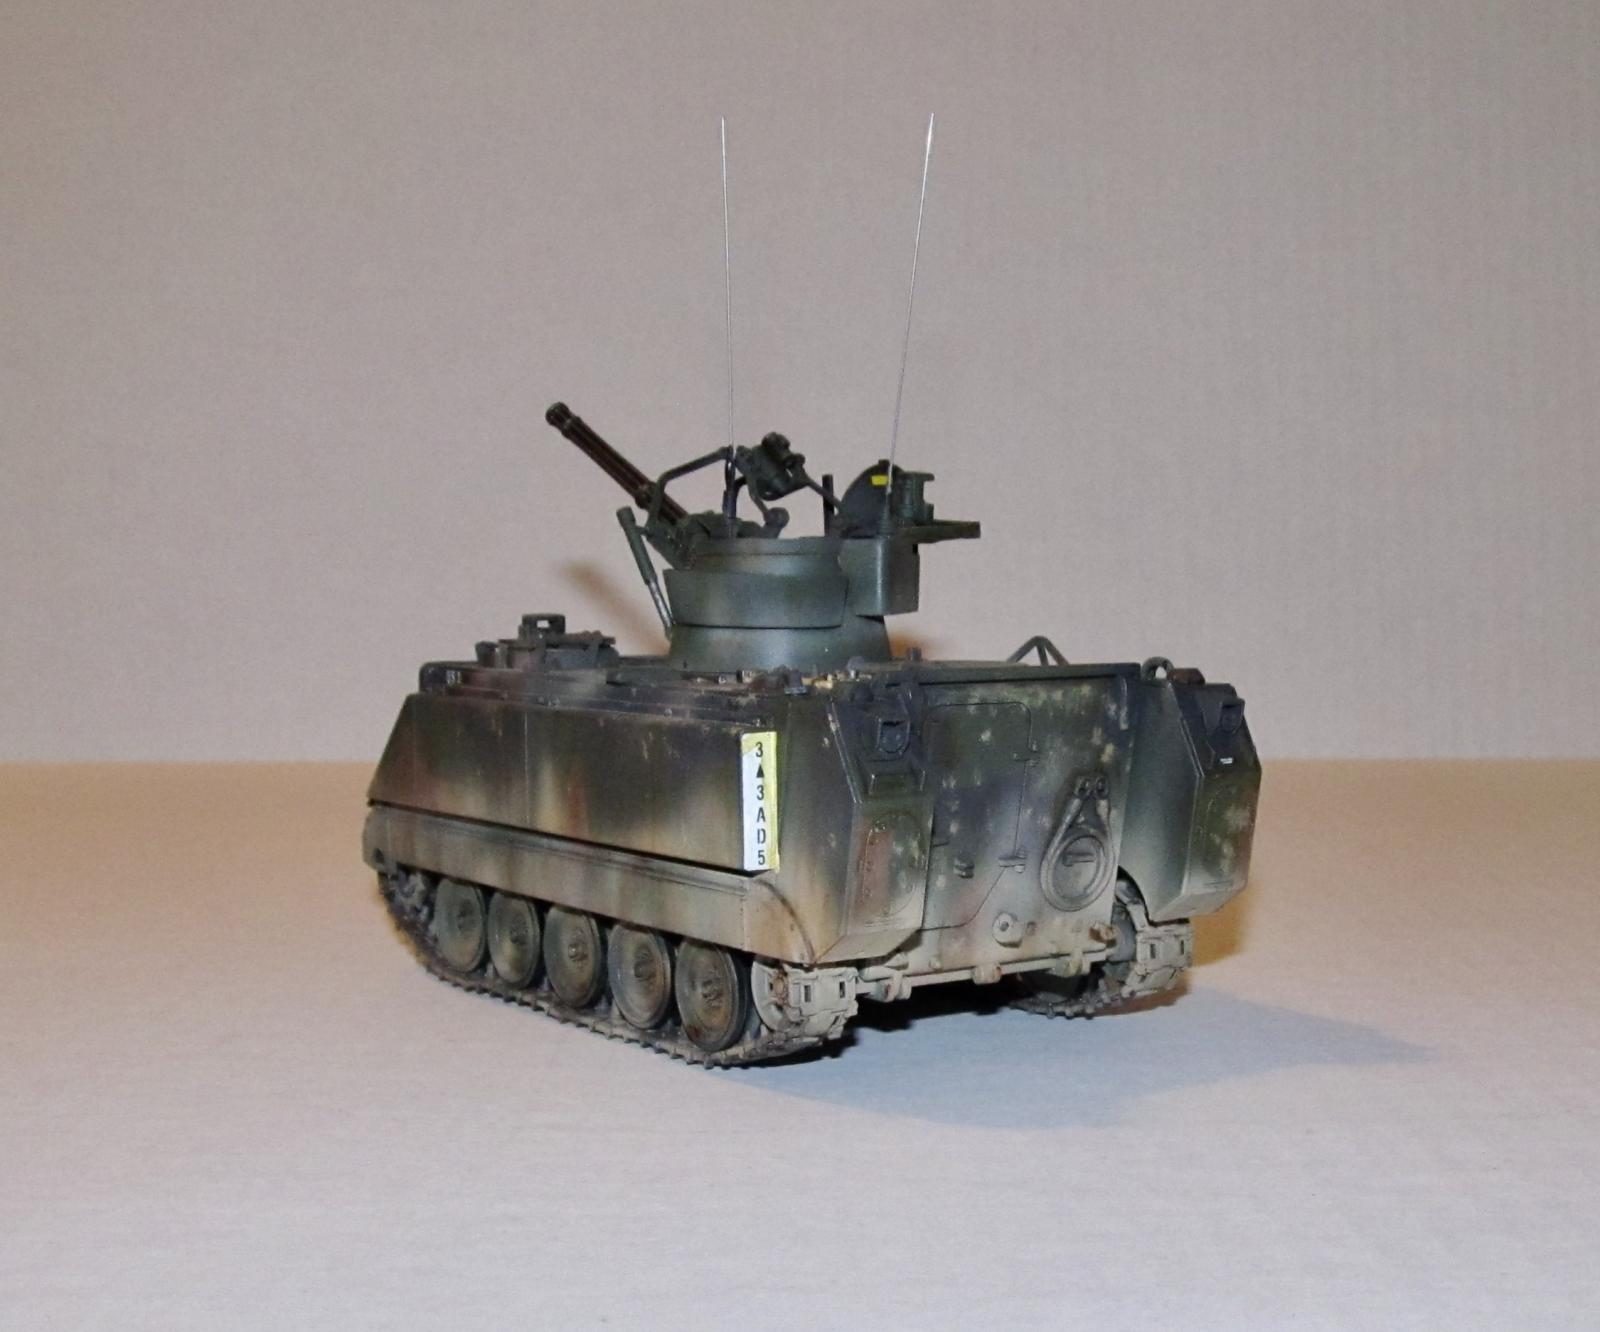
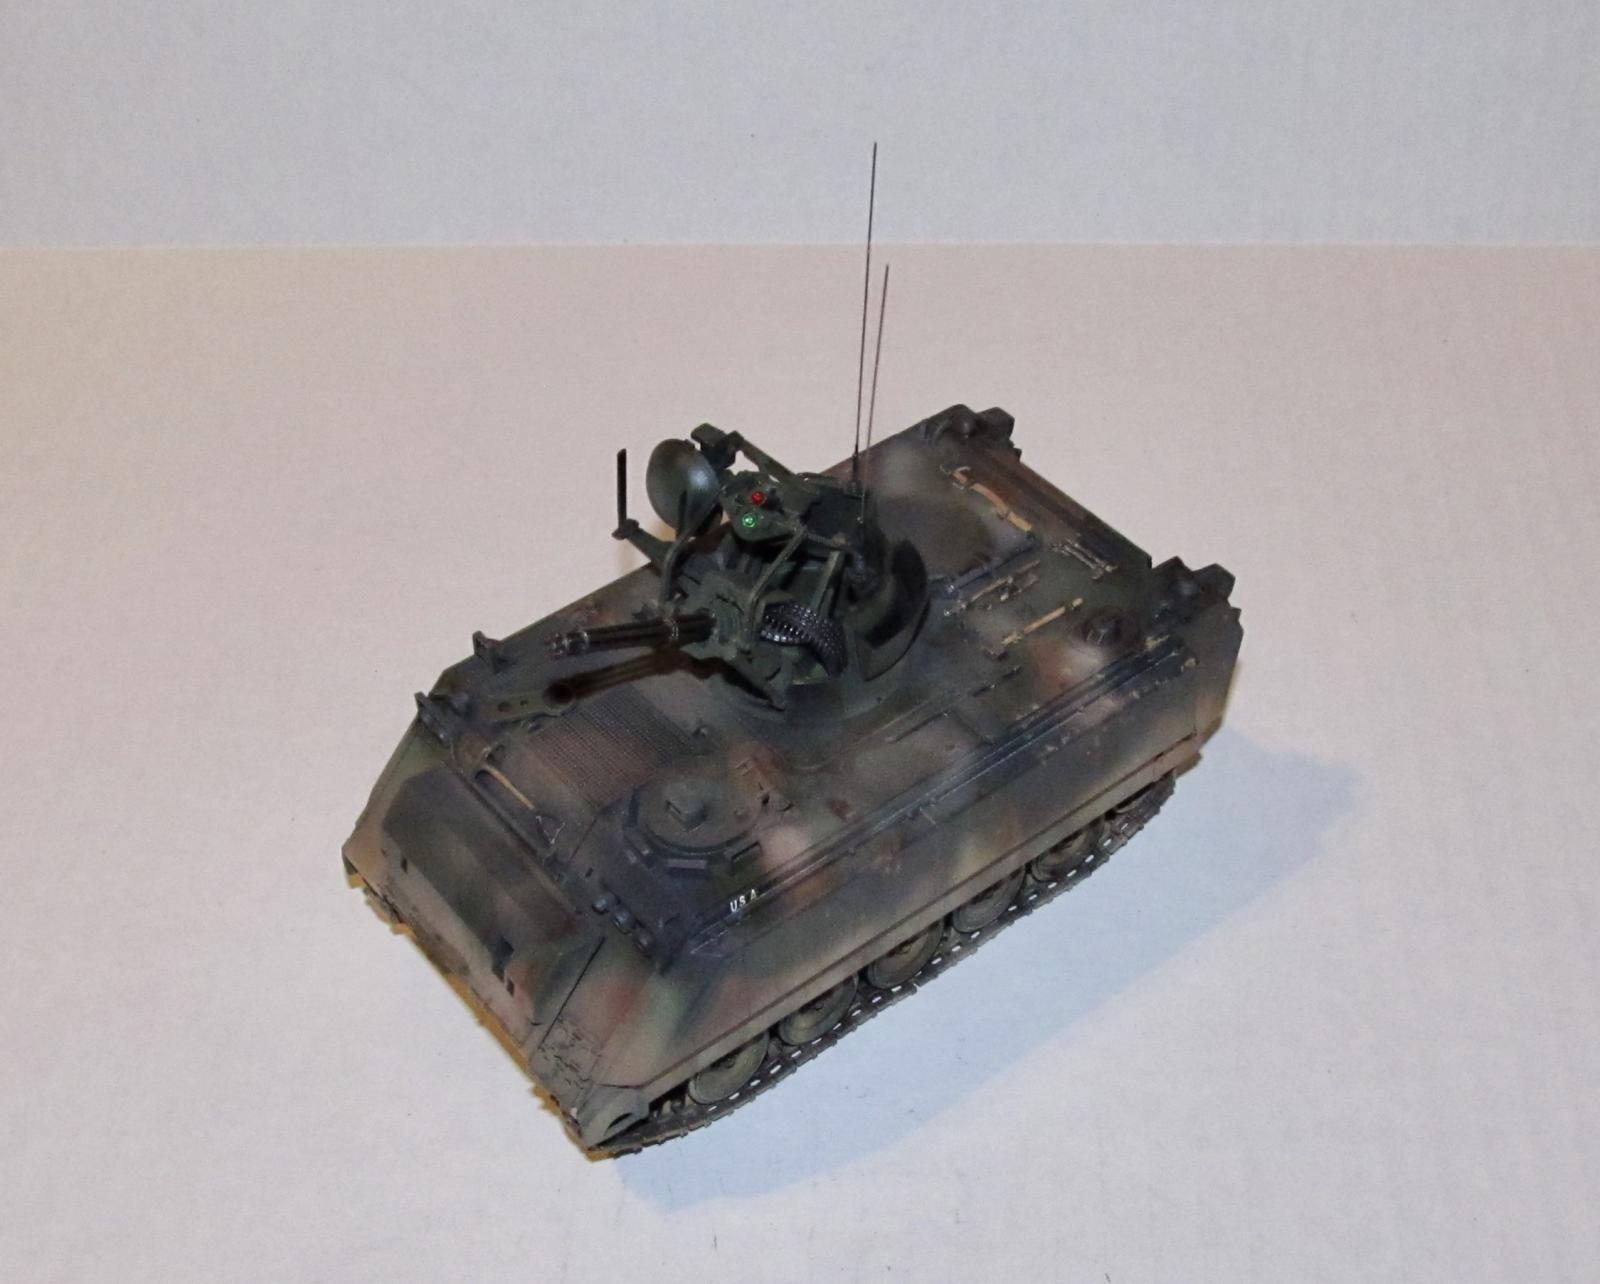
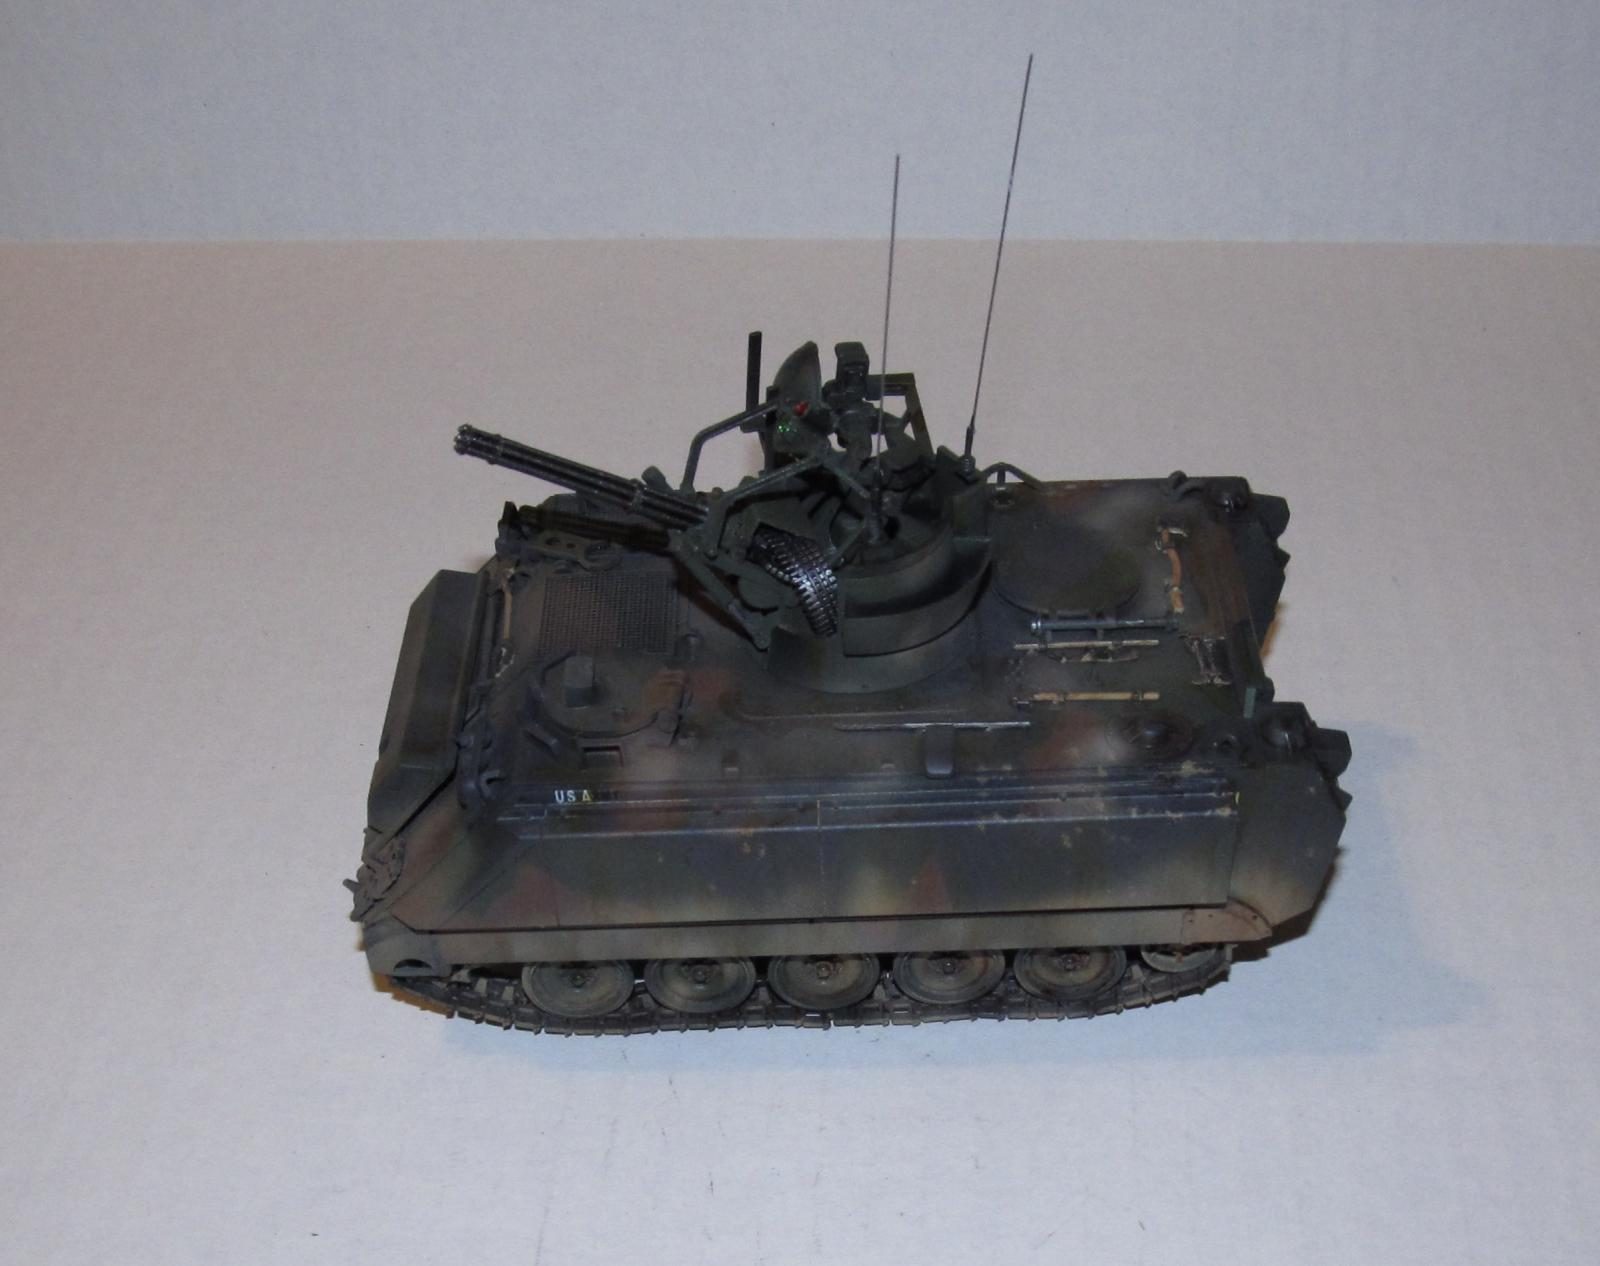
I began with the turret itself. The steps were straight forward as one builds the turret from the gunner's station up. Each piece was cleaned up of flash and/or mold markings before it was glued in place. I selected to elevate the gun to provide a slightly more dramatic pose. The ammo belts and Gatling Gun were left off till after painting. I also had to deal with some seams (filling and sanding) where the optical sensors were supposed to go.
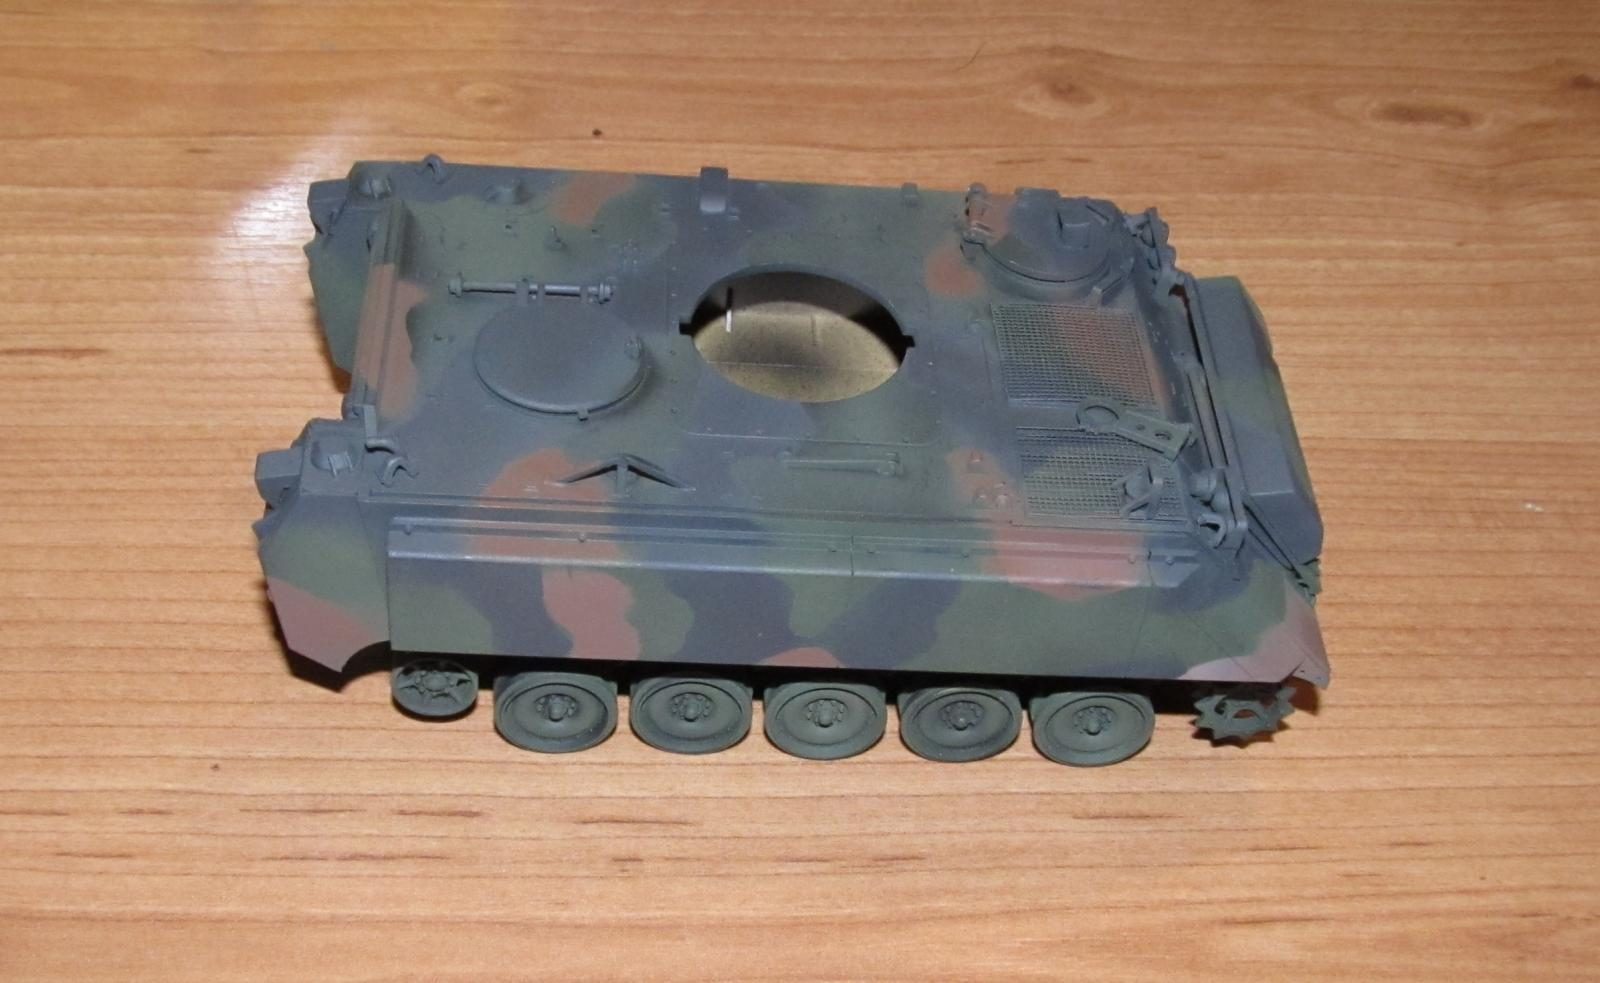
The boxy main hull was quickly assembled while the road and drive wheels were cut from the sprue and sanded smooth before being glued together. I picked the various options that went with the 3rd decal scheme.
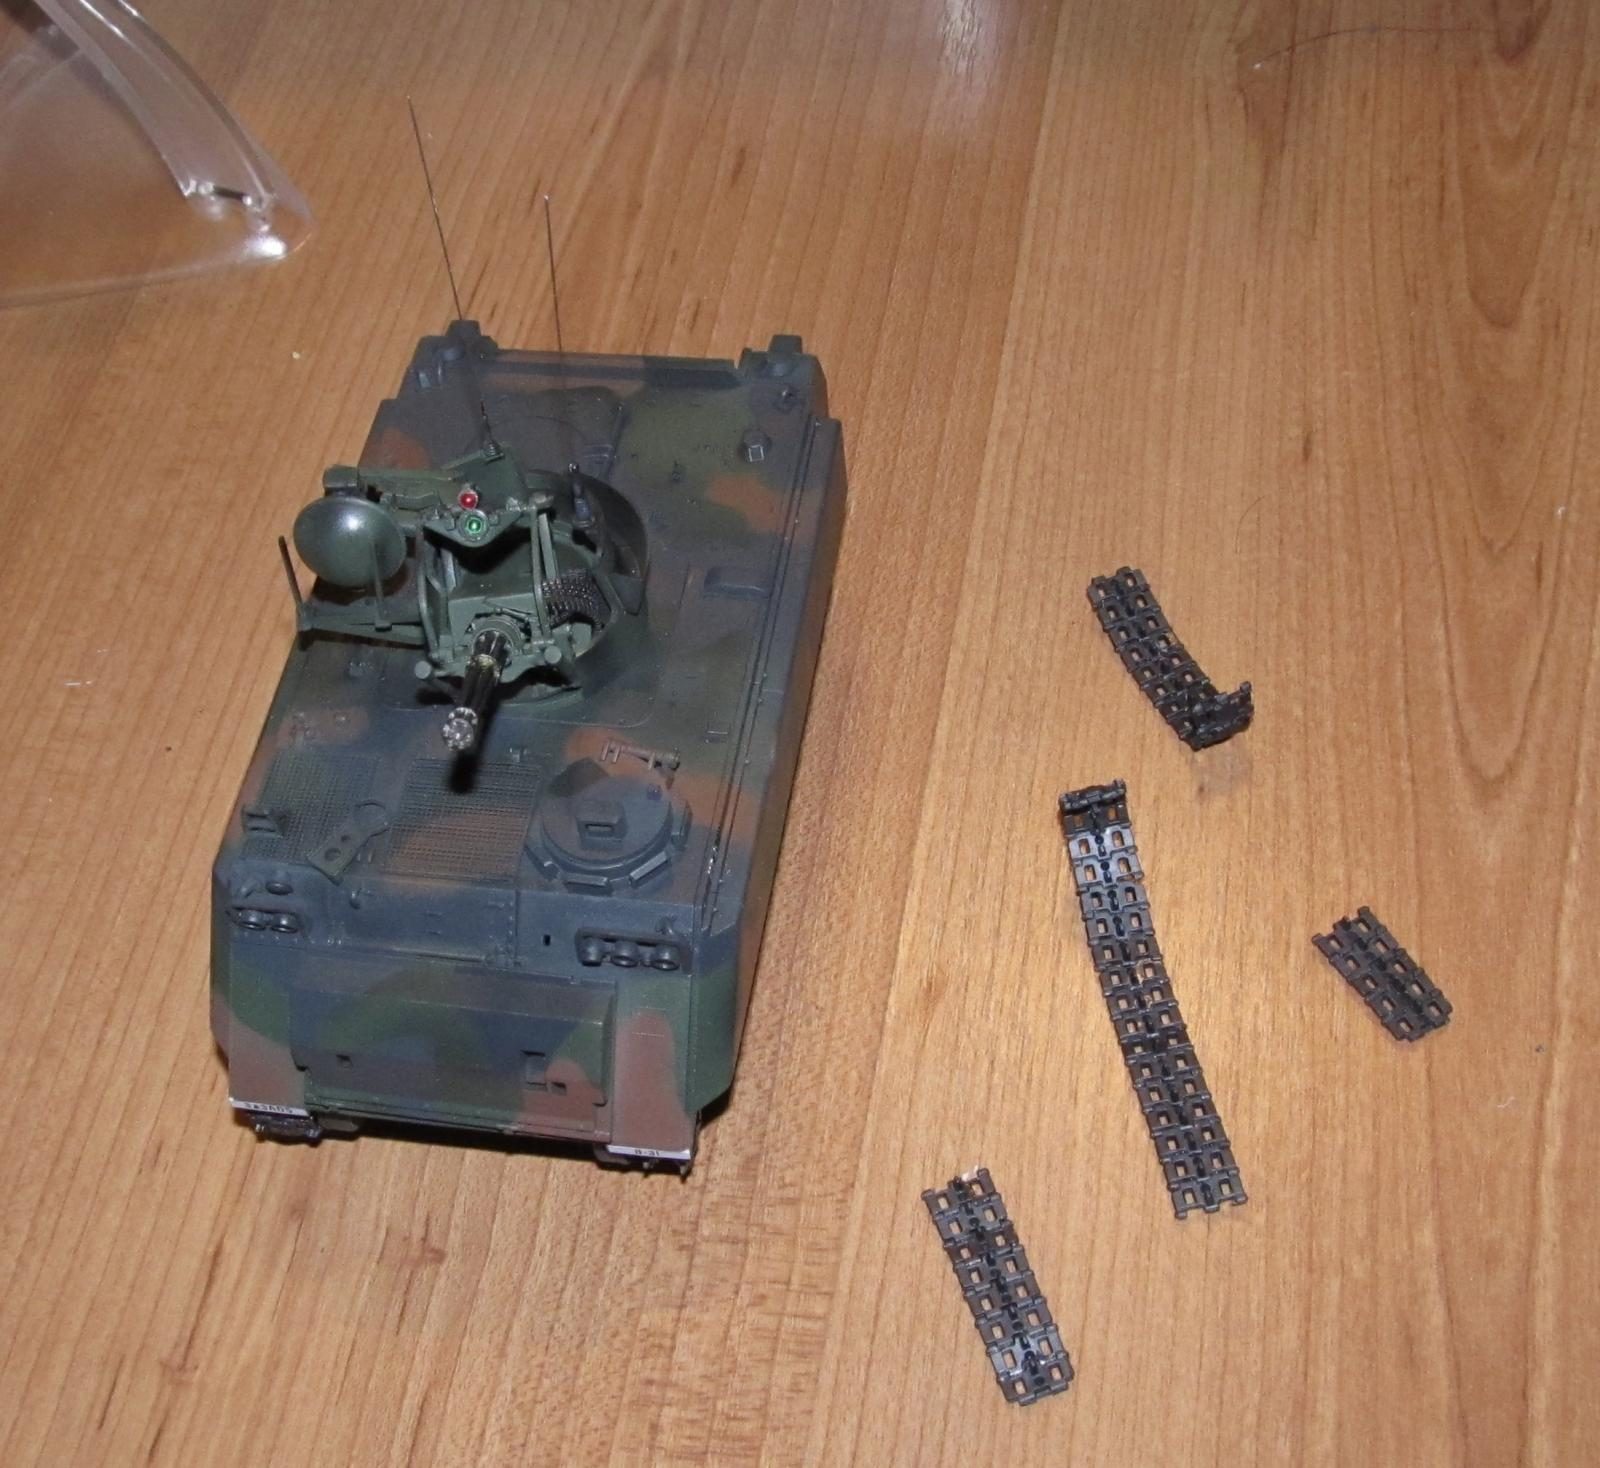
I didn't use the rubber tracks and used the individual links instead. Rubber tracks are easier to use, but lack the realistic sag and hills of individual links. However, individual links are a pain in the a*s and can drag things on and on which is what happened. Each link was cut and cleaned then glued into place. The hardest links to assemble were those around the drive wheels because of the curve and to make the the track sag in various spots.
The various small parts were removed from the sprue and cleaned up. I added the PE screens (secured with CA glue) and forgot to add the PE braces at the front of the M163.
COLORS AND MARKINGS Part 1
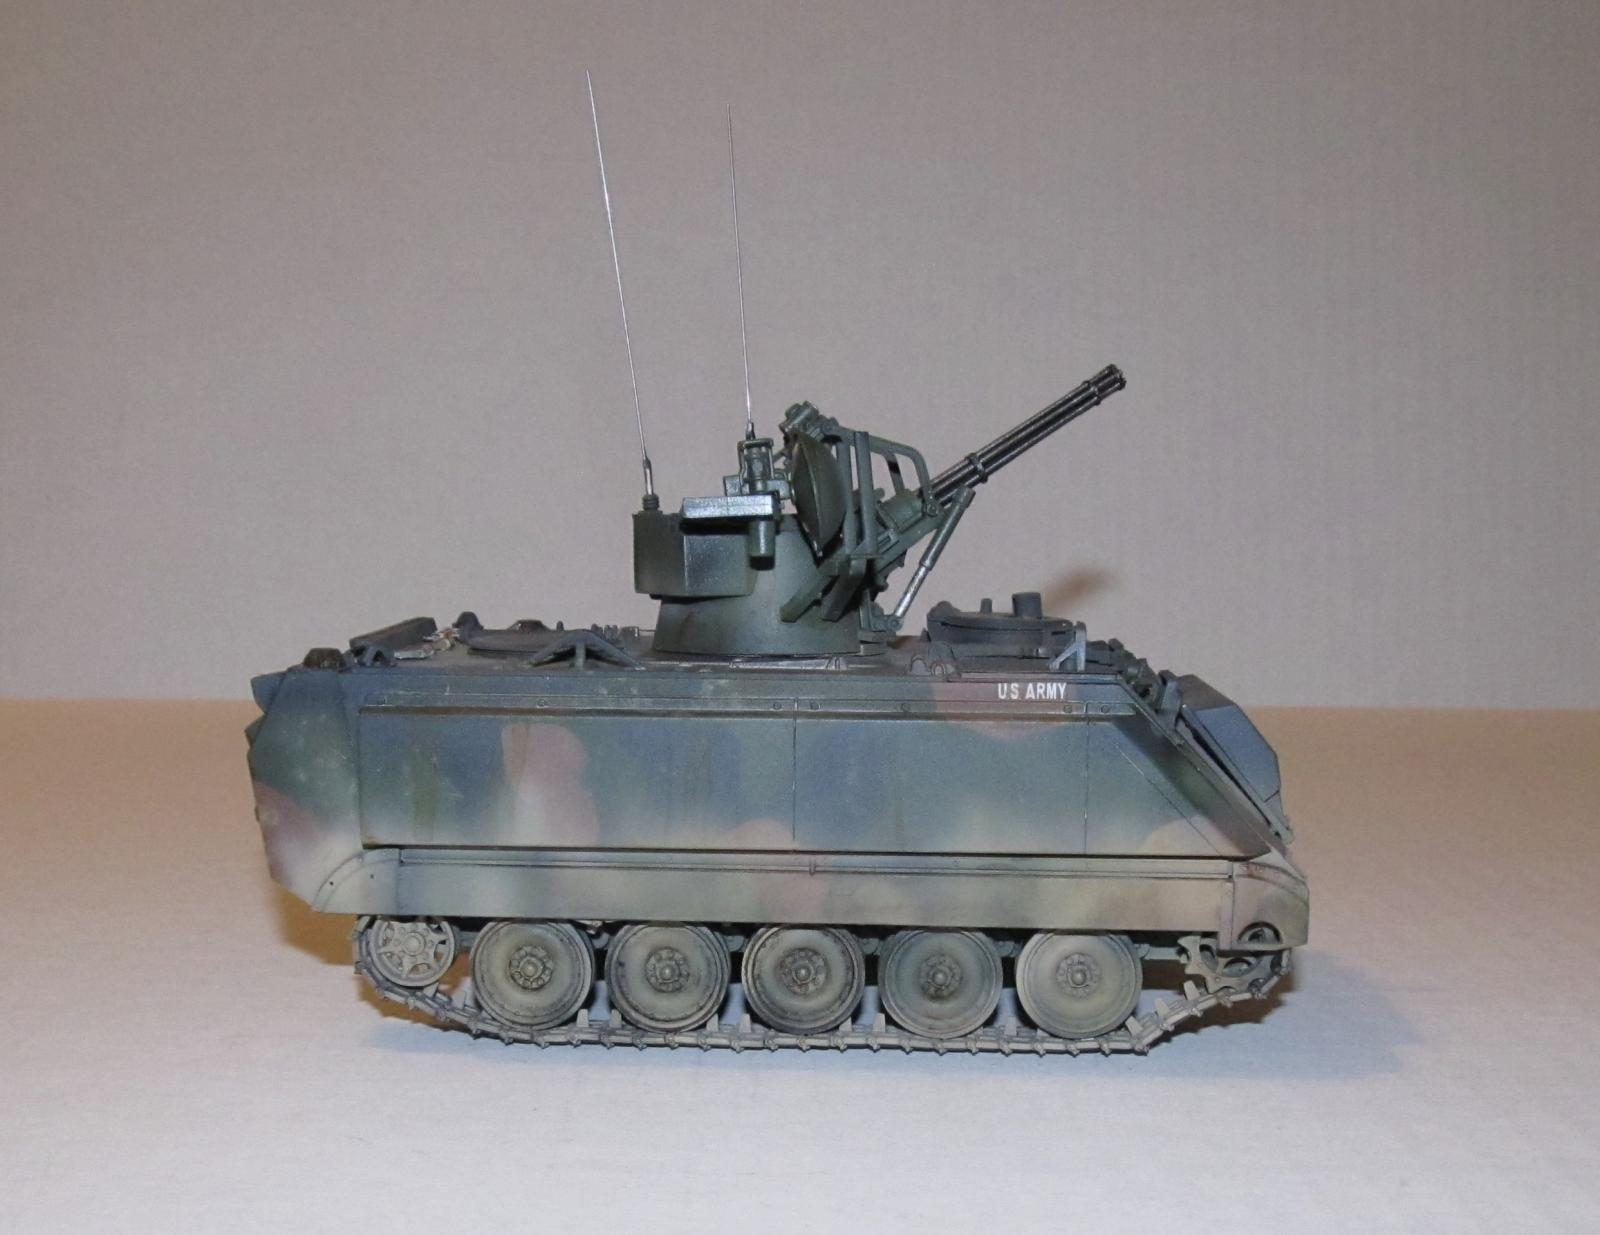
The Academy kit came with three options for the M163. Two of the schemes were in desert yellow and the last one came in the NATO camo scheme of NATO green, brown and black. I selected the NATO camo scheme because I had never tried to paint it before.
Painting
The first thing I did was prime the model with Stynylrez black primer. Once dry to the touch I sprayed on Tamiya NATO Green in a mottled pattern. The turret was painted NATO green at the same time. I let it dry overnight before I masked off the green areas (based on images I found on the internet) and sprayed on Tamiya NATO Brown in a similar mottled pattern. When the paint was dry, I masked off the NATO Brown areas before spraying on Tamiya NATO Black.
The glued together track sections were primed and sprayed metallic grey. The black rubber center sections were brush painted flat black.
Lastly, the turret interior was painted based on the few photos I found on the internet and some guess-timates.
FINAL CONSTRUCTION Part 1
The Master brass 20mm Gatling Gun was assembled together. I originally wanted to solder it together but my soldering skills are rusty so I passed. Instead I used CA glue to secure the brass parts together. The assembled gun was primed then painted metallic grey/gunmetal with the muzzles dry brushed with dark aluminum to make them stand out. The turret needed some extra details as I added some MV lenses to simulate the lens of the optical trackers which looked more like the real thing (secured with CA glue) and drilled out the antenna mounts so that I could add cut lengths of metal wire to simulate radio antennas.
Next up, the left and right side tracks were glued in place. This was the most fiddly part of the build even though I did some careful planning to form the track sections to make them easy to add. I used a lot of Tamiya extra thin to secure each section to each other.
The final parts (the tools) were added then painted after they were glued in place.
COLORS AND MARKINGS Part 2
Decals and Gloss Coat
The NATO camo option has some decals that need to be added to the model so I sprayed on Vallejo gloss coat then let it dry before adding decals. Once the decals were added then I began the weathering stage.
Weathering
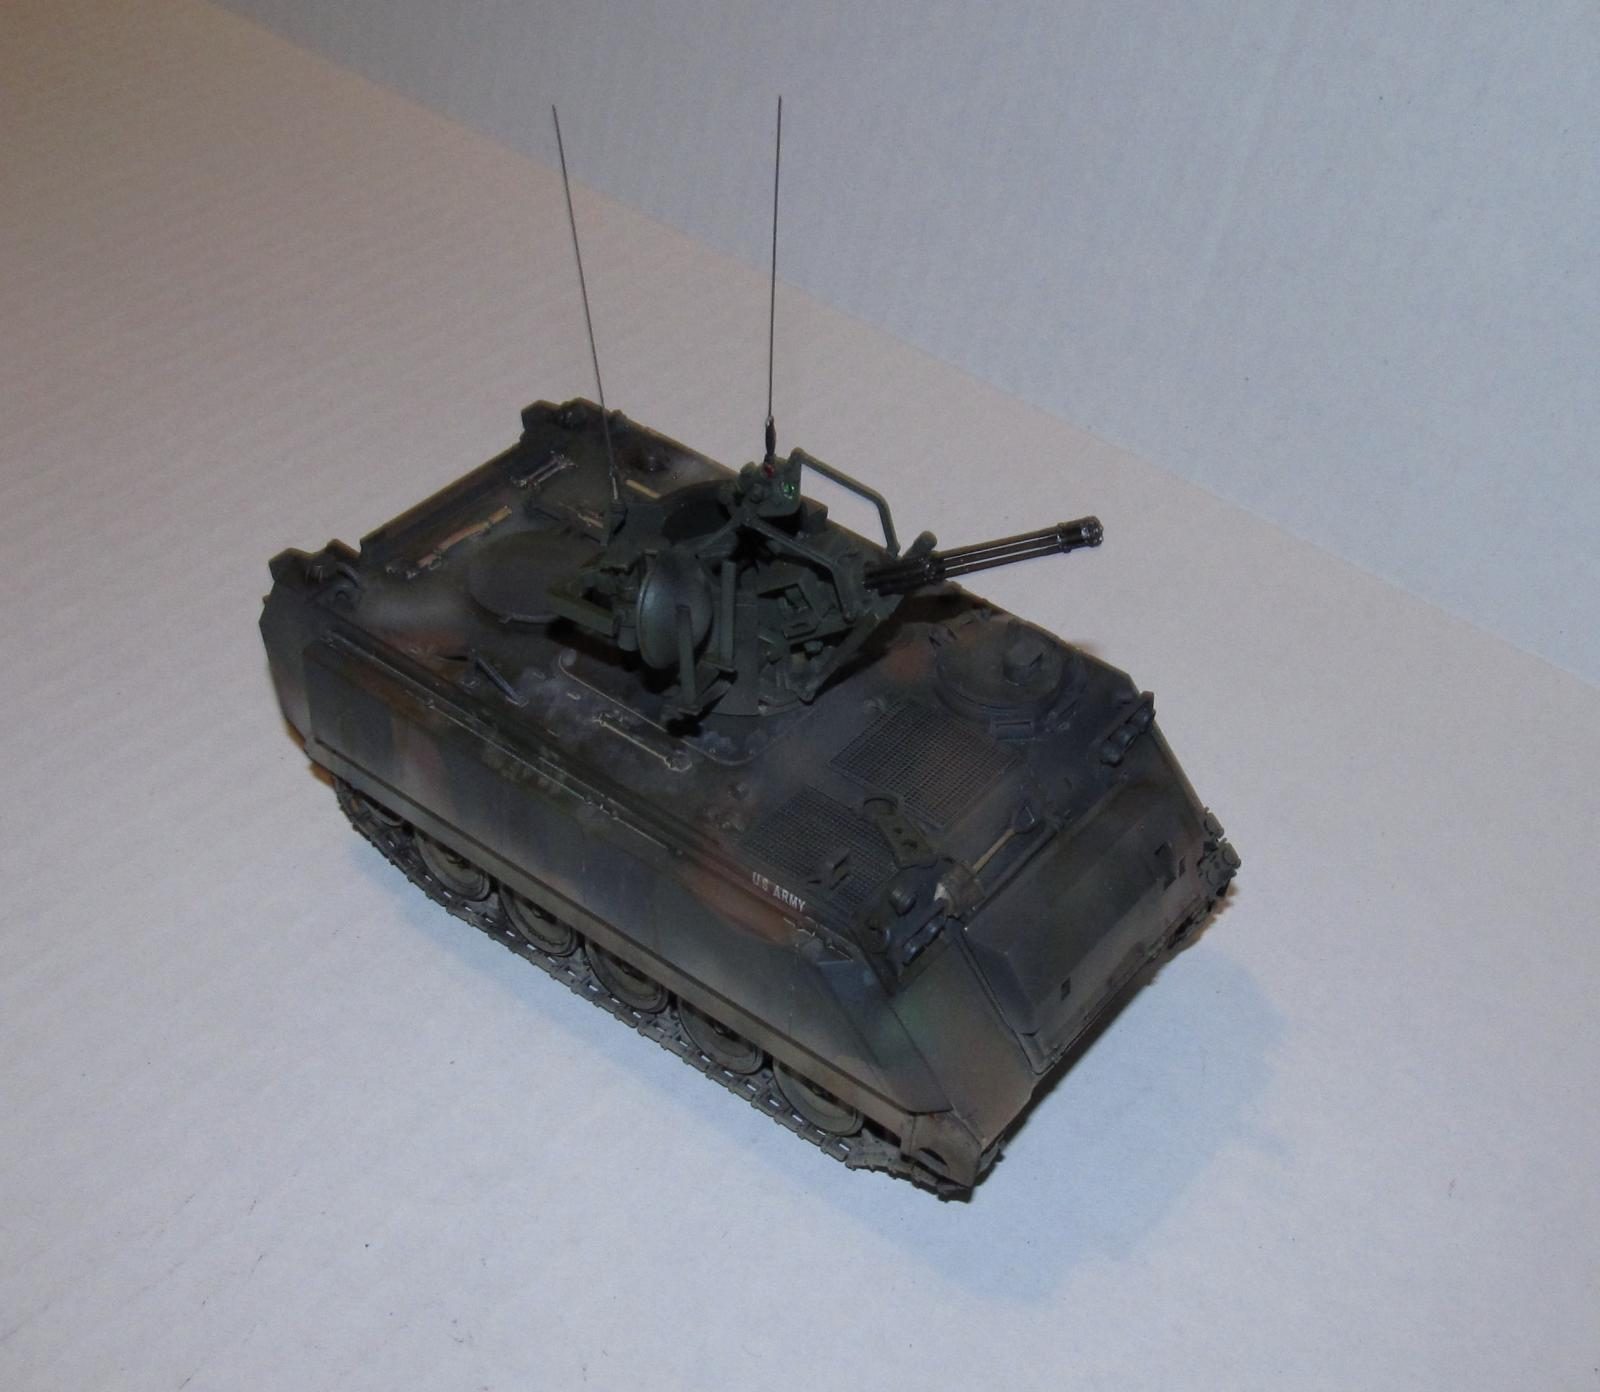
I used this model to do some weathered/rusted chipping on the hull, but I realized that the M163 was made from Aluminum so I didn't use any rust. I used a thin paint brush dipped in thinned desert yellow and buff paint and ran it along various edges. I didn't do that too much.
The chipping was done with a soft graphite pencil. Based on the photos I had, I focused on top of the M163 box where 20mm casings and belt material were ejected after being fired.
Next the tracks were weathered using a MiG desert enamel wash and Vallejo Acrylic rust wash.
I then sprayed on a coat each of thinned desert yellow, deck tan and buff paint (70% alcohol and 30% paint) all over the tracks and lower portion of the hull (front, sides and back) I tried to make the paint coverage complete so that the dirt could be seen from all angles including the inside areas which I did not do well in my previous armor reviews.
Next up I randomly placed a number of oil paints (black, burnt sienna and raw umber) dots to add variation in the dust layer and base paint on the side of the hull. I ran a flat brush dipped in turpenoid thinner down the hull to create streaks. Next I used a thin brush to thin out each streak some more and then a damp Q-tip to remove any extra paint that looked out of place or excessive.
Lastly, I used a combination of enamel and watercolor washes to add the last layer of weathering.
This was more weathering than I normally do for armor and it shows. I think it was a much better effect than my previous slap dash rushed results.
FINAL CONSTRUCTION, PAINTING AND WEATHERING Part 2
I realized that I made an oops when I forgot to add the PE braces at the front of the hull. Instead of leaving them off, I made an effort to add them. The PE braces were added using CA glue and left to dry for a week. I masked off portions of the front of the hull to repaint those areas using NATO Green and Brown.
After the paint was dried, I had to recreate the weathering I obliterated. It turned out to be less of a pain than I expected only because I didn't weather the front as much as I did the sides (again, based on photos I found on the internet.)
I sprayed the model with Tamiya Flat Clear to seal everything in.
CONCLUSION
The Academy M163 was fairly easy to build, but the individual track links were fiddly and need some preparation to make them work. I like how the weathering (if a bit excessive) turned out as I used a few new weathering techniques and materials that I hadn't used before. The brass 20mm Gatling Gun certainly looks a lot better than the plastic original.
I can't say this is the most accurate M163 (probably not) but it looks the part and isn't all that far off from the pictures I've reviewed on the internet. Definitely for modellers of all levels even if it is a bit of a minor challenge for the beginner.


Nicely done, Dan. @dbdlee
Great "how to" narrative, too.
Great work, I don't think that I've seen one before.
Awesome job. During Operation Desert Storm in Iraq, the M163 VADS which were attached to our Germany-based 2nd Armored Division (Forward) Brigade, were used to very great effect in a "troop suppression" mode on dismounted enemy soldiers and on BMPs. The 20mm was very impressive.
That's a great job, Dan! I have to say the first thing I admired was your excellent weathering, with the follow-in reading justifying it.
Congratulations!
Dan your M163 looks exactly like it should look after a road march in Germany. And BTY, that ROR rarely worked after being rattled around on hard surface roads. And you're correct the system needed an early warning radar which the FAAD radar system was to correct. But that's another story.
1 attached image. Click to enlarge.
Great build Dan, I like it a lot!
Thanks everyone! I appreciate the comments and insights from those who have seen the real life item up close and personal.
🙂 ... Greetings ... 🙂 :
Nice work on this one Dan. Too tell you the truth, I never thought I would see this version, just seeing it brings back memories of Germany. Will we se this one on a diorama ? It already has the weathering.