Tamiya/CMK F4U-4 Corsair
One from the vault, back in 2002, before the dawn of digital photography. The Tamiya F4U-1D with the CMK resin conversion to create an F4U-4.
The F4U Corsair was supposed to be the next fleet defense fighter for the Navy when it was ordered in 1939, the fighter that would be at the forefront of the Pacific War everyone in the Navy knew was only a matter of time. Unfortunately, the early Corsair was not the kind of airplane one would give to wartime-trained pilots and expect them to operate successfully from a carrier deck. The Navy was fortunate that a back-up in the form of the Grumman F6F was available. By the fall of 1944, the Corsair the Navy had wanted to begin with - the fully carrier-capable F4U-1D - was entering squadron service just in time to meet the menace of the Kamikaze and realize its original potential as a fleet defense fighter.
The ultimate Corsair to see service in the Second World War was the F4U-4. The first prototype XF4U-4 took flight on April 19, 1944, followed quickly by four other prototypes. The airplane was powered by the R2800-18W, an excellent high-altitude engine that gave the airplane outstanding climb and speed performance up to 35,000 feet, which was what was needed for a fleet defense interceptor. The airplane was equally capable as a fighter-bomber, equipped with two 1,000 lb. bombs or eight 5 inch HVARs. With a top speed of 446 mph at 26,000 feet - a 50 mph improvement over the F4U-1D at the same altitude (the F4U-1D's best rated altitude was 20,000 feet), the F4U-4 was competitive with any other fighter in the world. Production models began arriving in late 1944, and 1,856 had been delivered by the end of the war in August, 1945. The last of 2,056 was delivered in April 1946, and the F4U-4 became the standard fighter-bomber of both the Navy and the Marines.
The Korean War was where the F4U-4 really got to show its chops. Operated by both Navy and Marine squadrons from carriers ranging along the Korean peninsula, as well as on land by the Marines, the F4U-4 Corsair was in action from the first day to the last, providing the definition of "close air support" to UN forces.
In the spring of 1951, the light carrier U.S.S. "Bataan" was operating in the Yellow Sea off the west coast of Korea with the checker-nosed F4U-4s of VMF-312. Among the experienced combat veterans in the squadron was 11-victory Second World War ace, Captain Phil Delong, who had made his reputation in the Solomons with VMF-212. Enemy opposition was stiff; the squadron had lost its CO, MAJ D.P. Frame, to small arms fire on April 4; on April 20, his successor, MAJ Frank Presley, was wounded by light AA.
On April 21, the squadron put forth a maximum effort, with the sixteen Corsairs flying a total 42 sorties, including nine armed reconnaissance missions. Captain DeLong led his division on one of these missions, over Chinampo, southwest of the North Korean capital of Pyongyang. Just as the division went "feet dry", 1st LT Godbey reported engine trouble, and was forced to bail out. Two other F4Us arrived to CAP Godbey until the rescue chopper arrived; Delong and his wingman, 1st LT Harry Daigh, proceeded on the mission.
Daigh was the first to notice four unknown aircraft closing from astern. He called bandits and DeLong felt his Corsair take hits as he split-essed to evade and simultaneously dropped his ordnance. As DeLong climbed back, Daigh spotted the attacker, a Yak-9P, and shot it down. DeLong proceeded to expertly dispatch two more of the Yaks, while Daigh caught number 4 and sent it north, smoking. In less than three minutes, the two Marines had shot down three North Korean Yak-9Ps and damaged a fourth; two days later, a North Korean pilot was spotted 20 miles north of the combat site, likely the survivor of the final Yak, though full credit for its destruction was never confirmed.
Godbey was rescued by South Korean troops and returned to the "Bataan" by helicopter. During the next three days of operations, VMF-312 flew 128 sorties - strike, recon, CAP, close air support and RESCAP - with only three aborts. The month's tour of operations was considered "unremarkable" at the time.
THE KIT
Hasegawa produced a 1/48 F4U-4 in 1981. Though the kit shows its age today - with raised panel lines and unseparated flaps - it can still be turned into an excellent and accurate model, particularly with a True Details resin seat and a Squadron Vacuform canopy. The kit decals, which allow the modeler to make an F4U-4 of VMF-323 "Death Rattlers," or one from VF-193 "Ghost Riders," are quite acceptable.
However, modelers have been wanting to see a "state of the art" F4U-4, with recessed panel lines, separate flaps, and a wing-fold option, similar to the Tamiya F4U-1 series. For those who want their instant gratification instantly, Czech Master's Kits (CMK) released a conversion set to create an F4U-4 from the Tamiya F4U-1D. The conversion consists of a well-molded resin cowling and cockpit, a forward engine accessory cowling and different lower wing mid-section, along with photo-etch parts for the cockpit and a vacuform canopy. A set of decals is included that attempt to do the well-known Glossy Sea Blue/Gull Grey and White F4U-4 from NAS Olathe in the 1950s, and a Korean era Corsair from VF-114.
The canopy is best replaced by either the standard Tamiya canopy for the F4U-1D if the modeler is making an early-version F4U-4, or the Squadron vacuform canopy for the F4U-4 if making the later version with the flat-pane windscreen. As to the decals, there are better decals for an F4U-4 available from both Aeromaster and SuperScale.
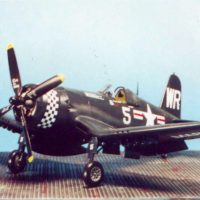
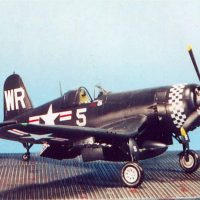
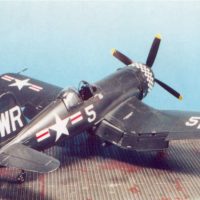
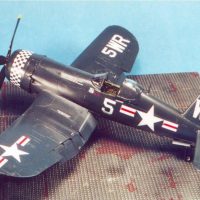
I elected to make a model of the F4U-4 flown by Phil DeLong in VMF-312, using the decals provided on the SuperScale sheet 48-500. From a photo in Barrett Tillman's "Corsair: The F4U In World War II and Korea", I determined that Delong's #5 was an early-version F4U-4, and opted to use the Tamiya canopy.
CONSTRUCTION
To begin, you take the razor saw to the forward fuselage of the Tamiya kit, cutting off the engine accessory cowling. Then sand off all the interior detail of the cockpit area on the fuselage halves.
I then painted the cockpit in accordance with the color drawings in the old Squadron "Corsair in Color" book, and installed it in the fuselage after I had glued the plastic halves together.
The next thing to do was the resin lower center section of the wing. This involved a lot of sanding to get the excess resin on the "back side" of the part down to where I could attach the plastic upper halves. This was a difficult fit, and I started wondering whether it would not have been easier to "kitbash" a Hasegawa kit with the Tamiya kit. This feeling became stronger as I realized the resin part would not allow me to assemble the wing as Tamiya had designed it, so there was a spar to support the outer wing panels properly. The resulting attachment is a very weak part, for which the only question of breakage is when it will happen. It happened twice to me before I finally got it through my head not to pick up the model by the outer wings.
My suspicions that a kitbash would be easier were completely confirmed when I had attached the center wing to the fuselage and proceeded to attach the resin part for the accessory cowling. If the part fitted the kit on the bottom, the top had a gap of 1/16 inch! This was enough that it made sense to make a cover from sheet styrene and fit it to create a smooth forward fuselage. Unfortunately, this meant complete loss of all detail in the area. A lot of putty, sanding, more putty, more sanding, and finally Mr. Surfacer 500 went into solving this as the air over the work bench went from lilac to deep purple. The final result looks OK, even though the overall shape is wrong with the area being more oval than the round shape it should be. I am completely convinced that kitbashing the Hasegawa nose would have been much easier.
The engine cowling is a beautiful resin mold, with the cowl flaps open. I used the Tamiya engine, even though purists would say it is wrong; to me, from a distance of six inches or more, an R-2800 looks like an R-2800 looks like an R-2800, and the final result certainly looks better than the molded-in engine of the Hasegawa kit.
Past all this, the rest of the model was assembled as one would assemble a Tamiya Corsair, and presented no problems other than the aforementioned lack of strength in the attachment of the outer wings. One could solve this by drilling in the resin lower center wing part, putting in a thick wire, creating a "tunnel" inside the plastic outer wings, and thus creating a spar. Unfortunately I came up with this idea after the model was complete; should the wings break again, I will take it under advisement.
I used underwing pylons from an ESCI Skyraider kit that I had in the parts box, since photos of VMF-312 Corsairs showed they had the later-version pylons - which allowed the carriage of light bombs as an alternative to the rockets - applied as a field conversion.
PAINT & DECALS
Painting:
Korean F4U-4s are simple: Glossy Sea Blue overall, including the wheel wells and the landing gear. I used Gunze-Sanyo "Midnight blue" for this. Once the model was painted, I mixed in a dollop of Gunze-Sanyo "Navy Blue" to lighten the earlier color, and applied lighter patches as subtly as possible to simulate sun and sea fading. Remember, the reason the Navy went with the Glossy Sea Blue finish was because the paint was very resistant to conditions at sea, so do not overdo this. When I see highly-weathered models of Glossy Sea Blue airplanes, my immediate reaction is, "there's someone who didn't do their research."
Decals:
I used National Insignia from an Aeromaster sheet, "Air War Over Korea No. 1" to get the large-size insignia carried by VMF-312 Corsairs (check this when you do Korean Corsairs - the insignia size differed on different airplanes). I opted to use two sets of two small red star decals from an Aeromaster MiG sheet, to make the airplane as it would have been after the Yak-killing mission. The decals from SuperScale 48-500 went down easily under a coat of Micro-Sol.
Final finish:
I applied some greyed-out exhaust stains, and some gunfire stains, attached the canopy and prop and painted the navigation lights using Tamiya Clear Red and Clear Green over Flat White.
CONCLUSIONS
The CMK kit has an excellent cockpit, and an excellent cowling. If you are determined to do this and have an old Hasegawa F4U-4 lying around, I would rob that kit of the lower wing center section and the accessories cowling, as the fit will be better and easier. Overall, the look of the completed model tells me Hasegawa could make a bundle if they re-did their earlier kit.
POSTSCRIPT: When moving back in 2005, all the problems outlined above came true when I dropped the model and it disassembled into its component parts, and not in a way that would lead to an easy repair. Sadly, the model departed the collection and went to the local landfill. I still think sometimes of getting the Tamiya and Hasegawa kits and having a go at another kitbash.
Review kit courtesy of me and my wallet!


That's a lot of work at this Corsair, Tom and a really beautiful result. It is very frustrating when the structural rigidity of the model is not good.
I liked reading Phil Delong's great story!
The following is an unpaid personal advertisement ( 😉 ):
You can read more about Phil DeLong and other interesting naval aviators in Korea in my book "Holding the Line: The Naval Air Campaign in Korea".
Tom,
Thanks for taking us through your build of this kit. It sure looks good, despite any troubles you may have encountered.
Cheers,
Scott
Very nice build Tom.
Great result from all that work. It is a pity that it crashed.
Nice job on the conversion Tom and thanks for the info on what challenges you had making that fine model.
An oldie but goodie - nice Corsair Tom.
Looks great !
That's a nice result from this oldie, Tom.
Thanks for sharing us the additional and interesting information.
Wow, is that already so long ago I read your article the first time? Some 18 years? Your build inspired me to recreate a dash-4 as well, then, but the project came to an early halt. The CMK stuff is still in my stash, the canopy had meanwhile turned dark yellow and the resin cowling obviously shrunk. Nevertheless I´ll try to use some cockpit parts for the F4U-4B kitbash of the Korean War group build.
Tom,
I want to understand your comment "When I see highly-weathered models of Glossy Sea Blue airplanes, my immediate reaction is, "there's someone who didn't do their research."' I'm currently researching Korean era Corsairs for my next project and the image I attached shows a highly weathered Corsair. The image looks like the base coat is glossy sea blue. Can you explain why this plane looks so weathered? I'm just trying to understand the contradiction.
1 attached image. Click to enlarge.