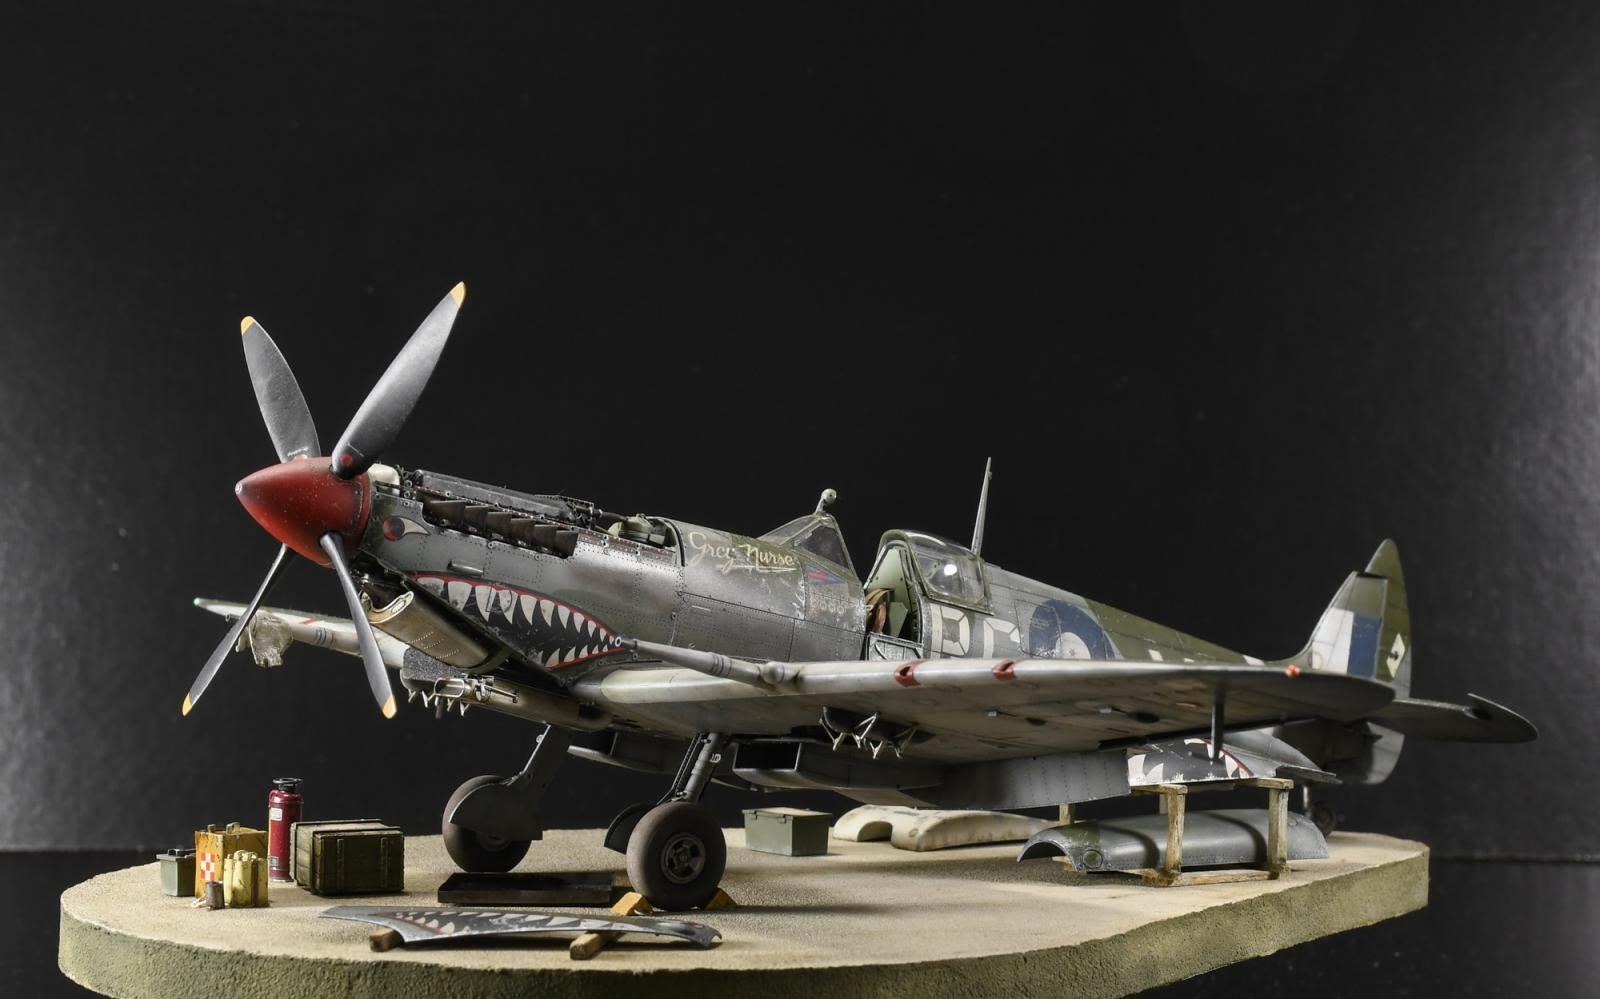
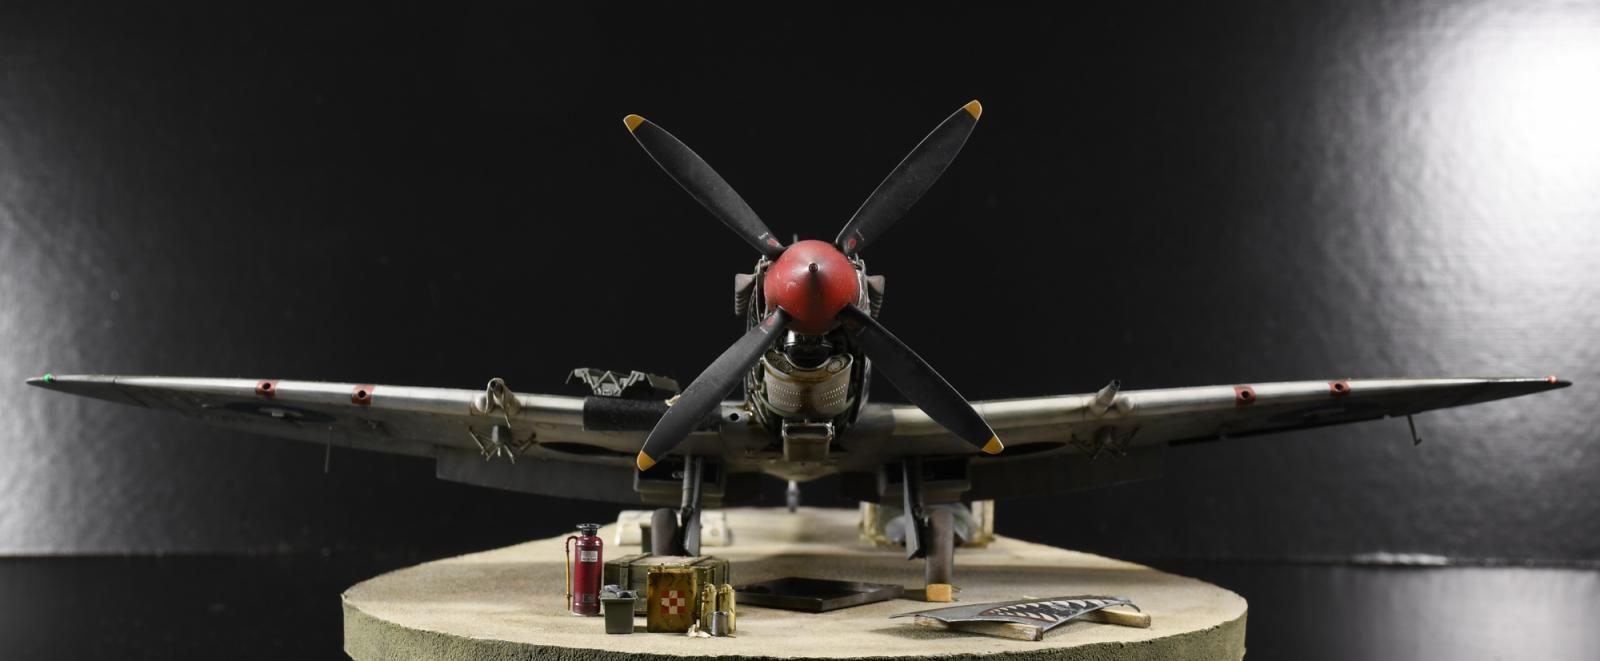
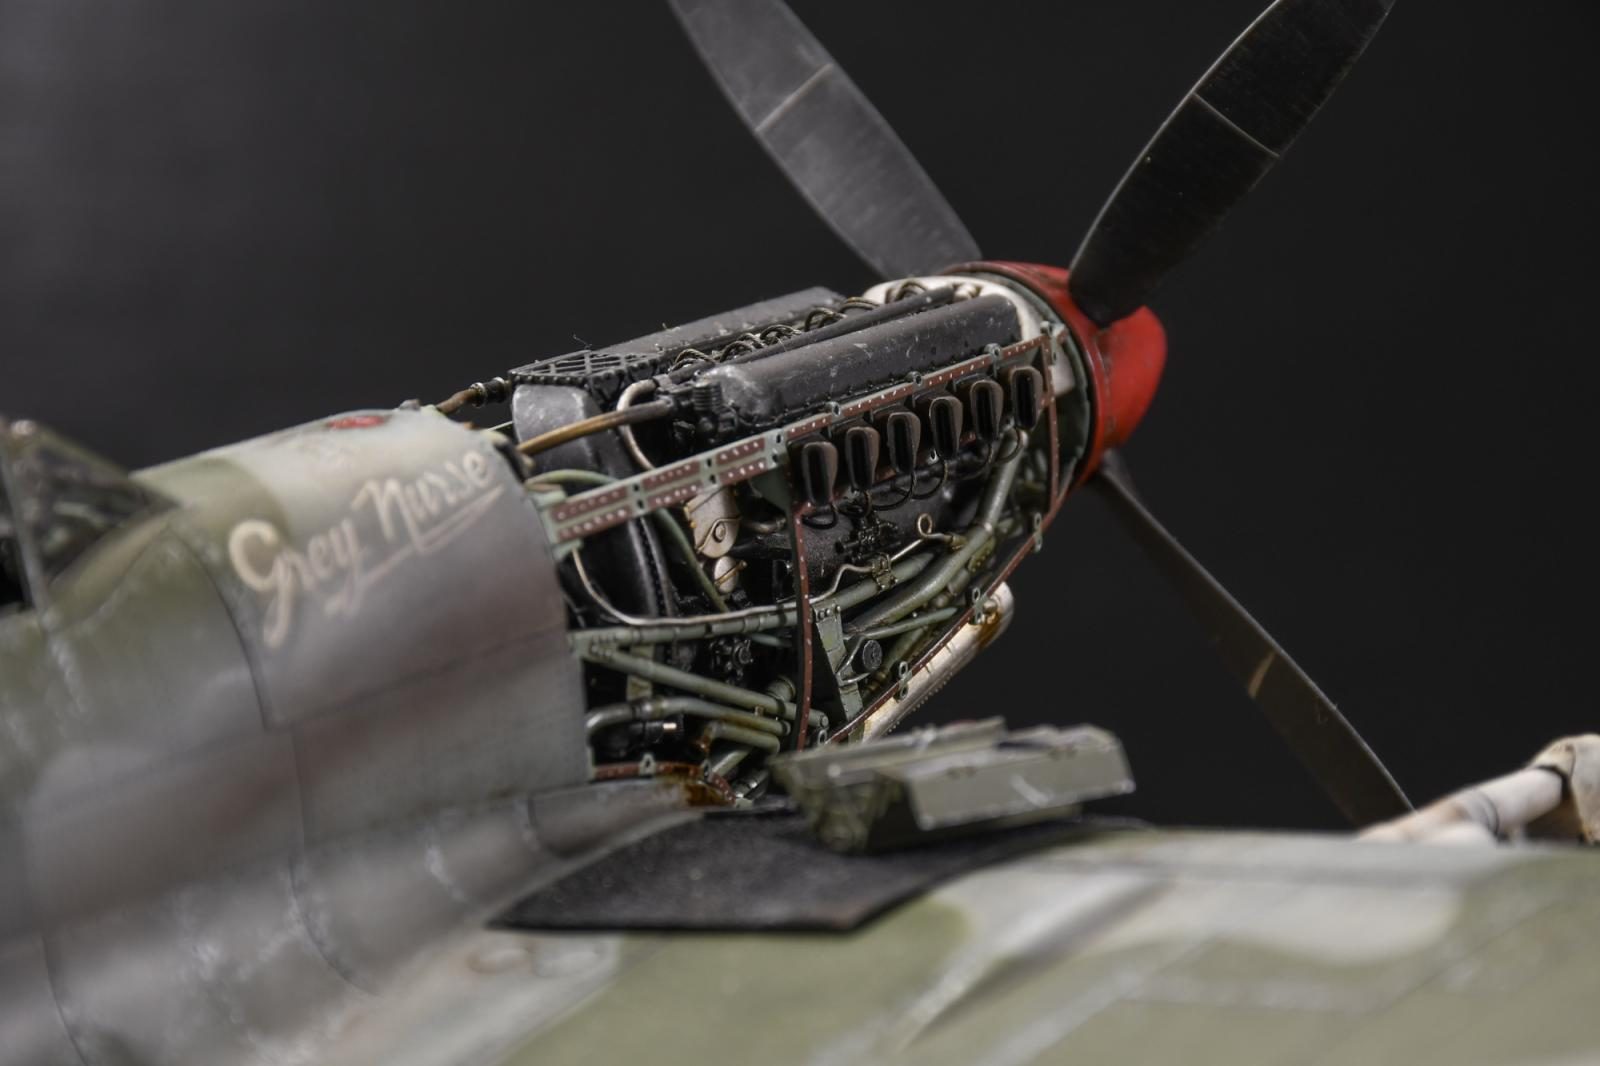
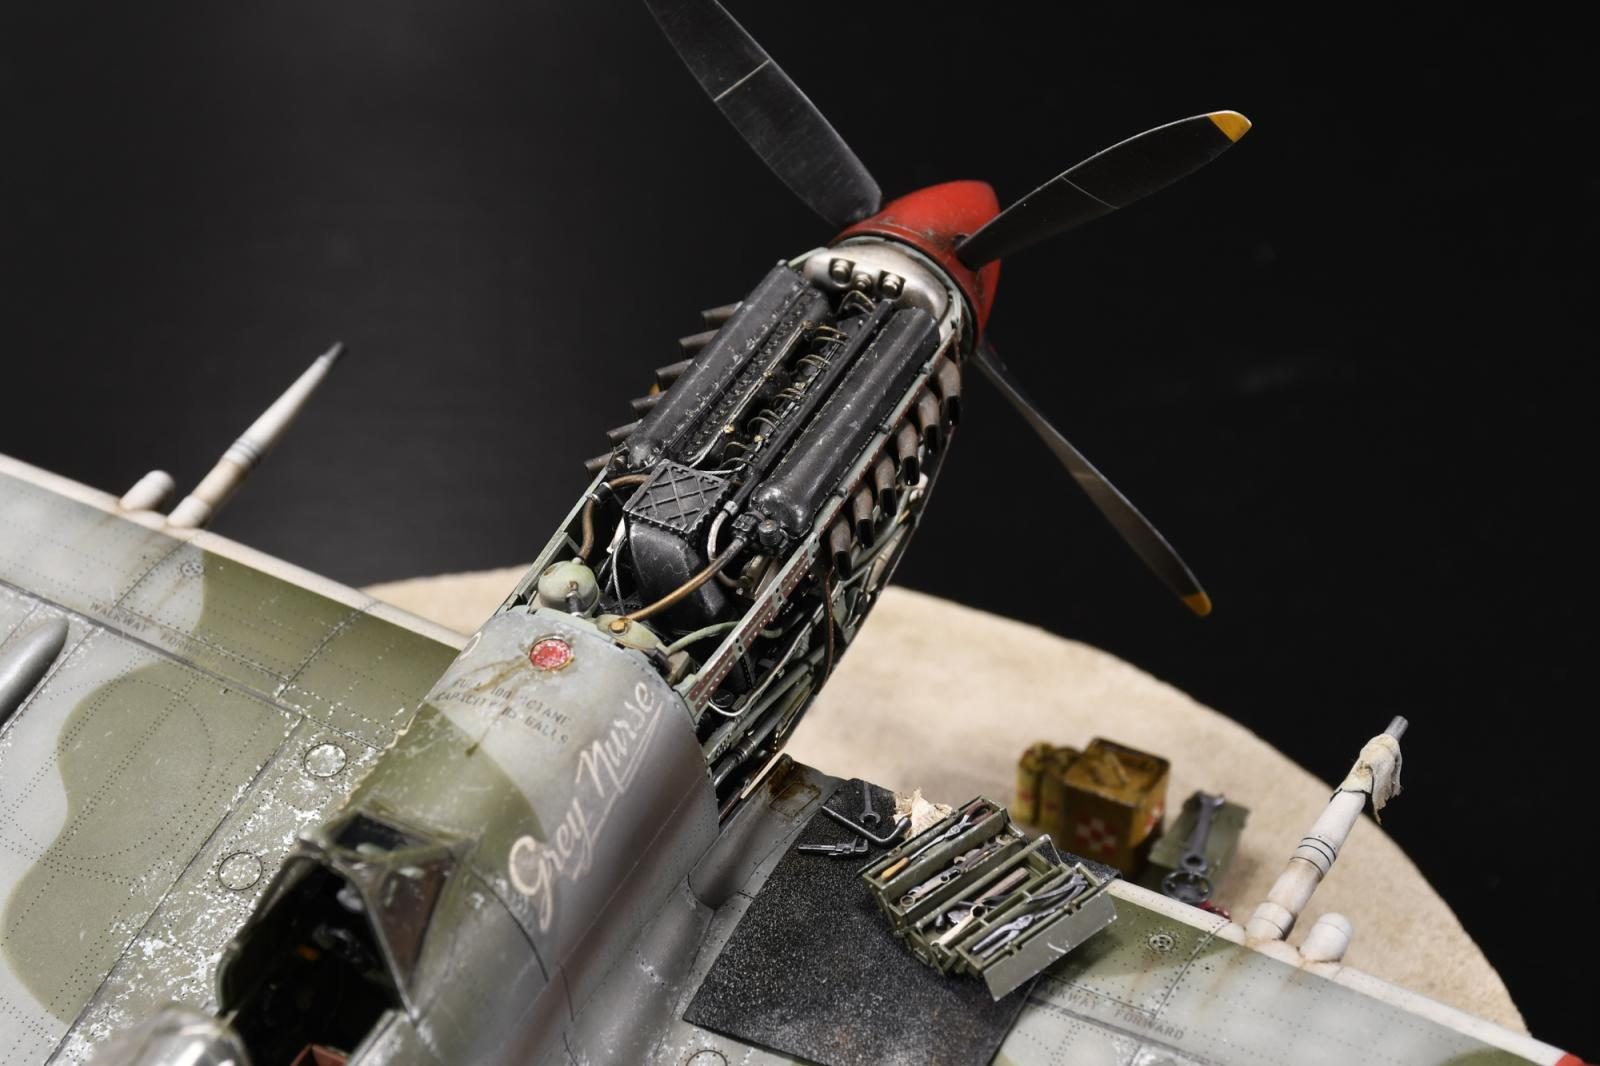
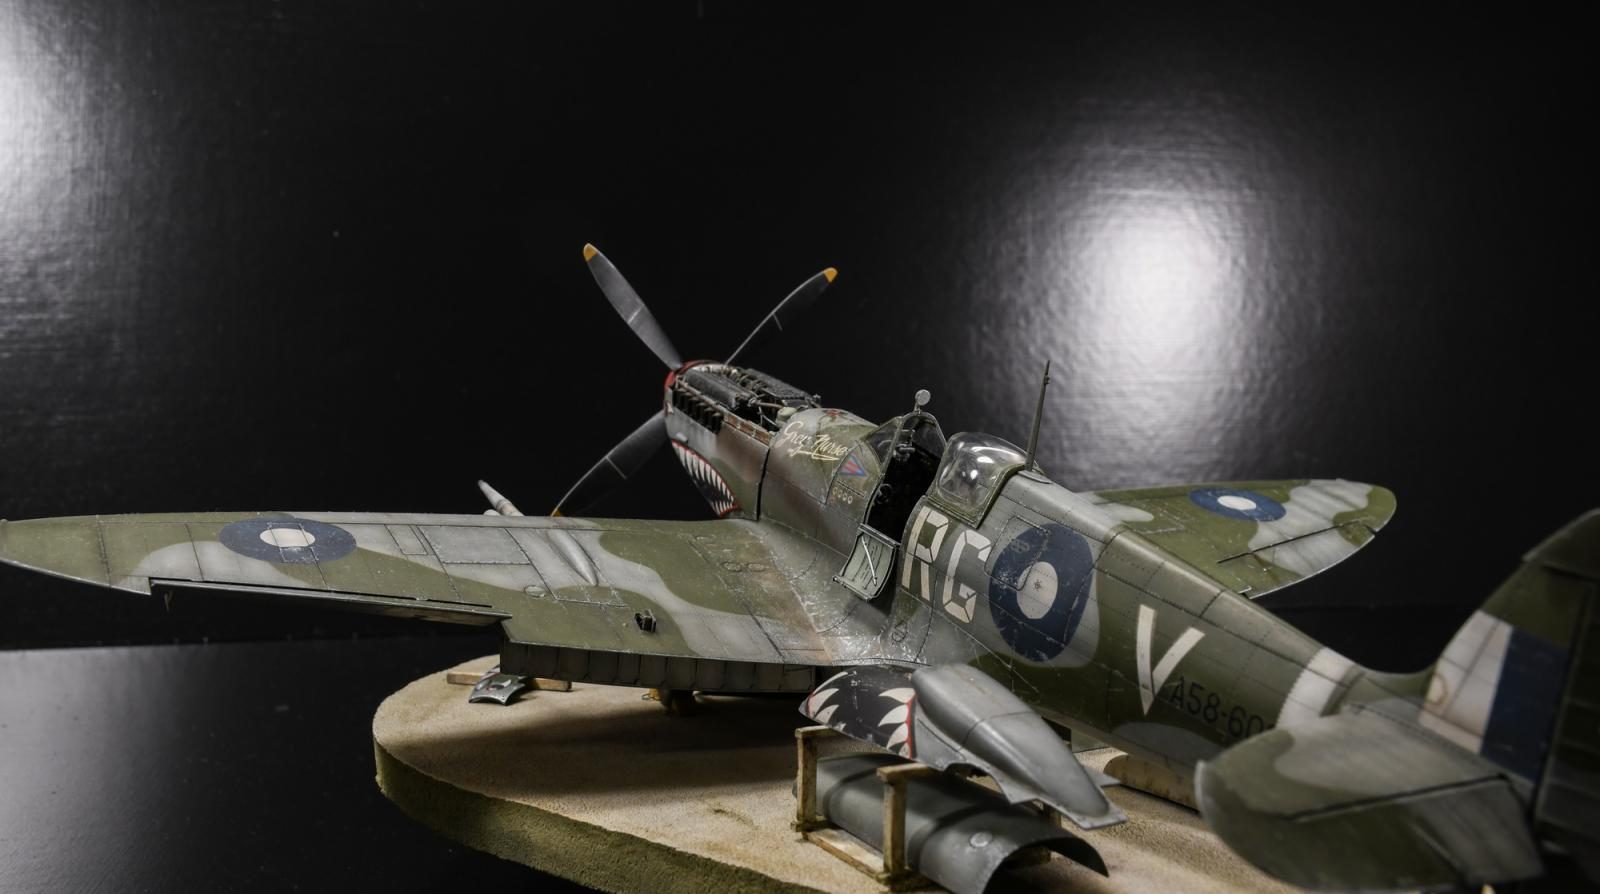
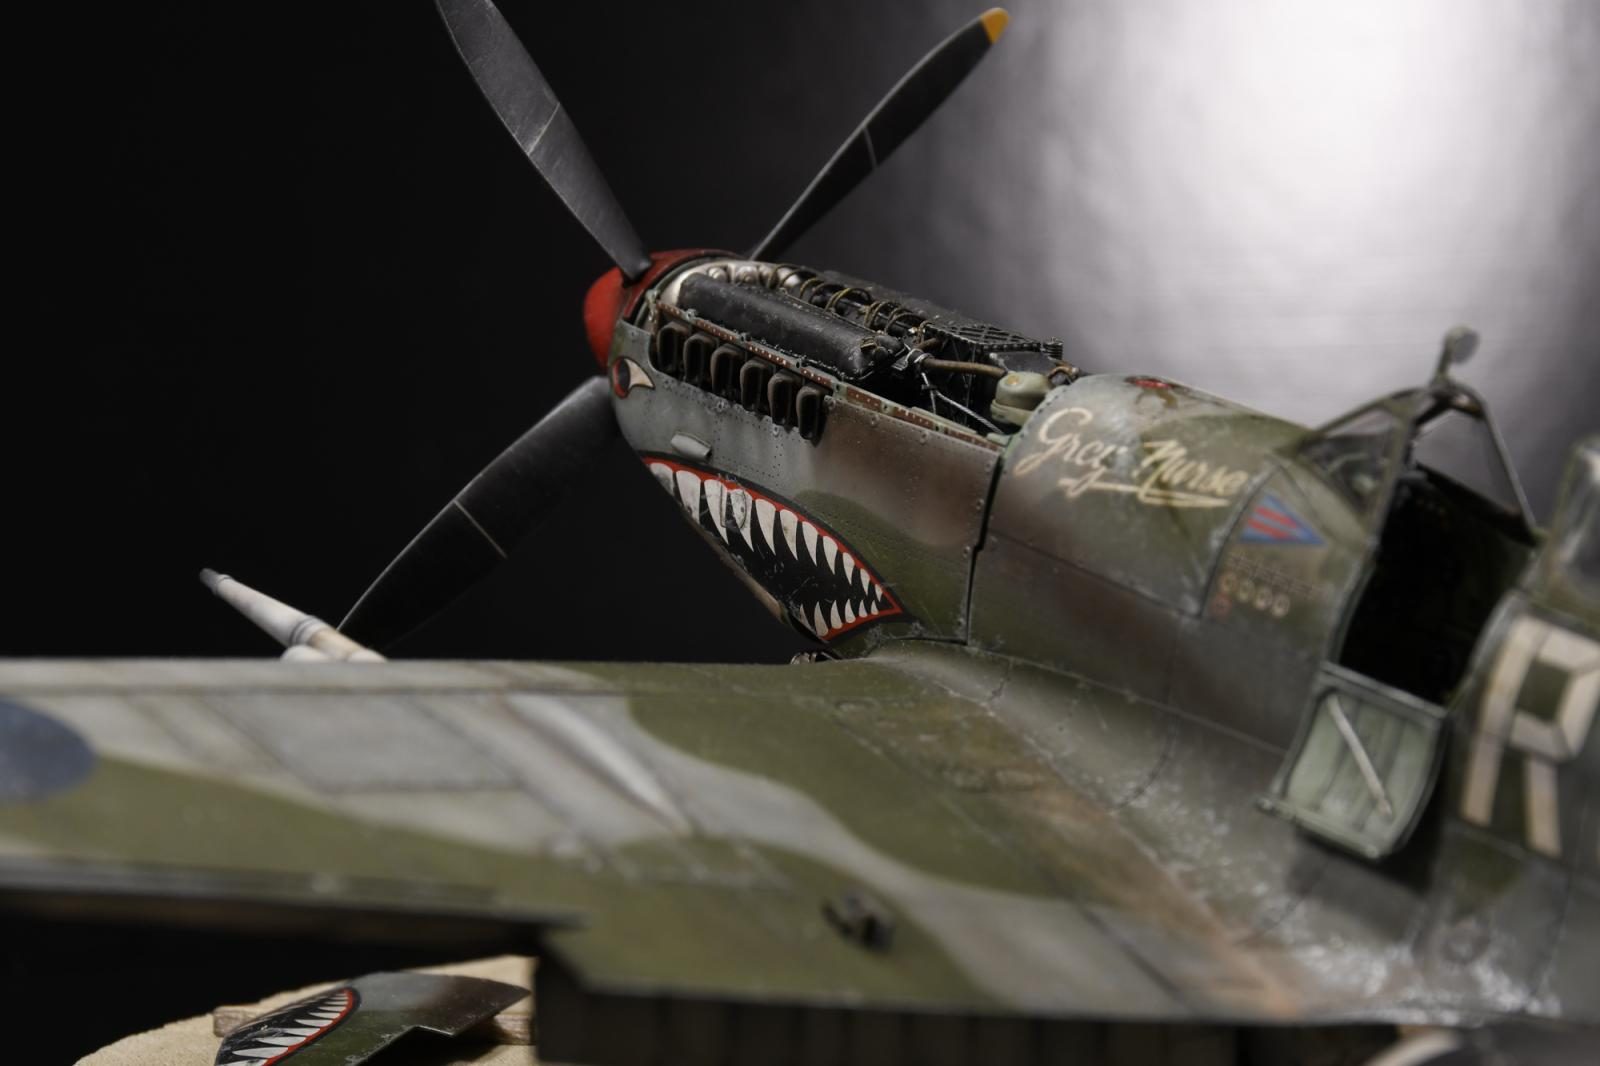
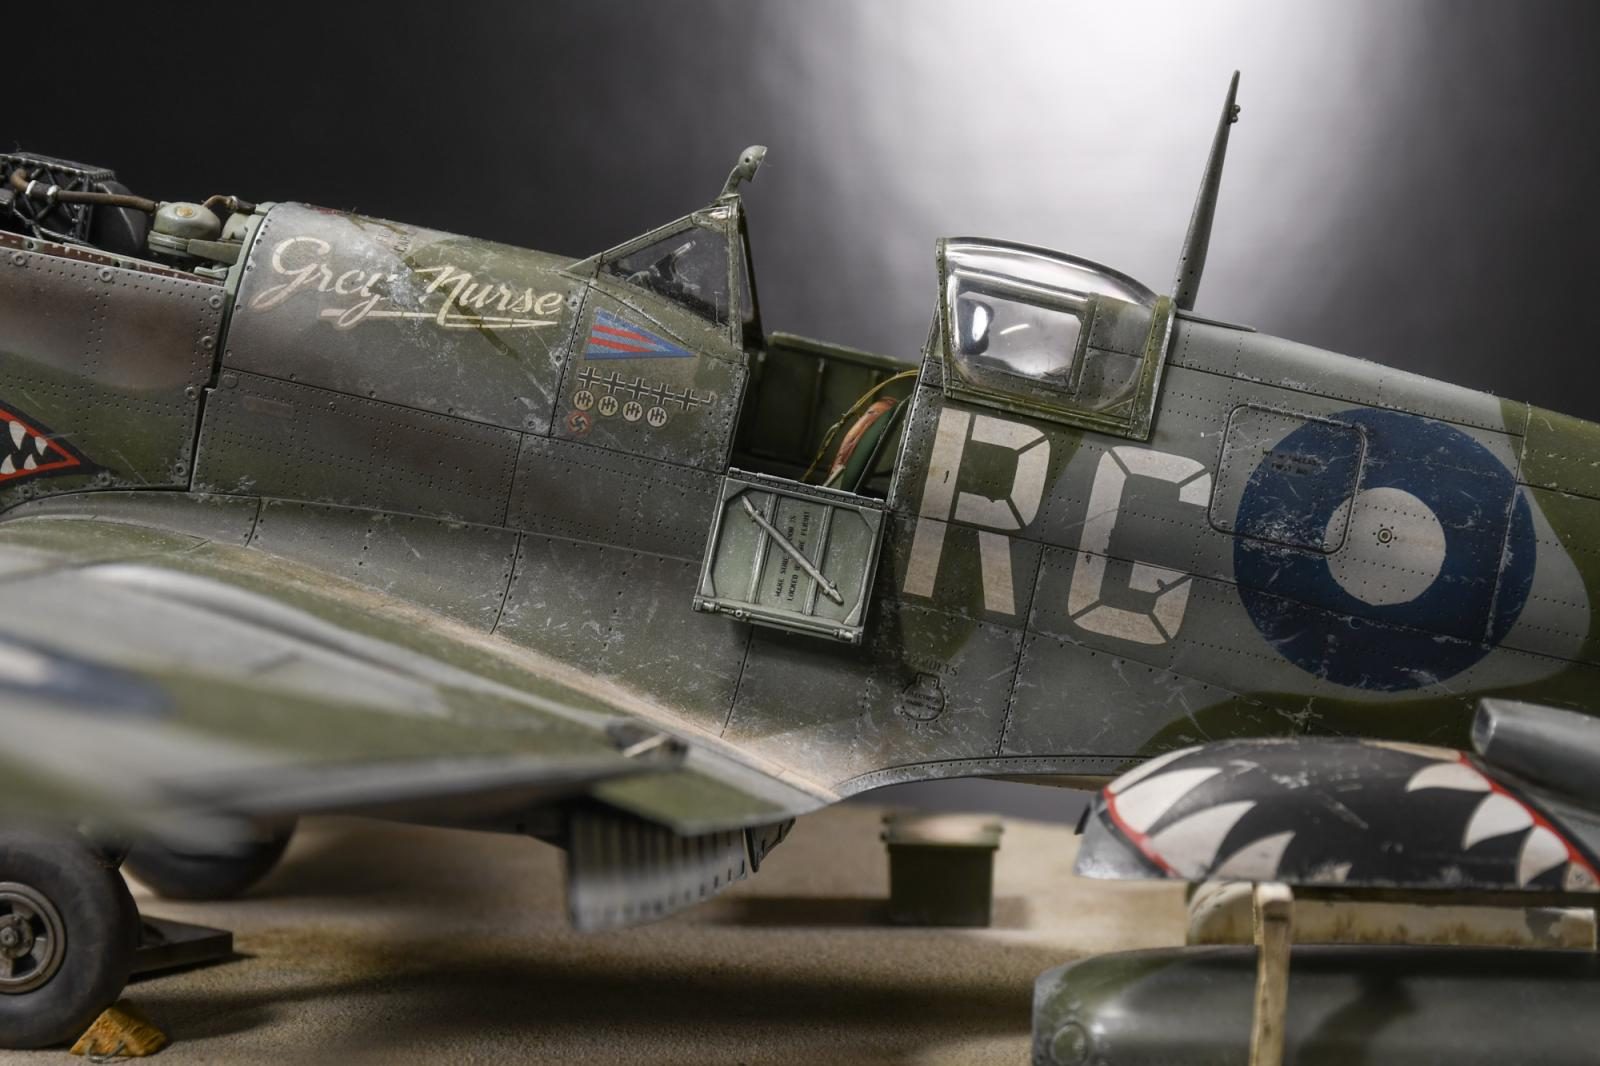
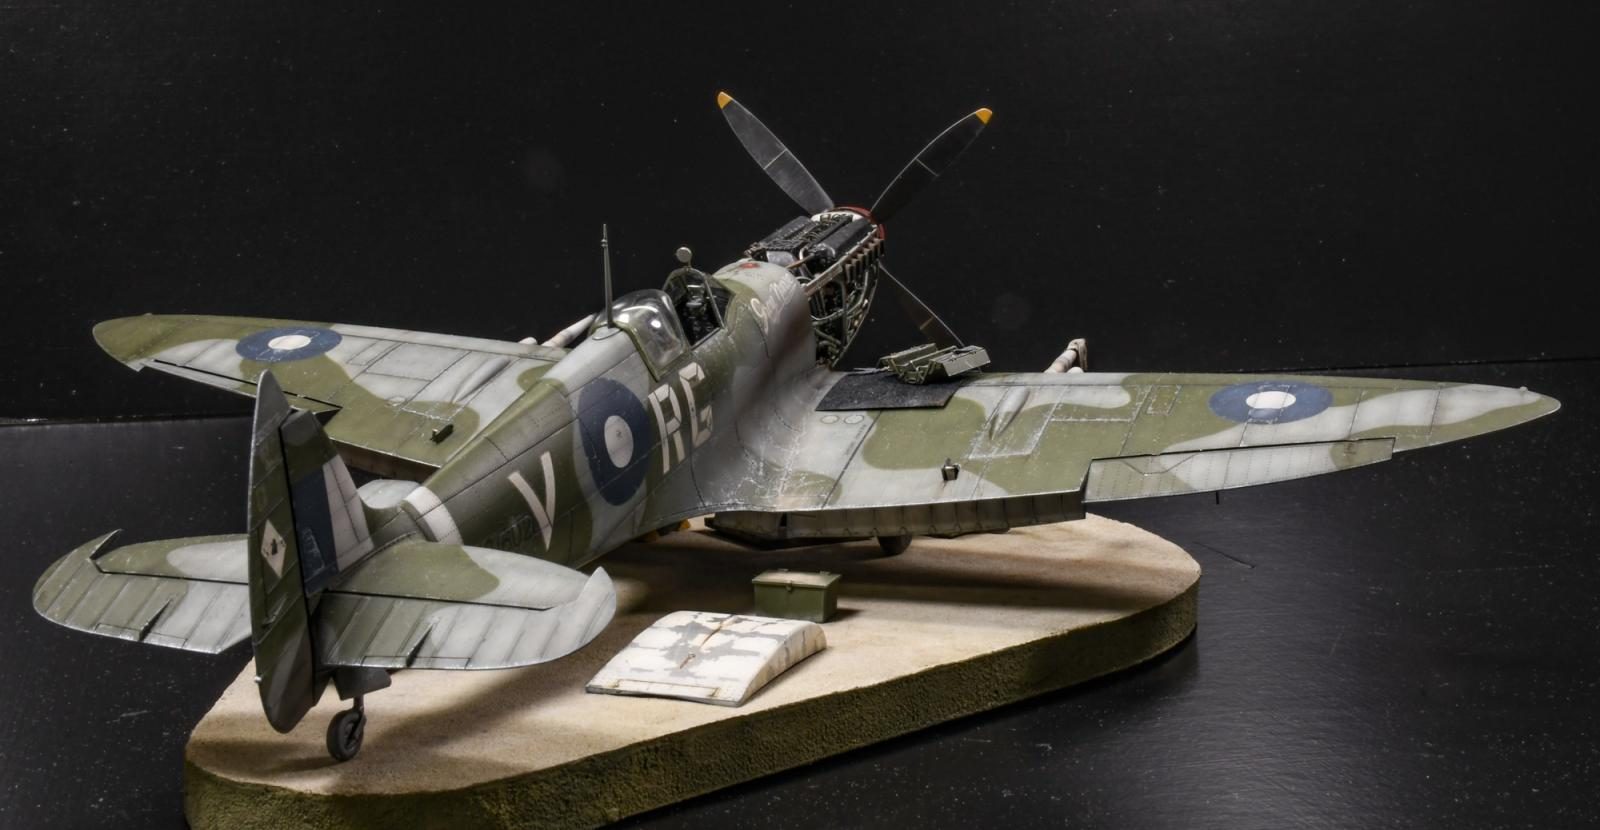
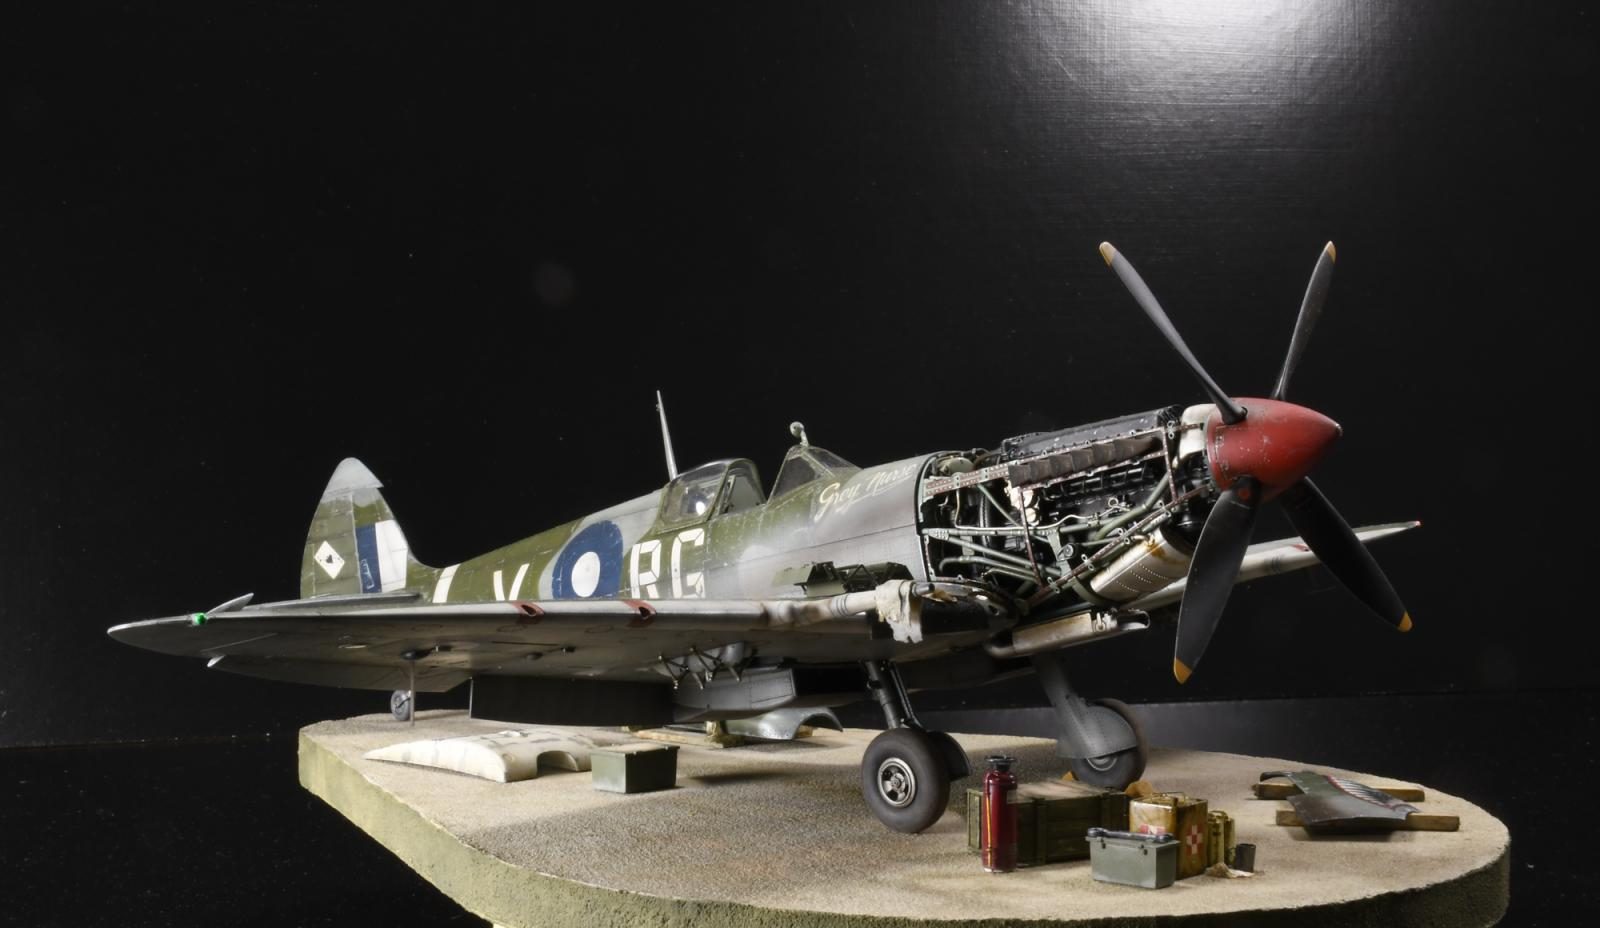
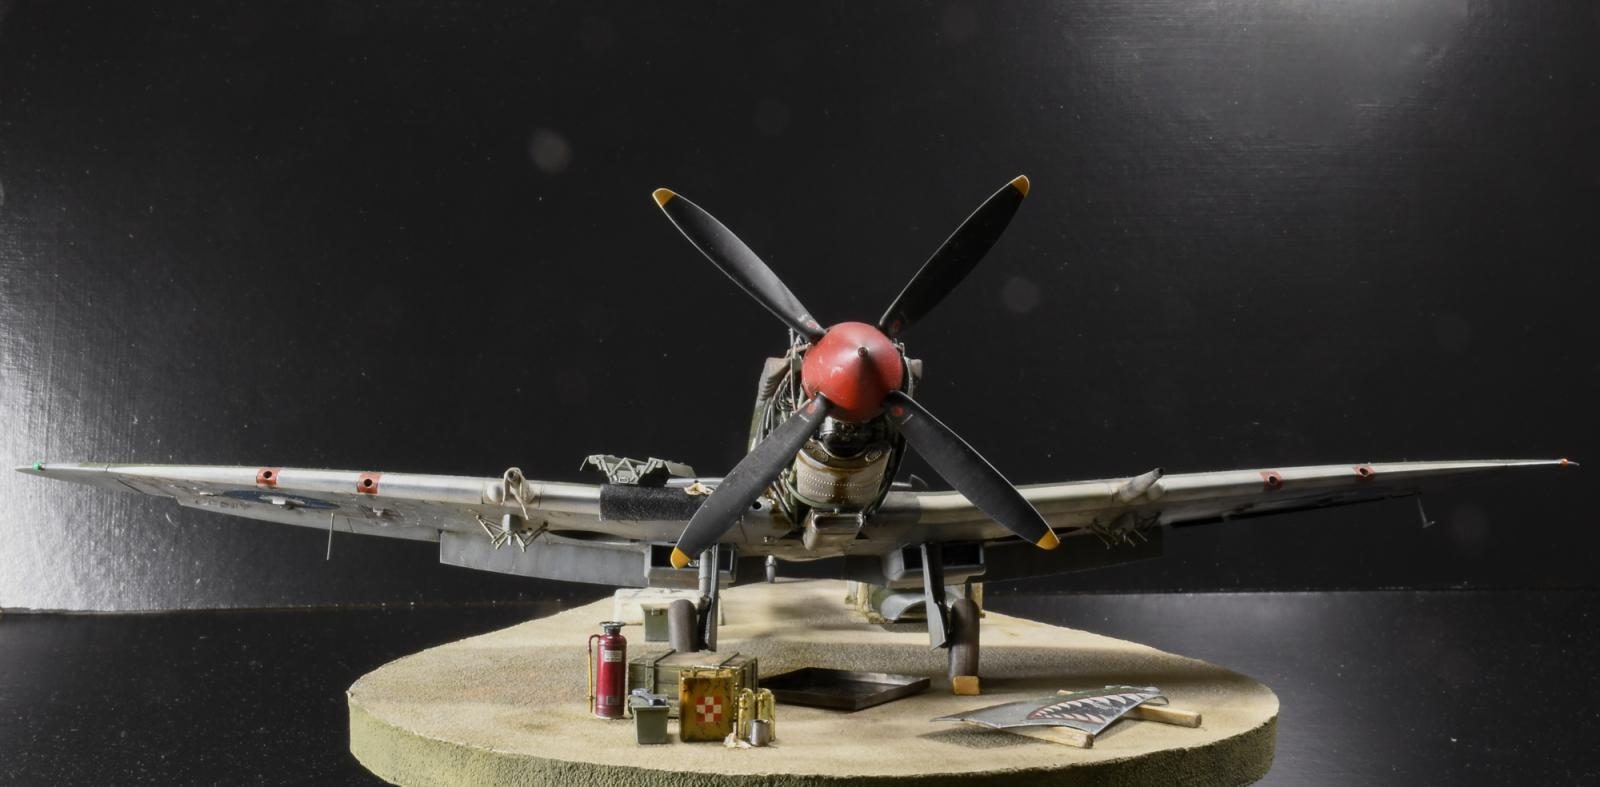
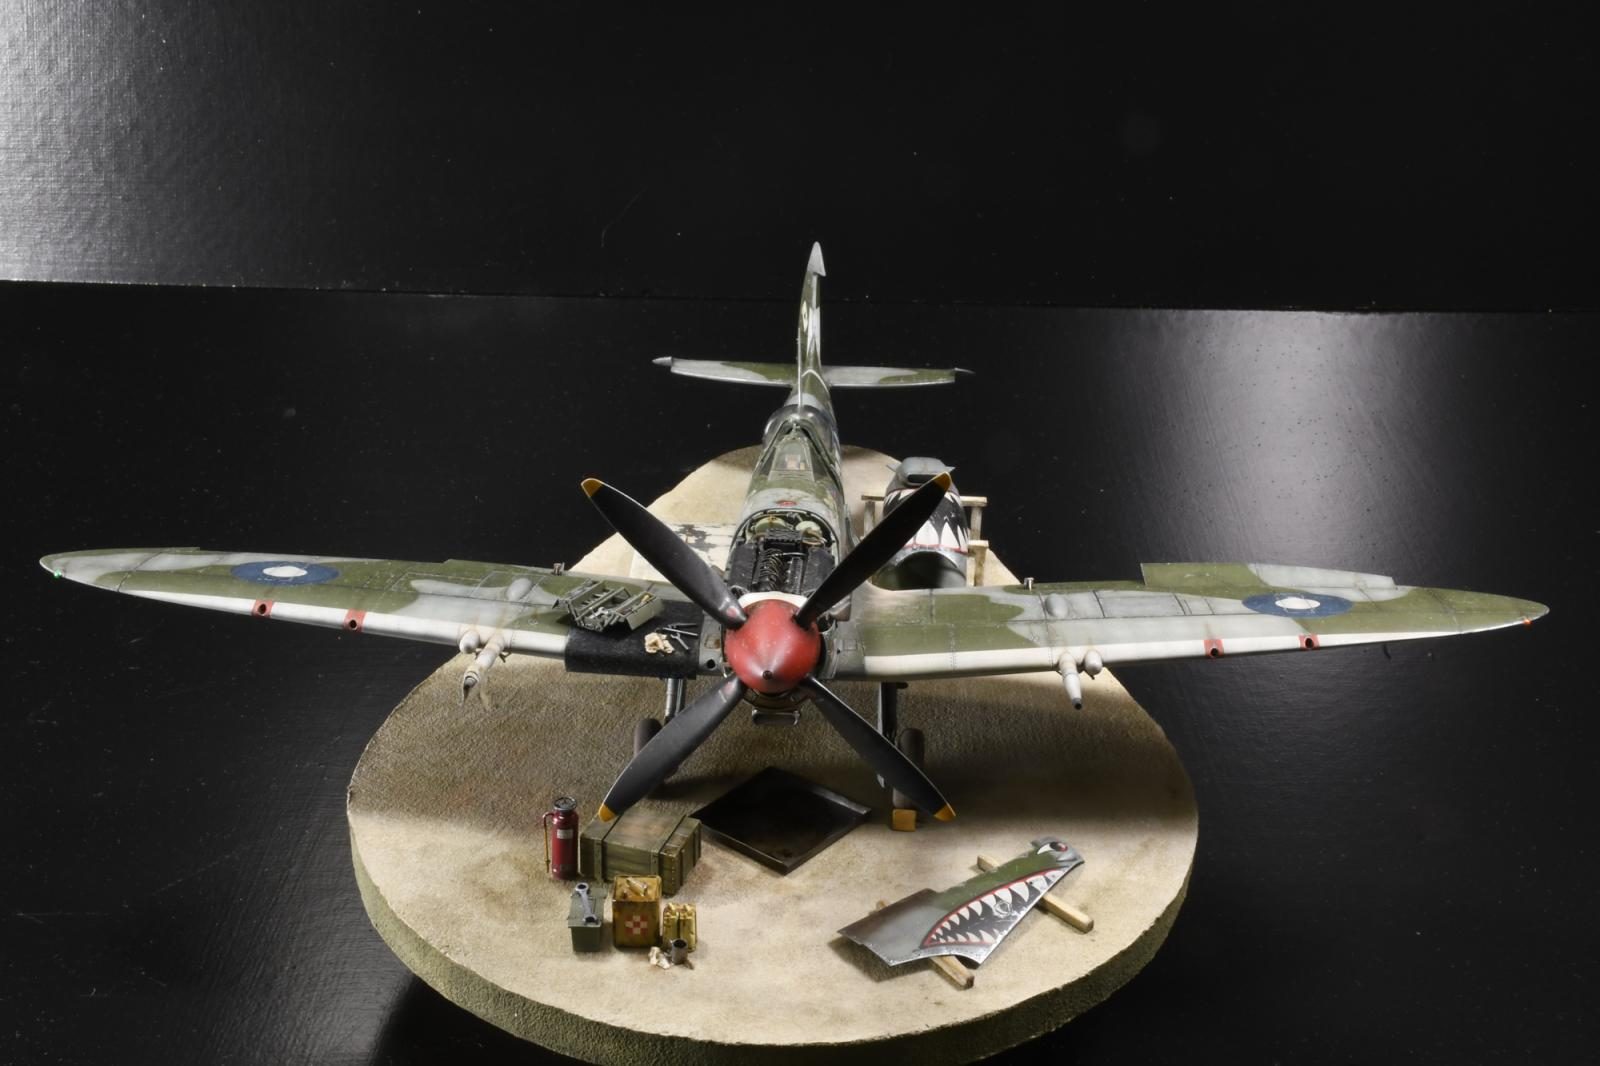
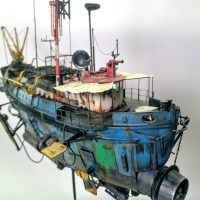
Spitfire Mk.VIII under maintenance in 1943 somewhere in Malaysia
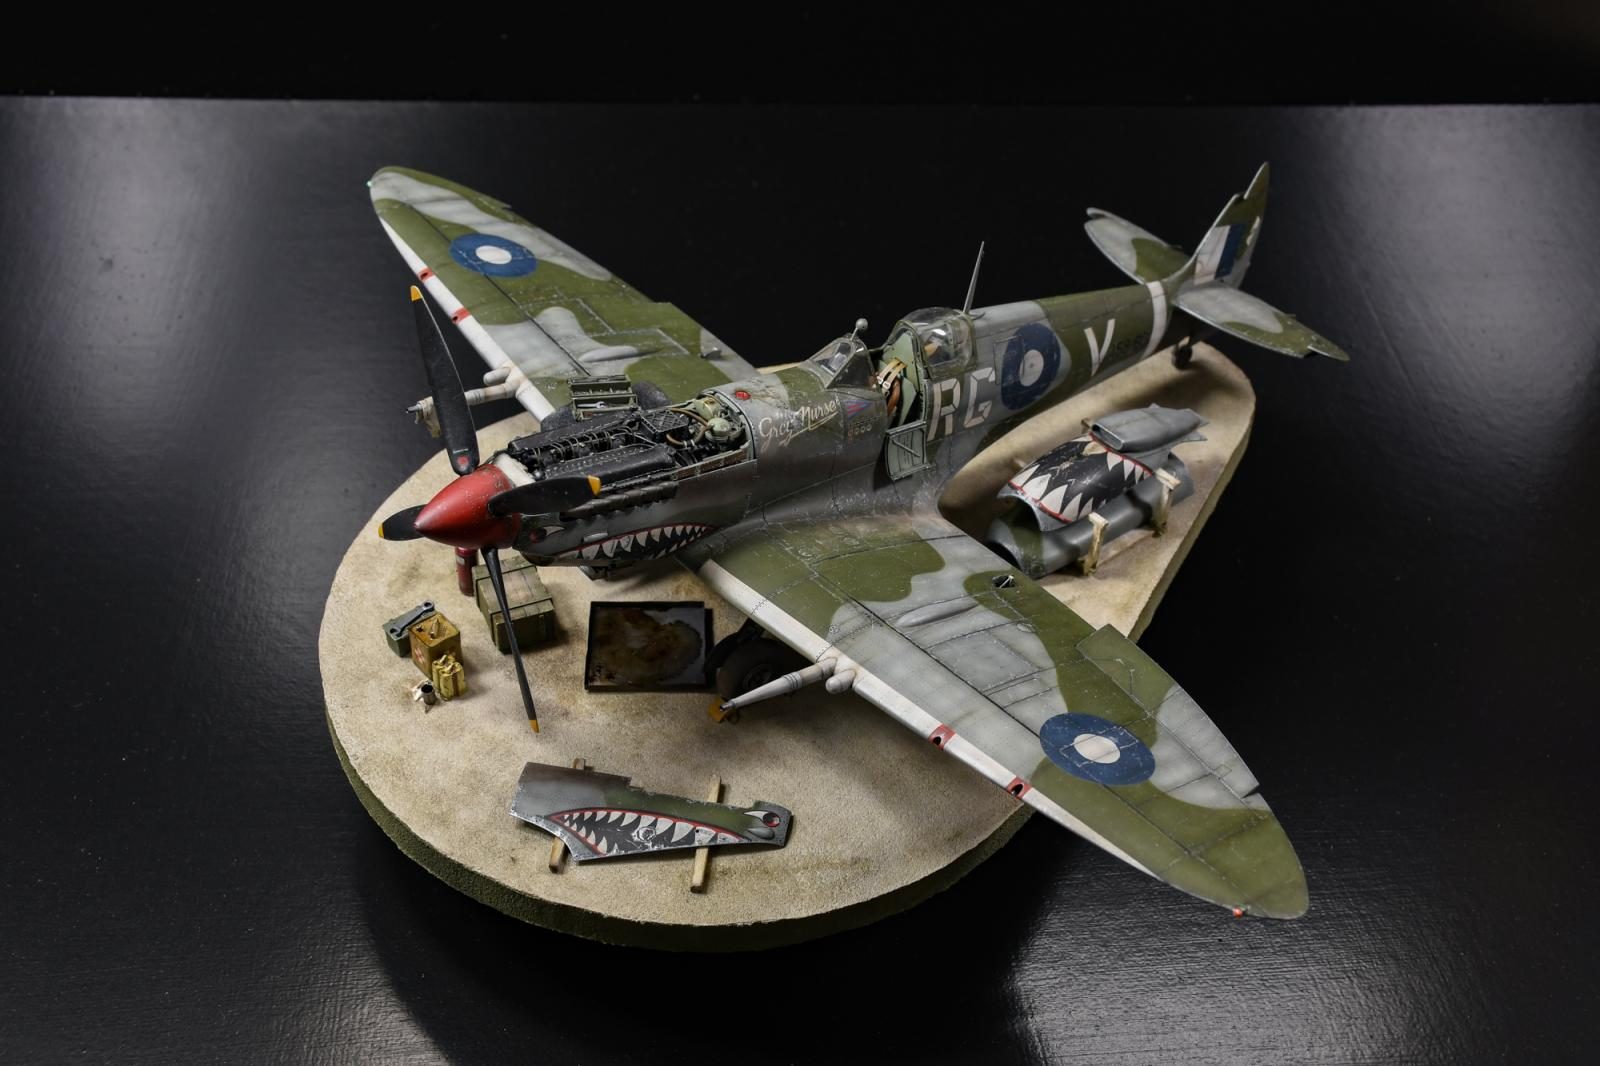
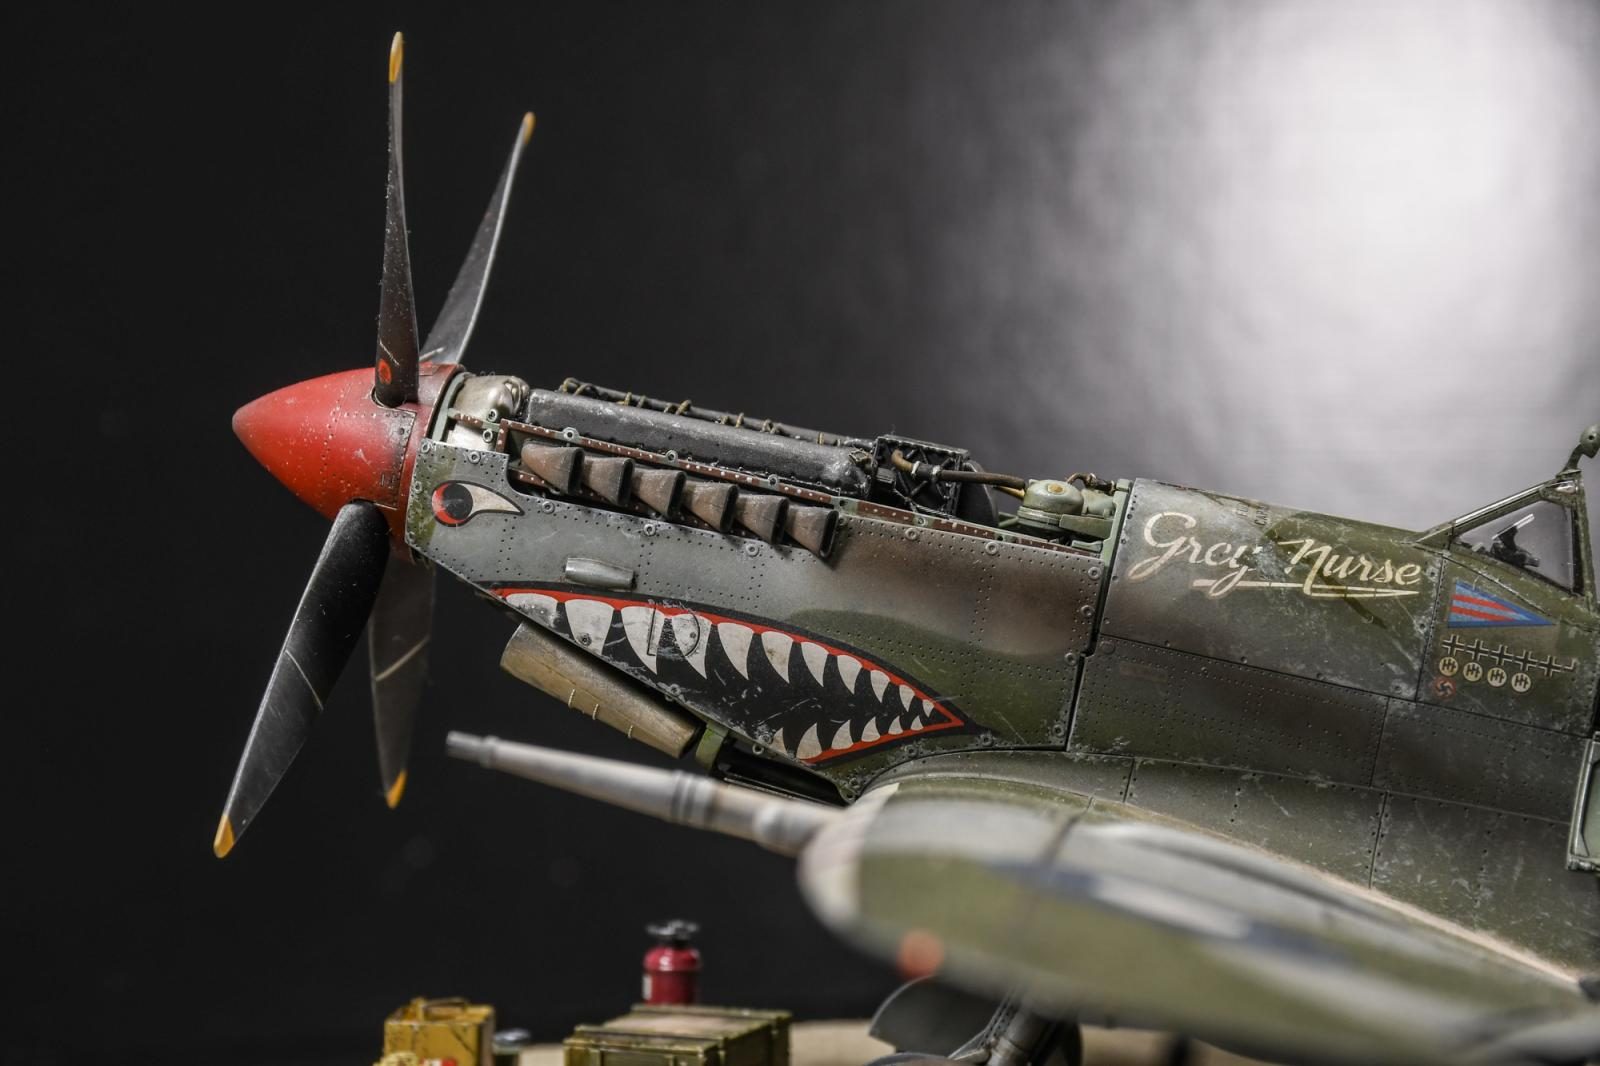
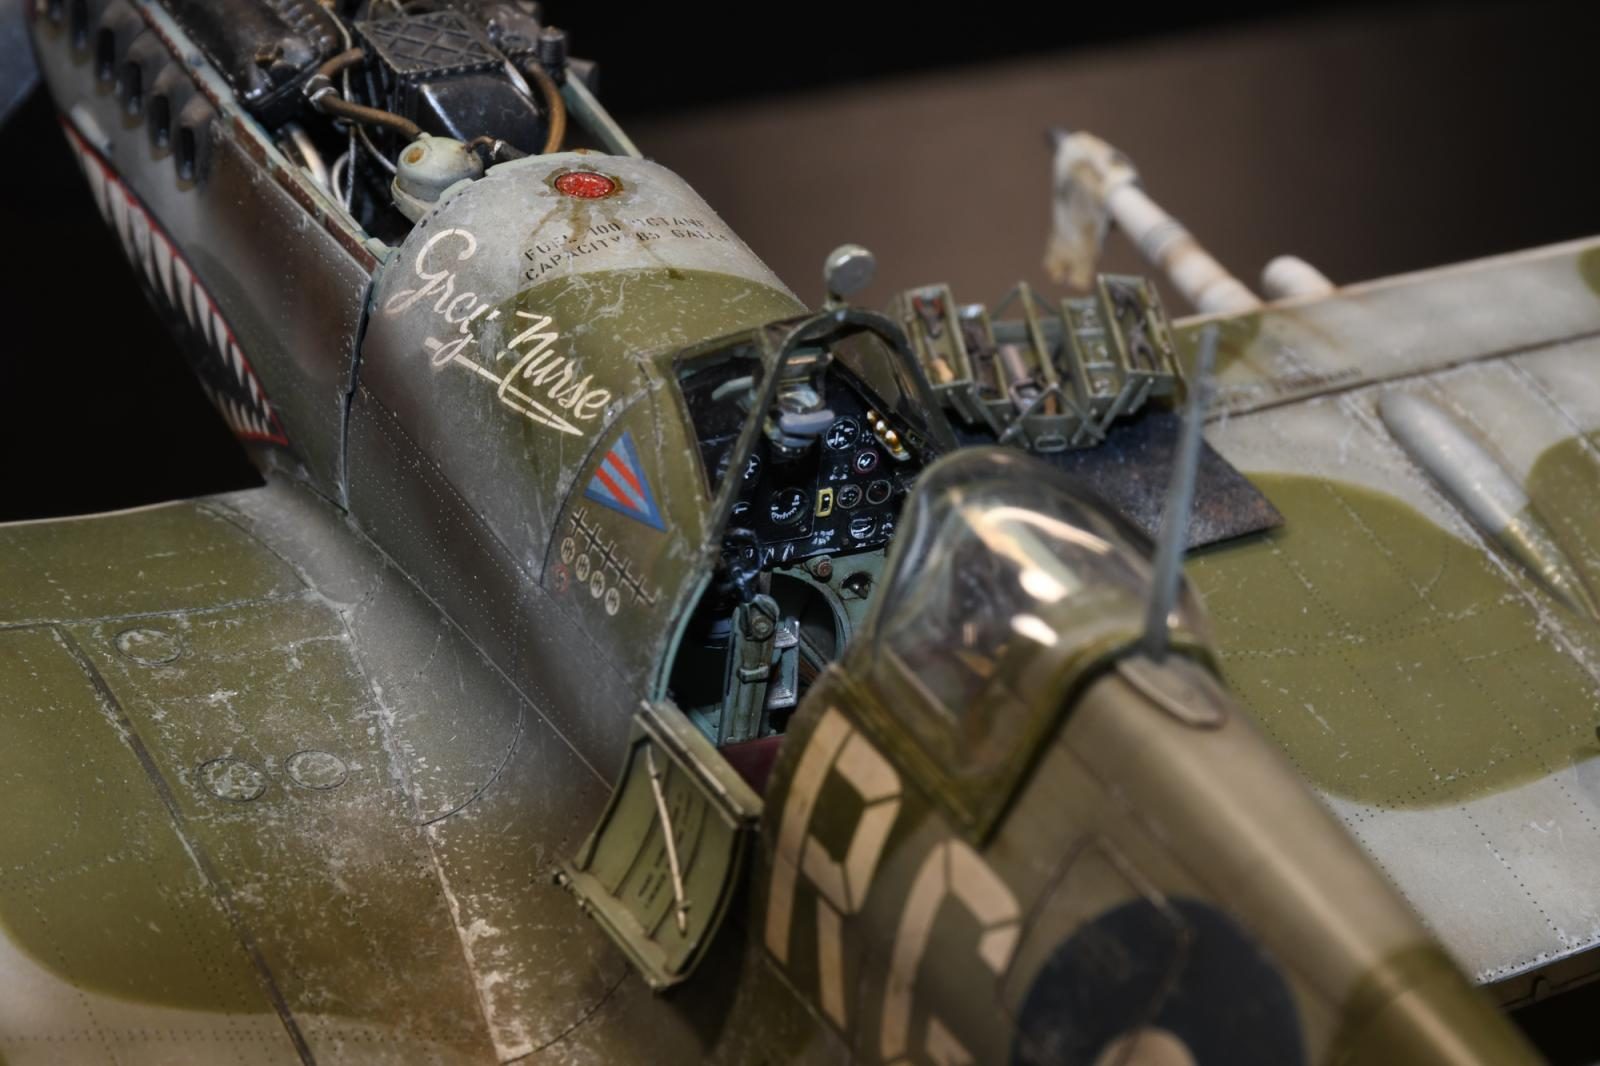
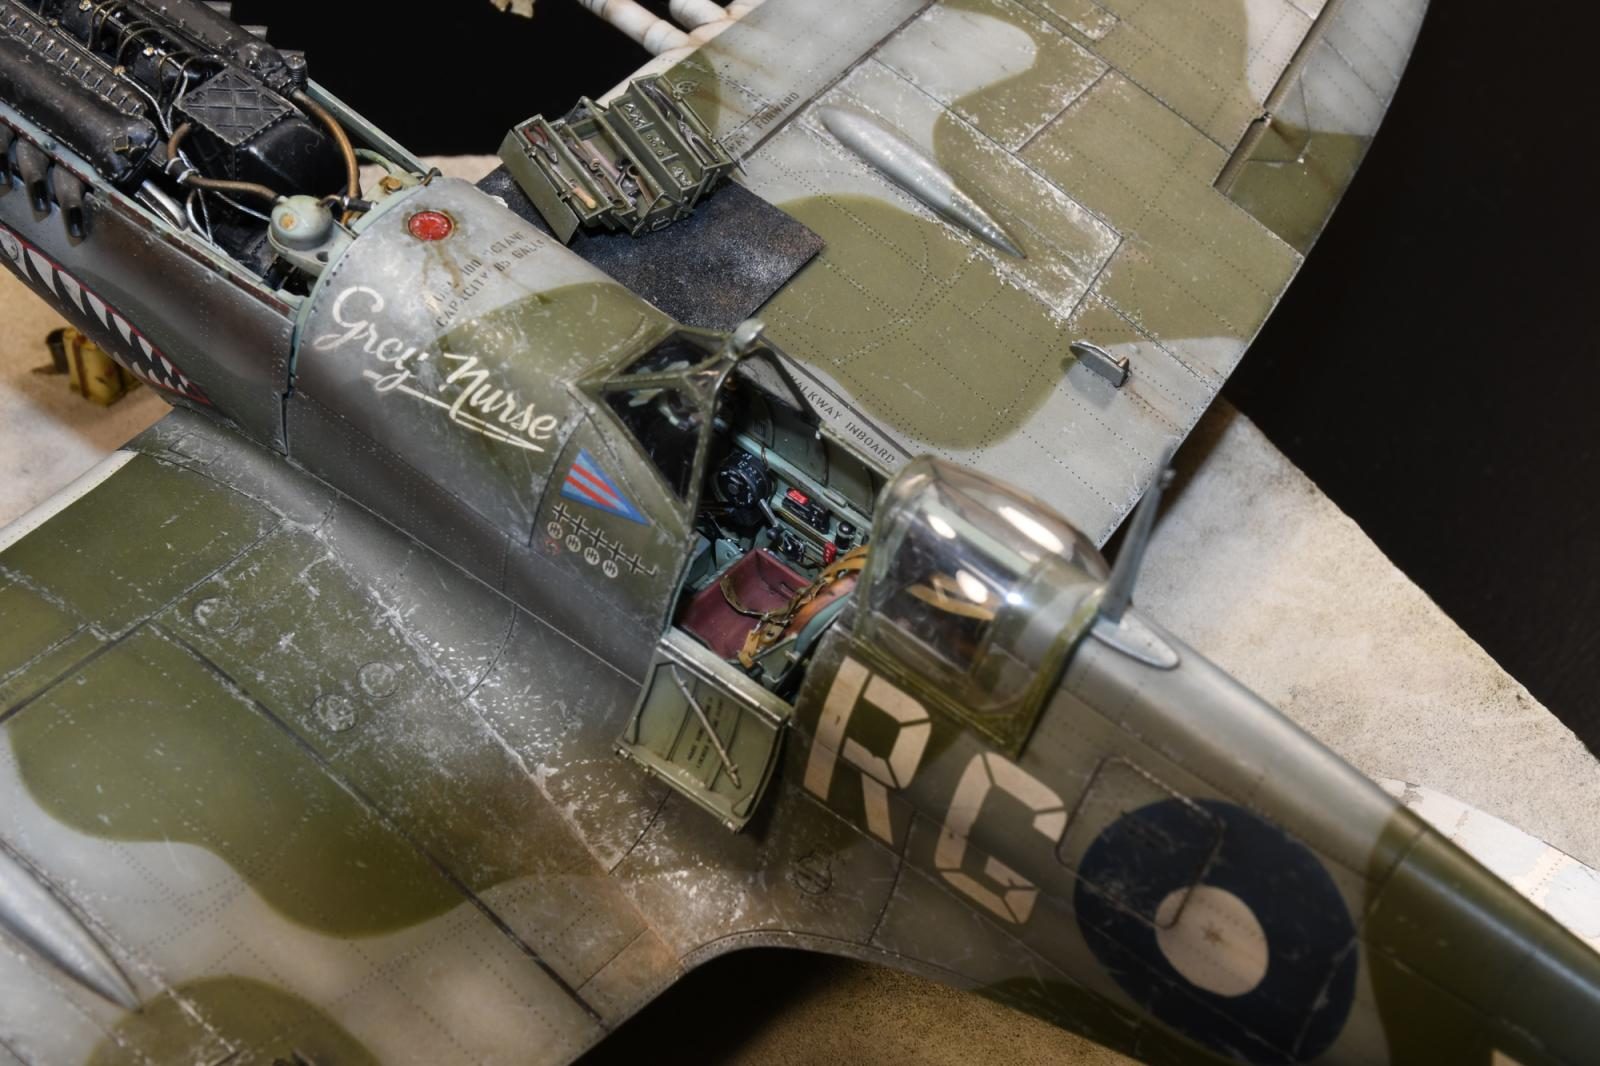
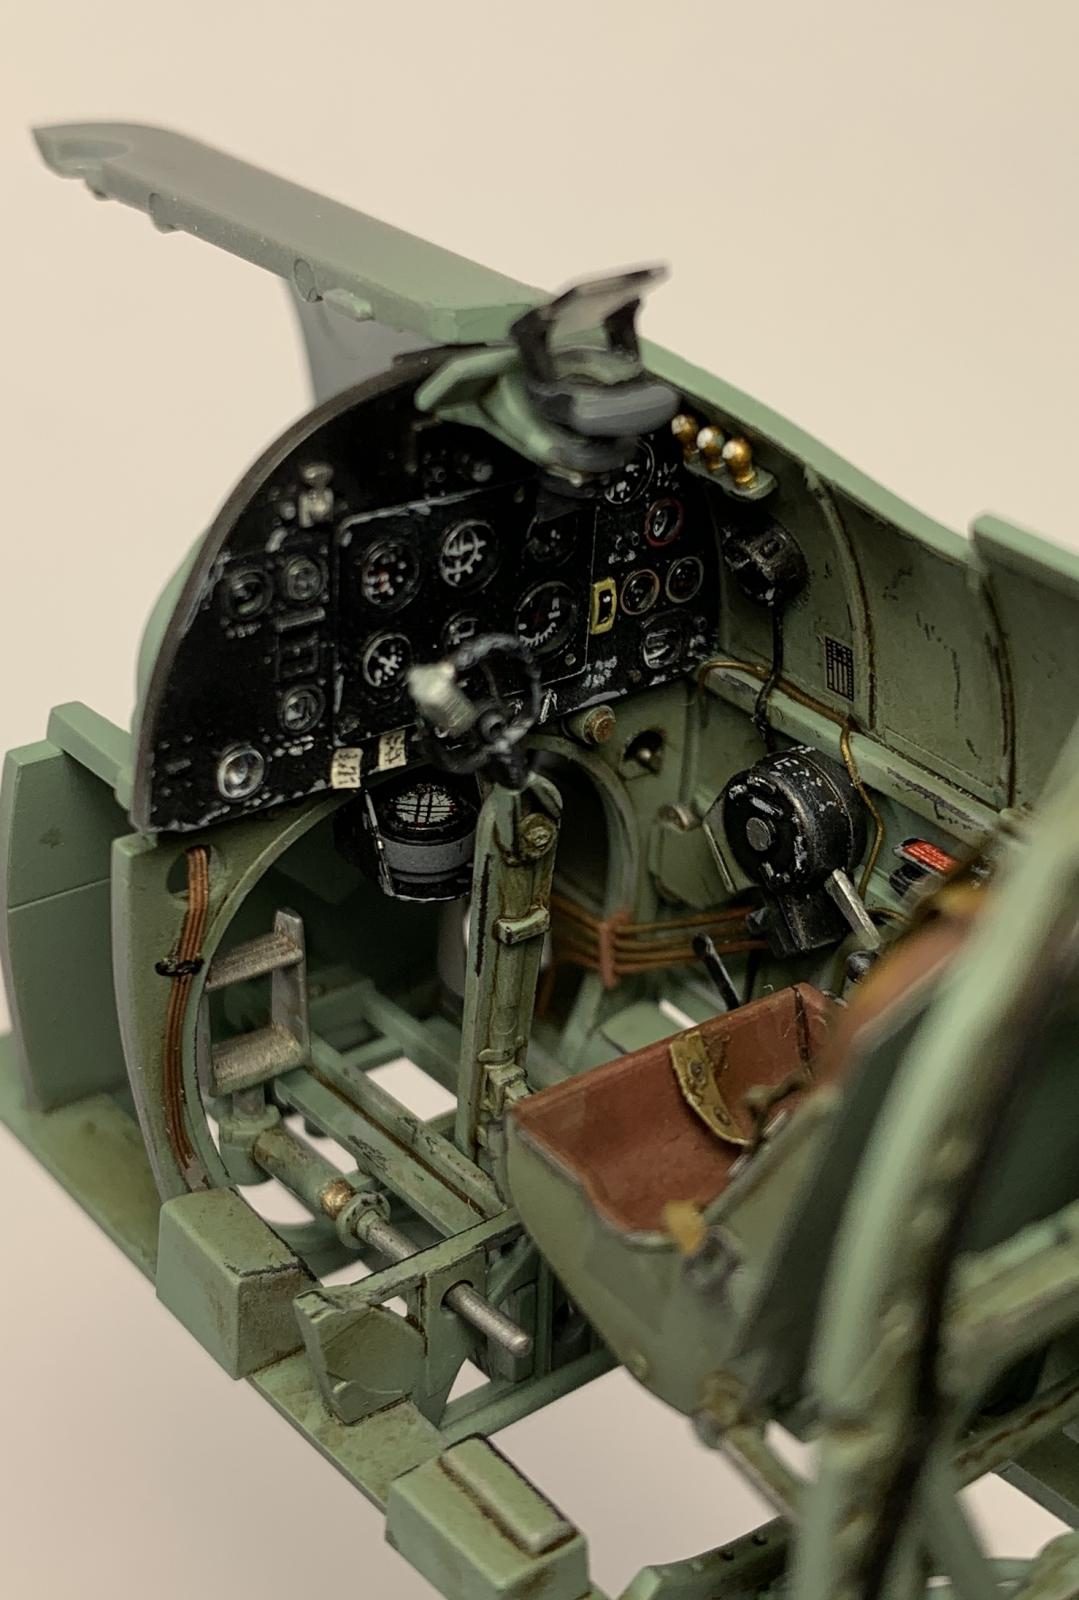
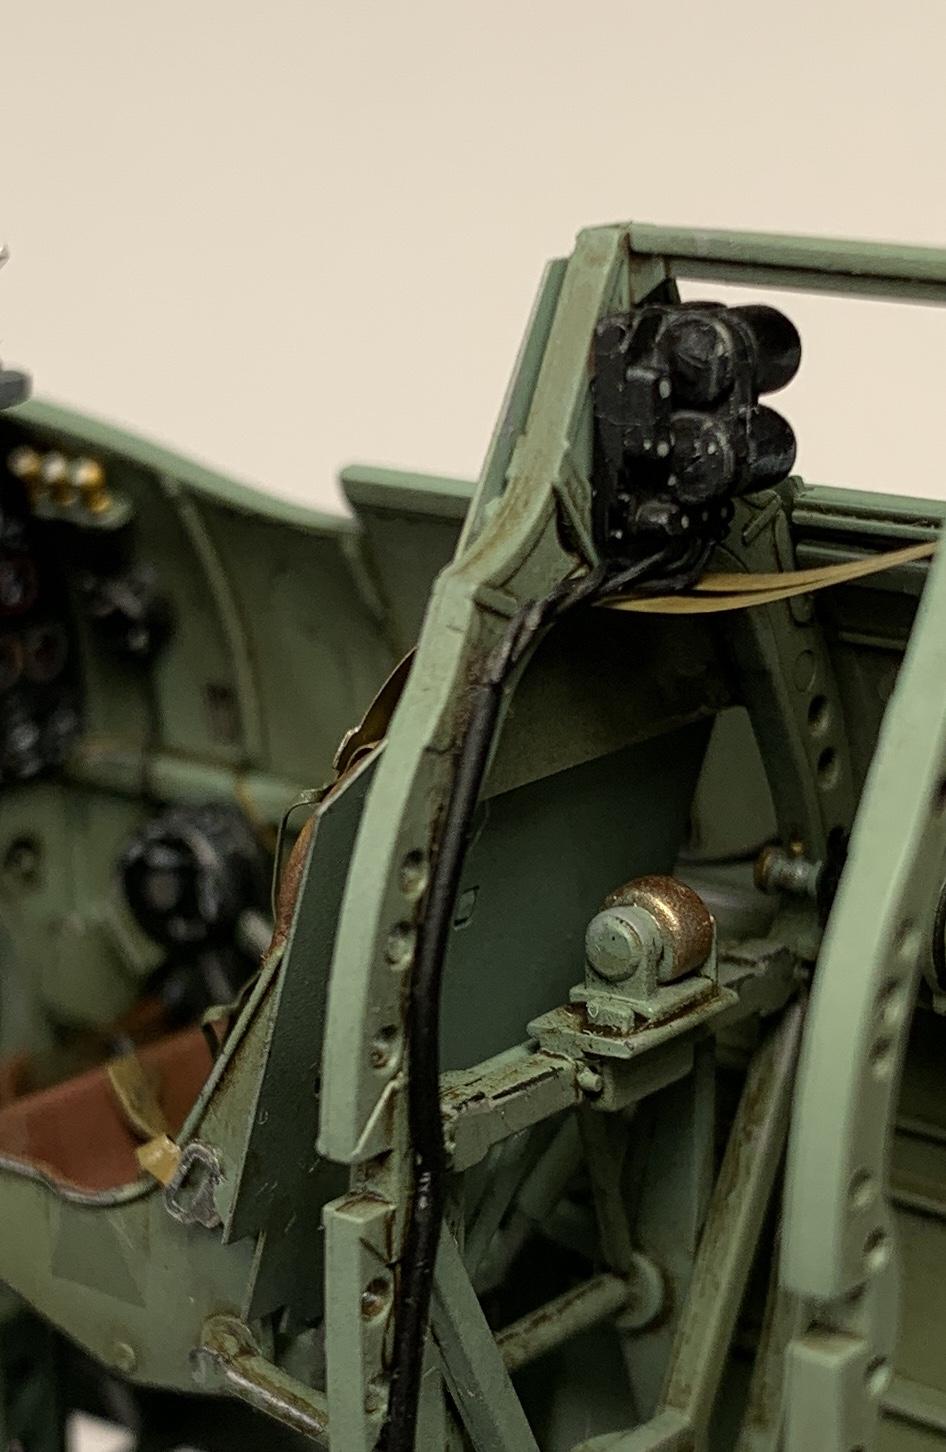
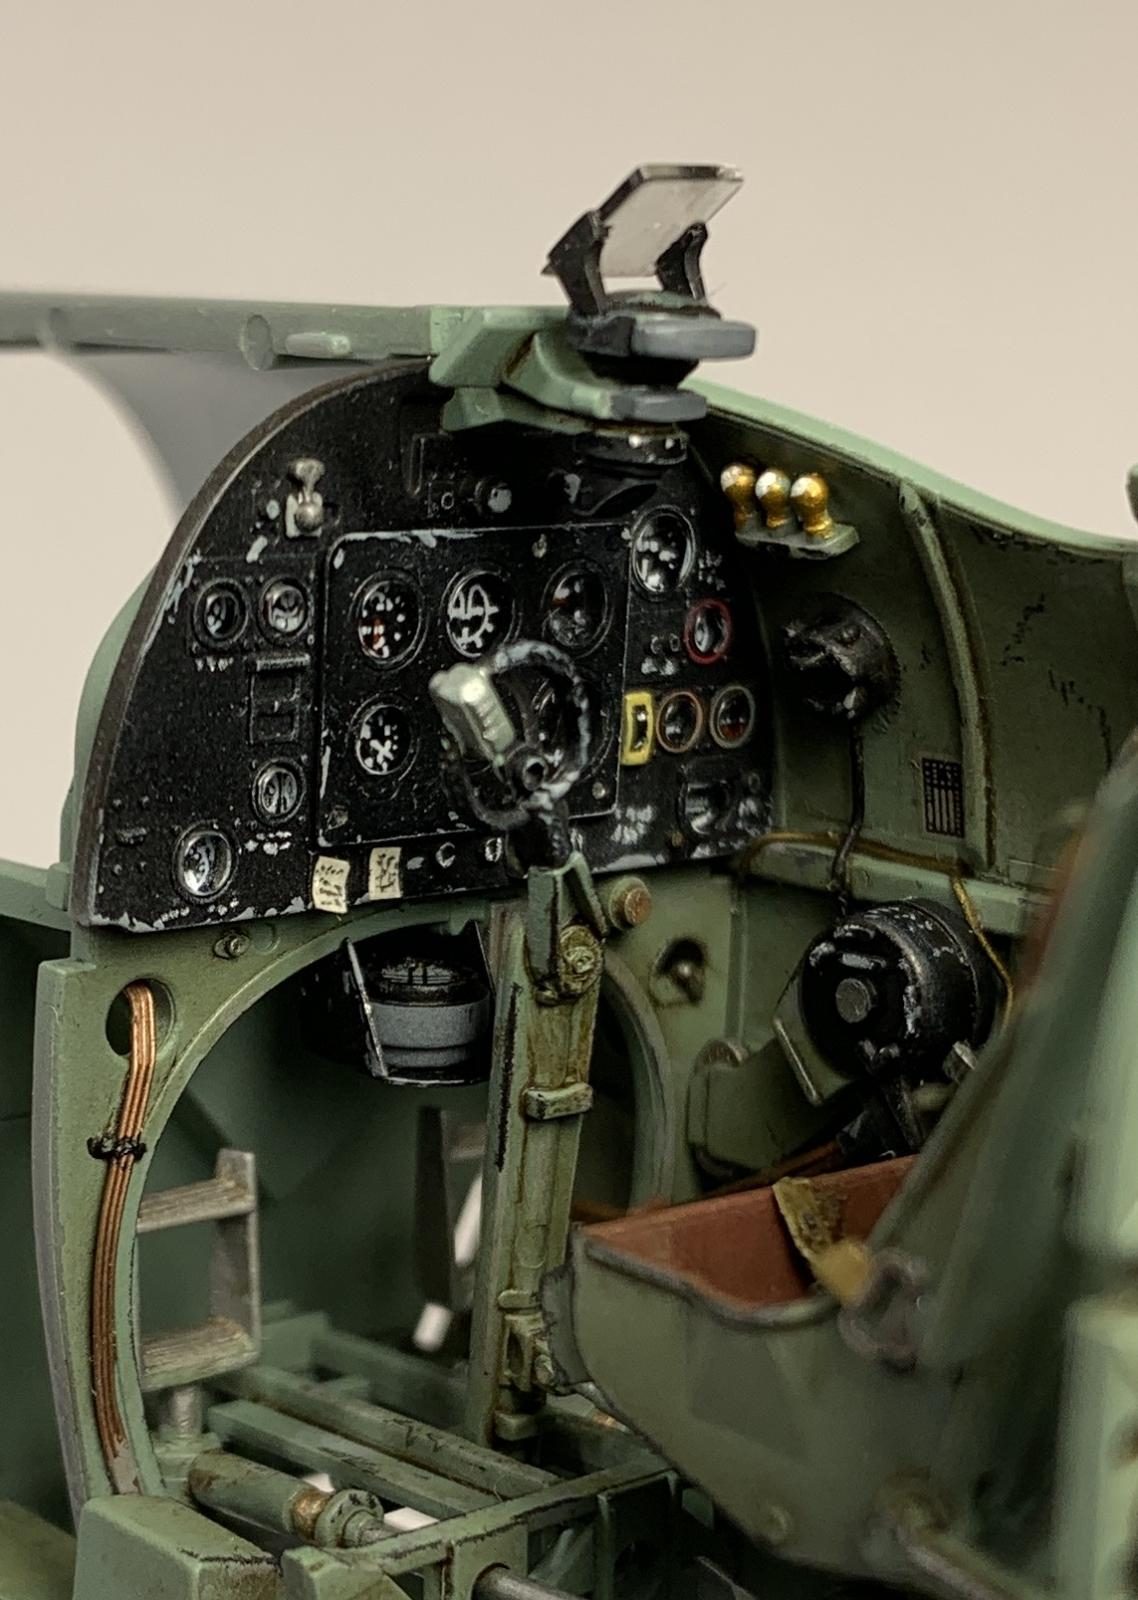
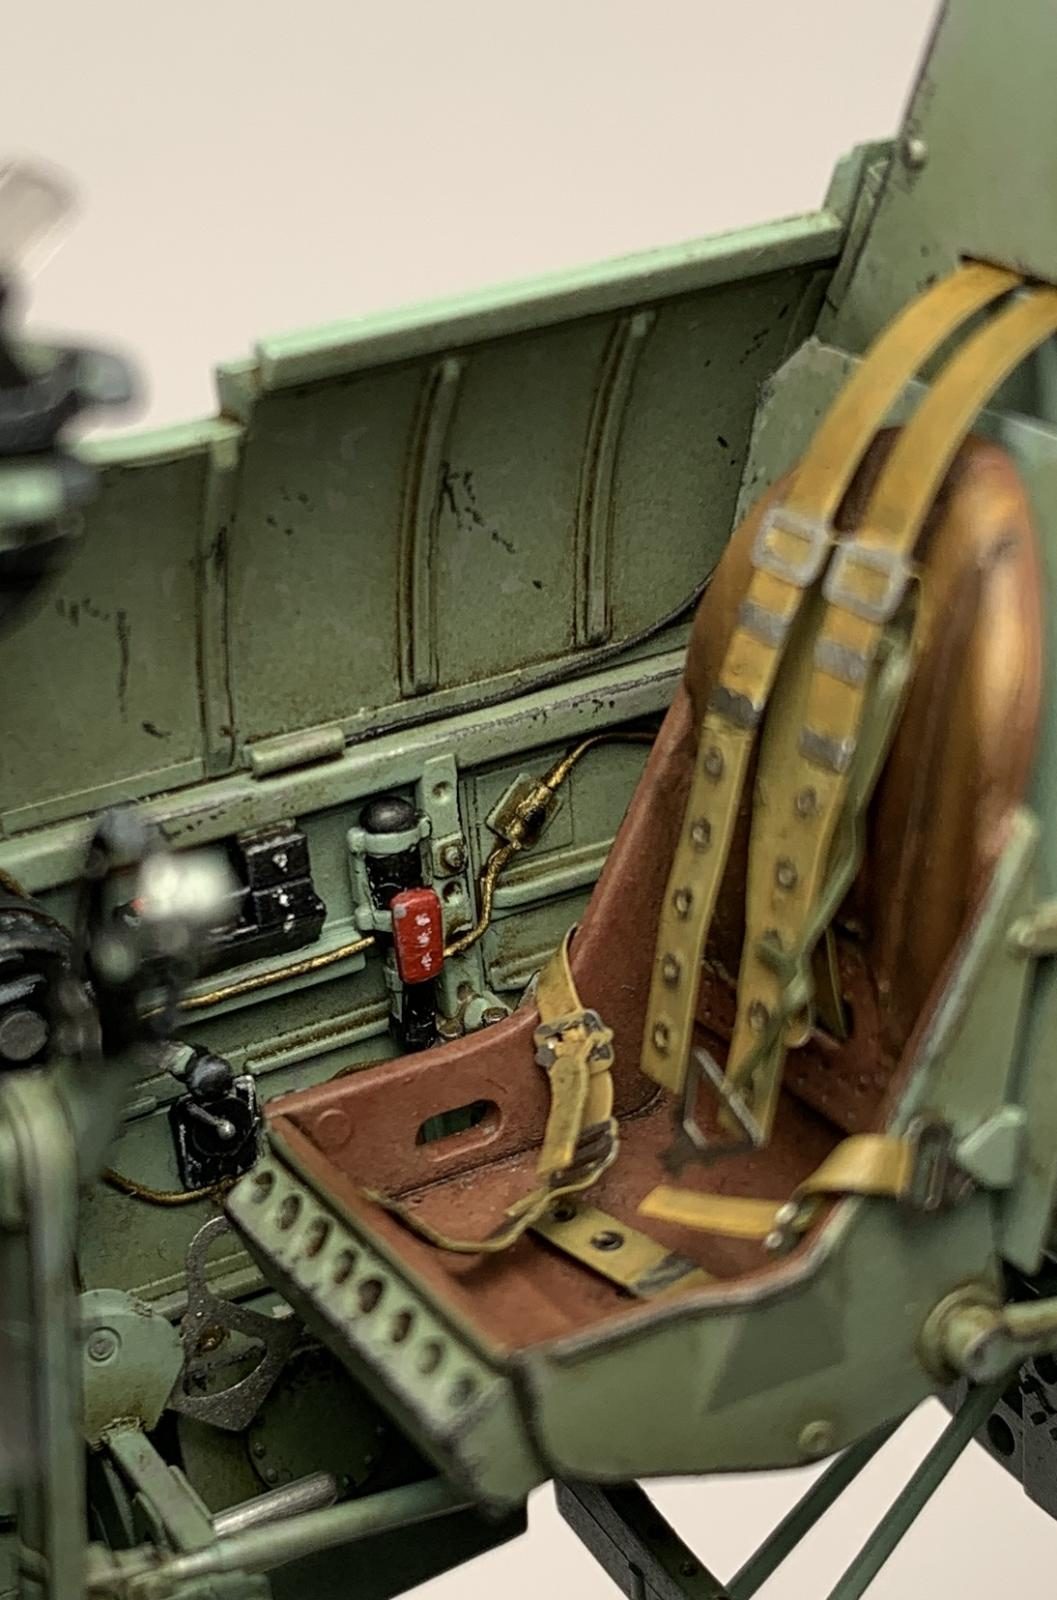
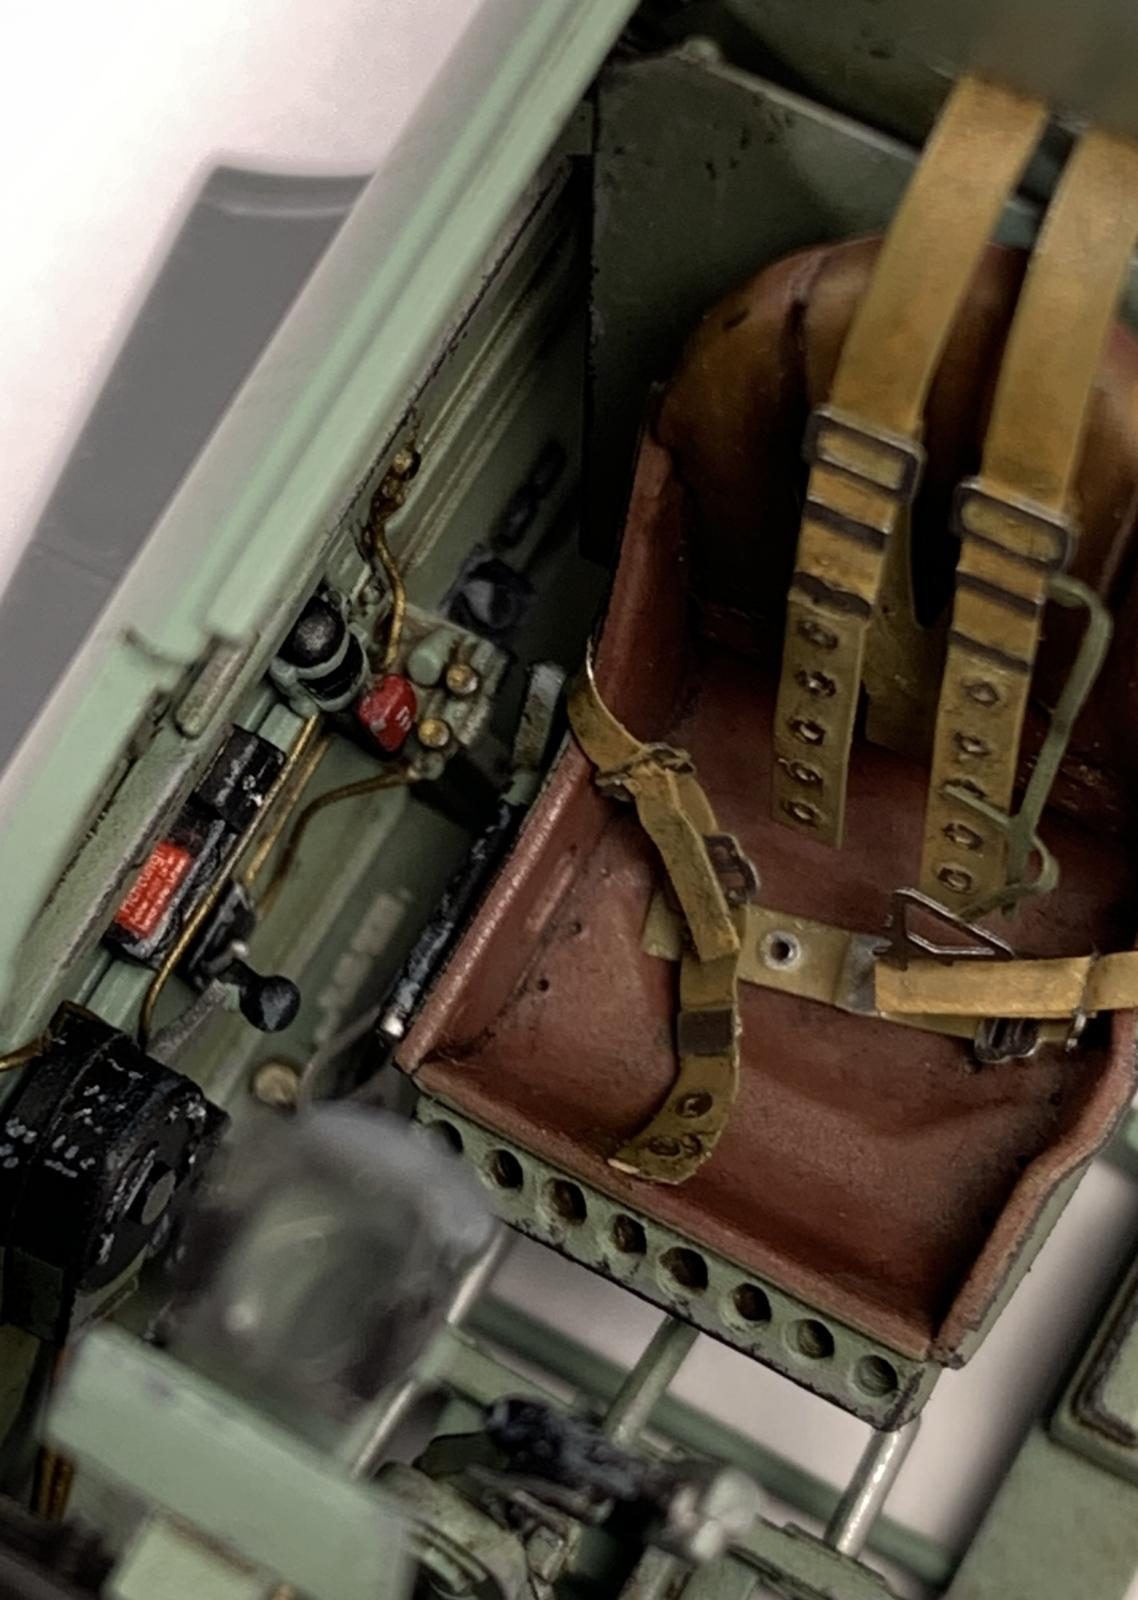
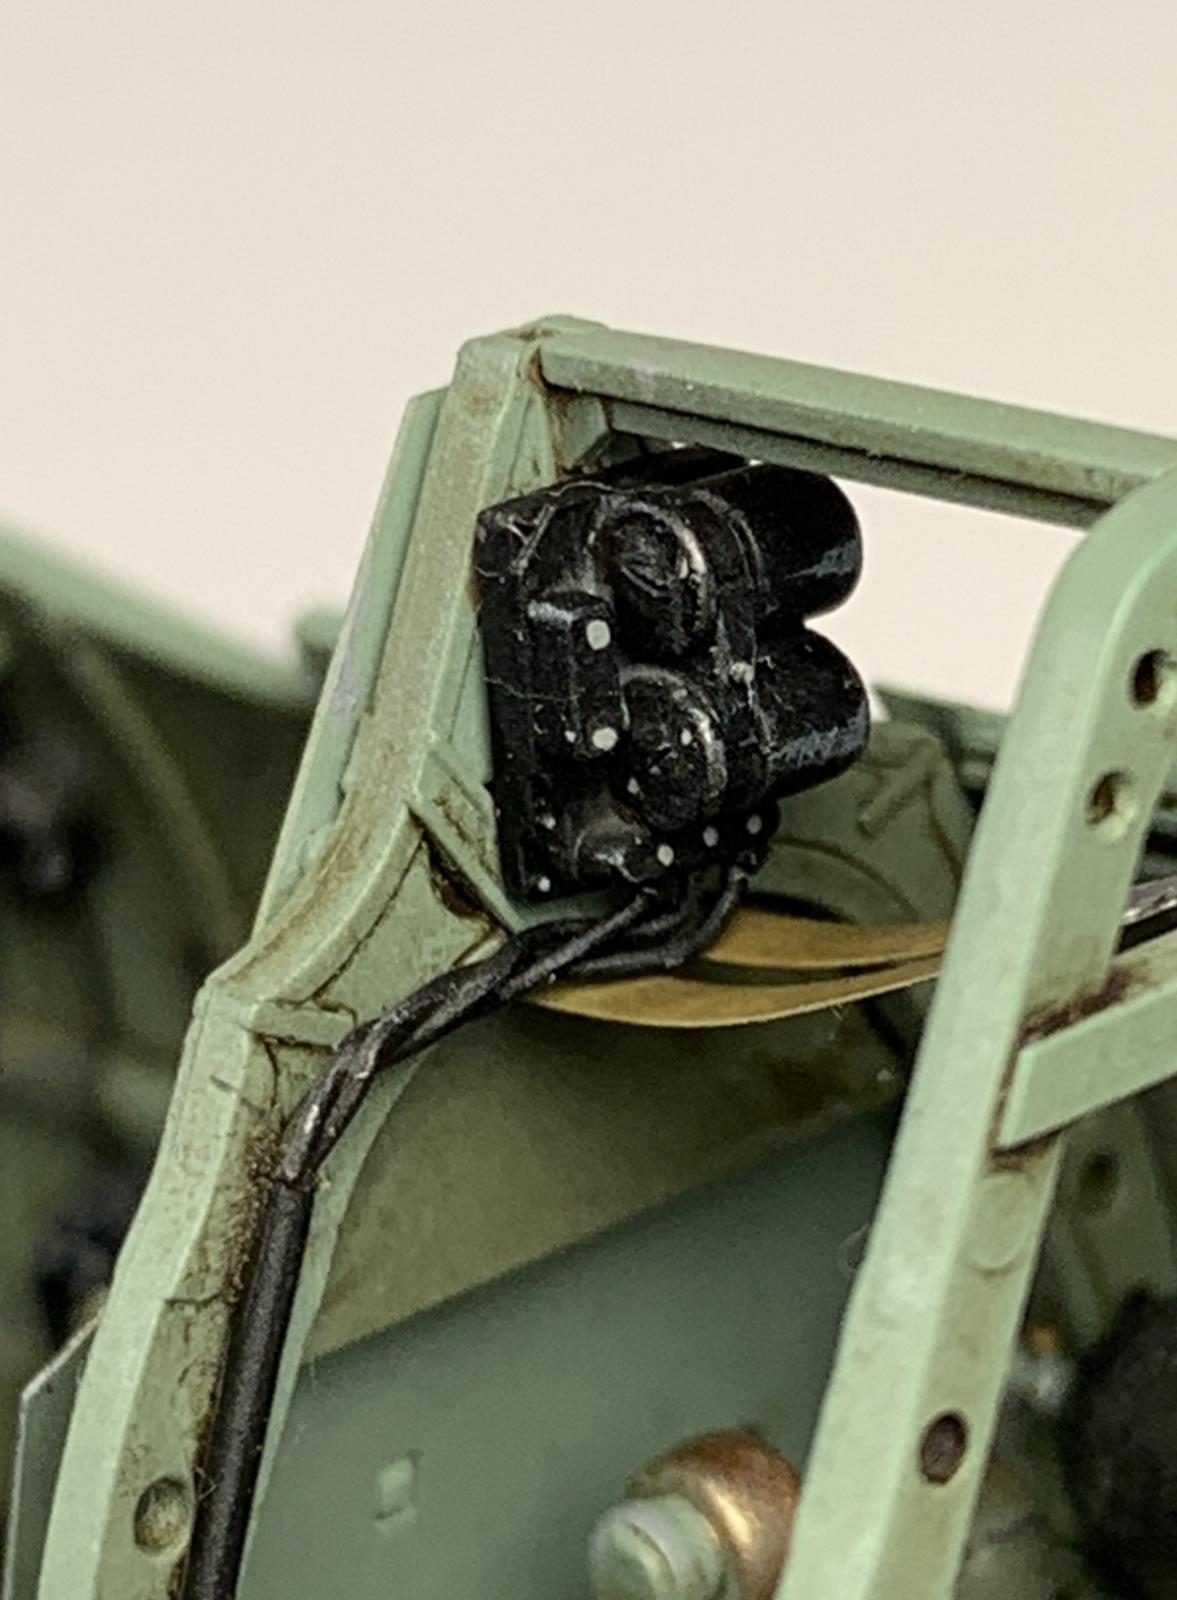
I really enjoyed spending a lot of time adding a lot of details in the cockpit and engine. I learned quite a lot about scratch build with this model, mainly playing with lead or copper wires and brass plates.
Globally the kit was aligned with the Tamiya high-quality standard however I was disappointed by the crazy amount of ejection pins, and often on visible spots.
I used AK Real Colors applied on a black primer which allowed me to build nice shadows with the airbrush and an uneven surface closer to reality.
I used VMS varnish to protect the paint before applying oils. VMS products are impressive and VMS varnishes are amazing!
Little tools are from Mini Art; was really impressed by the quality of the brand compared to the Italieri accessories I also used for the wood boxes.


Another super stunning build Alex! Liked!
Thanks Andrew, some other builds will come soon. Hope you will also like them
Great job on weathering
Thanks a lot, George
You may want to move that engine cowling out of the way. It's likely to get stepped on!
Great job!
Actually, I can remove it, but only for my home guest. You should come around with a nice bottle of wine and I will remove the cowling
Your love for detail definitely shows. Great job all around.
It takes sooooo much time... but I love it
Stunning would be the choice word for this build. I wish I had half the talent that I see displayed that put together a model like this. Excellent.
Hi Walt,
Looking at your models, you are also quite talented
Thanks a lot for your kind comment.
This is really beautiful work. Superb attention to detail, great paintwork, and a diorama result that "tells a story." "Liked"
One minor small thing (easily fixed) will move this from 99 to 100: the left aileron is deployed too high. It's not well-known among non-fliers (some pilots don't know it either) but the ailerons deflect up about 1/2 as much as they deflect down - it's to minimize "adverse aileron yaw." So if you reduce the deflection of the left aileron to half what you have on the right, you will have achieved the usually-unreachable goal of 100% perfect.
Hello Tom,
Hehehe, excellent point, I did not know that. I immediately did the change. Now I moved to 100! Yeahhhh
Many thanks for your nice comment and valuable remark.
Beautiful paint and weathering work, and love the detailing. Excellent build!
Thanks for your kind comment, Greg
Beautiful build.. well done...
Many thanks, John
Stunning work, Alex!
Amazing attention to detail!
Many thanks for your kind message, Spiros
Outstanding work with this Mk. VIII. Absolutly beautiful work...Now I want one
If you would come home with a dozen bottles of good Australian wine I would maybe give it to you... ;-D
Thanks a lot for your nice comment, Jorge.
A very different scenario for sure, very well done Alex.
Your skills are very well demonstrated here.
The painting and weathering are just so well applied that it is a amusement to see.
The work in the cockpit is well done and sharp, the model in whole is a total stupendous thing to observe. Thank you for sharing these images.
Really happy with your comment, because my purpose for this model was exactly what you described; I wanted the observer to spend time to discover tiny details and telling a story with the weathering.
Many many thanks for your kind message
Fantastic, Alex.
To me a perfect build on every part.
This diorama is fantastic, the toolbox is a perfect detail.
I am blushing now!
Many thanks for your kind message
One of the best builds I have ever seen on here.
Congrats!
Many thanks for your kind message, really touched by your words.