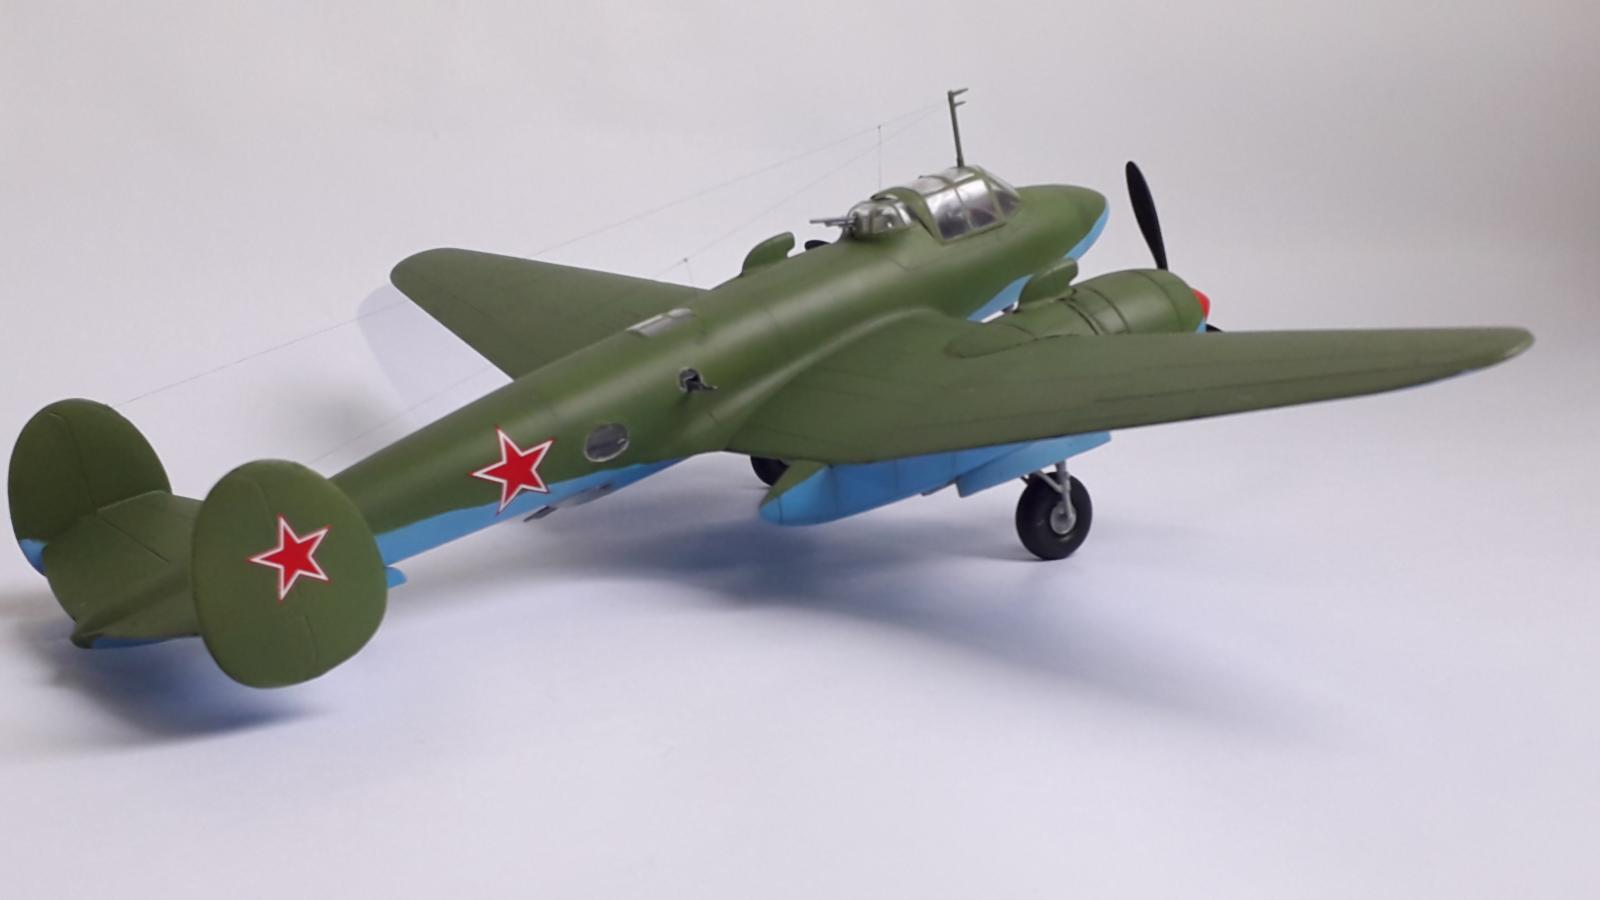
HiPM 1/48 Petlyakov Pe2 M82
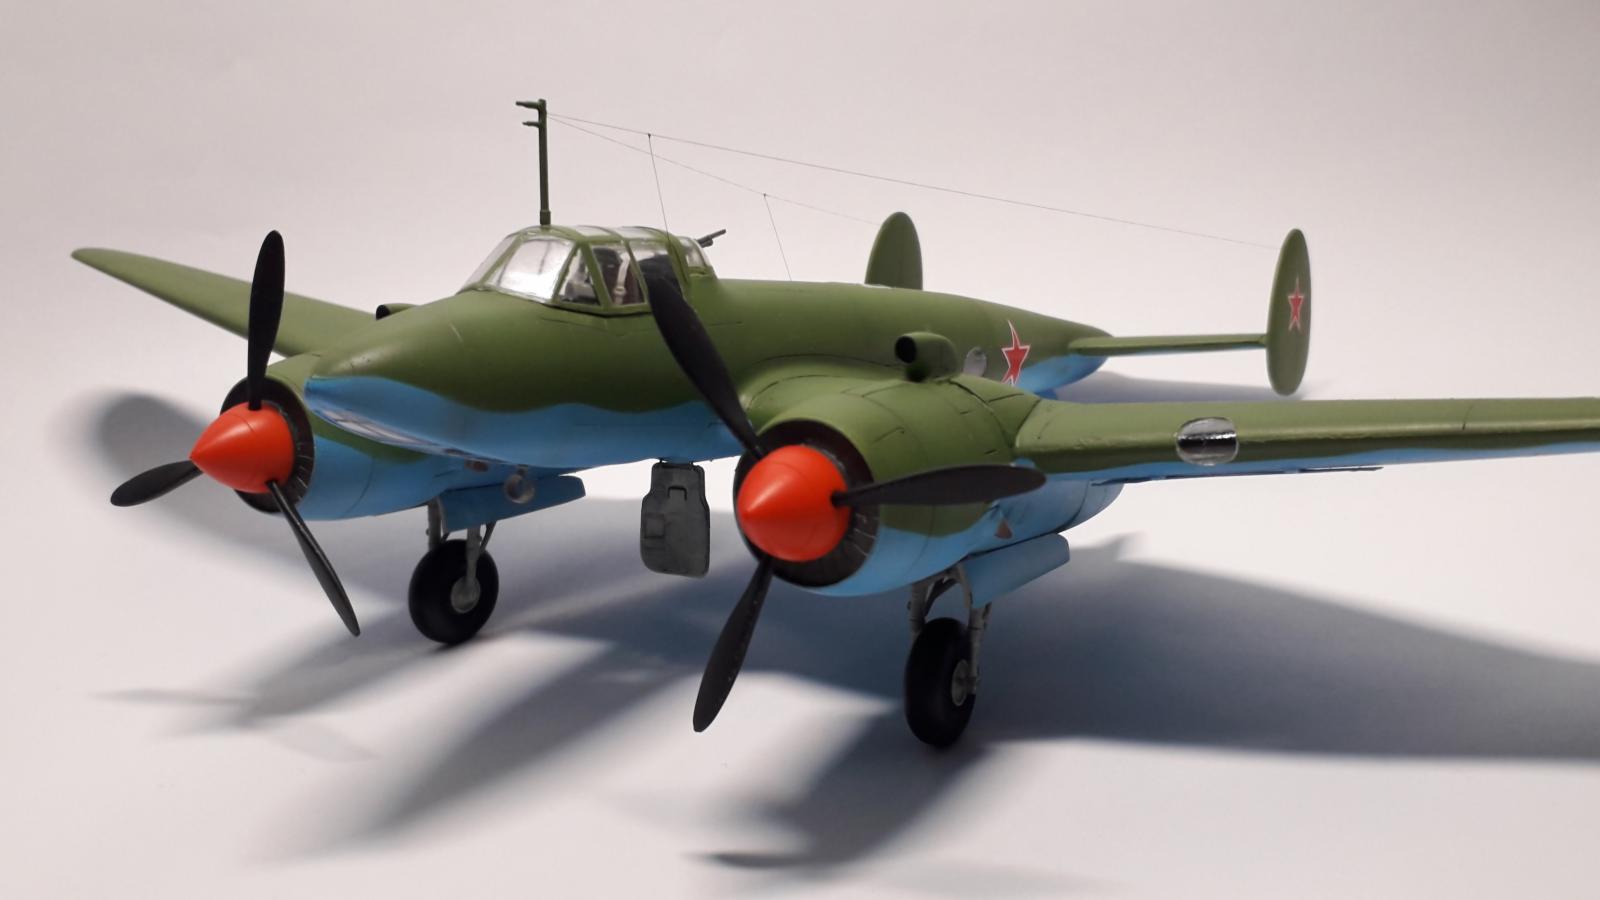
This is my build of the Petlyakov Pe-2 M82 from HiPM (Historic Plastic Models) in 1/48 scale.
The Petlyakov Pe-2 M82 was built to house the Shvetsov M82 radial engines. The reason for this was that there was a chronic shortage of the standard used Klimov M105 engines. At the end of the war only 32 aircraft were produced of which 24 entered service.
That this is a rare version is obvious when you try to search the internet for modelled Pe-2's in combination with these radial engines, I was not able find any example of already finished models.
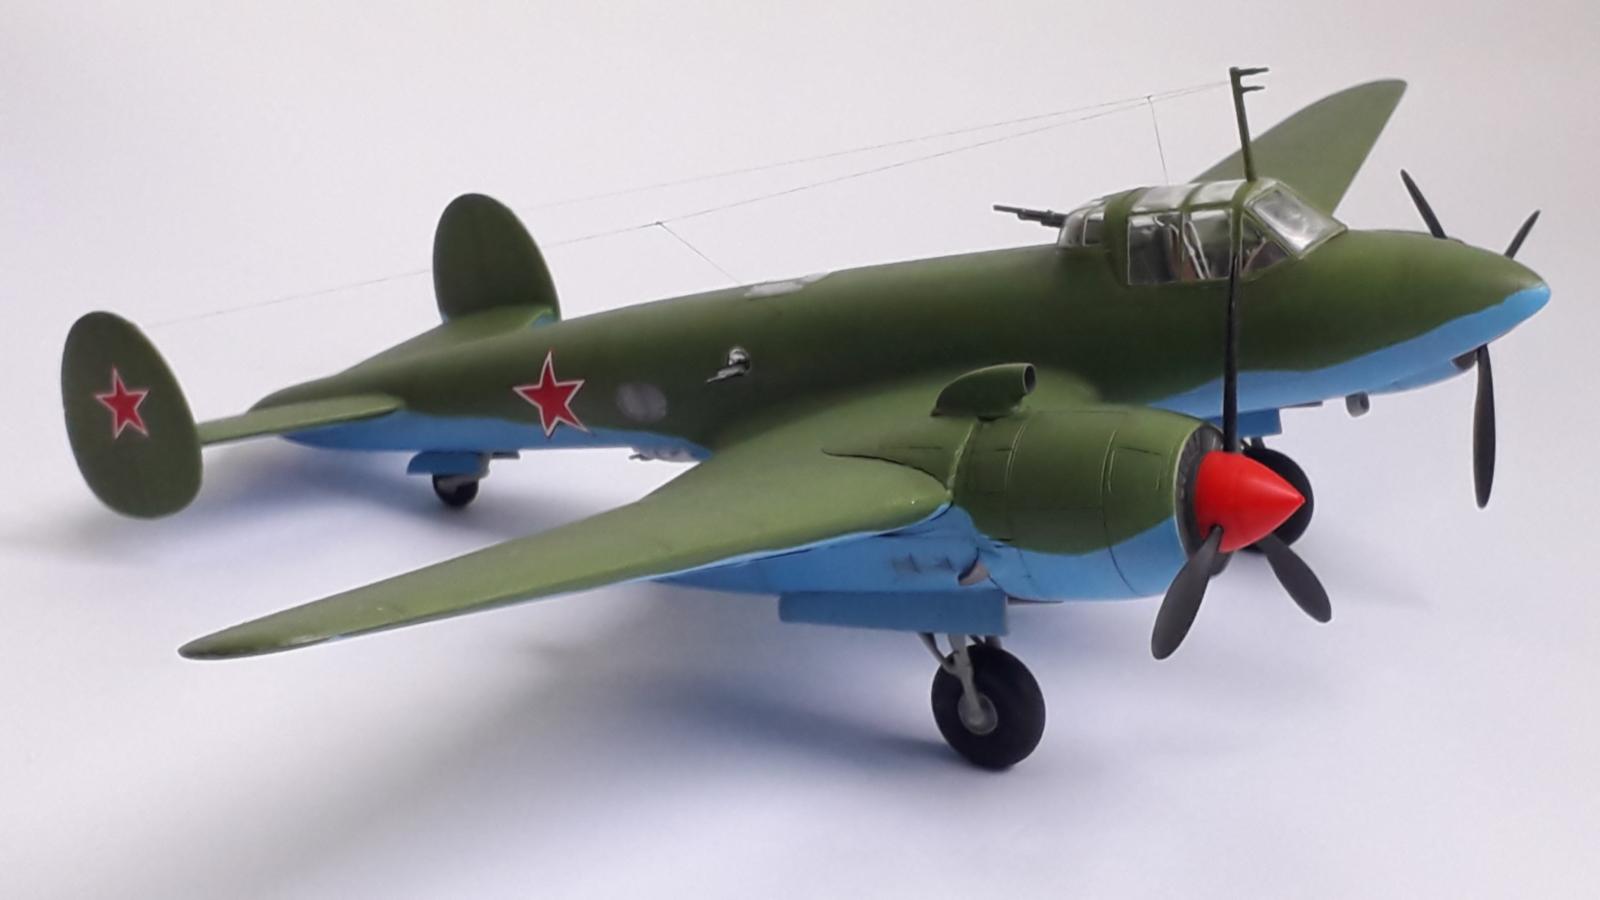
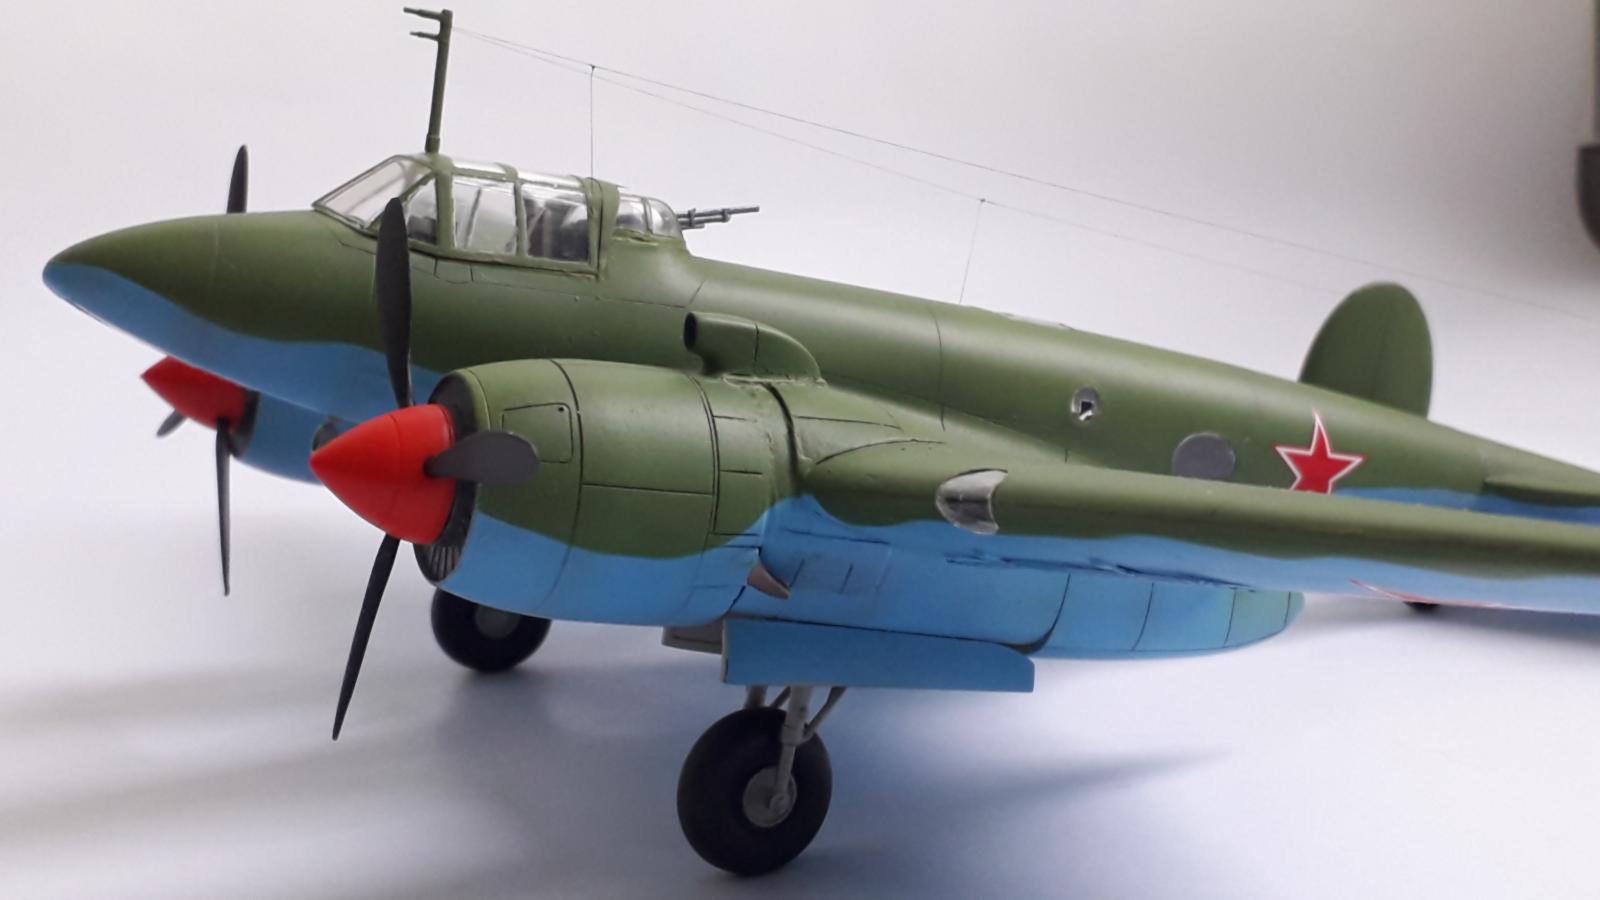
The box from HiPM (48-503) was a limited edition and to create it like an M82, they provided several parts in resin like the nacelles, spinner and propeller blades. Although nicely shaped, parts of the nacelles were very thin. Even so thin that it was impossible to separate them from the holder without getting damaged. Some parts were eventually so badly damaged that I had to spent quite some time to correct them.
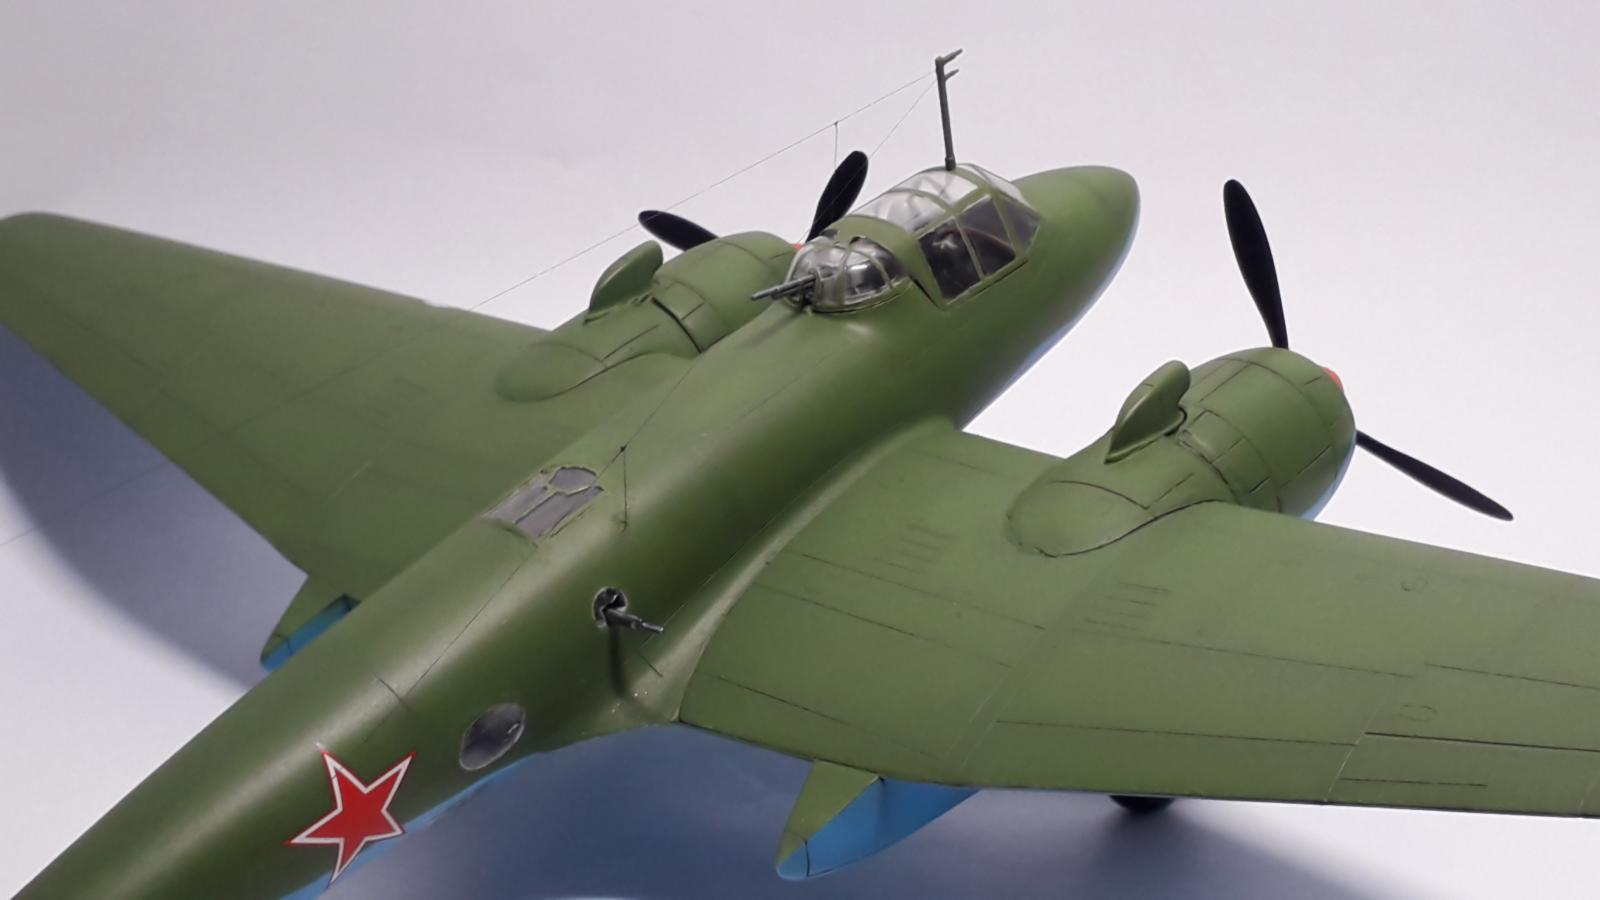
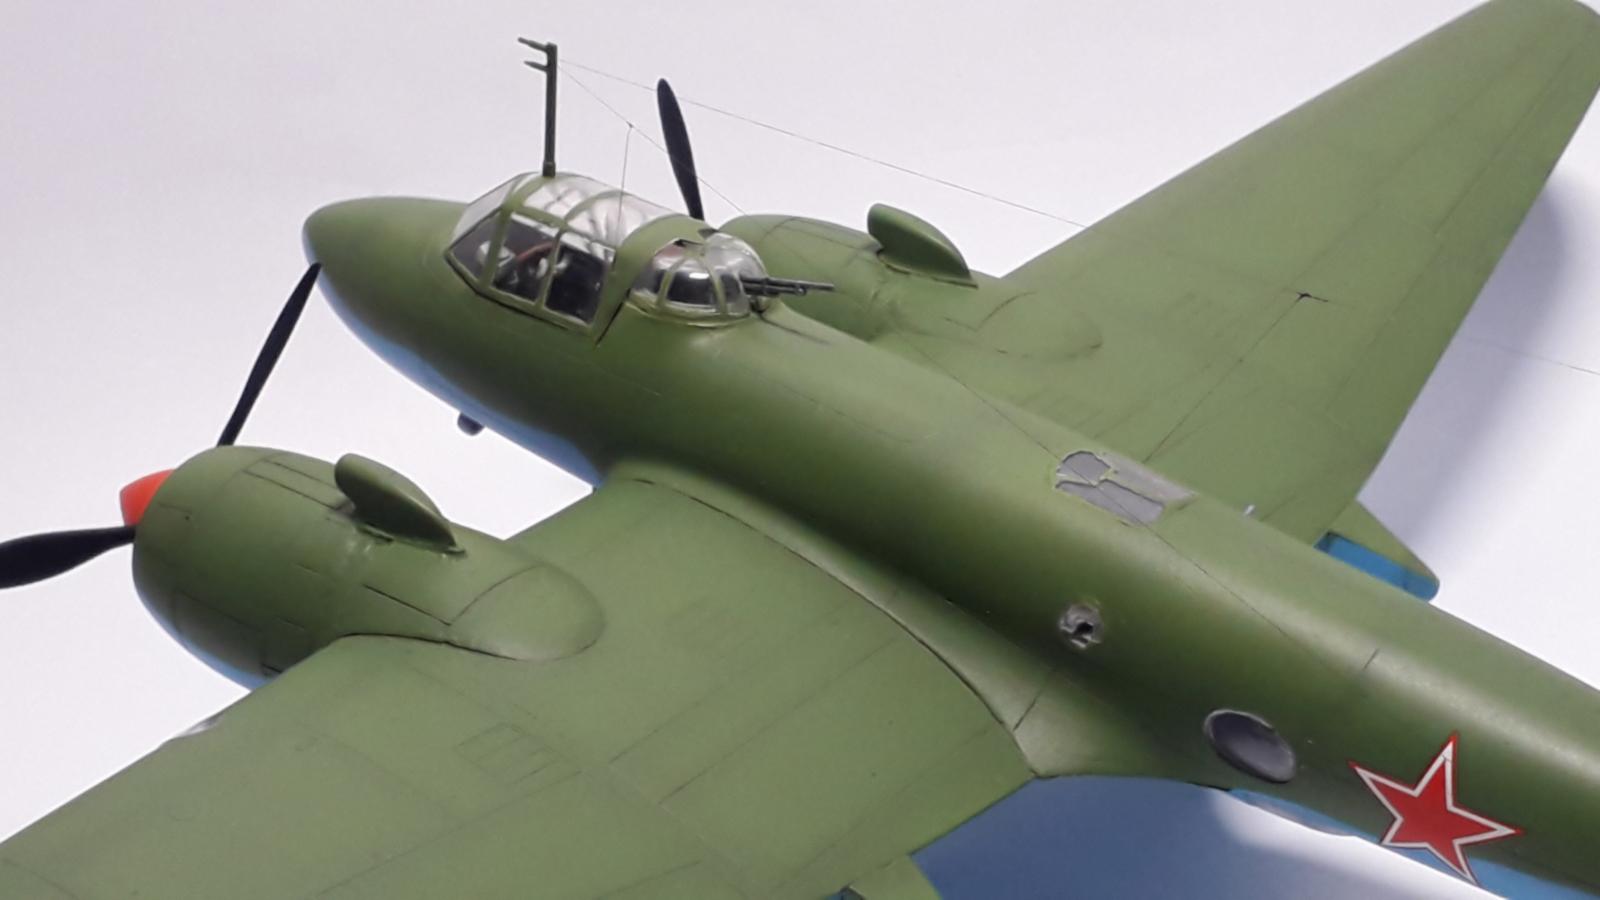
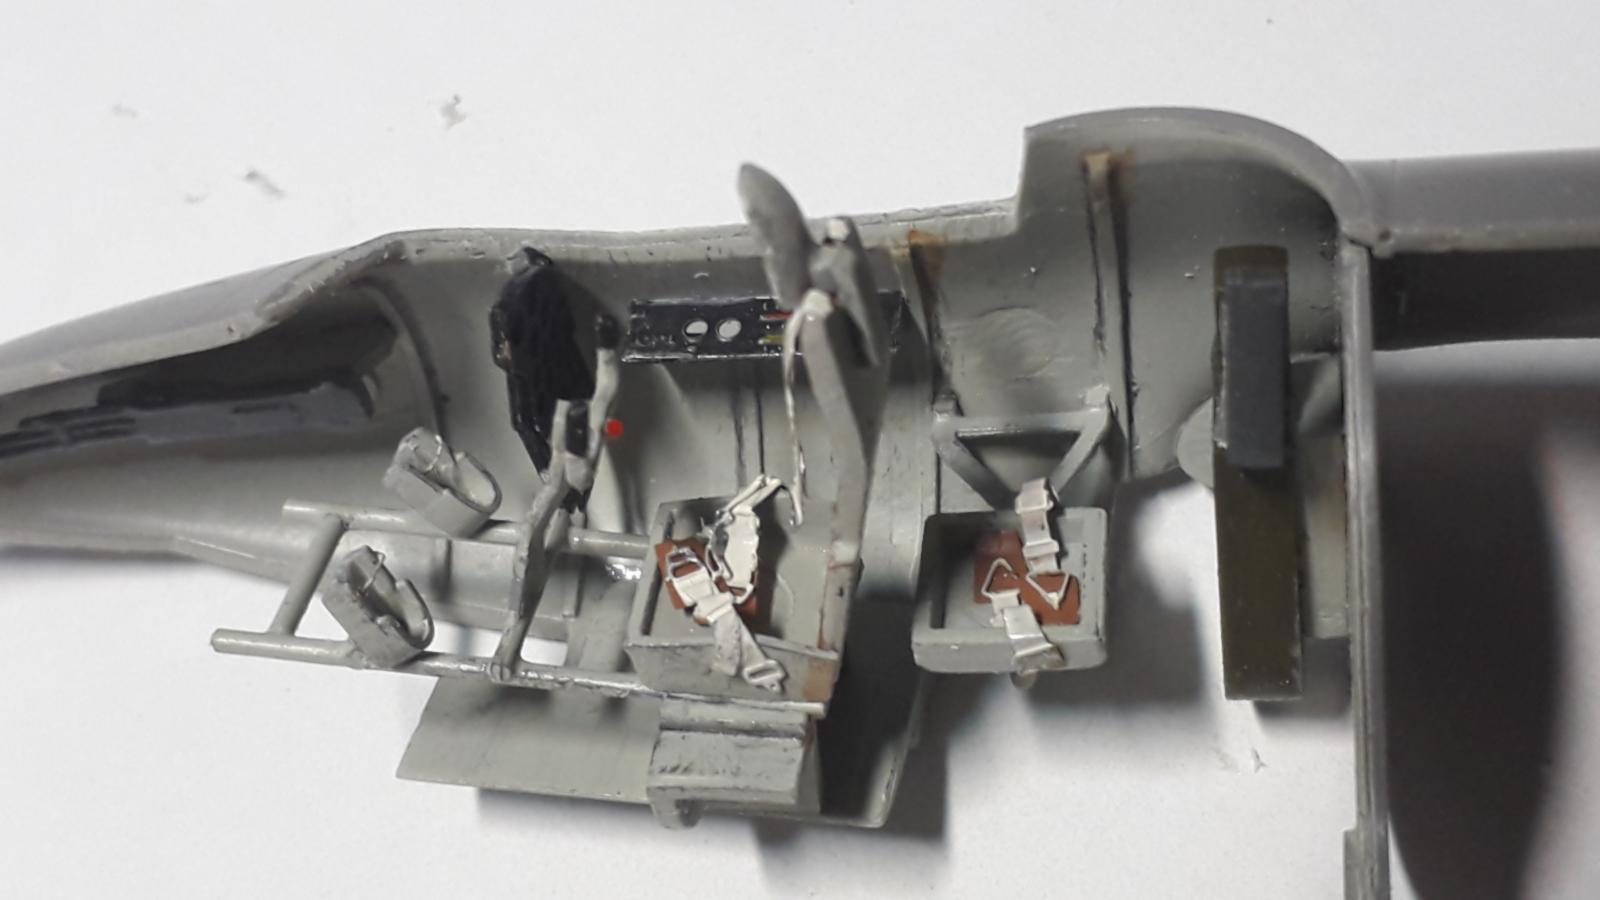
A nice number of photo etched parts was present and of good quality to give the plane some more details, like some cockpit controls, seatbelts and the entrance hatch.
Quality of the plastic parts however was not that great, lots of flash on almost every part had to be grinded to get it nicely shaped. Also, the point which holds the parts were pretty big.
Thickness of the plastic parts did also vary a lot. The fuselage halves for example had different thicknesses making it very hard to get them fit properly. Only severe grinding could solve this.
Following the instructions is not advisable. You have to figure out yourself what is the best order to get everything in place without being hampered by parts blocking your progress.
In general, to get this kit fit properly, a lot of grinding, filling, grinding, filling, and so on, had to be done. There was a certain point where I thought to just stop with this kit and start an easier one to relax a bit.
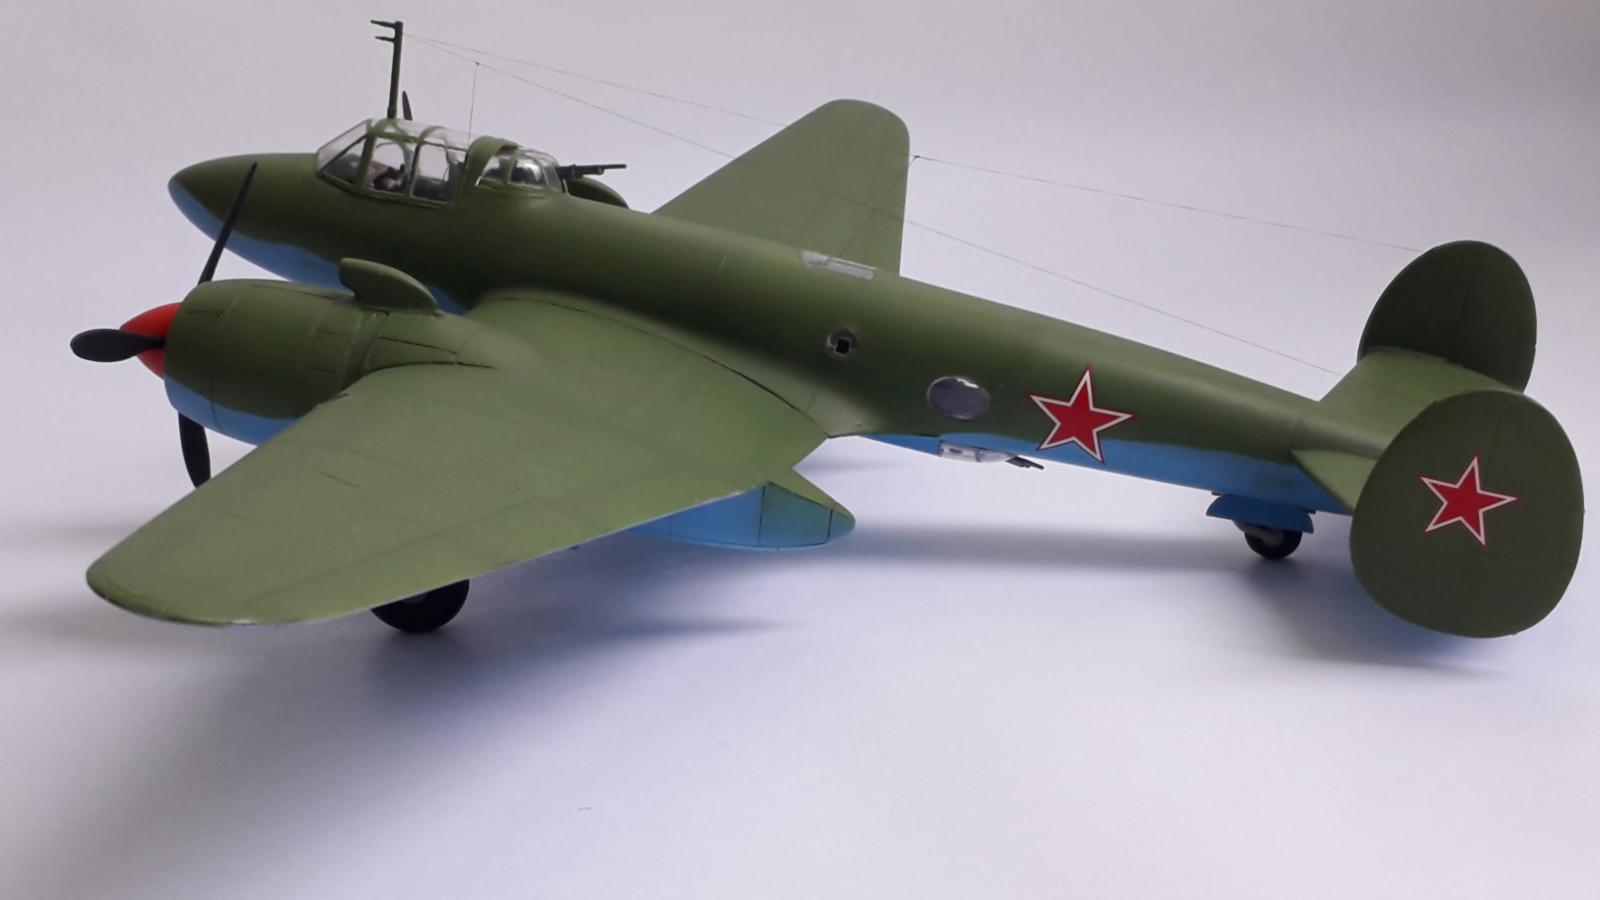
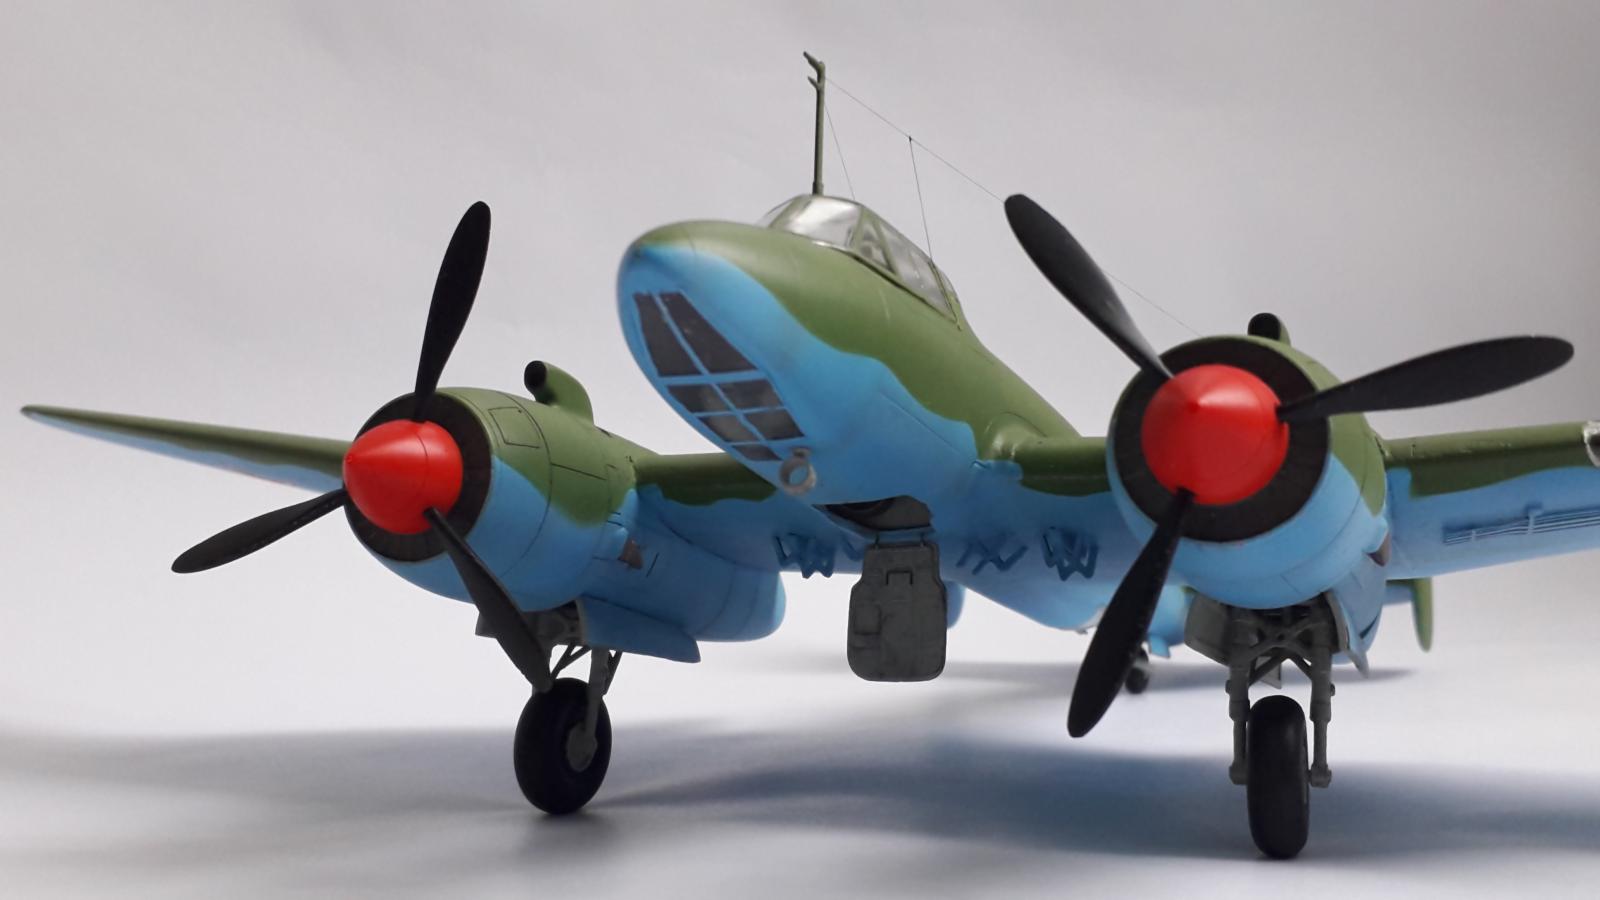
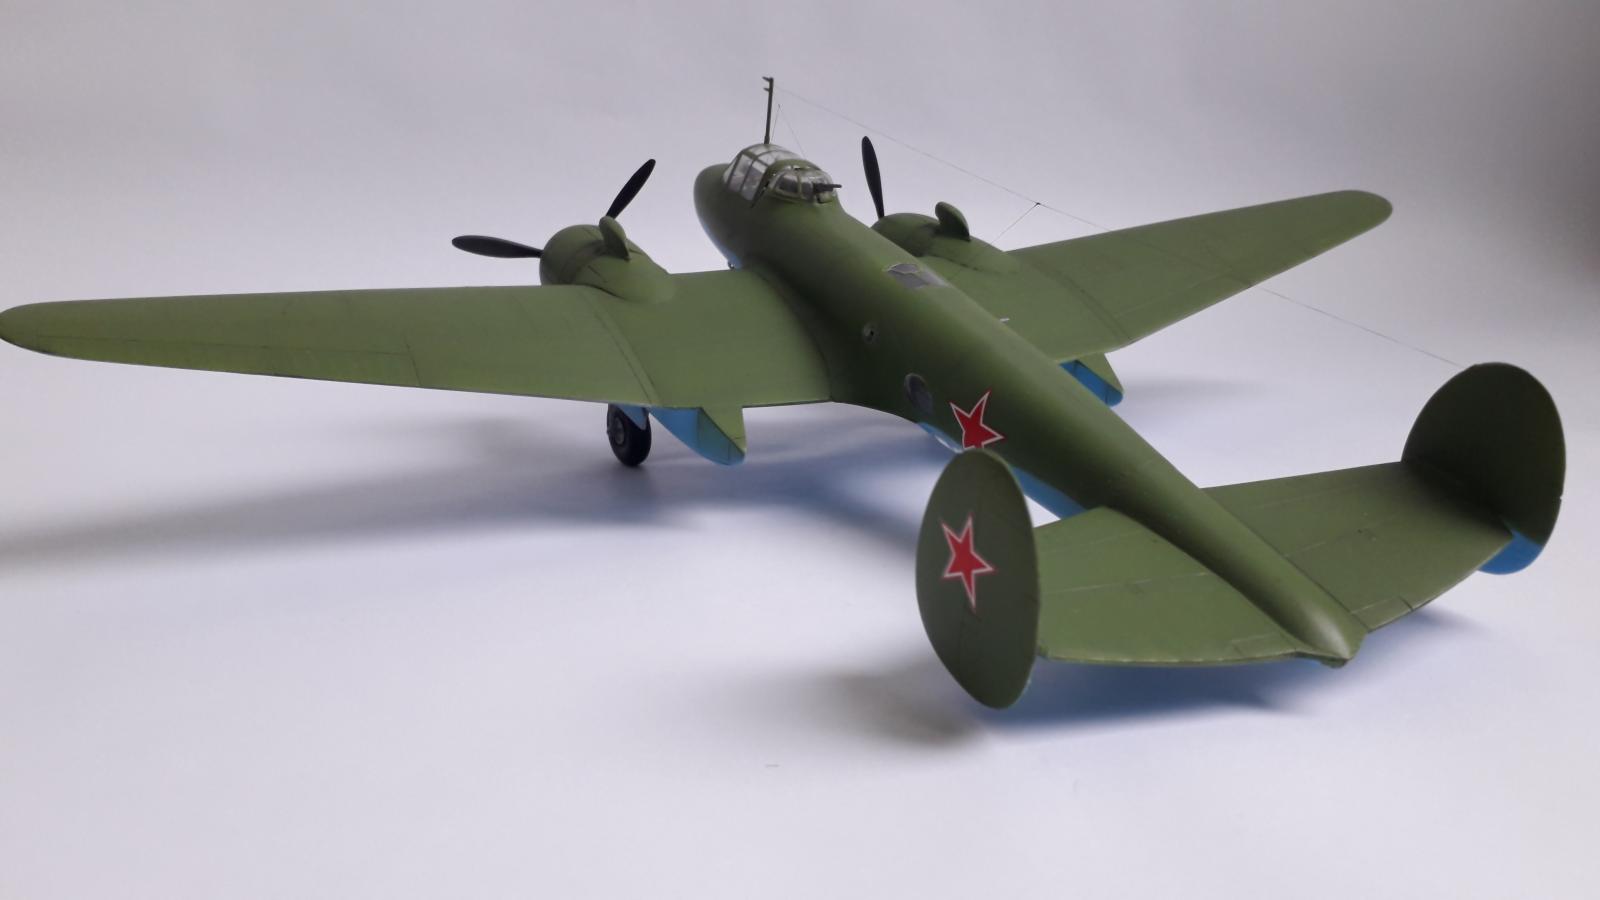
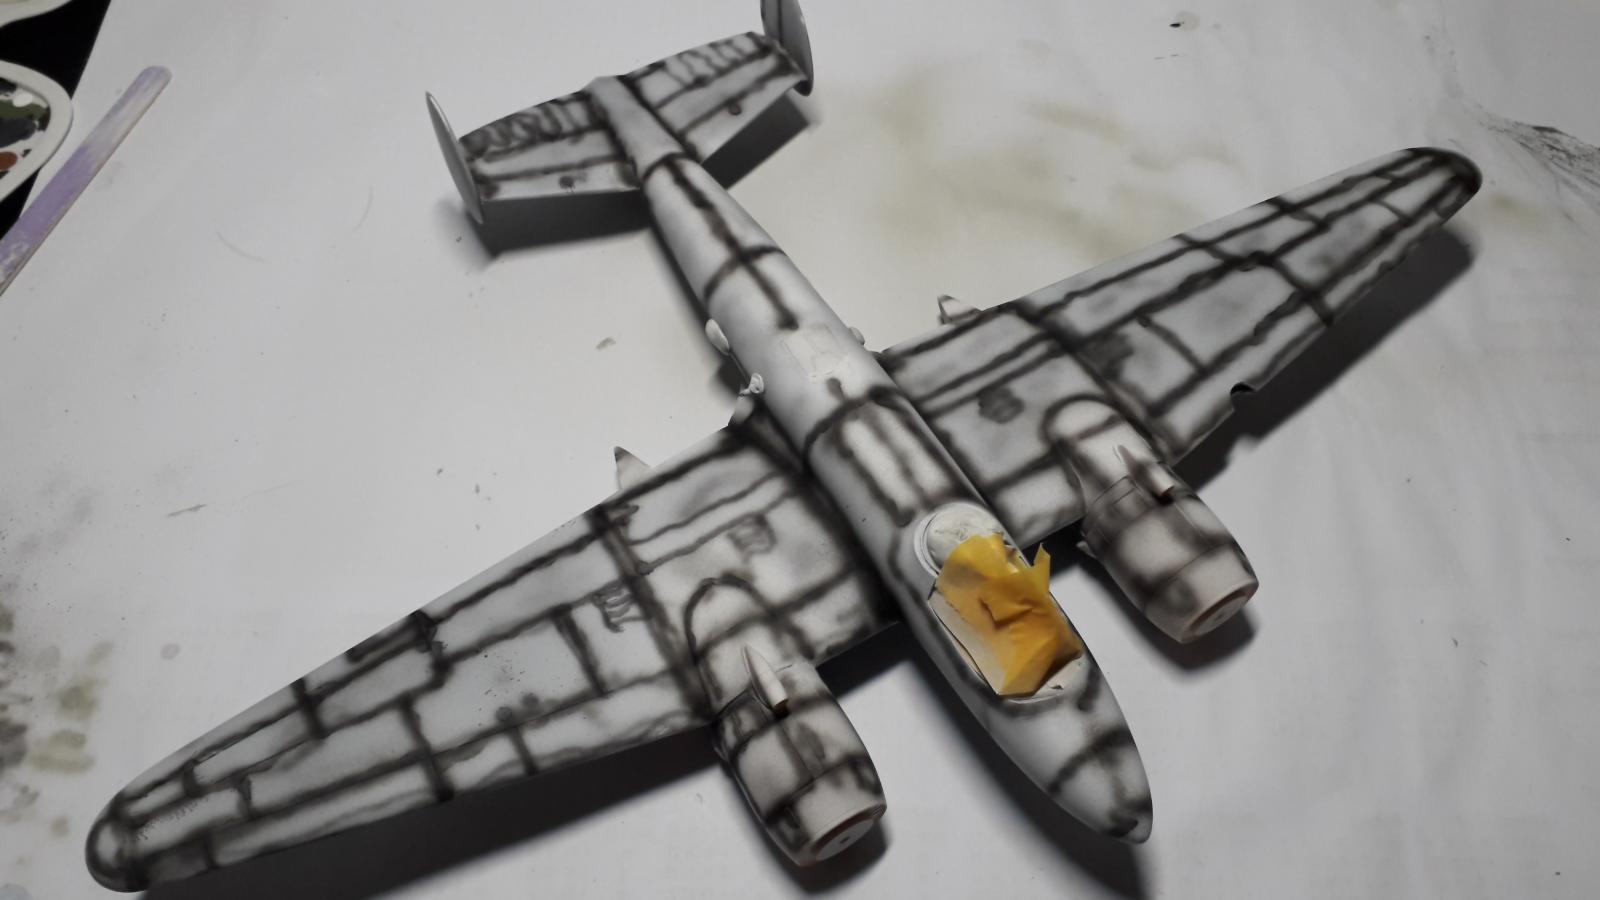
At the end I forced myself to continue with this one and tried to get the best out of it with my novice skills. After finally getting everything more less together, I applied Vallejo white surface primer. Next, I pre-shaded the panel lines and finished the top part with Vallejo light green (71.006) and the bottom with a 1:1 mixture of light sea blue and white, both Vallejo as well. Finally, I applied a satin varnish.
Applying the decals on the other hand was pretty simple since only six were provided.
This kit was built straight out of the box, besides a lot of putty and the antenna wiring, no additional elements were added.
Although this is certainly not my best build and I'm sure it can be done better, for myself the end result is not that bad considering the number of corrections and repairs that had to be made. I just tell myself that this plane is so beautiful by itself that the imperfections of the build are simply overlooked.


This is simply a stunning job on this most difficult kit, John!
Finishing a HiPM kit is an event by itself, let alone a beautiful result like yours.
I love the looks of the Pe-2, this special version really standing out.
You certainly went a long way taming this beast of a kit. Love the colors and the cockpit, too.
Had no idea of the M82; now I am so glad I know and your model's image will come in my mind everytime I will think of this version!
Congratulations!
Of a note, I have the "classic" MPM Pe-2 at my stash, that would love to build sometime, your build being so tempting to start it now. I have so many ongoing modeling projects, that I certainly have to restrain myself. Don't know for how long, though...
Thanks for your kind words, Spiros. @fiveten
I picked this kit just because I like this plane, not being aware of the lack of quality of HiPM and the existence of this version.
Really looking forward to your build.
Although I'm wondering how can add even more builds to your work in progress list.
John, you have presented a really nice model of this rare variant of the Pe-2. Tough kit too boot as well. I will give you lots of credit in your perseverance on finishing in the end a quality build. Overcoming all the issues. Everybody is driving Spiro's building time over the top with all these neat models. Very motivating. Outstanding work on this super rare bird and the first one I have ever seen built, much less even seen a pic of the real one. Thanks for sharing.
Thanks Chuck @uscusn
At the end this rareness makes it even more special after all those struggles.
I’ll just echo Spiros and Chuck comments, a great result over what looks like a very difficult kit, your build is as rare as the real plane was John
Thanks a lot, Pedro. @holzhamer
Even in documentation this variant of the plane is hardly mentioned.
I found some information in "Petlyakov Pe2 in action" by Hans-Heiri Stapfer.
Great looking Pe-2, details in cockpit are superb, what stands also for overall look. Very nice model
Regards Djordje
Thanks, Djordje @djordjestarcevic
Hi john. Beautiful job !
Soviet Aircraft design has elegance written all over this one. Their model kits however...
I have had similar issue as you describe of poor fit, flash and sinkholes.
Not sure I will embark on more of these well intended, but technologically poorly made kits.
It would be nice if we could see injection moulding explained. That and making the mother model . I alway wondered how the kit designers got all the minuscule details incorporated.
That said I am still learning, especially around paint and techniques.
Not showing anything right now for this reason !
Thanks Bernard. @bernardbedeur
It would be nice to see this kit being re-engineered.
With current techniques they should be able to create a wonderful kit.
Good for you, John. You did a fine job on a very difficult kit, a tough one even for folks who've been around for a while gluing-up little plastic airplanes (speaking from experience, I tossed it after many re-starts).
FYI, there's a great 1/72 PE-2 from Zvezda (# 7283) which goes together quite well, although the interior is a bit fiddly. An enjoyable build, unlike the HiPM.
Again, good work on a demanding build.
Thanks a lot for those kind words, Bob @bails
Not sure if my eyes can still handle 1/72, but I might give it a try.
Great job on this tough kit John. It looks as if your ready for the Fokker G-1!
Thanks, Dale @dtravis
Hopefully the G1 will be my Christmas gift.
It sure is on my wishlist.
Looks good! Way to wrangle it together! Love the Pe-2 also, and you don't see many built - regardless of the version.
Thanks, Greg @gkittinger
Those Pe-2's indead are atractive planes, regardless the version.
Since the release of the Zvezda kit you don´t see these kits very often. You did a great job with a not so easy kit!
Thanks, Reinhard @grimreaper
They are indeed pretty rare.
Fantastic work and result. Particularly since "HiPM" is Modelerese for "Run Away! Fast!"
I did the "normal" release and found it "interesting" (as in, "May you live in interesting times")
Thanks, Tom @tcinla
I bought this kit because of the plane and was had not heard of HiPM before.
After reading some comments about HiPM I had my doubts but decided to just give it a try.
Indeed a monster to modelers but also a challenge.
Sounds like this puppy arm-wrestled you all the way through - but you definitely triumphed in the end!
You have a beautiful looking model and a beautiful looking aircraft, Well done John.
I have found and bought a couple of HiPM kits (He100D & BV141B) and I an too shy to try them out just yet.
Thanks for your comments, George @georgeswork
It was indeed not a cute puppy.
Your HiPM kits are also lovely planes, but can imagen that you doubts to start building those.
John, @johnb
You should be commended for finishing this one up. It looks very nice, and I have never seen another one like it built before... Ever !
In fact, I didn't even know they made such a kit as yours. I have the "Classic" kit, like the one that Spiros has mentioned, and I also have the newer Zvezda offering which looks very good in the box. Both of my kits are 1/48 scale. The other HiPM kits I have are the He-100 and a SB2C Vindicator. Once I purchased the HiPM Vindicator, Accurate Miniatures immediately released their wonderful version of the same plane. So I never built it up yet. But the He-100 has been looked at several times, including once not too long ago... 🙂
The cockpit work looks exemplary, as does the rest of the model. You have build a wonderful looking plane, and if you ever get tired of it, I'd put it in my display case in a split second...
Well done, and I pressed the "liked" button too.
Thanks for these kind words, Louis @lgardner
Will be looking forward to your He100, a beautiful plane as well.
It looks really nice, you did a lot work on it! I like it!
Thanks for a great straightforward build post. I started on this model before building the Klimov engined version as I was intrigued (read: impatient) with the radial engine adaptation version. I was frustrated by the lack of quality made parts but continued until just before the clear parts needed to be masked. I did so e work on the landing gears and then put the model aside. That was about 5 years ago. I was sidetracked by the GWH version of the P-61 and tackled it instead. I bit more than I could chew with that one, by getting conversion kits and all 4 detail sets from Eduard. I got bogged down at some point and what with house addition work taking precedence, I halted all model work. A few months ago I finally finished the P-61 and felt I was ready to complete the Peshka. I agree that the instructions are not the best guide and have looked elsewhere for authentic direction for proper detail work. I have Peter Smith's book and the "Petlyakov Pe-2 In Action" books but find it difficult to access specific photo views for accurate details.
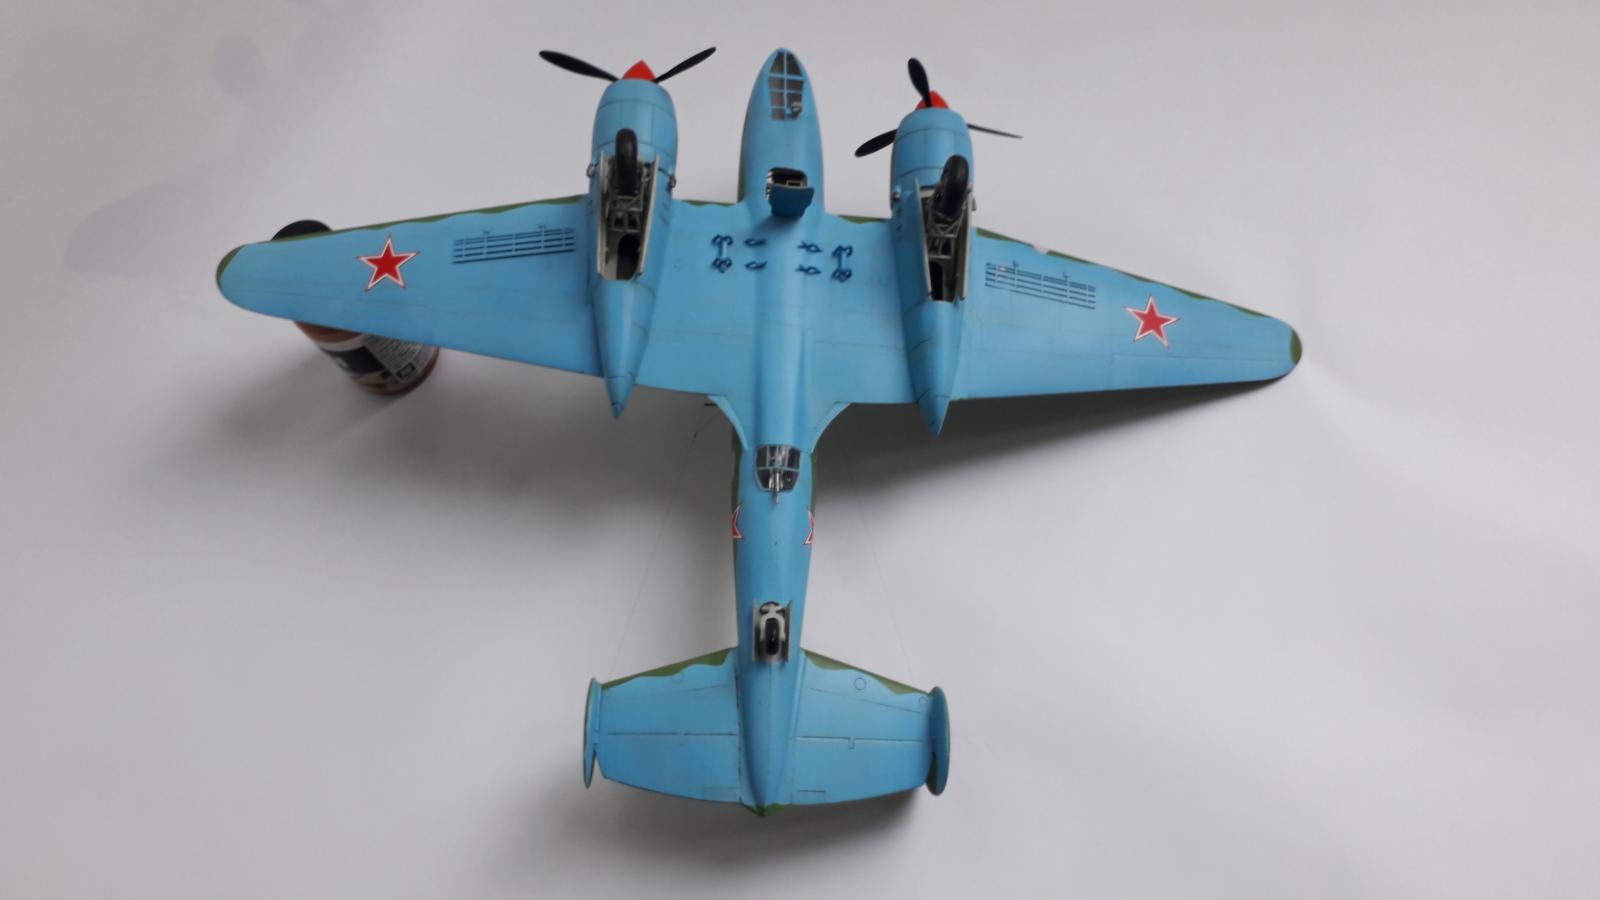
The rear gun enclosure under the fuselage is shown in the instruction manual with incorrect center portions being unglazed and I had a feeling that they were all glazed within the frames. I saw the photo of your model depicting the enclosure with all panes so I feel justified in depicting them as well.
we're lucky to have so much reference material in print and online so we can be as detailed and true as we want.
Thanks