1/72 Revell Shackleton AEW.2
1/72 Revell Shackleton AEW.2
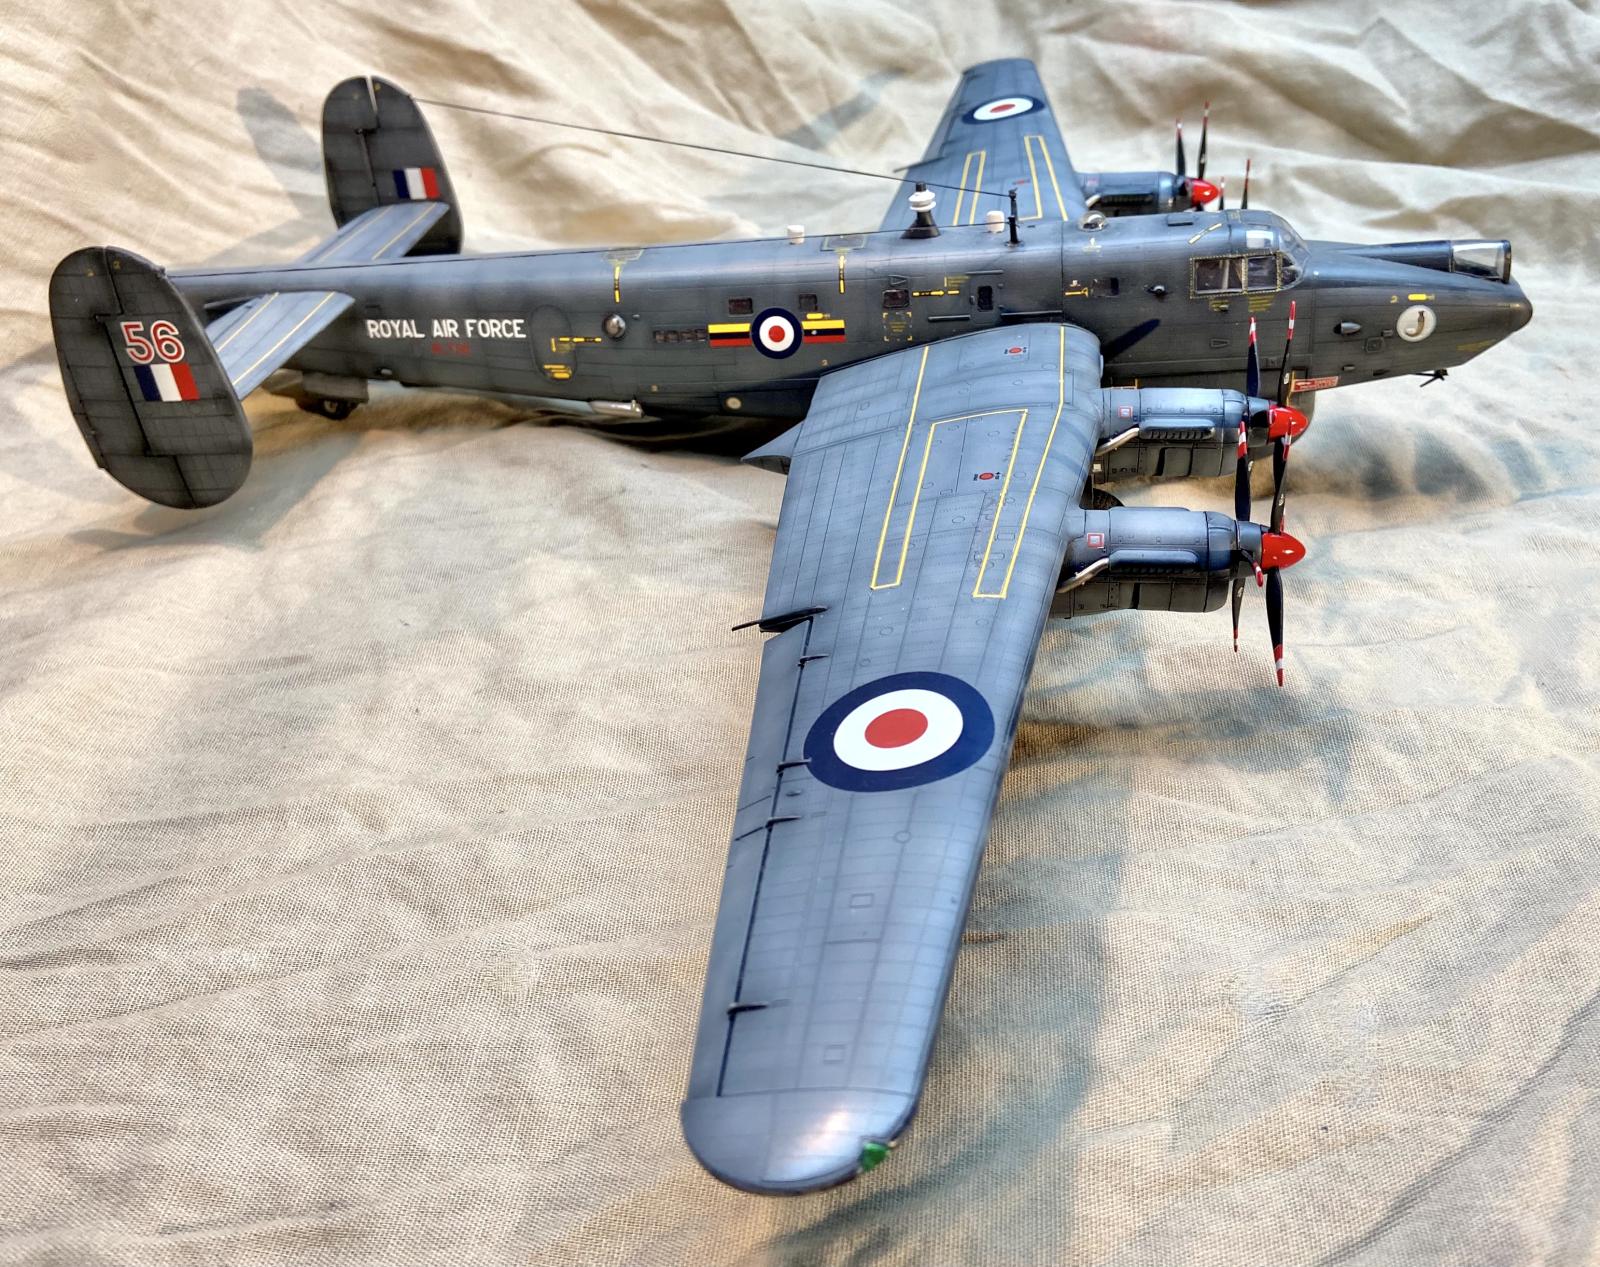
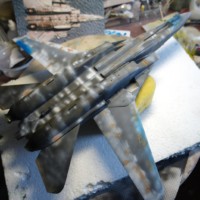
One of my favorite ‘big wings'. I wanted to build one for many years and for my sins, Revell delivered this great kit! The slide spar wings fit so perfectly they didn't require glue. I used white metal for main landing gear and kit styrene for the support parts. Thanks to Revell for the critical parts replacements!
Hope you enjoy it?
Eduard window masks
Eduard PE details
White metal and styrene wheel struts
Brass pins on all joins
Re cut rivet details where necessary
All control surfaces moveable
Resin weighted tires
EZ Line rigging
MIG Oil brusher panel accents
Tamiya, Vallejo and Mr Hobby paints
Testors DullCoat and GlossCoat 50/50 for final finish
Nice model and good work.
However - and this isn't a complaint - just passing on what we all learn when we first start posting model pix, a bedsheet backdrop is about the worst possible. You'll notice most photos use a more "solid" backdrop. A good thing to use is a large posterboard backdrop - usually two, one for the "floor" and one for the backdrop, and if you get them thin enough you can curl them together so you get a seamless backdrop. That way it doesn't distract from the really nice work you did here with the model.
PS - your model really will look better, and as really excellent as the work you put in to achieve this result is, that's a good thing.
Superb result, Clarence!
Great result
Nice work on this, Clarence, and I don’t think your background takes anything away from what must be a fairly large model. I remember the Shackletons from my teenage years when they flew from RAF St Mawgan in Cornwall, I was lucky enough to get an “air experience” flight in one when I was a cadet, too many years ago now. Definitely liked.
Superb build, Clarence @jagmkx
Great work on giving the black color a worn look.
Clarence, I’ve watched your progress with this build and the final result is OUTSTANDING….. A tribute to your skills. Knowing you for years I am fully aware of your profession as a photographer and cinematographer. Evidence of this is the extremely focused and sharp images of this model. You are indeed a professional model builder and photographer.
Nice work, Clarence.
Great build and painting!
A real beauty, Clarence...well done!
Some strong work of a elegant lady Clarence. Impressive.
Looking forward to seeing your next adventure in modeling.
Two thumbs up.
Nice model, Clarence. Very good detail as well.
Whew - real beauty there! Your finish work is excellent - love the weathering.
THANK YOU ALL for your appreciated comments! Inspires me to move forward with the next efforts!
Maybe there's a more appropriate place on iModeler for my questions but I'll ask;
I always have an issue with dust bunny particles I suspect statically attaching to the back of aircraft windows? I'd like to hear solutions? Static Gun? I tried micro vacuum, Tamiya static brush. NG
Love to find solution?
I frequently have fuselage seam separation problems? Especially like the long dorsal length on the Avro.
If you need to add lost rivets with a rolling tool, that also stresses the seam. (maybe pre heating the tool?)
I like to actually see the amount of adhesive I put on a seam (and yes I clamp and band the join while curing).
I am not trusting (maybe I should?) capillary fluids (and about any surrounding surface damage ?) like Tenax or more recently DeLux Plastic Magic. But tests have shown that the latter produces a very very strong bond. Such fuselage seams are usually thin without much local surface area albeit long. I'm considering using a contour gauge and fabricating fuselage bulkheads to provide internal strength? Or, adding a lip along the internal part of a long seam, anything to reduce the flex on the seam. I usually use Testors Liquid Cement as most Cyano doesn't allow enough positioning time imho?
The help lights are lit:) Thanks
1 attached image. Click to enlarge.
Excellent model.
As for seam separation, it is probably best to add reinforcements along the length of the model where ever possible. I usually add cut pieces of the sprue true or cut strips of plasticcard/bar perpendicular to the seam or in some cases, bulkheads,(but that gets very complicated so I prefer to keep things simple) to a very long seam to prevent the seam from flexing.
Nice job, it came out great. She a beauty.
A great looking build!
Clarence. This is a wonderful looking model. Your paint work makes is really pop !
Nice work Clarence...a great result.
As a kid I remember 35Sqn Maritime Command Shacks (MR 3) flying over our house on finals...what a wonderful noise!