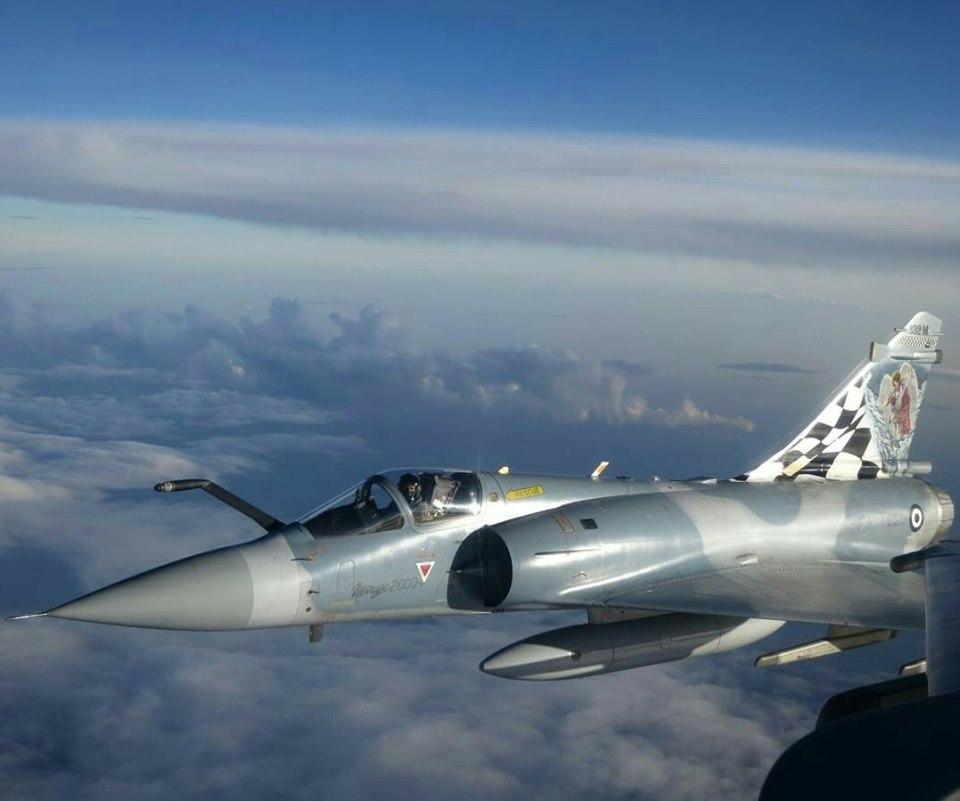
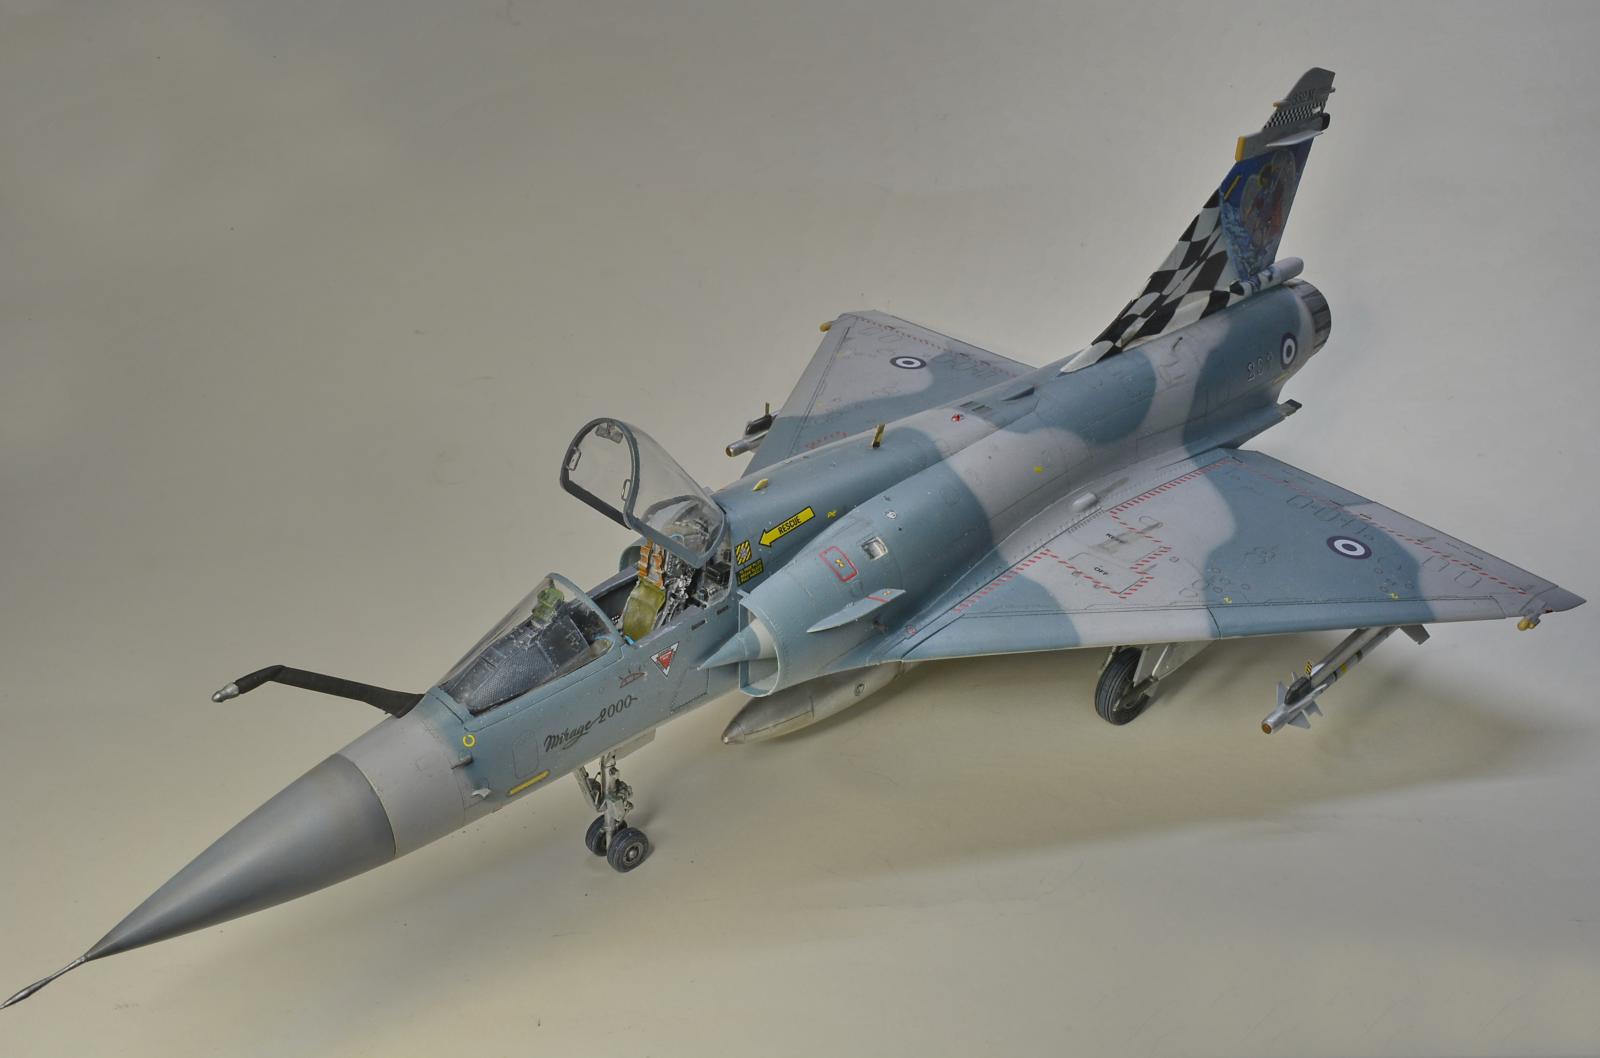
Mirage 2000 Kitty Hawk 1/32
Mirage 2000 Kitty Hawk's kit 1/32
By Giannis Asimakos
Kitty Hawk's Mirage 2000 kit in 1/32 was released in 2019 and is the only one in this scale. Opening the very large and heavy box we find 13 light gray plastic frames, one transparent with excellent clarity frame, three pieces in resin for the pilot and the very detailed engine nozzle, a small frame with photo-etched pieces, two large sheets with decals and instruction booklet.
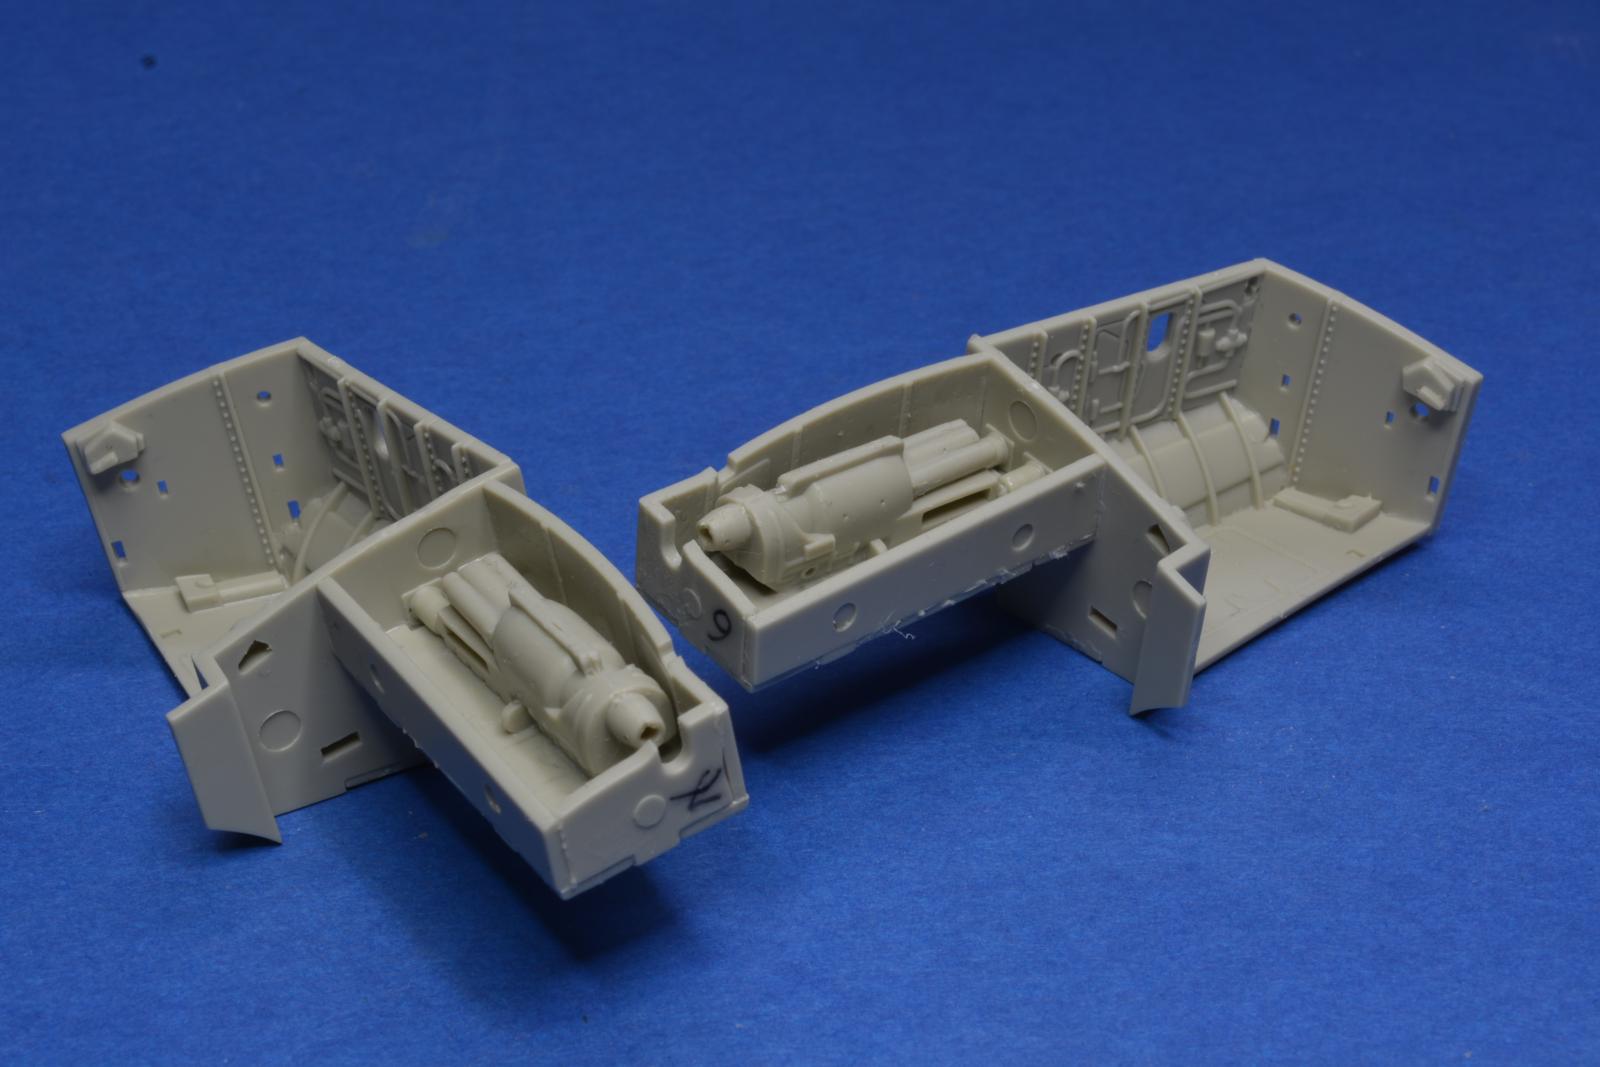
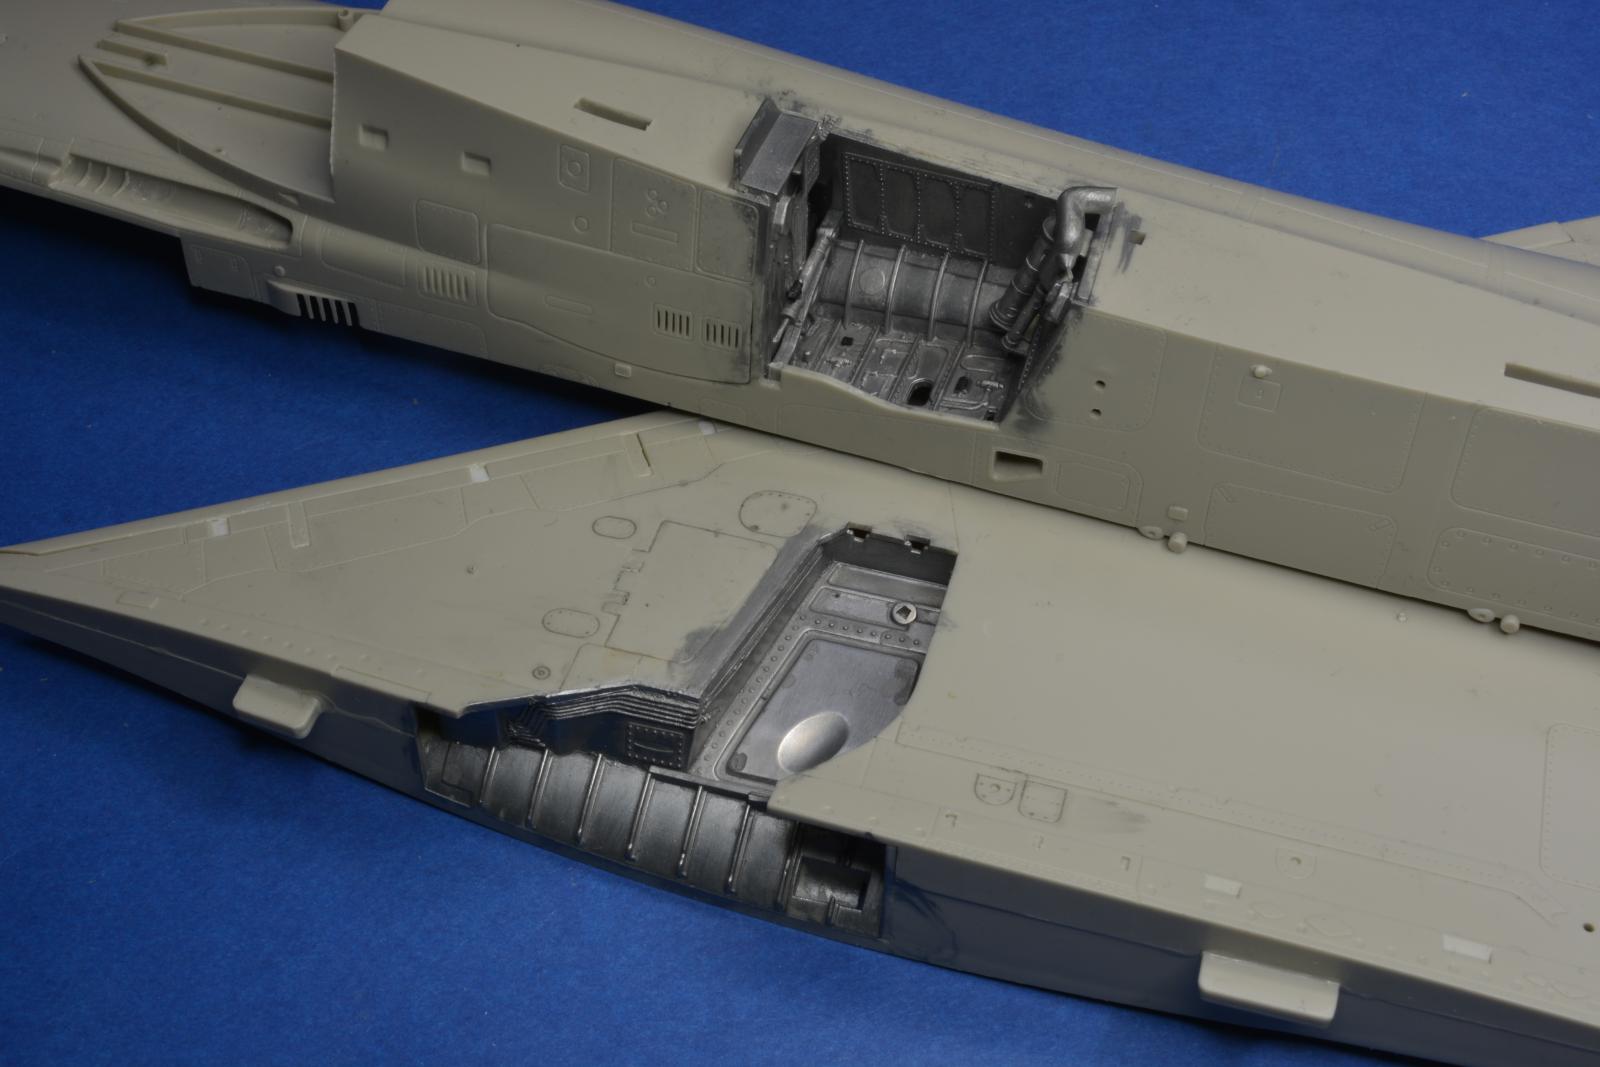
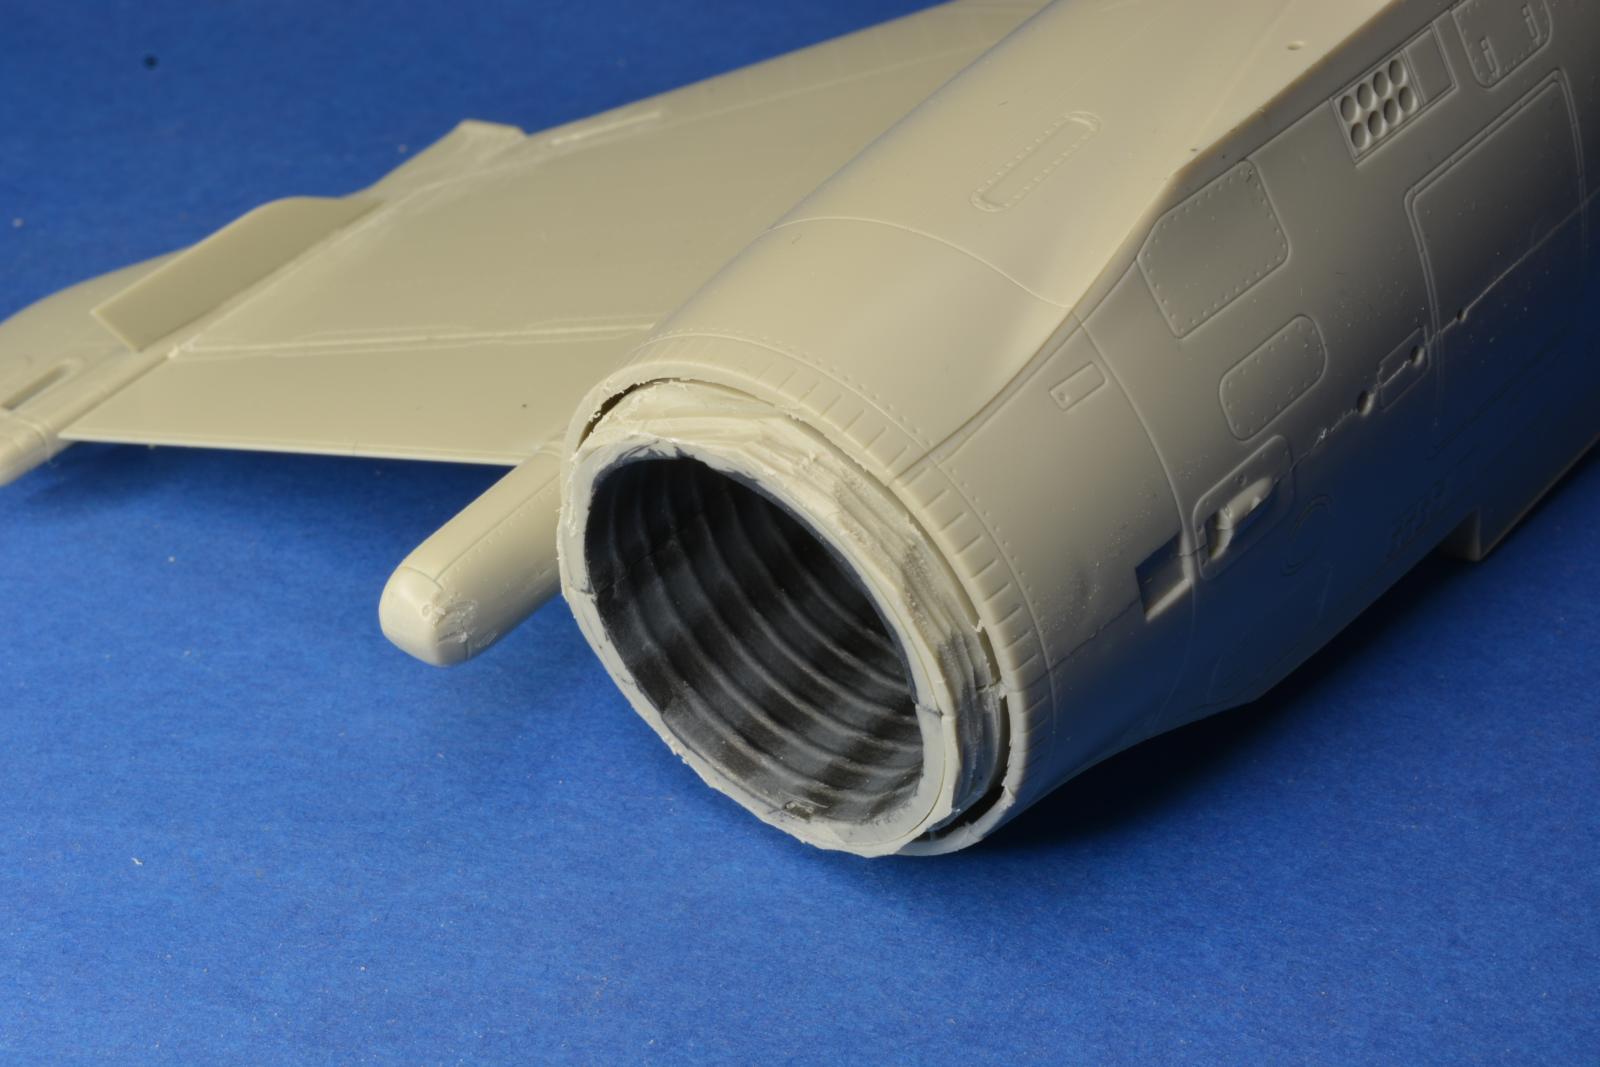
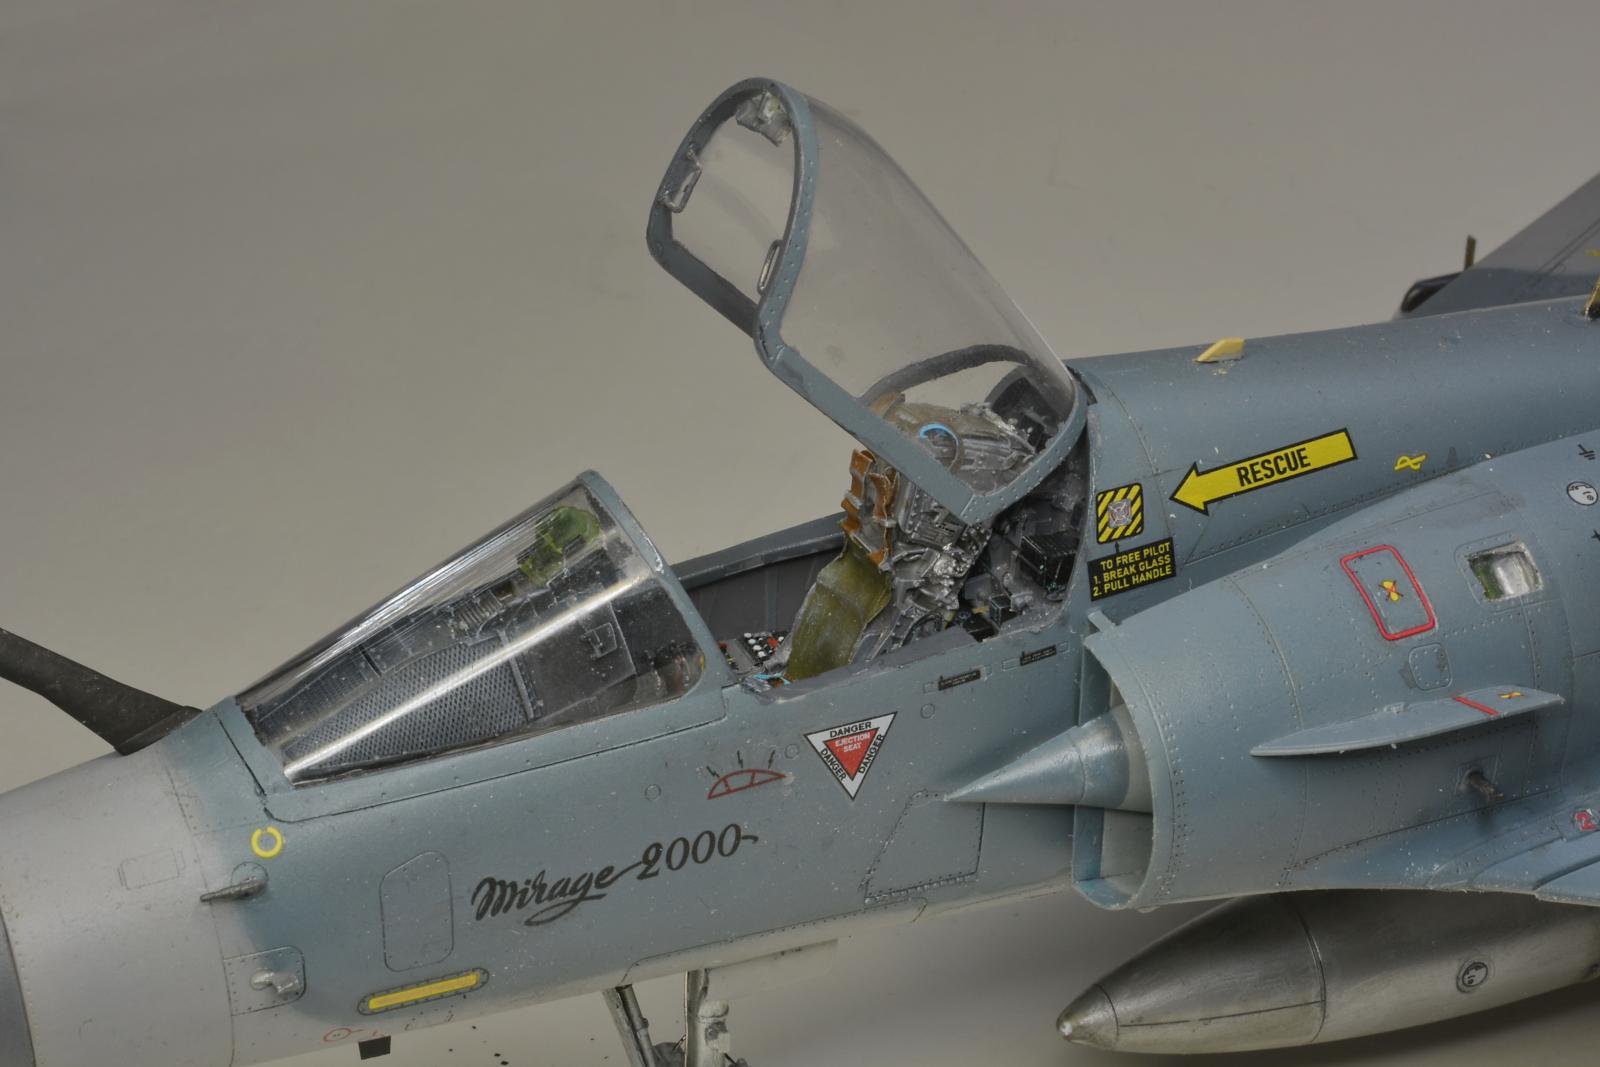
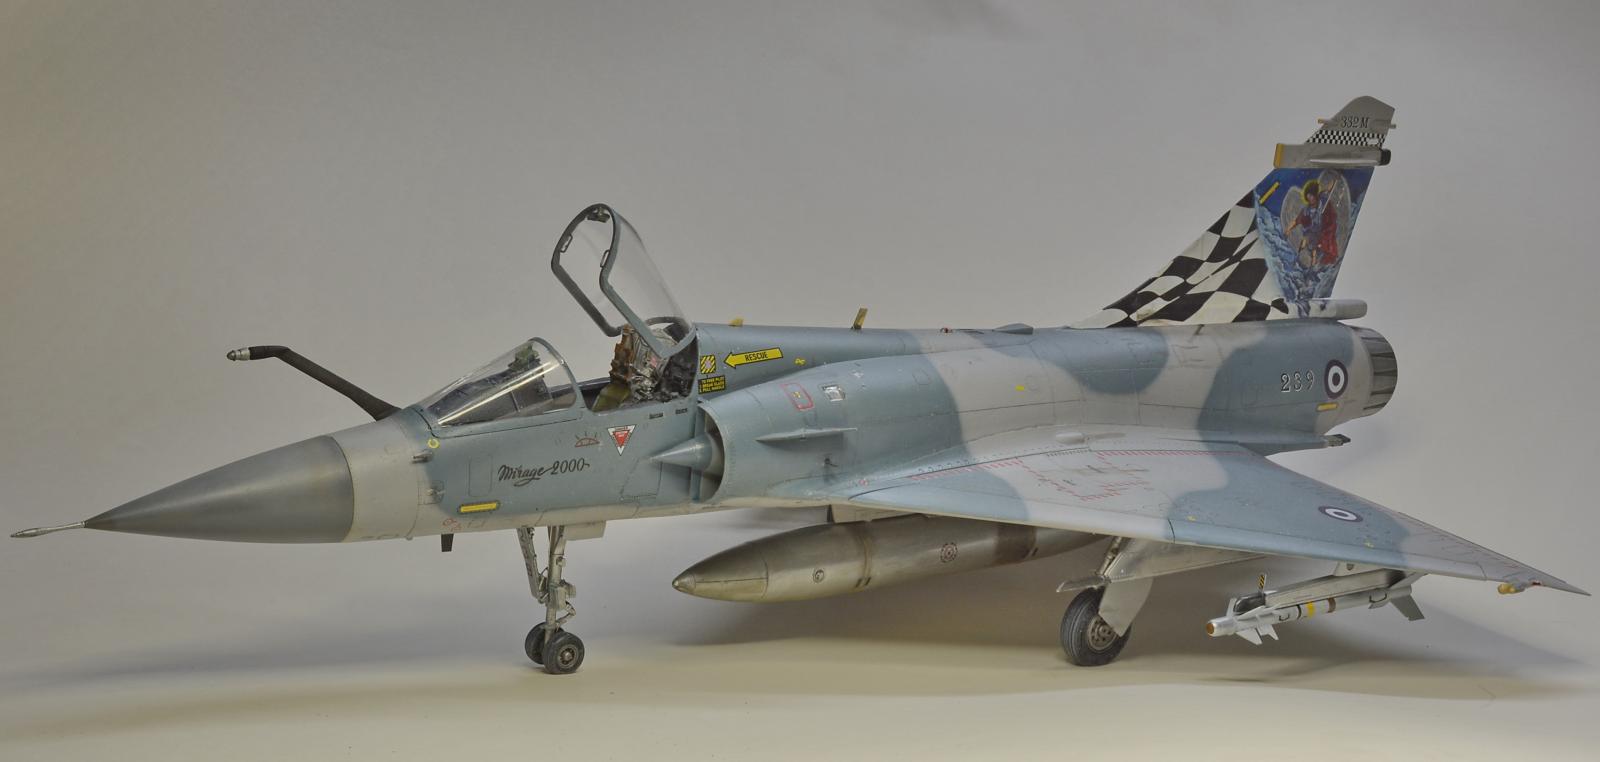
Detail is well above average, with finely etched linework. The small pieces are thin and realistic. The fit on the large pieces, such as the fuselage, is very good with the exception of the fin-fuselage joint which will need a bit more attention. The cockpit consists of 31 pieces including the seat. The seat has moderate detail and consists of 14 pieces. The instrument panel is embossed and a decal is given for the instruments. The vents are full depth and the first stage of the compressor dominates the depth. The engine is given complete but with only basic detailing. The rear section has proper depth and the detail of the afterburner mesh is considered good. The flaperons are given separately, so if you want you can glue them down, as it happens in real life when the hydraulic pressure "drops", turning off the engine. Landing legs and wheels have good detail. The landing gear nests are also well detailed with many pieces.
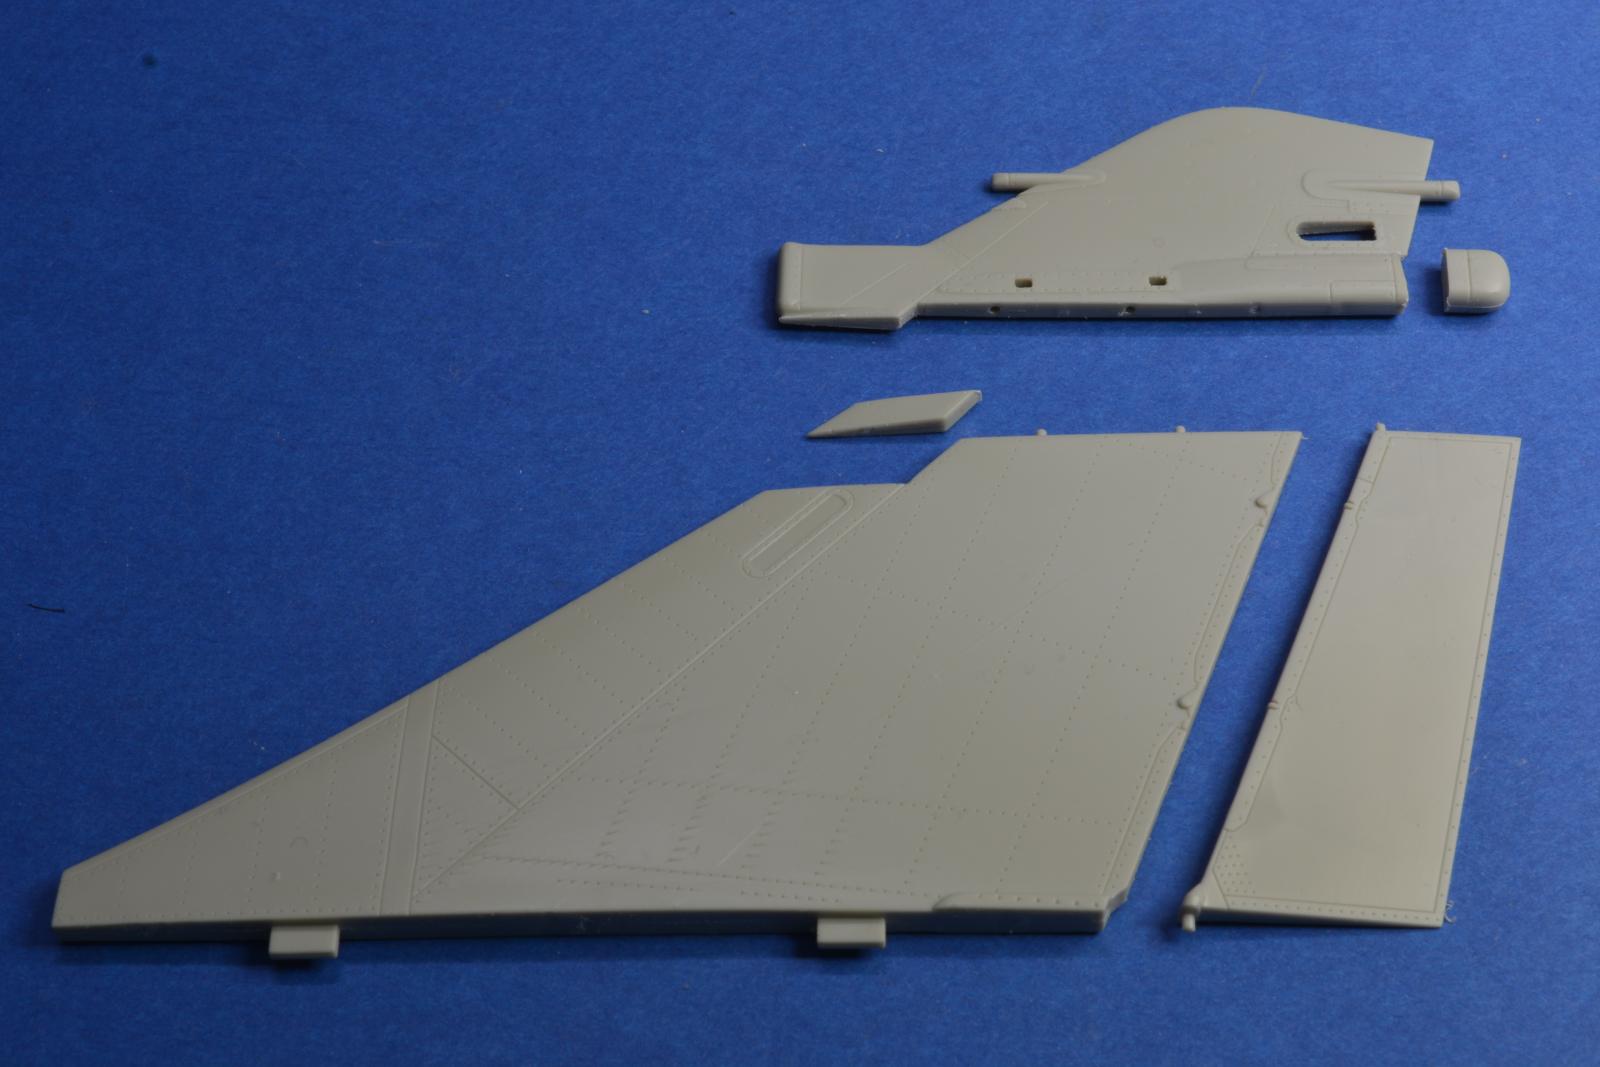
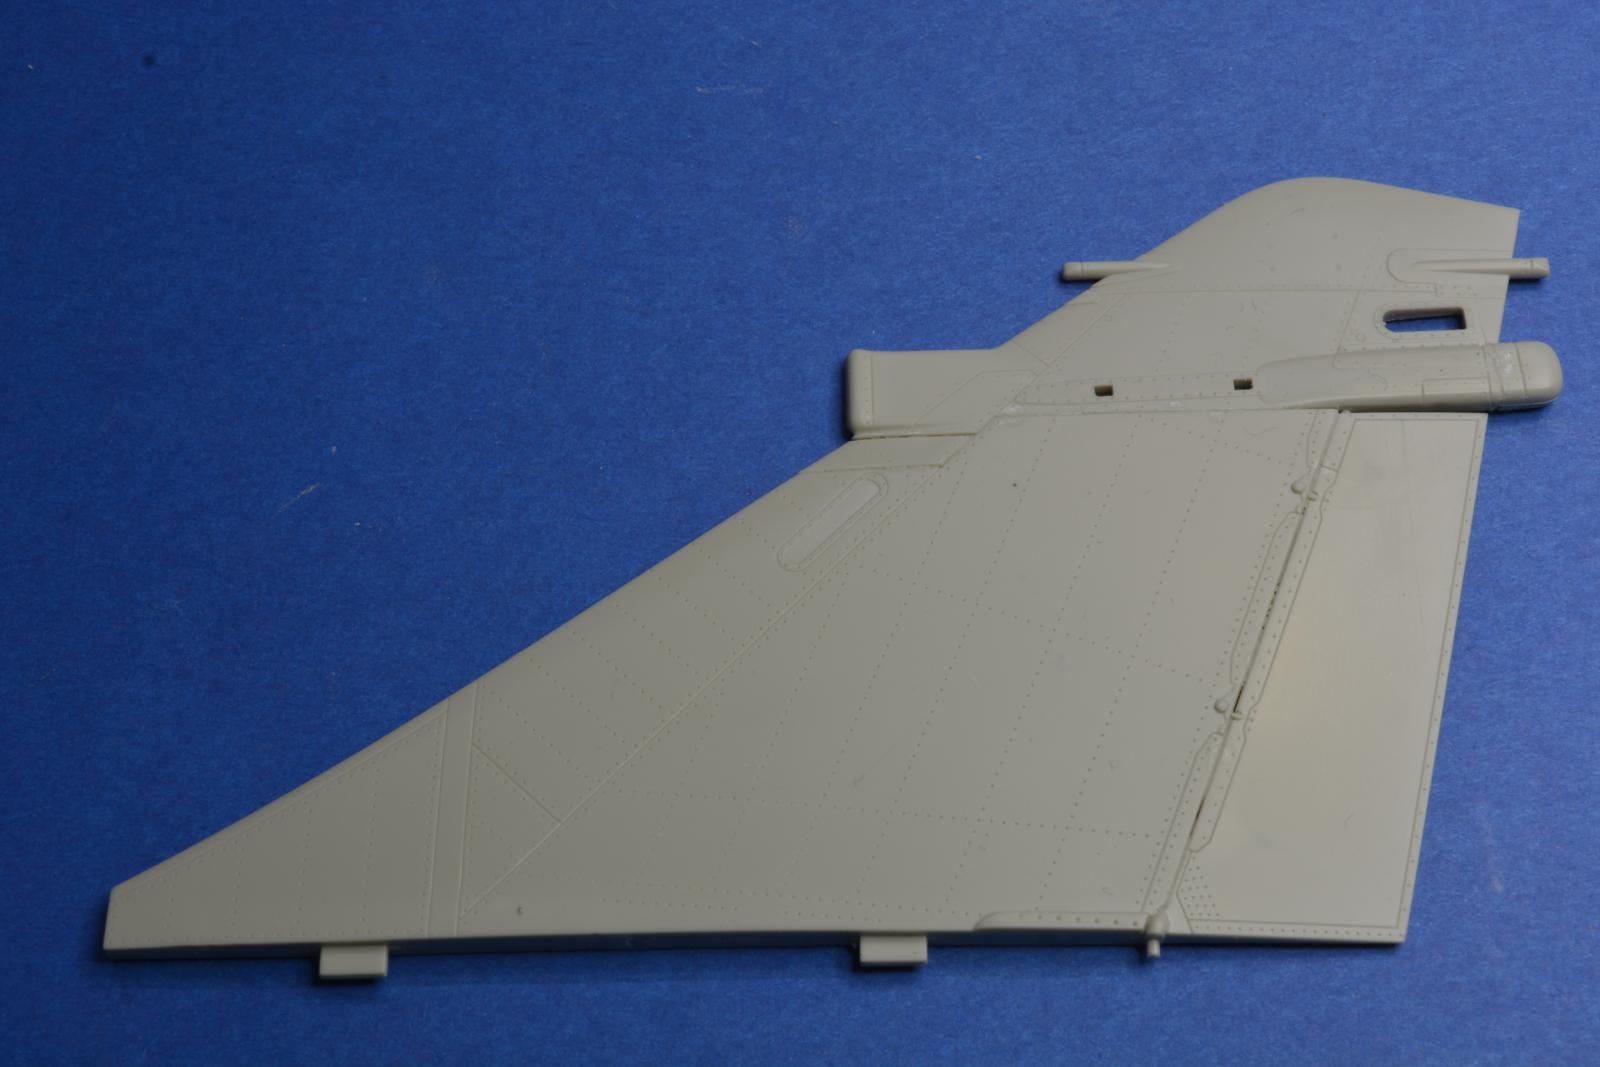
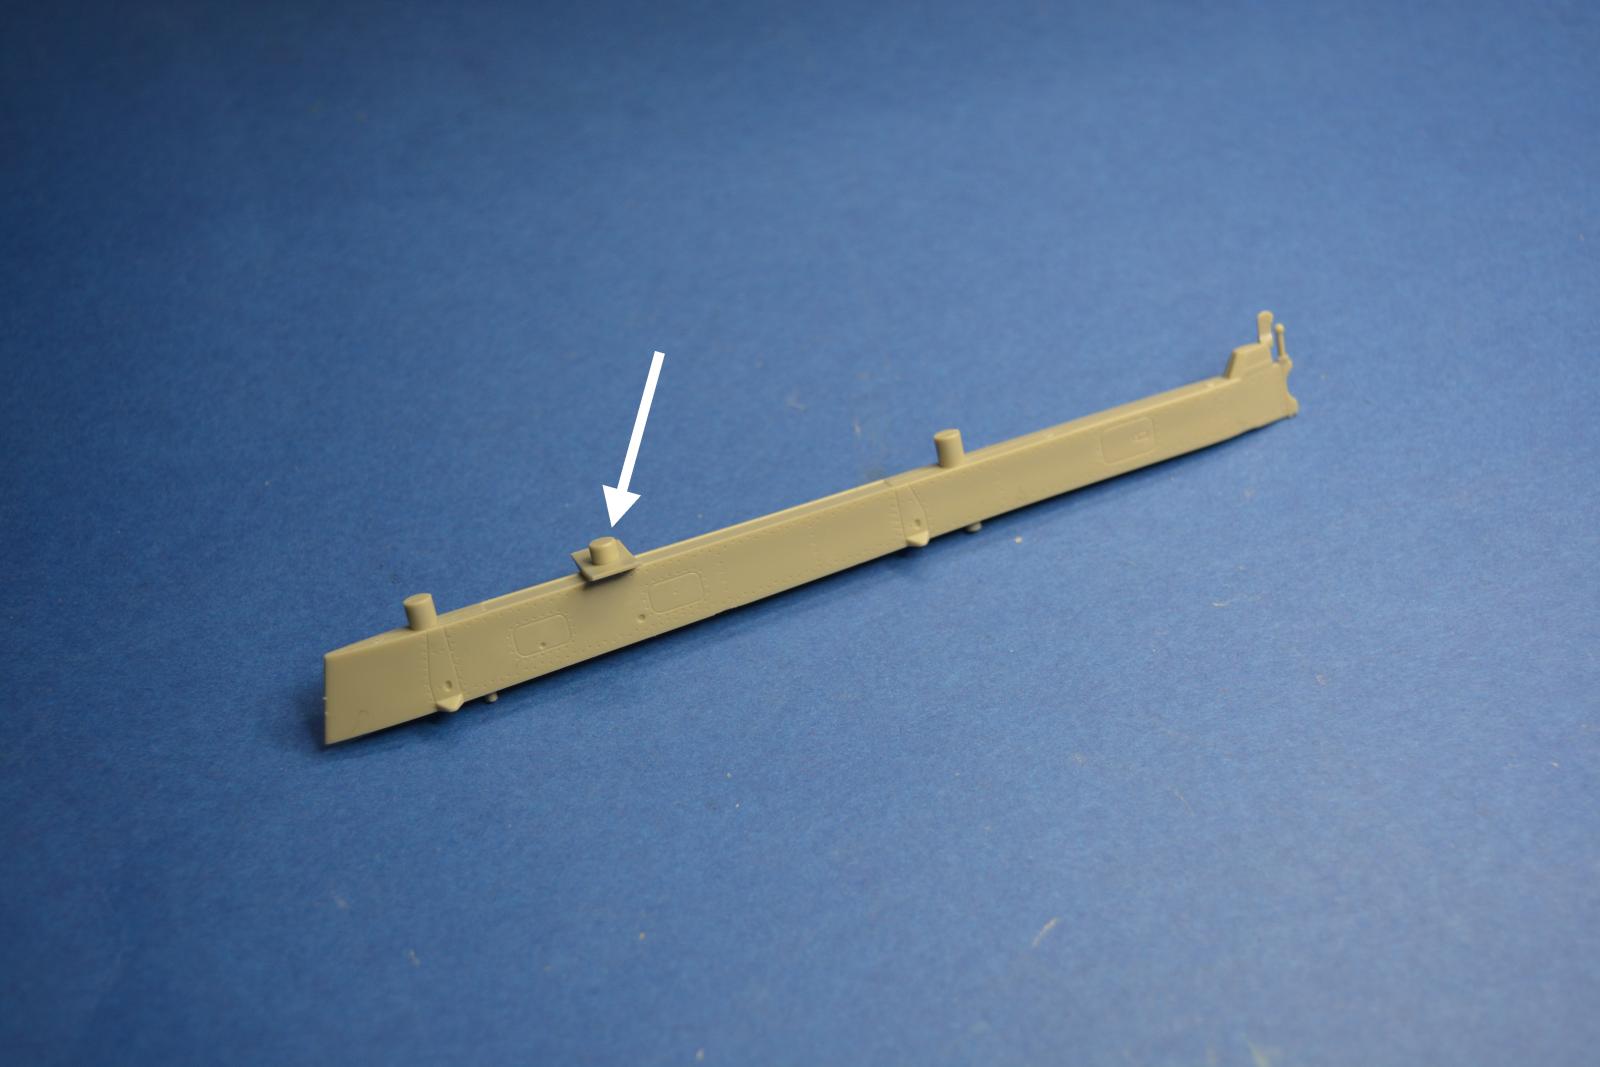
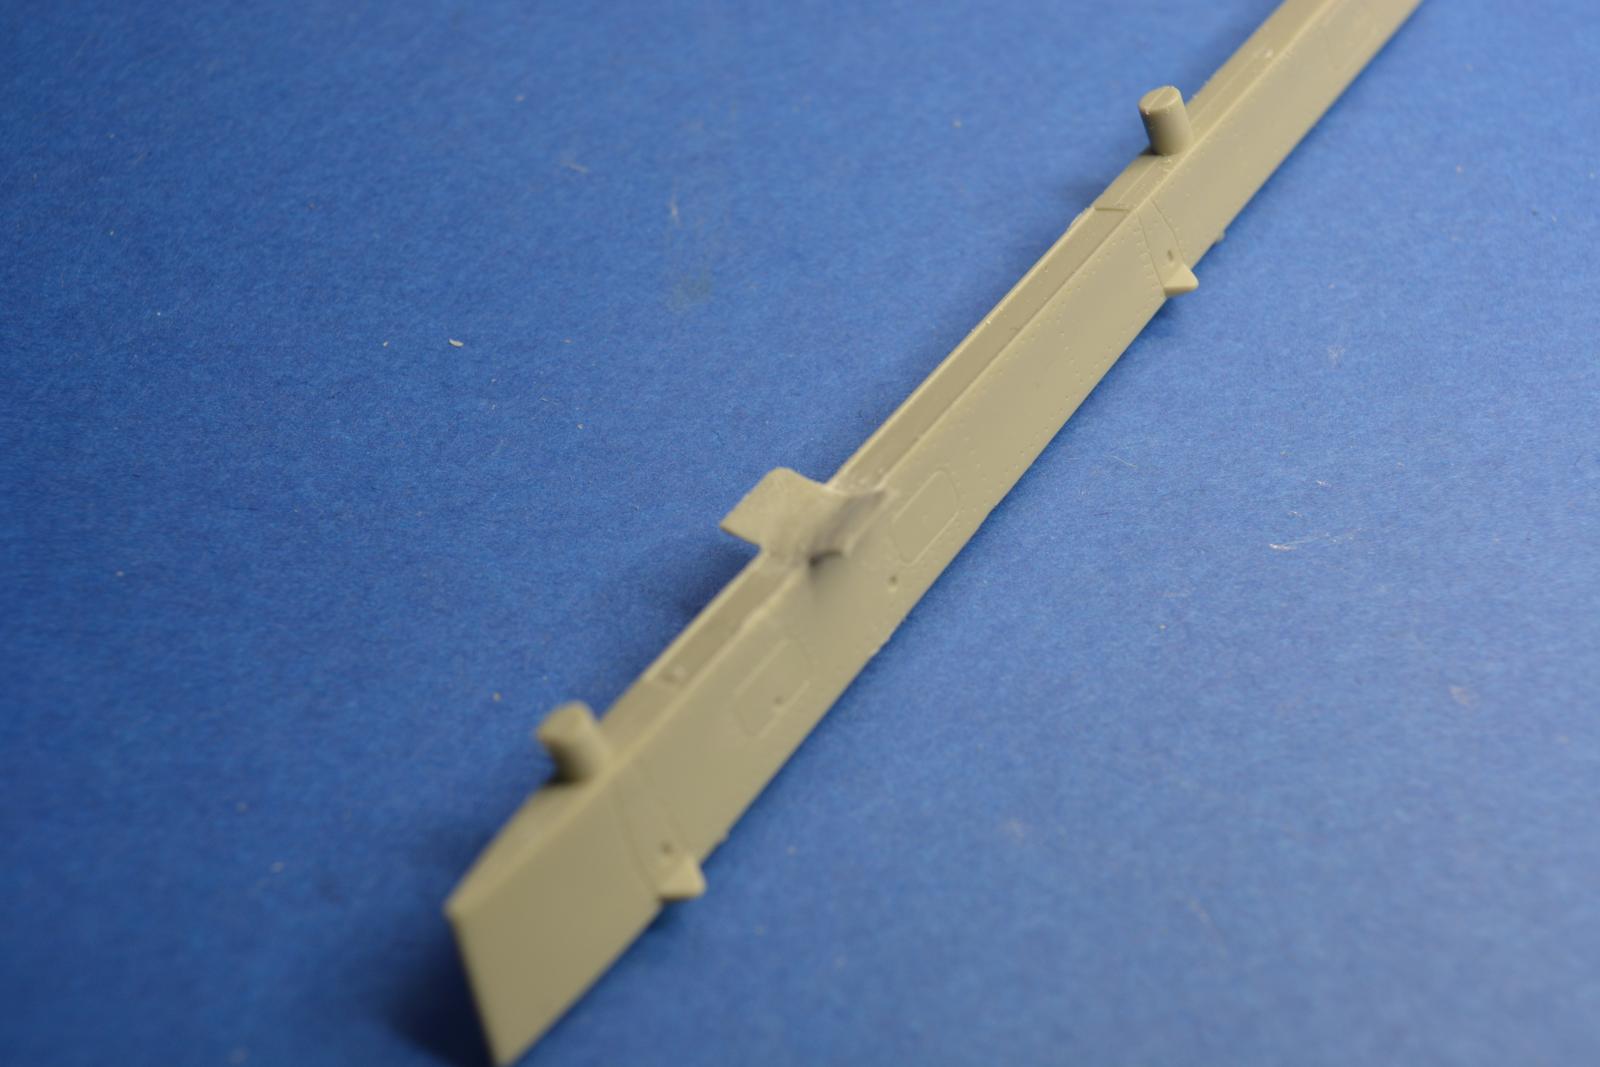
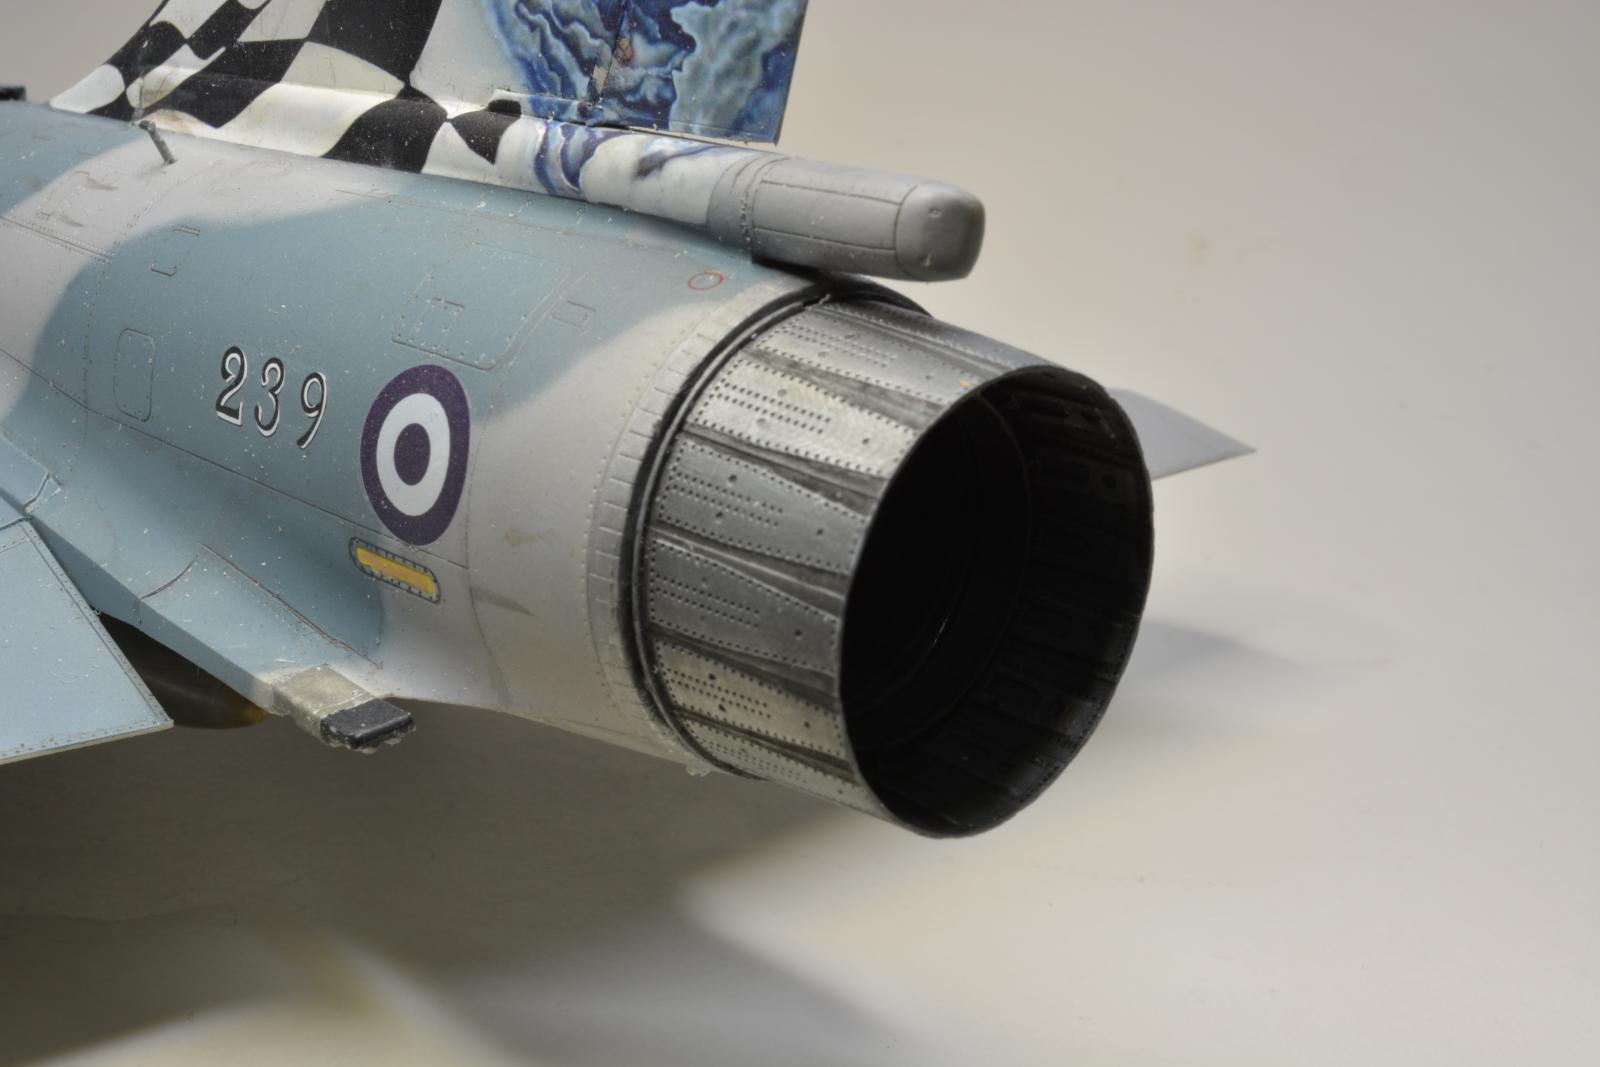
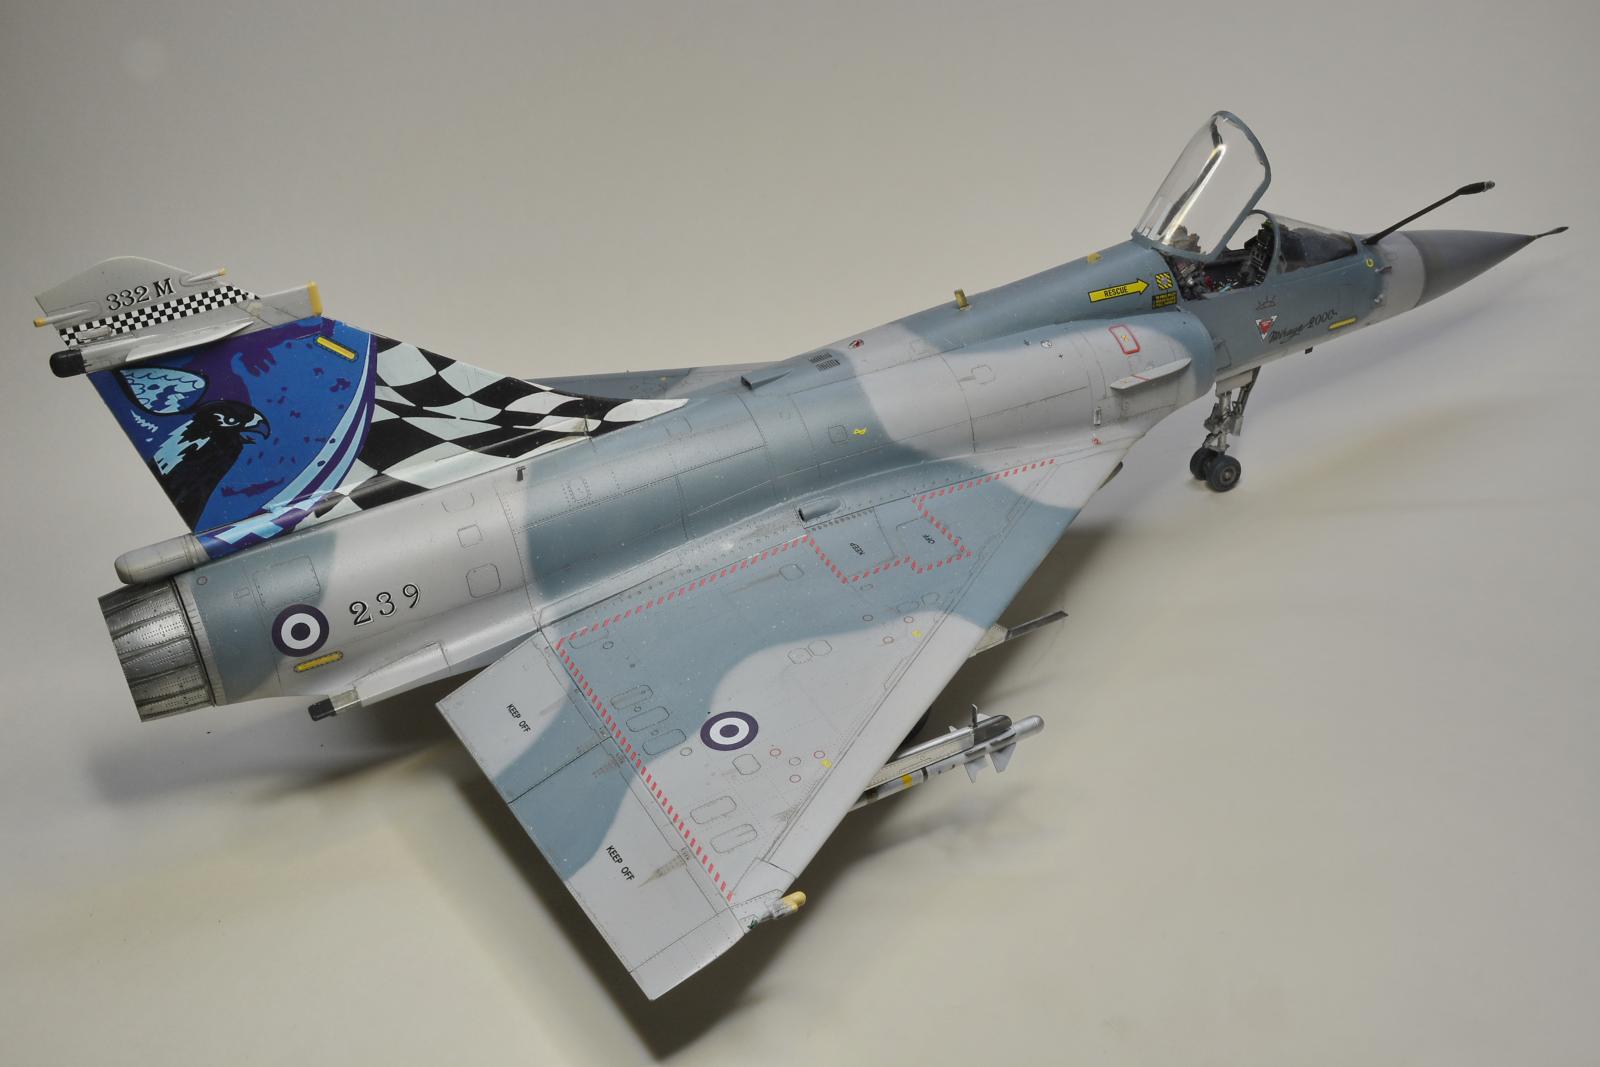
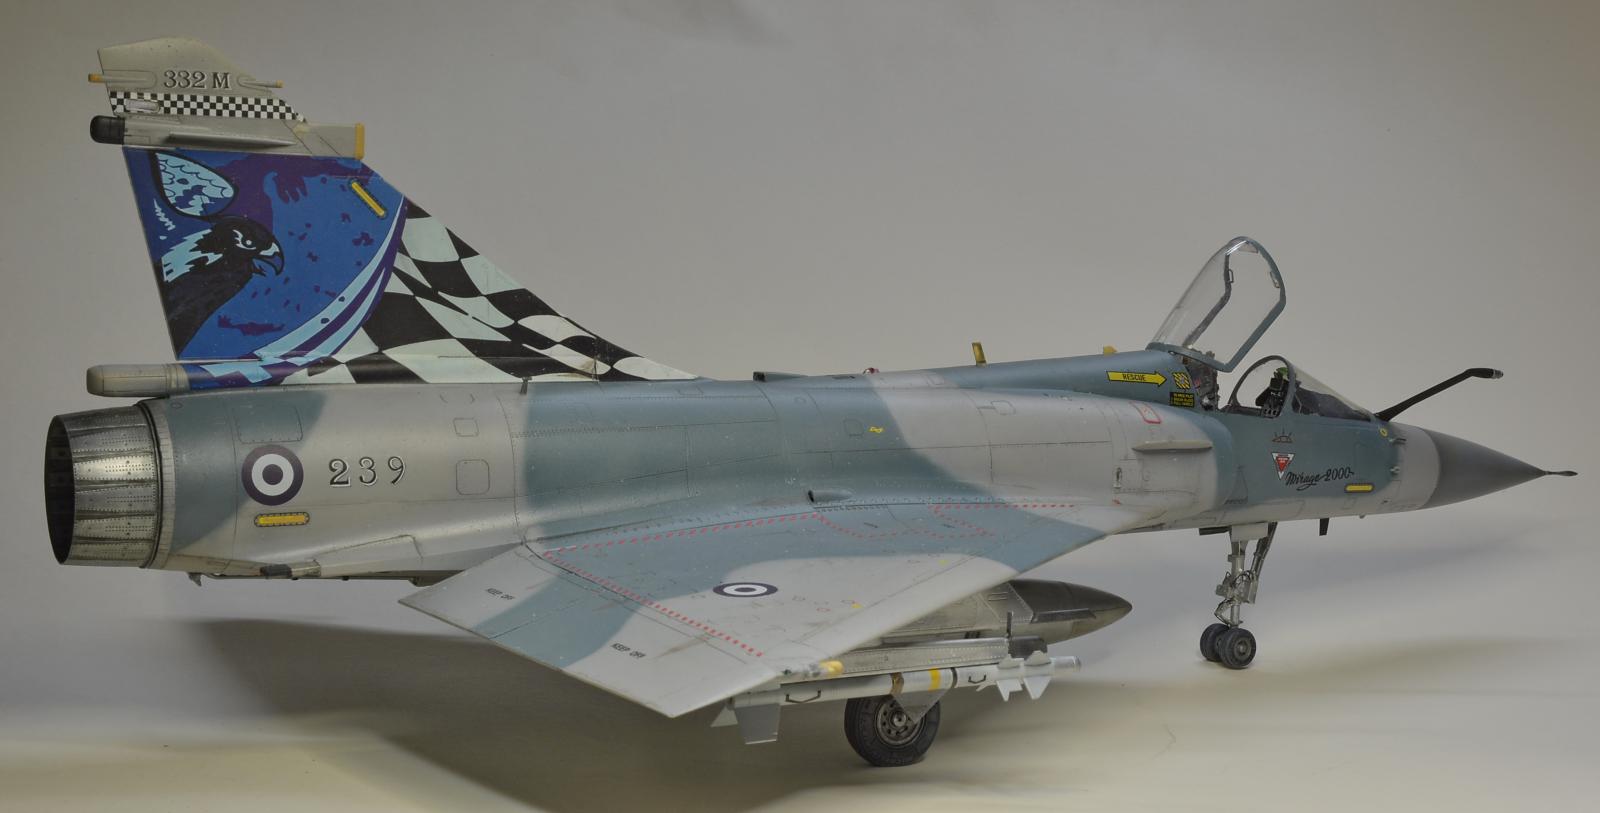
The kit gives us three choices between D, EGM (which is our subject here) and -5. Two different radar cones and 4 vertical fixed vertices are provided. Of the 4 peaks, none make for the Greek ''239'' (contained in the marks) and a slight modification (described below in the photo) must be made to get the complete set.
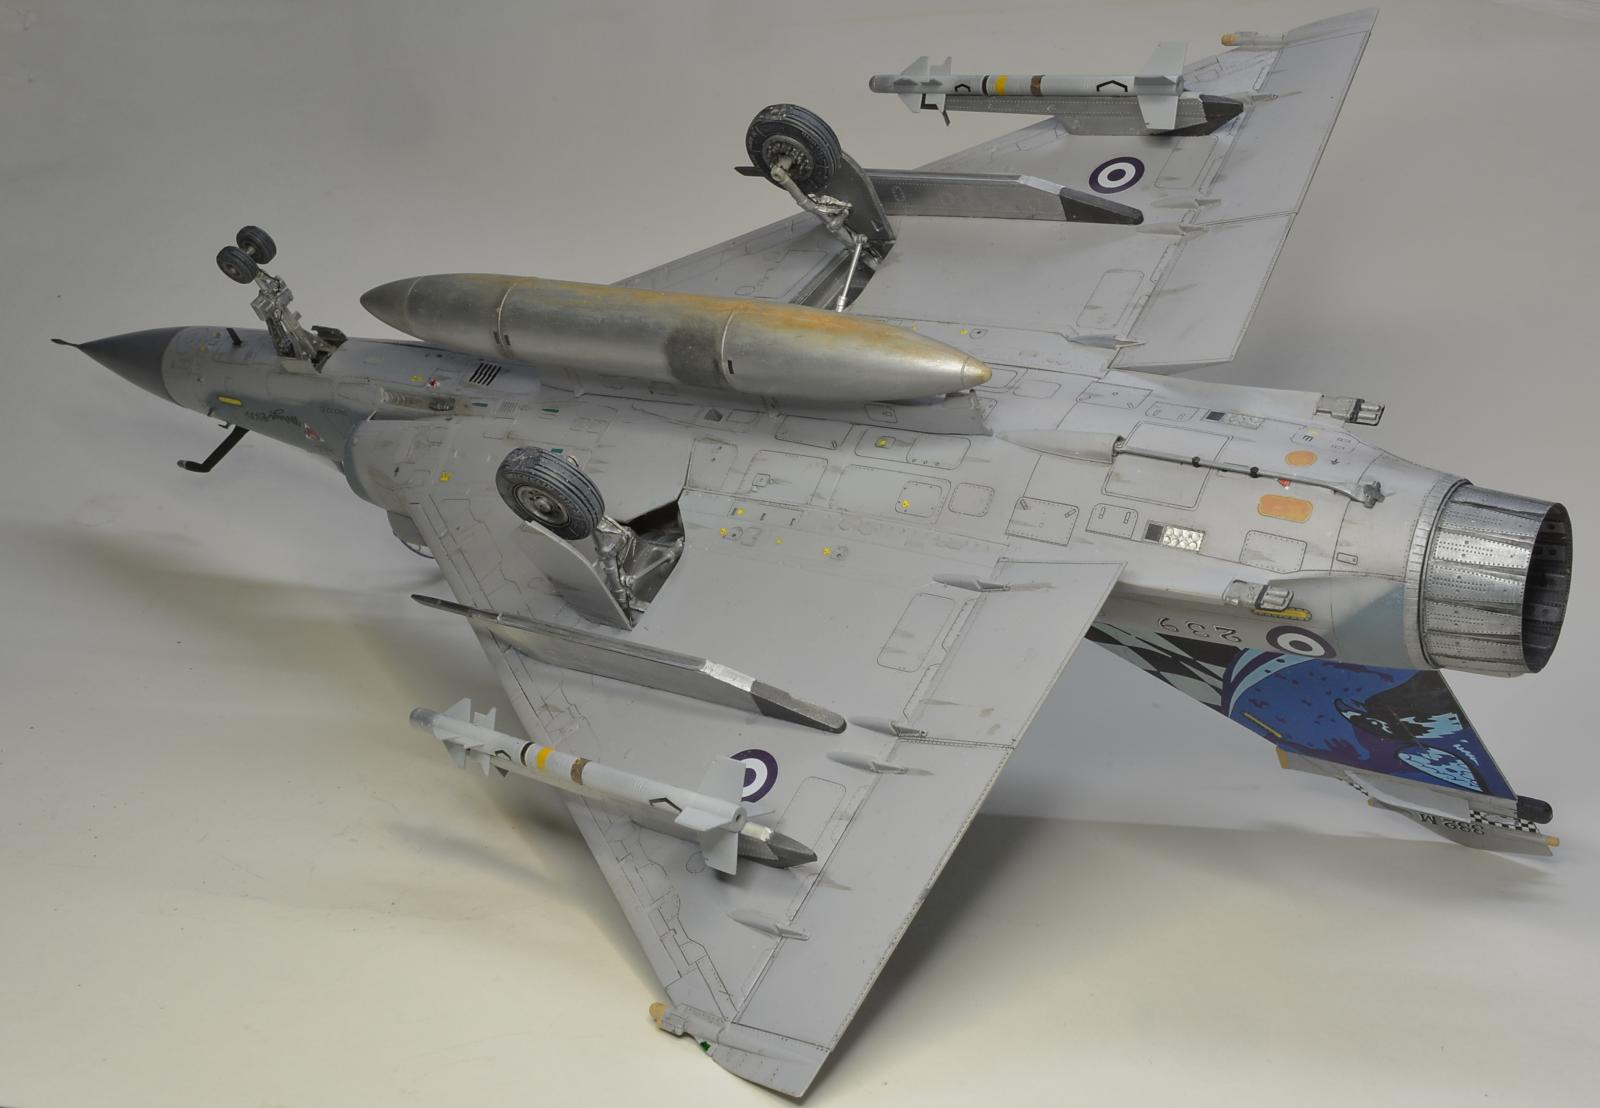
The external loads are: 2 CC630 gun pods, 2 RP 541/542 2000 liter external tanks, 2 RP 522 of 1300 liters, where one is used as a center line, 2 Scalp missiles, 2 AUF-2 vertical ejector racks, 2 R550 Magic 2 missiles, 2 MICA missiles, 2 Super 530 missiles, AS-30L laser guided missiles, 2 LRF-4 rocket pods, 1 ATLIS II targeting pod, 1 PDL-CT targeting pod and 1 PDL-CTS targeting pod. The radar antenna, 2 cannons, separate slats and airbrakes on the wings are provided. The 2 sheet of decals give a large number of warnings and 8 options are provided for an equal number of aircraft. The multi-page instruction booklet is in black and white for the instructions but gives color profiles for the camouflage. It needs attention in many places because it has many ambiguities/deficiencies and it is good to be cross-referenced with photos of the real aircraft.
Improvements
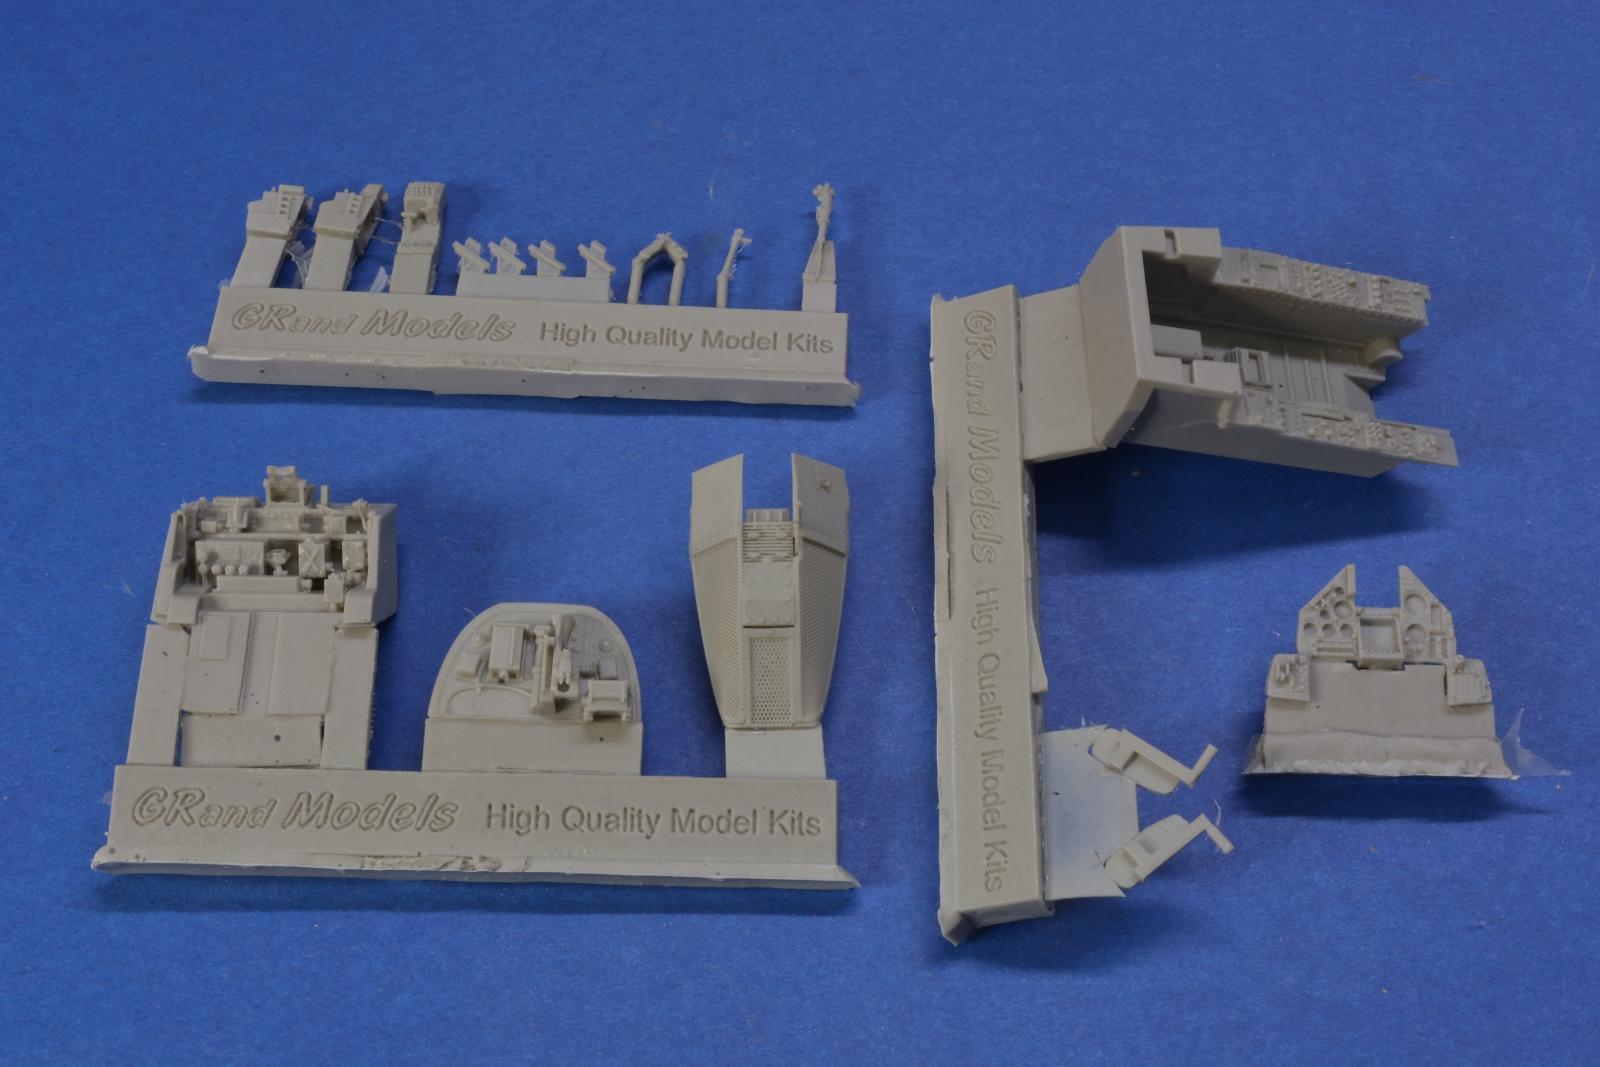
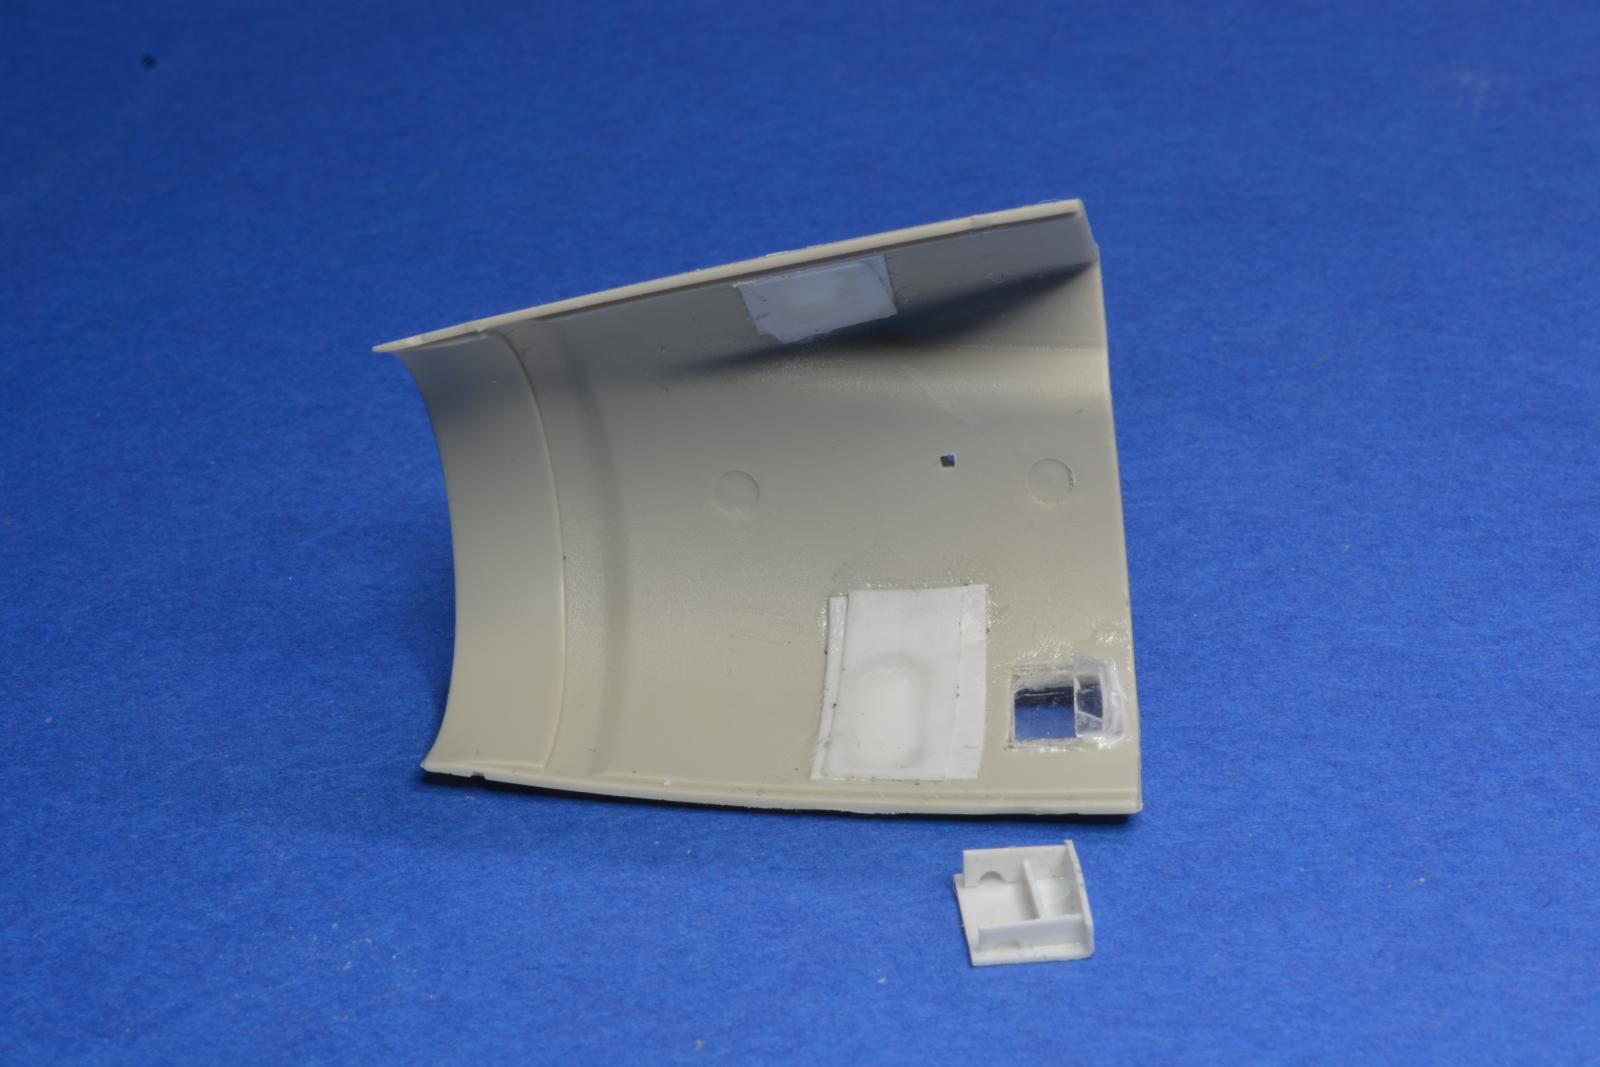
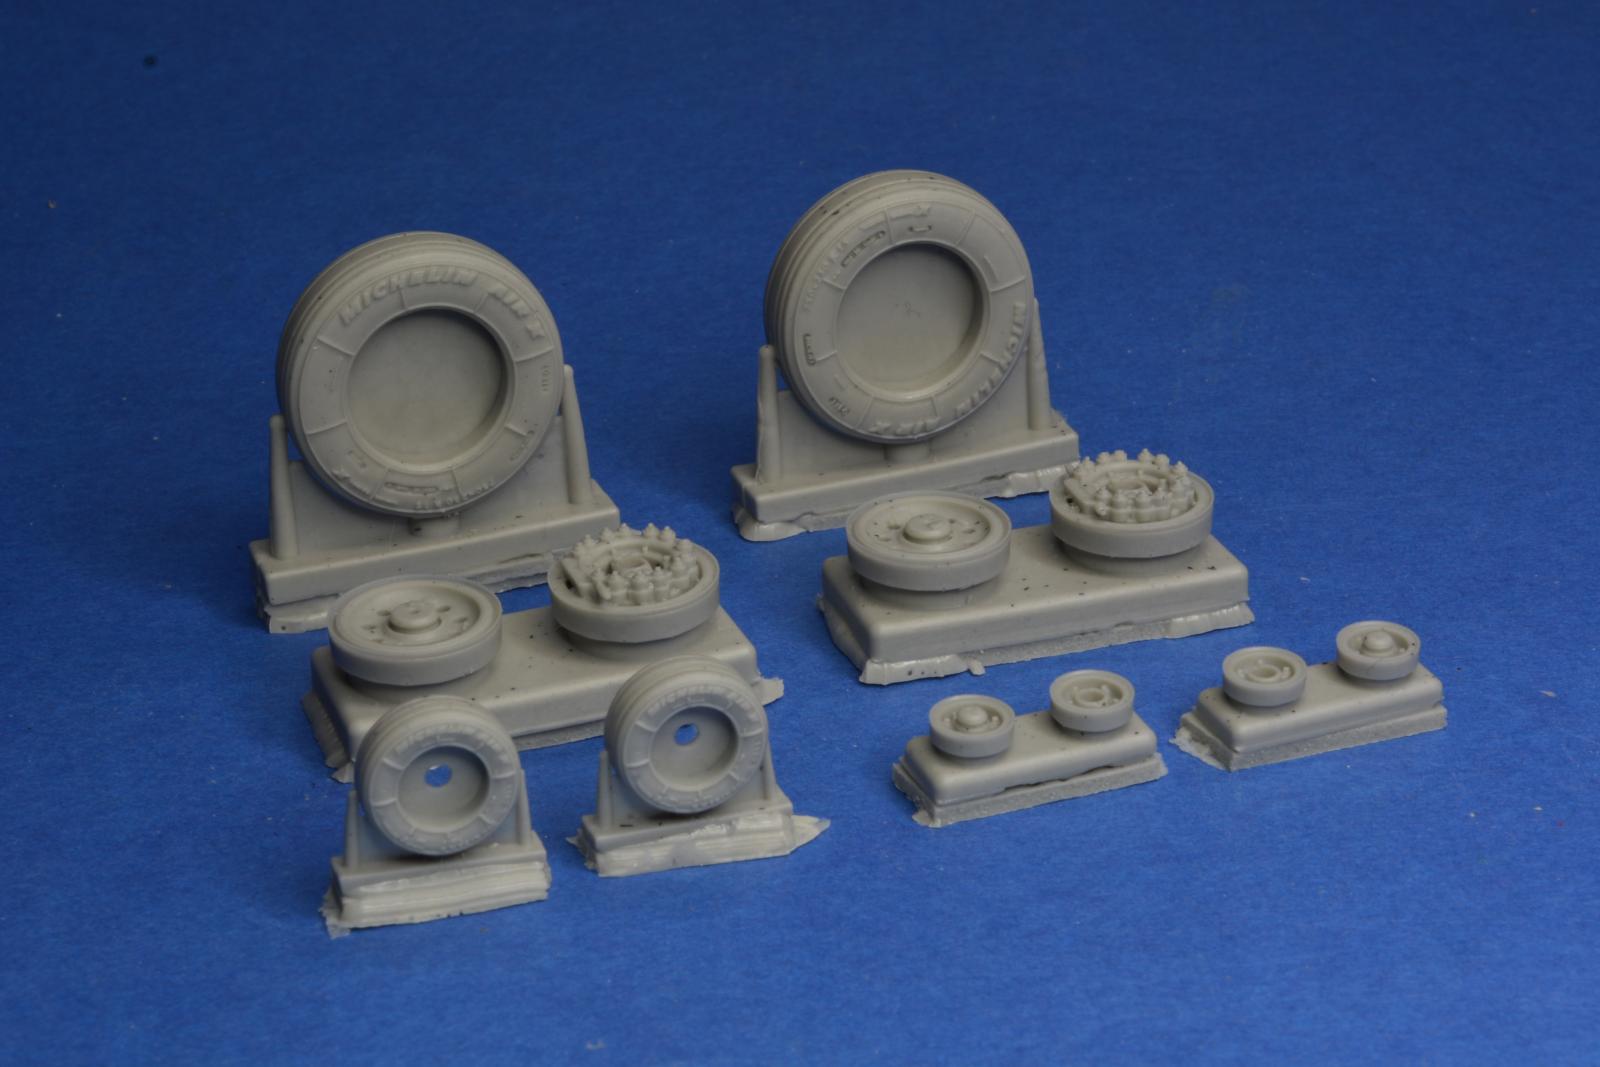
Along with the purchase of the kit came the supply of three Grand Models enhancements for the model's cockpit, seat and wheels. The detail and accuracy of these enhancements are top notch, and their application to the kit is impeccable. All it takes is careful painting to bring out the details. Also, in order to place the seat correctly, a small part that is on the floor at the back right must be removed with the speed wheel, as shown in the corresponding photo.
Construction
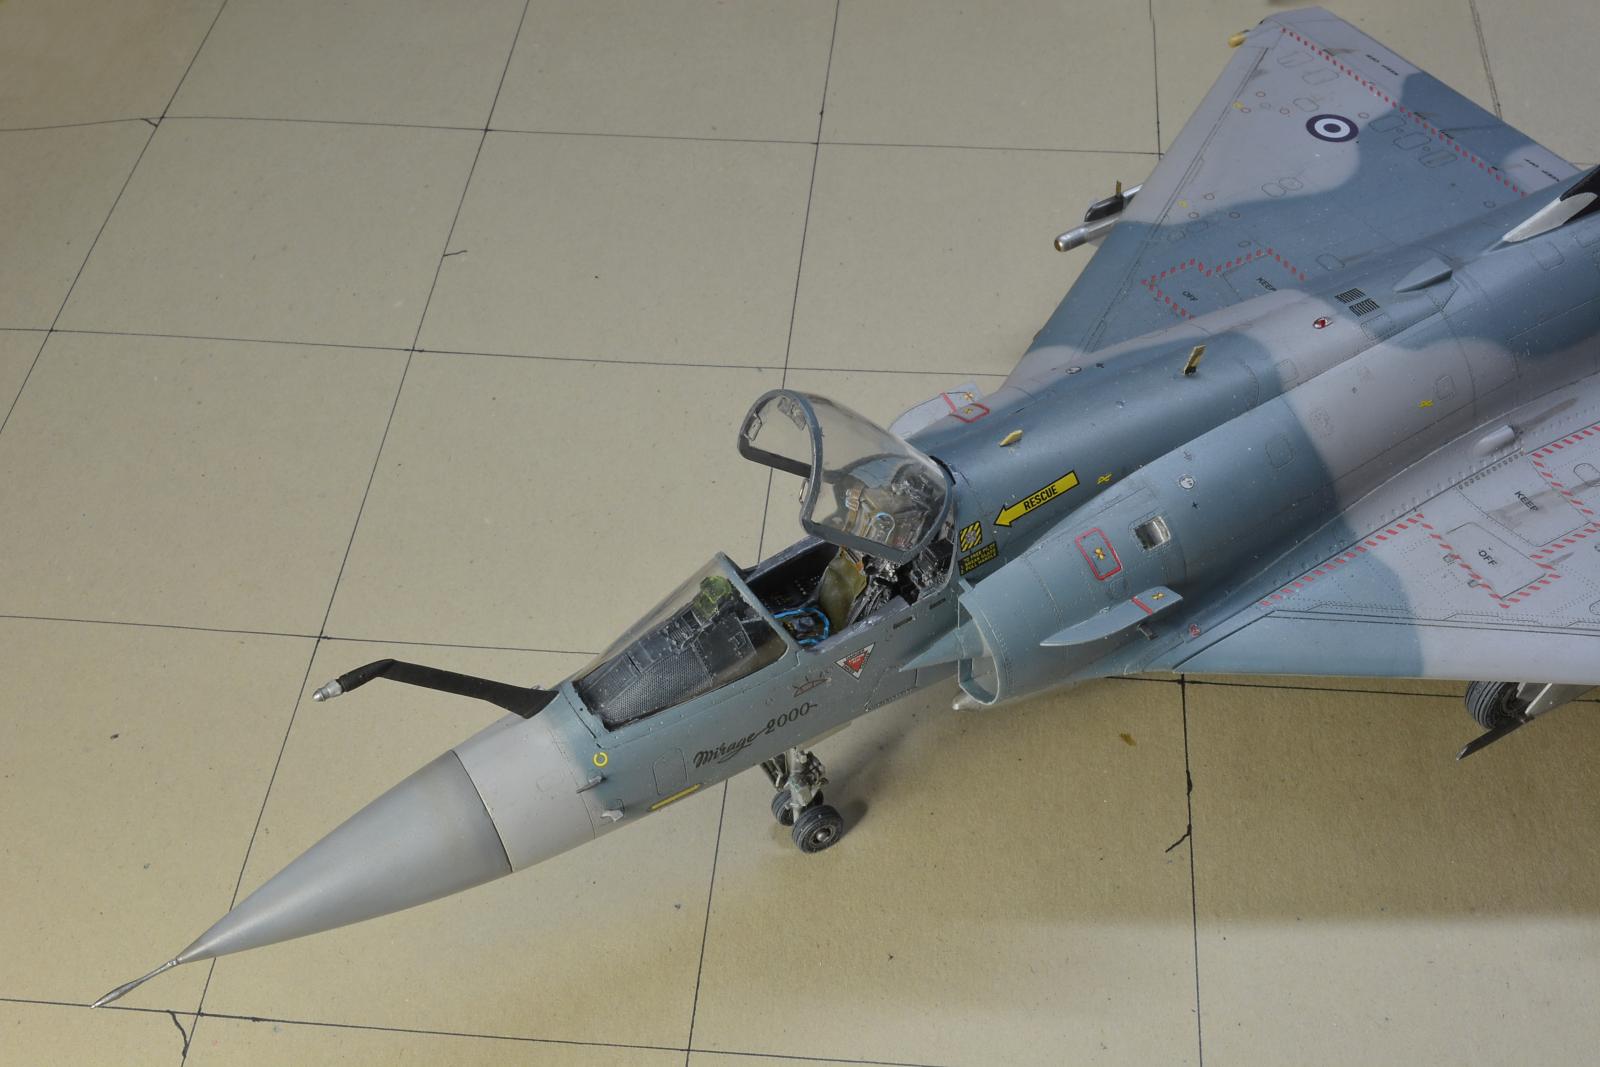
The construction in the EGM version as we wanted, was done generally following the multi-page instruction sheet and everything followed its natural flow without any particular problem except for a few points. In the cockpit everything was painted dark gray. The switches on the consoles were painted white, red and yellow and the details were brought out with a dry brush and gray oil painting. Some small decals are provided for the resin seat. Added some piping and wiring to the wheel legs. Minimal putty was required on the fuselage seam and wing joint. Some points that need attention in terms of the realism of the model are the four small air intakes located on the main vents. They are the worst pieces in terms of application of the kit and were replaced with more realistic ones, made from plasticard. These, although they could be placed open, are always closed when the aircraft is parked with the engine off. The same goes for the slats and airbrakes, where they are in "CLOSED" positions respectively. Another pitfall is the radar. If you want to present it, you will have to cut and glue a part of the nose to the piece of the cone that the kit gives, as shown in the figure given. Also the rear part of the radar will have to be built from scratch. All these details can be clearly seen in photos in the book by Yiannis Lekkas ''Mirage 2000 Under the skin'' which is highly recommended. Finally, in order for the model to balance on its legs, it will need to add weight to the nose.
Painting
The model was rubbed on the few stuccoed areas with wet tissue paper and after the missing lines were restored, it was washed with liquid dish soap and allowed to dry thoroughly. First the radar cone was sprayed with Mr. acrylic. Hobby/Gunze H307, to which some dark gray was added (about 10%). When it dried well, it was used with painting oils and a dry brush to represent wear. H308 Mr. acrylic. Hobby/Gunze was used for light gray, with which the entire model was covered. Then a mixture consisting of H42, H25 and White was prepared in a ratio of 80%, 5% and 15% respectively for Blue - Gray. The contours of the variation were defined with a airbrush and the painting was done freehand, with the airbrush spraying in a medium to sharp beam. The model was sprayed with two light coats of gloss varnish, so that the signs would have good adhesion. The decals are thin and of good quality and there was no problem with installation. The lines were emphasized with a wash of a mixture of painting oils, thinned enough with white spirit. A mixture of white, black and minimal raw umber was used. The lines were then sprayed with diluted (8 parts thinner - 2 parts paint) Tamyia Smoke X19 to give extra depth. Finally, two coats of AK satin varnish restored the gloss of the model. The central fuel tank, which was suitably oiled, and two Matra Magic rockets were mounted on the pylons.
Epilogue
No doubt this kit is a time consuming build even if we want to build it straight out of the box. Of course, if you decide to go "over the top", the goodies of Grand Models are the only way to go, together with the book "Under the skin". Then the two thousandth will "take off", offering a beautiful and realistic model.
Bibliography: Yannis Lekkas, ''Mirage 2000 Under the skin''


This is a truly superb job, φίλε Γιάννη! Whereas the kit itself is good and the added extras are top quality, it takes your excellent skills to produce such an astonishing and utterly realistic result!
Congratulations!
Kitty Hawk had a reputation for slightly imperfect kits, but you’ve shown how to get over these difficulties and end up with a perfect model.
A real beauty, Giannis. Well done.
A big beauty Giannis! Very realistic scale modeling sir! 👍
Wow, great work! A very solid build
Beautifully done - I love the paint and weathering work. Looks fantastic.
Beautiful work on a beautiful plane.
This is indeed a superb looking Mirage, Giannis @mfcg
Your chosen scheme beautiful and perfectly applied.
A Kitty Hawk kit defeated and turned into a great model.
A beautiful result for a beautiful aircraft. Top marks!
Excellent work on the big Mirage!
Thank you all very much for your kind words.I'm glad you liked my build.