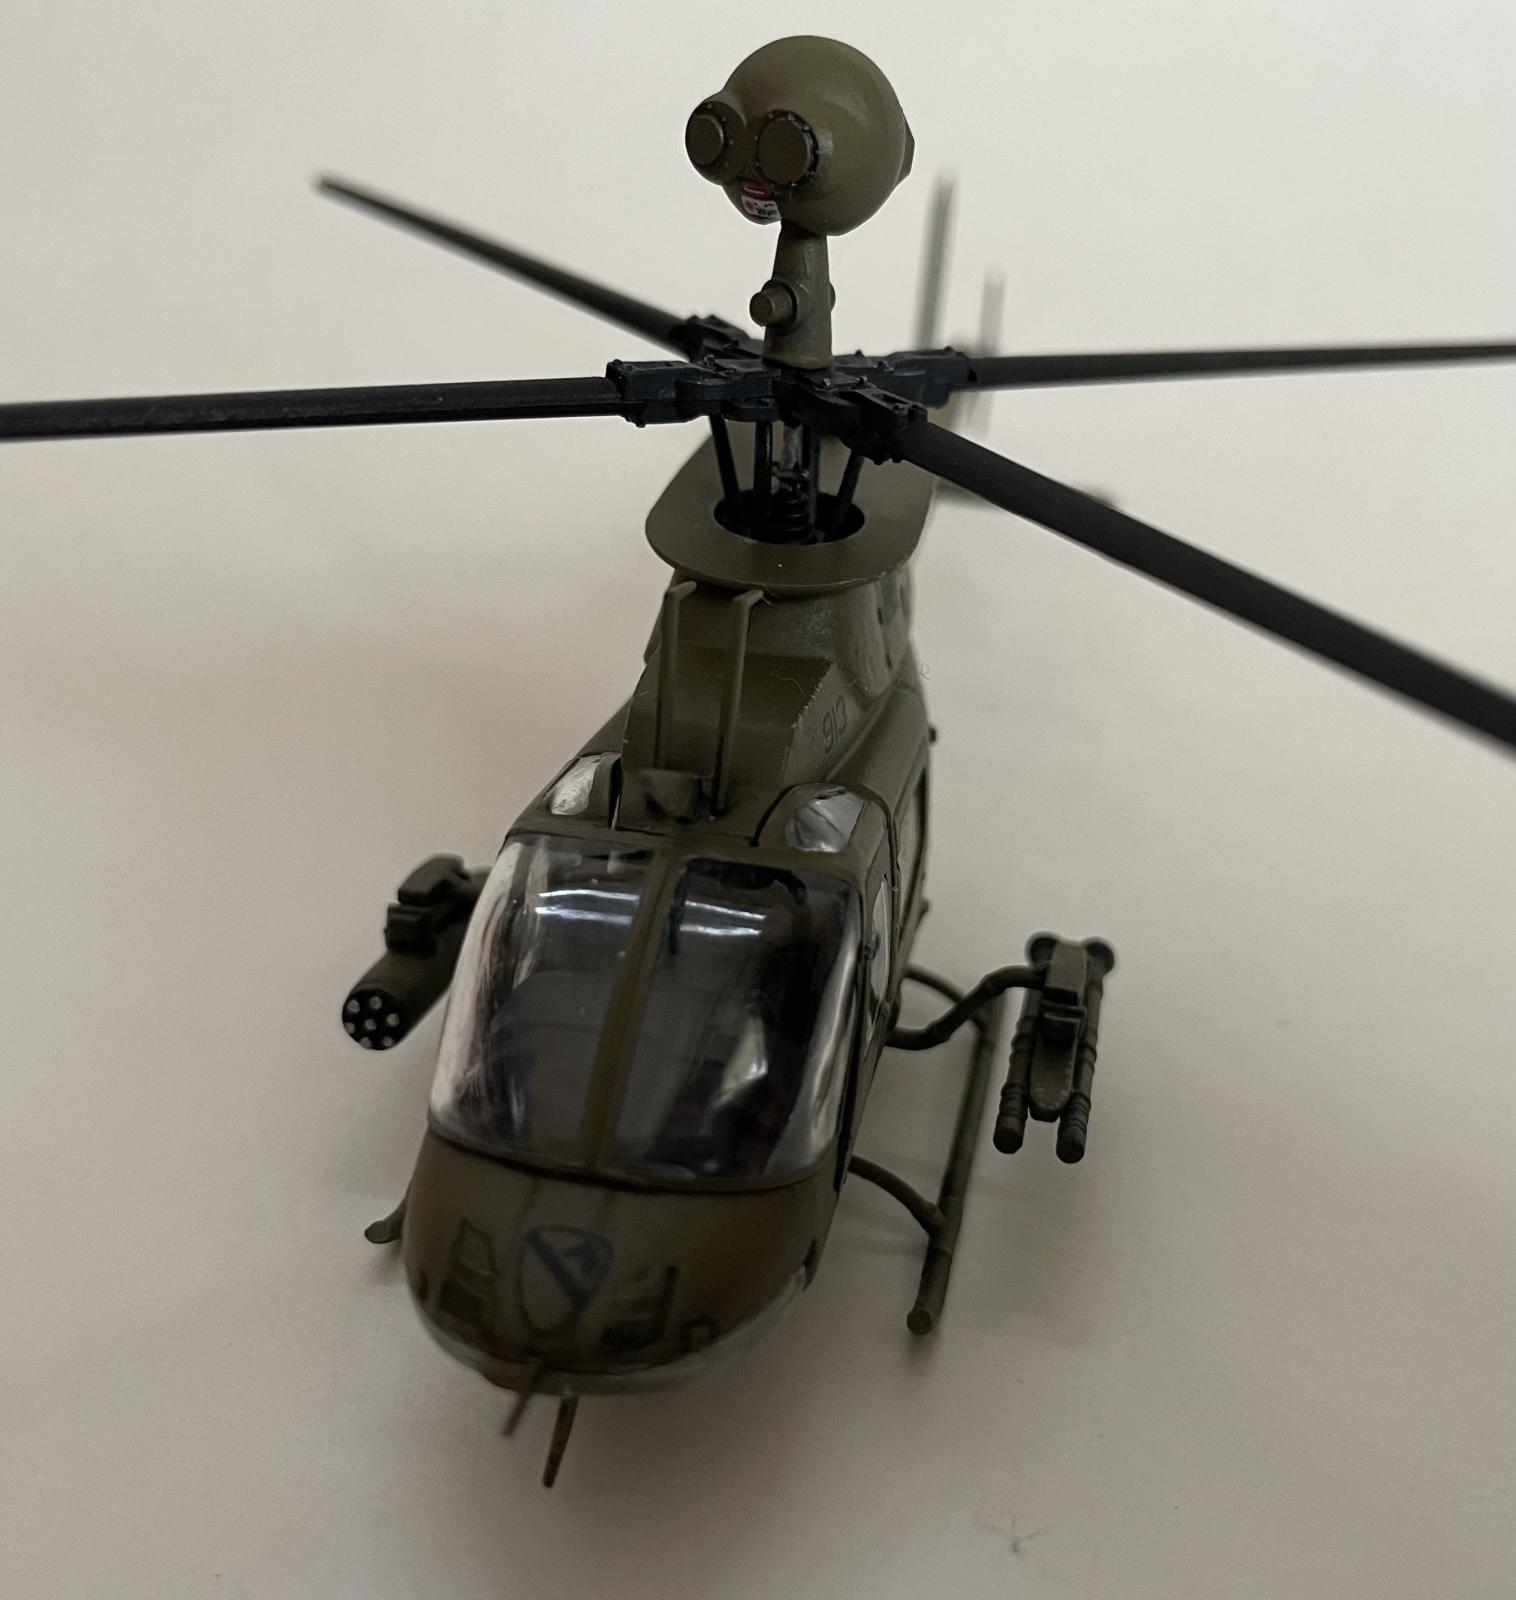
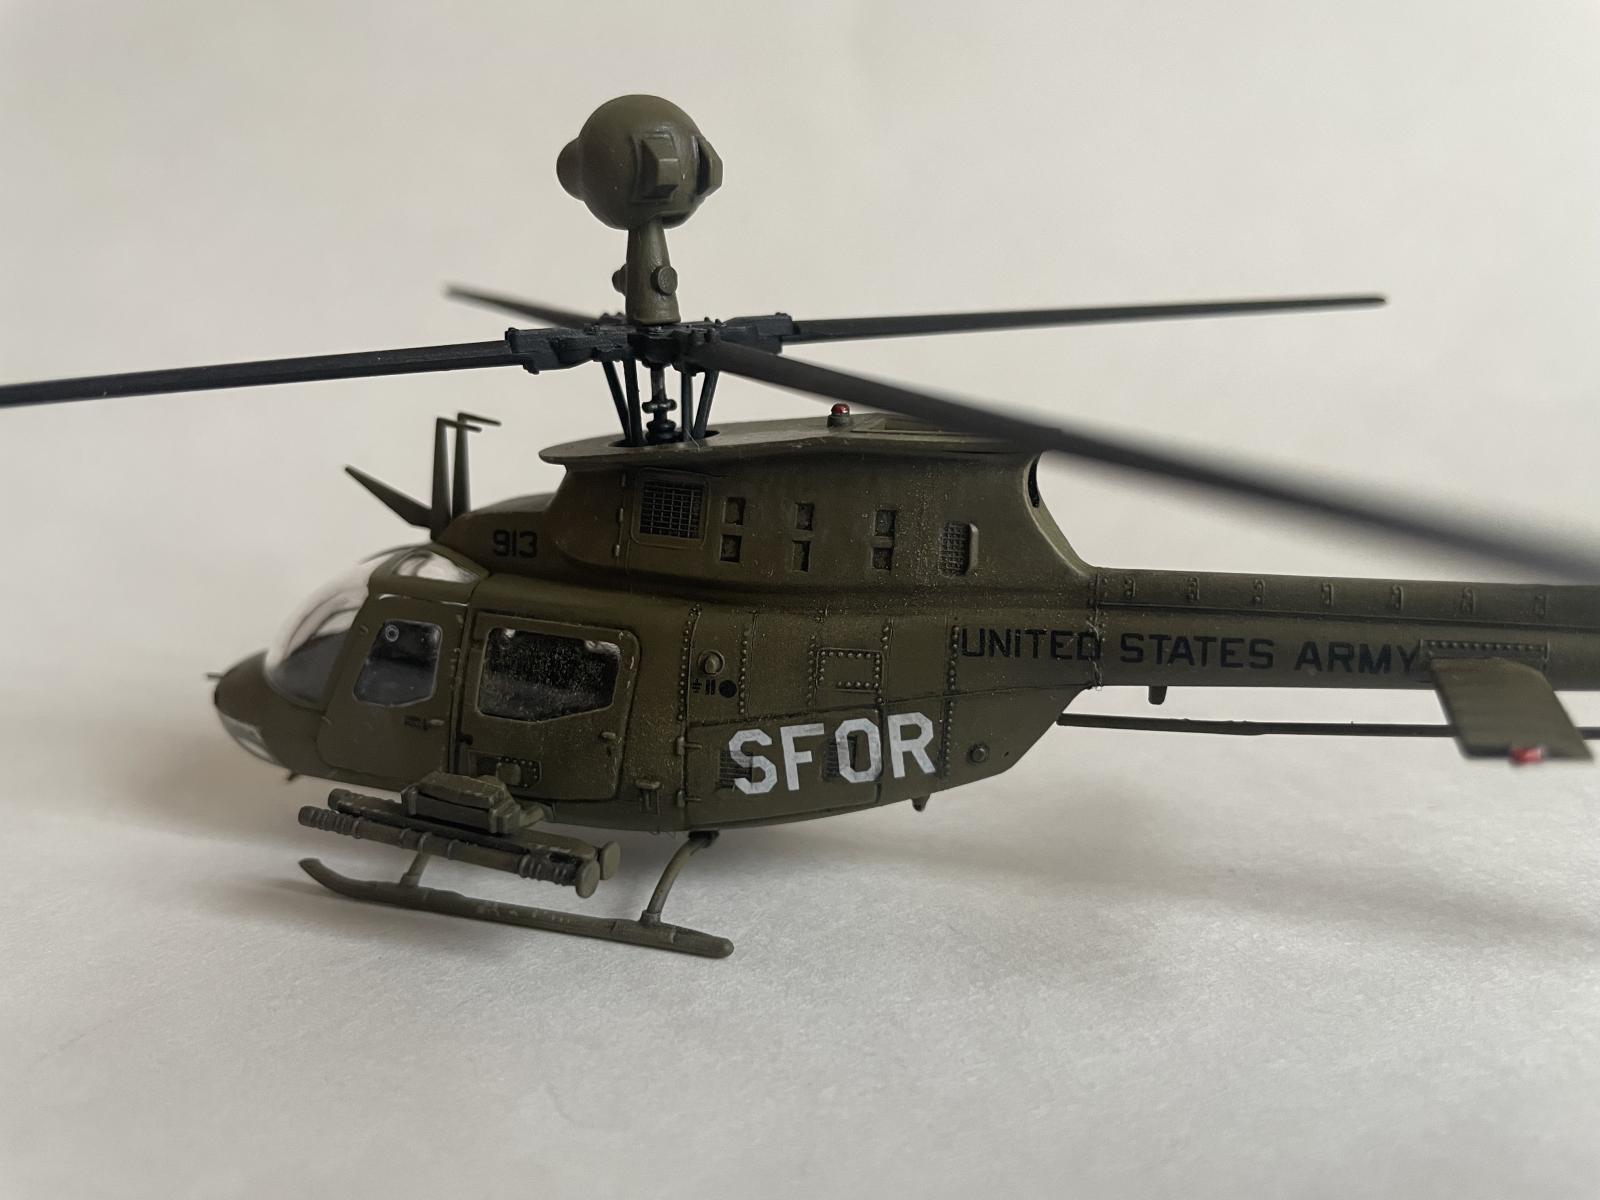
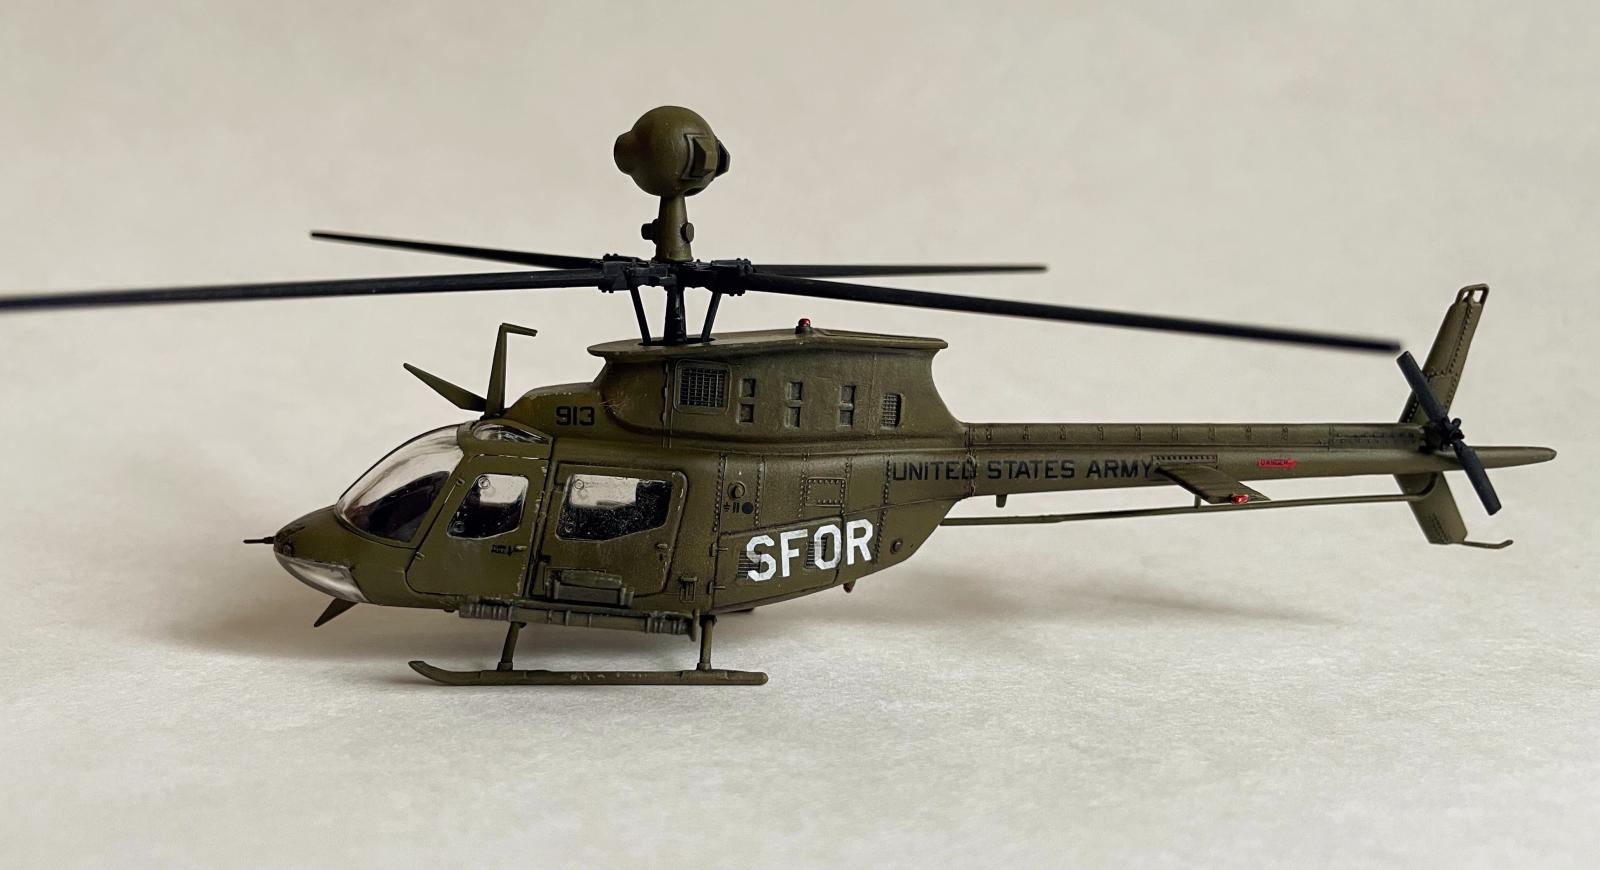
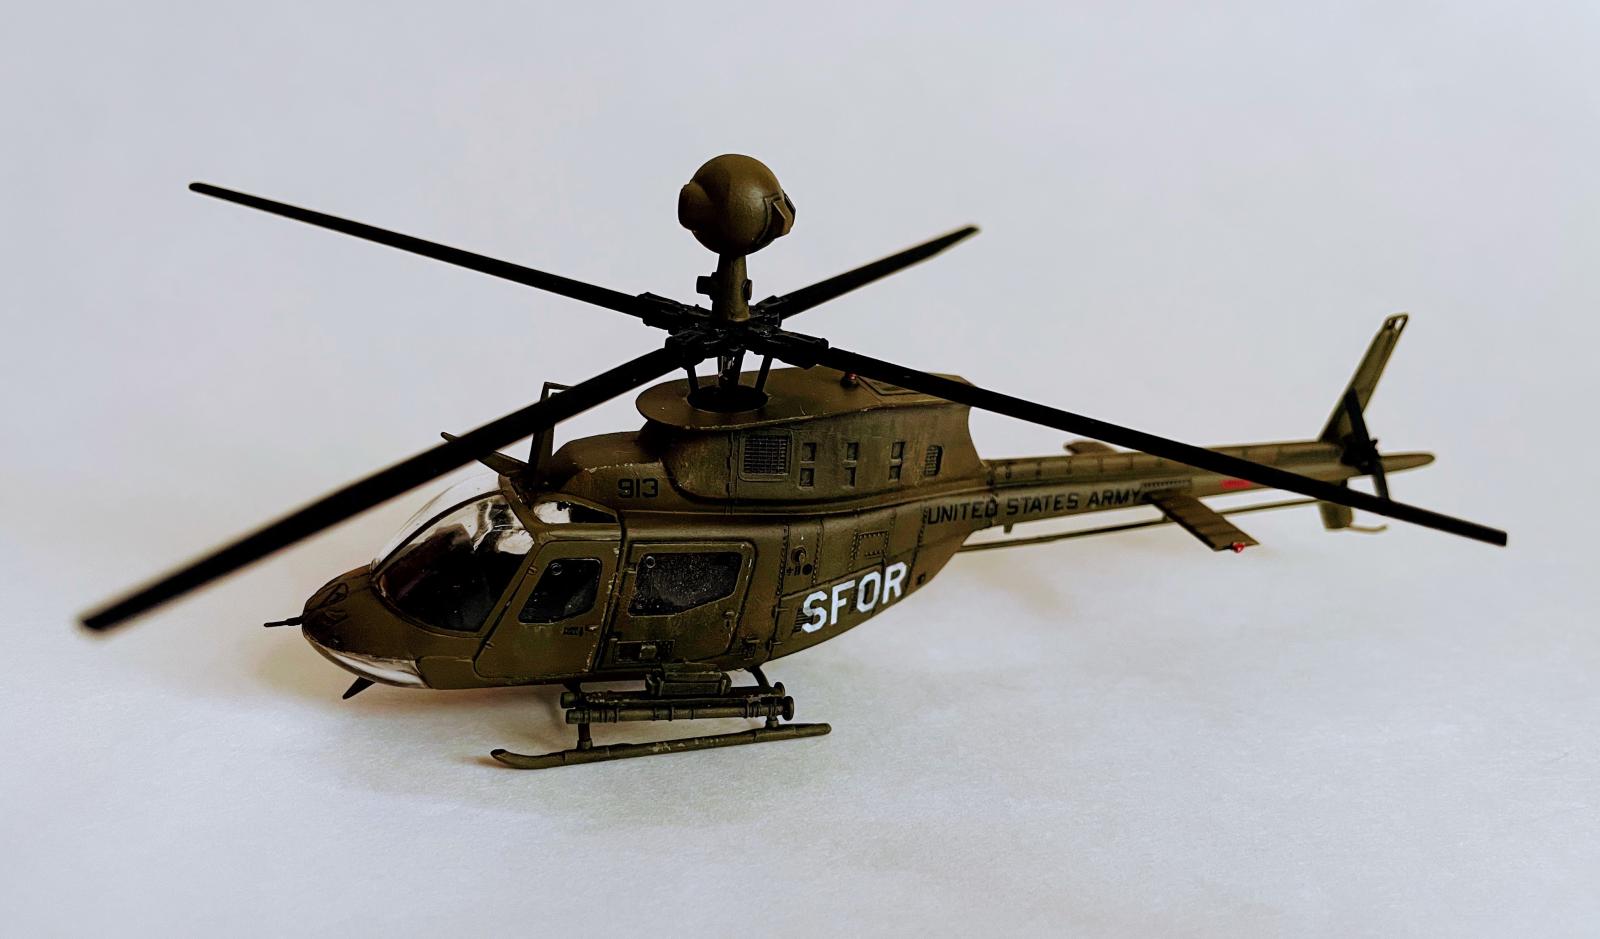
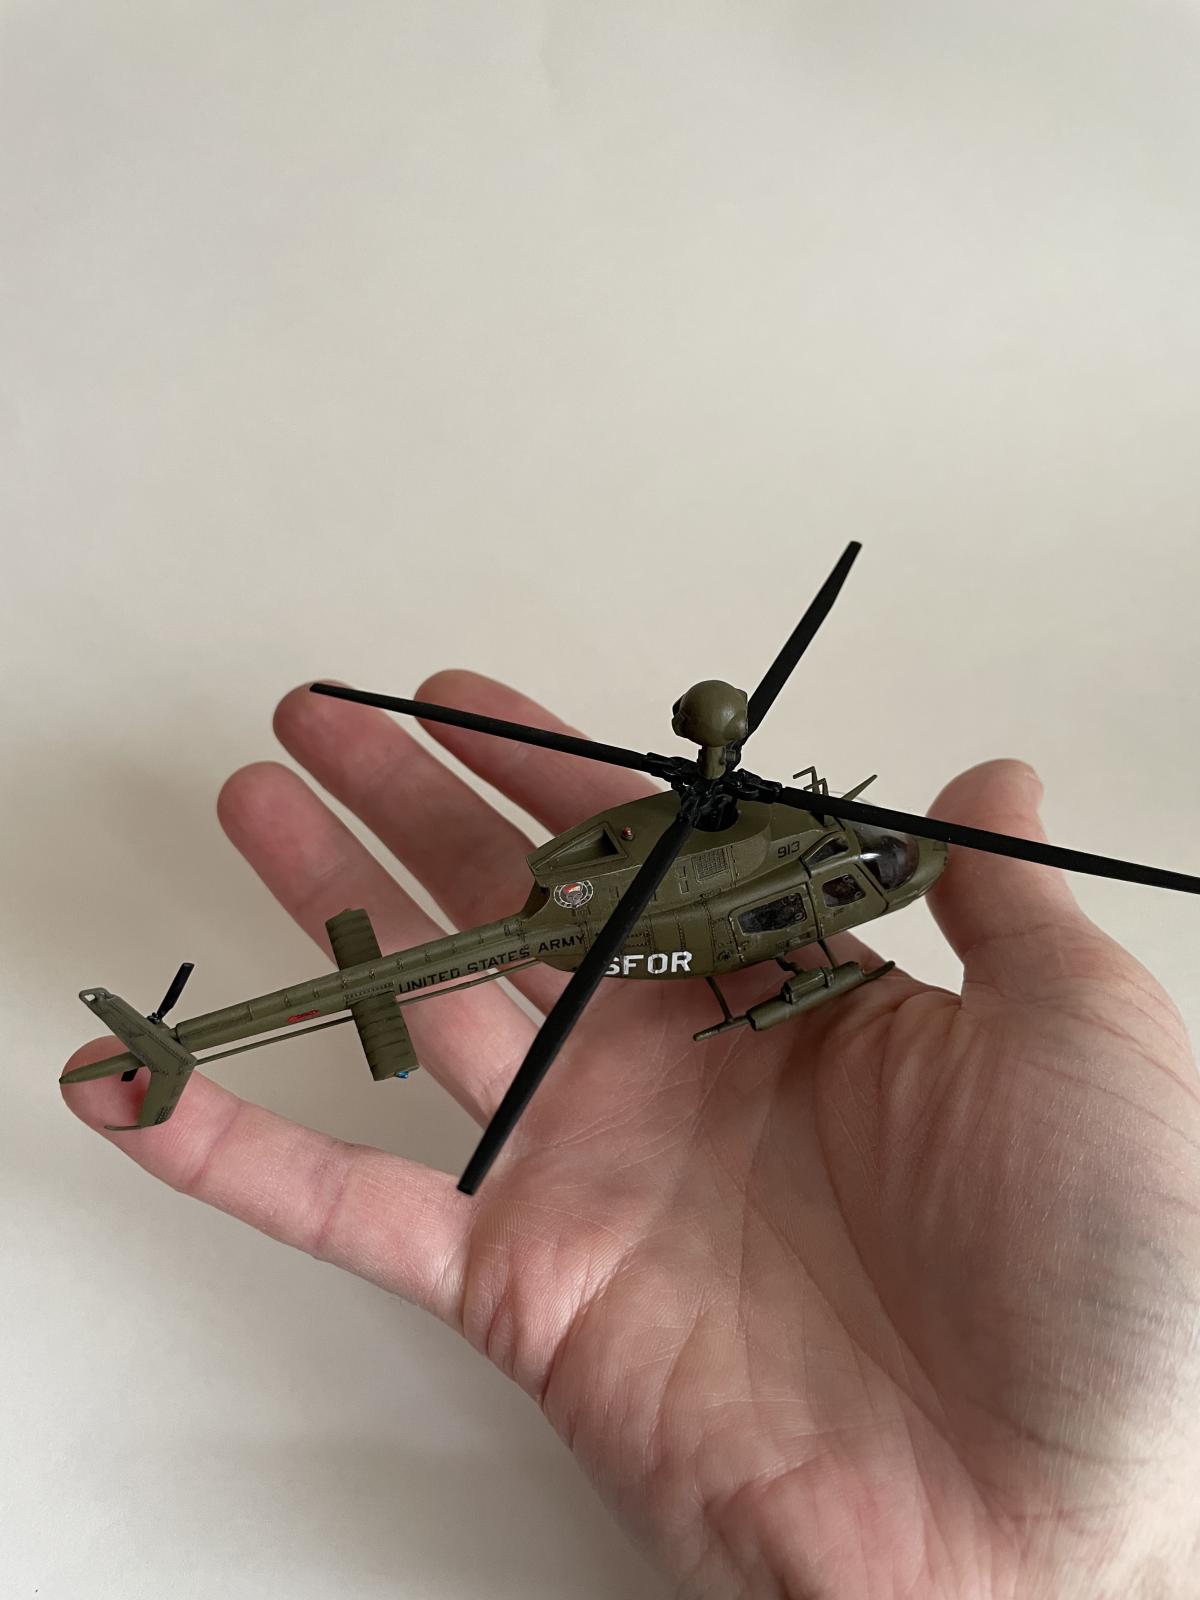
1/72 Italeri OH-58D Kiowa Warrior
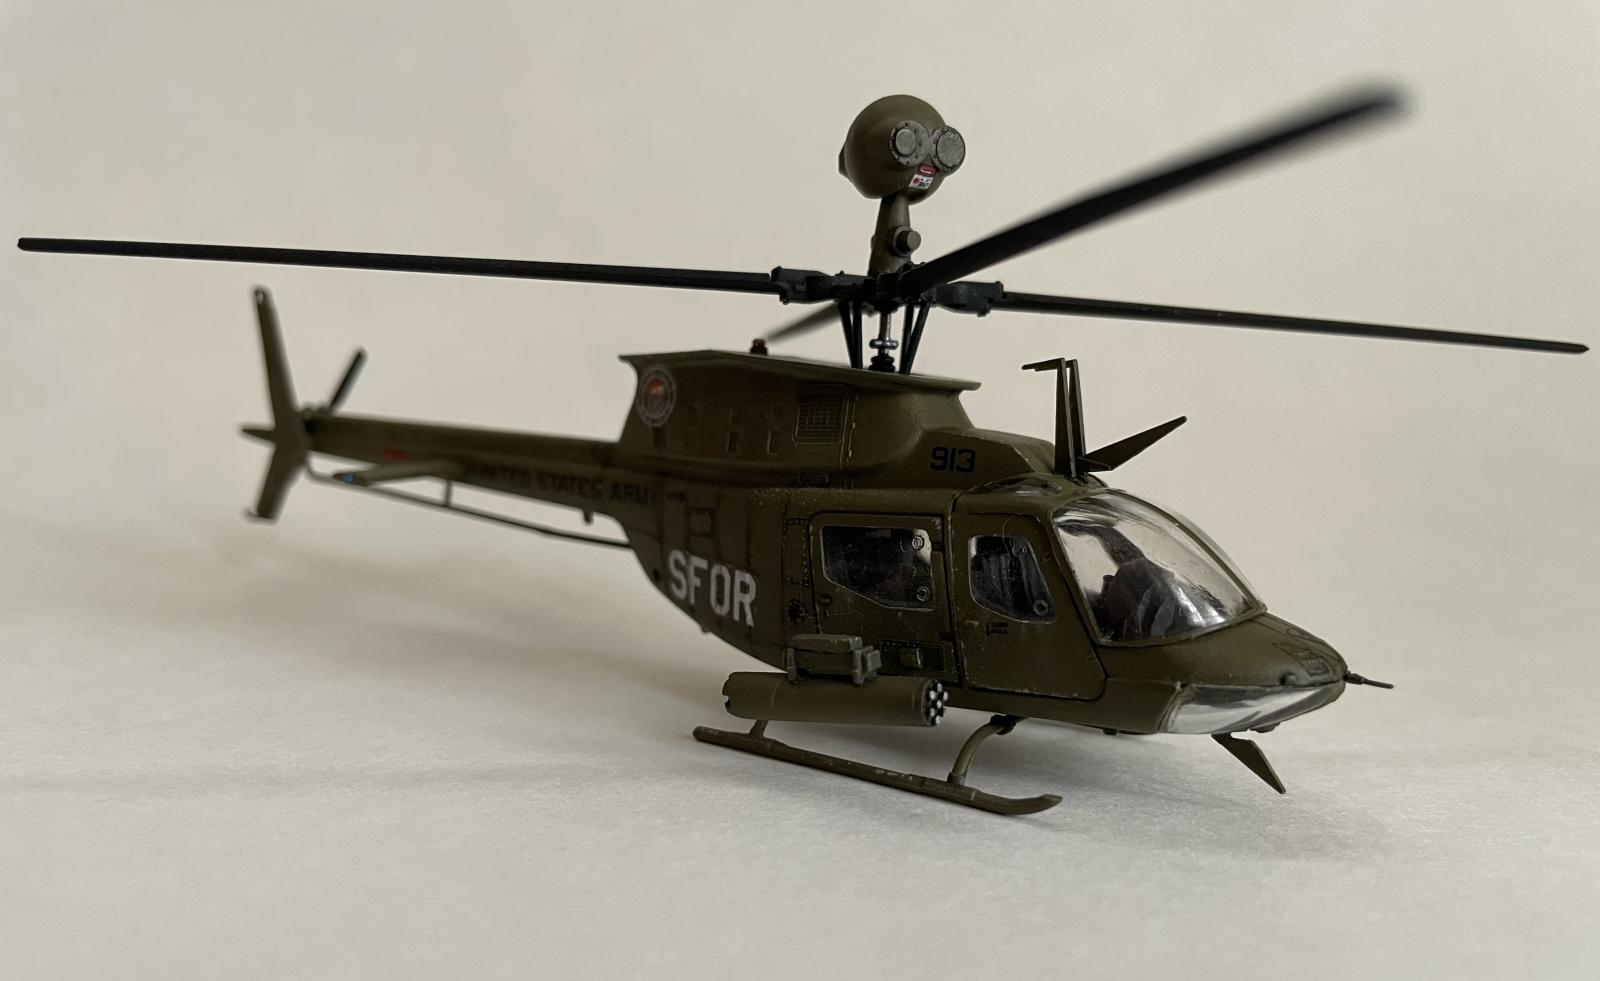
The OH-58 Kiowa is a single-engine, four-blade helicopter designed for the US Army primarily as a scout aircraft. In addition to its observation role, the OH-58D is capable of carrying munitions on two hard-points and performing direct fire support. The OH-58D also sports the conspicuous Mast-Mounted Sight (MMS), a giant ball that sits atop the propellor shaft and provides a variety of imaging and laster designation capabilities. As a terrain-following craft (so-called “nap of the earth”), the OH-58D would fly low, using the MMS to peak above obstacles and ridge lines. It also sports the distinctive wire strike protection system, the blade-like extensions near the cockpit which function as giant wire cutters. Evidently, getting tangled up in power lines and other low-lying cables is a bit of a problem: in the 70's, it accounted for 16% of aircraft-related fatalities, according to Wikipedia.
The Kit
There are two available releases of the OH-58D: the Italeri/Testors/Tamiya and the Matchbox/Revell. I have both, and there really isn't much comparison: the Italeri kit is considerably more detailed and generally of better quality. Below, Matchbox is on the left and Italeri on the right.
Both kits have raised panel lines, though the Italeri has some nice raised rivet detail. Plus, the Italeri scout has weapons options (Hydra rockets and Stingers), so it's possible to build the venerable Kiowa Warrior. Note that neither OH-58D has an IRCM turret. I let my 6-year-old son have some fun with the Matchbox while I built the Italeri. I picked up the Kiowa decal collection from Print Scale (No. 72-070), with options to build a dozen or so versions. Some of these decals, though, seemed maybe a little large for the scale, and many of the “technical” decals, labels saying things like “Lift Here” and “No Step” were just illegible scribbles, which is pretty lame. The decals were very thin and prone to folding over and wadding up, but they weren't delicate and would survive a good repair mangling
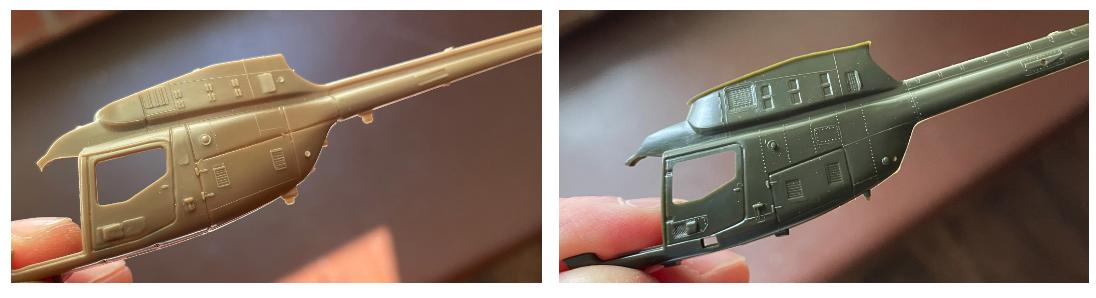
First, I rescribed all the panel lines. This was a little challenging in places where the fuselage had curvature: my preferred method of using Dymo tape didn't work here, since that tape is quite rigid and simply will not bend. For the more curved sections I used Tamiya's white bendy tape, which worked pretty well.
I chose to build the Kiowa of the “Bounty Hunters”, belonging to the Stabilization Force (SFOR) in Bosnia in 1998. Both the model kit and the decal collection called for FS34087, which is Mr Color 304 Olive Drab, though it looks rather more olive than most of the OH-58D's I see on internet. The clear plastic windows attach from the inside, and so these must be well-masked. This was easy enough to do by covering the window with masking tape and cutting around it with a knife. But, I was afraid that I might pop the window into the helicopter when it came time to remove the masking tape (imagining the sparing beads of PVA glue being no match for a tooth pick probing the window edges, however lightly). So, I got what seemed a good idea: affix the windows with clear packing tape:
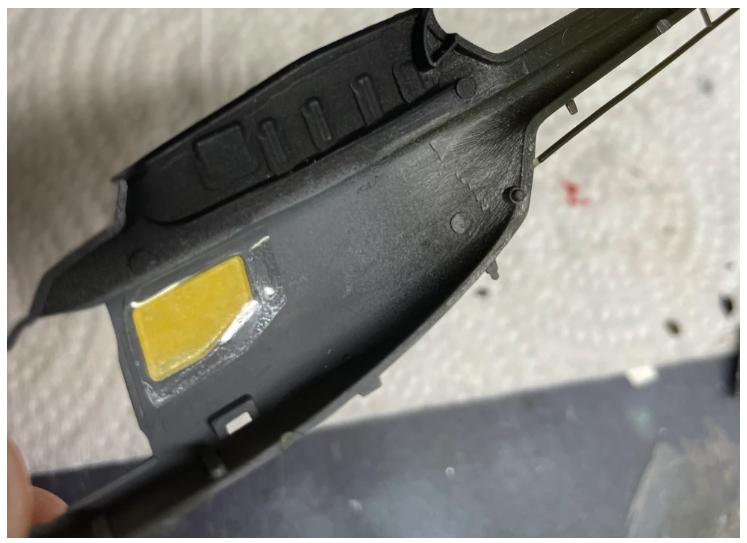
But, duh. This packing tape would be visible when looking into the helicopter through one of these very windows! Happily, this wasn't the case: it's too dark in there to make out the tape around the opposite window, and so perhaps there's something to this method if the situations allows for it.
The only part I had trouble with was the canopy: it didn't sit flush against the fuselage at the very top, and so I ended up adding a tiny strip of styrene to the fuselage to fill this gap. All good.
I used Tamiya Black panel liner to accent the rivets and other details: I tried a few lighter gray tones, going for a more subdued look, but these didn't play well off the olive green base. It was challenging to not completely remove the panel liner when doing touchups, since there was so much raised detail. By letting the wash fully dry, I was able more carefully remove the excess with a precision swab.
After the dull coat, I applied some oils sparingly to simulate fading and dirt: a little bit of Oilbrushers Dusty Earth and Abteilung Ochre in places, like light streaks under windows. I stippled some Tamiya Buff along some edges to simulate chipping and worn paint, but I was mindful of restraining myself here: it's a tiny model and easy to kill with too much weathering. Lastly, I gave it a quick dusting with Tamiya Weathering Master pigments Sand to give it some real-life texture.
In the end, I really enjoyed this build. Tiny but just the right amount of detail to make it look realistic without making too big a chore.

This is such a fantastic result, Brian!
Such a wonderfully built petite model!
Congratulations!
Looks great indeed, Brian @bapowellphys
Helicopters in that scale are always a challenge.
Wow, it’s tiny, a great build with lots of detail, Brian. How’s the Matchbox kit coming along?
Tiny but mighty! Well done Brian.
Nicely done Brian.
Nicely done! How'd your six-year-old make out with the Matchbox ?
Thanks all! The six-year-old had a great time with the Matchbox kit. Learned what happens when one uses styrene cement on clear parts. Now he wants to tackle my spare 1/72 AC-130 and I'm like tap the brakes, my man.
Very nice! That is one small whirly bird... well done!
Nicely done Brian!