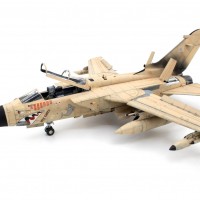
Airfix P-40 Warhawk, American Volunteer Group
The Curtiss P-40 Warhawk was introduced in 1938 and saw extensive use in both theaters during WWII. It was a popular aircraft with allied militaries during the war, forming the backbone of the Desert Air Force (DAF) in North Africa. Its engine lacked a two-speed supercharger, greatly limiting performance at high altitudes; however, the P-40 excelled in the low-altitude close air support role relevant to the North African campaign. At high speed it had a tighter turn than any German aircraft, outmatched in the Pacific only by the Japanese Zero and Oscar fighters.
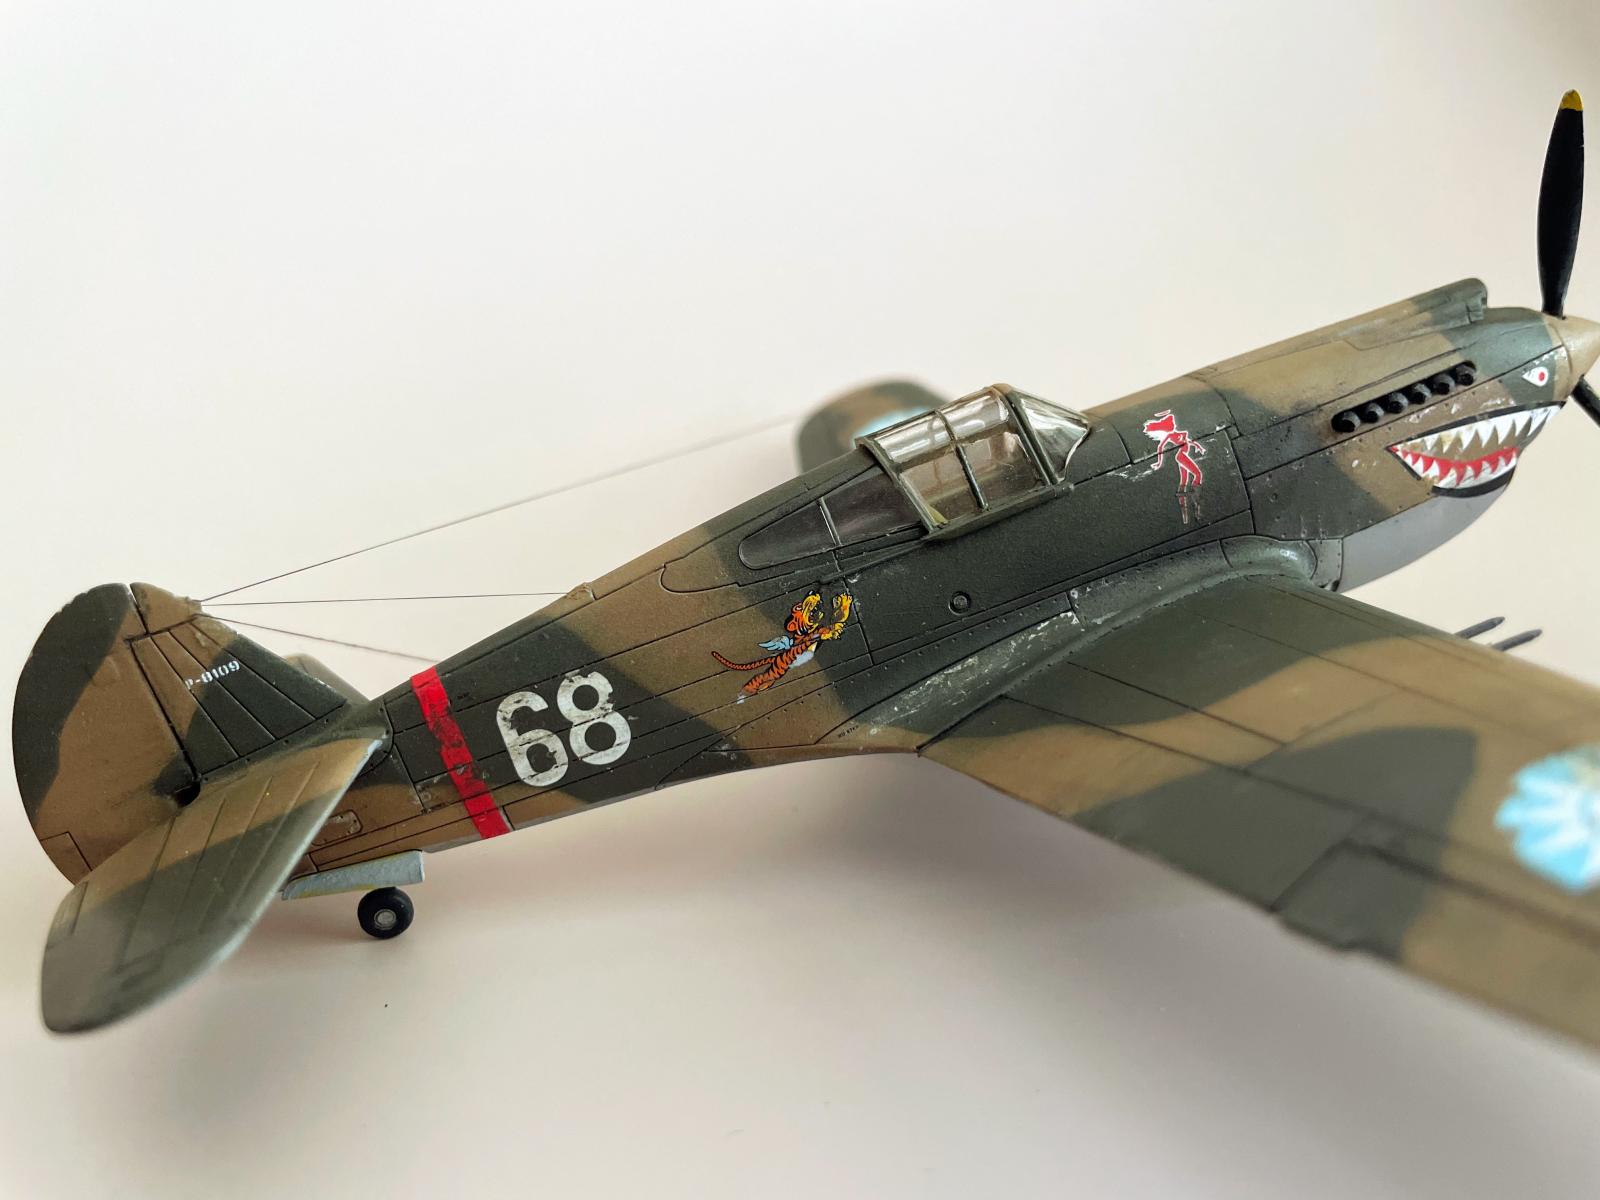
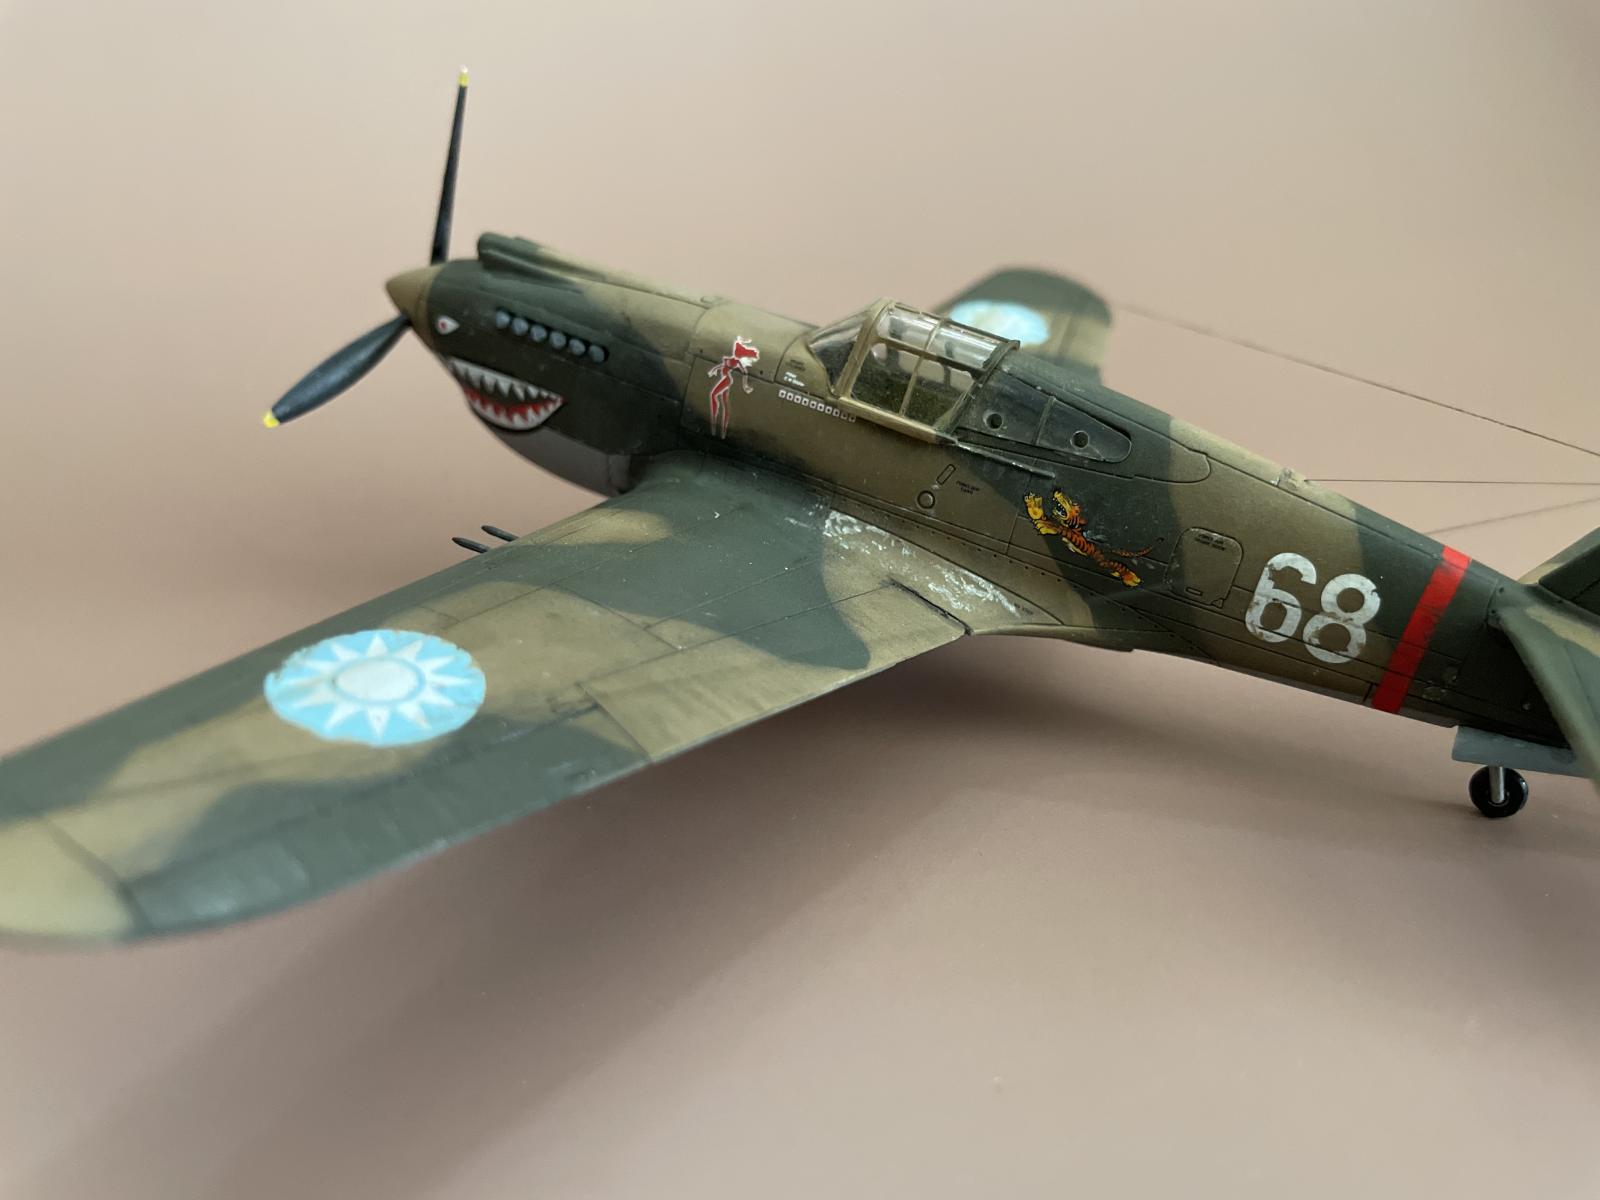
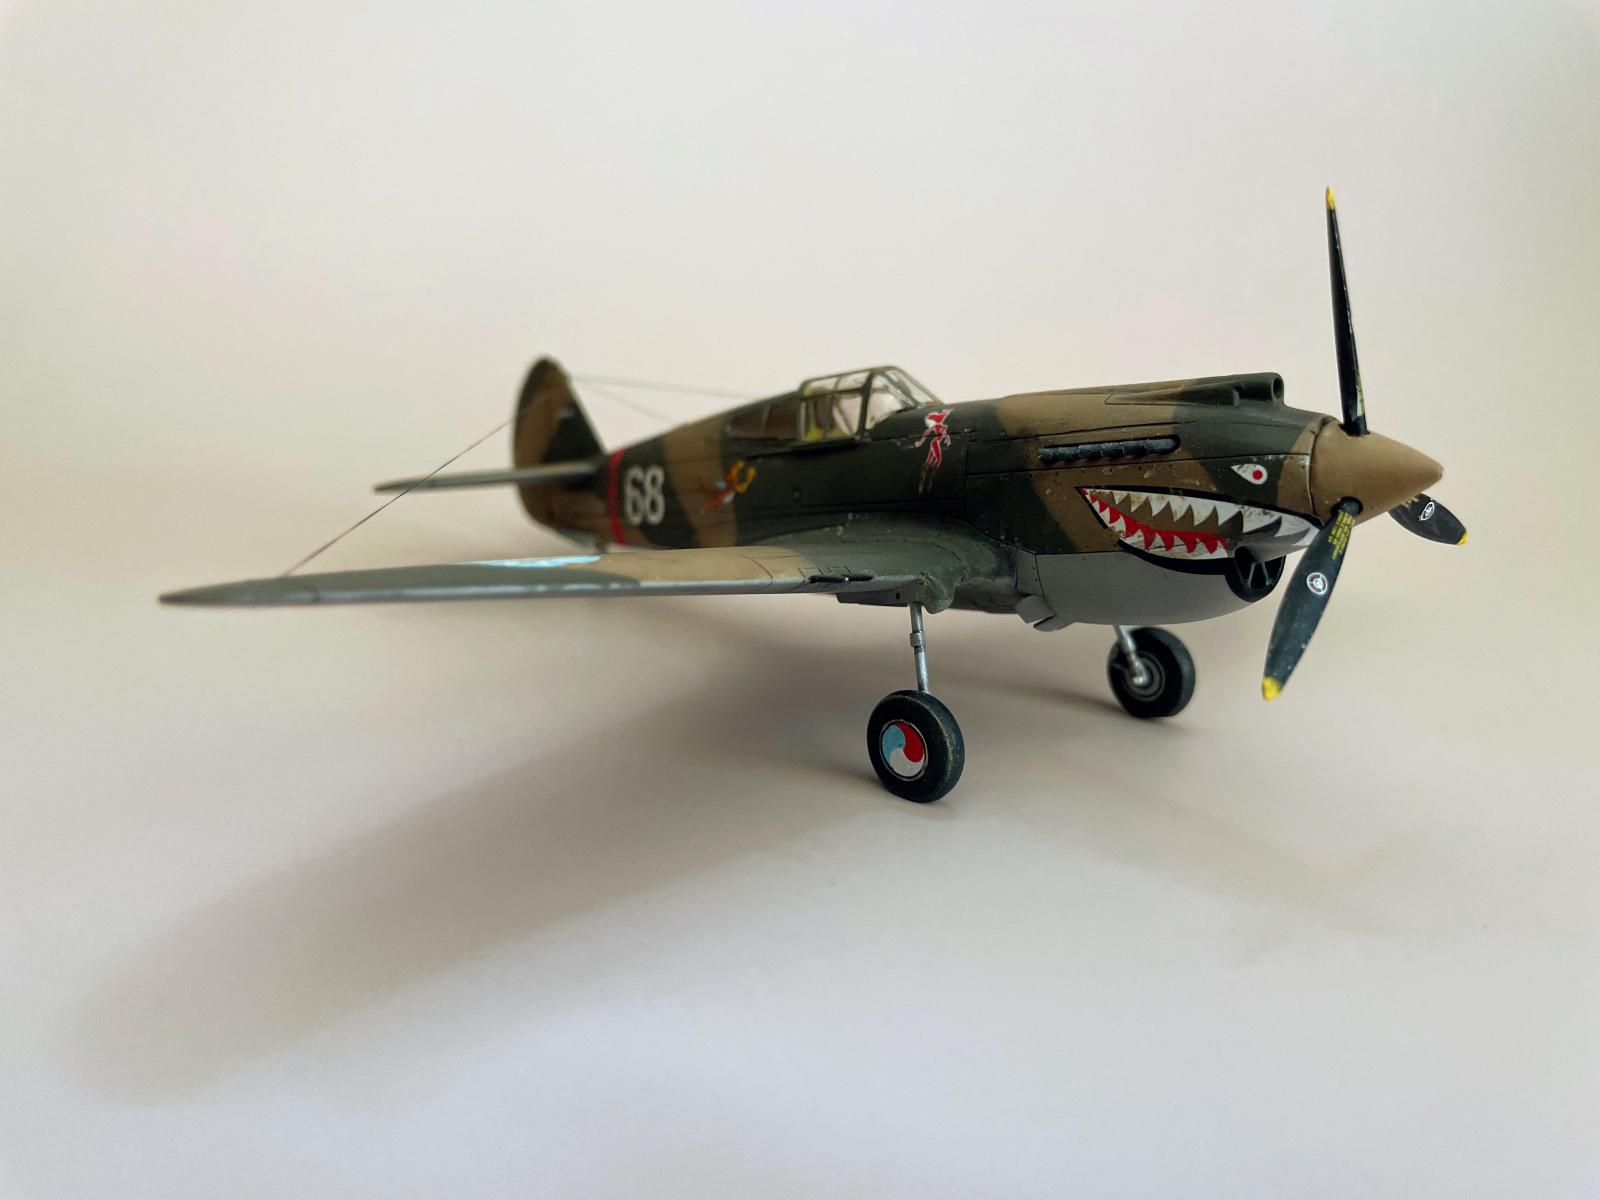
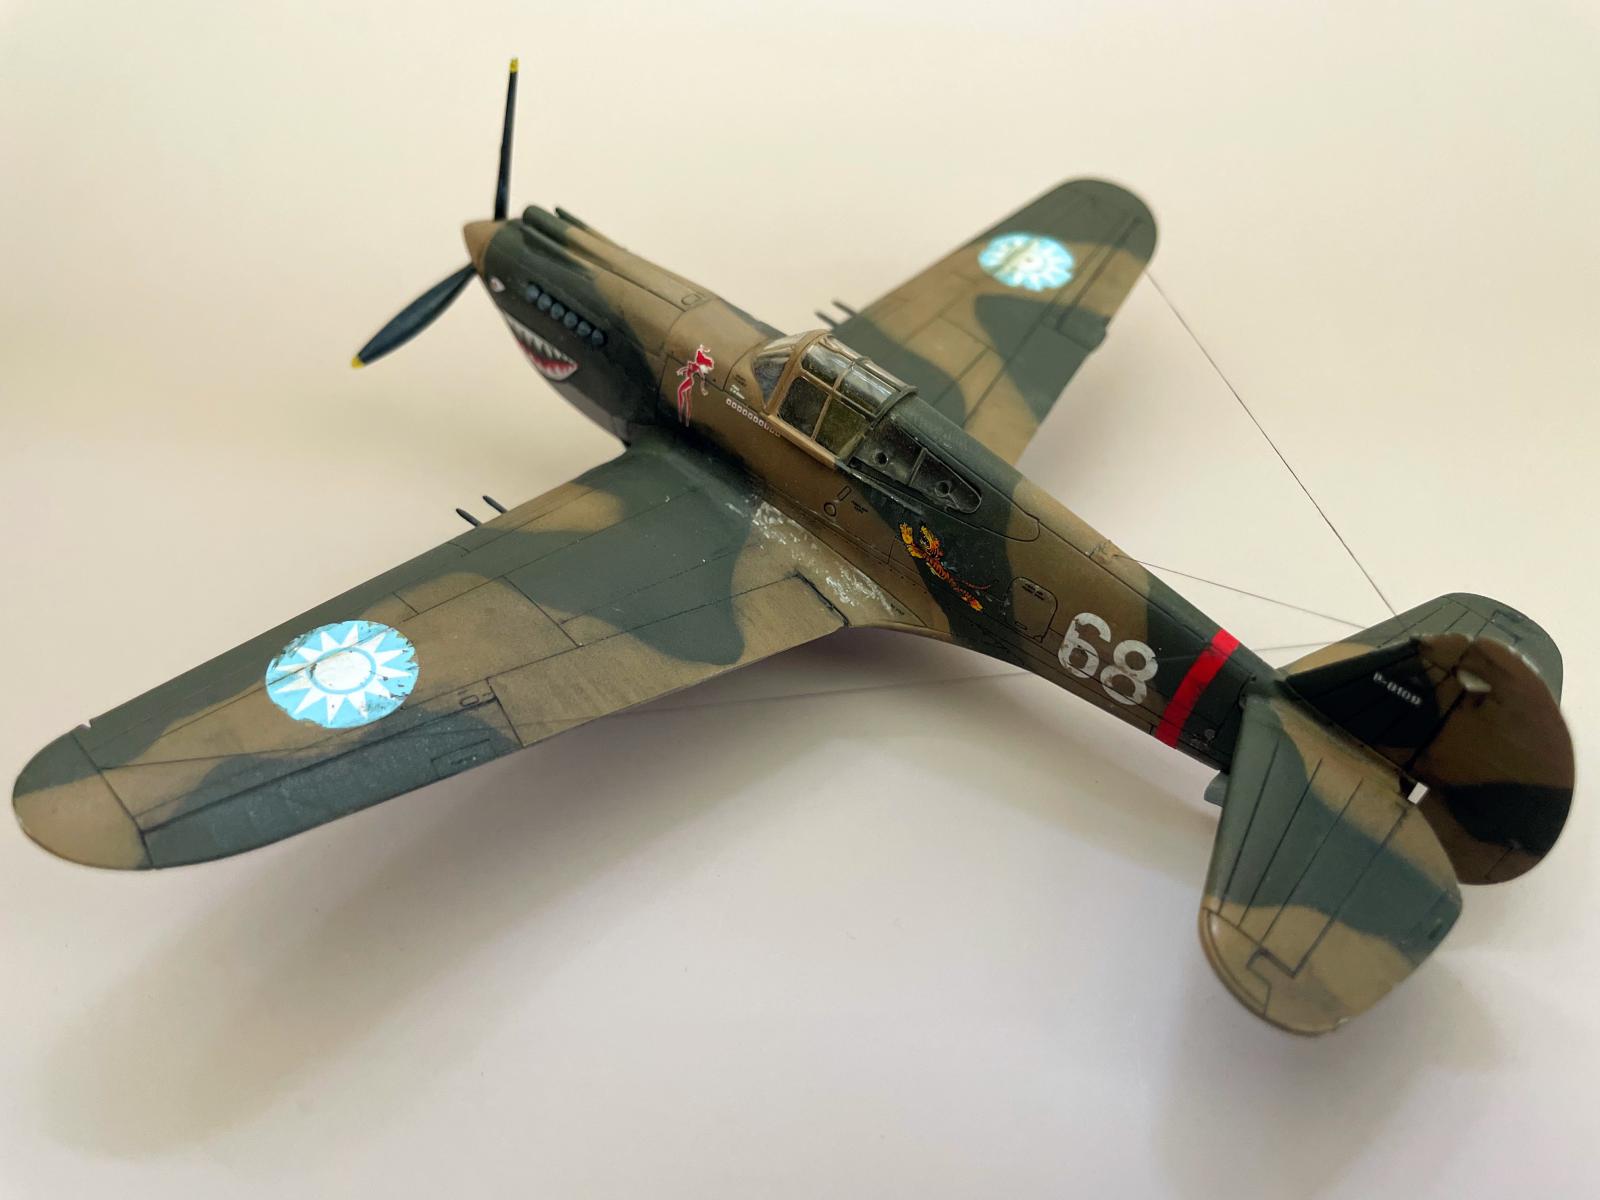
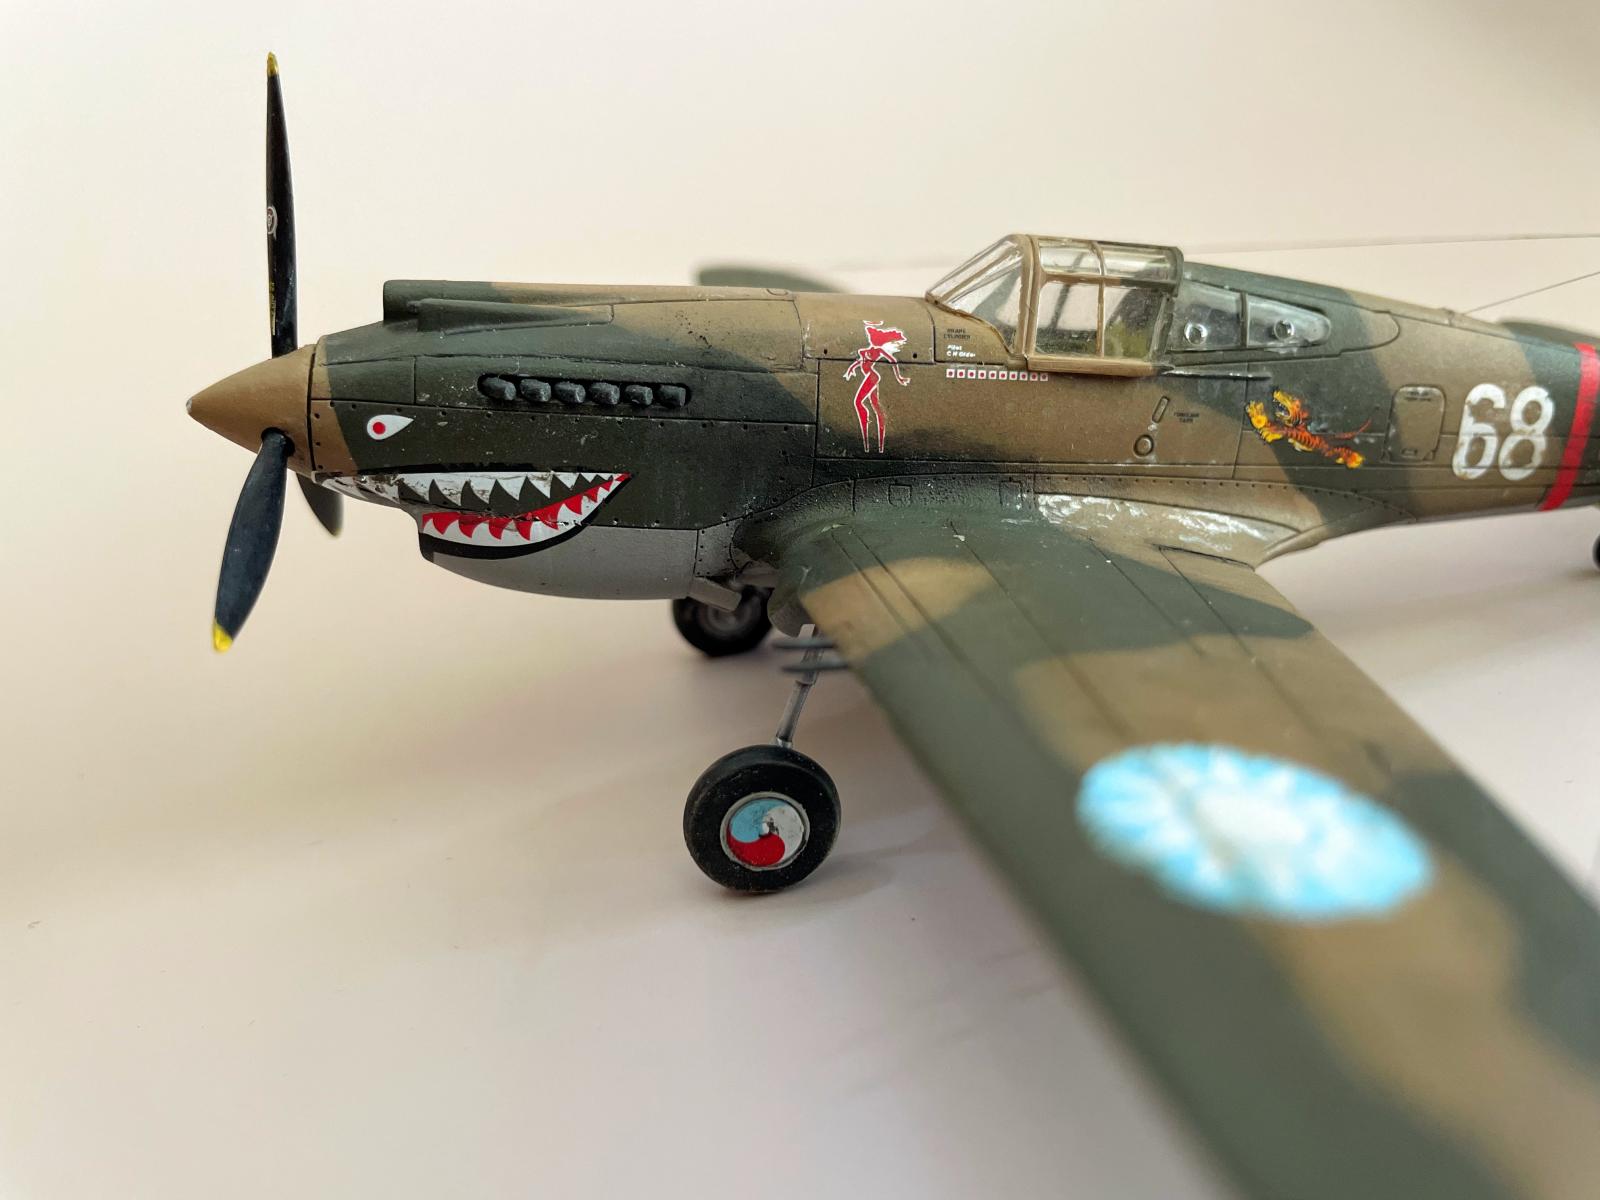
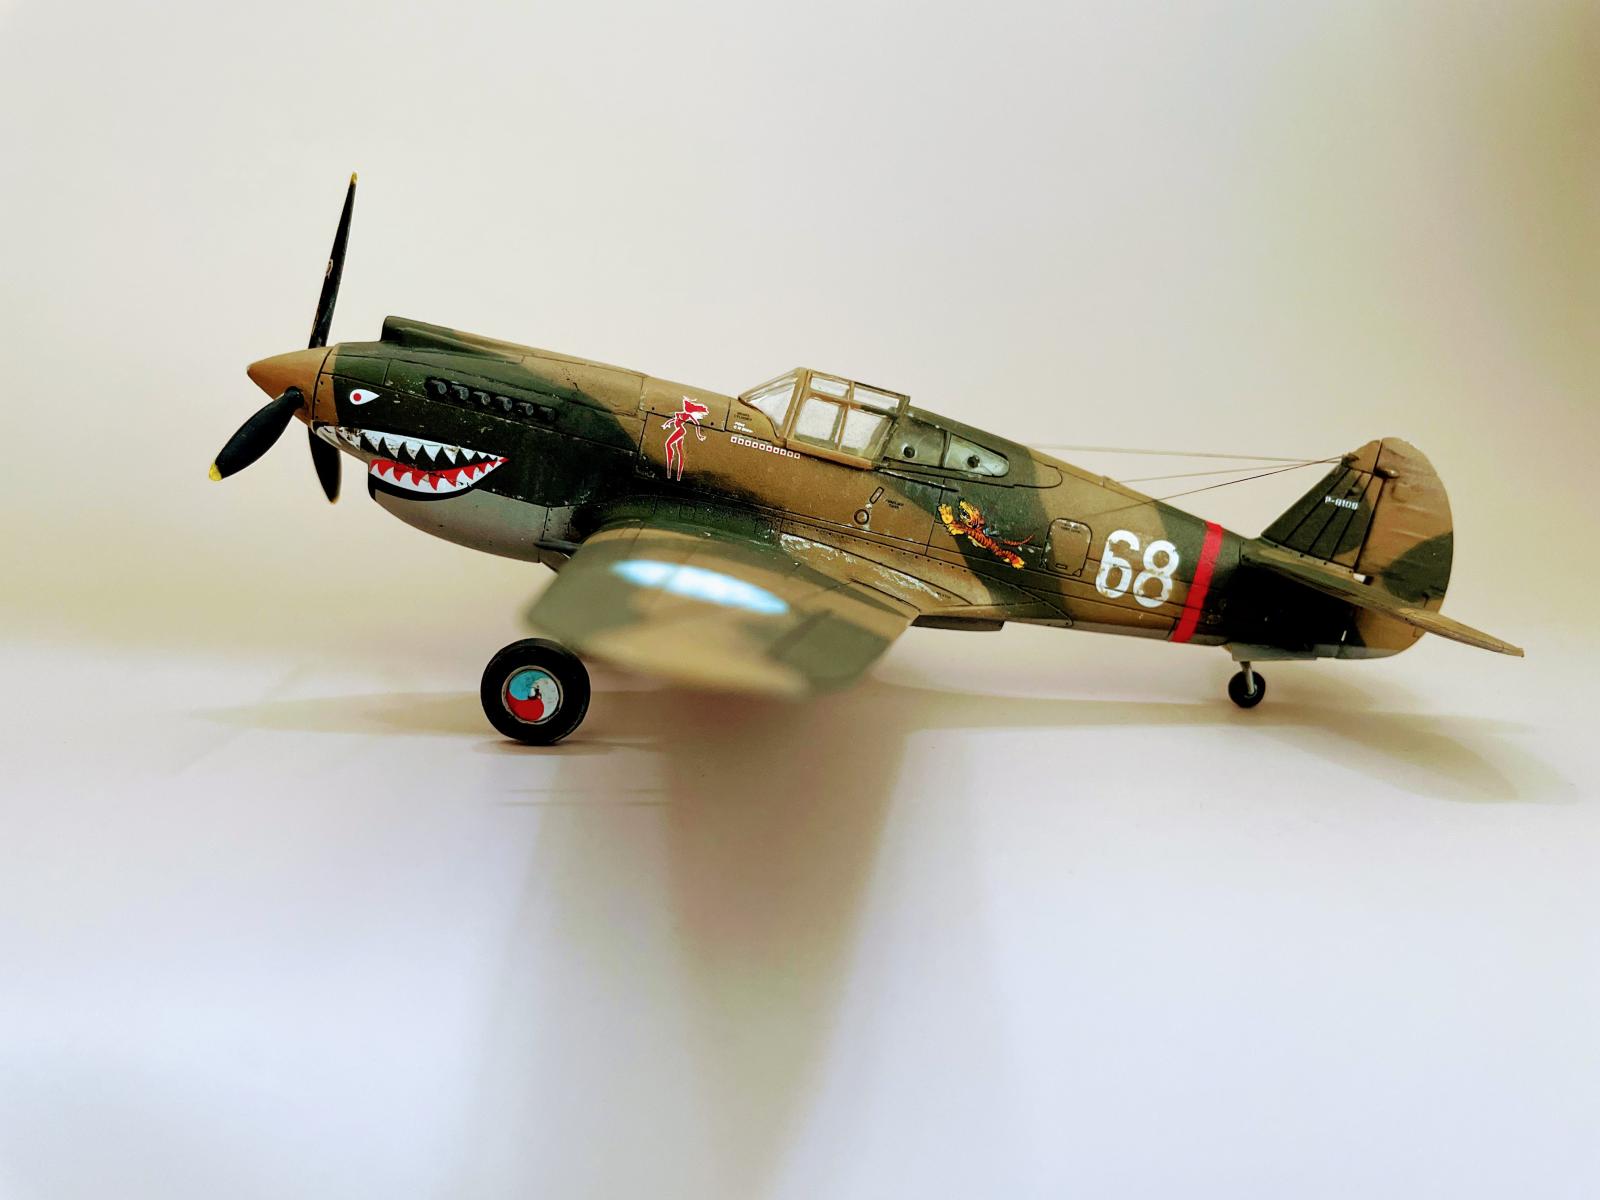
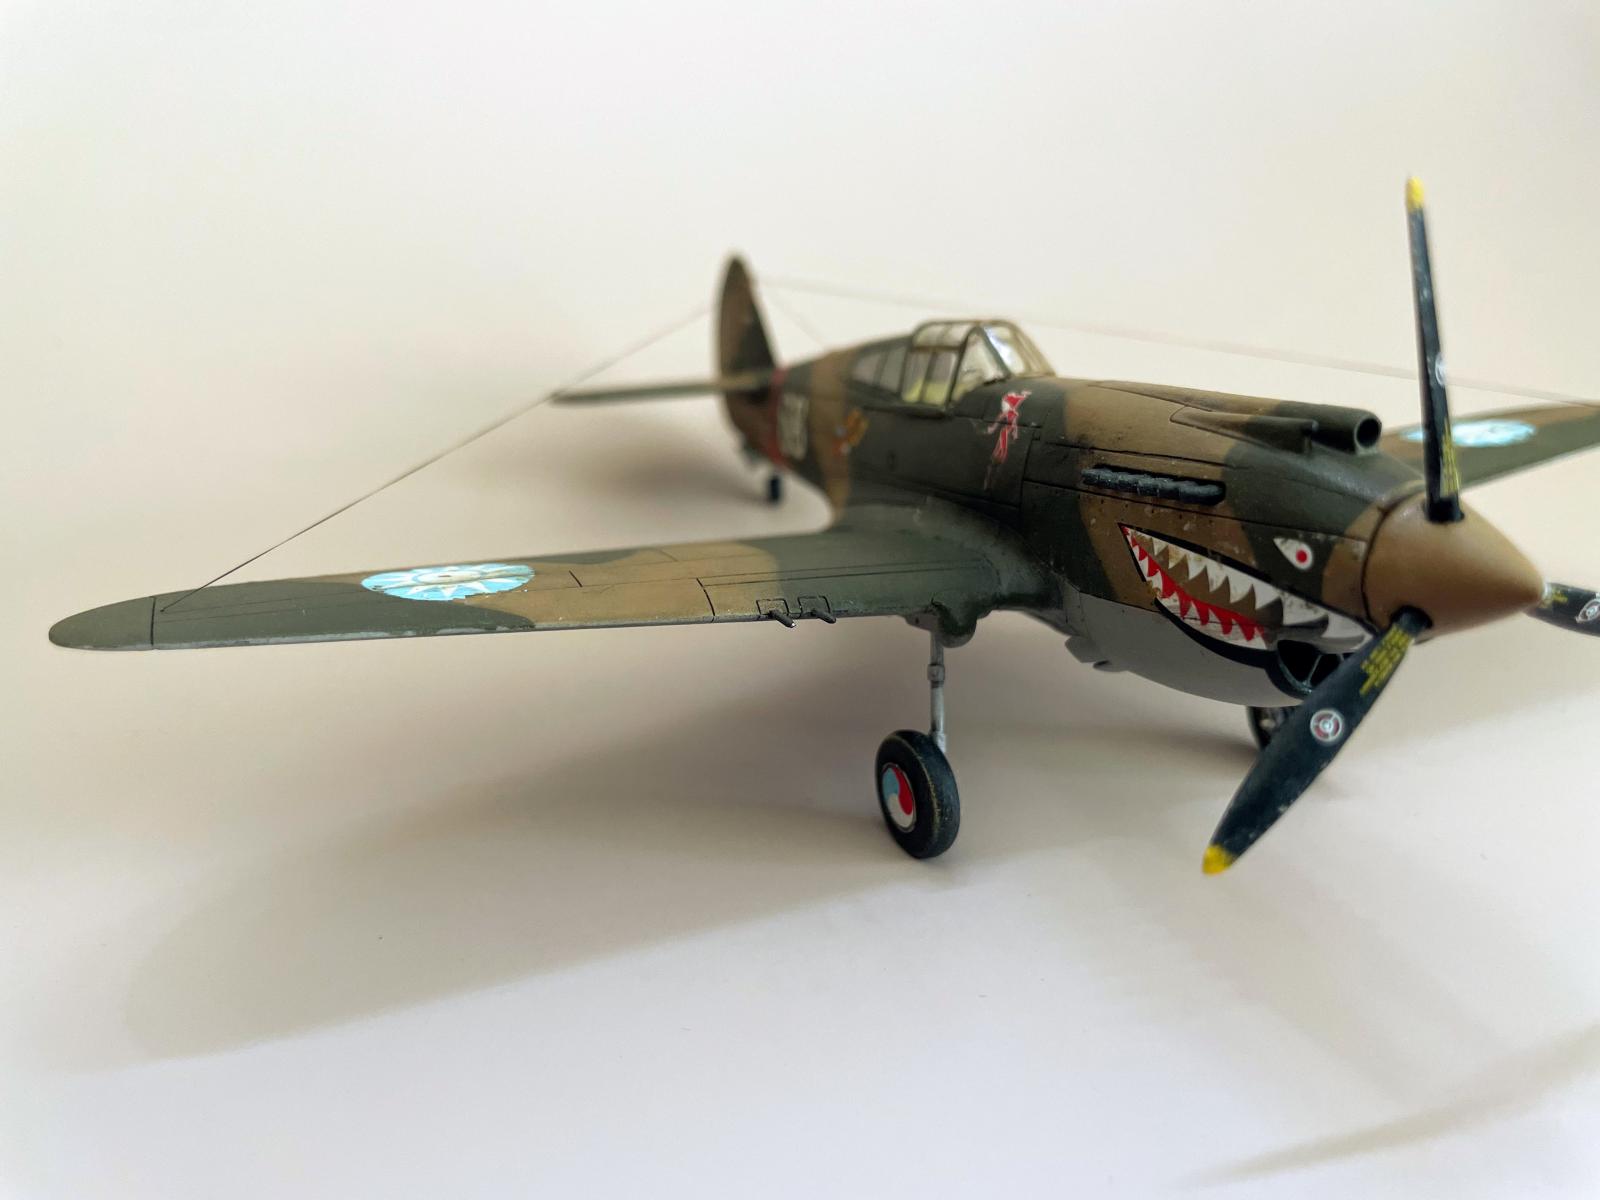
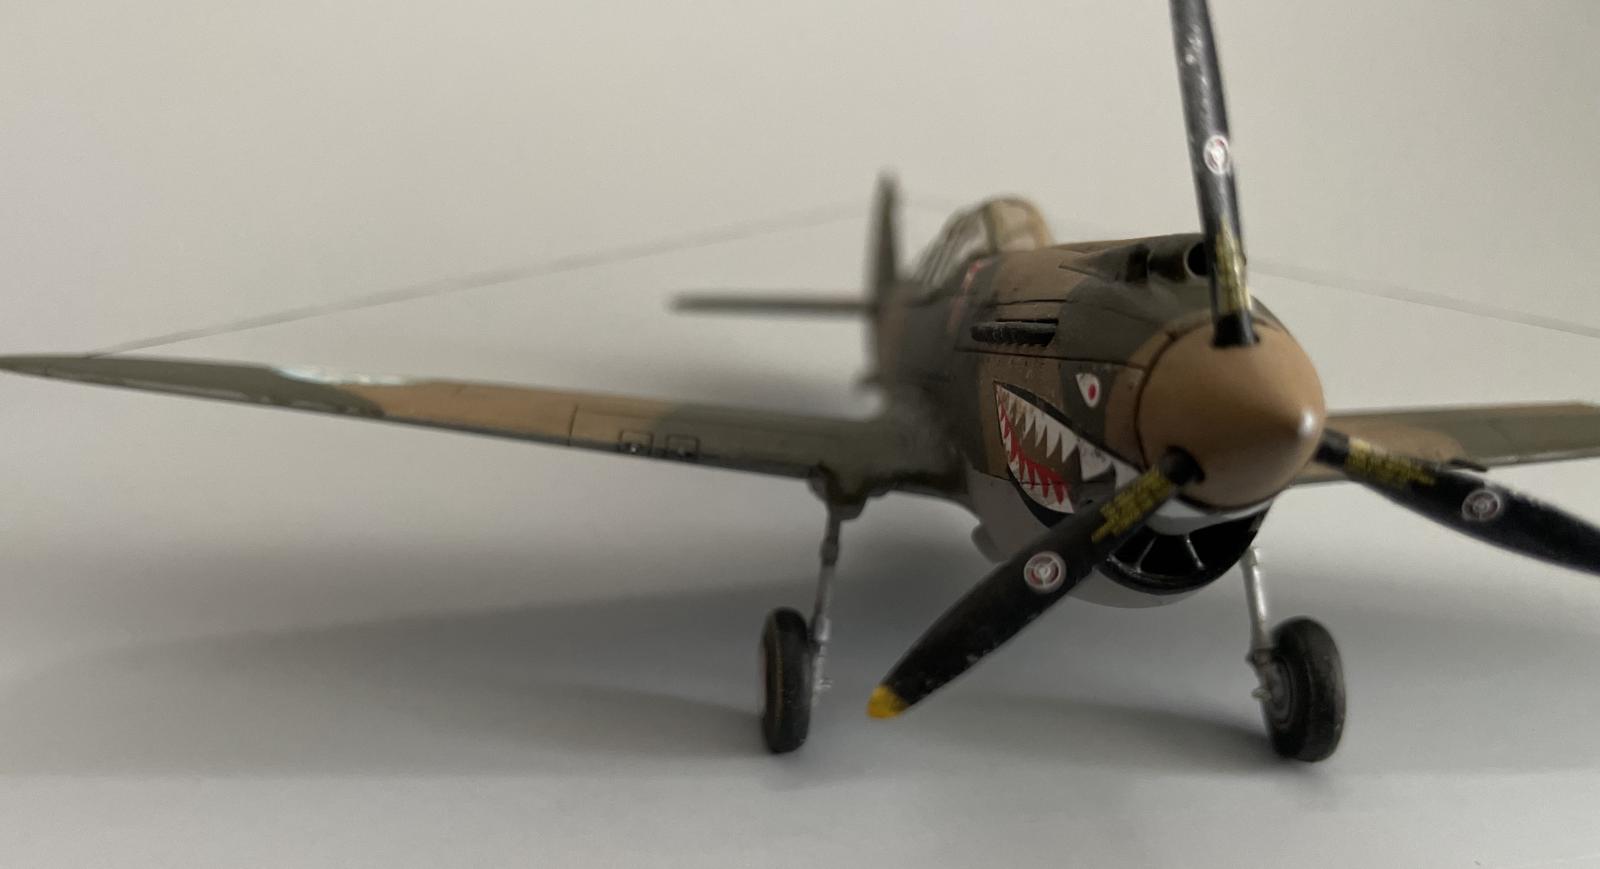
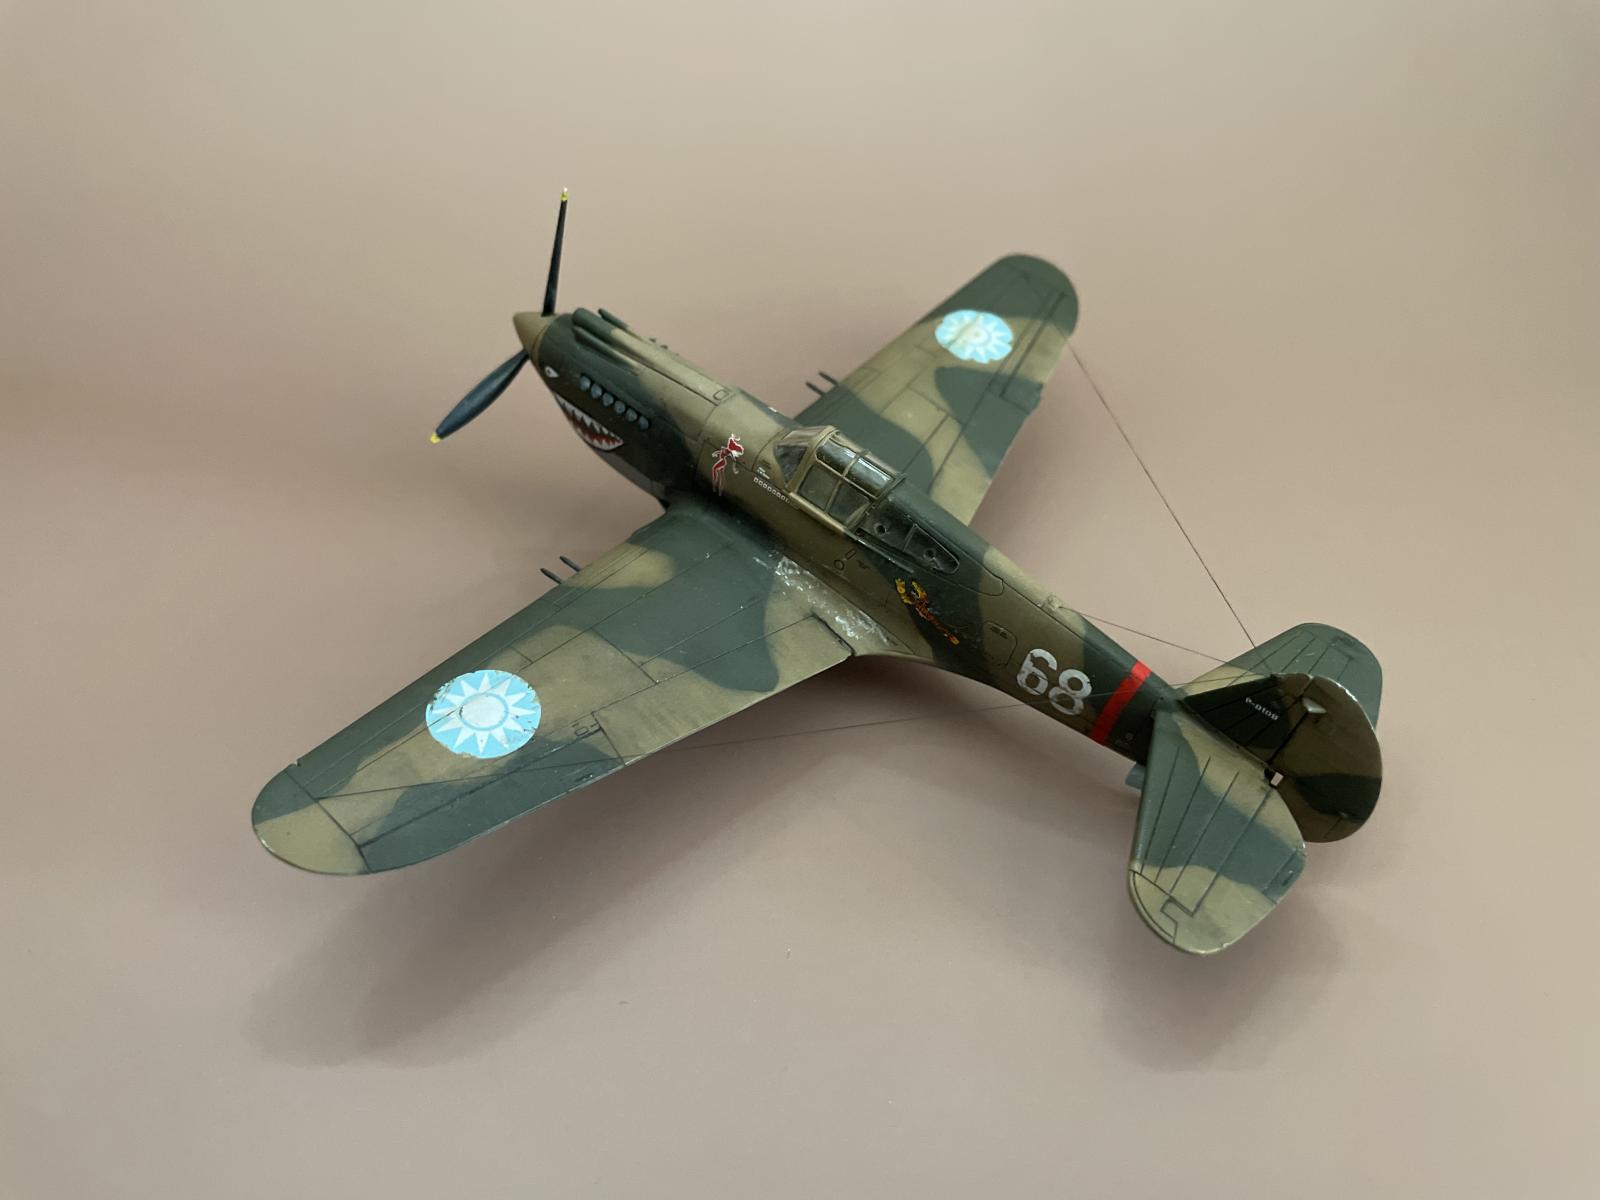
As the Hawk 81-A-2, the P-40 was used by the American Volunteer Group in support of the Nationalist Chinese Air Force. This group, known as the Flying Tigers, comprised 100 pilots and 200 ground crew chosen across the USAAC, USN, and USMC; they flew P-40s dressed in Chinese markings and aided in the defense of the Chinese mainland from the invading Japanese. The AVG P-40s were painted with the menacing shark mouth inspired by the P-40s of the No. 112 Squadron RAF in North Africa, which were in turn inspired by the nose art of Bf 110s in Crete.
The AVG were a rugged crew: though stationed in regions rampant with malaria and cholera, they had only “4 doctors, 3 nurses, and a bottle of iodine.” Food was a disappointment, and mail was slow. Their P-40s were allegedly sub-par, rolling out of Curtiss factories with left-over parts slated for P-40Bs, not the C variant currently in production. And yet, to say that the squadrons performed admirably would be an understatement: the AVG was officially credited with 297 enemy aircraft kills, with a kill ratio of 10:1 against the more numerous and better equipped Japanese air forces.
Curtiss would cease production of the P-40 just prior to the war's end, in 1944. In total, 13,738 units were built, making it the third most-produced American WWII aircraft behind the P-51 and P-47.
The Kit
The 1/72-scale Airfix Curtiss Hawk 81-A-2 is a well-regarded kit, and for good reason. It has excellent recessed detail (subdued rivets and panel lines) and crisp molding. It comprises 35 pieces in gray styrene, and 4 clear pieces. The only notable fit problem was a large (maybe 2mm) gap at the wing root of one of the wings. Extra parts are included for wheels up configuration, and the canopy can be made in the slid-open position. The paint guide is a little nuts: colors are given in Humbrol codes with the "approximate" DuPont codes for the green and brown camouflage. But, when these DuPont codes are translated to FS codes, the Humbrol numbers corresponding to these FS codes are not the ones called for on the box! I therefore tried to match the FS codes as closely as possible with other paints, settling on Mr. Color 310 for the brown and Tamiya XF-81 Dark Green (RAF) for the green. The underside was painted XF-19 Sky Grey.
I originally wanted to build a French P-40 from the African campaign, since these looked like real tough and dirty workhorses. But, I picked up an Airfix Warhawk having heard they're some of the best out there in 1/72, and was excited to learn about the volunteer group in China. For sure these planes were rugged enough.
I therefore decided I would do my best to put this poor thing through the wringer. This would mean I would try my hand at weathering decals for the first time: the most I'd ever done to this point is apply washes and oils over certain decals to either accent panel lines or to simulate grit or fading. This time I wanted to actually scrape and cut away parts of the decal to simulate paint chipping. I tried a variety of tools: scriber, Xacto, fingernail, 320 grit sandpaper. Doing this after the decal was set with Solvaset was difficult, and typically resulted in chipping not just the decal but the undercoat of paint. Decals that had not set yet were easier to deal with, though then it's easy to remove too much decal. I also played around with painting over the decals in places to simulate chipping, and obviously had to do this in areas that were chipped down to the plastic. In all, probably overdid it, but it was a good learning experience.
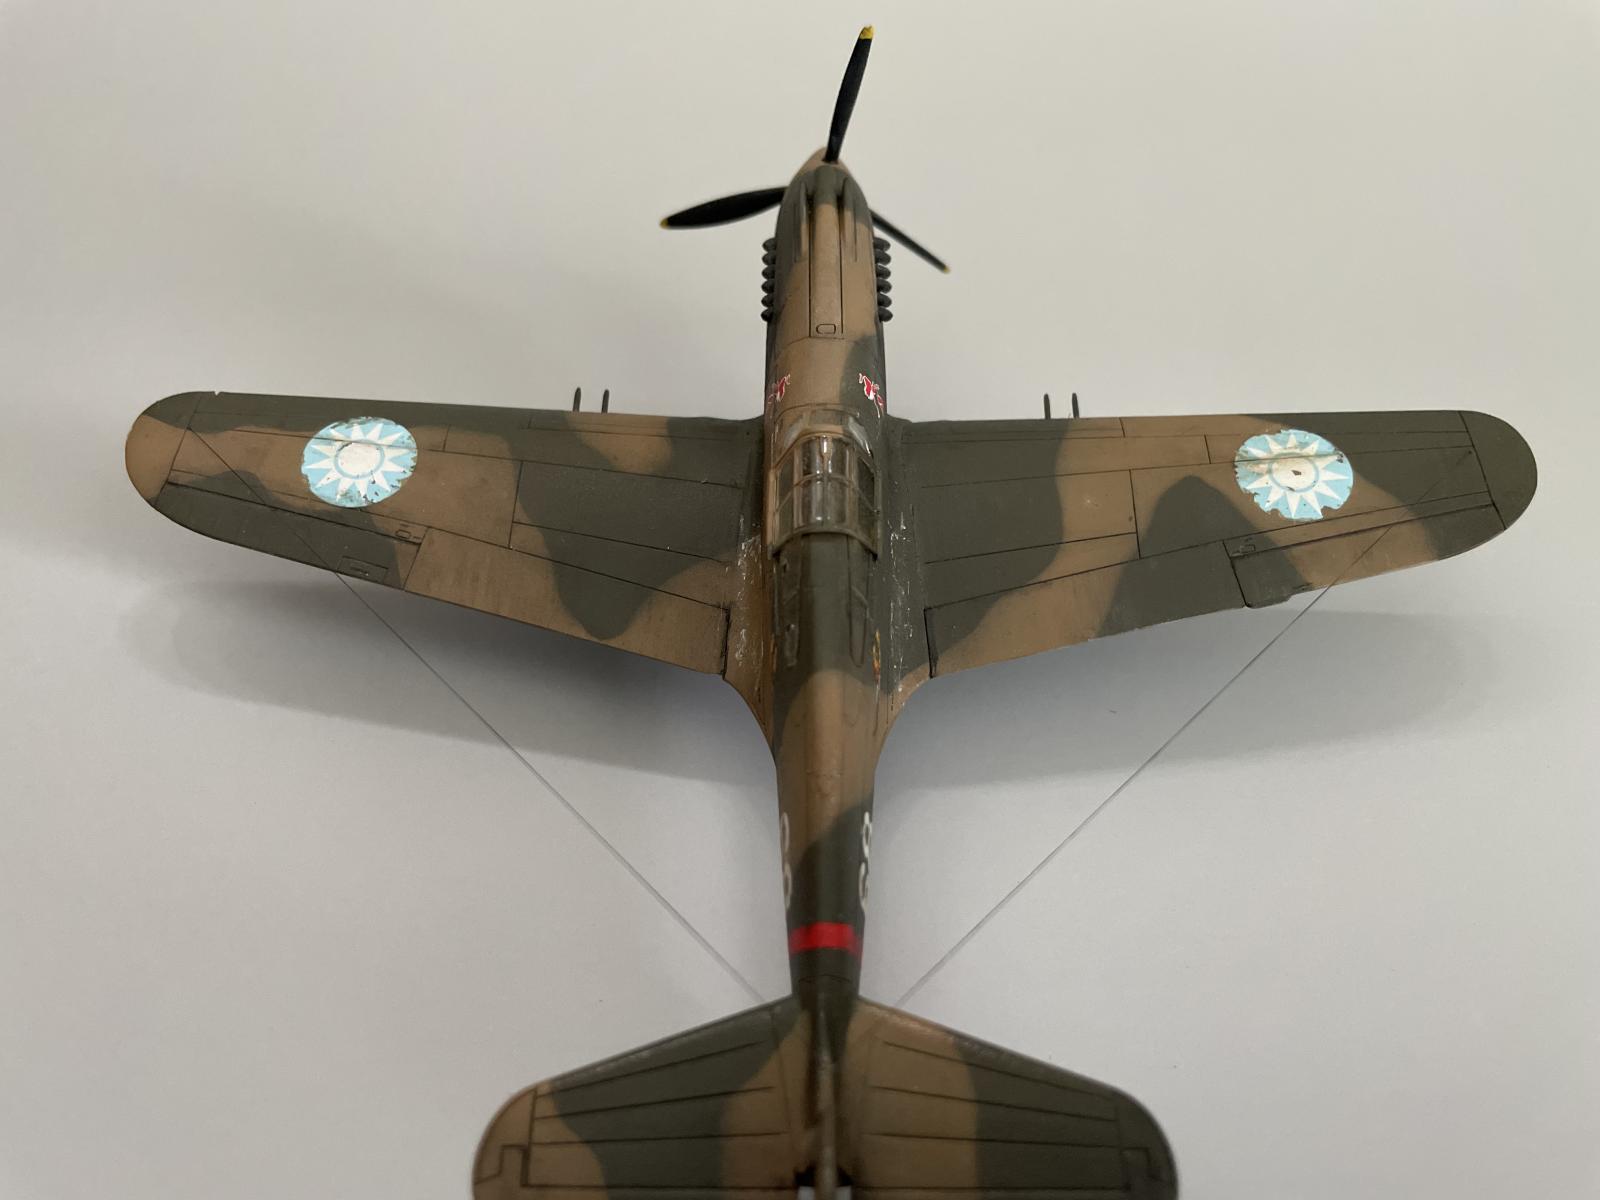
I applied some Tamiya XF-16 Flat Aluminum in a few places to simulate paint chipping down the bare metal, and then gave the whole thing an enamel pin wash with AK 2071, then did some work with oils including some fading on the wings and fuselage with Abteilung 502 Light Gray and Buff, some panel line shading with Mig Oilbrushers Starship Bay Sludge, control surface streaks and grime with Starship Filth and Black, and some dirt streaking on the underside with Abteilung 502 Sepia and Burnt Umber. I also attempted to create some engine soot downstream from the exhaust using black oils and some Tamiya Weathering Master Soot pigment.
Finally, I used Infini Model Aero Rigging 0.055 mm for the radio antennas. Overall, fun build. Now my P-47 has a pal.

The mother of all P40ies! Lovely paint job!
Thought it was the larger scaled kit. Nice work!
Amazing job, especially for the scale, Brian!
Great write-up!
Really great result, Brian @bapowellphys
It does indeed look like a much scale build, excellent modelling skills shown here.
Great work on the Airfix kit, it could easily pass for a larger scale model.
You nailed it, Brian @bapowellphys.
She definitely has that "rode hard and hung up wet" look to her! Nice job.