My Vanity Spitfire
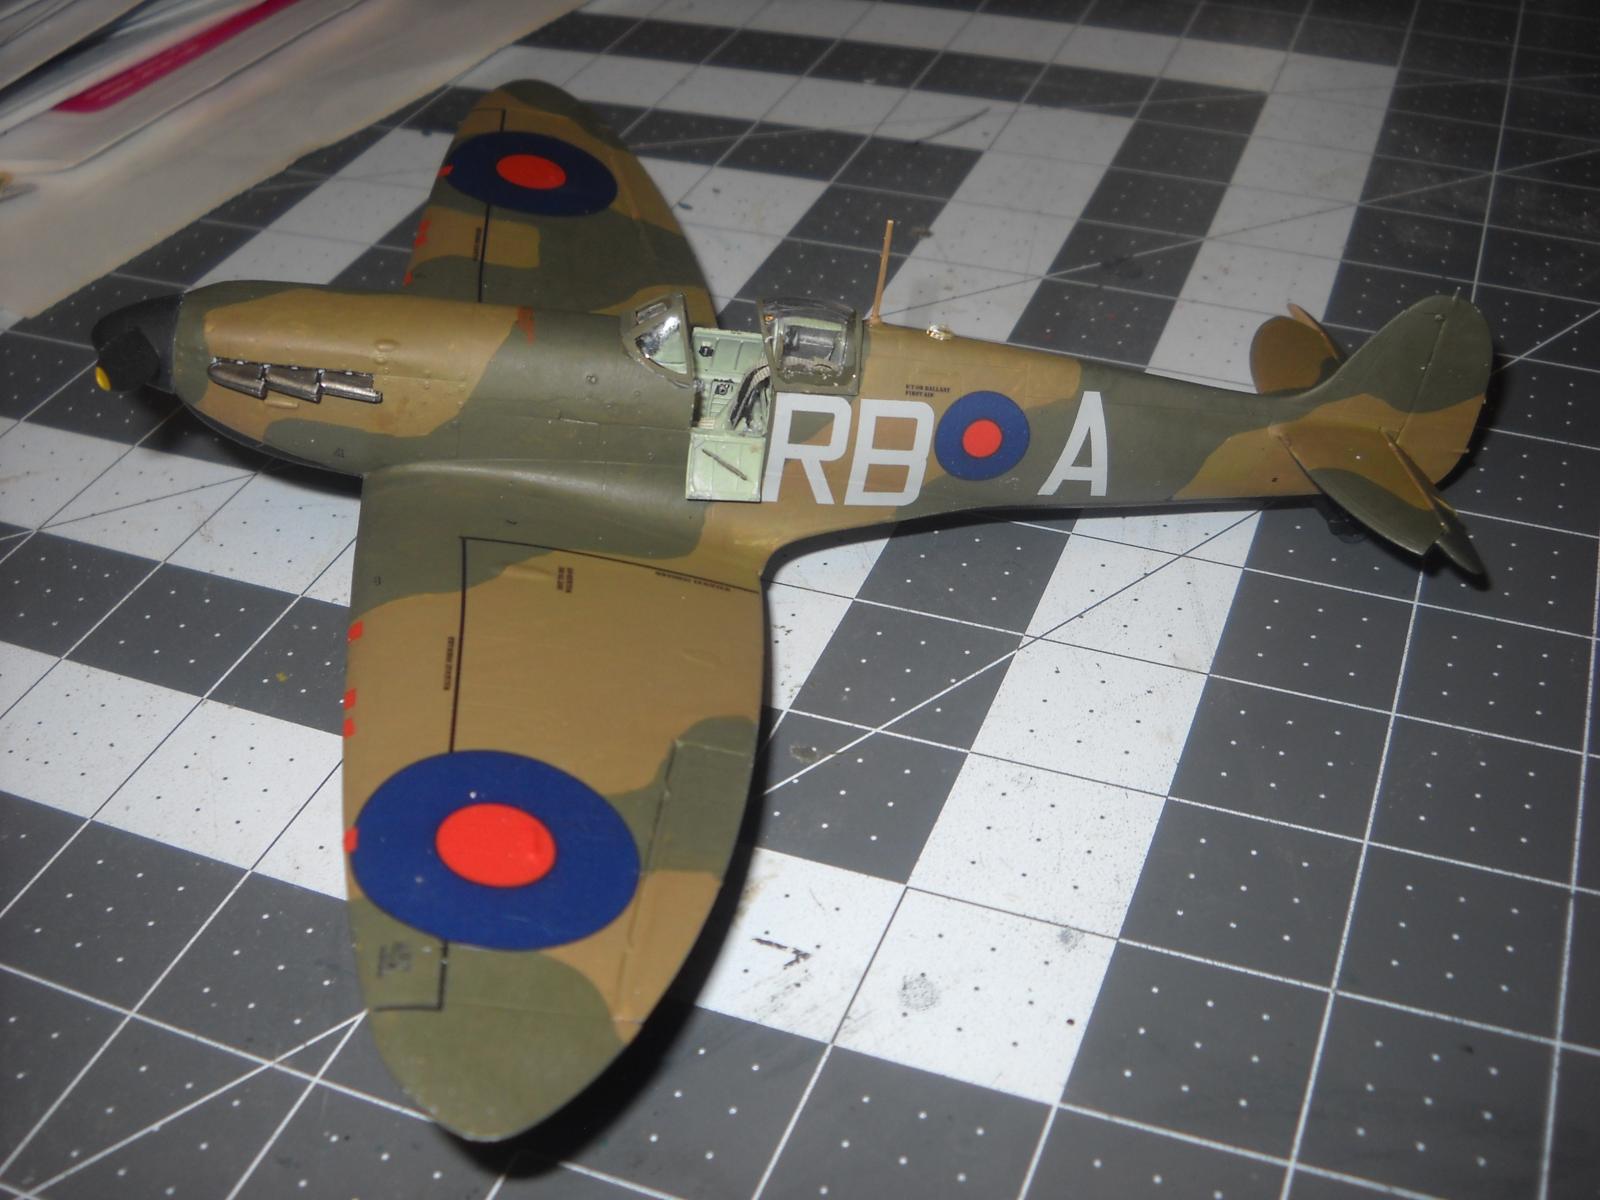
The RAF allowed Squadron and Wing Leaders to use their initials as their code. Famous ones are JEJ, DB, and RST. As I always fancied myself as an Sqn. Leader in an Eagle Sqn, Why not have my vanity codes? The problem was the only aircraft with my initials (RBA) was seen on a Sunderland. Not exactly what I wanted. Then on a modeling website, there was a thread about Eduard's Spitfire Mk.I's lack an engine-driven undercarriage (u/c) pump. And there in the thread, a Spitfire Mk.I (early) with the codes RB*A. I now knew the a/c I would build.
There are three choices to do a modern issue Spitfire MK.I. I have not built, or closely inspected a new mold Tamiya MK.I., I will not comment on it, except I have seen built-ups and something looks off to me. I have not figured out what, but something. The two kits I am familiar with, Eduard and Airfix are both nicely detailed ( though Eduard is better detailed) and are currently available. However, the Eduard is a more fiddly build. All of the Eduard MK.I boxing I have seen does not have the engine-driven U/C controls. And the Eduard ( and Airfix) lack the visible hand pump hydraulic fluid reservoir. So, looking at a lot of things (ease of build, Mk.I option of early or late and price), I find I prefer the Airfix kit to the Eduard kit of the MK.I Spitfire. Place the Airfix and Eduard kits side by side and you would be troubled to decide which is which.
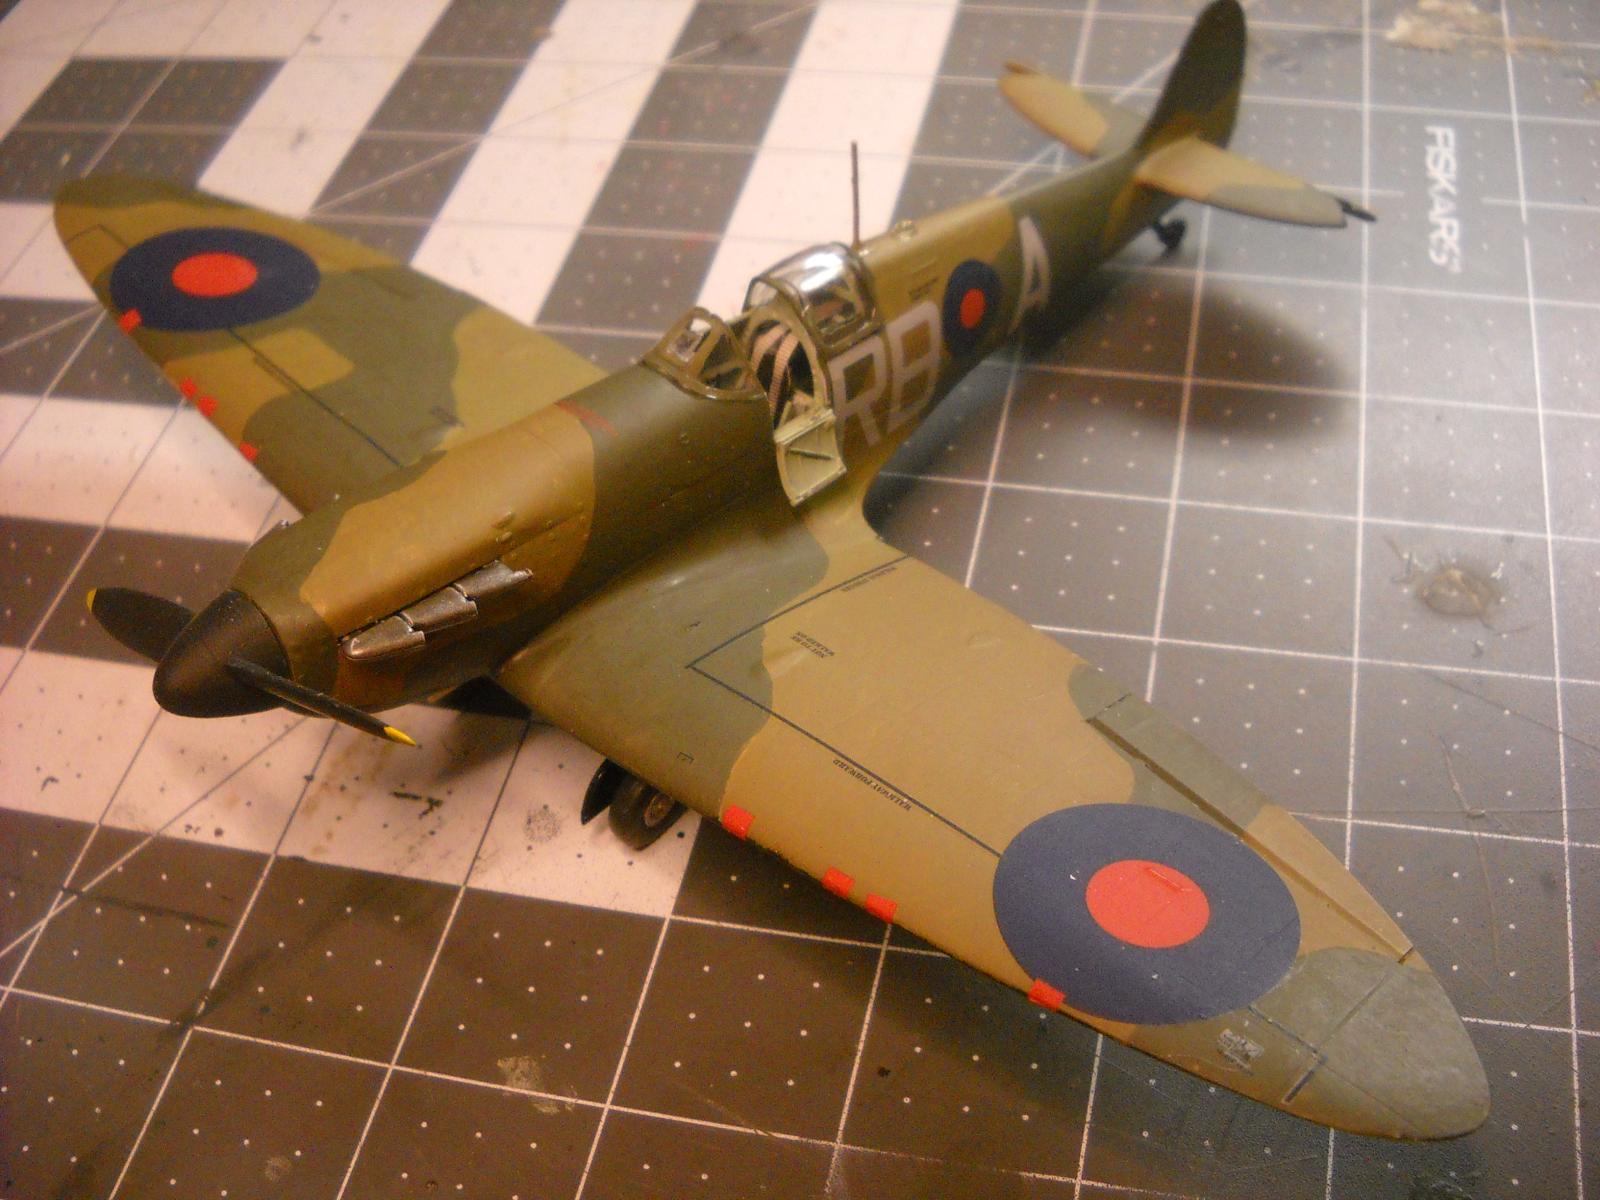
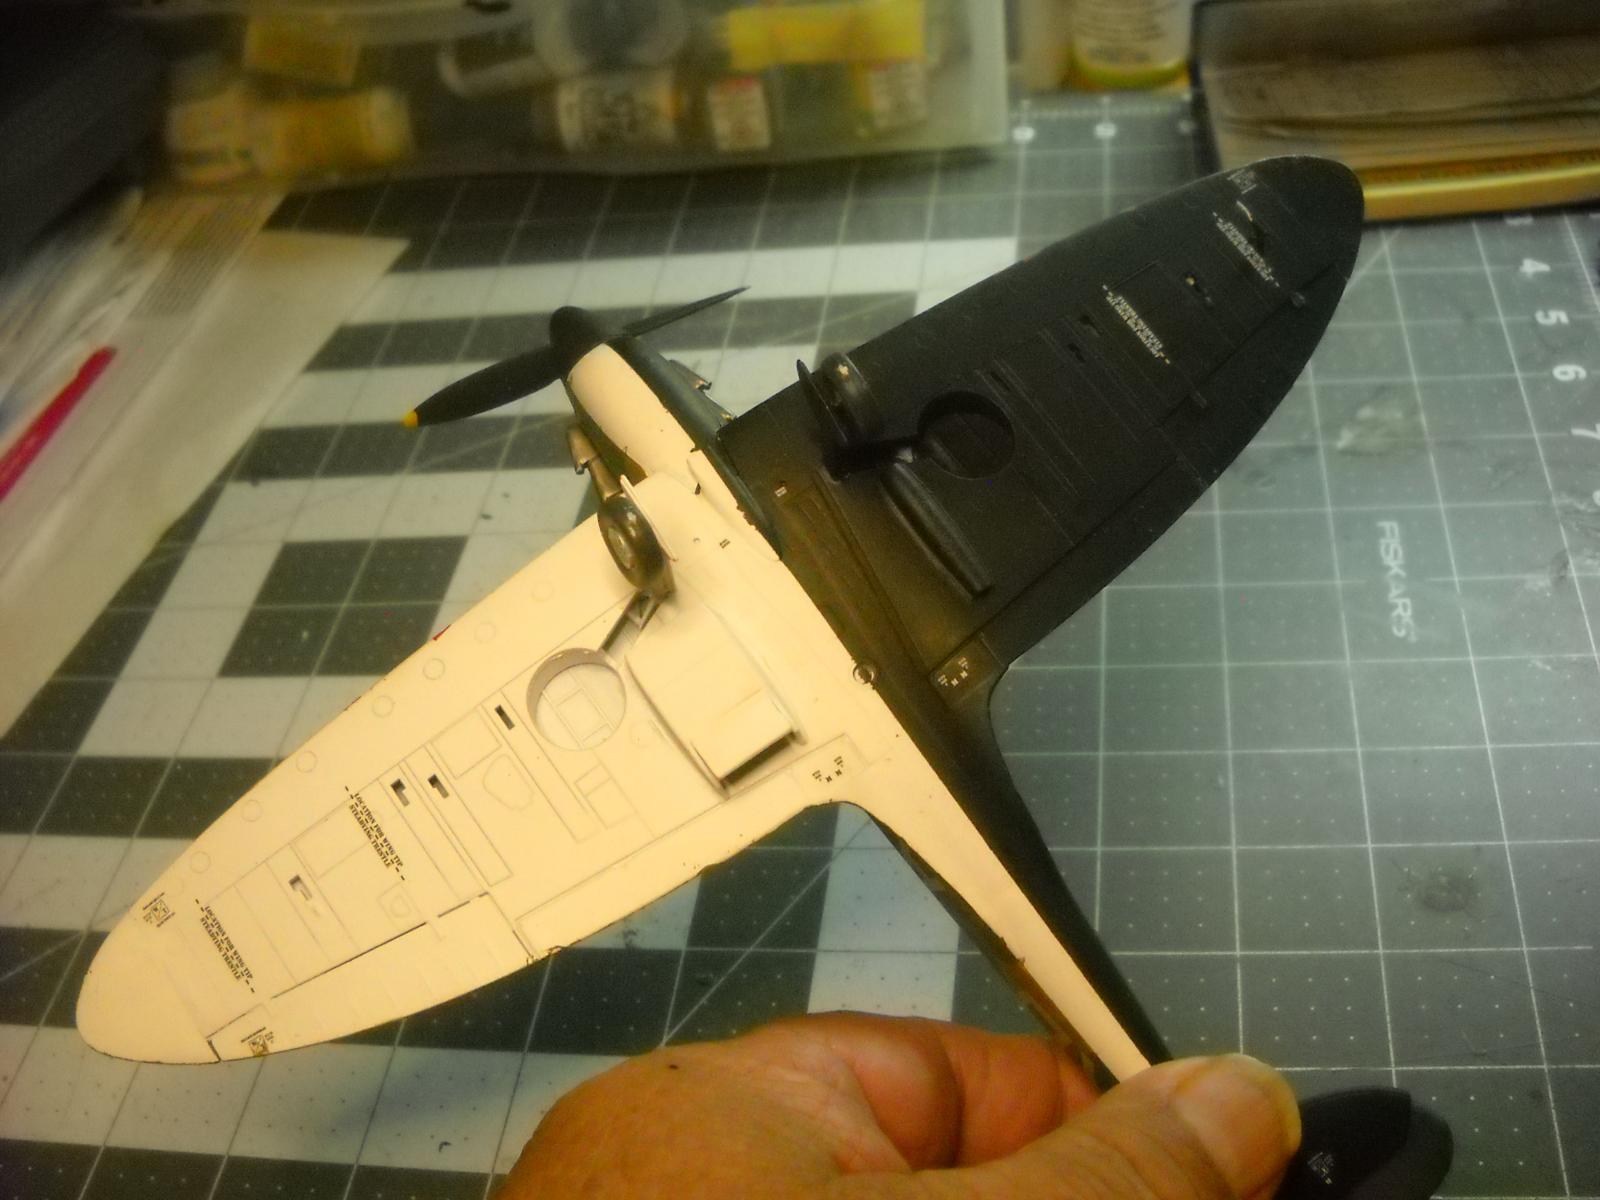
The build was basically event free (except when I dropped the model...more later). I did do a couple of things differently from the instructions. For the instrument panel, I Painted it black. When dry I soaked the instrument decal and when it slid free I applied a coat of Future onto the panel. I then applied the decal aligning it with the instrument dials. I then added a second coat of Future. When practically dry I used a wet finger to make sure it was contoured to the panel. I then sprayed it with a flat clear. When dry I picked out the dials with Future to represent the glass faces. As the Spitfire I was building was an early one, It needed the hand u/c pump and therefore needed the hydraulic reservoir. One was made from an Evergreen shape, and glued to the starboard side under the backlite ( the rear fixed part of the canopy) just poking up where it can be seen. As I did not have an etched Sutton Harness, I had to make one from the surgical tape my mother acquired for me too many years ago. I added a peg to the rear fuselage to draw the harness tight.
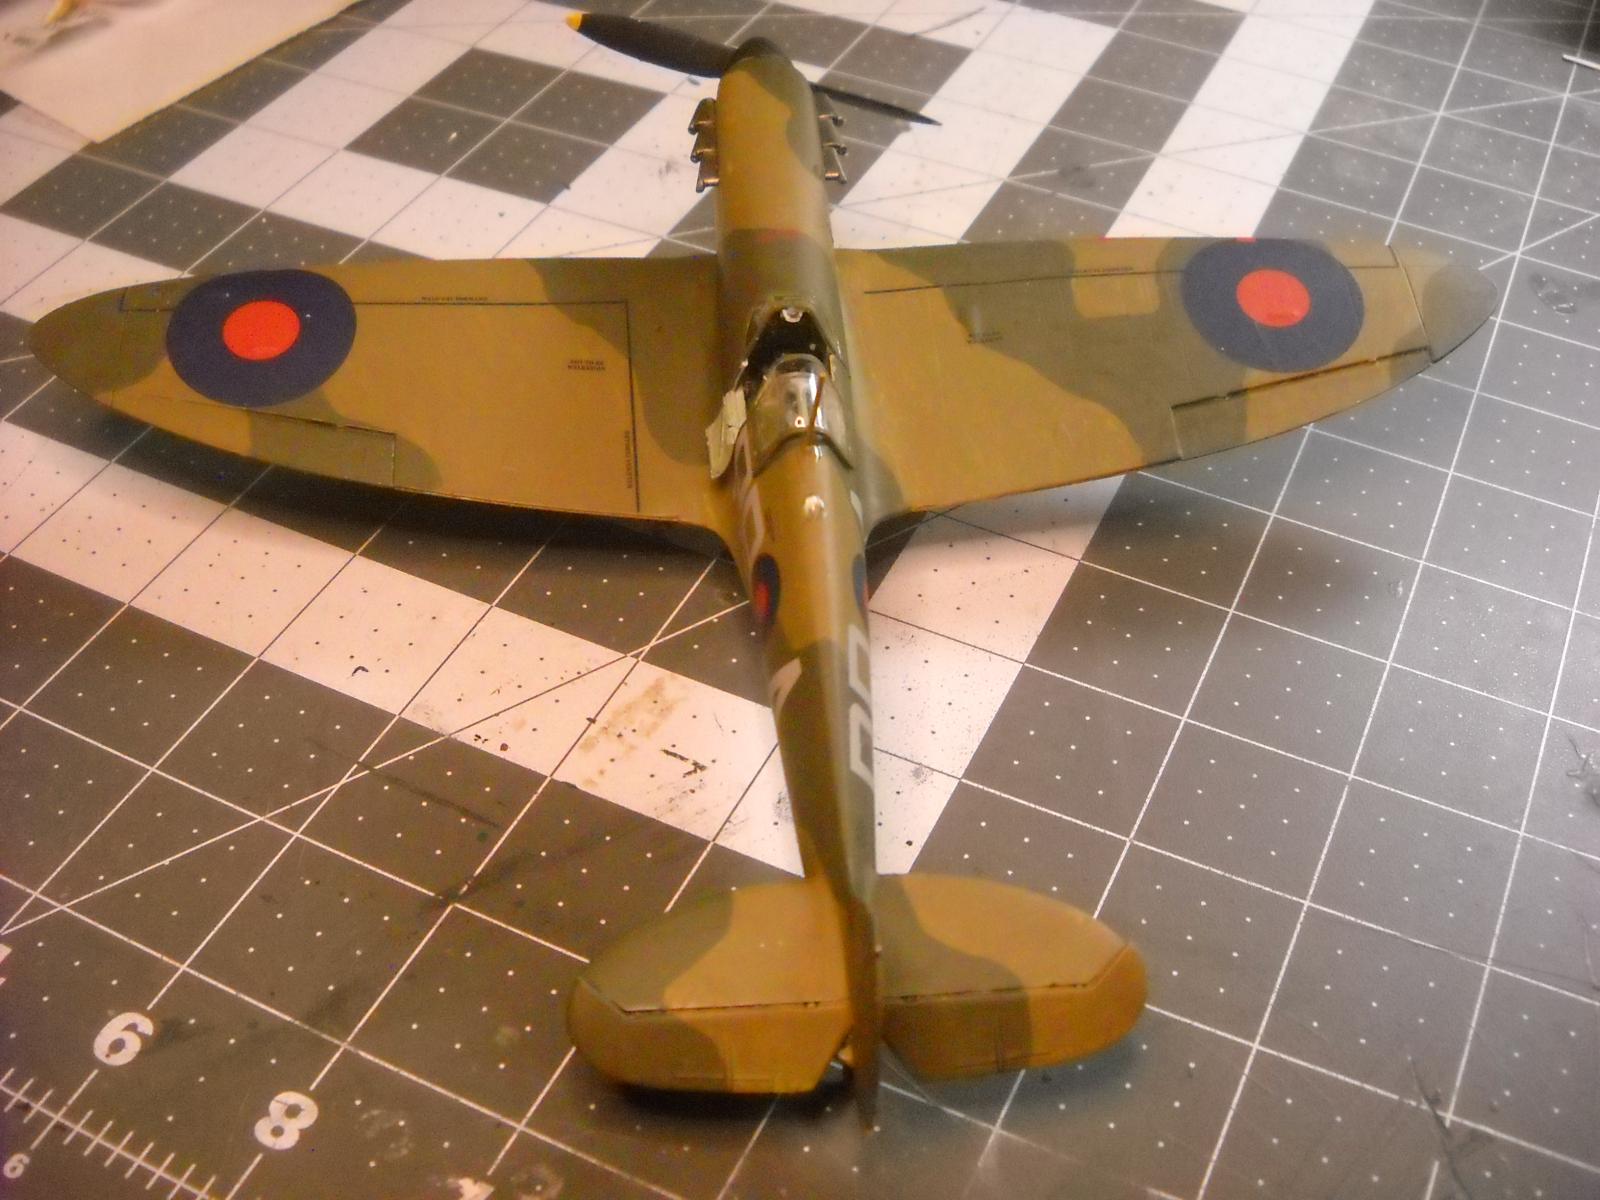
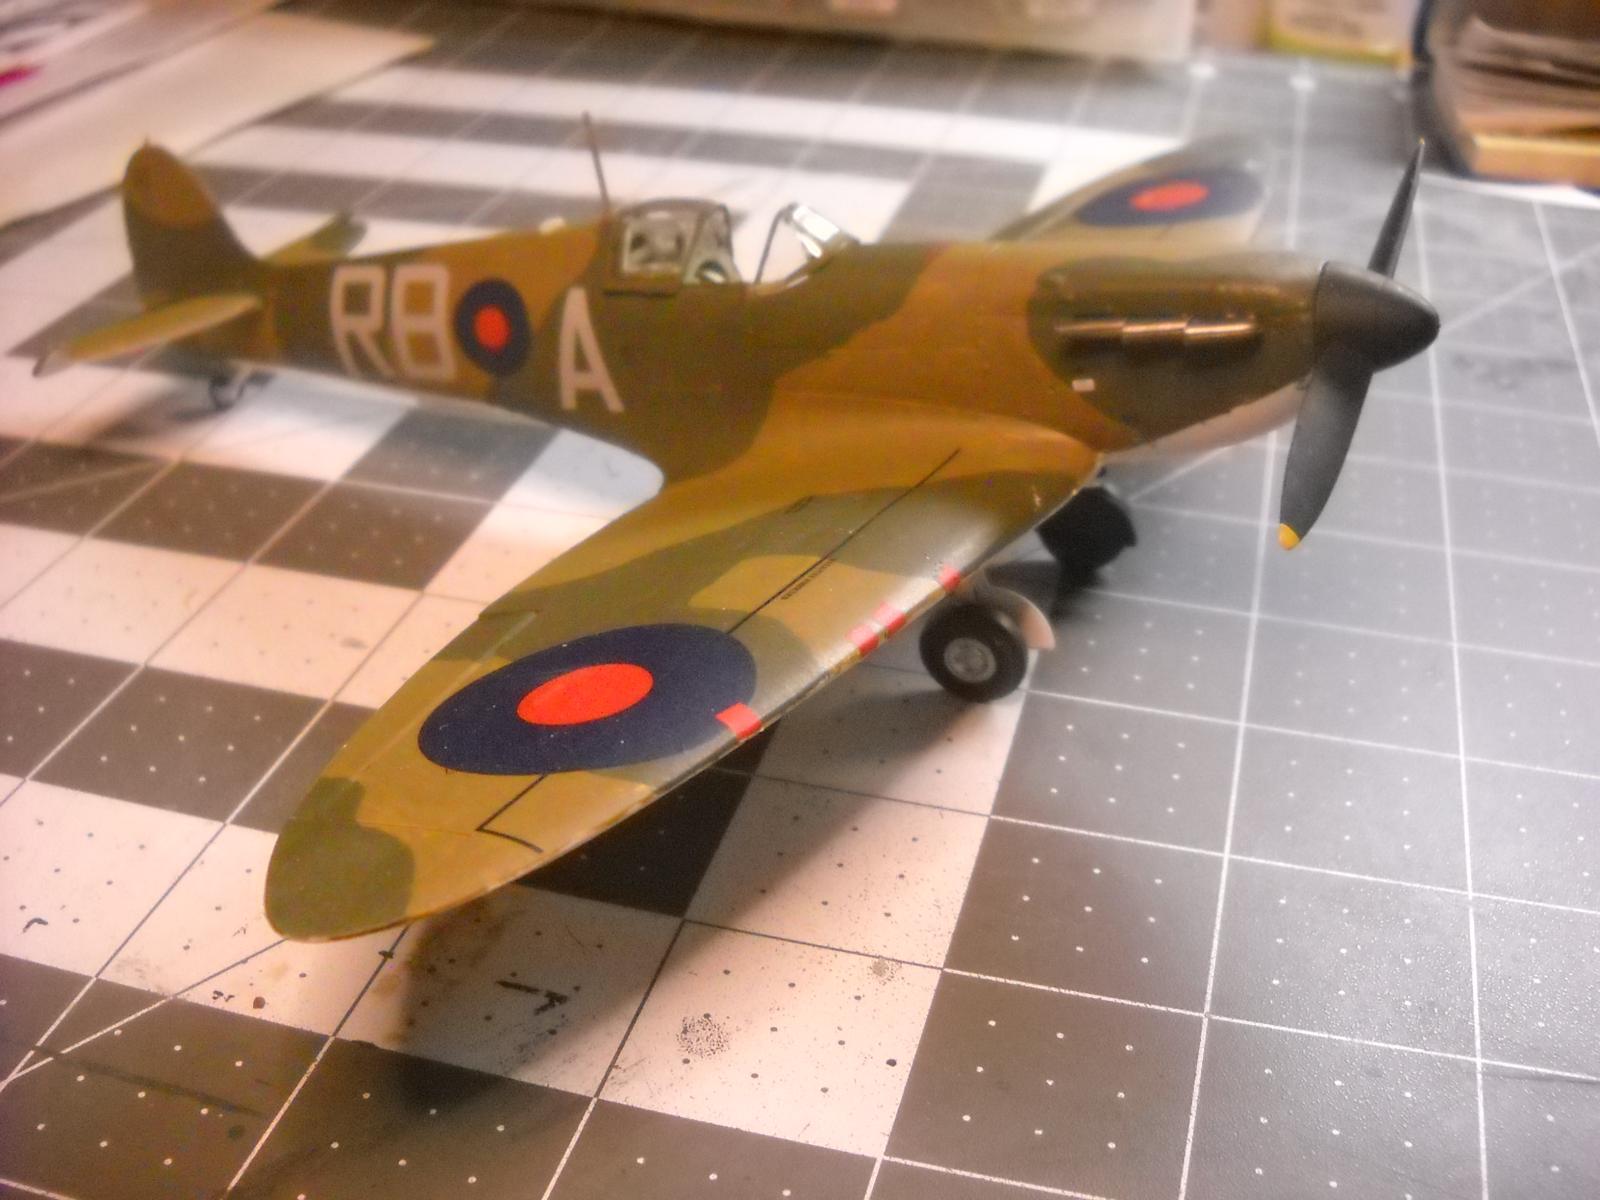
The rest of the instructions were followed and no major problems popped up. Only a small amount of filler was required around the intake, the remainder of the seams were finished with an X-Acto knife and sandpaper. When the seams were finished to my liking, Isopropyl Alcohol was used to wipe off and clean the model. As this was an early build Mk.I had my choice of aluminum undersides or night/white undersides. I chose night/white. The cockpit was masked off and Testor's Flat white was sprayed onto the underside. After allowing the paint to cure for a couple of days, 1/2 of the underside was masked off and painted night ( black). The wheel wells and inner strut covers and struts were painted their respective underside color. When all of the paint had dried the lower surfaces were masked off and the upper side was painted in Vallejo Dark Earth and Hataka Dark Green. when dry, a coat of Future was applied for the decals to seat on, and the decals were applied. Most came from the kit ( thank you Airfix!) and the codes from an Aeromaster sheet. Looking at some other a/c from this time period, no serials were applied or were painted over. When the decals were set, a second coat of Future was applied and a flat clear coat was sprayed on. The final bits were attached, these being the Schwartz Prop, dual-head Pitot, round antenna mast, and a flat-sided but raised canopy.
So here it is, my vanity Spitfire. It was the 27th Supermarine Built Spitfire Mk. I serial K9806 and coded RB*A of No. 66 Sqn, July 1939 at Duxford. It landed wheels up and was written off.
The question always comes up which is better; the Eduard Mk. I or the Airfix Mk. I? The Eduard kit has more detail but requires different fuselages for the differing windscreens, and lacks the engine-driven u/c controls. The Eduard also is more fiddly a build. The Airfix kit is not as detailed but only requires one fuselage for all of the windscreens, and has the engine-driven u/c controls. Neither kit has the hydraulic fluid reservoir tank for the hand pump. So if it is greater detail you wish then the Eduard kit is for you. If you wish an easier, less expensive build then Airifx is for you. I can recommend either kit.
Bruce

A very fine looking Mk.I, Bruce @rbrucearcher
Well done.
I was not aware that the early ones did not have a motorized undercarriage pump. Must have been a lot of work for the pilot to get the wheels up or down.
Amazing result, Bruce!
Great writeup as well!
Nice work on your Airfix Vanity Spitfire, Bruce!
Now you 've got me thinking - my 'vanity' WWII build would be a RAF P-51 from 112 Squadron with a choice of a Mk III or a Mk IV, both with shark teeth no less.
Thanks for the great idea.
1 attached image. Click to enlarge.
Always good to see a well built Airfix kit, Bruce, they’re what I grew up on. Here in China my sister-in-law has a great vanity number on her car, purely by luck, C GW 007. C is the area code for our city, GW are my initials, (George Williams)and I don’t need to explain 007.
What a nice write-up and lovely Spitfire!
Awesome build.
Nice build of a Spit! Looks great.