Review: At last, a large scale TBD – Trumpeter 1/32 Douglas TBD-1 Devastator
"Mythical", according to Merriam-Webster, is defined as :existing only in the imagination: fictitious, imaginary. Well, for how many years now has a Trumpeter 1/32 scale TBD Devastator been dangled in front of the modeling public? I tried to find the first date this kit was listed, without success. I figure it has to be at least 15 years ago, probably more. Imagine my surprise when I saw the Boxart, listed as available. I said to myself, "Nah, it can't be, this kit is only mythical". On my weekly trip to the LHS, I asked my favorite retailer, just for the hallovit, if he could possibly get a Trumpeter 1/32 TBD. "I'll call my distributor", he answered. I was browsing when 5 minutes later he said "I can have it here by Tuesday". And I didn't have my Nitro pills with me! The mythical 1/32 TBD was an actual creature! 3 days later it was in my hot little hands. Good on ya, Jimmy. BTW, 'ol Jim at Men-At-Arms Hobbies is going to be closing up shop next Year and entering a well deserved retirement. Sure am gonna miss my trips to Jim's.
Well here it is. The box art is nice, a pair of brightly colored Pre-War TBD's out on a jaunt. Packed in typical Trumpeter fashion with a sturdy cardboard top-opening box, and each sprue in it's own bag. First looks show a really nice bunch of plastic, with nicely done surface detail, choice of two cowlings, open or closed canopies, optional bomb or torpedo loadouts, rubber tires, small etched sheet, and wing folding option. The decal sheet looks good, with a choice of a prewar yellow winger, or a Coral-Sea timeframe camouflaged machine. Everything else went to the side and I jumped on it.
Well, turns out the kit is the usual Trumpeter mix of excellent, not so good, and weird. It looks like a TBD, it might be a tad fat in fuselage cross section, through the spectrum of my trained eye, but all else looks good. One issue I ran into here was that ALL of my TBD reference books, including one very good one, were not in my possession, but up at my Kid's residence in Albany. So all the refs I used were internet based, and I decided to an out-of-the-box build. Instead of a dragged out story, I will do the excellent, not so good and weird in list form.
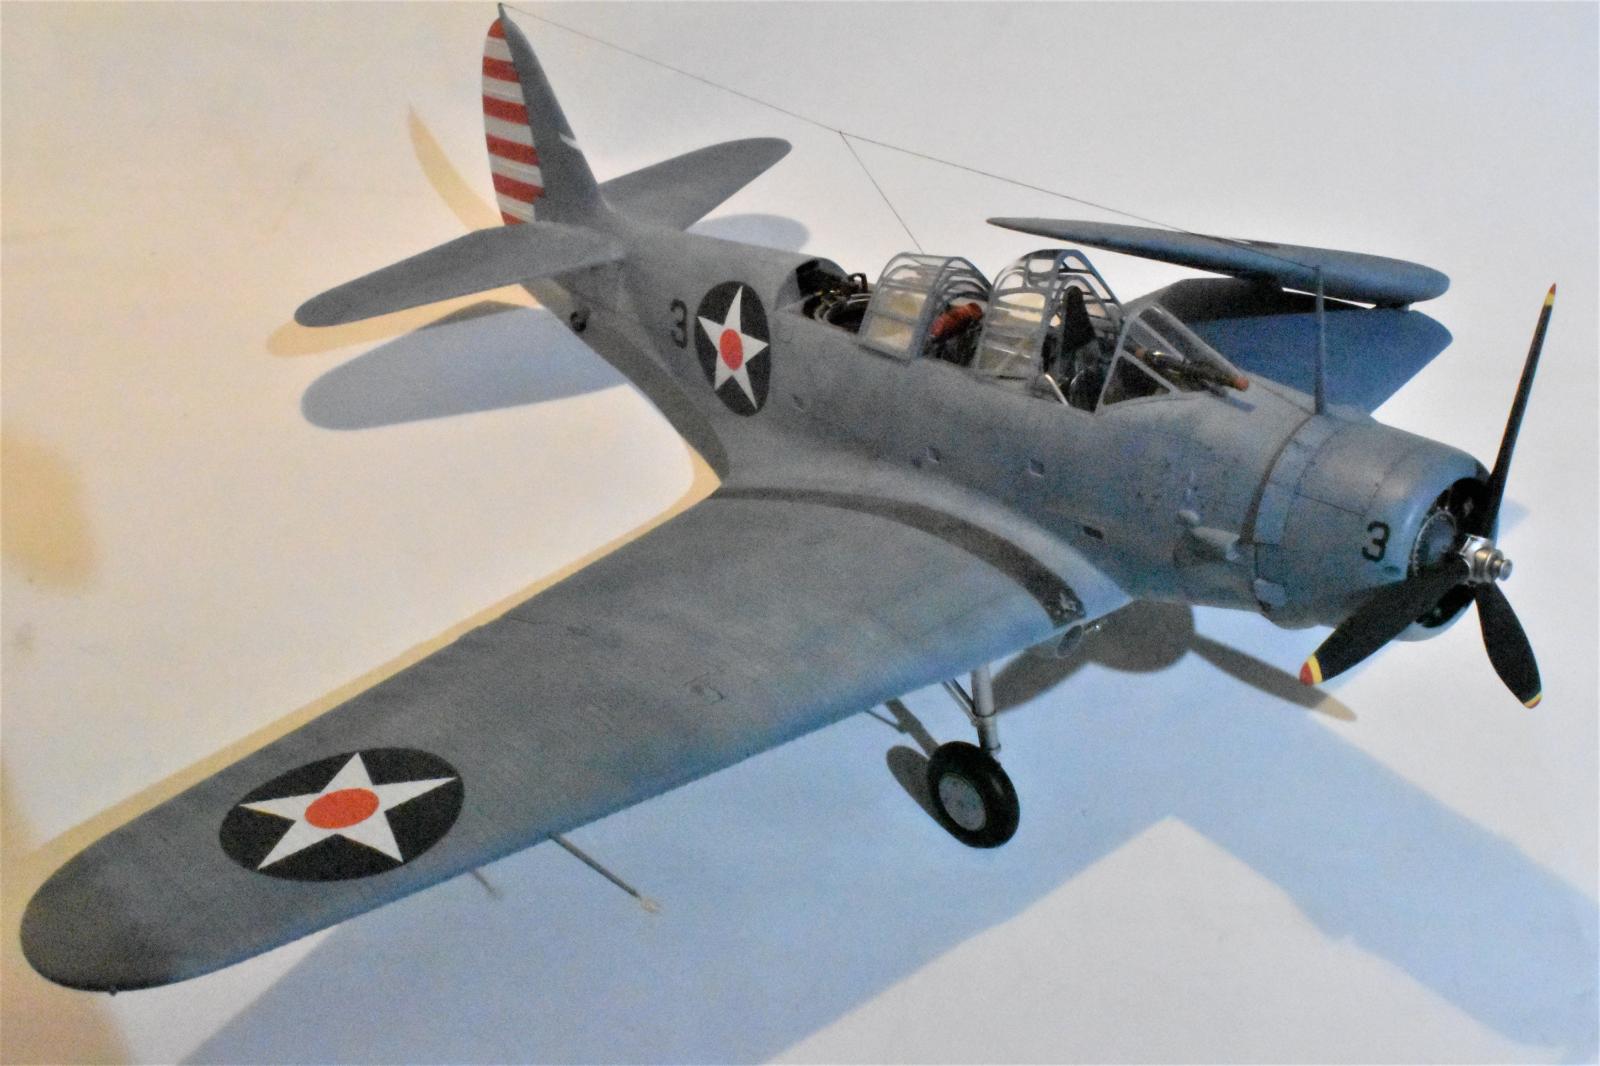
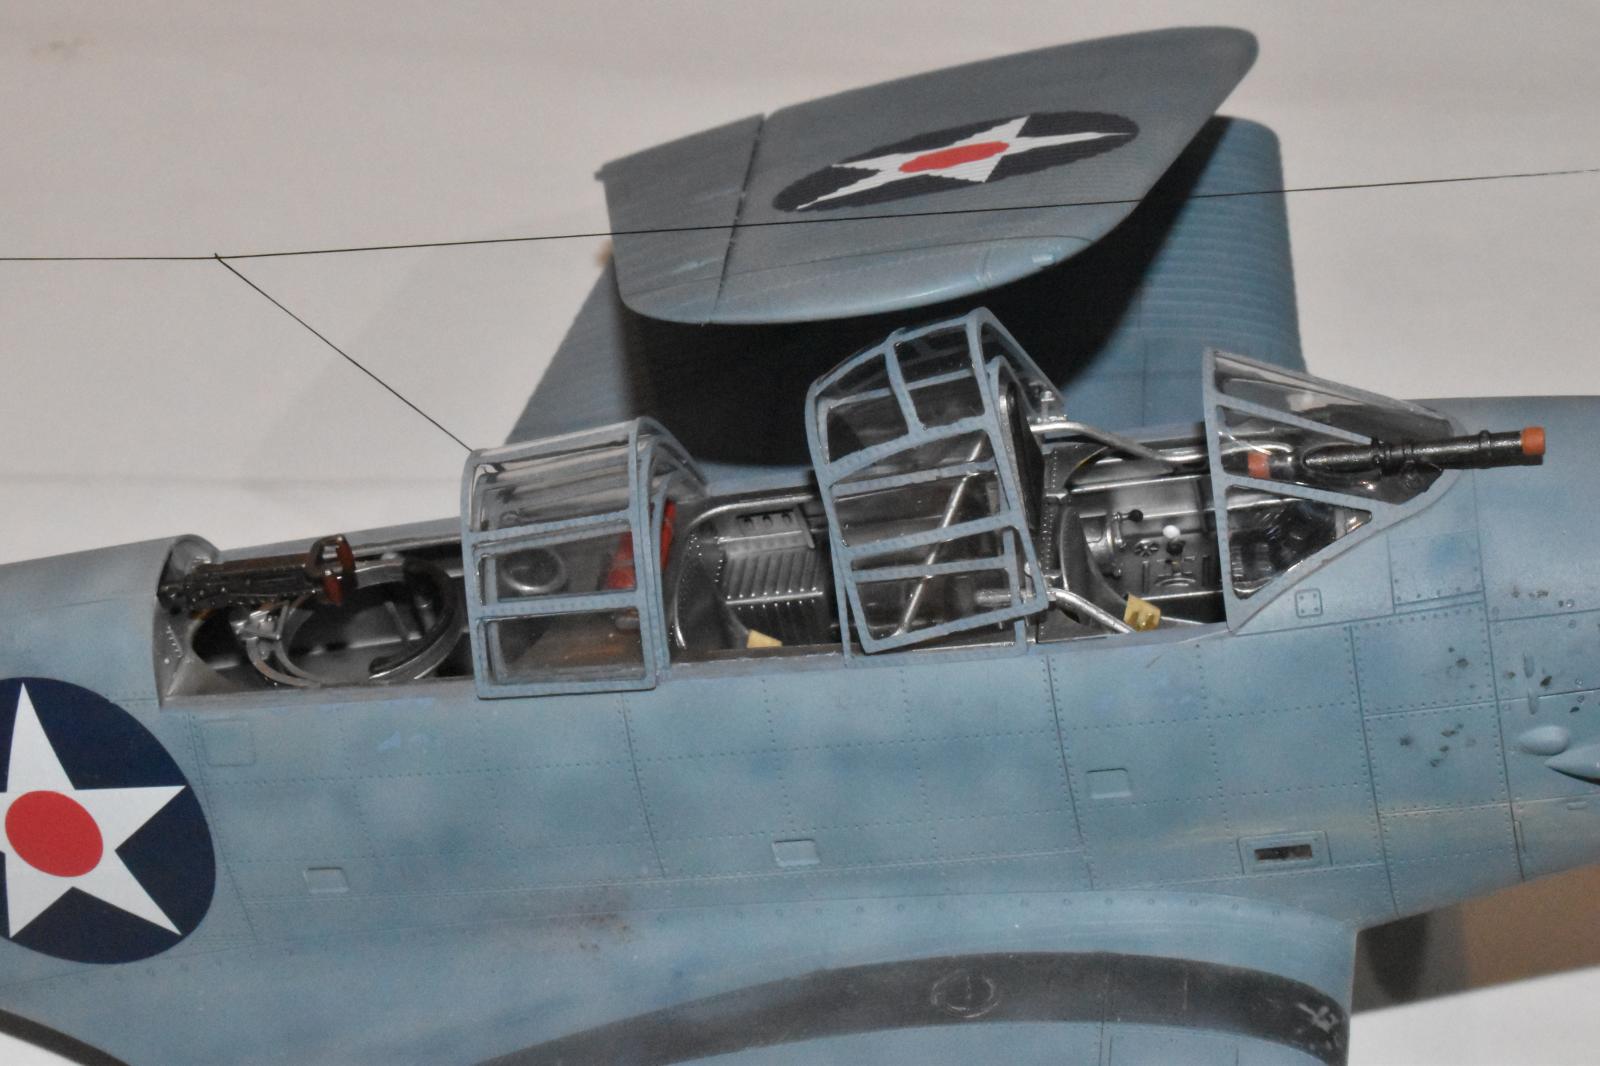
The Excellent: Fit on MOST parts was very good, some of these would snick into place and stay on without glue. Wing fit, elevators, rudder, ailerons, landing gear. No filler was used anywhere, just sanding sticks. The only fit problem I ran into was when trying to get the fuselage halves together. There is a lot of stuff to stuff together and I ended up doing some trimming to make it work. I left off the upper instrument panel till after it was closed up. The interior is good, though leaving plenty of room for detailing-up. The surface detail as mentioned is beautiful, the riveting being nice and subtle. The landing gear legs have nice molded-in brake lines. Clear parts are thin and delicate. But will they fit?
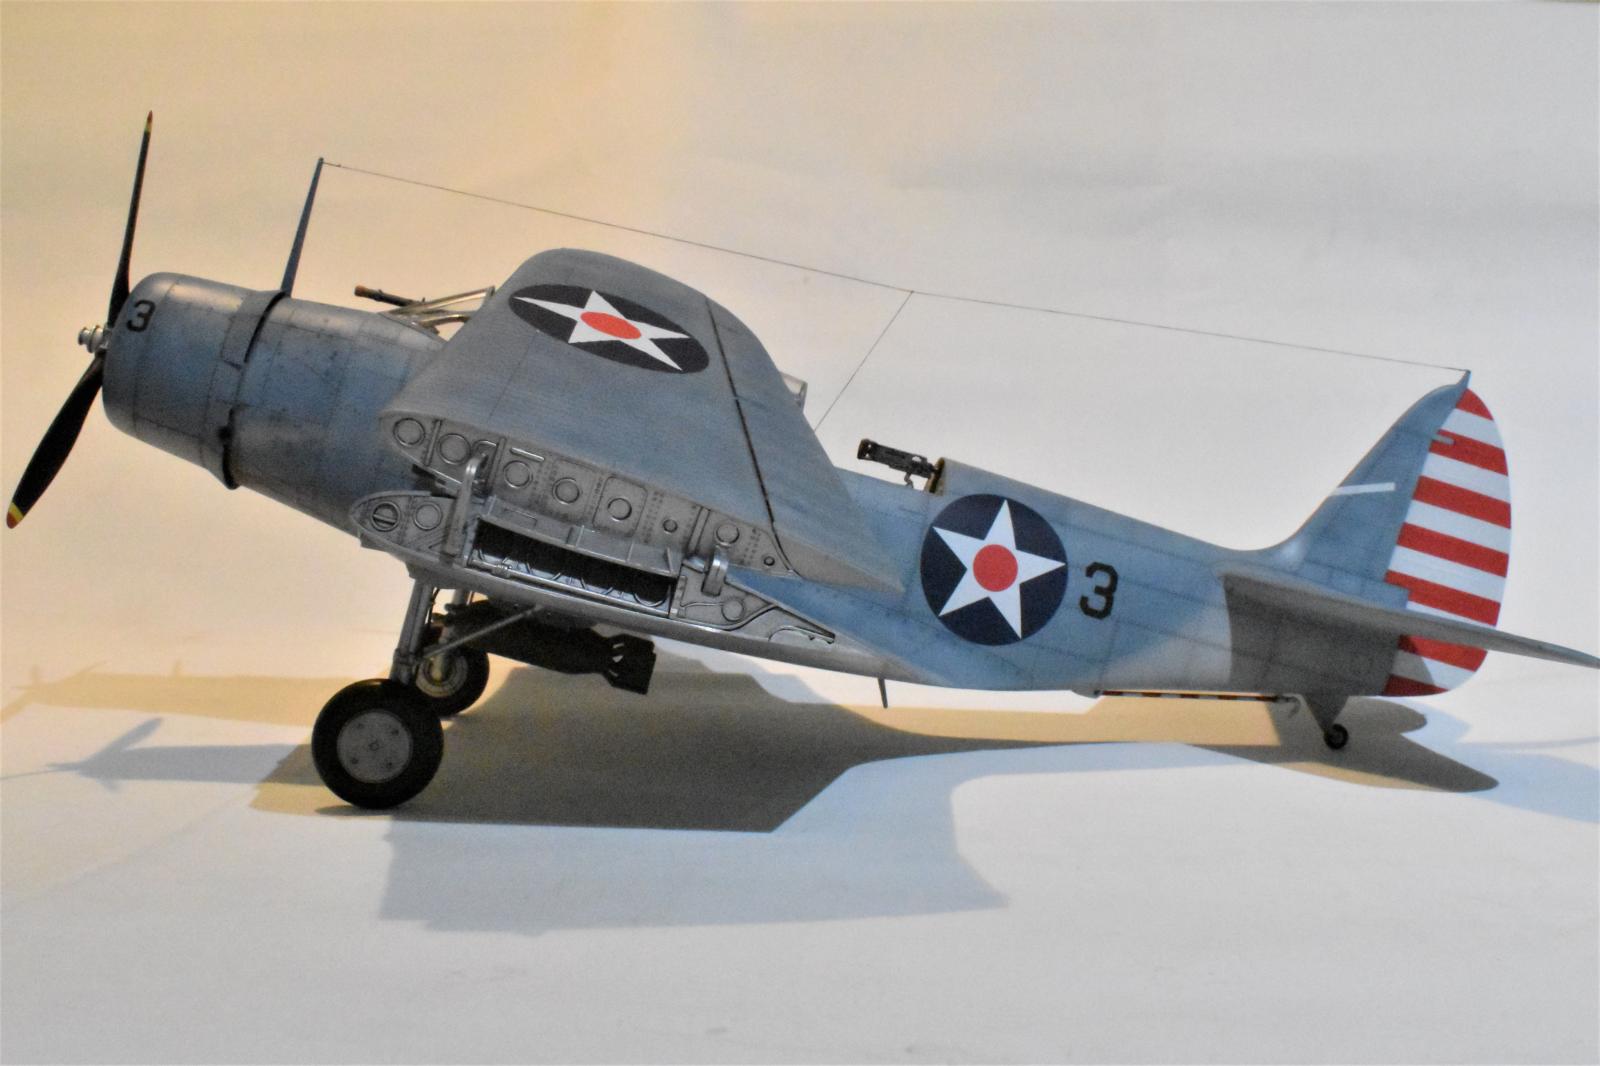
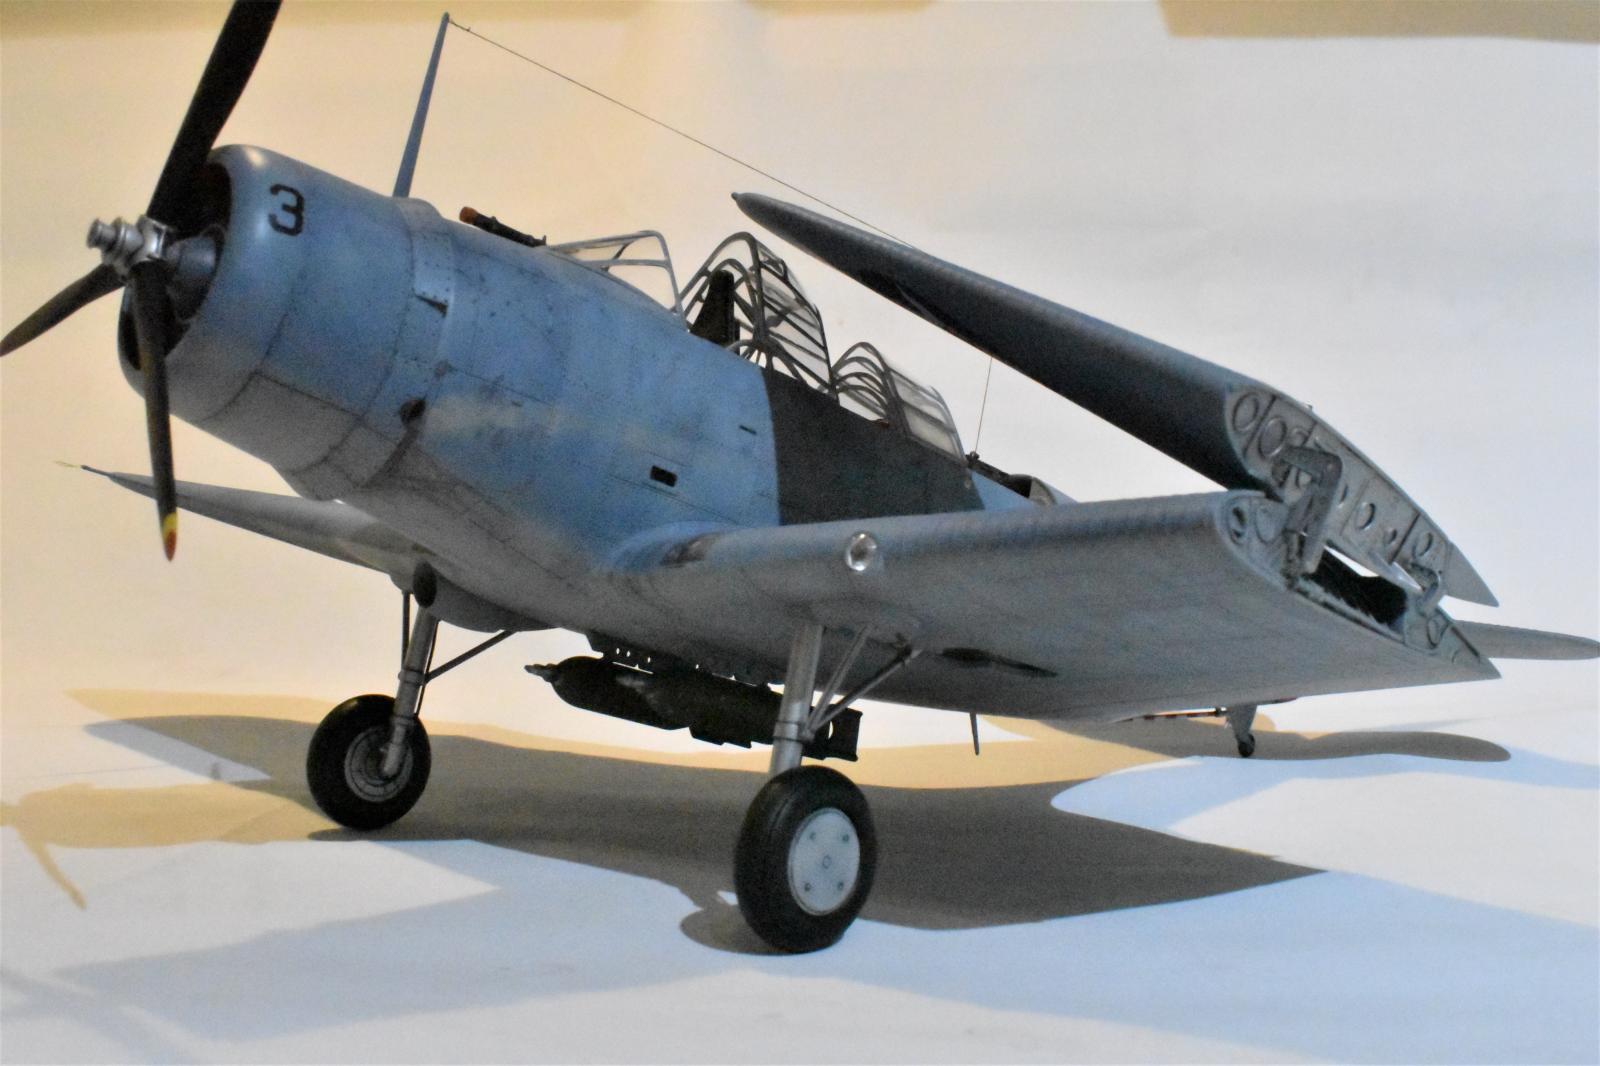
The Not-So-Good: Why do manufacturers like to open up the bomb-aimers doors? They did it again here. The only time these were open was on the bombing run. To close them requires some trimming and fussing. It comes out alright, but give us an option for closed, eh? The engine is kind of weird looking, with boxy things around the spark plug areas, and the cooling fins are poorly defined. Not really a very good twin wasp. Next one, I will do aftermarket. Two cowlings are provided, open and closed cooling flaps. The attachment point for the cowling is given as a single tiny lug at the bottom. I Assume they want You to use the antenna as the top attachment point. Um, no good. So I made two more attachment lugs at the 2 and 10 oclock positions. They can't be seen readily unless you look for them.
The Weird: I wanted to do the bomb toting version, just to be different, but the bombs Trumpy came up with, well WTF are these? They look like sausages with beany propellers, not 500 pound GP pills. These are on only temp until I get some realistic ones. The prop has no pitch balance weights, what would it have taken to include these? Color call outs were almost non existent, not that I should trust them anyway. But with limited refs, it would have been nice. The painting options are not marked as to Squadron, Carrier, time, etc. The camouflaged one could be from Enterprise Or Yorktown , I'm not sure. All I know is it can't be Lexington
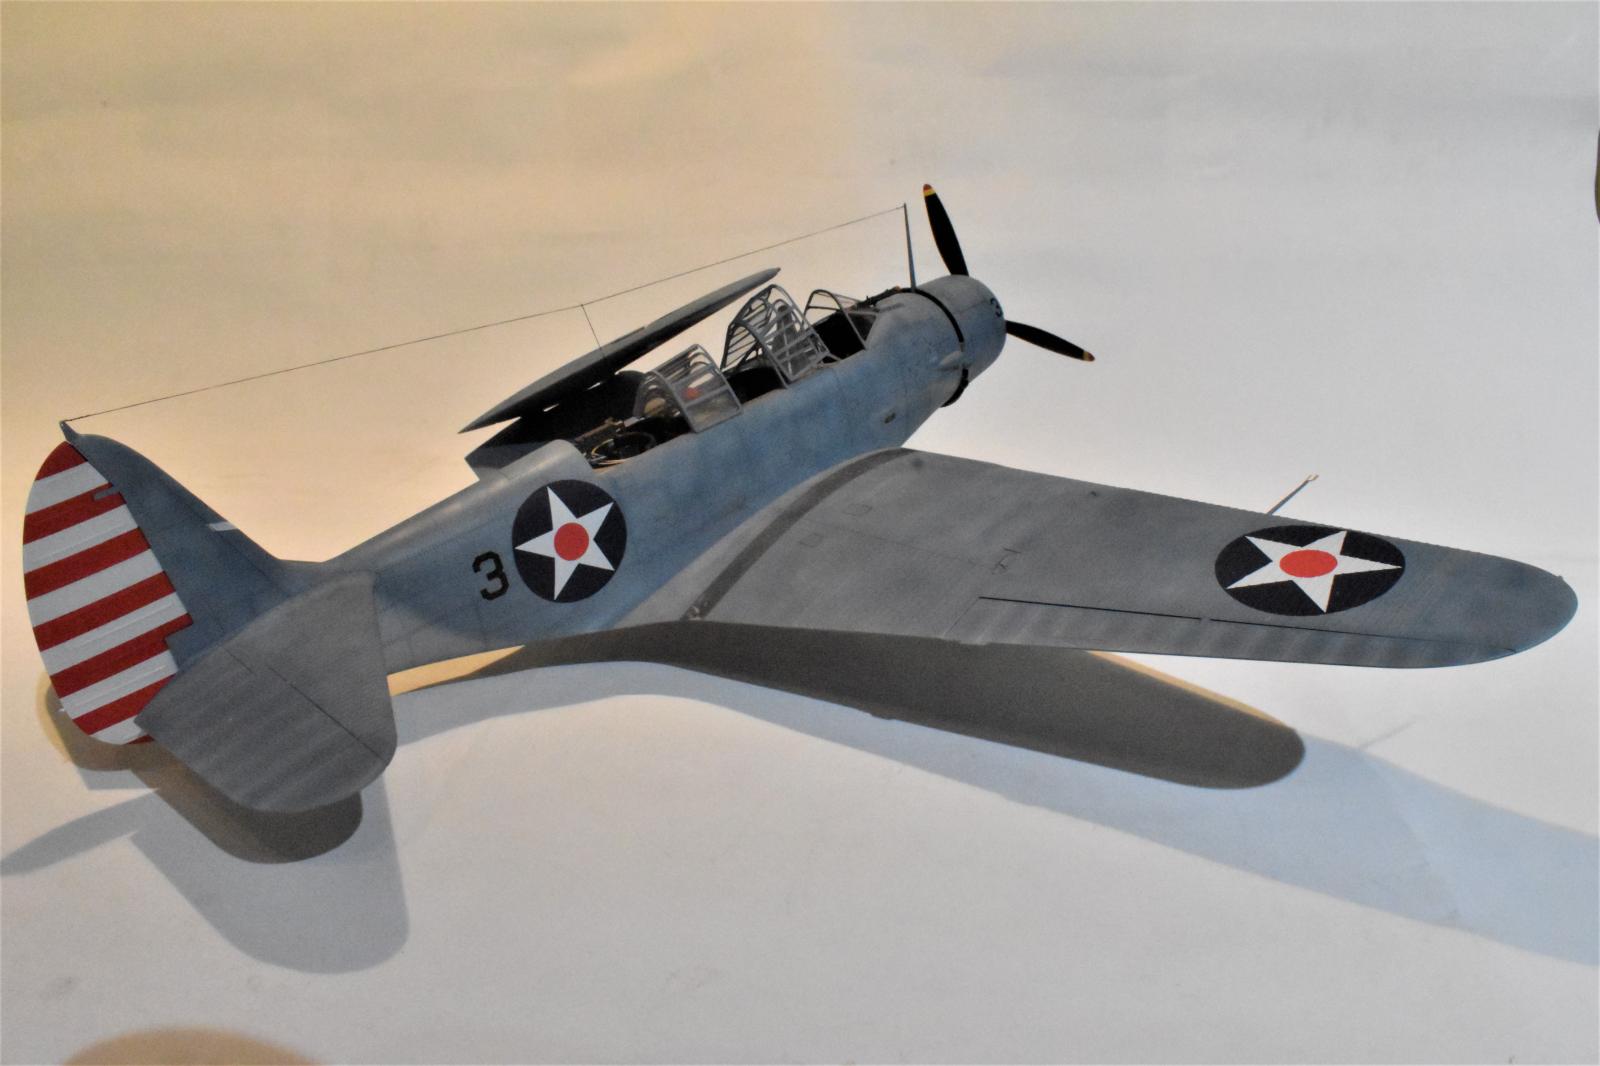
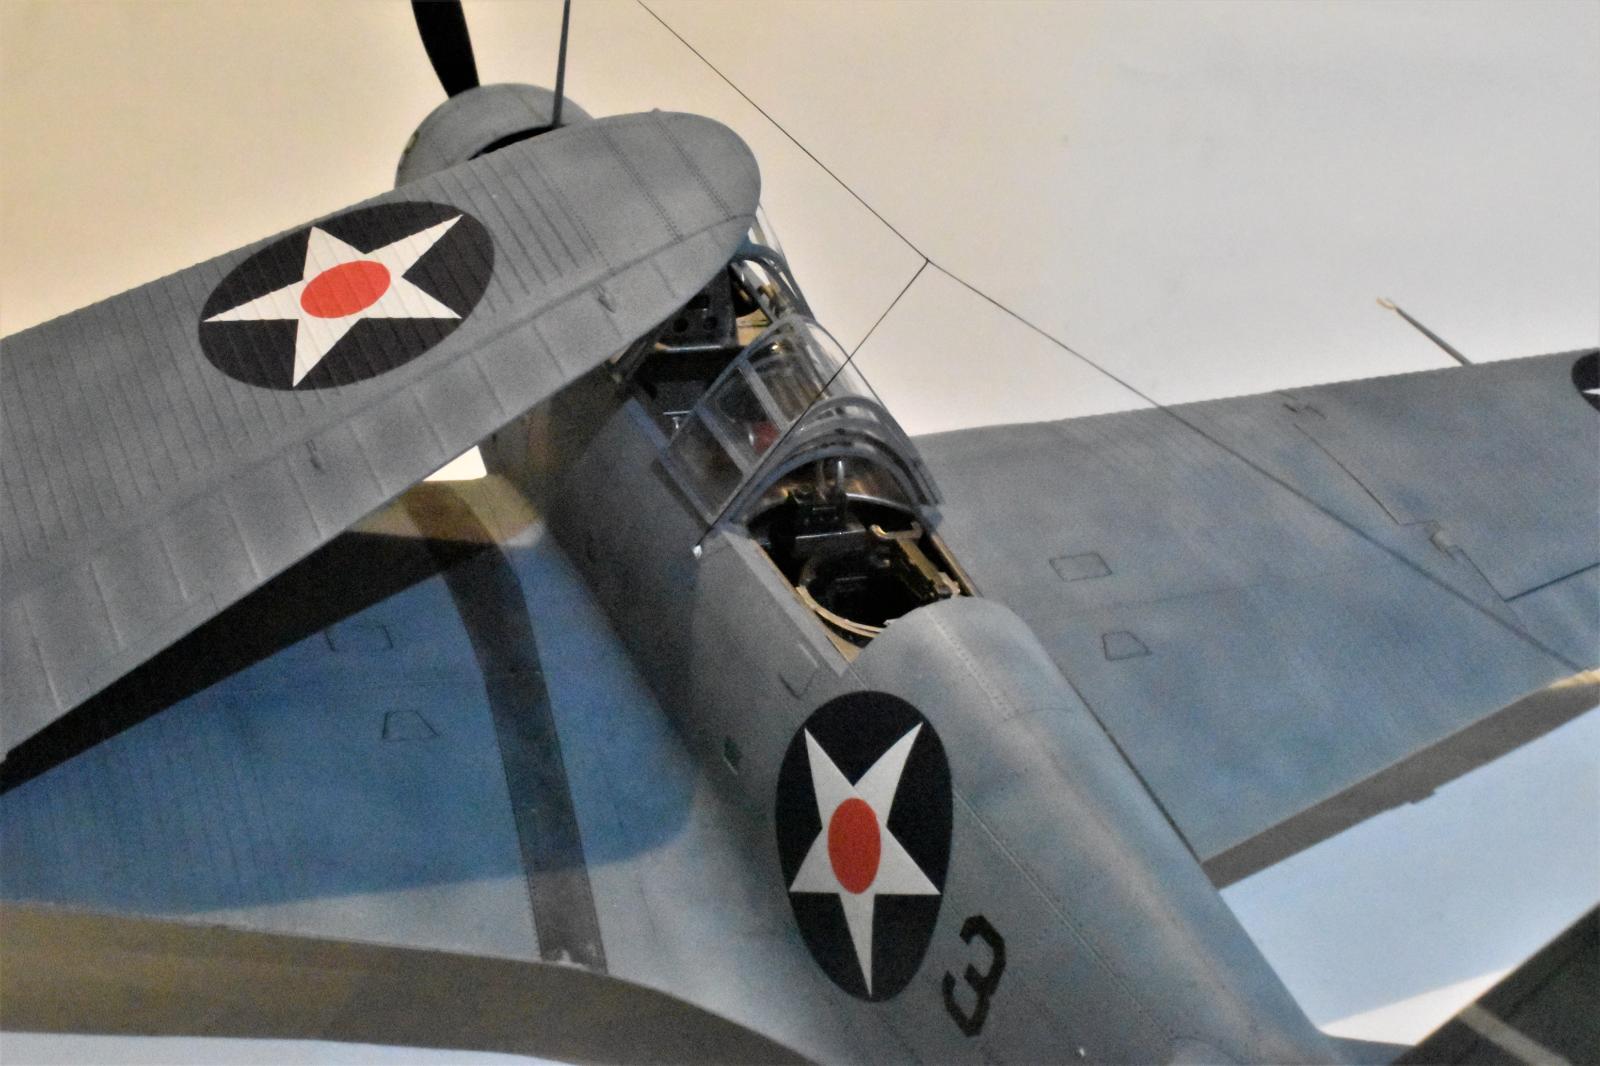
I could not decide to go with the folded wings, or deployed. So I did what all great putoffskis do and did one of each, based on a flight deck picture of some Enterprise Birds on the left side of the deck. The left wing was folded on the left edge and the right was open and sticking out into the deck park. Makes sense, right? Now I'm thinking about it, it does not. Oh well.
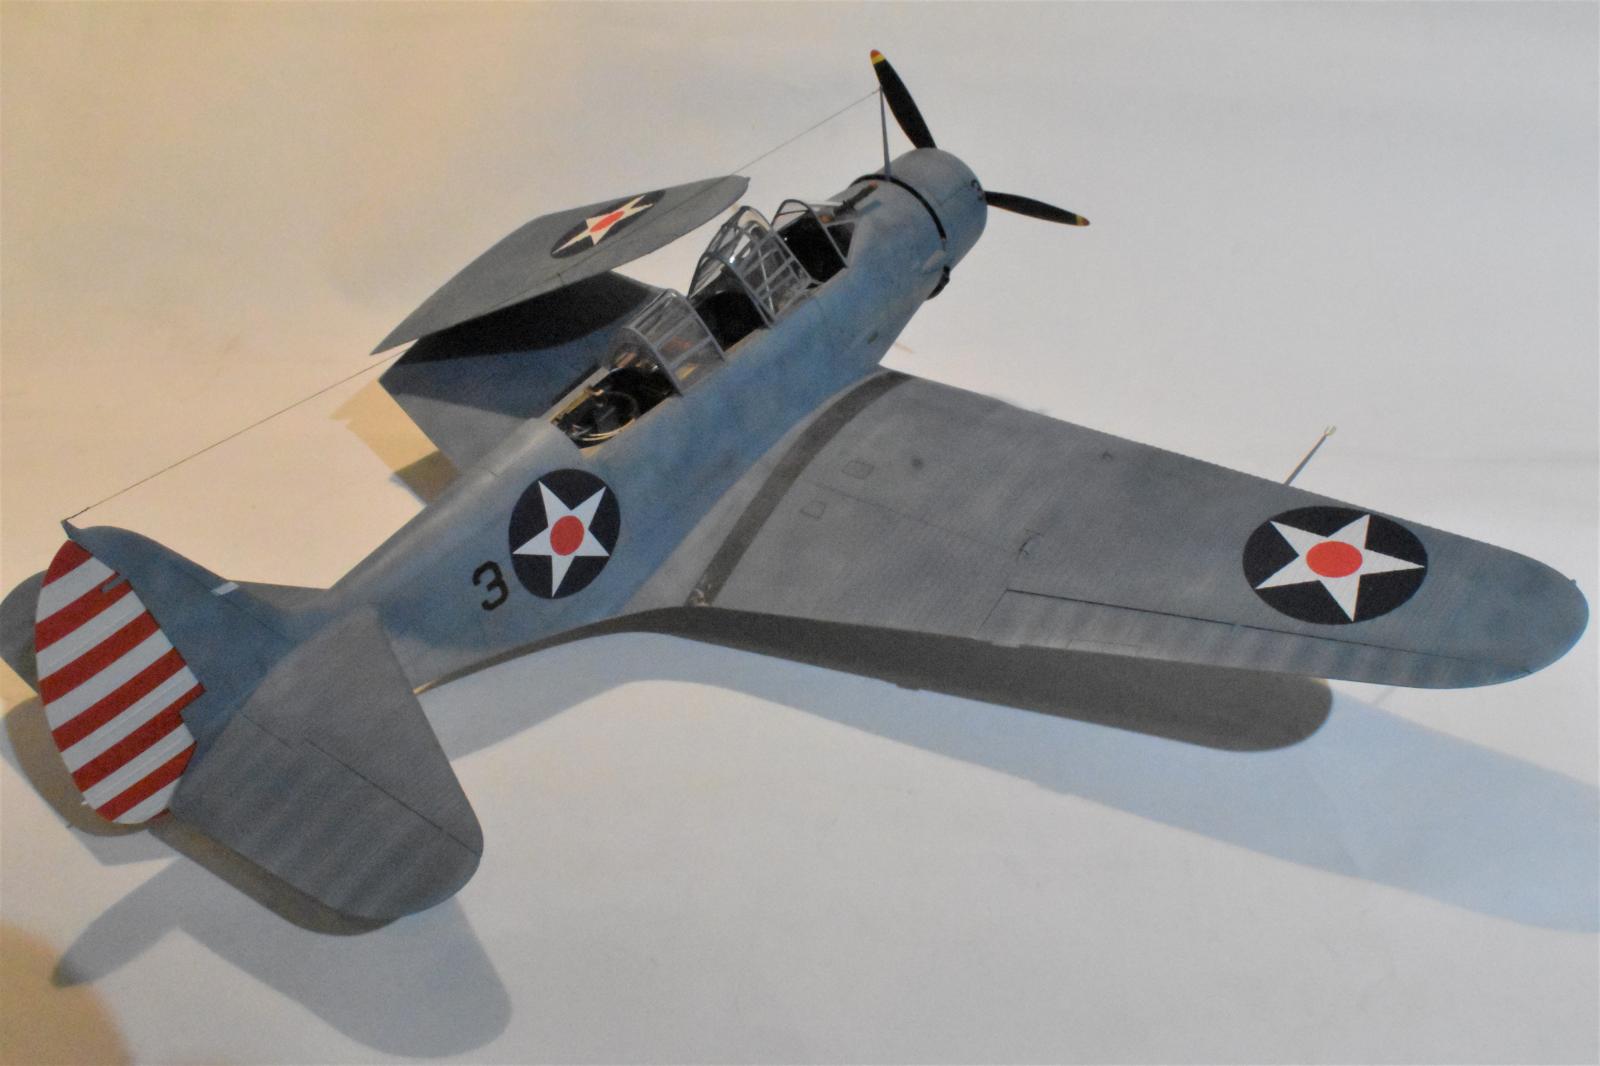
Coloration: I ended up mixing my own colors using the new Tamiya Lacquers, which I really like. Trouble is they don't make their paints in bottles that say, "U.S. Navy Blue-Grey". Scrounging through the Tamiya rack I ended up with LP-36 "Dark Ghost grey" and LP14 "IJN Grey Maizuru Arsenal". 50% each of these, plus a touch of Testor's glass bottle Dark Sea Blue, yielded something close enough. During my paint job, during which I tried to pre-fade the model, the colors were lightened and darkened anyway.
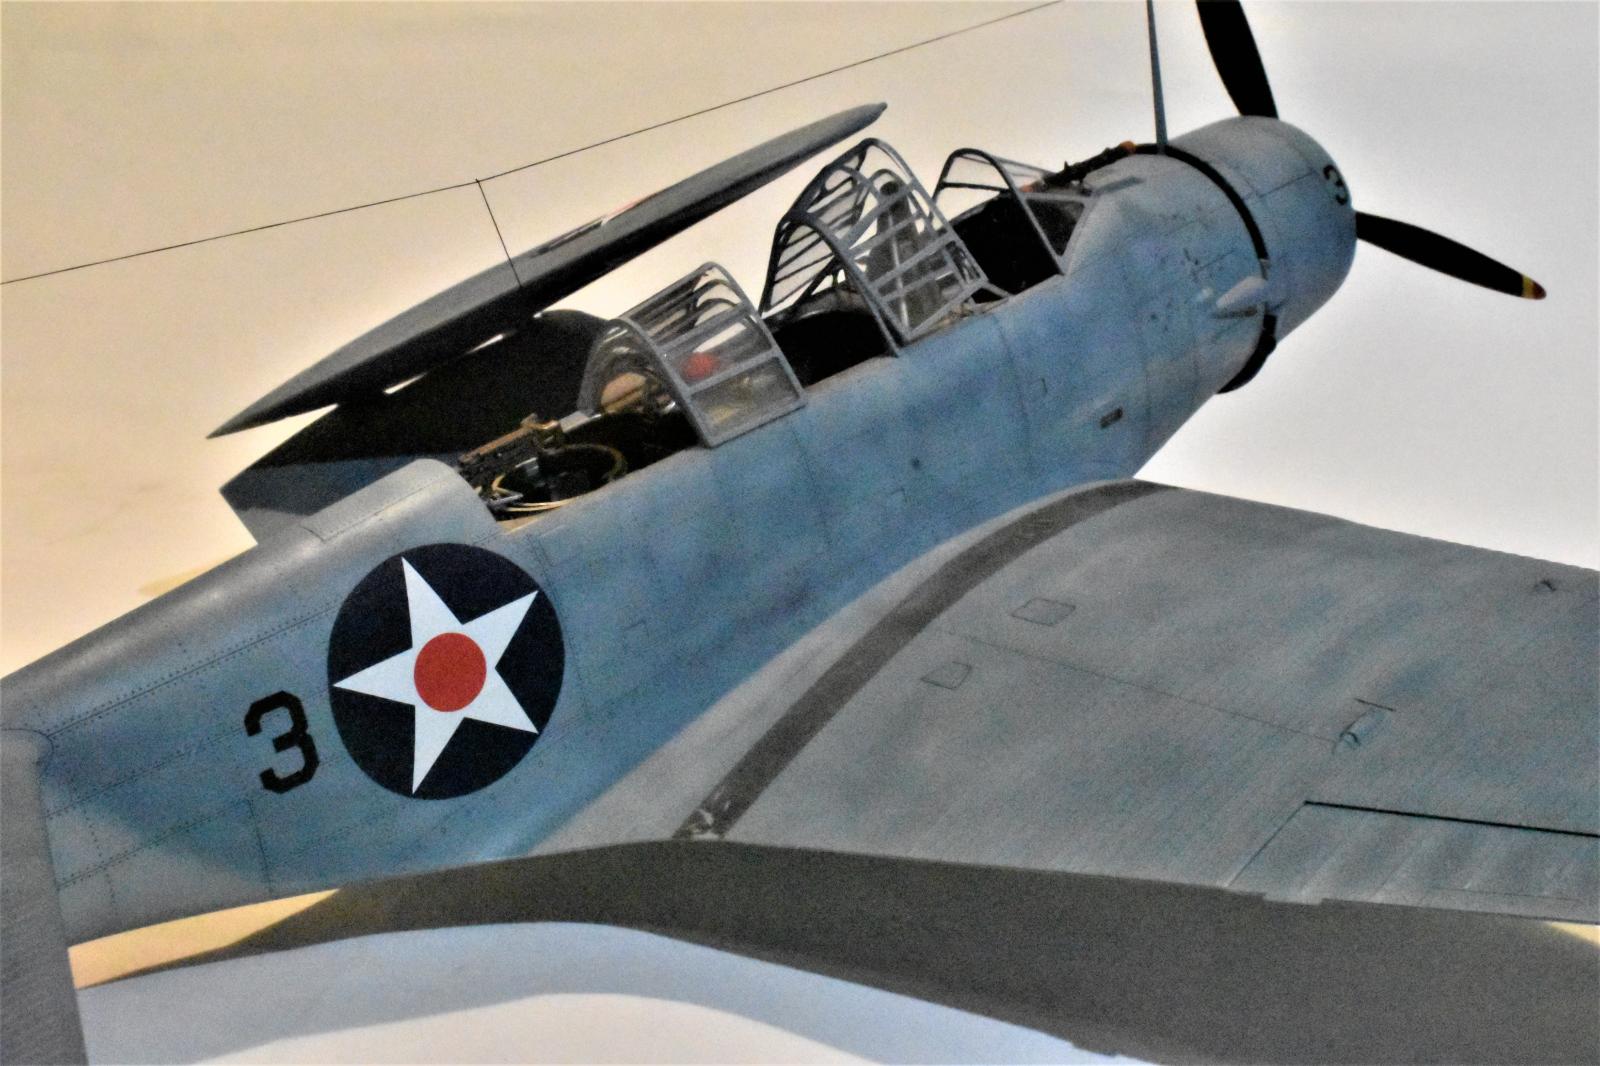
On the subject of the paint job, I went to something different on this. Instead of the usual "marbling", which tends to stay in panel line boxes, I tried to go totally random, pre shading the darks and lights all over the place, with no pattern other than trying to keep the upper areas more faded. I also did not do any panel line enhancement on this, as the panel lines and rivets can be seen just fine as-is, IMHO. I think I like it.
The decals need a paragraph of their own. First a coat Of Tamiya lacquer Clear was applied. This stuff goes on very smooth when used with their own thinner, and dries SUPER fast. The decals looked good on the sheet, nice and thin, not like past Trumpter abberations. So, I figgered let's try them. Always try new decals on the Bottom first, screw-ups can be better hidden here. The big wing star came loose of the backing in seconds, as usual I missed where I wanted it by quite a bit, so slide it over. It would not budge. No amount of nudging would make the thin decal move. Get out the Nitro! Deep breath, calm down, Ommmmm. Must have Focus, Daniel-San. Flood it with water, get the tweezer underneath, the decal folds over. Ommmmm. Finally ending this story, after a couple of minutes and flooding with water, the decal decided to start moving, apparently the glue takes a while to get loose. I managed to get the fold out of it and get it in place. Then the good part, when I could pat it down, it conformed nicely to the wing corrugations, stood up to poking and yanking and responded well to a light app of Solvaset. Turns out in the end these decals worked out pretty durn good, and after the gloss and flat coats look painted on. The trick is to get them off the backer as close as possible to your area, flood it well with water and give it a couple of minutes. I would not chance the rudder stripe decals, as it is easy enough to paint these on. I still hate decals.
The canopies: The TBD has lots of them and as a result there are lots of chances to screw up. The kit provides a very nice set of masks, which fit perfectly, stick well and come off easily later. Trumpeter did the parts pretty well as you can actually stack 4 parts between the gunner's and the radioman's cockpit areas. The last one hangs over the sill a bit, but WTH. As usual, I pushed my luck trying to use Tamiya Super thin on some of the clear parts and, as usual, glue got where it was not supposed to. The thing with this glue is you can use it on single pieces, but if there is another clear part anywhere near, the glue will find it's way in between them. Capillary action, doing that thing it does. The big problem is the pilot's hood, which slides on roller coaster rails on the real machine, The kit gives You the rails, but no provision of any kind to attach the hood to them. I was saved by a nice picture of the late Lance Massey, Torpedo 3 Commander, in the pilot's seat, with a decent view of how the hood works. I scratched a couple of brackets to hang the canopy on. The hood is held in place by on two tiny pads of sliced sprue, with white glue. If I sneeze on it, it's gonna go flying. The tube gunsight is not held on by much either.
So, here it is, the mythical large-scale TBD. I'd bet there is plenty of aftermarket on the way for this. It needs a good photo-etch set and better decals sheets. I may do another, and go all the way. I'd also bet Trumpy is coming out with a Midway version eventually. Maybe in another 15 Years?
Also let me pay tribute to those Bravehearts that charged into the guns with these slow, unprotected steeds. God rest them all. I didn't include any history here but there is plenty available "Out there" for those interested.


Super build, Bill. And your finish is special. Exceptional model.
Excellent build, Bill! Painting and weathering are superb.
Thanks for the kit info.
Thanks for the work, Big Bill. Nice result.
Mine will be here Monday. I did the Squadron pre-order, got the kit for $90, with the Gold Medal Models decal sheet for all six pre-war squadrons and the four that saw combat in 1942 for another $20. All-in-all, $118 on my front doorstep.
Having looked at the kit in the bare plastic twice now at the two (count 'em - two!) LHSs here, I can say pretty conclusively that Trumpeter did the smart thing here and did what they did with the SBD kits, which they scaled up from the best SBD kit, the Accurate Miniatures kits. They have scaled this up from the Great Wall Hobby kit, which is good (just finishing my second).
Here is some information for anyone else doing this kit (and for you if you do a second kit):
By the time the war arrived, the TBDs did not have aluminum cockpit interiors. The first deliveries (100) came out of the factory in aluminum lacquer. The second batch of 15 came out with whatever green it was Douglas was using on the SBDs (which was not what we would call "Interior Green" - something closer to Medium Green). In March 1939, BuAer issued a report that the cockpits were to be painted in Bronze Green at the next overhaul. Apparently by 1941 this had been accomplished - all the cockpits of the VT-2 airplanes sitting on the bottom of the Coral Sea have cockpits that have been identified as being Bronze Green.
This means if you are doing a pre-war airplane, you can do aluminum lacquer or Bronze Green (and if you can ID the BuNo and get that it's one of the final 15, US Medium Green). If you are doing a wartime bird, Bronze Green. BTW - Dana Bell is doing a special TBD book for Squadron that should be available in August (you can pre-order now) that will have all this color stuff explained in detail, along with a lot more.
There is a great series of color photos from LIFE shot by Carl Mydans on board Enterprise in the summer of 1940 in glorious Kodachrome-25, of Air Group 6 airplanes, that shows well what "Chrome Yellow" is for the wings, the interior colors (these appear to be the last 15 with the "Whatever Douglas was using Green" interior) and such. You can find them all over the internet.
From what I have seen, and from what you demonstrate here, Bill, I think the final words to others who may be interested in the kit are Buy. In. Confidence.
BTW - the kit was first announced by Trumpy in 2003.
Also, those bombs are the right shape for pre-war USN bombs. They should be yellow (practice) or gray (real).
Thank you much, Tomas. 20 years ago, sheesh.
You may be (are probably) right about the interiors. BUT. Having been a mechanic for 45 years, I cant imagine repainting an interior like that. Would they mask off all the instrumentation and dials and spray it? Or scrunch in there and brush everything? I did some squinting at those sunken Lexington planes, and couldn't get proof positive. Been underwater a while. Can't believe how well the outer paint is preserved BTW.
$118 for all, that's pretty good. Enjoy the canopies. 🙂 Good about the bombs. Now I'll replace the arming props.
Damn, knocked out of the top spot already. That's one thing about this site...
Yeah, it’s all these You Tube reviews, I don’t think they should be taking up space in our headlines, but that’s just my opinion…………
Mine too.
The prewar Navy was very "rules oriented." Yes, they would have masked off, etc. It was being done at the "depot" level.
2003? Time flies?
That was the year I restarted this hobby.
Another excellent build Bill!
BTW, did Trumpy bugger up the shape or size of the canopies? It seems to be one of their "things". If not, kudos to them.
Shapes look very good to me. Guess they can only make them so thin. The TBD had a "stack" of 4 in back when all were opened. Trumpeter gives 3 that stack in back ,expecting to have the center closed, then the pilot's open (somehow). I cheated and stacked the Four, as you can see, the fourth sticks out past the "sill" a bit but looks passable. The biggest problem is how to attach the pilot's canopy, I described my fix in the text. See below
1 attached image. Click to enlarge.
Great job, Bill (@billkoppos). I have one of these on order and I can hardly wait for it to come. Thanks for the detailed info that I can use to help on mine. Well done.
Well, you had to wait twenty years for this, Bill, but you seem to have built it in double quick time, and it’s a beautiful result.
Nice work, Bill! One of my favorite planes.
Amazing it finally was released. Another stunner, pops
Excellent achievement, Bill @billkoppos
I can imagine the exitement when you got your hands on this kit.
You really created a wonderful TBD out of it.
Well done.
Good looking TBD , mine will arrive Monday. Plan to build it soon.
After a 20 year wait I think it was worth it. Very nice looking TBD Bill, enjoyed reading your building remarks as well.
Great work, Bill, thank you! After looking closely at your build and the video review from Squadron (https://imodeler.com/2023/07/at-last-a-large-scale-tbd/) I do notice something missing that was in the GW kit, namely the rather finicky-to-install torpedo site. I don't see Norden bomb sight either. Am I just missing those?
There were some kind of small PE parts, probably the torpedo sights, on top of the upper instrument panel. To tell you the truth, I forgot about them. I might go back and get them, the windscreen is only on with white glue. A ring sight (tiny) is also given for the tube sight. I'll def put that on. No representation of the Norden sight is given. I didn't go nuts in that area as I closed the bomb aimer doors, but I don't think it can be seen under the pilot's floor anyway. The kit definitely needs a good PE enhancement set, and I'm sure they will be coming.
I think those are part of the "computer". The sight I'm talking about is a large angled framework that sits inside of the windscreen and also seems to be a bracket for the telescope sight. Here's a picture from the David Doyle book:
1 attached image. Click to enlarge.
All in all a successful build. I know how it feels waiting for grail level kit. No matter the challenges you have to build it. Great end result, thanks for sharing.
The obvious joy you had in building this kit is the very best of what this hobby is all about. It is a wonderful job. Thank you for sharing it.
Great looking TBD!
You did a fine job on this kit, it looks fantastic.