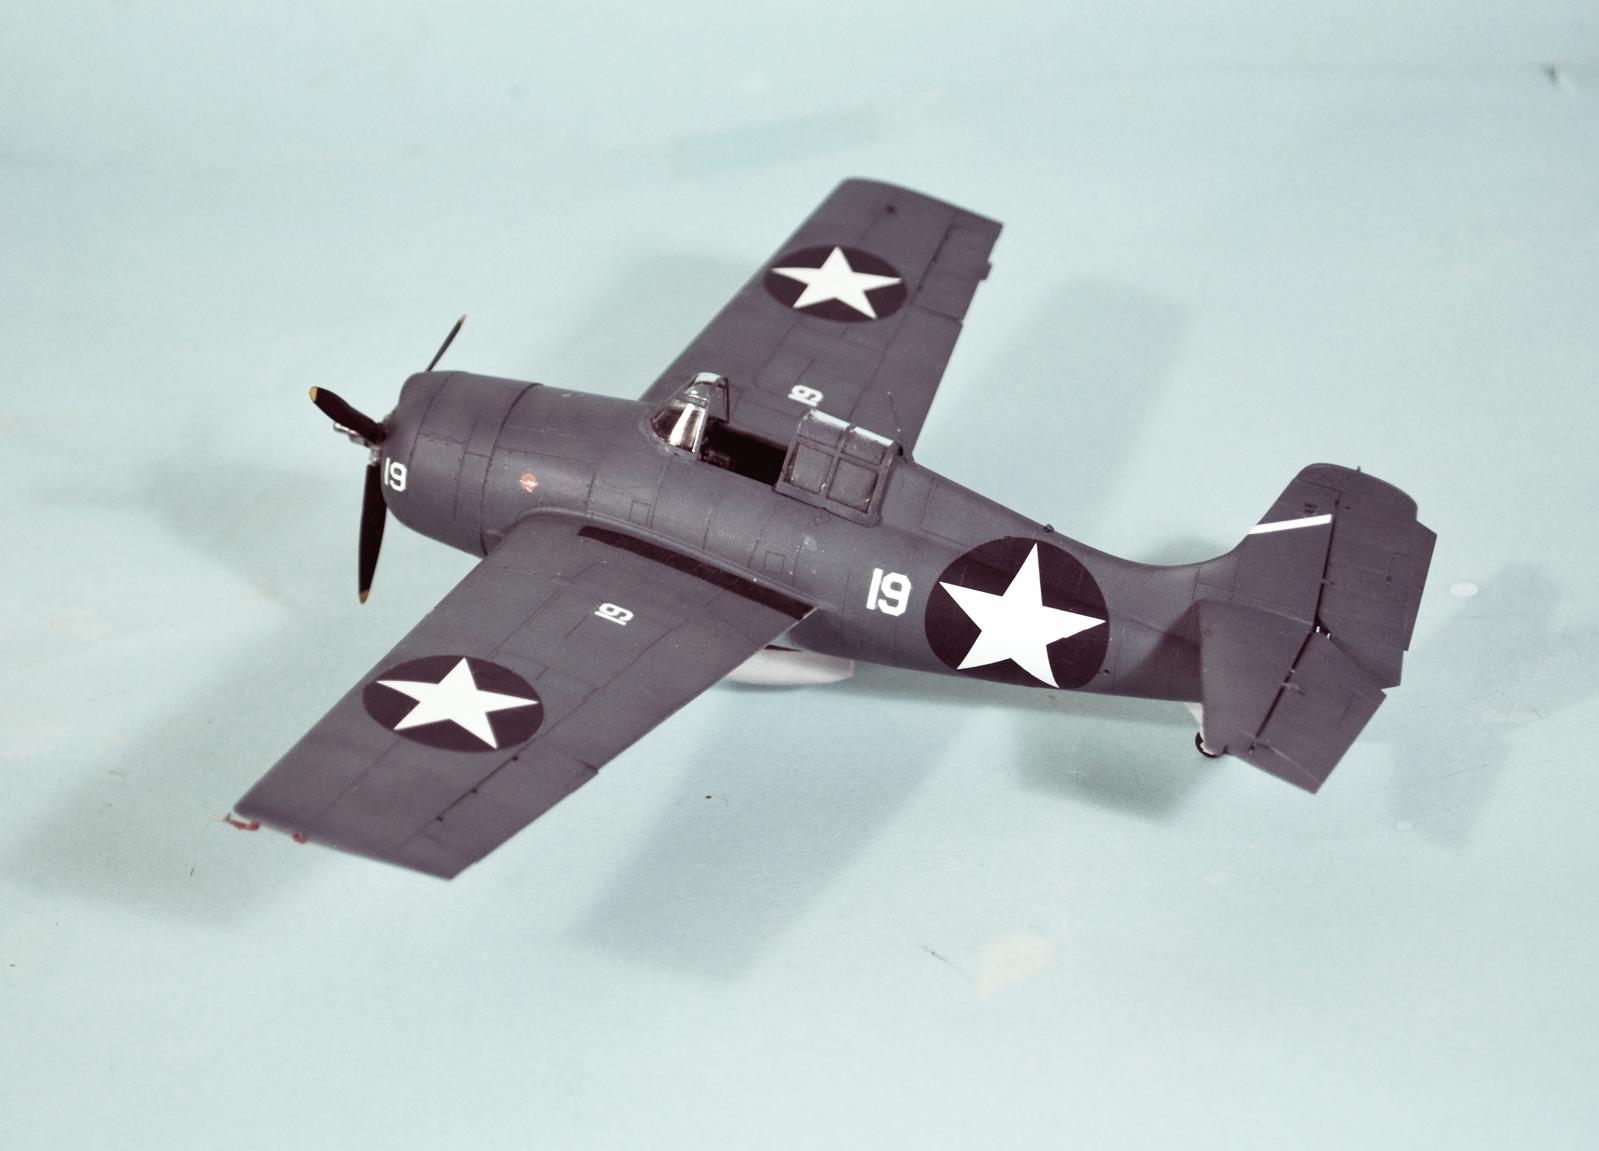
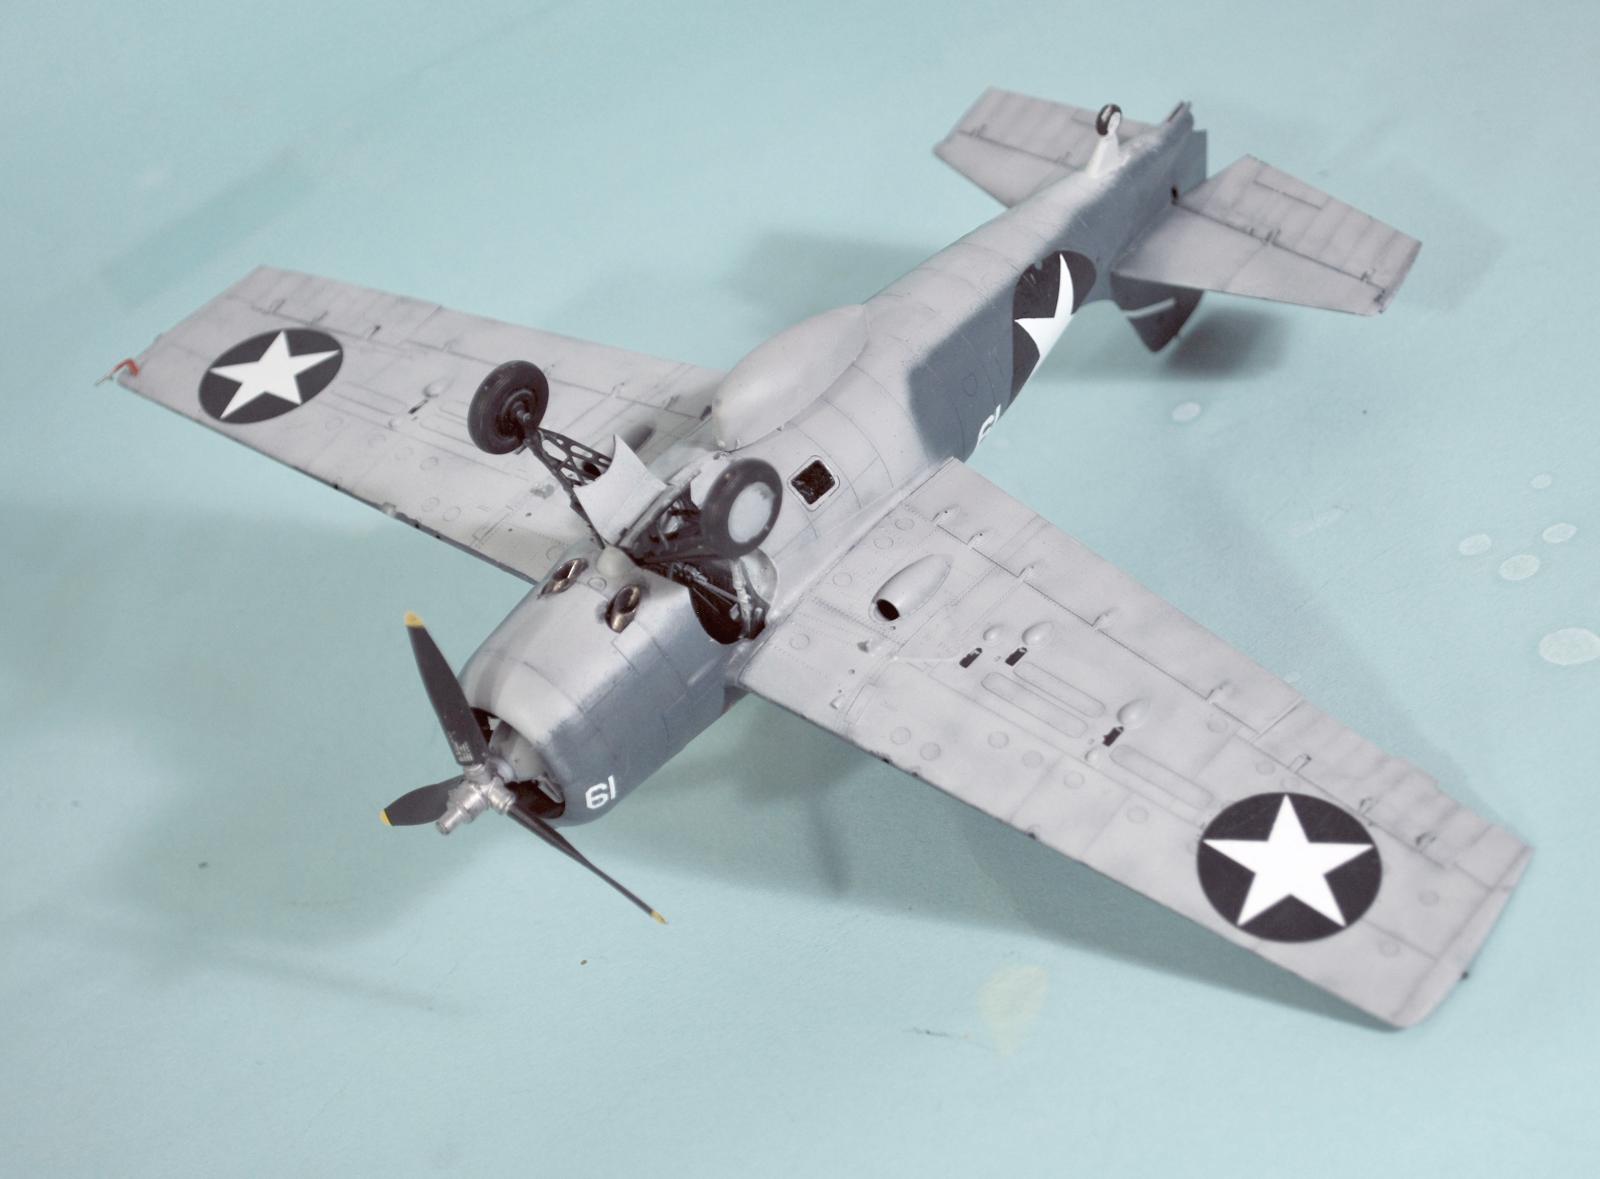
Eduard 1/48 F4F-4 Wildcat (early)
The Airplane:
The F4F-4 Wildcat was the result of a British request for a Wildcat with folding wings, to allow more to be carried on the escort carriers they operated from. At the same time, the British asked for an increase in armament from four to six guns.
Grumman used its Stow-Wing system to apply folding wings, allowing three Wildcats to be stowed on deck where one with non-folding wings was stowed before. The folding mechanism added weight to an already-heavy design, so Grumman added the two extra machine guns without adding additional ammunition - distributing ammo for four guns to three and reducing firing time by a third.
This didn't matter to the FAA, which was using the Wildcat to intercept the Fw-200 Condor, where the fighter might only get one pass and needed the additional weight of fire to shoot down its opponent. However, U.S. Navy pilots universally saw this as a retrograde move, since they were involved in extended air-to-air combat with the Zero, and needed the extra time of fire.
The FAA got their Martlet II - a Martlet III with the folding wings - while the U.S. Navy got the F4F-4, which entered production in January 1942. VF-3 was the first Pacific Fleet squadron to replace the F4F-3 with the new fighter in early March in Hawaii, while VF-6 was second when Enterprise returned from the Doolittle Raid in late April. Following the Battle of the Coral Sea, VF-42 took on the new Wildcat, and it first saw action at Midway. It would go on to be the main U.S. fighter at Guadalcanal and see action at the Battles of Eastern Solomons in August and Santa Cruz in October, carrying on in the Solomons until the summer of 1943 following the arrival of the Corsair and Hellcat in the South Pacific.
“Swede” Vejtasa at Santa Cruz:
Following the loss of Wasp on September 15, 1942, Admiral Nimitz wrote bleakly of the situation in the Solomons a month later on October 15: "It now appears that we are unable to control the sea in the Guadalcanal area. Thus our supply of the positions will only be done at great expense to us. The situation is not hopeless, but it is certainly critical."
The day before writing his bleak assessment, Nimitz ordered Vice Admiral William F. Halsey, Jr., who was now out of the hospital from the attack of shingles that had kept him from command at Midway, to pay a visit to Admiral Ghormley's headquarters and provide a personal assessment of the situation. Halsey flew to Nouméa on October 16; over the next two days he interviewed Ghormley and his staff. Halsey's messages made it quickly apparent to Nimitz that Ghormley and his staff did not have answers to the serious questions that were in need of quick answers. In a curt message on October 18, Nimitz informed Ghormley he had been relieved of command and would turn over his duties to Halsey. It was one of the most important decisions he made during the Pacific War.
Placing Halsey in command was precisely what was needed. “America's Fightingest Admiral” quickly and decisively took command. Word flashed through the fleet and the Marines on Guadalcanal like a shot of adrenaline. His reputation sent American morale skyrocketing. His first act was to fly to Henderson Field, where he personally assured General Vandegrift that the Navy would provide all possible support.
Halsey faced an immediate crisis. Most important, a fleet had to be cobbled together to face the Japanese, since it was now apparent their carriers were at sea and that plans were afoot to provide support for an offensive on Guadalcanal by the Imperial Army that could come any day.
Admiral Yamamoto's plan was to support General Hyakutake's 17th Army to end the stalemate on Guadalcanal. The Imperial Army had prepared a major ground offensive now that 15,000 troops had been landed between October 1-17. The battle to take Henderson Field would start October 20 with victory by October 25. There was a fatal flaw in the plan, since intelligence estimated there were only 10,000 Marines on the island when in fact there were 23,000, nearly two and a half times the force the Japanese expected to fight. The Imperial Navy's carriers and other warships were moved into position near the southern Solomons to support this offensive and to block any American attempt at reinforcement, with the ultimate hope of engaging the Allied naval forces that responded to the ground offensive.
The main force hit Marine positions on the Lunga River late in the evening of October 24. Over the nights of October 24-25 and 25-26, the Japanese launched several frontal assaults, as the two sides battled in a driving tropical downpour. In the two nights of battle, over 1,500 Imperial Army troops were killed, while the Americans suffered only 60 casualties.
Despite the Army's failure on Guadalcanal, Vice Admiral Nobutake Kondō kept the Mobile Fleet south of the Solomons in hopes that the plan to force a fleet action might still happen. Vice Admiral Chuichi Nagumo, commander of Kido Butai at Pearl Harbor and Midway, commanded the Main Force, composed of the veteran sister ships Shōkaku and Zuikaku, and the light carrier Zuihō.
On October 24, Enterprise, which had departed Pearl Harbor on October 16 following completion of repairs for damage at Eastern Solomons, rendezvoused with Hornet and her task force, 273 miles northeast of Espiritu Santo. Operating in accordance with pre-war carrier doctrine, each carrier task force operated some ten miles apart and would thus fight separate, uncoordinated actions as the battle developed.
On October 26, 1942, 40 days after the loss of Wasp, American and Japanese carriers met in the fourth and last carrier battle of the opening phase of the Pacific War, the Battle of Santa Cruz, which would prove everything learned in American fleet exercises of the Thirties regarding the deadly speed of carrier warfare.
At dawn, the Japanese were 200 miles from Task Force 61. Both Japanese and American carriers launched scouts at first light, and each side discovered the other at almost the same time. Both sides knew that the force that struck first would likely win, and each launched immediate strikes.
The U.S. strike was the least-successful mission ever flown by the U.S. Navy in the Pacific War; the two scouts that found the enemy and then damaged Zuihō's flight deck, putting her out of action for the rest of the battle, were too late to prevent her launch. Ten SBDs from Hornet attacked Shōkaku at 0927 hours scoring six hits and wrecking her flight deck, putting her out of action. They were too late.
Zuikaku, Shōkaku and Zuihō had already launched 64 aircraft including 21 Vals, 20 Kates and 21 Zeros at 0740 hours. At 0810 hours, Shōkaku followed up with a second strike of 19 Vals and eight Zeros, while Zuikaku launched 16 additional Kates at 0840 hours, putting 110 aircraft headed toward the Americans fleet.
The incoming Japanese strike was picked up on radar at 0830 hours. Unluckily, Hornet was spotted by an enemy scout at 0852 hours, just after Enterprise entered a rain squall. At 0855 hours radar reported the enemy force was 35 miles from the fleet and 37 Wildcats on CAP were vectored to engage. The single high frequency radio net was swamped with calls within minutes and only a few defenders engaged the enemy. Hornet and her escorts opened fire at 0909 hours when the untouched 20 Kates and 16 Vals commenced their attacks.
At 0912 hours, a semi-armor-piercing bomb hit Hornet dead center on her flight deck across from the island. The bomb penetrated three decks before it exploded, killing 60 men. A moment later, a high explosive bomb hit the flight deck and detonated on impact, creating an 11-foot hole and killing 30 men. At 0913 hours, a second armor-piercing bomb hit hear the first and also penetrated three decks before exploding, causing severe damage. At 0914 hours, a Val was hit and set afire by Hornet's defensive fire. The pilot continued his dive and hit the carrier's stack, killing seven while burning fuel spread over the signal bridge. Two Type 95 torpedoes hit Hornet in her engineering compartments at 0913 and 0917 hours which knocked out all power and brought her to a stop. A burning Kate deliberately crashed into the hangar deck, starting a fire near the main aviation fuel tanks. At 0922 hours, the surviving enemy planes departed. Hornet was dead in the water and on fire.
Enterprise was spotted by a departing attacker as she and her escorts emerged from the rain squall. She immediately began landing the CAP fighters from both carriers while the flight deck crew worked to launch a second strike as soon as possible. At 1030 hours, Enterprise's radar spotted the second Japanese strike, 40 miles out. She ceased landing operations and ordered the remaining airborne planes out of the area. Hornet's fires were under control with firefighting assistance from three destroyers which had also taken aboard her wounded. Despite the impending attack, Northampton continued her preparations to take the carrier under tow.
The enemy arrived overhead at 1105 hours. With Hornet judged to be sinking, they concentrated on Enterprise at 1108 hours. Radar had missed the enemy altitude and the defending Wildcats were unable to get high enough before the attackers reached Enterprise. Two Vals were shot down as they initiated their attack, but Enterprise was soon hit by two 551-pound bombs with a third a near miss. Two SBDs were blown overboard while 44 men were killed and 75 were wounded. Worse, the midships elevator was jammed in the “down” position, stopping flight deck operations.
At 1123 hours, Pearl Harbor and Coral Sea veteran Lt. Commander Shigeharu Murata arrived with 15 Kates. Lieutenant Stanley “Swede” Vejtasa, who had just shot down two escaping Vals spotted Murata's force racing toward Enterprise at 250 knots, ten miles out. With his wingman, Lieutenant Harris, Vejtasa dived on the Kates, shooting down five - including Murata - while Harris shot down a sixth before they ran out of ammunition; another three were shot down by other Wildcats. In so doing, Vejtasa had just set the Navy record to date of seven enemy planes in a single day. The record would only be beaten when Dave McCampbell shot down nine at the Battle of Leyte Gulf two years later.
In the course of the three attacks, Enterprise's VF-10 claimed 17 shot down against seven Wildcats lost and four pilots killed. Hornet's VF-72 claimed 28 for five pilots killed and ten Wildcats lost. The Japanese recorded the return of nine Zeros from the second strike in serviceable condition, while only two of the 27 Vals and Kates that attacked Hornet returned, period.
Junyō's air staff officer, Lt. Commander Masatake Okumiya, described the return of the strike groups: “We searched the sky with apprehension. There were only a few planes in the air in comparison with the numbers launched several hours before. The planes lurched and staggered onto the deck, every single fighter and bomber bullet-holed. As the pilots climbed wearily from their cramped cockpits, they told of unbelievable opposition, of skies choked with antiaircraft shell bursts and tracers.”
At 1235 hours, Enterprise turned into the wind and commenced recovering aircraft. In the finest performance ever by an LSO, Robin Lindsey brought in plane after plane at 30-second intervals. They were carefully pushed past the open elevator, though it was impossible to take them below because the forward elevator had been jammed “up.” Lindsey refused three orders to stop and brought 95 planes from both carriers aboard. The last 12 had to catch the first or second wire to avoid crashing into the full deck ahead. The last trapped aboard at 1322 hours with its engine dying of fuel starvation on touchdown. With her deck full, Enterprise couldn't conduct air operations. Surmising correctly that the enemy was still capable of launching strikes, Admiral Kinkaid ordered a withdrawal.
At 1445 hours, Northampton commenced towing Hornet at five knots. The carrier was on the verge of restoring partial power, but there was no chance she could be towed successfully in the face of continued enemy action, with the fleet so far from a friendly naval facility; 35 minutes later, Junyō's second strike found the carrier. Six torpedoes missed but Hornet was hit amidships at 1523 hours. The sea flooded into the gaping hole and she took on a 14-degree list while the newly-repaired electrical system failed. Admiral Murray agreed the cause was hopeless and Hornet was given up for lost. As her crew went into the water, Zuikaku's third strike arrived and inflicted the final hit at 1720 hours. Admiral Halsey reluctantly ordered Hornet scuttled. Despite destroyers Mustin and Anderson firing multiple torpedoes and more than 400 5-inch shells, she remained afloat. With the enemy 20 minutes away, they abandoned the burning hulk at 2040 hours and the Japanese surrounded her at 2220 hours. When Admiral Kondo realized this was the carrier that had launched the Doolittle Raid, he considered taking her as a war trophy, but it was impossible. Makigumo and Akigumo fired four Type 93 torpedoes at her and Hornet finally sank at 0135 hours, 27 October 1942. The Japanese could not continue to pursue the retreating Americans due to fuel shortage. Turning north, the fleet met oilers north of Bougainville and dropped anchor in Truk lagoon on October 30.
The U.S. Navy was now reduced to one damaged carrier afloat in the South Pacific. Over ten and a half months of combat, only Enterprise and Saratoga were left of the seven carriers so carefully created over the previous 15 years. Hornet had lasted 371 days from her commissioning. She would be the last American fleet carrier sunk by enemy action.
While Santa Cruz was a tactical victory for the Imperial Navy, it was a pyrrhic victory. Shōkaku and Zuihō suffered such severe damage that Shōkaku remained under repair until March 1943. She was not reunited with Zuikaku until July 1943. Zuihō returned to Truk in late January 1943. Zuikaku was forced to return to Japan because she did not have sufficient trained aircrew to man the air group. The mperial Navy's air force lost 148 pilots and aircrew members, including two dive bomber squadron leaders, three torpedo squadron leaders, and 18 section or flight leaders, a greater loss than the total from the previous three carrier battles. With these losses, 409 of the 765 elite aviators who had attacked Pearl Harbor were dead. Their loss would never be replaced.
Admiral Nagumo was reassigned to shore duty in Japan. In his report to Admiral Yamamoto, he stated: "This battle was a tactical win, but a shattering strategic loss for Japan. Considering the great superiority of our enemy's industrial capacity, we must win every battle overwhelmingly in order to win this war. This last one, although a victory, unfortunately, was not an overwhelming victory."
Historian Eric Hammel summed up the significance of the Battle of the Santa Cruz Islands thus: "Santa Cruz was a Japanese victory. That victory cost Japan her last best hope to win the war. The Japanese never got stronger, while the U.S. Navy went from strength to strength."
The Kit:
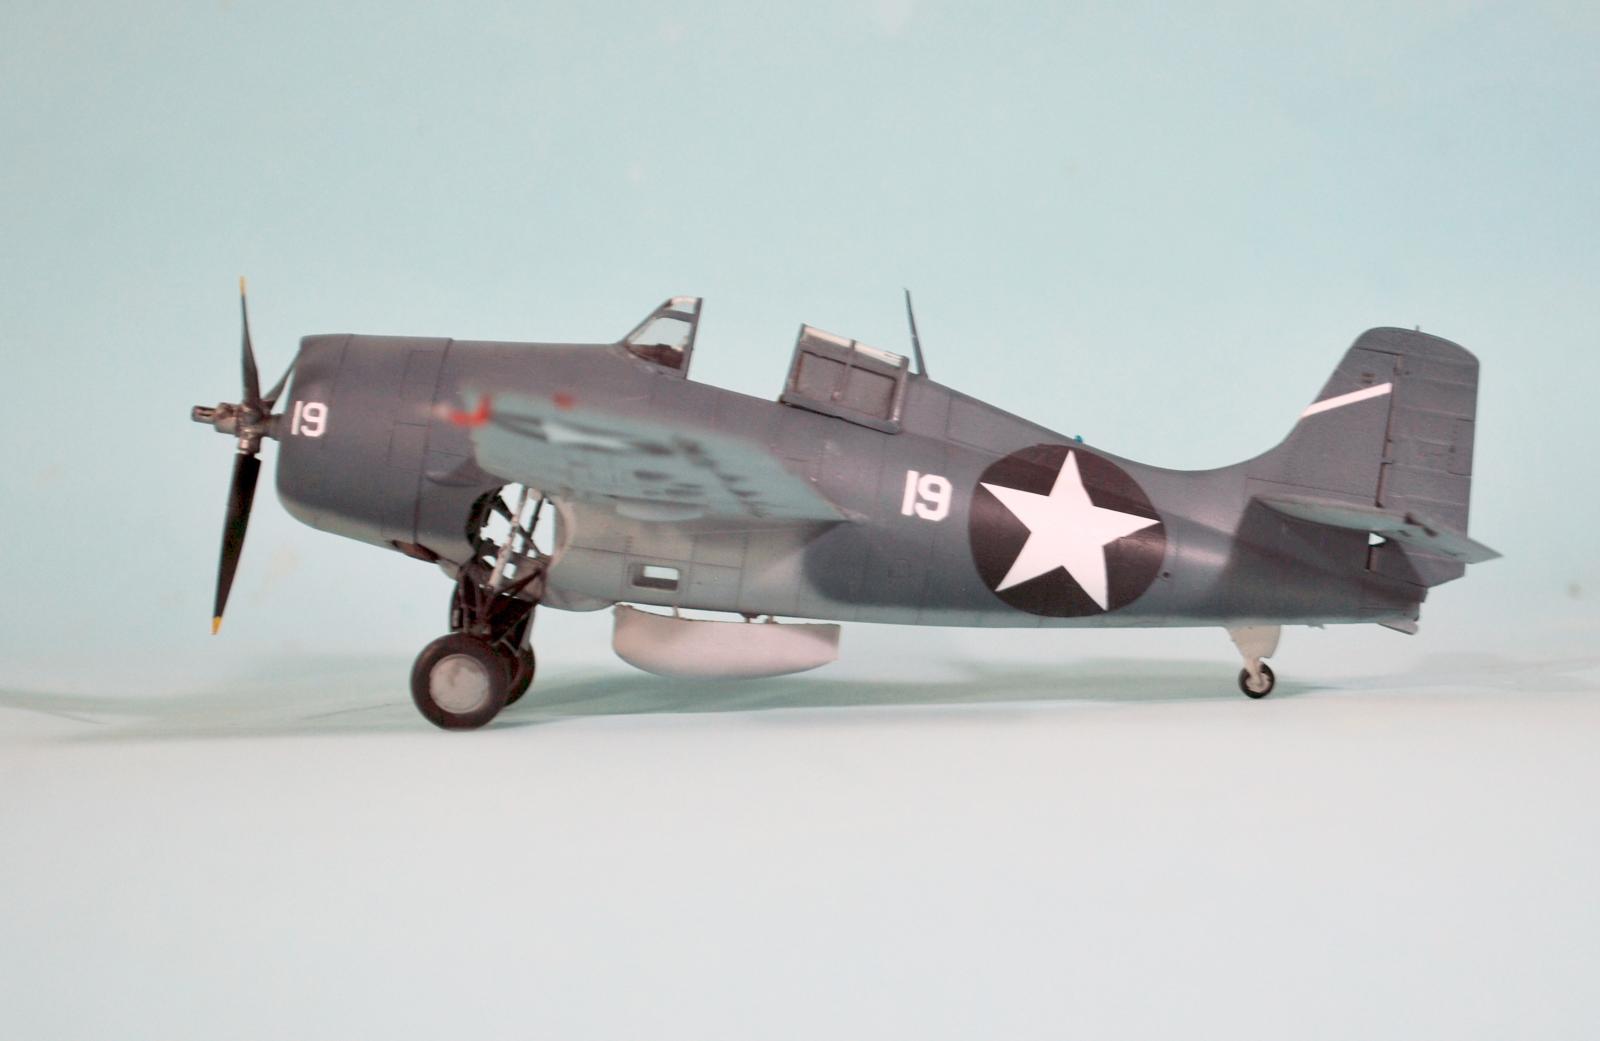
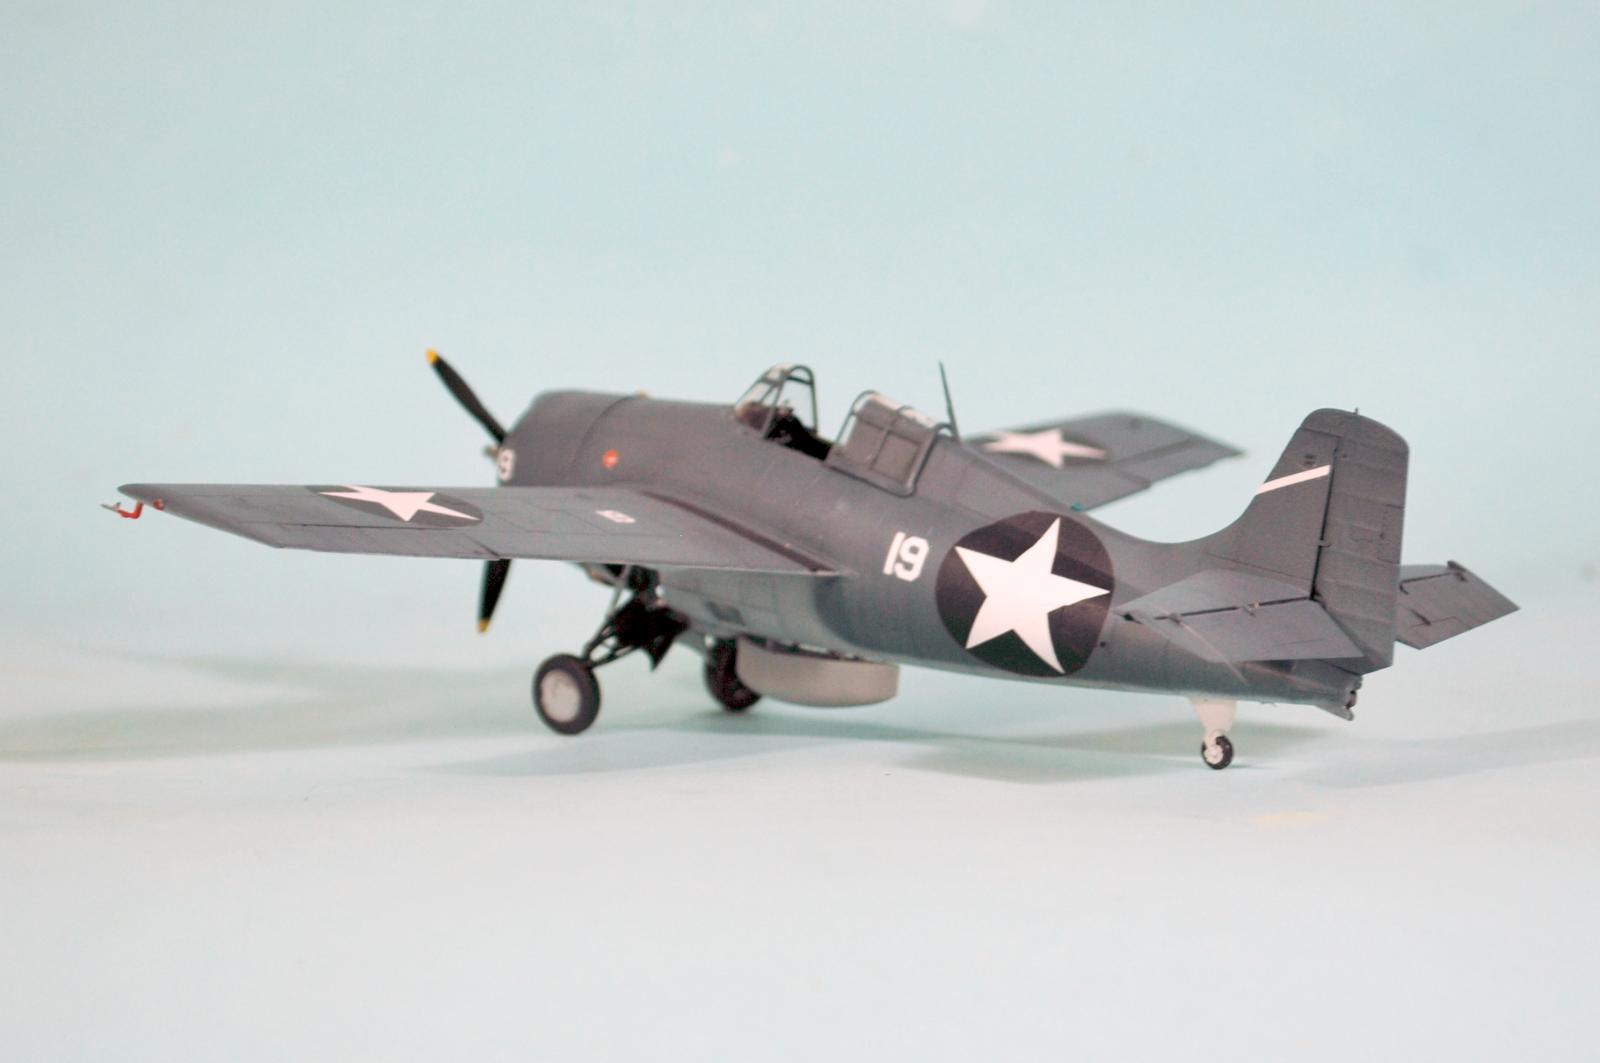
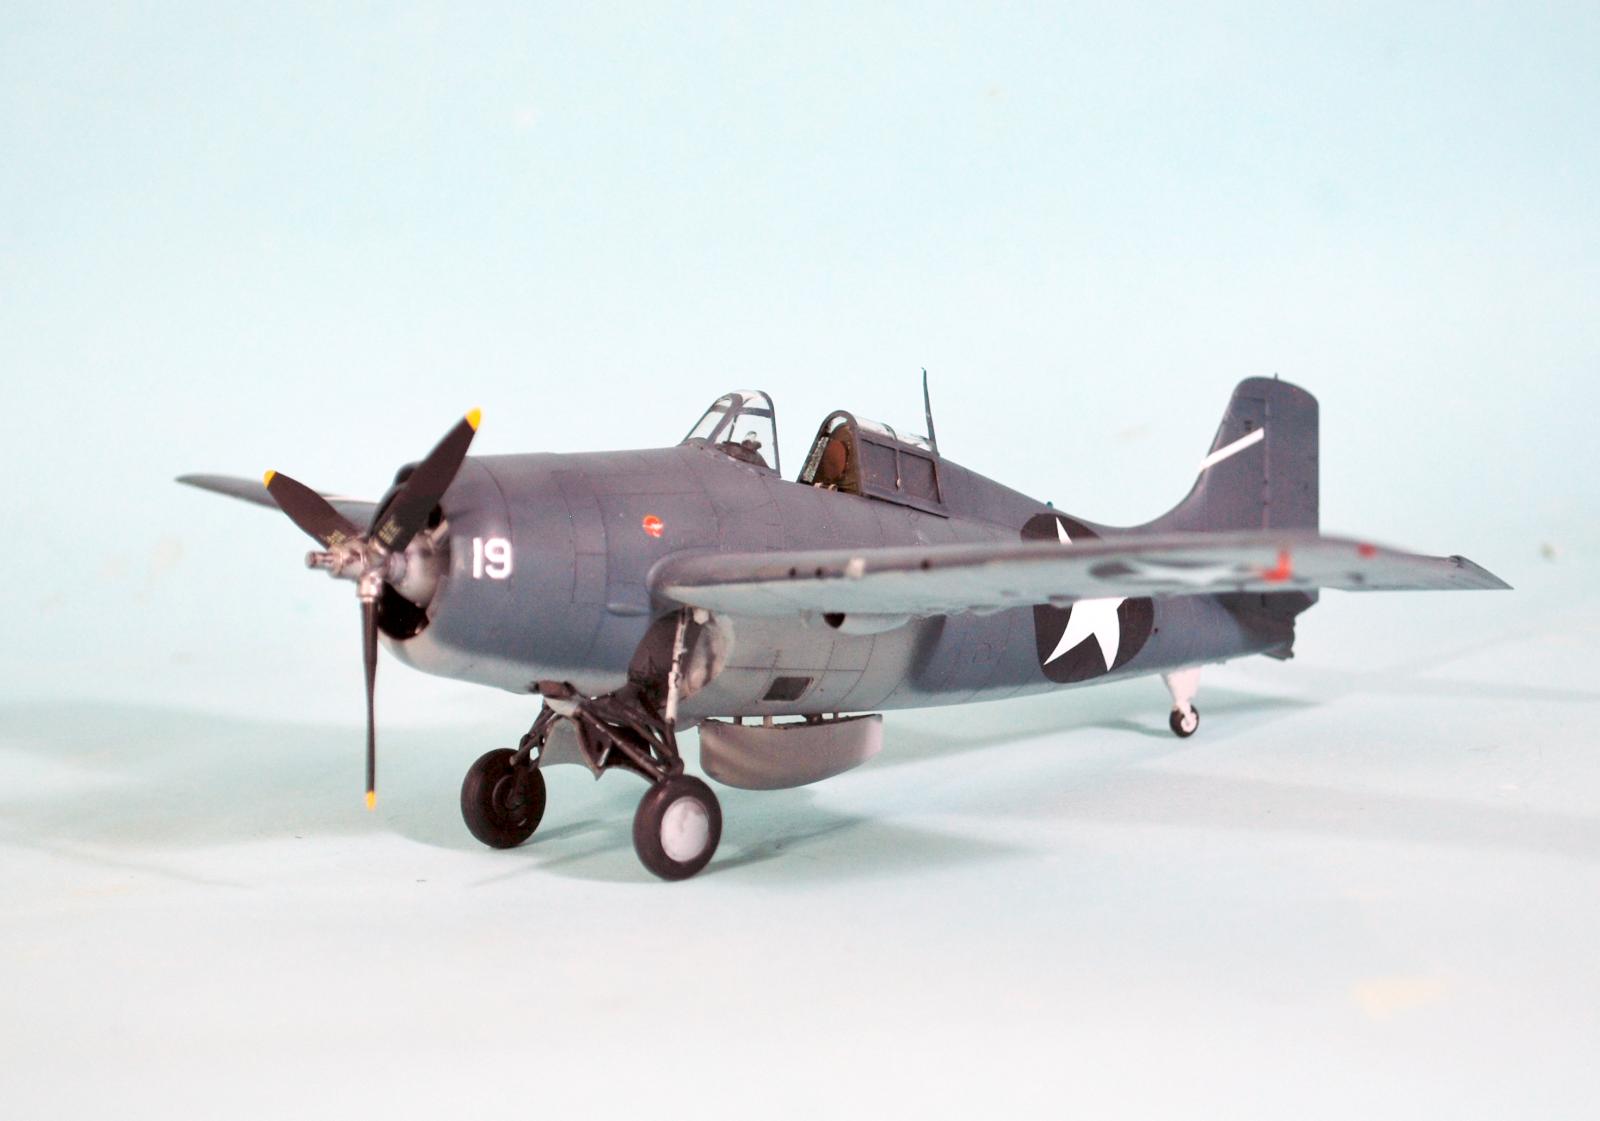
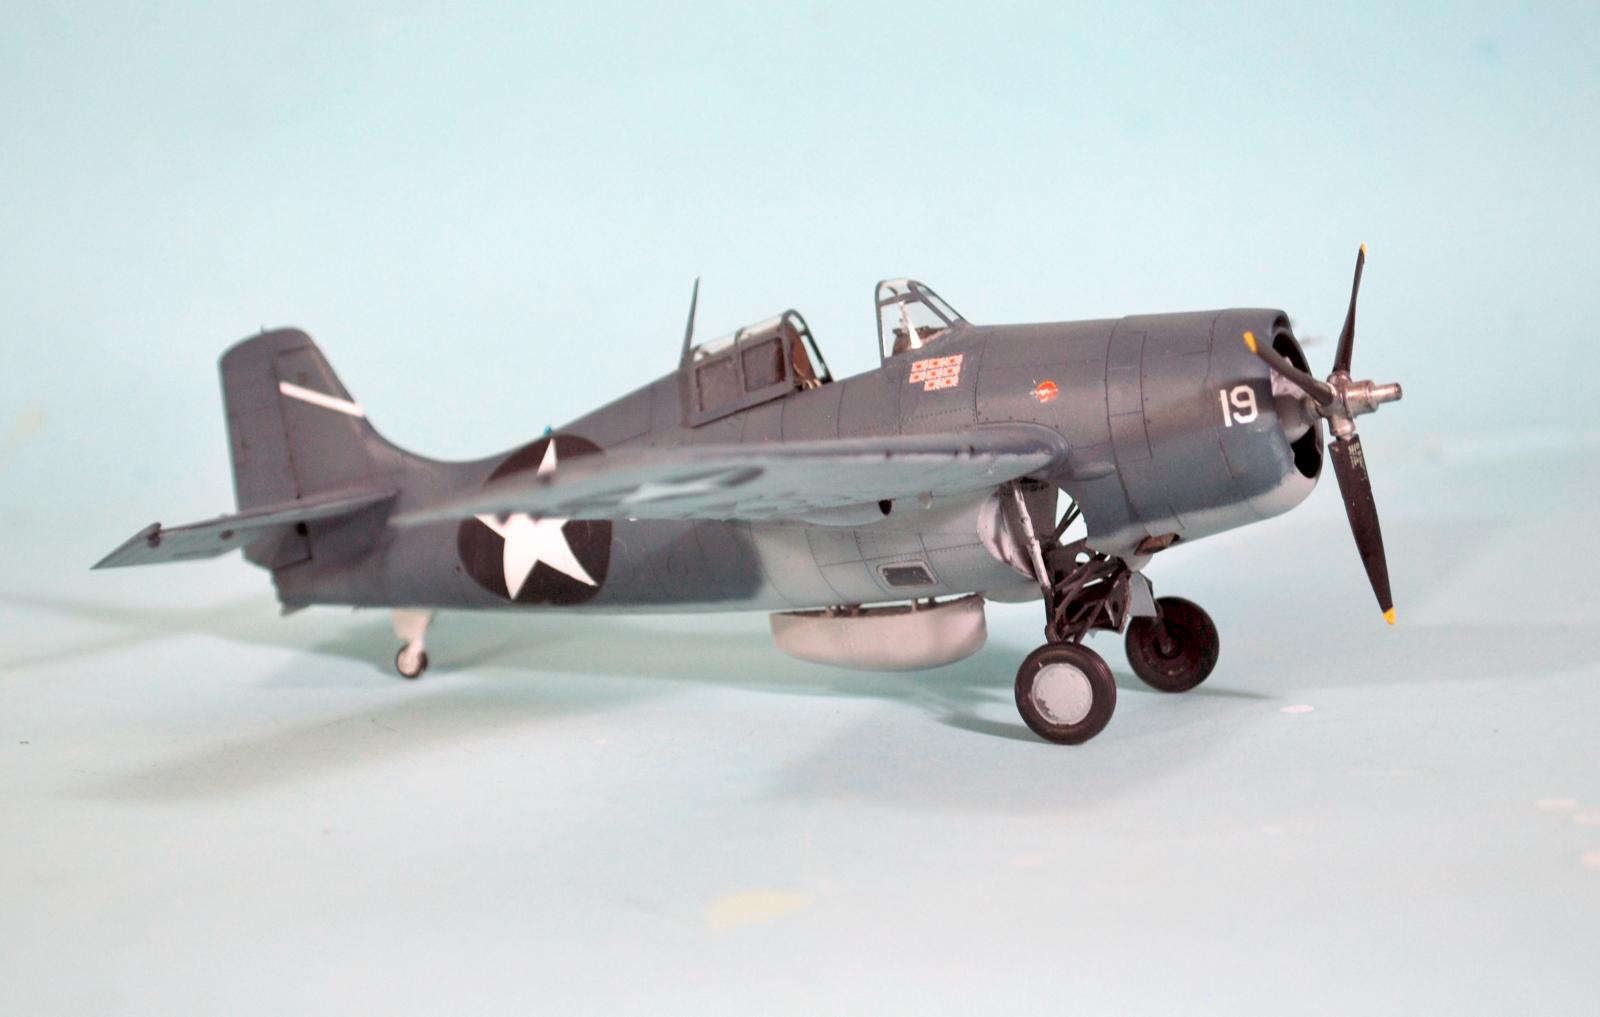
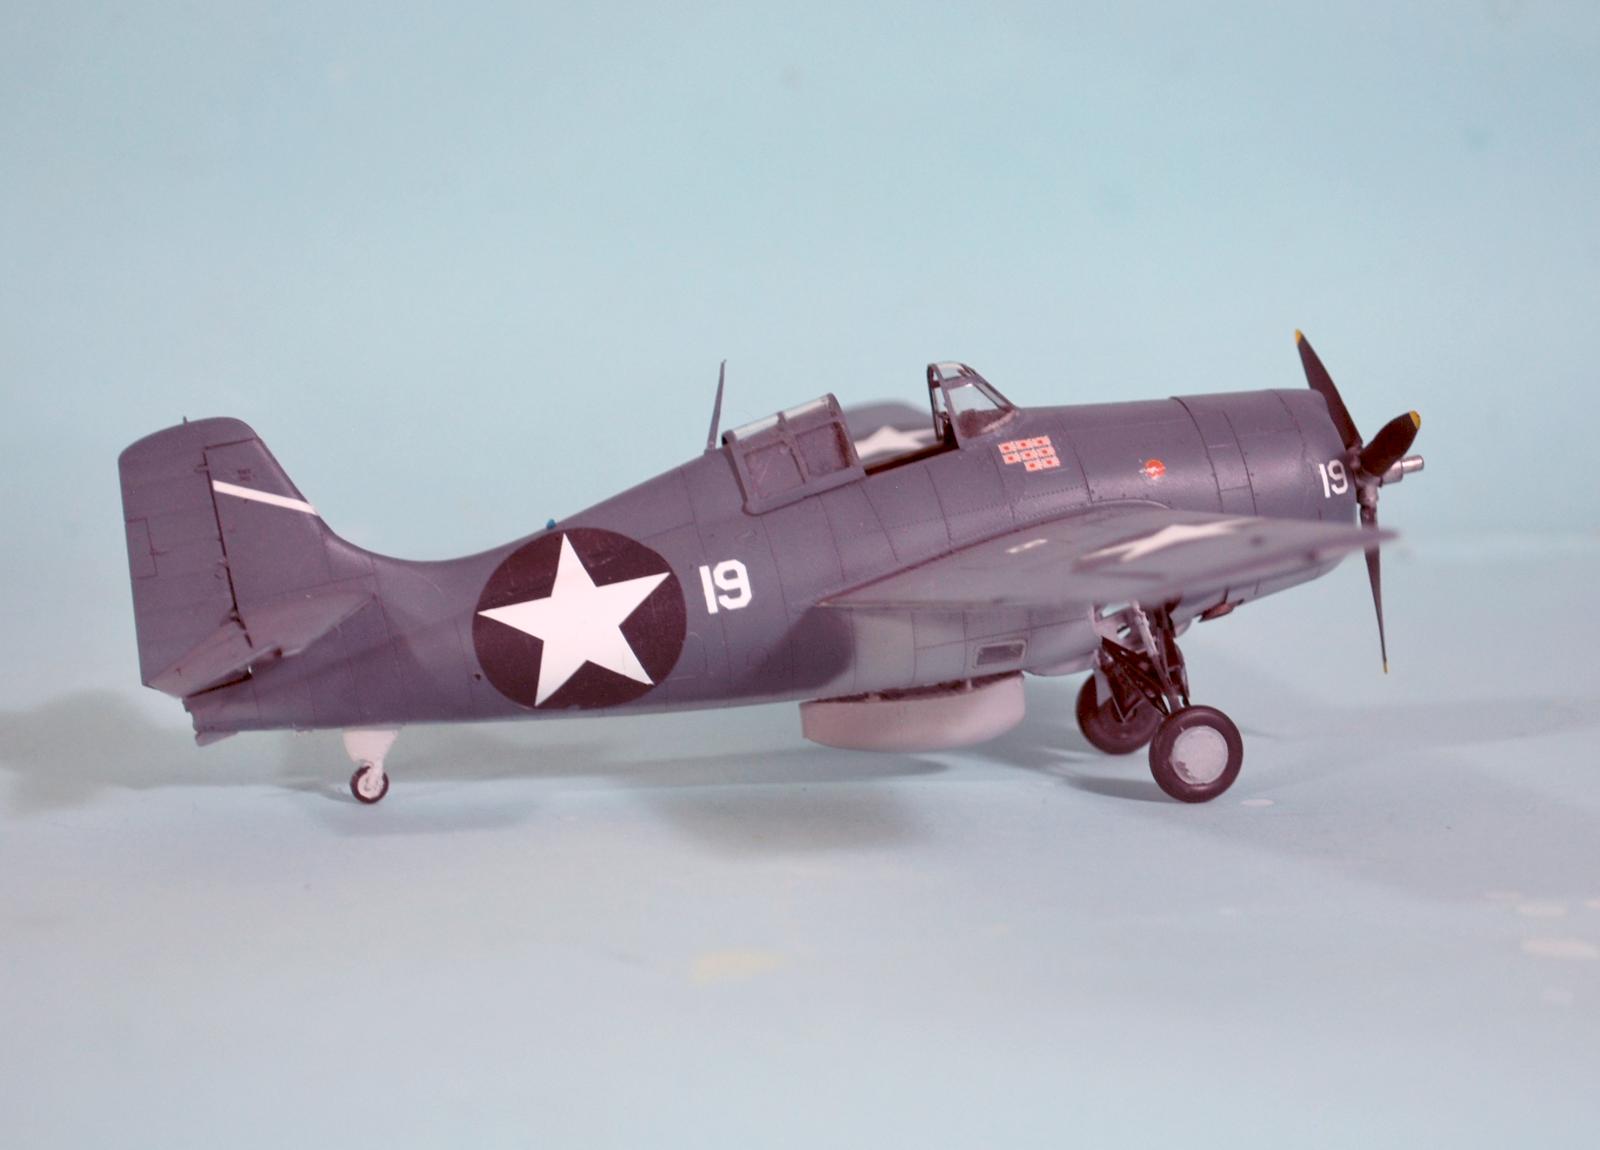
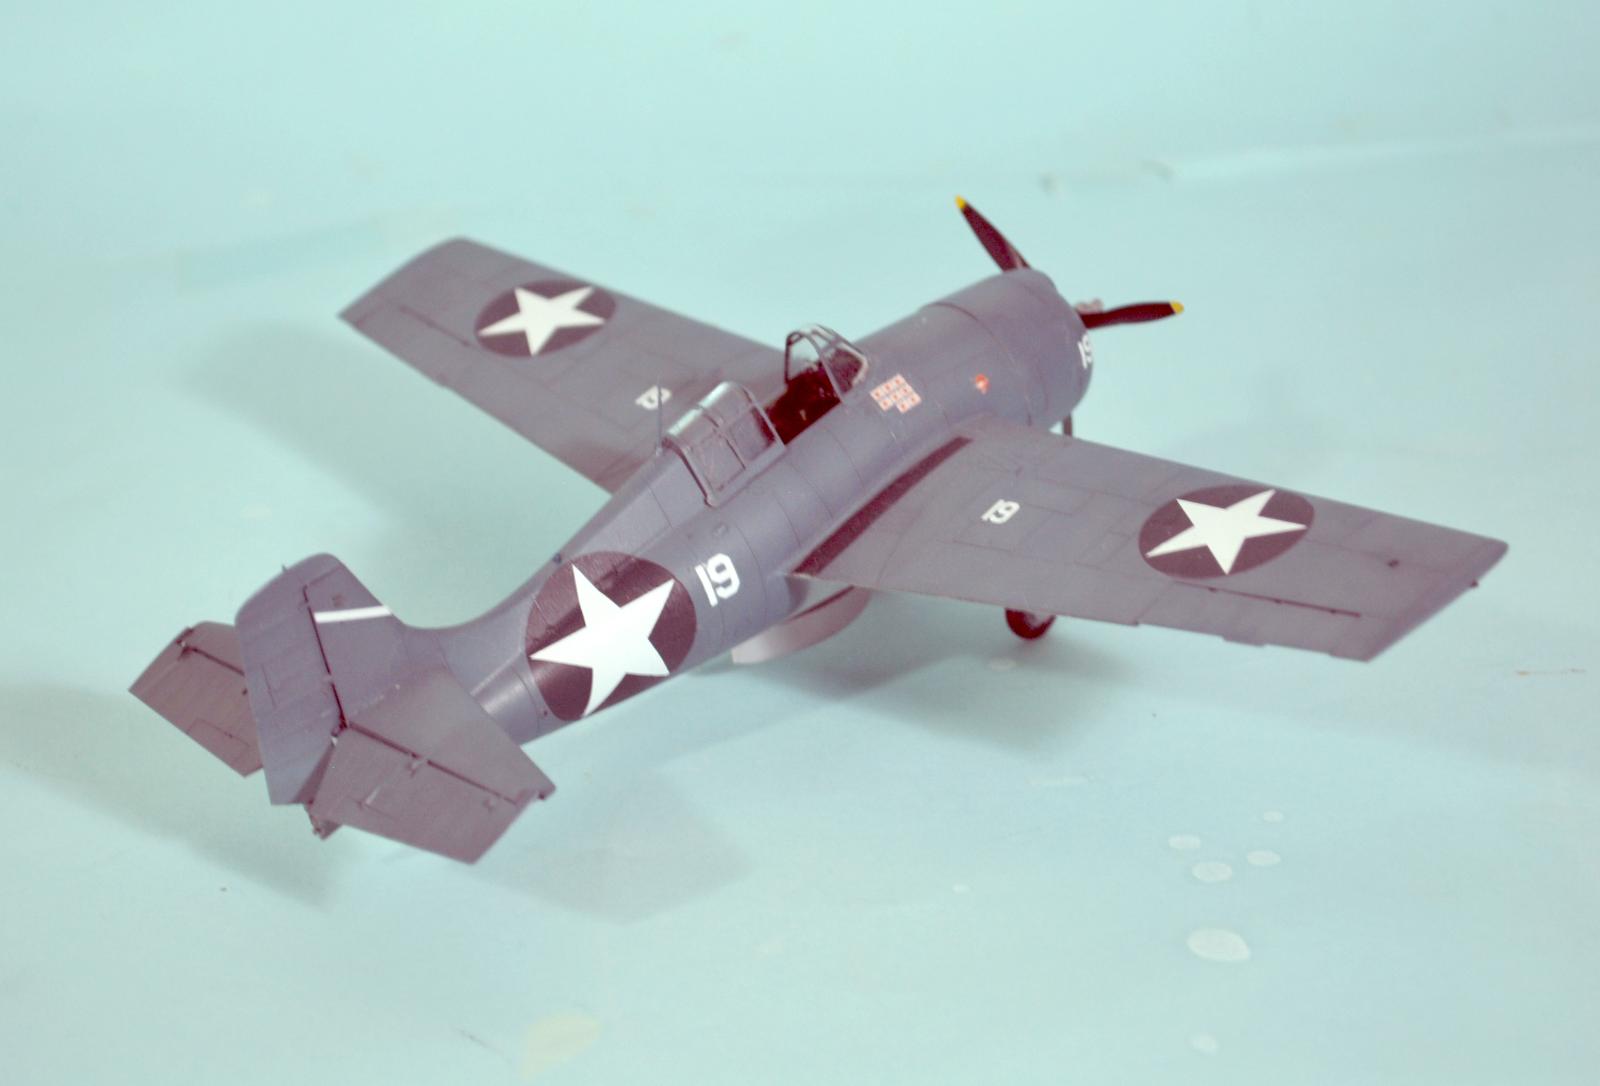
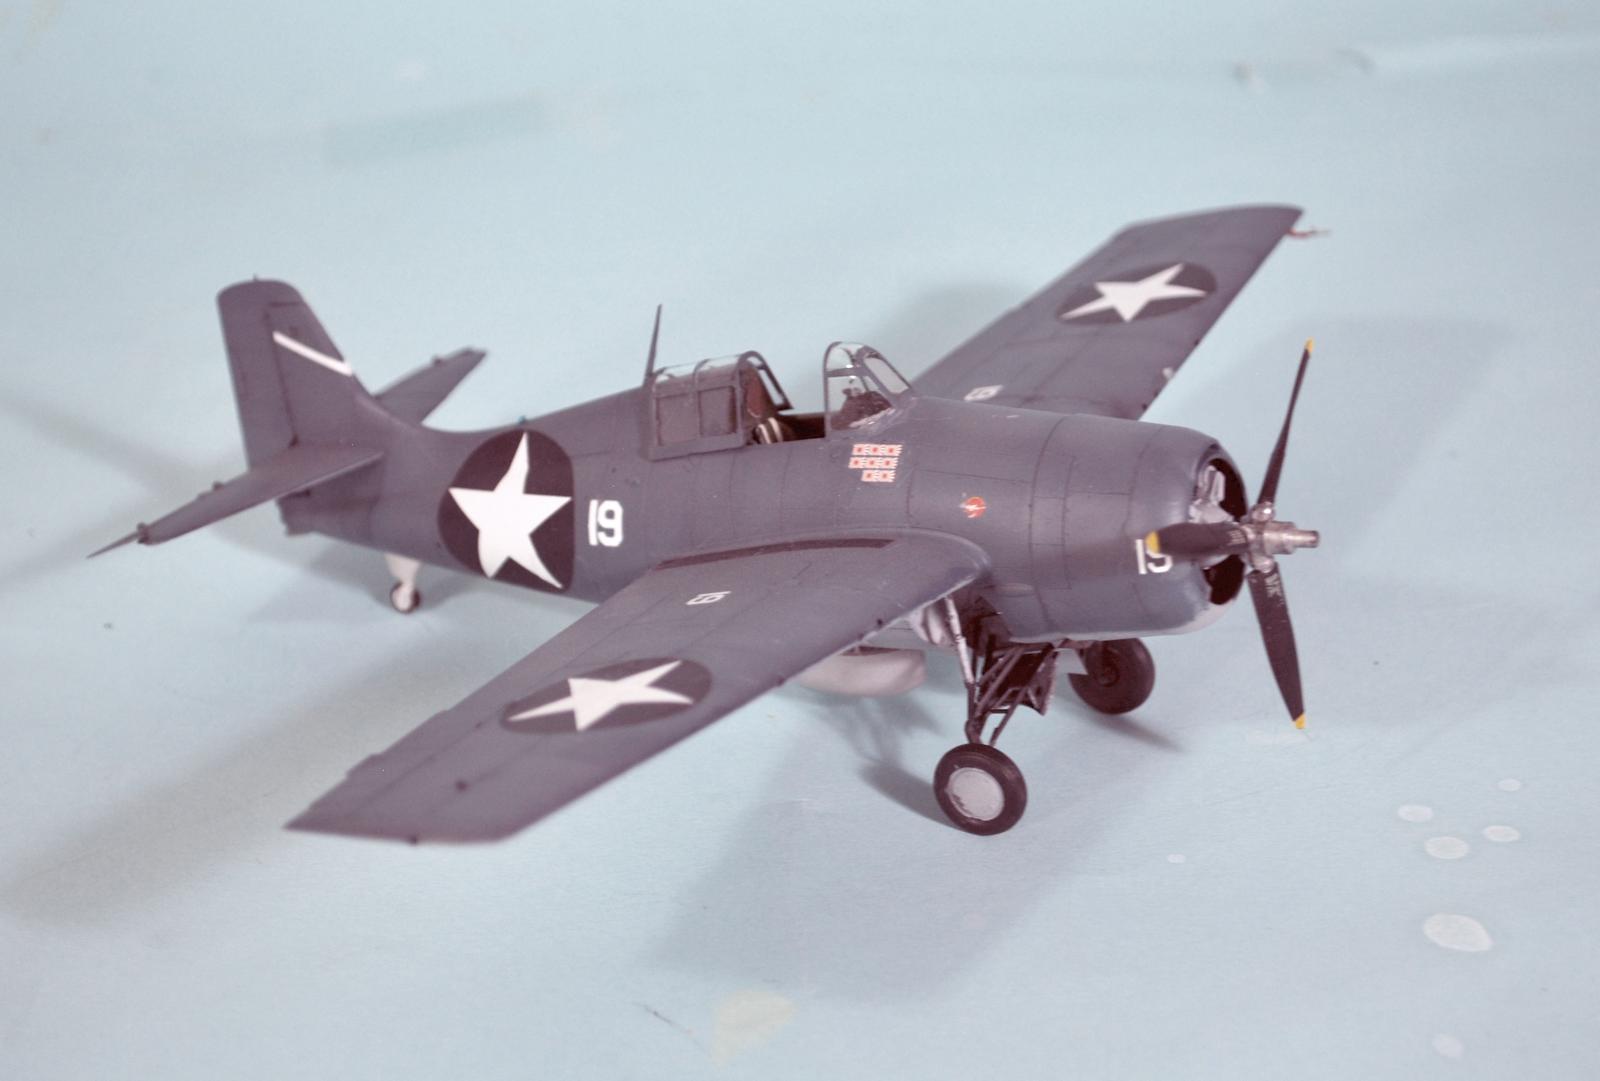
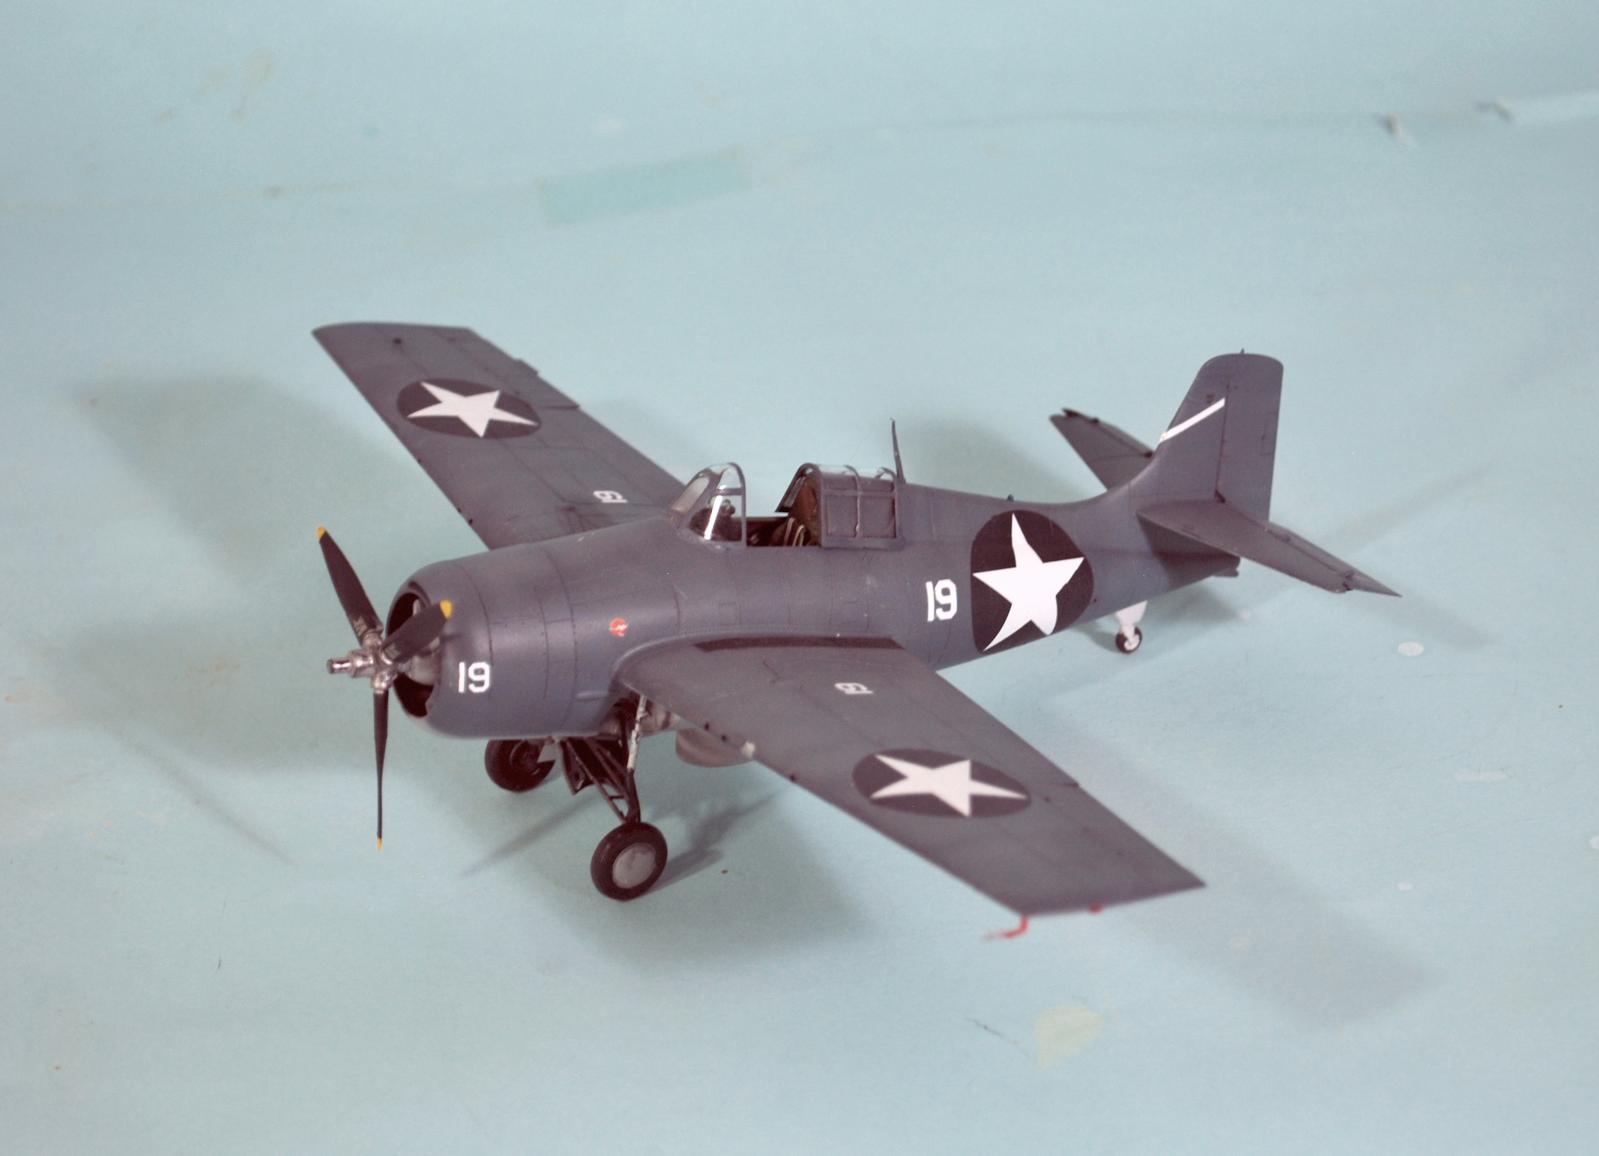
Eduard's F4F-4 Wildcat is the second major sub-type of this fighter released. As with the F4F-3, this kit effectively makes all other Wildcat kits obsolete, with greater detail and accuracy than any other.
The kit differs from the F4F-3 with the substitution of the wing sprue, a folding six-gun wing being provided. Eduard has also released a 3D printed wing fold option for those interested.
Decals are for six Wildcats including “Swede” Vejtasa's VF-10 Wildcat and two others from the fall of 1942 in the South Pacific; the other two are a VF-3 Wildcat at Midway and an F4F-4 in tri-color camouflage used as an advanced trainer in 1944.
Construction:
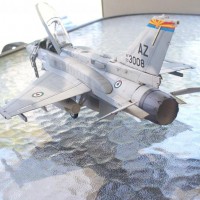
Construction is exactly like the F4F-3. I used a 3d printed cockpit, which does provide finer detail, but most of that isn't seen through the cockpit opening once the fuselage is closed up. If you take your time and ensure all sprue nubs are removed from the parts, you will not use any putty on the kit.
Painting:
I used Gunze-Sangyo Mr. Hobby Aqueaous H-42 Blue Gray for the base upper color, then went over it wit Mr. Color H-367 Blue Gray (it's lighter in shade) to simulate some sun-fading. Enterprise brought new Wildcats with her, and they weren't under the Southern Cross long enough to get extensively sun-faded. I used Mr. Hobby H-338 Light Gray FS 36495 for the underside color. Since these were new airplanes operating from a carrier that still had a pre-war air department, I kept the airplane clean other than engine exhaust.
Decals:
I used Yellow Wings Decals national insignia, and kit decals for individual markings.
Final Assembly:
I attached the landing gear and prop, unmasked the canopy and posed it open.
Overall:
Eduard keeps knocking each new release out of the park. Comparing this kit with the Tamiya kit from 30 years ago, it is clear that “Buildability” and “Accuracy” are two completely different things. The Tamiya kit suffers on every point, from a too-low and too-wide canopy and an incorrect cockpit to heavy surface detail; admittedly, that was as good as they could do during their battle with Hasegawa to get the most new kits released back then, but time has overtaken that kit very obviously. Eduard's Wildcats are a winner all the way. If you take care in assembly, you are guaranteed a nice result. Recommended for all Wildcat fans.
Review kit courtesy of Eduard.


This looks great ! I especially enjoyed reading the article and I learned a few things along the way. I’ll definitely click on the buttons before leaving. Thanks for sharing this with us. How does it compare with the Hobby Boss kits ?
@lgardner - there's no comparison. The HB kits have a lot of faults (being downscales of the Trumpeter Wildcats which have A LOT of faults) regarding things like where the wings are attached. etc. The Eduard kits are right.
Beautifully done, Tom @tcinla. I just finished reading the Time/Life "Carrier War" and enjoyed your recap of that crucial period of the Pacific war.
Excellent result - Tom and very interesting history and detail. I was particularly fascinated by the details on F4F weight. Great article.
That is a really impressive build of a truly impressive little kit. The center line fuel tank is certainly different.
Already built the Eduard -3 Wildcat and yes it blows everything else out of the water. Just remember to put stoppers in the wings or there will be machine gun barrels rattling in the wings if you are not careful. And truly have patience if you are building a Wildcat with the little bomb racks, like the machine gun barrels the little PE sway braces tended to go ping but luckily I also have the Midway dual combo which will be a future build using the Fundekals sheet.
Nice job!
Excellent build and superb article, Tom!
@tcinla - Once again, I truly appreciate the history behind the build Tom. The amount of research that must go into your articles is incredible... oh, and the build turned out really well too! LOL
Fortunately, with an article like this, you're getting an adaptation from my book. (In this specific case, from "Under The Southern Cross").
Very very very nice, Tom @tcinla
The historical part is really interesting and informative, thanks for sharing.
Great work Tom - I'm looking for ward to building this kit myself!
An excellent explanation of of the battle of Santa Cruz and the contribution of “Swede” Vejtasa and all the other US servicemen who fought there.
Well done, Tom
Nice cat, Tom! I’m eagerly awaiting the FM-2.
Excellent Hellcat, well done Tom. Love the write-up and history as well, thanks!
excellent build and history Tom!
Another beautiful build, and snippet of history. Always enjoy your posts.
Another great one Tom!
Beauty, Tom @tcinla! 👍 Great history lesson as well! 😁
Excellent history lesson as usual, Tom @tcinnla and a superb looking Wildcat. Another winner!
Another great job, Tom. You always inspire me in both your history lessons and model building. Thank you!
Another great build and superb story to go with it. Got to get me some Eduard Wildcats!
I enjoyed seeing those in person last year. Glad to see it completed. I agree with you on the Eduard, they are way above the competition in terms of detail and build.
My Hobby Boss kits are just going to sit in their boxes.
Finished my Wings of Gold F4F-3 (I know the green I used for Willow Green (closer to Interior Green) is wrong, but I had to use what I have.)
1 attached image. Click to enlarge.
That looks very good, and that shade of green is quite close to Willow Green. Excellent result on this.
Well done Tom, great looking flying beer barrel. Amazing what that little bird accomplished during the war.
Another great story and build Tom!
I like Your painting very much!