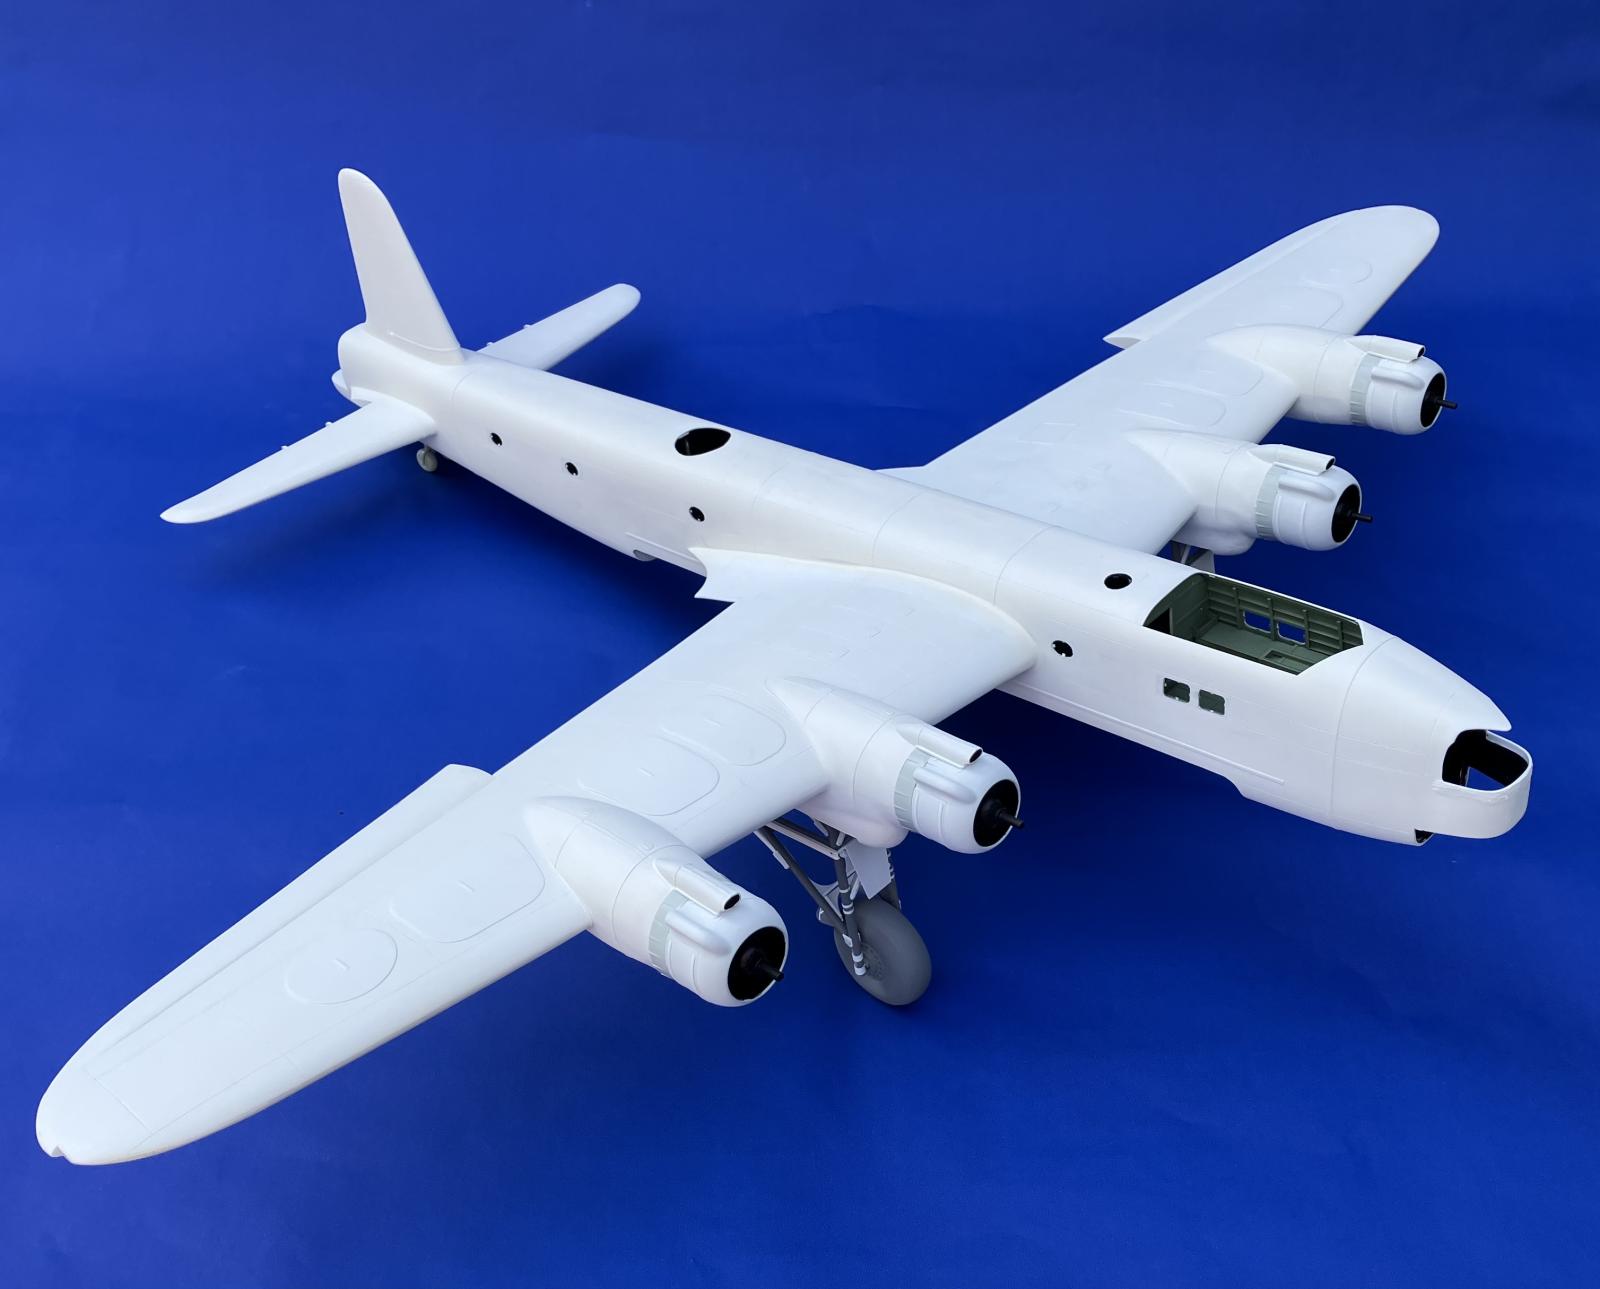
1/32nd scale Short Stirling – WIP update

Greetings fellow imodelers!
I thought I'd update you all on my current long-term vacuform project - a Short Stirling in 1/32nd scale from Tigger Models which are the ex-ID Models moulds. I began this build around 5 years ago but ran out of steam and got side-tracked with other models. I'd made a start on the wings but had not made the best job, so it was consigned to the loft. However, after a conversation with a fellow modeller from The Netherlands and the offer of parts from his also-stalled project, got things moving again and I've been working on it on and off for the last year.
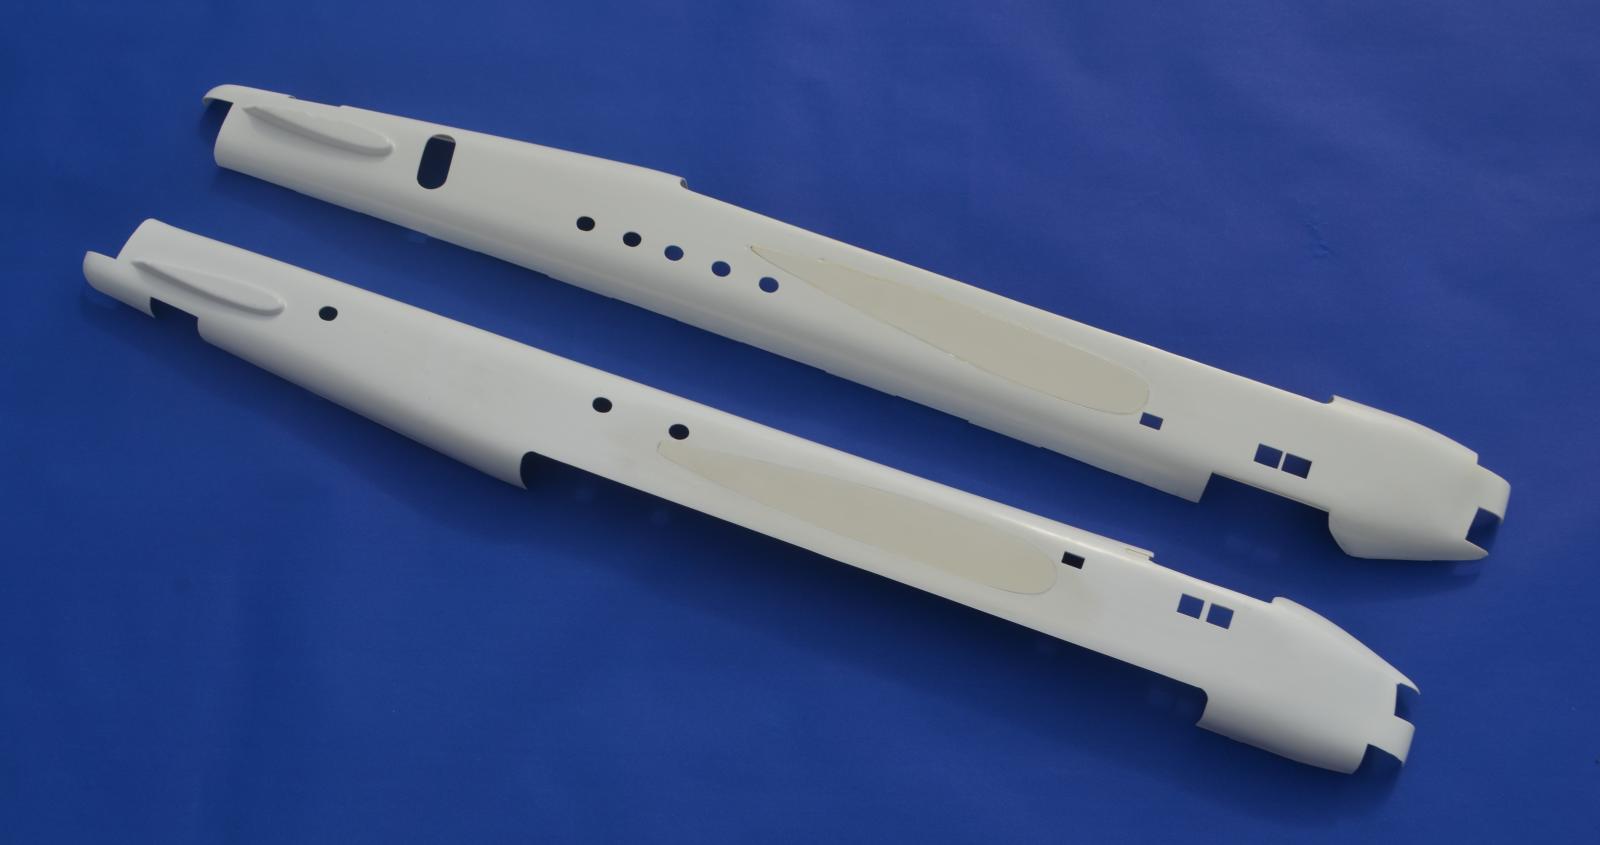
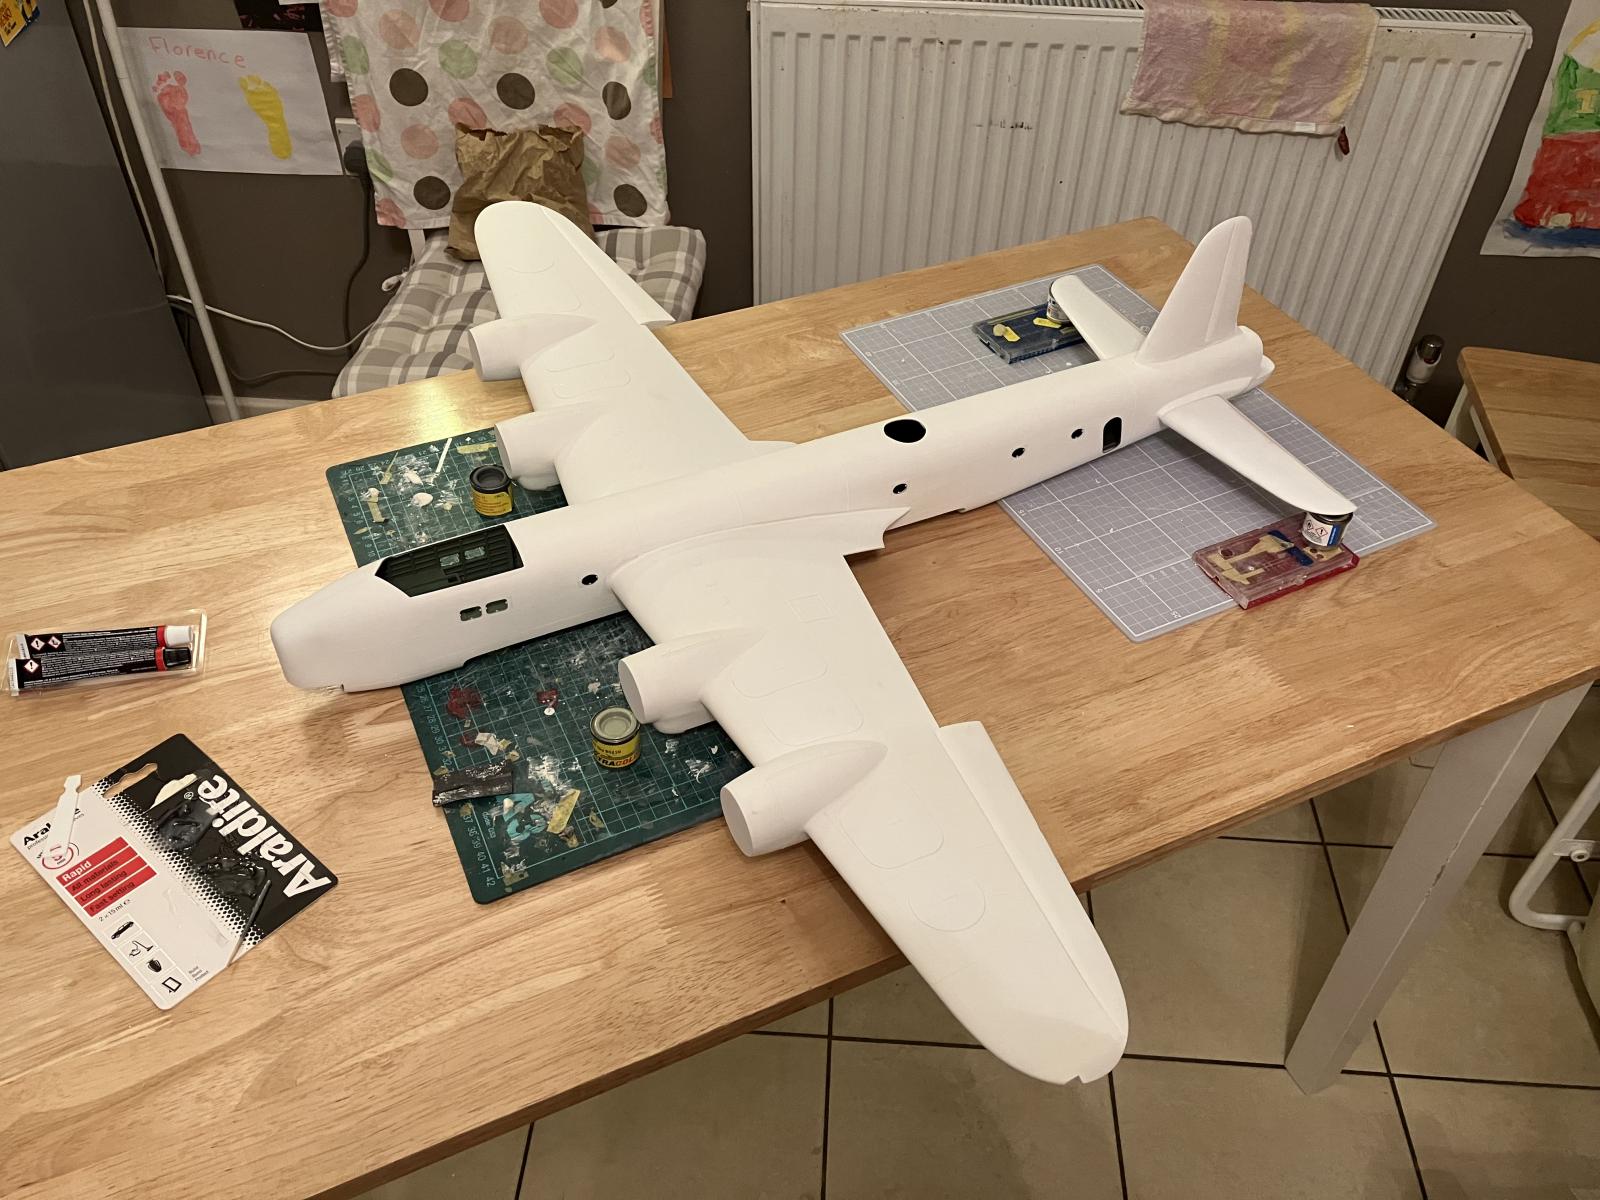
Kits such as this are very basic and just give you the shapes of the fuselage, tail, engines, stabilisers and wings in thick vacuformed plastic. There are no interiors or detail parts, the surfaces are completely smooth and in short, are bumps in plastic. They are a blank canvass for the modeller to work his/her magic - the sort of project I love. The model is around 3ft in length and approaching that in span, so it's a big canvass indeed!
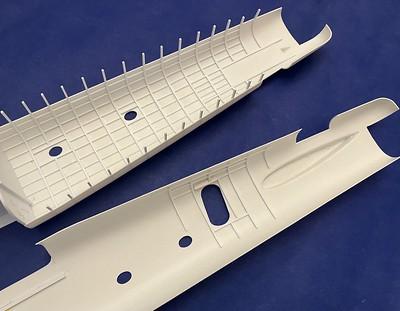
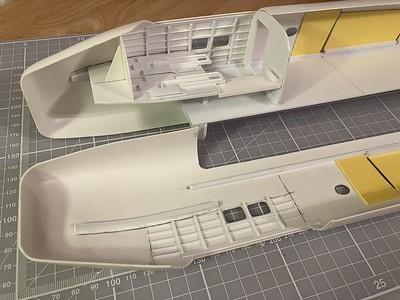
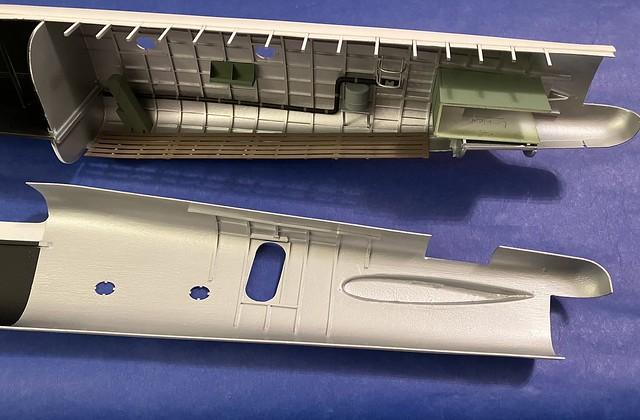
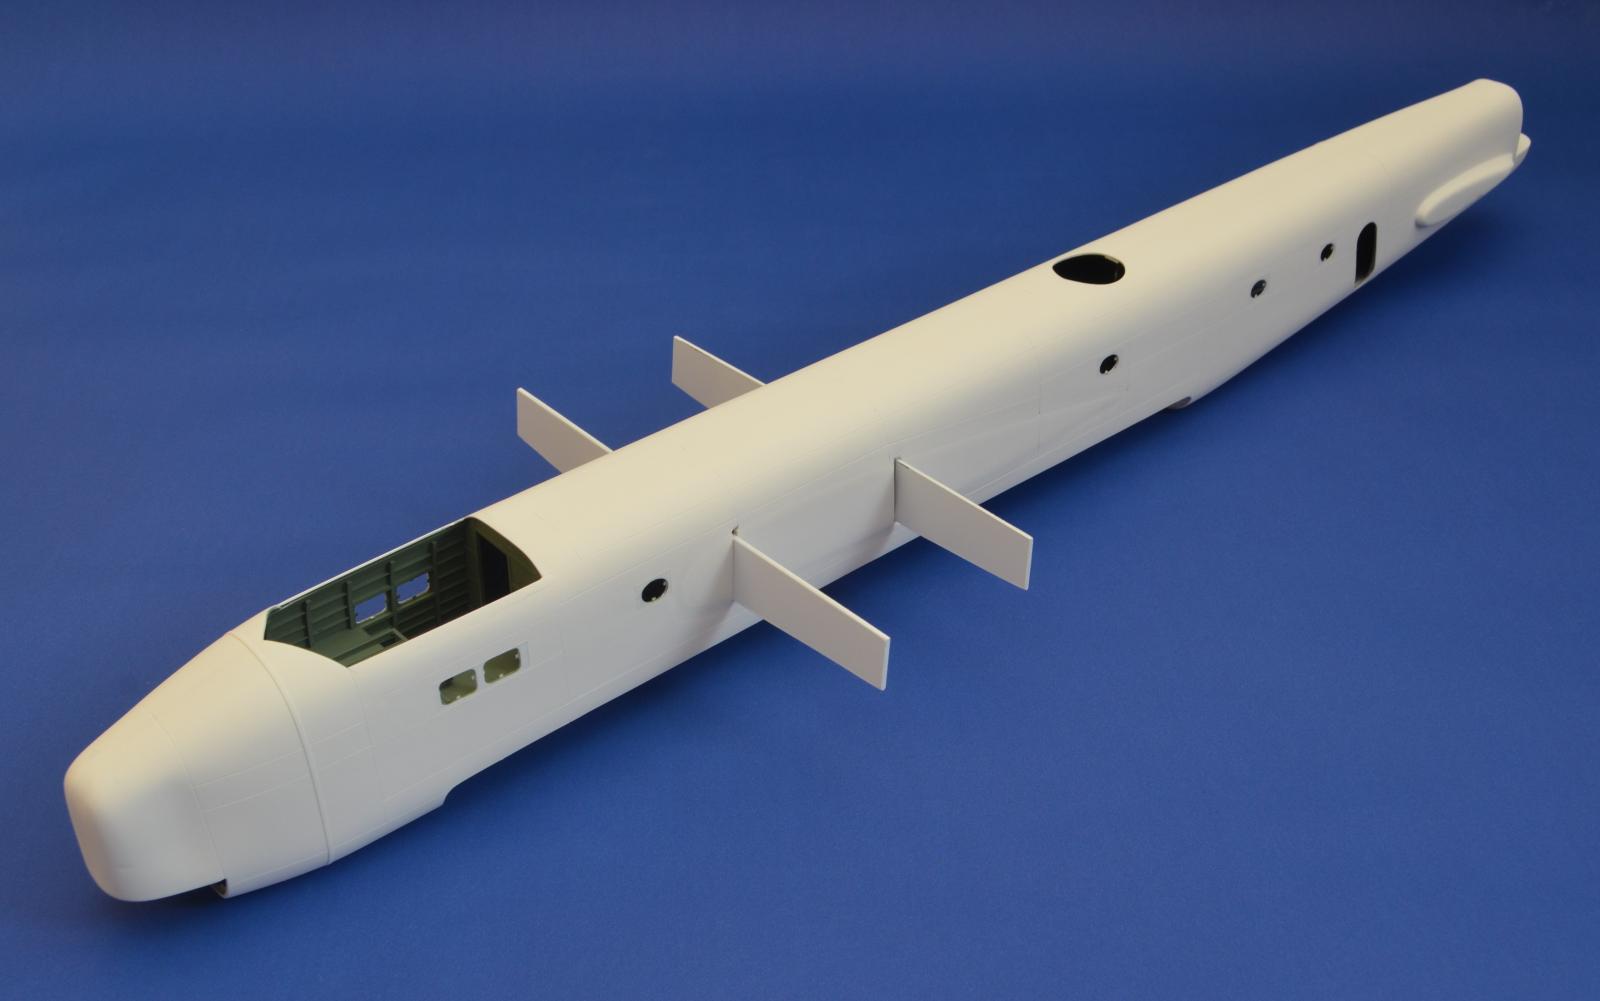
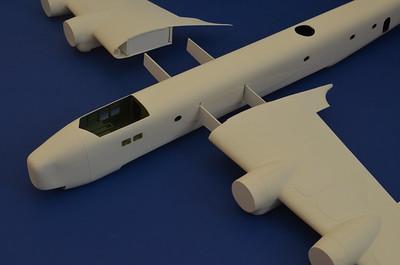
Work began on the removing the fuselage halves from the sheets and cutting the openings for the cockpit, turrets and bomb bay etc. Unfortunately the kit's wing root is in the incorrect position, so this had to be removed, blanked off and repositioned. This was all done using the classic Airfix 1/72nd scale kit as a guide, with all measurements being scaled up to 1/32nd scale. Next, the visible areas of the interior were made from scratch, using Evergreen strip and plastic card. Only the basics of the flight deck have been completed this far, with the remaining detail to be made towards the end of the construction process just before the canopy goes on. When the interior construction was done, it got a quick lick of paint before the fuselage halves were joined using plastic tabs to align everything correctly. Spars were made and added in preparation for the wings to be joined at a later date, and the fuselage scribed its panel detail.
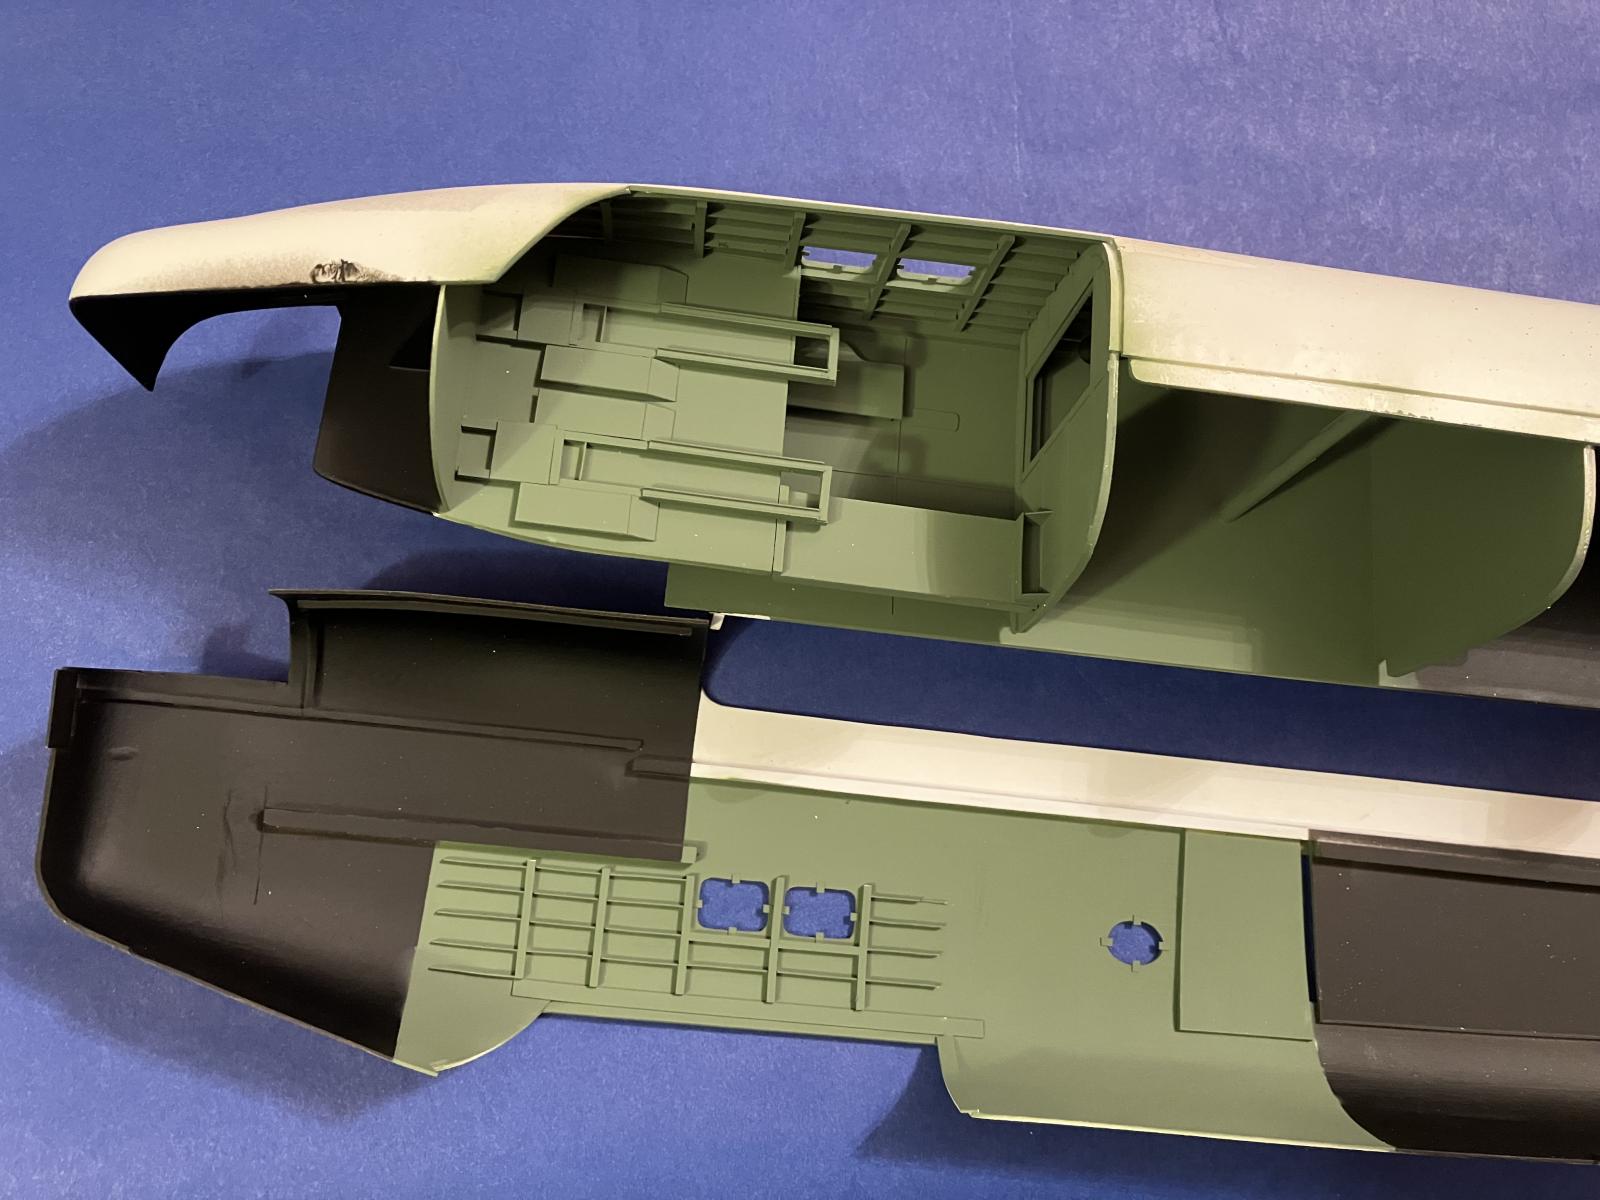
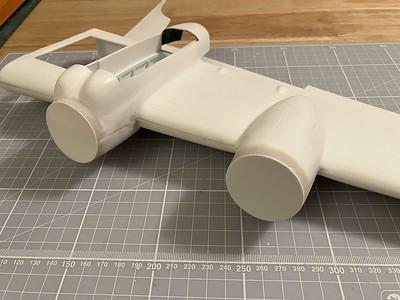
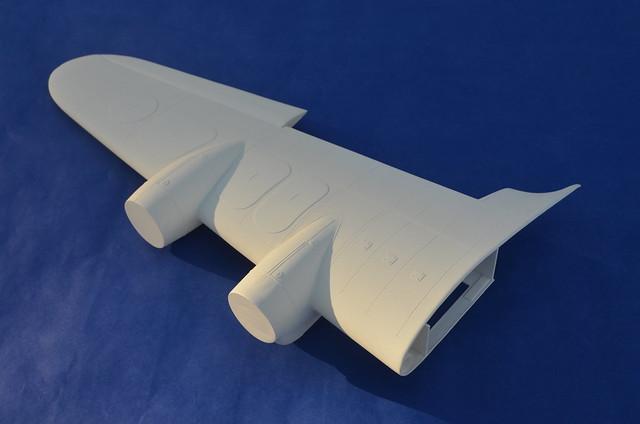
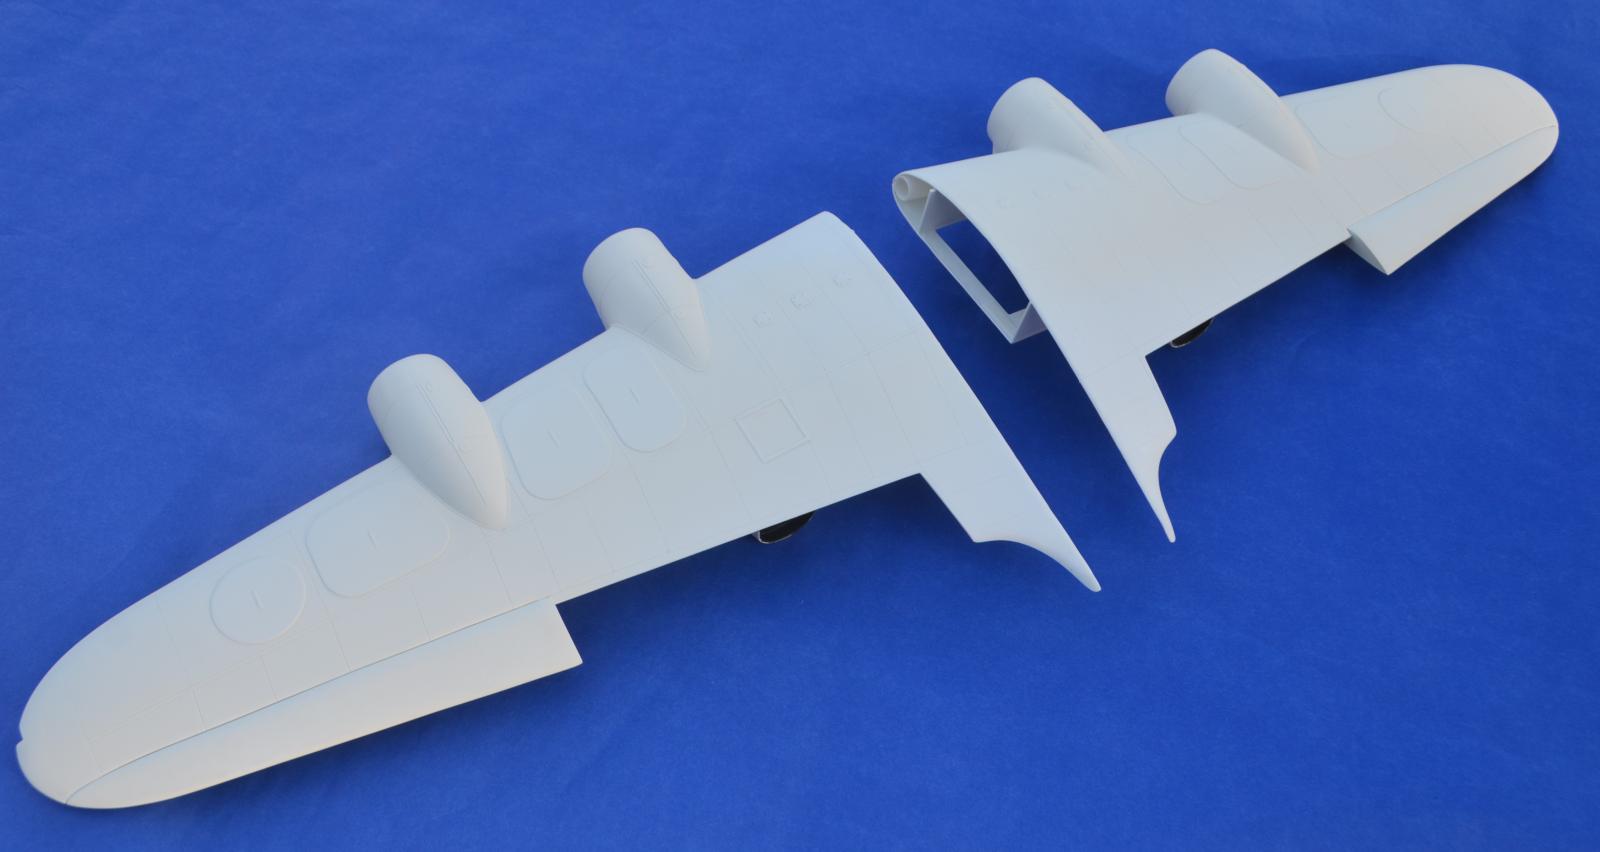
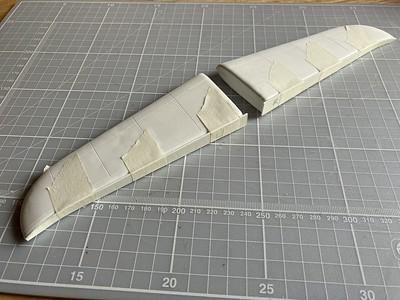
Next came the wings. I threw my earlier efforts away and began, once again, by removing the new wings (from my friend in Holland) from the backing sheet. All panel detail was scribed onto the wing surfaces, and thick spars were fashioned from 2mm plastic card to support the weight of the model. The basics of the wheel bays were made at this stage with a view to adding more accessible detail at a later stage. The wings were too narrow in depth and lacked the correct and distinctive aerofoil shape, so the spars were vital for correcting the wing's profile. The firewalls were made from plastic card to match the Revell Beaufighter cowls which would be used for the engines. All this was blended with filler, and the wings began to take shape and take on the form of the real aircraft. Once the wings were completed to a point that they could be joined to the fuselage, I slid them over the fuselage spars and everything locked nicely into place.
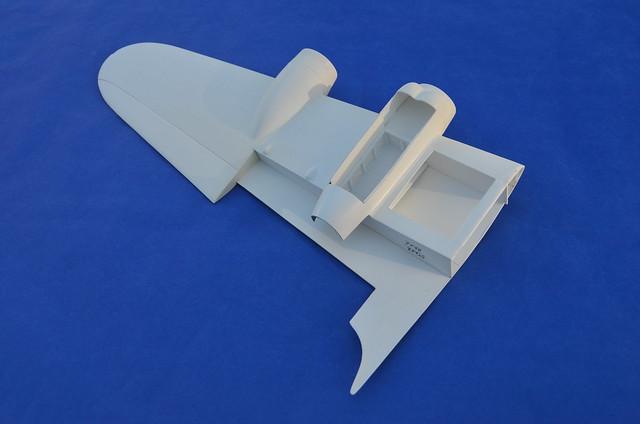
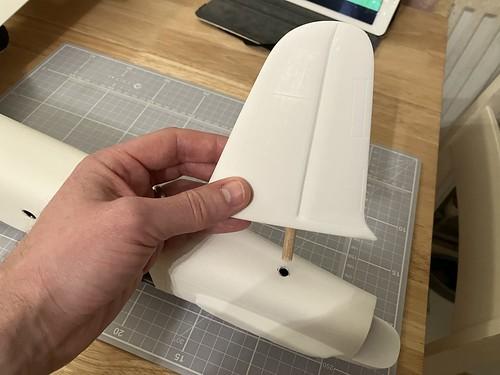
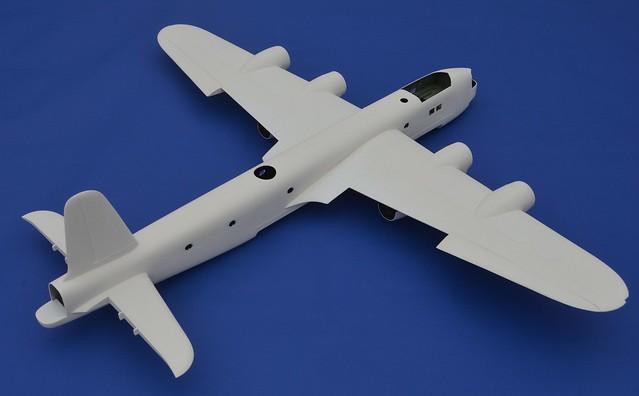
Next came the fin and stabilisers - once again everything was sanded to shape and scribed, before being added to the fuselage as appropriate using wooden doweling as spars. All joints were blended with filler and any lost detail re-scribed and then, with the main construction done, I gave the whole airframe a coat of white primer to highlight any blemishes that needed attention.
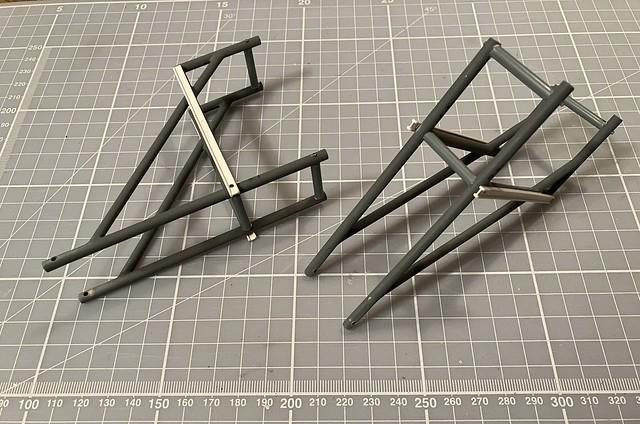
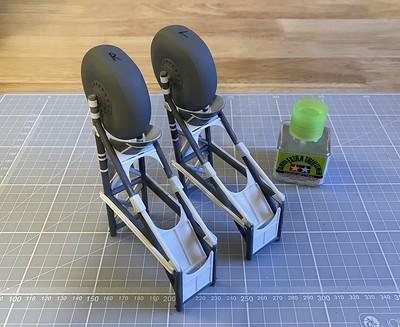
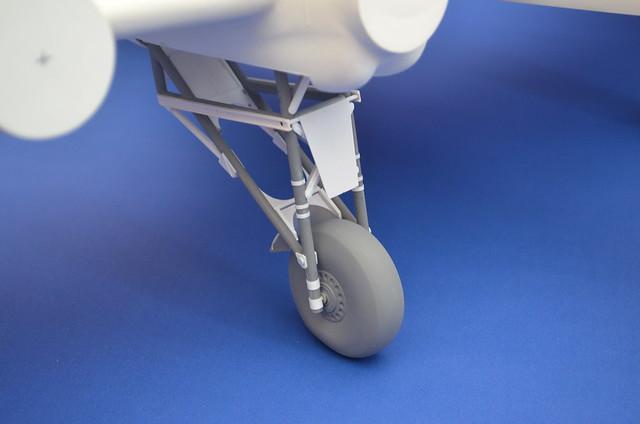
Next came the landing gear - a very complex structure on the Stirling! I used some spare HK Models Lancaster wheels (both aircraft shared the same hub) but enlarged the tyre's diameter by wrapping plastic around the tyre and shaping and blending it all with filler. The legs/struts themselves are wholly scratch-built and were made using mainly left-over sprue from the HobbyBoss B-24 kit, joined together with metal pins and detailed with Evergreen and various plastic card. The process of making the landing gear took me the best part of 2 months, but they look the part. Details such as brake wires and the doors are still be added, but will be done so later on.
The kit supplies engine cowlings but they are very basic. Therefore, Revell Beaufighter cowls and engines have been used - luckily both aircraft share the same 'power-egg'. These were constructed and painted, some additional detail added such as lengthening the intakes above the engines and adding fasteners, etc., before they were attached to the firewalls. Oil coolers, which hang below the nacelles, will be made and added in due course.
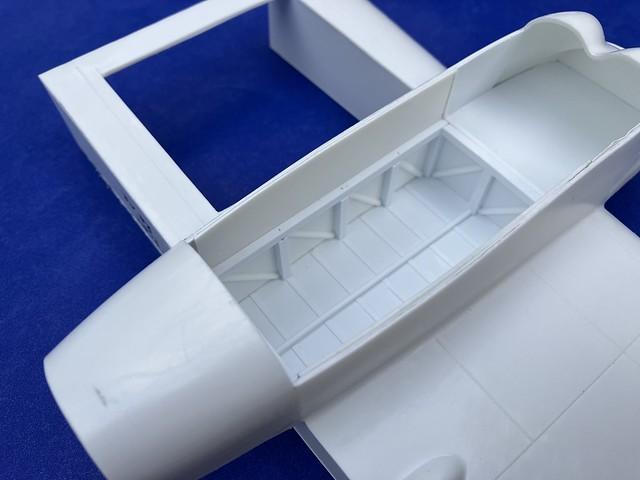
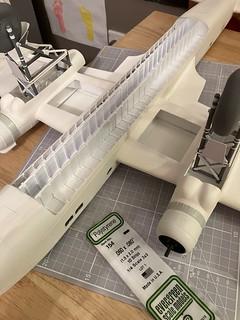
I am currently working on making the bomb bays - the main fuselage bays are more or less done (including 238 individually cut pieces of ribbing!) and I'm now about to turn my attention to the wing bomb cells.
Having passed the one-year point, I think I have around another year or so to go before I will be able to call this finished - I'll keep you updated from now on when there's some more meaningful progress to report.
All the best,
Tom


Absolutely wonderful result so far, Thomas!
Thank you!
Wow all the comments to be made. "Did you buy stock in evergreen?". "Whaddya mean it's big, that thing had short little wings". "How many gallons of paint you gonna need"? That is quite the project, and so far looks VERY impressive. Please keep forging ahead!
In all seriousness I think I’ve spent more on Evergreen than I did on the initial purchase of the kit!
A 1/32 Stirling is impressive, but in vacu-form even more, Thomas @vacform
All the extras you already added are amazing.
You deserve a lot of respect to tackle this kit.
Have a go at one, John - they’re great fun and not as difficult as many perceive.
IMPRESSIVE! You are nailing this!
And I'm concerned about finally tackling the H-K 1/32 Lancaster...
Wow! Just, wow!
You constantly demonstrate how far we muddlers have to go to become modelers, Mr. Probert.
Vacs are nowhere near as scary as people believe. I am simply a trial and error modeller and I can assure you there are plenty of balls-ups on the way. You just need to enter a build like this with the mindset that it’s going to take a while and you need to get creative!
That looks like hours of fun. The interior work is particularly impressive and the borrowing of parts from other kits.
Many hours indeed. I estimate I’ve spent around 400hrs thus far but that’s all part of the fun…
Simply Amazing! It looks like the Vacu-form kit really only offers you a shell in which you scratch build EVERYTHING! Wow! That is some incredible and impressive work. I especially like what you did with the landing gear.
Thanks, Walt. This is particularly basic vac but there are some that provide all that you need. This one, however, just gives the basic shell.
The key is to approach each stage a mini model in itself, and then these bits can be brought together to make a completed model. These types of model usually take a couple of years on and off, but are immensely rewarding and great fun!
That’s impressive. What a monster.
Great work on a really huge kit, Thomas (@vacform). Vacuforms are really evil and it takes a special sort of modeler to build one. I can't even manage a vac canopy, much less a whole plane.
Thanks, George. Vacs are nowhere near as challenging as many believe. They just need a different approach. Any reasonably competent modeller can build one - you just need to think outside the box a little!
Amazing work, but headlines are for finished models, why not post it in one of the groups.
Apologies, George. I wasn’t aware of the protocol. I have regularly posted WIPs in the past on this page (as have others I believe) but if the moderators feel it inappropriate I will happily delete.
A labor of love, indeed. Great stuff.
Incredible. Far beyond my abilities. I am too much of an instant gratification builder. Anything over a couple of weeks would wear me out. My hat is off to you.