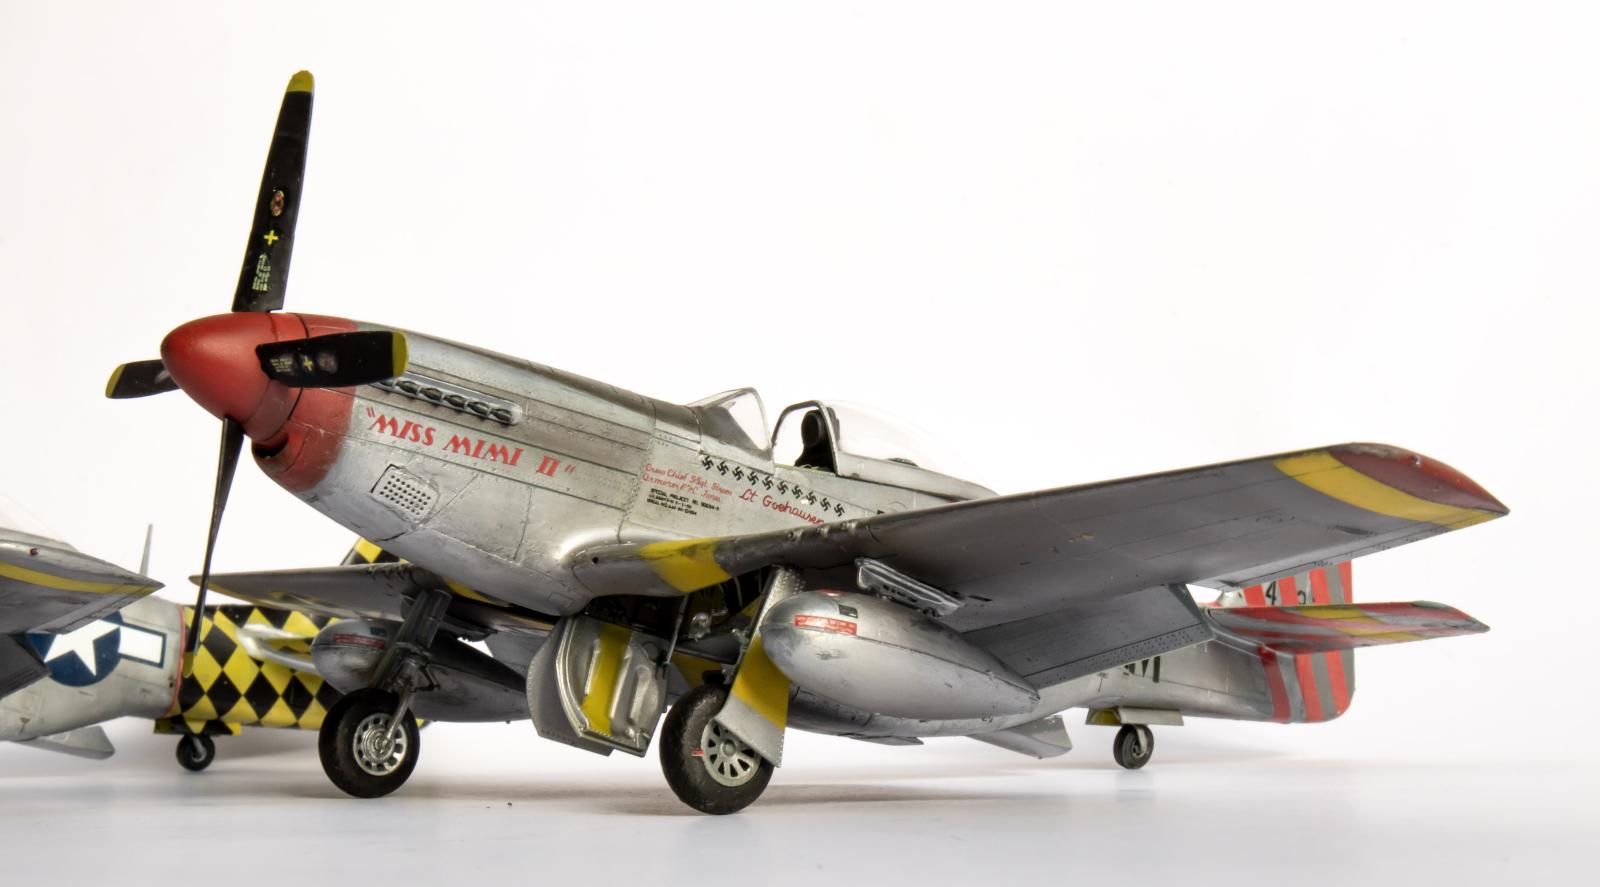
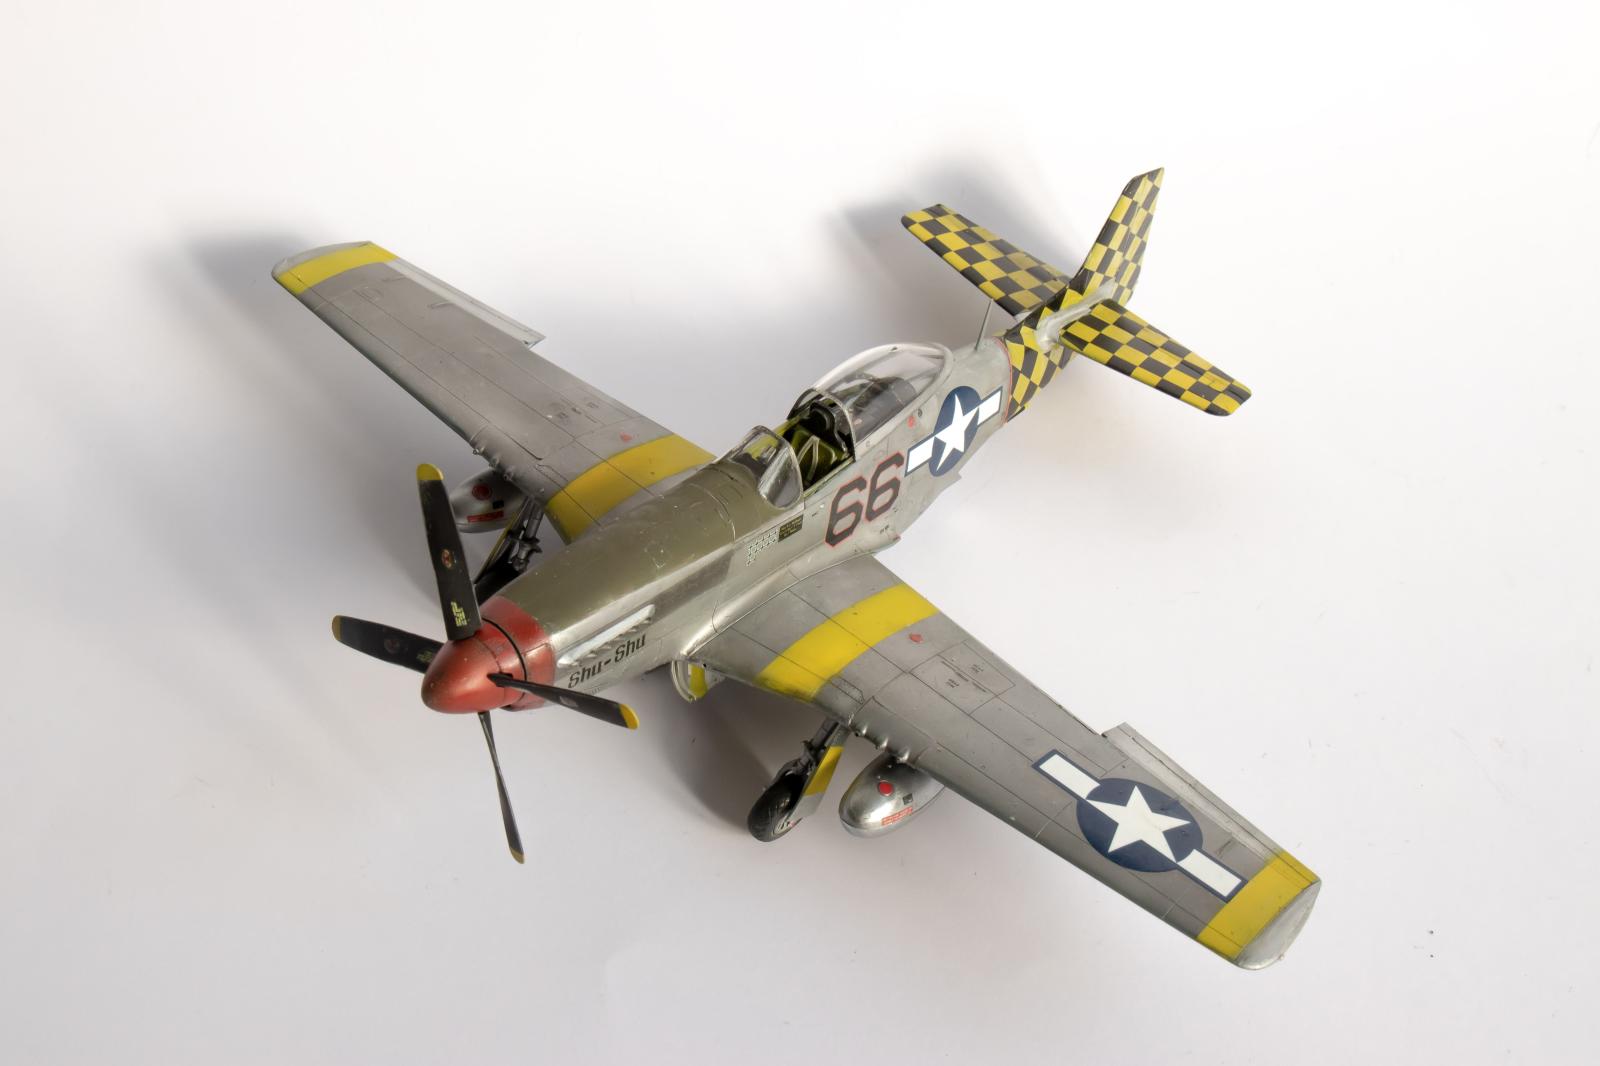
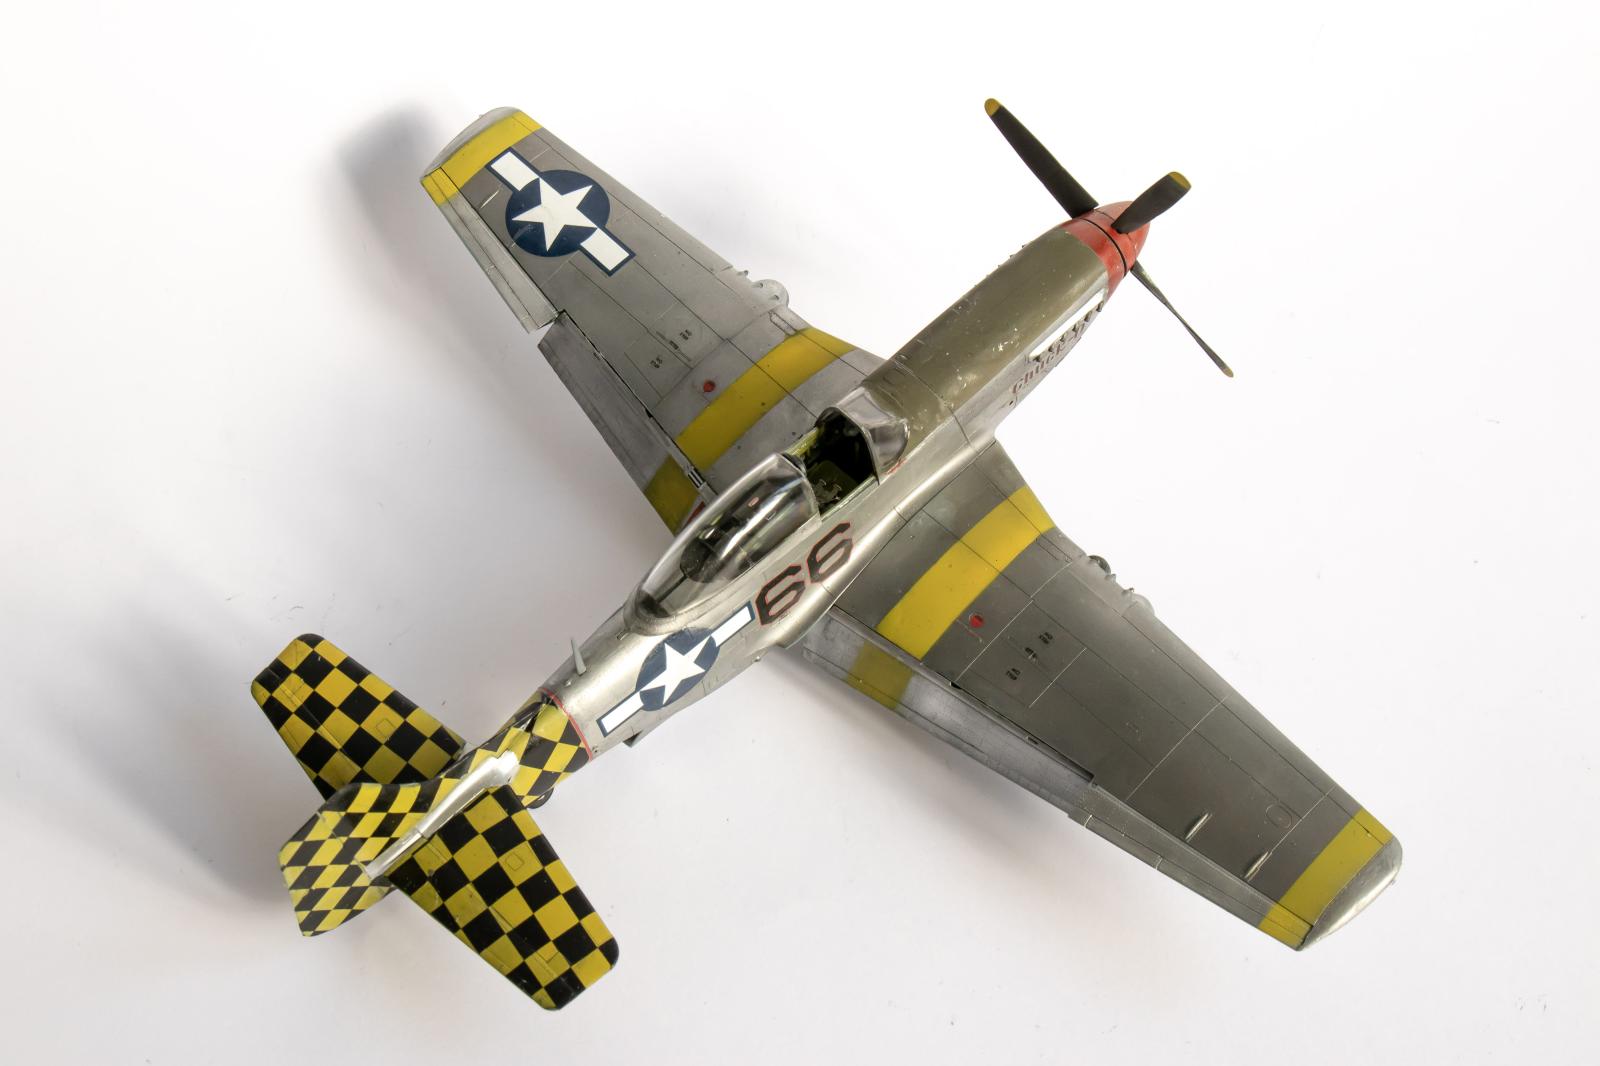
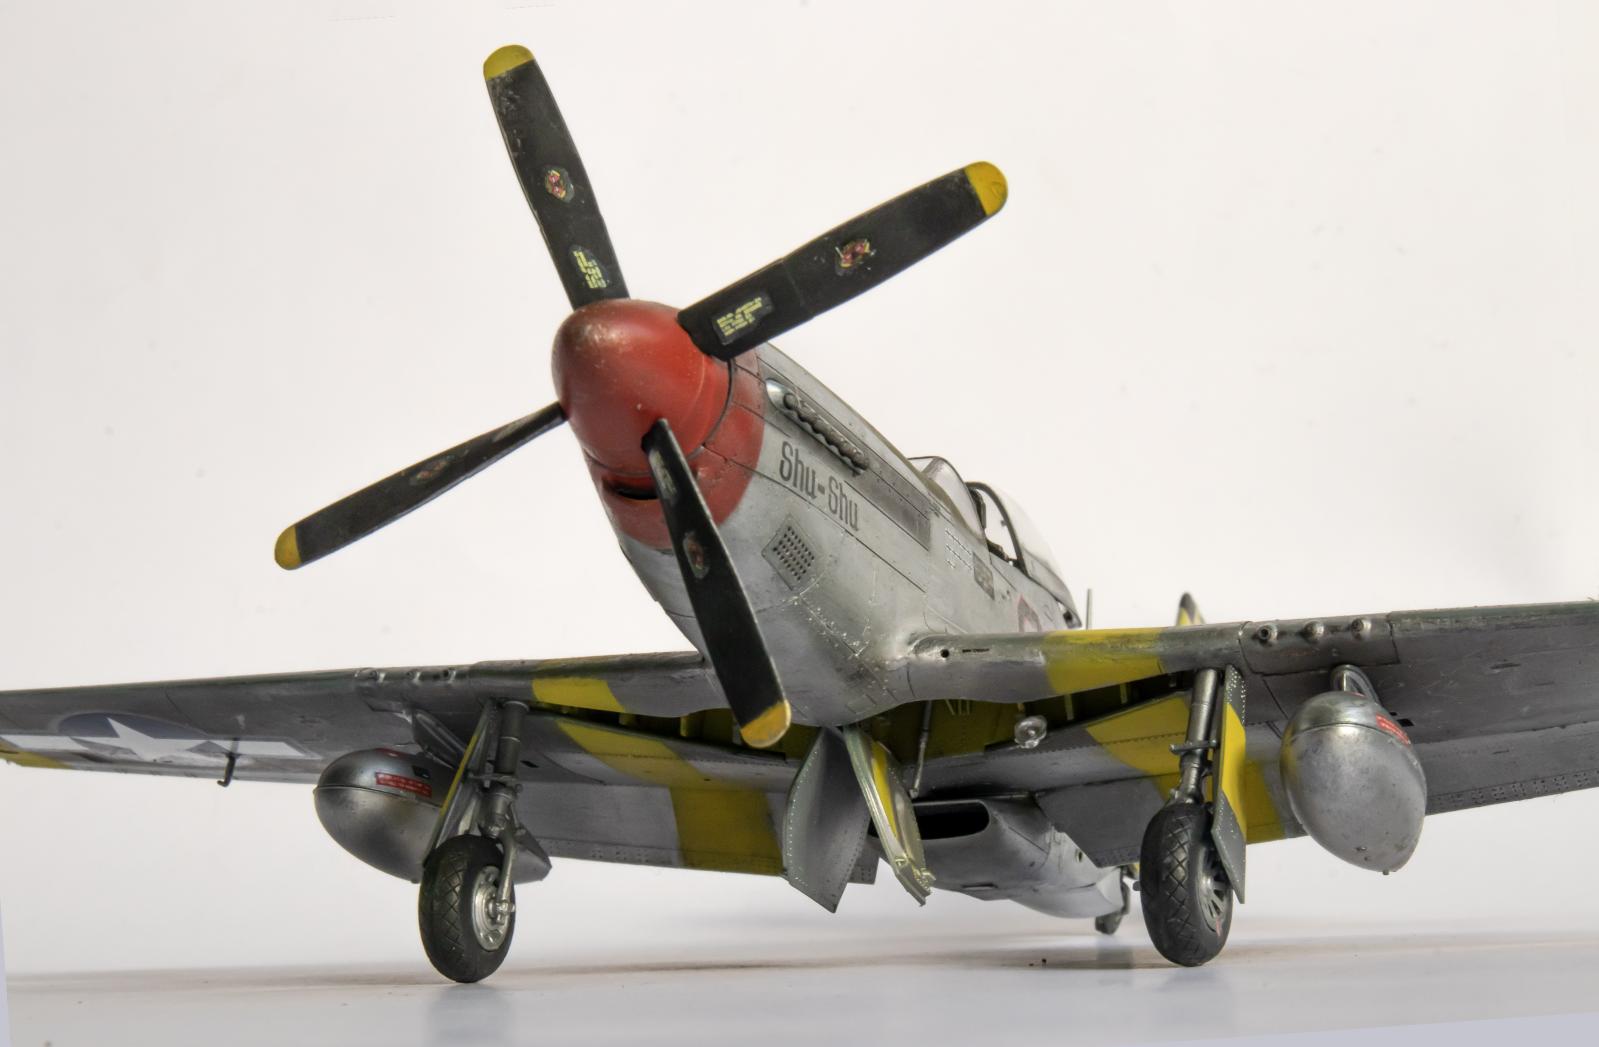
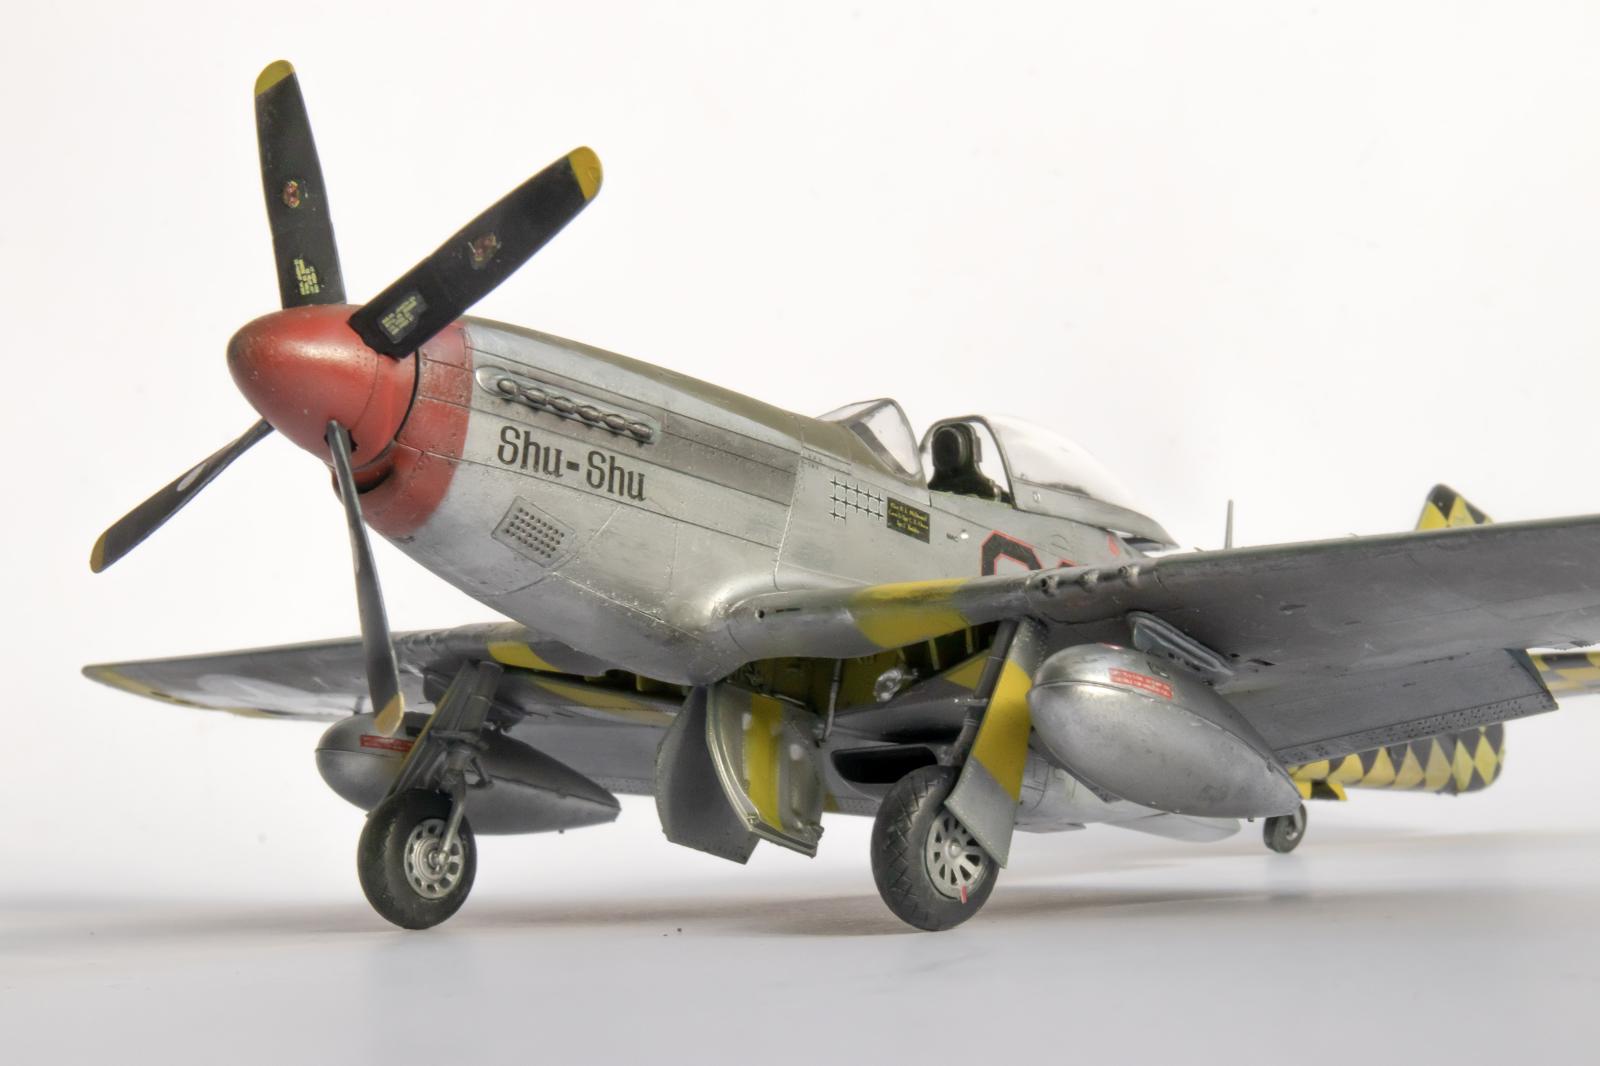
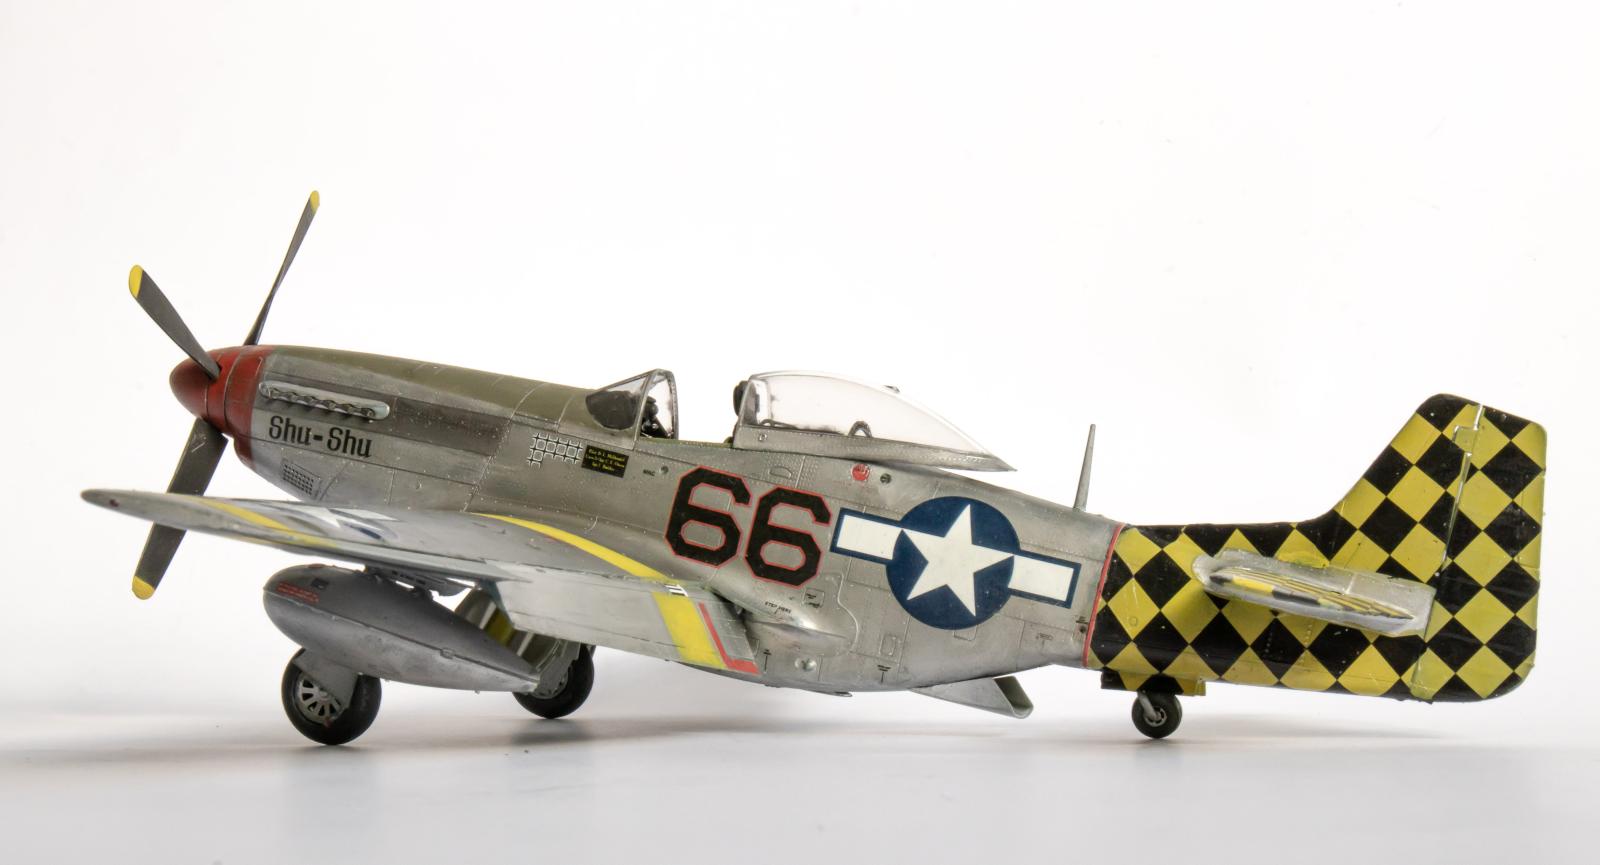
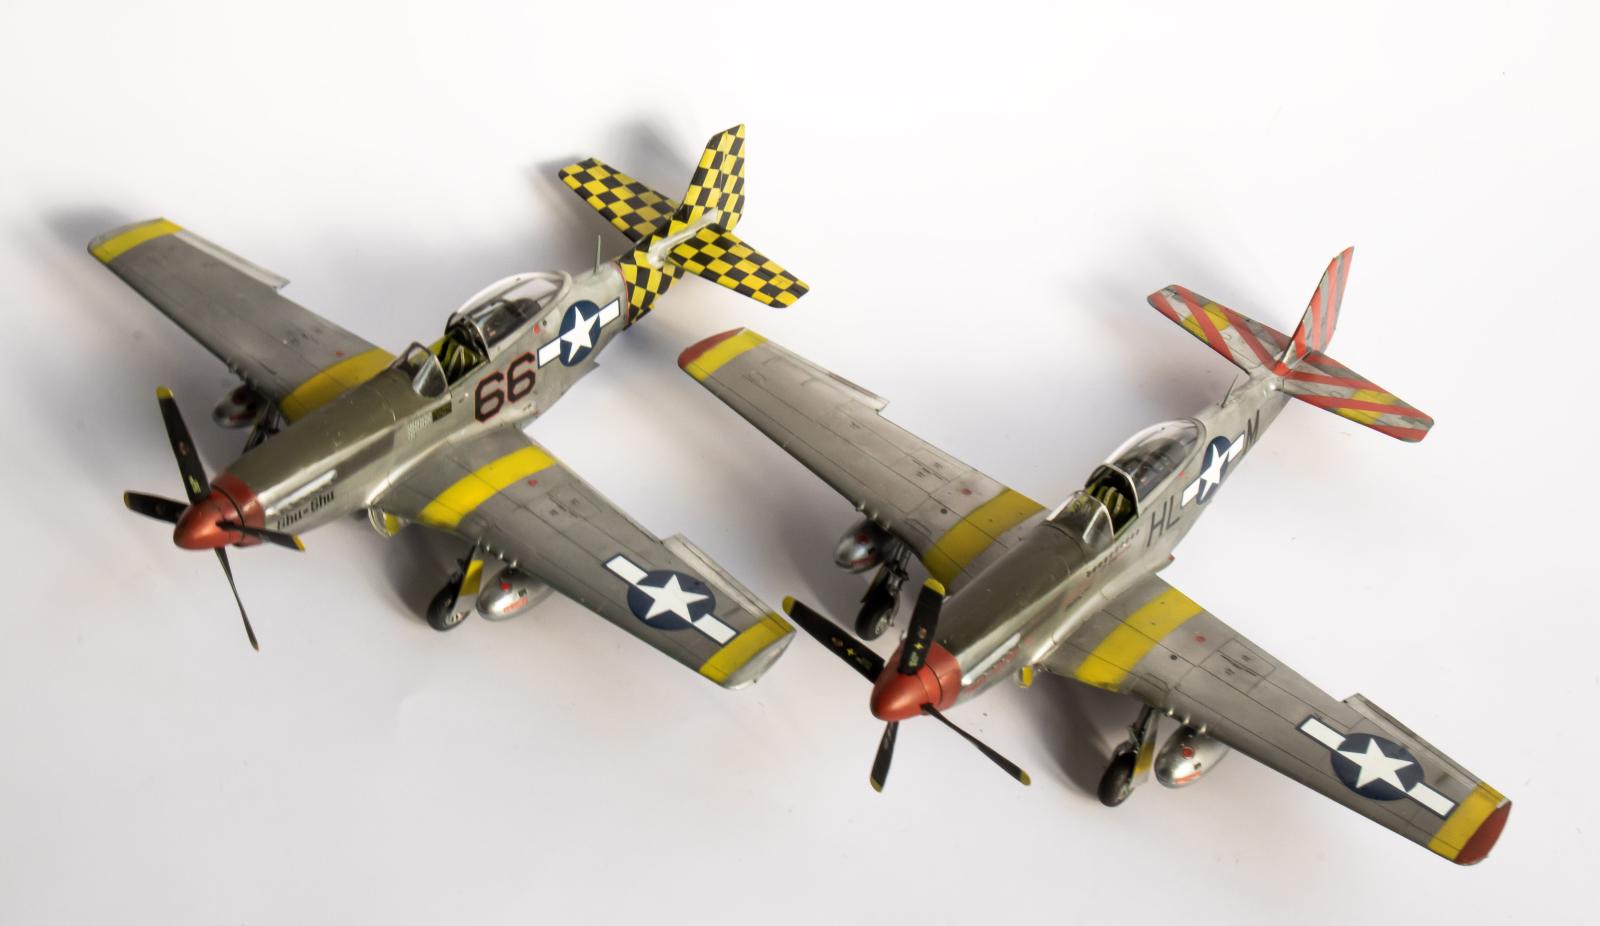
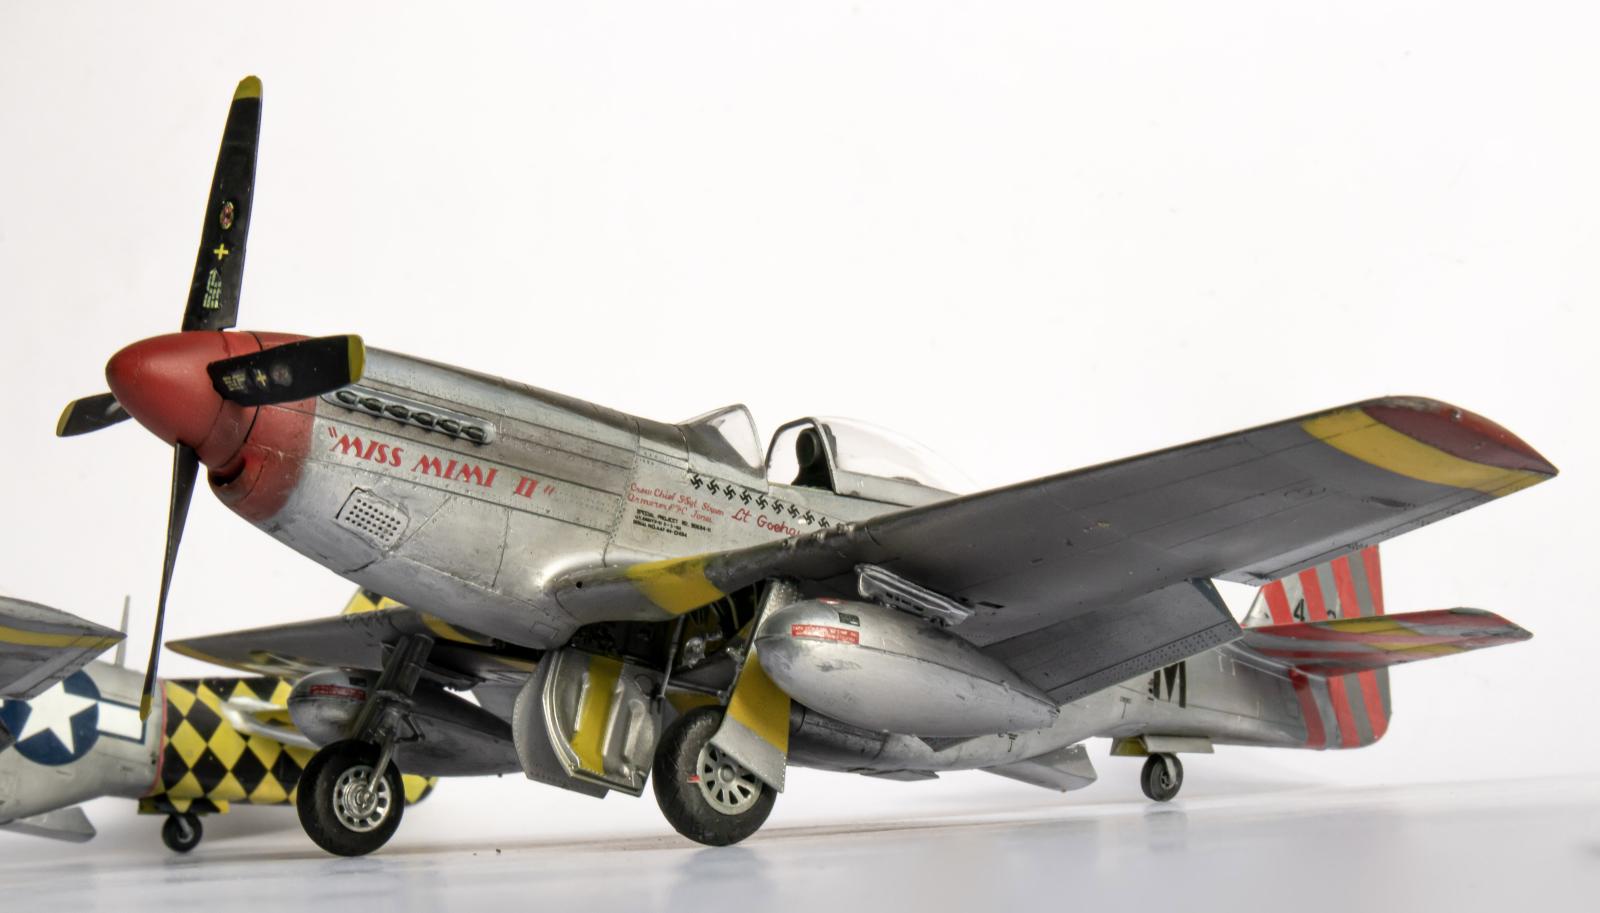
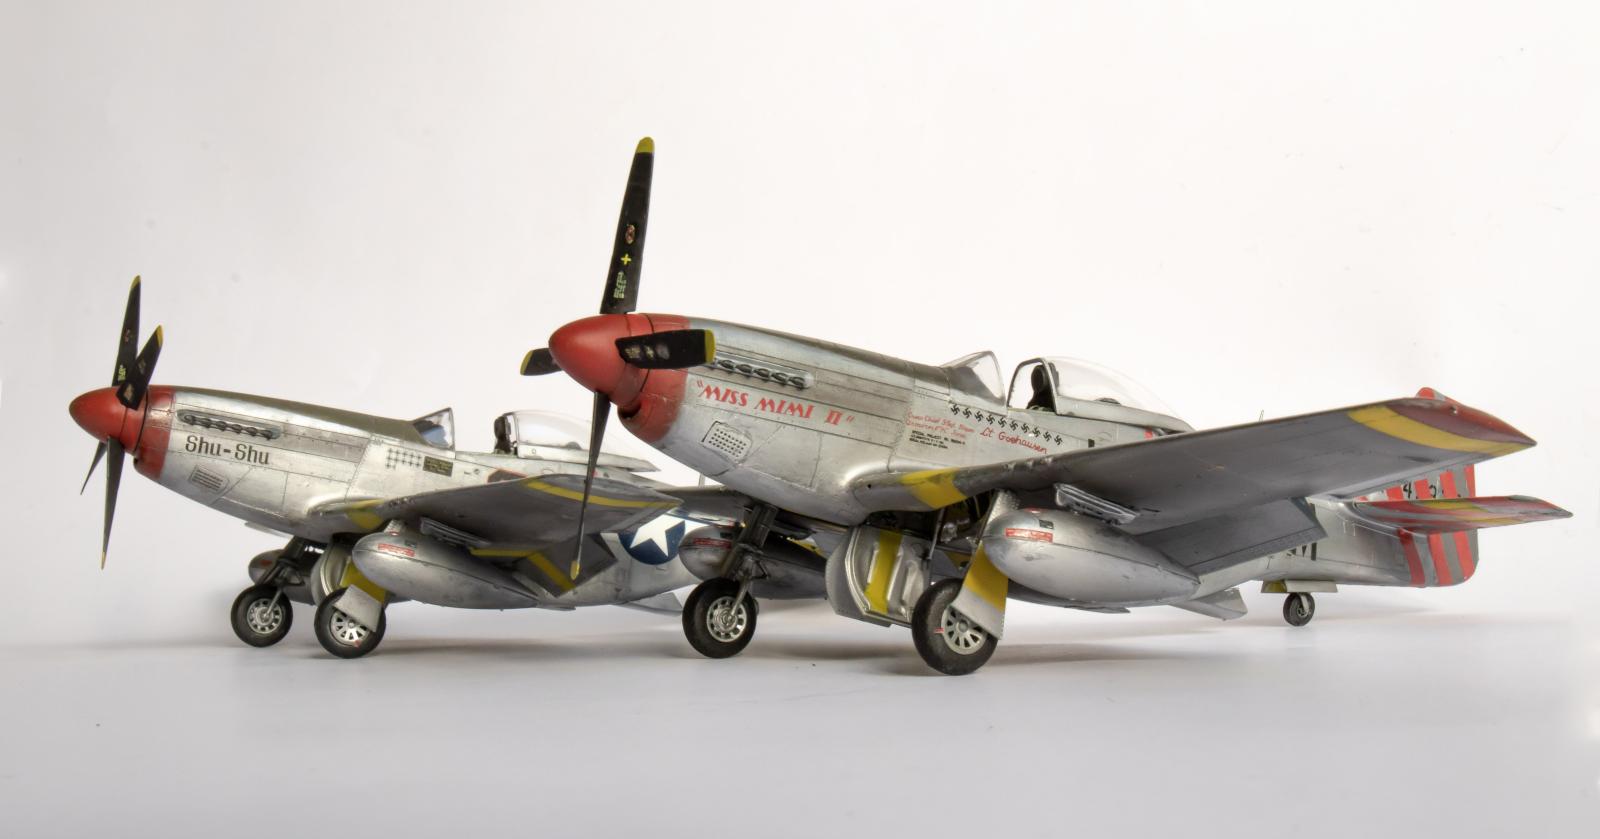
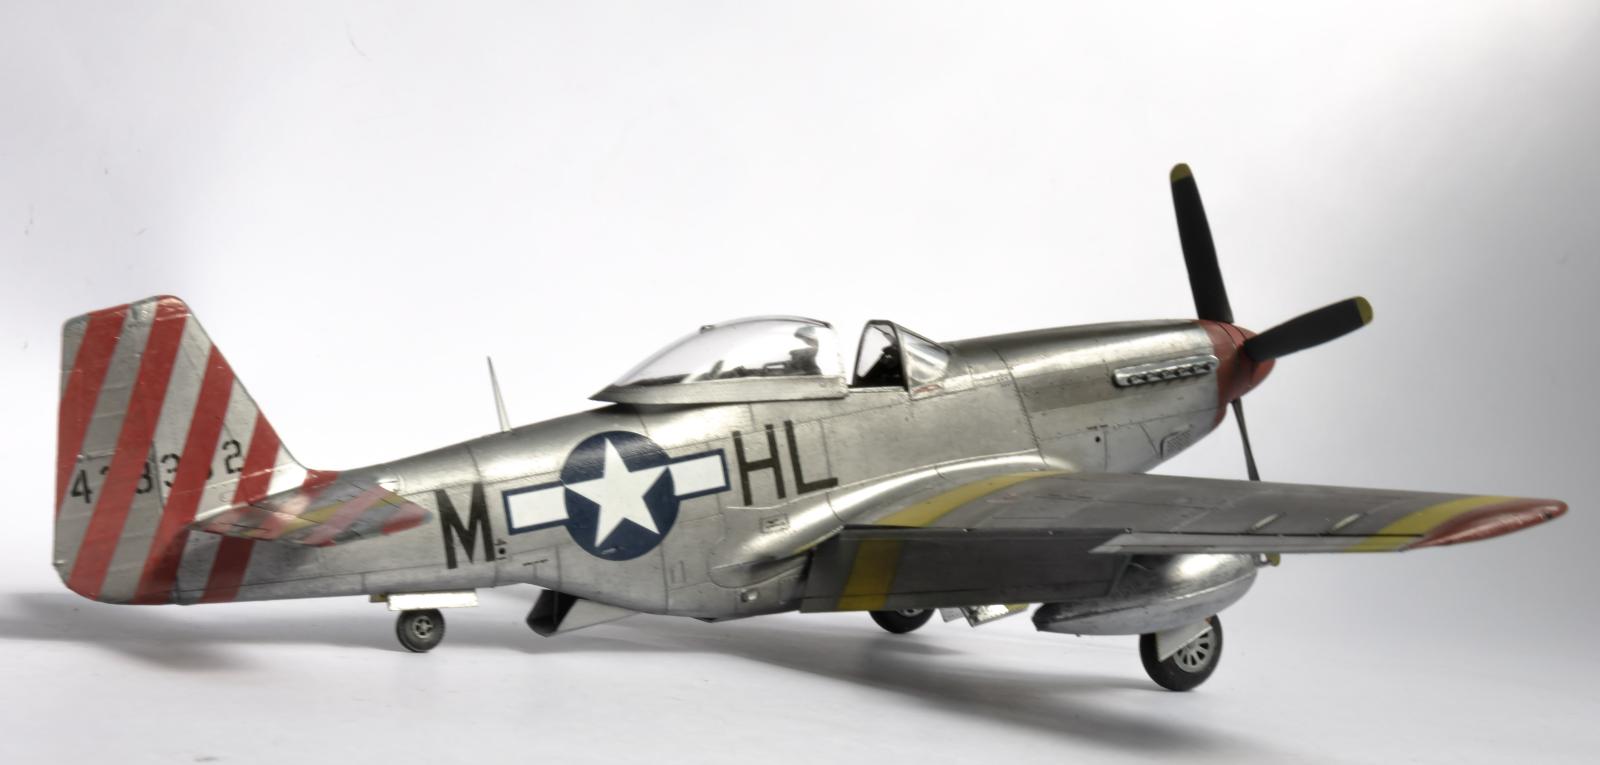
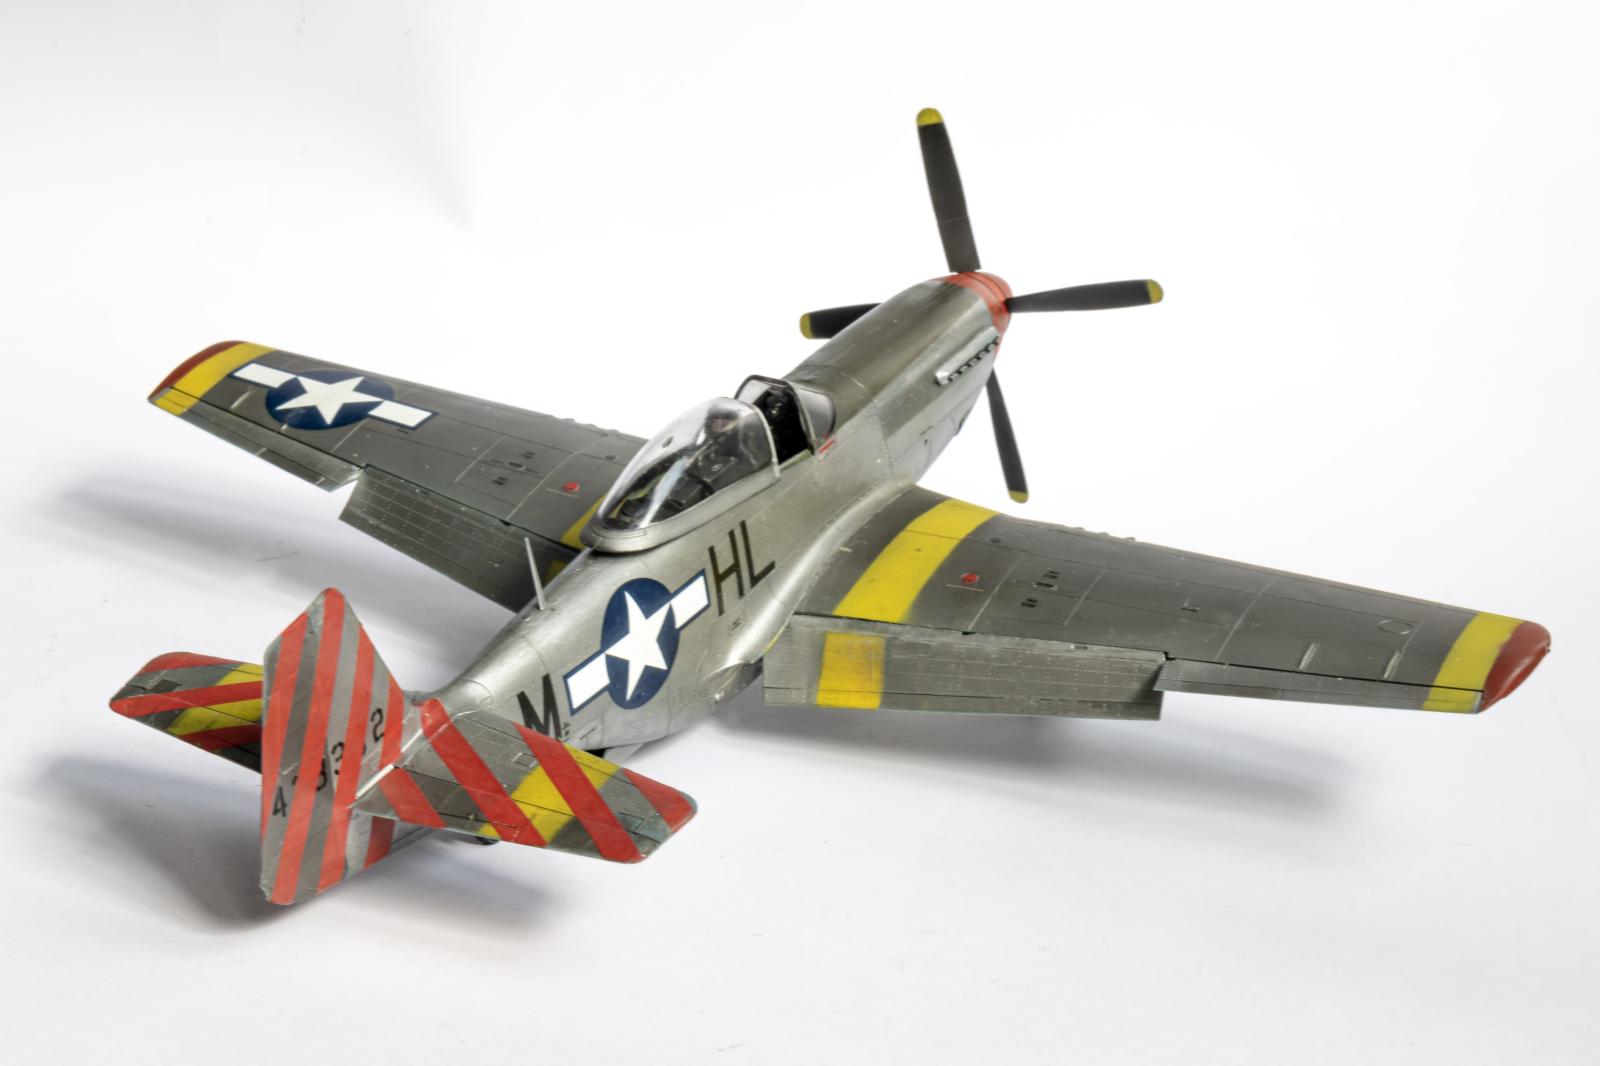
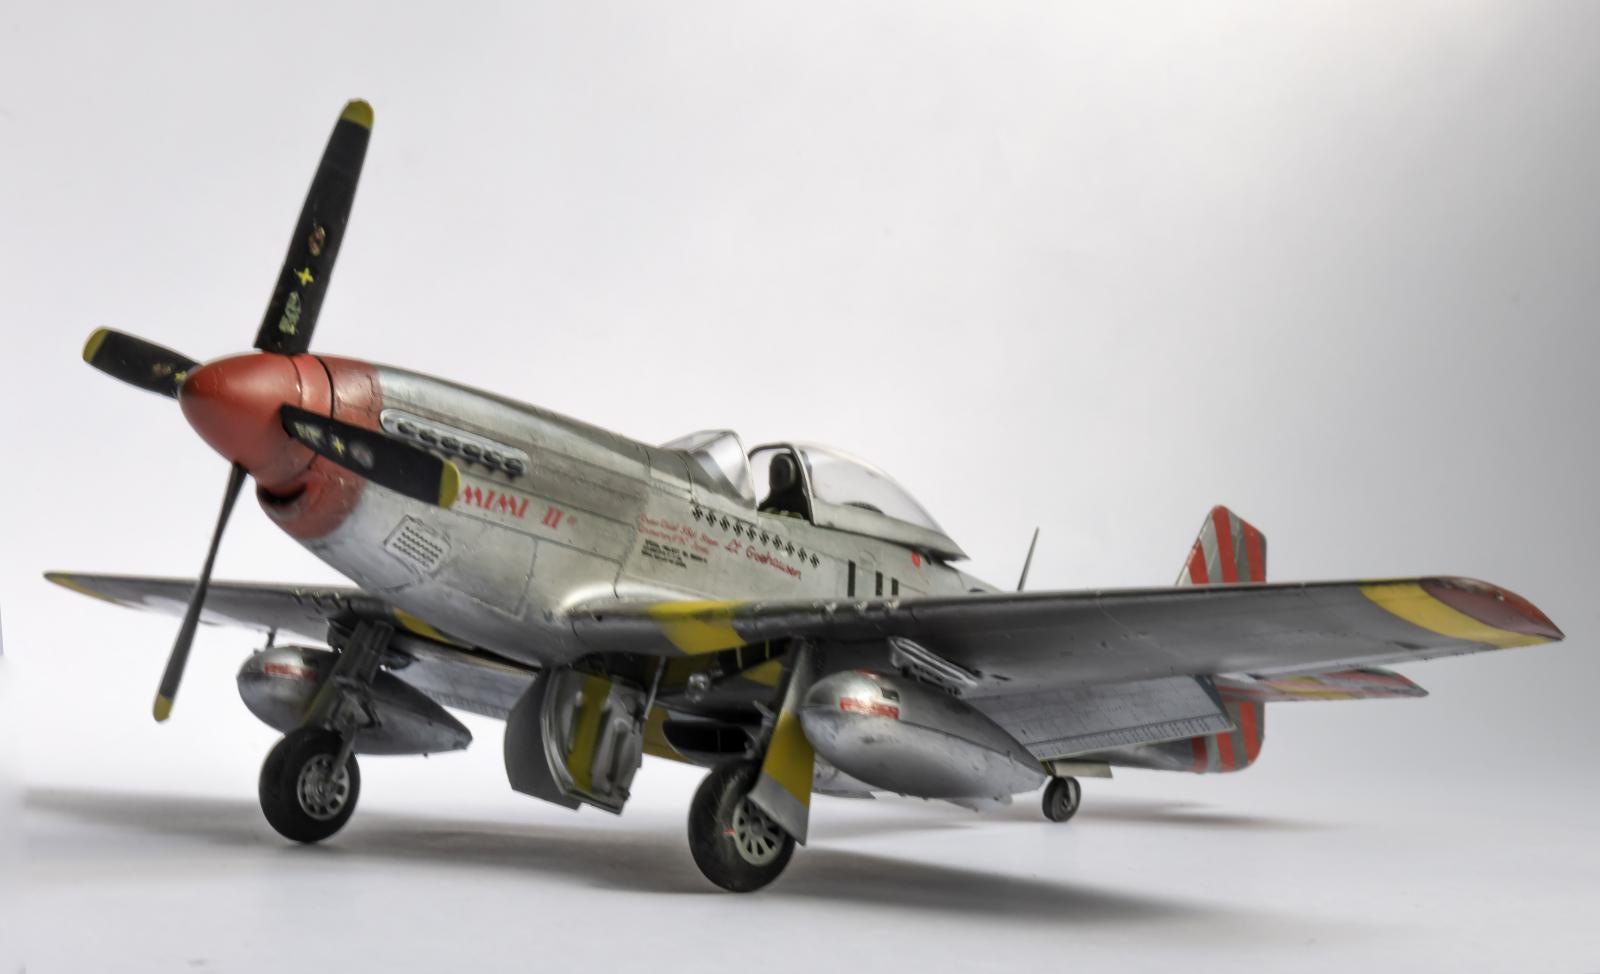
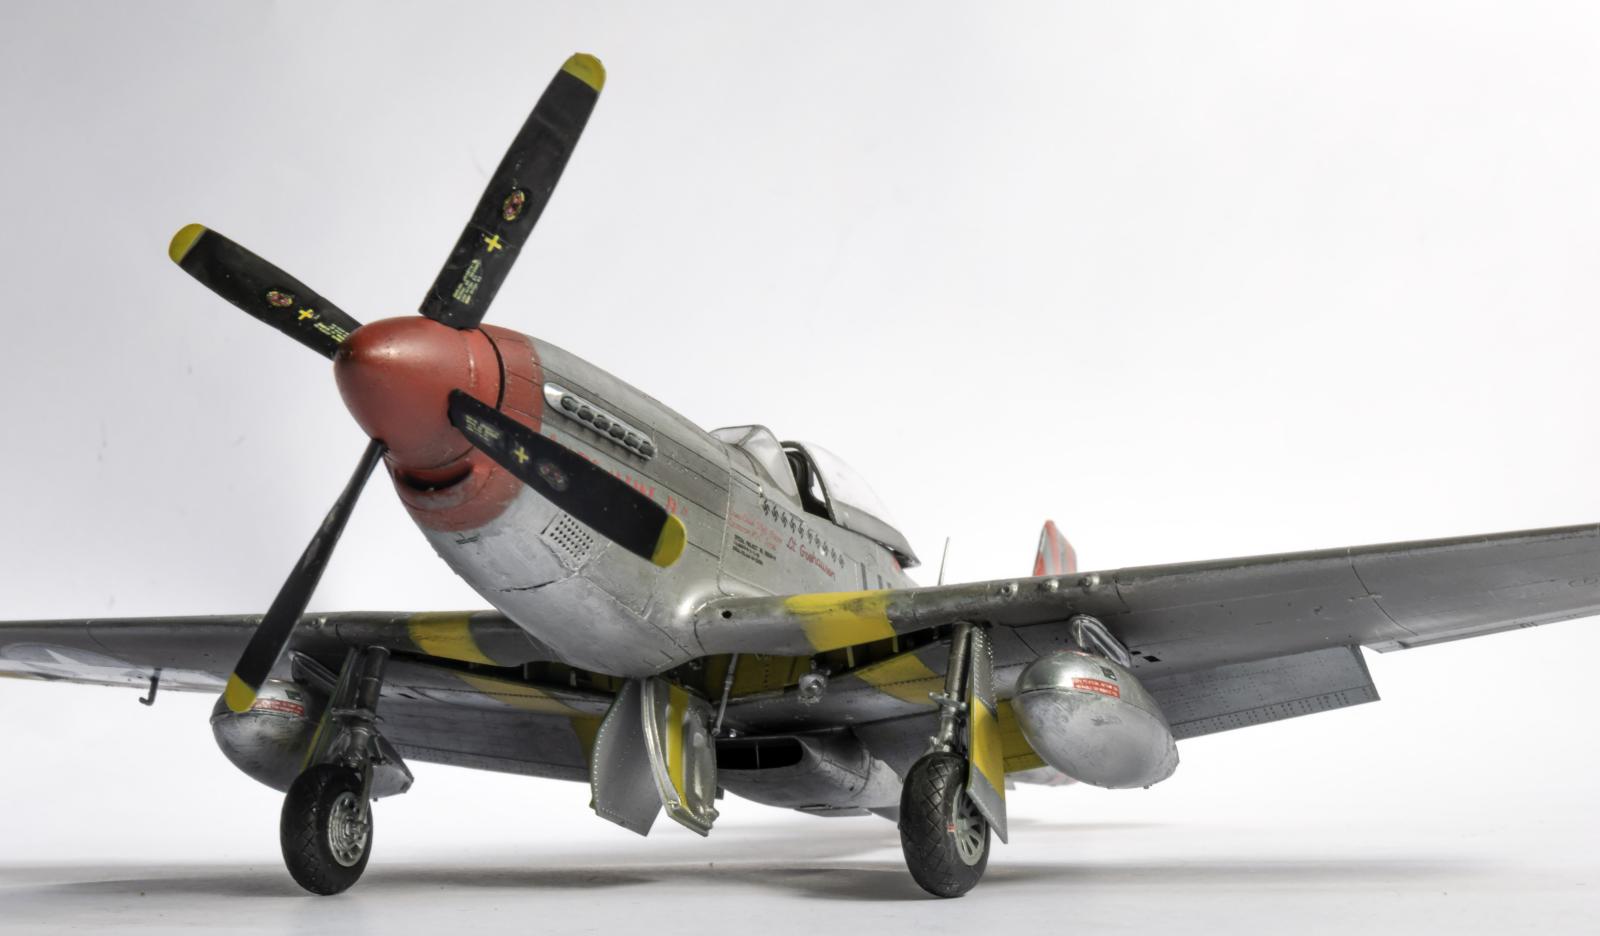
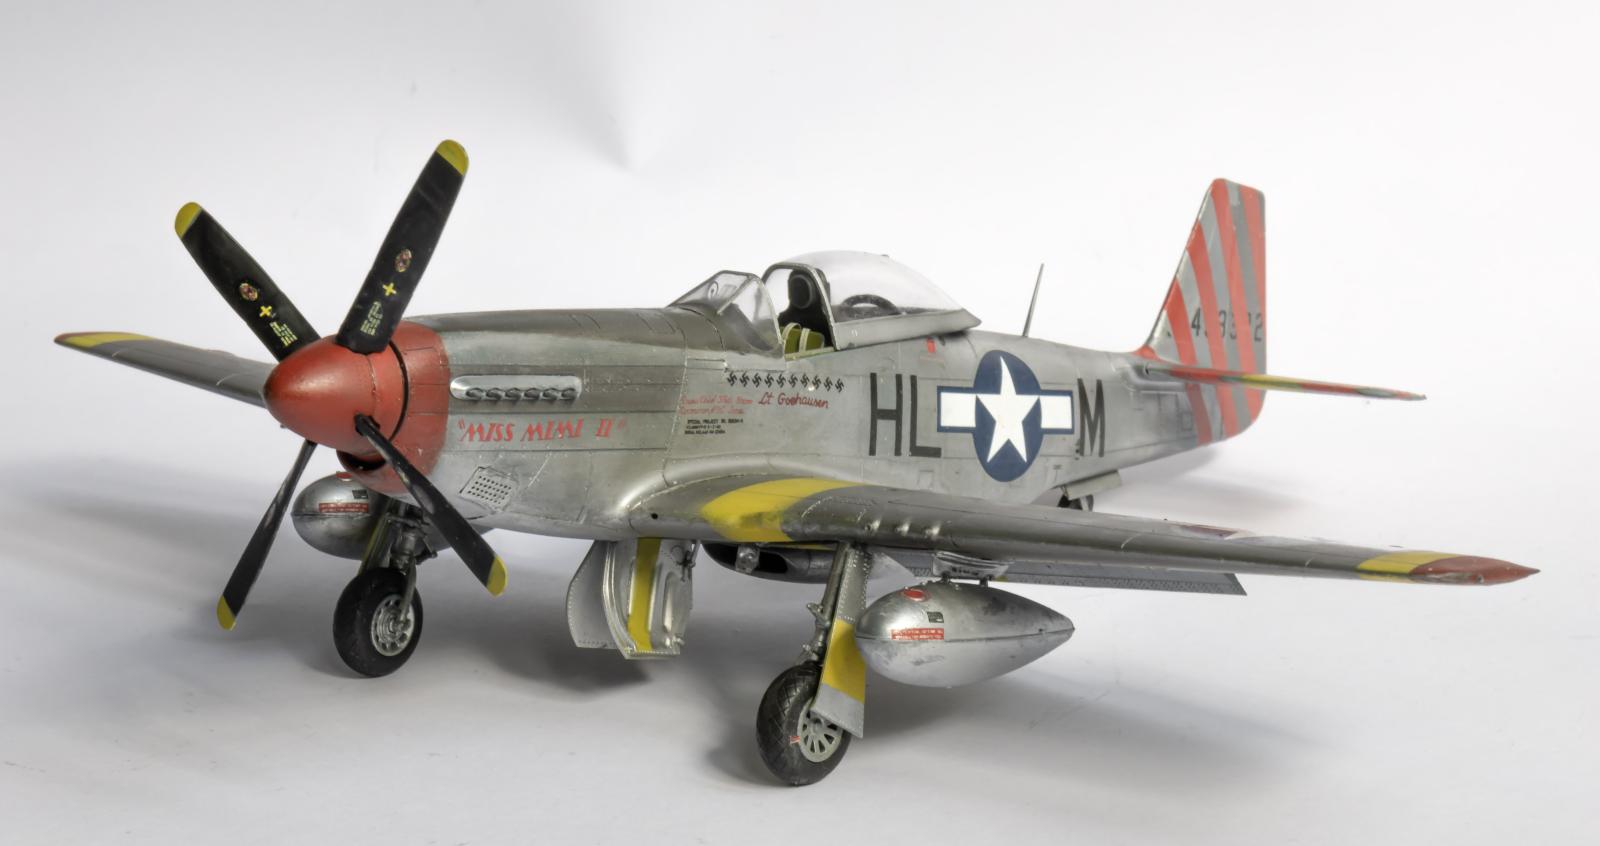
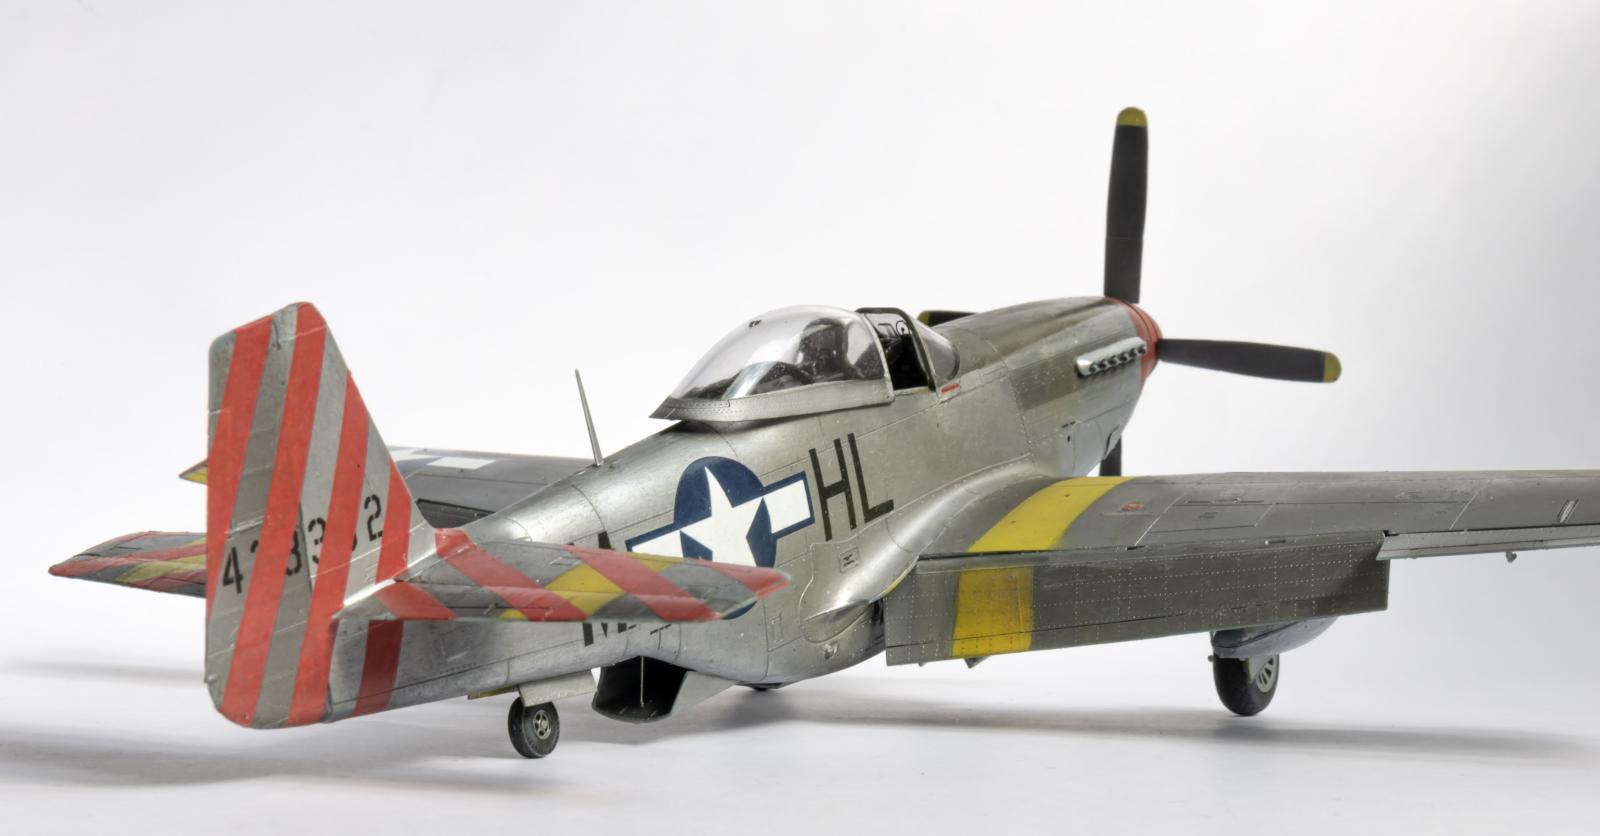
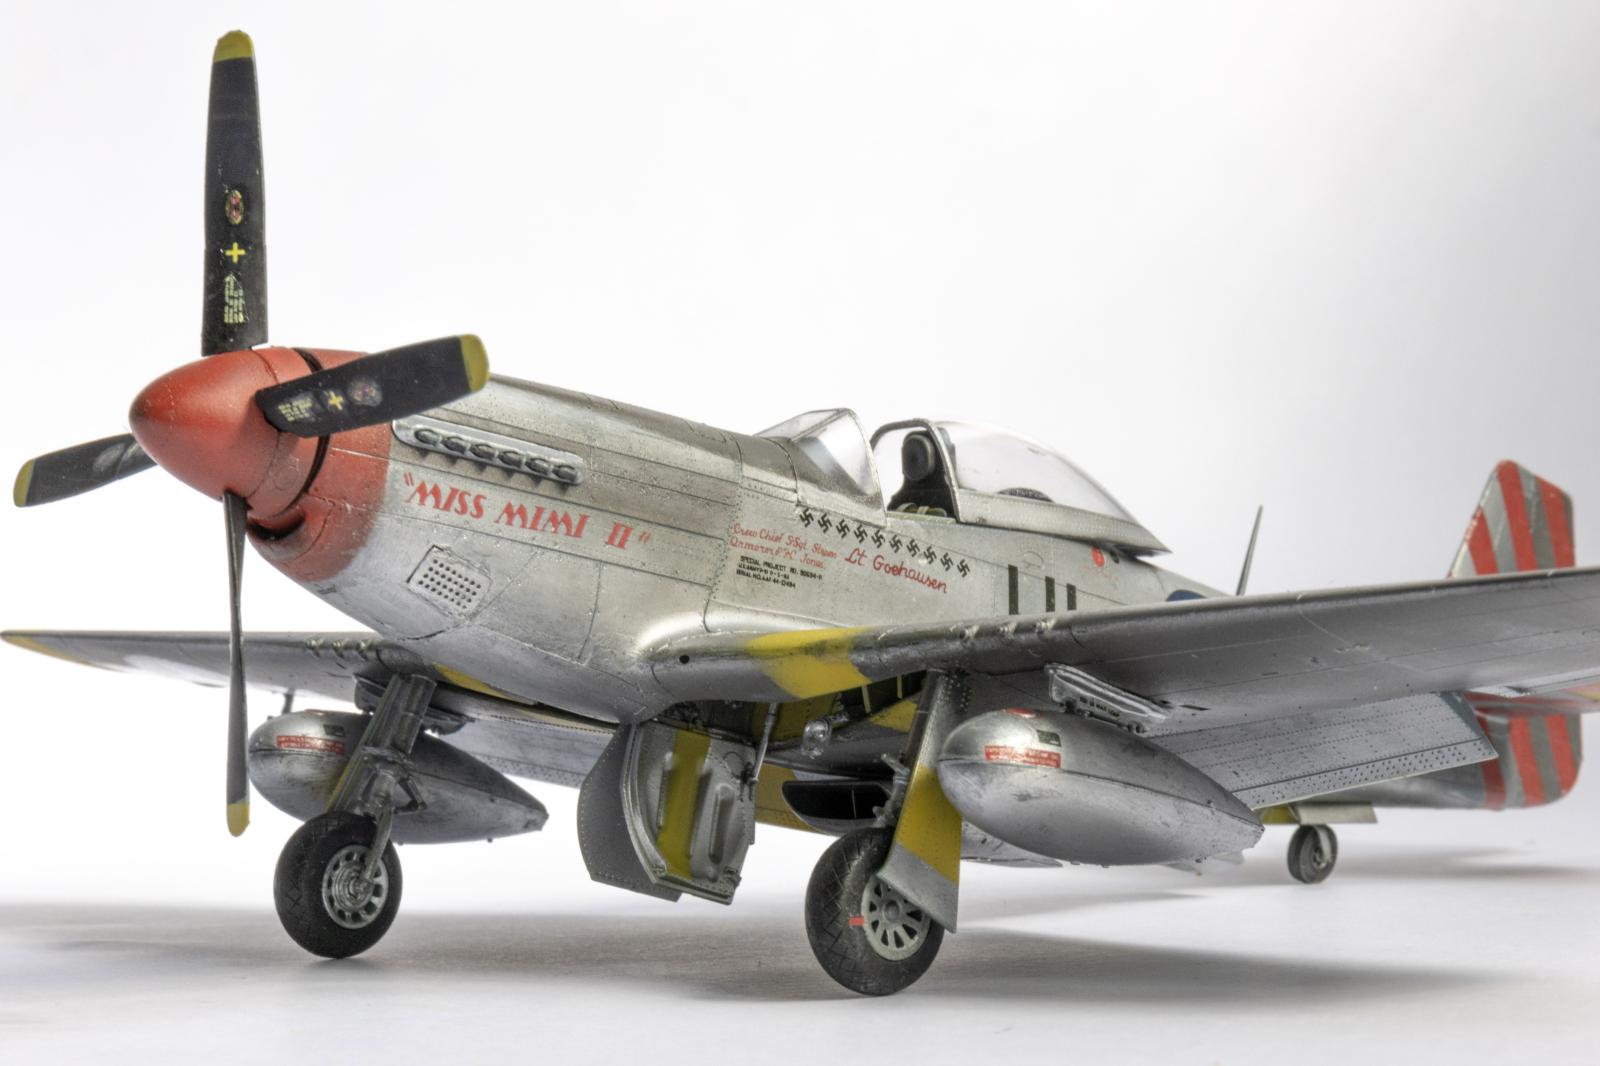
Red Tails P-51Ds: Eduard's model conundrum
Eduard's offerings in recent years of 1/48th scale WWII fighters are candidates to be the best models in the scale. I find that the sublime plastic surface texture and the plethora of colorful scheme options are tempting when considering a model purchase. Built Eduard's models look fantastic.
However, the models are a challenge to build. There are many tiny parts that comprise the sub-assemblies, such as the cockpit. Also, there are PE options that are hard to ignore if you wish to detail the model. But, most of all, the attachments of fuselage halves and wings to fuselage are problematic. Often, putty is required to seal the remaining seams, thus destroying the fine nearby riveting patterns.
I built a few Eduard kits of different kinds and also from the same kind. The building process of Eduard's models differs significantly from other mainstay model manufacturers. Typically, if you build several models of the same kind, a learning curve develops that assists in getting better results with less effort. For example, my later Dragon models were built without using a drop of putty. With Eduard's models, the learning curve flattens quickly. This means that in an early stage, no improvement is made. It is baffling if not frustrating to fall time and again in the same and also new traps that necessitates much extra work for no obvious reason. How can it be that I cannot glue properly parts of a high precision model after all the years of my experience in the hobby?
It took me a while to figure out the problem. The precision scale of parts does not stand in par with the soft qualities of the plastic building material. (Sometimes, the plastic is already bent upon opening the box). In addition, the design of parts at the joints allows a great magnitude of movement in the attachment process thus, throwing off the overall high precision approach. This means that VERY slight deviations in the position of attachment of parts in subassemblies, such as cockpit, engines and wheel well will cause big seams to appear in critical joints. The use of slow drying glues does not change the outcome since the subassembly is already completed.
The Red Tails P-51Ds presented a typical Eduard model experience. The excellent surface texture was a source of joy to exploit for the 3D effects. I was on my toes for the potential problem areas and conveniently ignored the inherent kit deficiencies to ease the build process. After building and painting I thought, 'golly it went well'. And the kit bit back. The decals came off with the protective sheet! This is not unusual. About 10 percent of the Eduard kits, I built had decal issues. So much for quality control. Fortunately, the decal sheet was only partially damaged and the rest of the decals came from my spare box.
This Eduard model conundrum has been with me since the issue of the Mig 21. I adjusted my expectations from Eduard kits since then. Eduard models are great! But, on average I paid less and at times much less than $40 inclusive per model. Frustration thus, has been a non-issue in the builds.


That was an interesting read.
Thank you Emberson.
Here's the "secret" about attaching the wing and fuselage subassemblies: attach the "roof" part of the wheel well to the lower side of the cockpit floor, where it is meant to attach. Then cut off the little tang on that part so you don't get caught up trying to fit that "key" into the "keyhole" blind. Then attach the wing to the fuselage; it will be as easy as a Tamiya kit.
Beautiful work on these Rafi. With "the secret" in-hand, I expect to see many more - you're entirely right about the kit, and these beauties are the proof.
One minor critique (easily fixed): the canopy does not slide up into outer space. The rear end slides along the top of the fuselage immediately behind the cockpit. The front of the canopy does "slide up". If you attach the canopy by the rear tip, and by the ends of the spreader bar to the rim of the cockpit, you'll have it perfect. Pop 'em off and do that and you're at 100% wonderful.
Thank you Tom.
The Mustang is a less problematic among the rest. It has been a while since I built a P-51. Thank you for the critique.
These are wonderful Red Tail Mustangs, Rafi! Spotless job as always!
Indeed, a very interesting read on things to take care of when building the otherwise excellent Eduard Mustangs.
Well done!
Thank you Spiros!
Very nice. I haven't used the new generation decals yet
Thank you George.
Just use them like normal. All that "peel them" business is baloney. Why anyone wants to screw around with the most important thing at the last point of the project is beyond me. They go down just fine under decal solvent.
Absolutely, Tom.
Sometimes the decals peel and others you are left with a great disappointment. The decals are thin enough as they are.
Despite your woes, you did a magnificent job, Rafi.
Thank you Gary.
A great looking pair of Mustangs!
Thank you John!
The word Fiddly is often used in describing some of these kits. I think of myself as practicing surgery on these kits. My normal approach would be to think like a mechanic. However, there really are few tolerances or room for slop in these kits. Some parts must be applied with out the use of sausage sized fingers and mits.
Rafi, some strong work in the making that really inspires the viewer. Loved the article.
Thank you Stephen.
Agree! This is one of the best kits Eduard made in several aspects but I find them fighting me along the build. Perhaps your explanation is the key to why some parts don’t produce a clean joint Rafa.
Beautiful models both, thumbs up!
Thank you Pedro.
Those are a couple of real beauties!
Thank you Chas!
Despite the struggles you delivered an amazing pair of Ponies, Rafi @blackmopane
Well done.
Thank you John.
Beautiful pair of mustangs- absolutely fantastic work. I think your assessment of Eduard is spot on. I love the detail they offer but they definitely fight (or as you said bite) back at you. Personally I think you can get almost the same level of detail without all the fuss by going with the Airfix P-51D in 1/48. It isnt quite to the level of Eduard but it still impressive, has less fuss, and costs less as well. Just my 2 cents worth. Great work on these and write up!
Thank you David.
Indeed, I considered other build options. I loved Tamiya's (who does not?) but built enough of it. As it turned out, Eduard was cheaper than Airfix at the time.
What a beautiful pair of Mustangs! Very colorful, and marvelously done.
Thank you Greg!