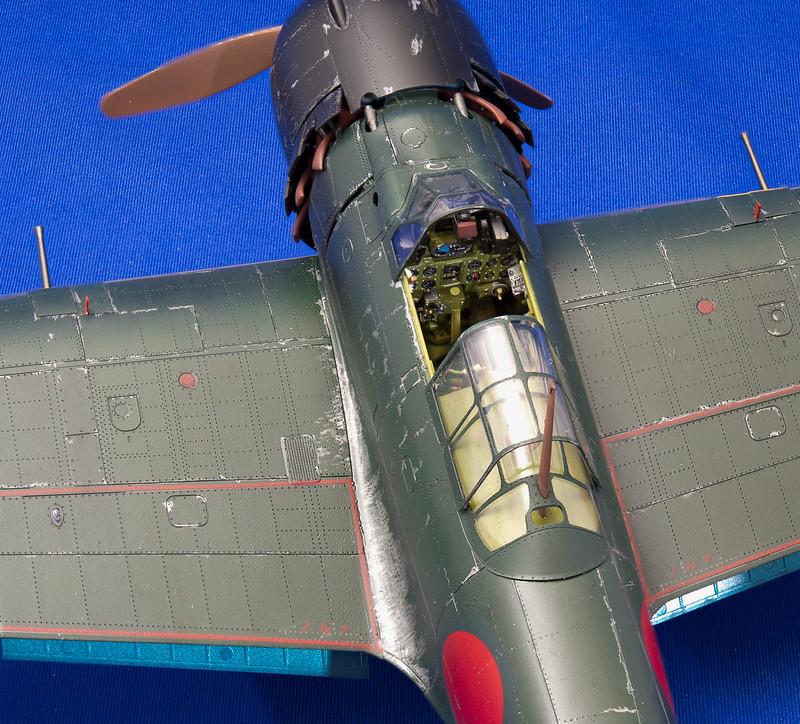
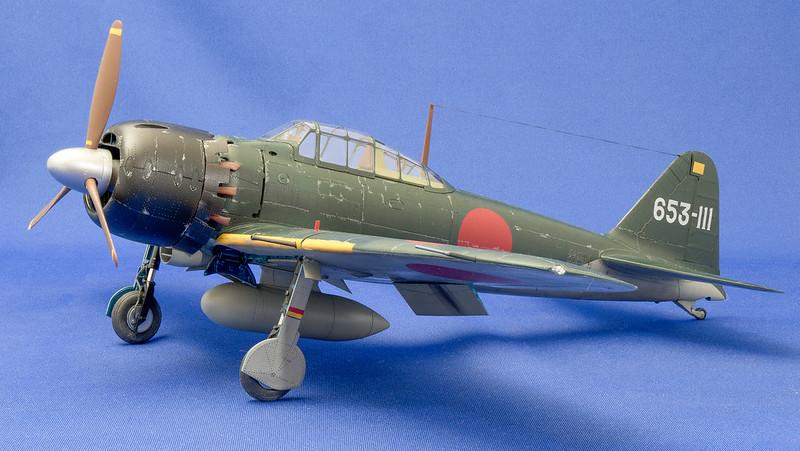
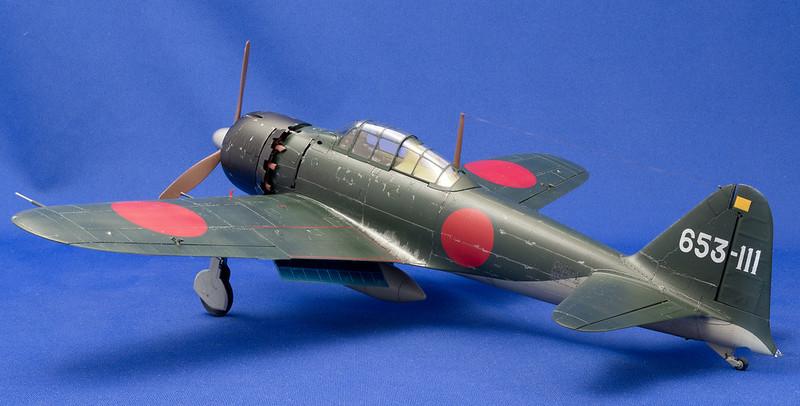
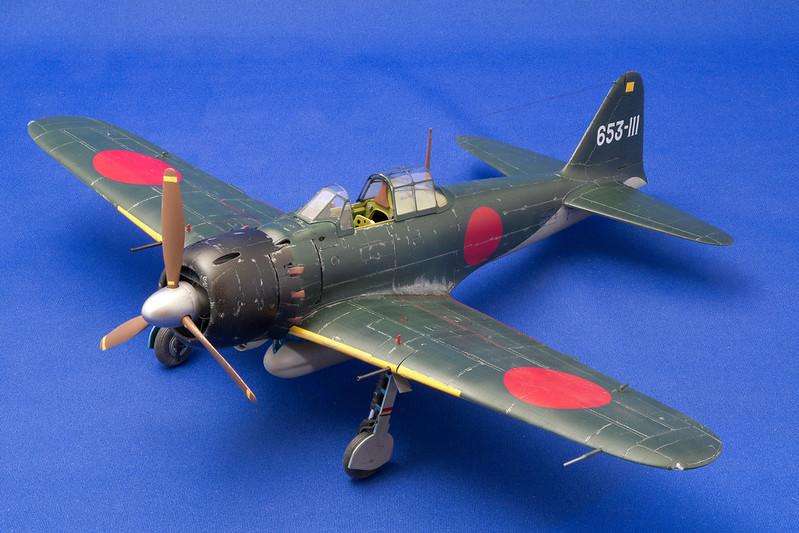
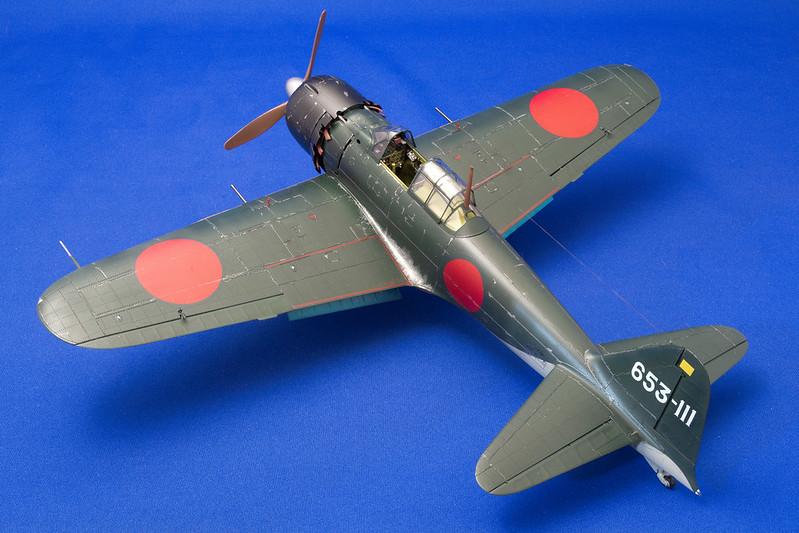
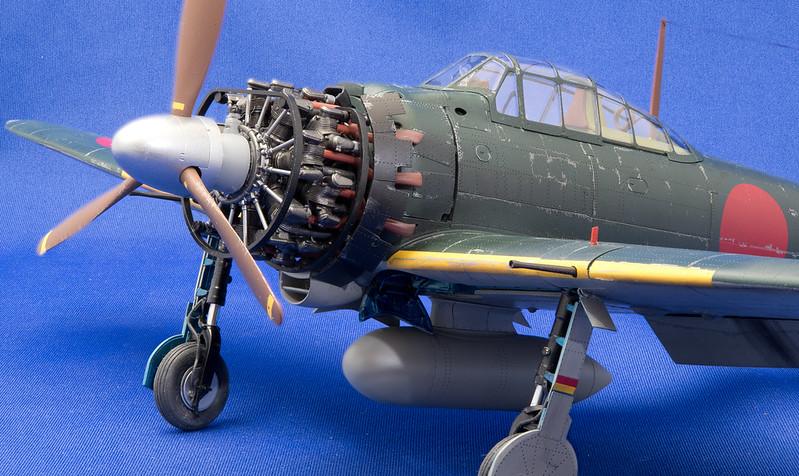
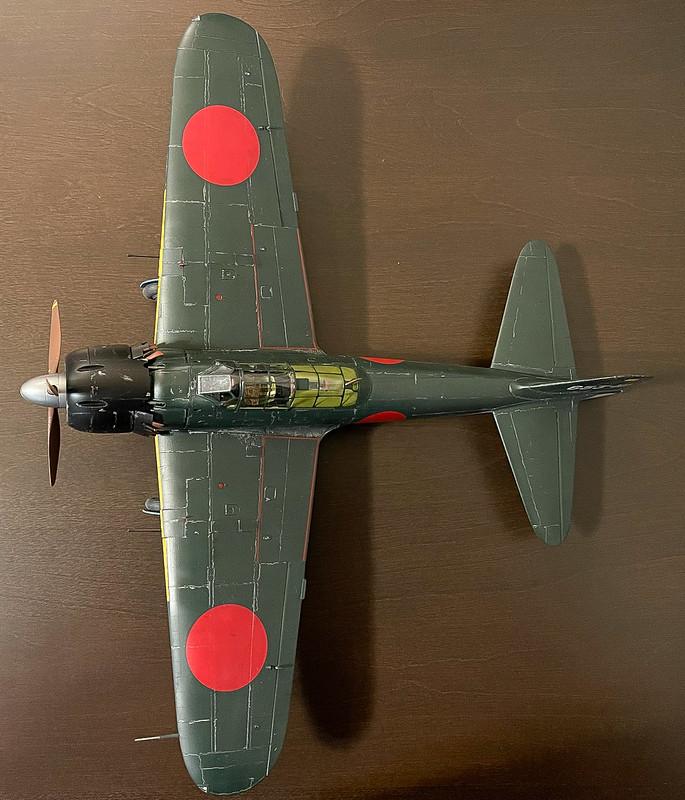
1/32 Tamiya A6M5 Zero
See all my models at: https://www.flickr.com/photos/98961263@N00/albums/72157603606379755
PHOTOGRAPHY:
Nikon D7500; Focus Stacking using Helicon Focus; Editing using LightRoom
PAINT:
Exterior top: AK Interactive RC304 IJN D1 Deep Green Black
Exterior bottom: AK Interactive RC302 IJN J3 Hai-Iro (grey)
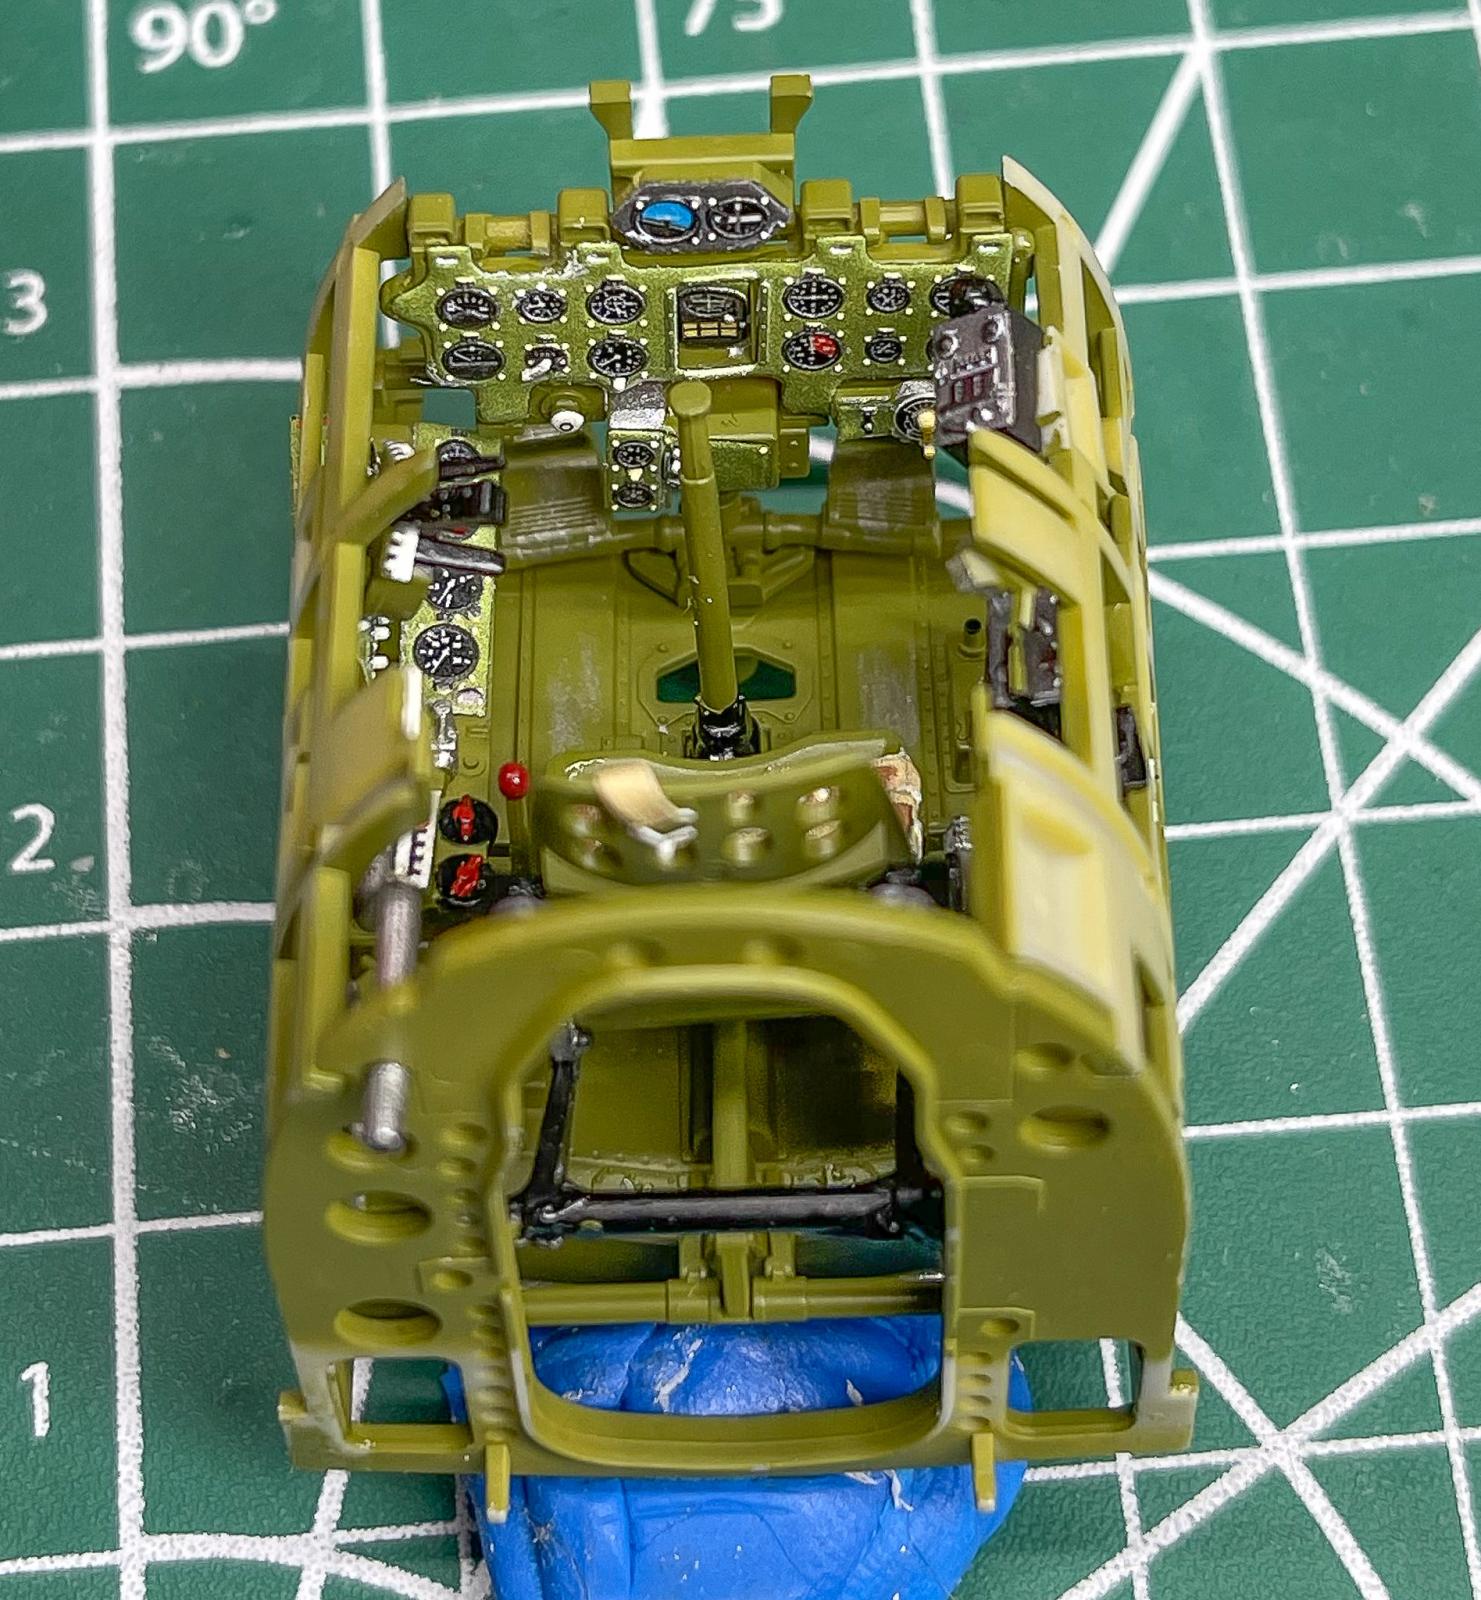
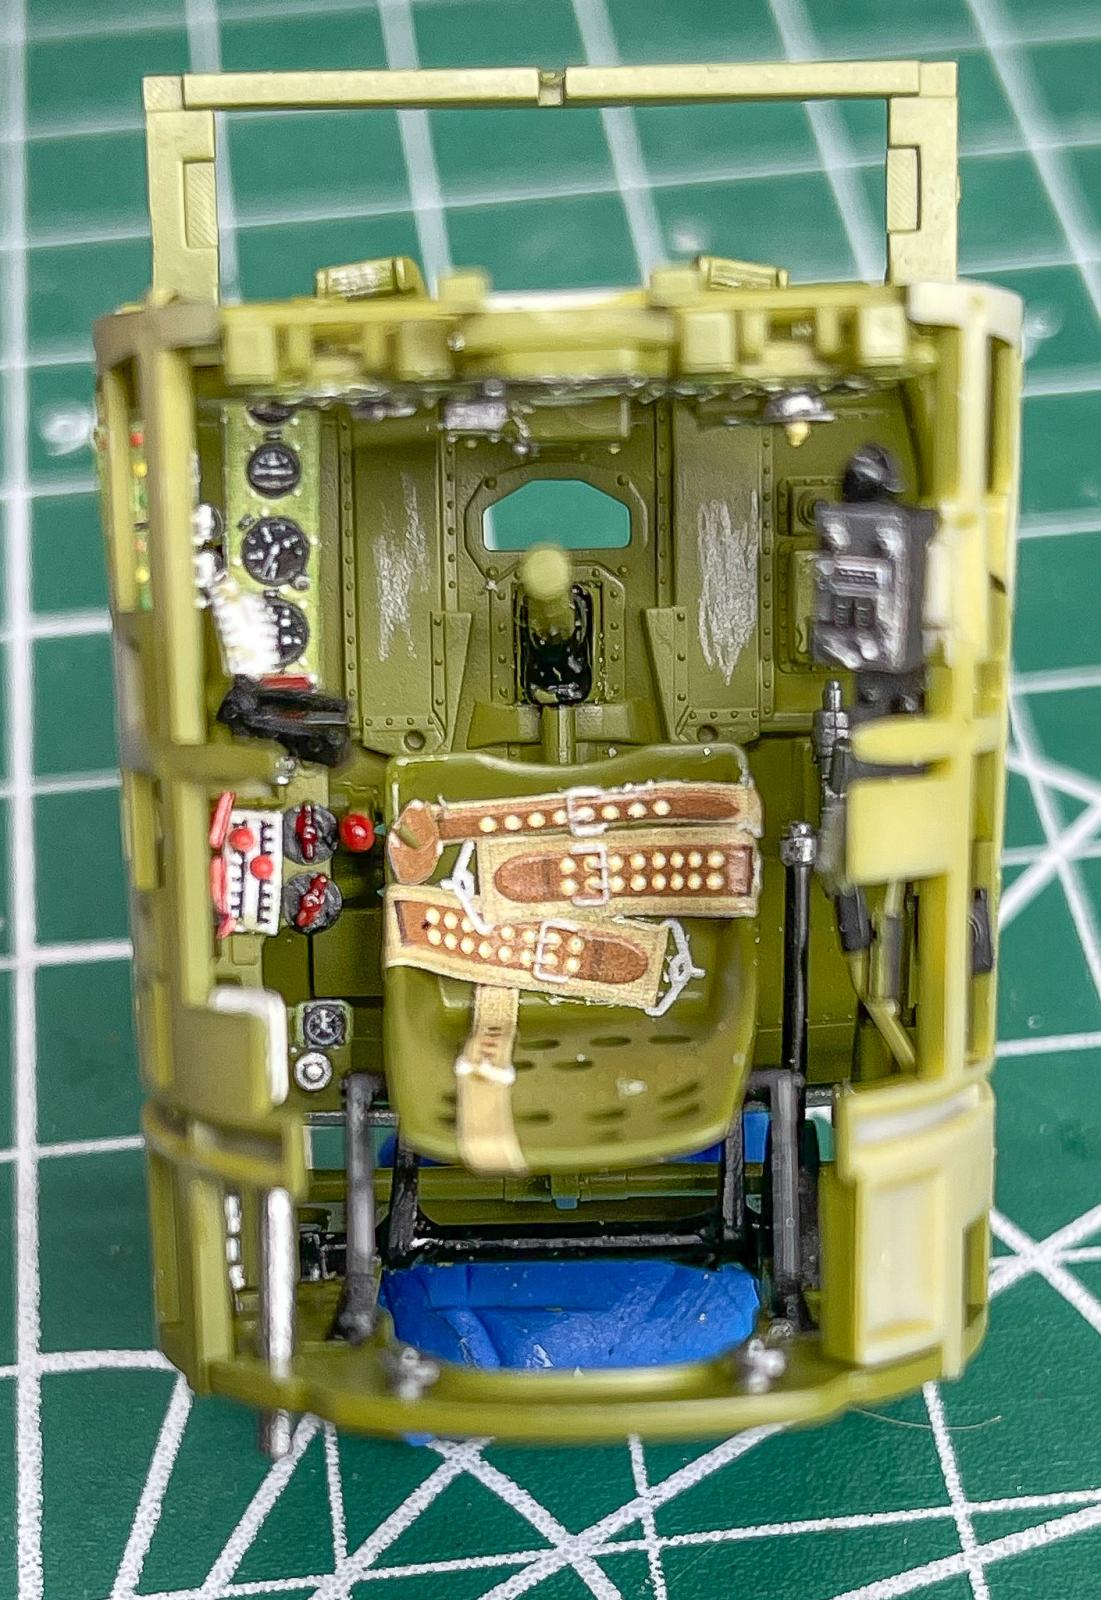
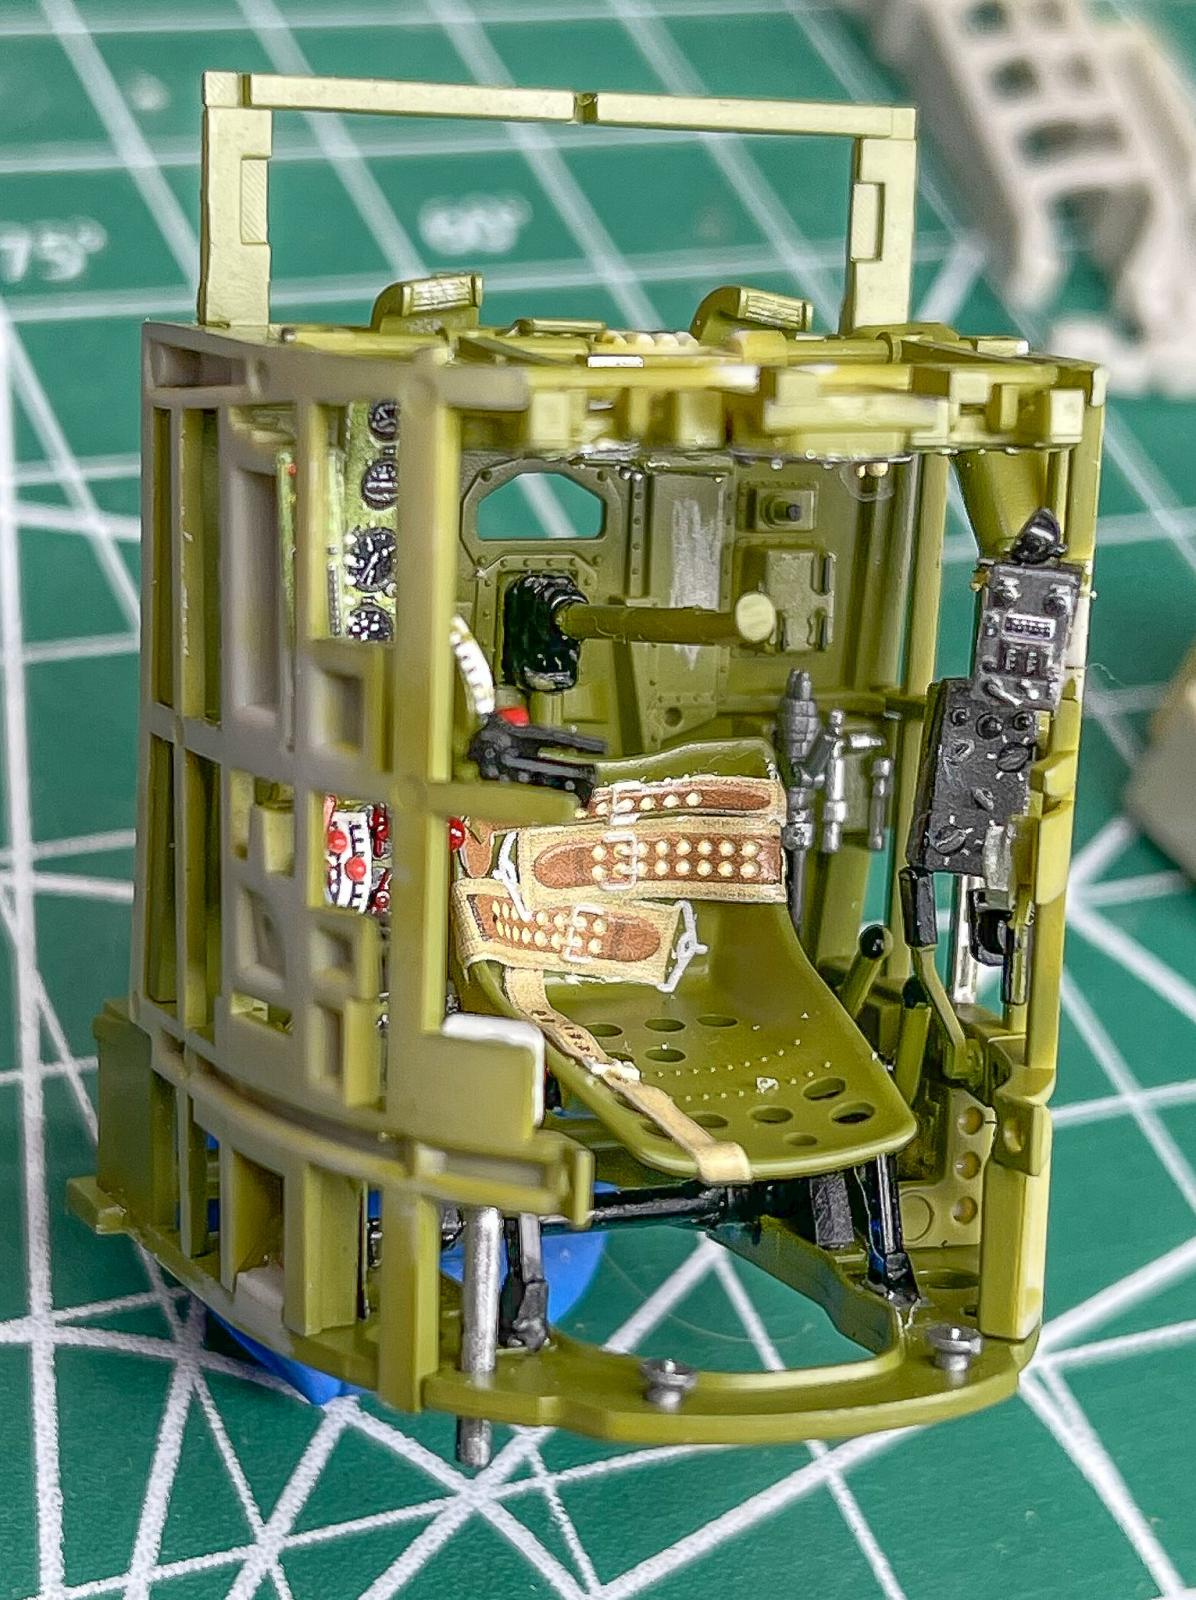
Cockpit: AK Interactive RC306 IJN M3 Mitsubishi Interior Green
Wheel wells: Tamiya X13 Metallic Blue x 3 + Clear Green x 1 (as per kit instructions). Based on pictures I've seen since I finished the build, in future I will try adding clear yellow rather than clear green to get to a more turquoise color.
ACCESSORIES:
Quinta Studios cockpit 3D decals - As usual these were great to use. The color is close to Mitsubishi Interior Green but the difference is noticeable. Luckily, the shear amount of detail brought to the cockpit by these decals makes the slight color difference less noticeable. My method for using Quinta decals is to dip in water, separate the decal, dry the decal with a cotton swab, smear the back with medium CA glue then position. If any of the glue squishes out, a quick spray with semi gloss clear will make it disappear. I have to be more careful to prevent the glue from squishing out on decals with clear lenses since spraying them with clear semigloss would ruin the clarity of the lenses.
THE KIT:
This kit is superb although I found it to be very challenging. I had built the 1/32 Mustang, Corsair and Spitfire previously and the Zero was the most difficult. The Zero is nearly 23 years old now but it still stands up to today's standards. I do find it to be a bit over engineered in order to make many parts movable including:
- Landing gear which fully retracts with the use of an included tool.
- Landing gear suspension - I gave up on making these movable since they are spring loaded and I didn't think the weight of the model would be enough to compress the suspension realistically.
- Landing gear indicator tabs - I couldn't get these to retract automatically when the gear is retracted. It doesn't matter to me since I won't ever retract the gear again.
- 4 x small landing gear doors - these are the most difficult to get right and by their nature, they have to be installed as in the instructions just to attach them. ie. no workarounds - at least none I could figure out. Unfortunately they are extremely fragile and one broke off without any obvious reason.
- Ailerons - I glued these in place since they both hang down otherwise.
- Flaps - No issues but I suggest not test fitting and waiting until final assembly to attach them due to the nature of the attachment tabs - ie, they could bend if removed after test fitting.
- Rudder - mine moves but separates at the top if moved so I leave it alone.
- Elevators - no problems here except they are very fiddly and would be easy to accidentally glue in place.
- Cowling - simply snaps together but mine pops open.
- Wing leading edge panel around the guns - removable to enable repositioning of landing gear but nothing holds them on well so I just dropped my landing gear and glued the panels in place.
While these movable features are not to my taste, the manner in which Tamiya engineers them is extremely well done. The fit is near perfect across the kit but the many movable/positionable parts each create a challenge due to very tight tolerances. ie. The metal rods, brackets and hinges require near perfect application of adhesive to a) attach the parts in proper position, and b) make the parts actually work. Also some of these parts are very fragile even when installed successfully. Often these movable/positionable parts require metal rods or tabs to be sandwiched between plastic parts. I always find the sandwiching method to be nerve wracking. A third arm would be helpful but in lieu of that, much patience comes in handy.
It is interesting to see the evolution of Tamiya kits (at least those I've built) since the Zero was introduced. The Mustang, Corsair and Spitfire all take a different approach to positionable features than the zero and newer kits like the F-4, F-16 and F-14 offer simpler methods to position parts foregoing the movable option. I prefer the newer approach.
The build was largely problem free… EXCEPT FOR THE BIG MISTAKE (more on this below).
- The cockpit goes together perfectly and slides into the fuselage into the proper position without any problem or the need to be glued.
- The engine is very nicely detailed and consists of 32 parts; it goes together quite easily.
- The canopy and wind screen fit perfectly - I was able to install them after painting with no issues.
- The wing to fuselage join is perfect and only requires some liquid cement to secure in place.
- The panel lines are very fine - even by 1/48 standards. I prefer more prominent surface details since I have a heavy hand with the airbrush. That said, I would guess most modellers would prefer what Tamiya has done. The upside is that I had to be more careful with the airbrush in order not to obscure the detail which sharpened my skills a bit.
- The decals are nicely printed in perfect register but they are typical Tamiya - thick. My bad, I should have invested in an aftermarket set.
THE BIG MISTAKE:
As I built-up the engine I installed parts D12 and D13 upside-down. I did not notice until the engine was completely built. The placement of these parts is critical to attaching the cowl and the cowl flaps so unless I could reposition them, I could not finish the kit. I did try to reposition D12 and D13 but the locater pins broke starting a cascade of failed attempts to fix the mistake. Also D13 was trapped under other parts so I had to cut it and as hard as I tried to rescue the engine things just got worse and worse the more I tried so I had to give up on the engine. Having invested in the Quinta cockpit and a lot of time, I did not feel like trashing the whole kit so I bit the bullet and bought a whole new kit, just to use the 32 engine parts. Luckily one of my LHSs had it in stock but it was still a bitter pill to swallow. Once I had the second kit, the engine went together without issue.
TIPS:
Here are a few tips for the build:
- Do not attach the cockpit guns until after painting - just to keep them out of the way. You'll have to remove the tabs they fit on to allow them to slide into position.
- Leave pars H7 and H9 (wing guns) off until after the wheel wells are glued in place. Otherwise they get in the way when trying to sandwich the little gear doors between the wheel wells and the wing bottom.
- If you remove the exhausts from the sprues for painting, label them so they'll be easier to sort out during construction - each is unique.
- Don't install parts D12 and D13 upside down unless you have a second kit lying around.
CONCLUSION:
Fantastic kit but one that put me through my paces. So, after much toil, I have the most expensive 1/32 Zero ever built. At least it turned out ok.
Thanks for looking,
Richard

Ahhhh ya beat me to it with the "most expensive Zero" quip. Dang.
One of my buds did this with a Trumpeter P-47N engine. Bought another kit also. The heart wants what it wants.
Anyways it sure did turn out good, glad you didn't kill it with over-chipping, it looks about right.
The surface detail is still showing up beautifully, Tamiya got this spot on IMHO.
One idea, next time you do a Japanese subject, spray the hinomarus. It's so easy especially when there are no outside borders like this one and gives a much better result.
Happy New Year.
Thanks Bill - happy new year!
Excellent job on the very nice Tamiya Zero, Richard!
Well done!
Thanks Spiros
Wow - great save. Looking at the result, it was definitely worth "going the extra mile."
Thanks Tom
Excellent build. And I thought I was the only klutz to have to buy another kit to save a build! Happened more than once, too.
Yeah, I've done it more than once myself.
Nice looking Zero! @rbungay
Thanks John.
A very nice result on the Zero, Richard @rbungay
Quite expensive this way but definitely worth it/.
Thanks John.
Looks great - especially all that interior detail - WOW!
Thanks Greg