Newbie and my 1st build…
Hey everyone. I've just recently joined this group and I'm looking forward to learning from you and sharing ideas.
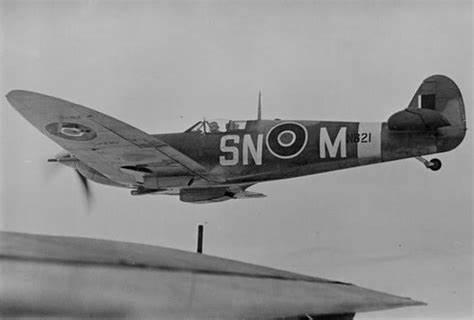
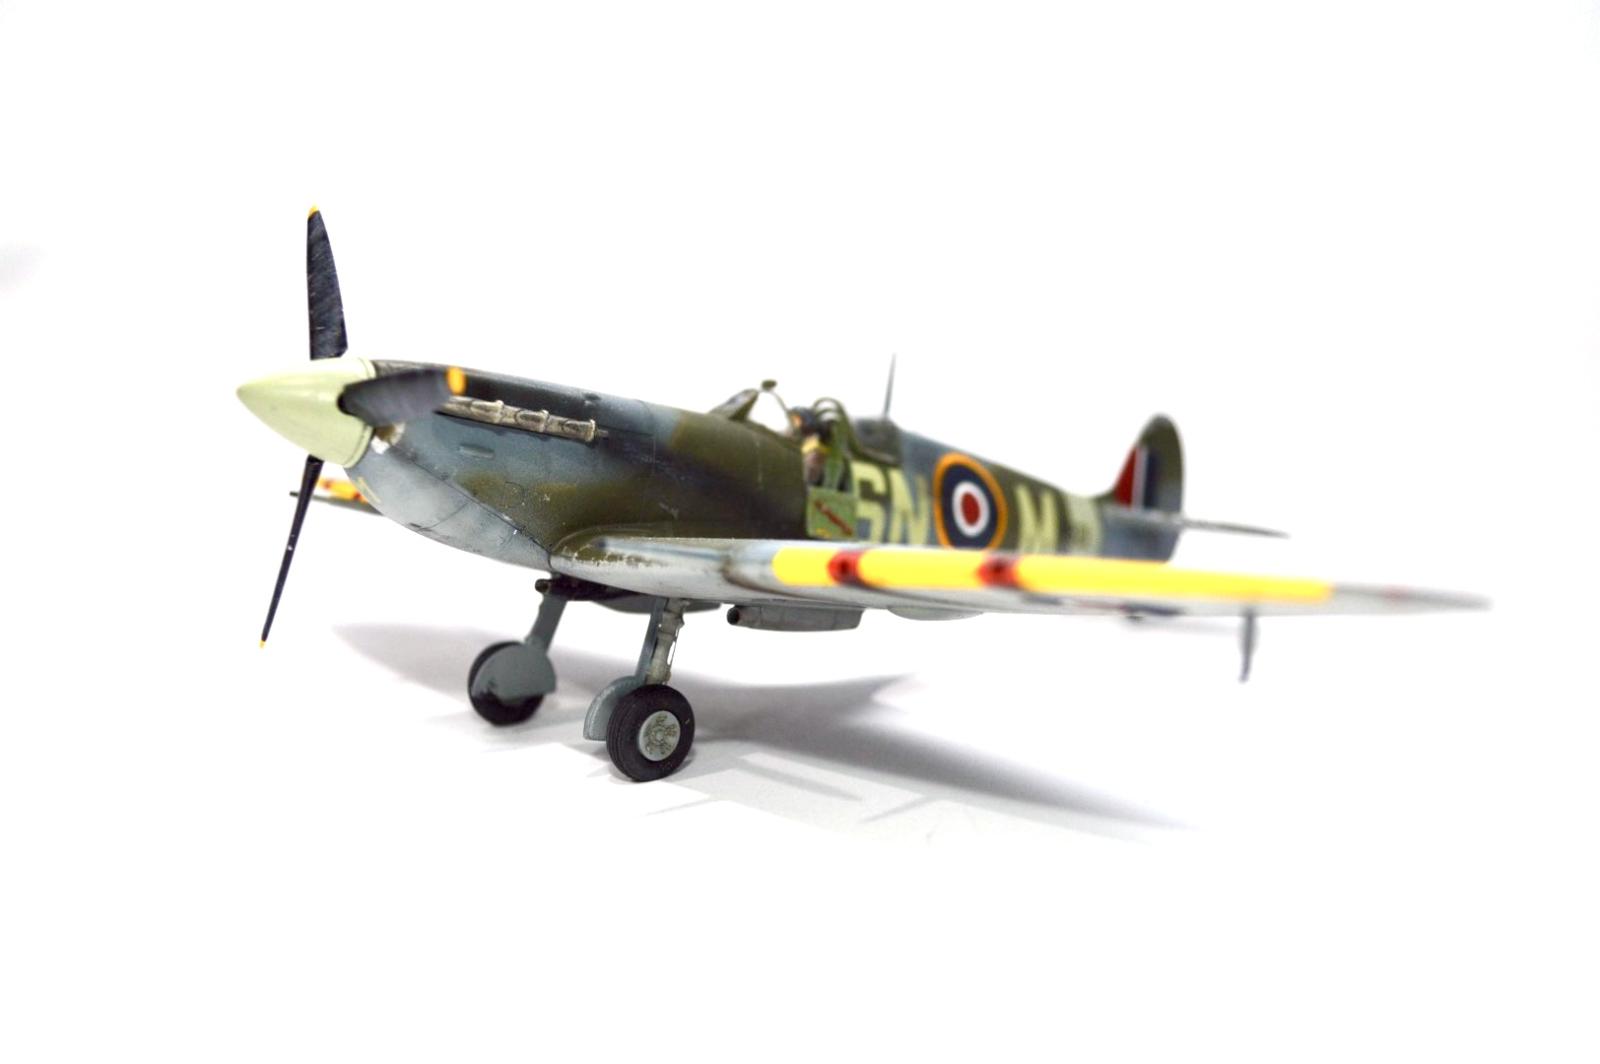
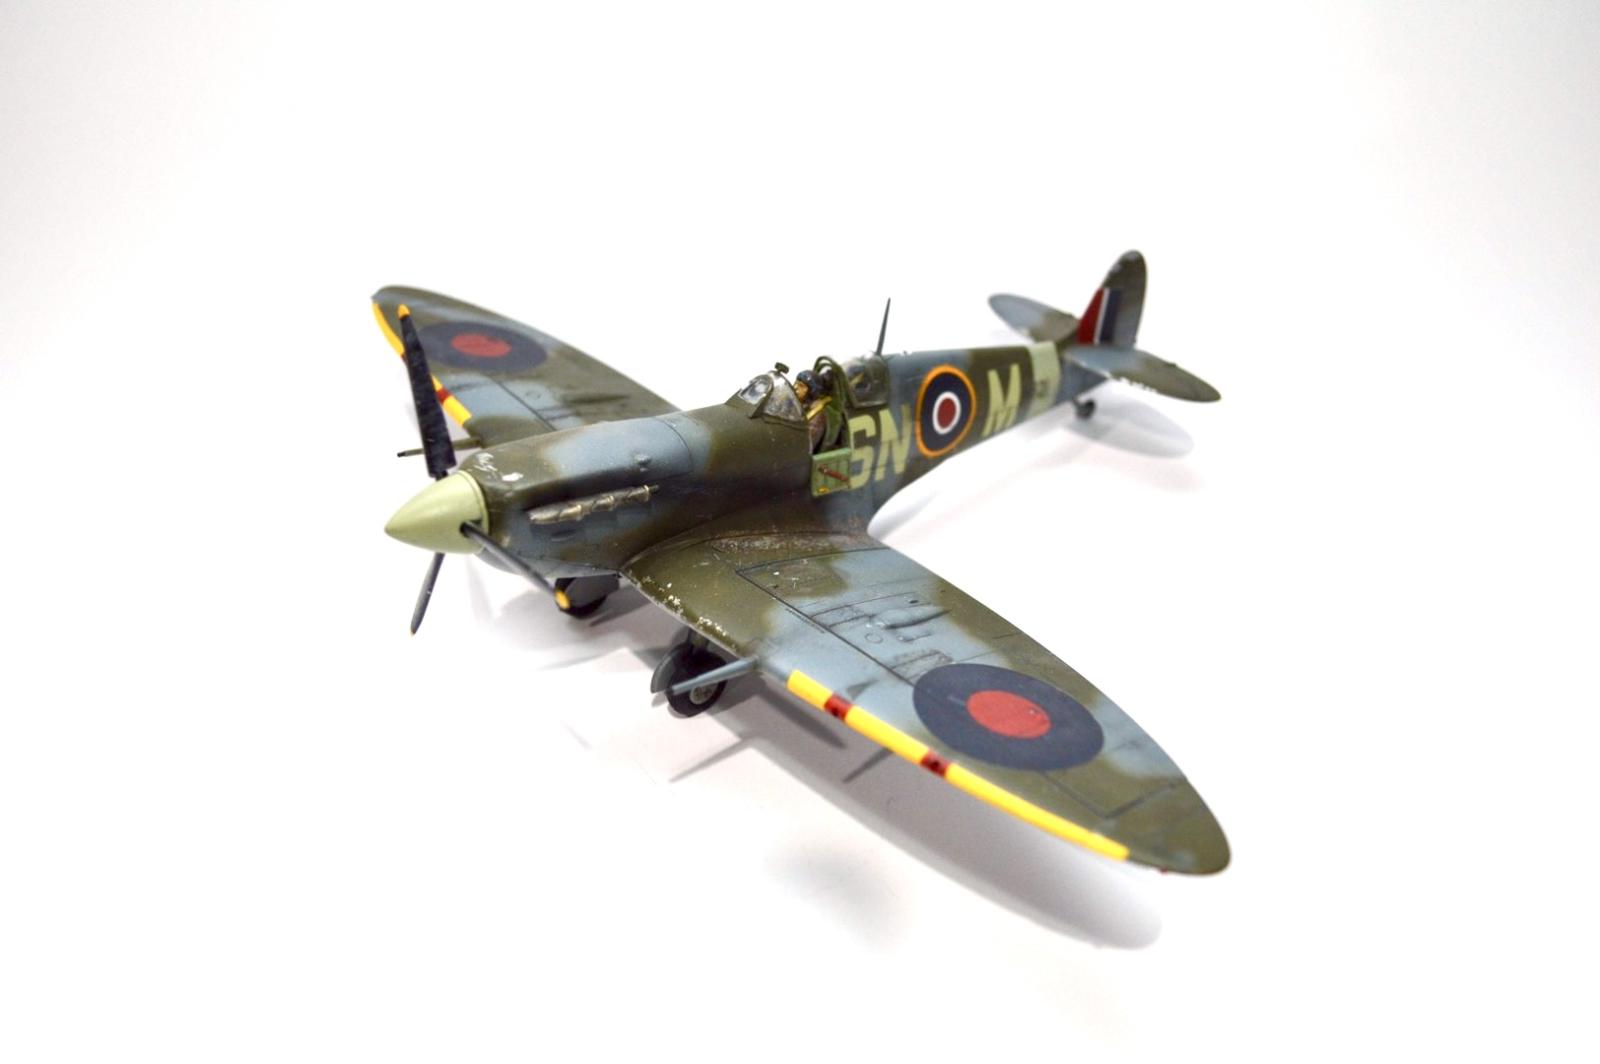
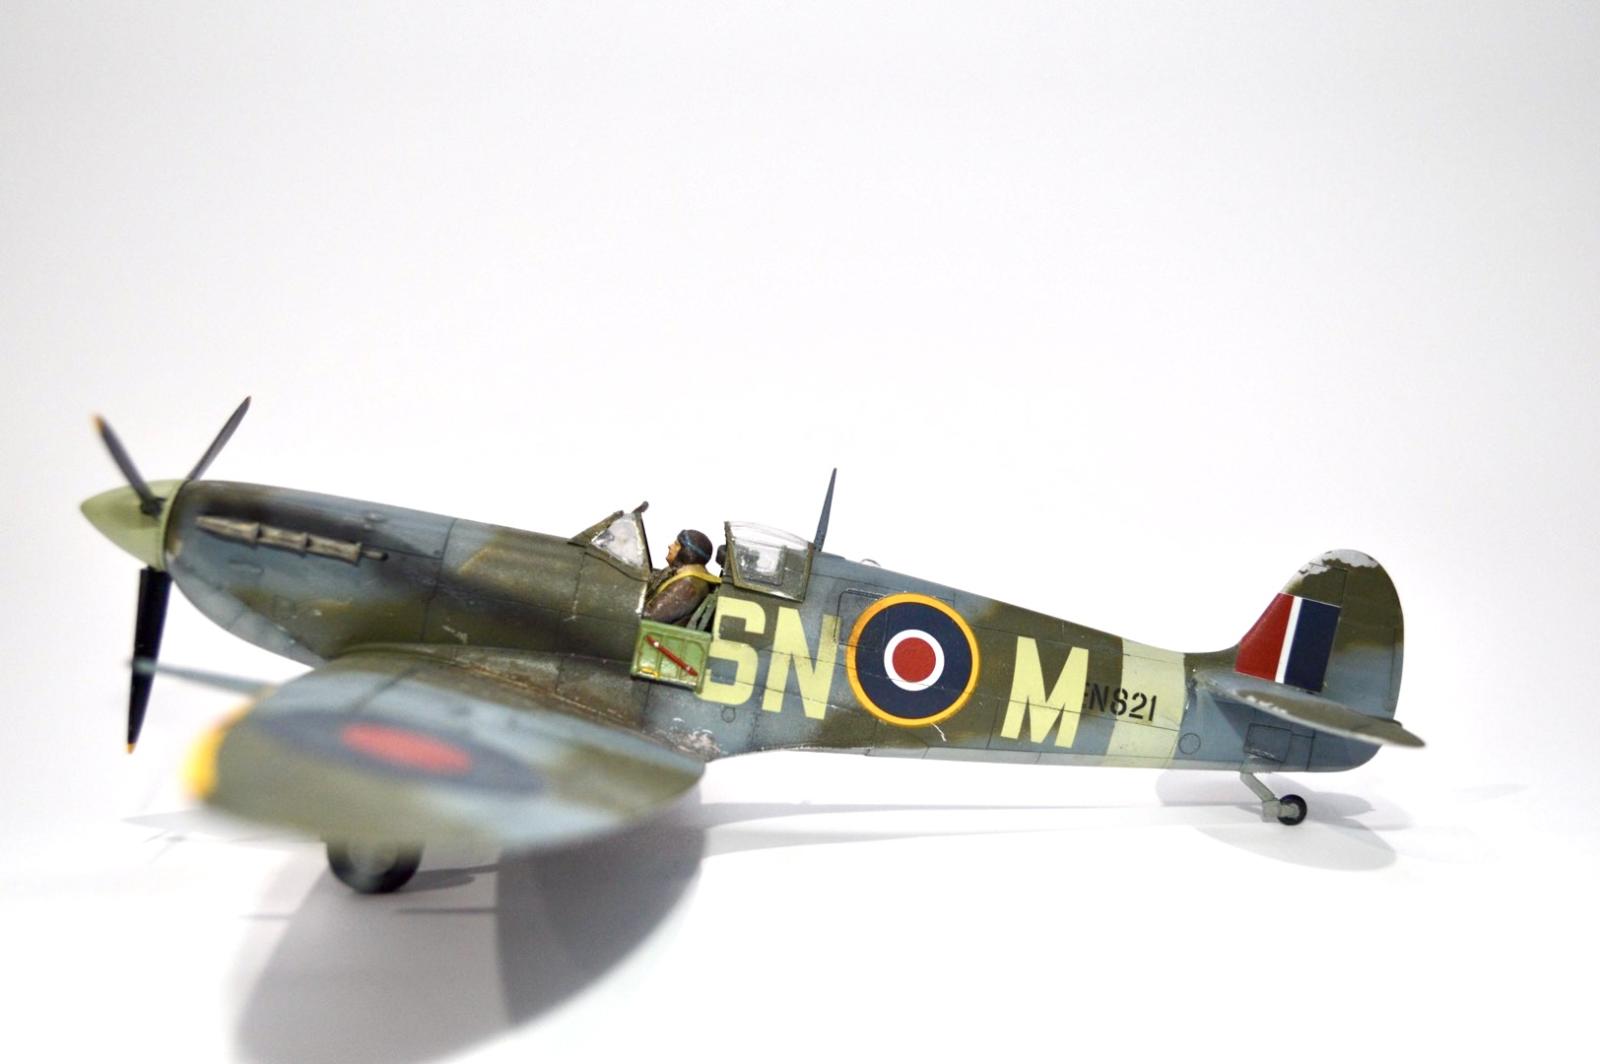
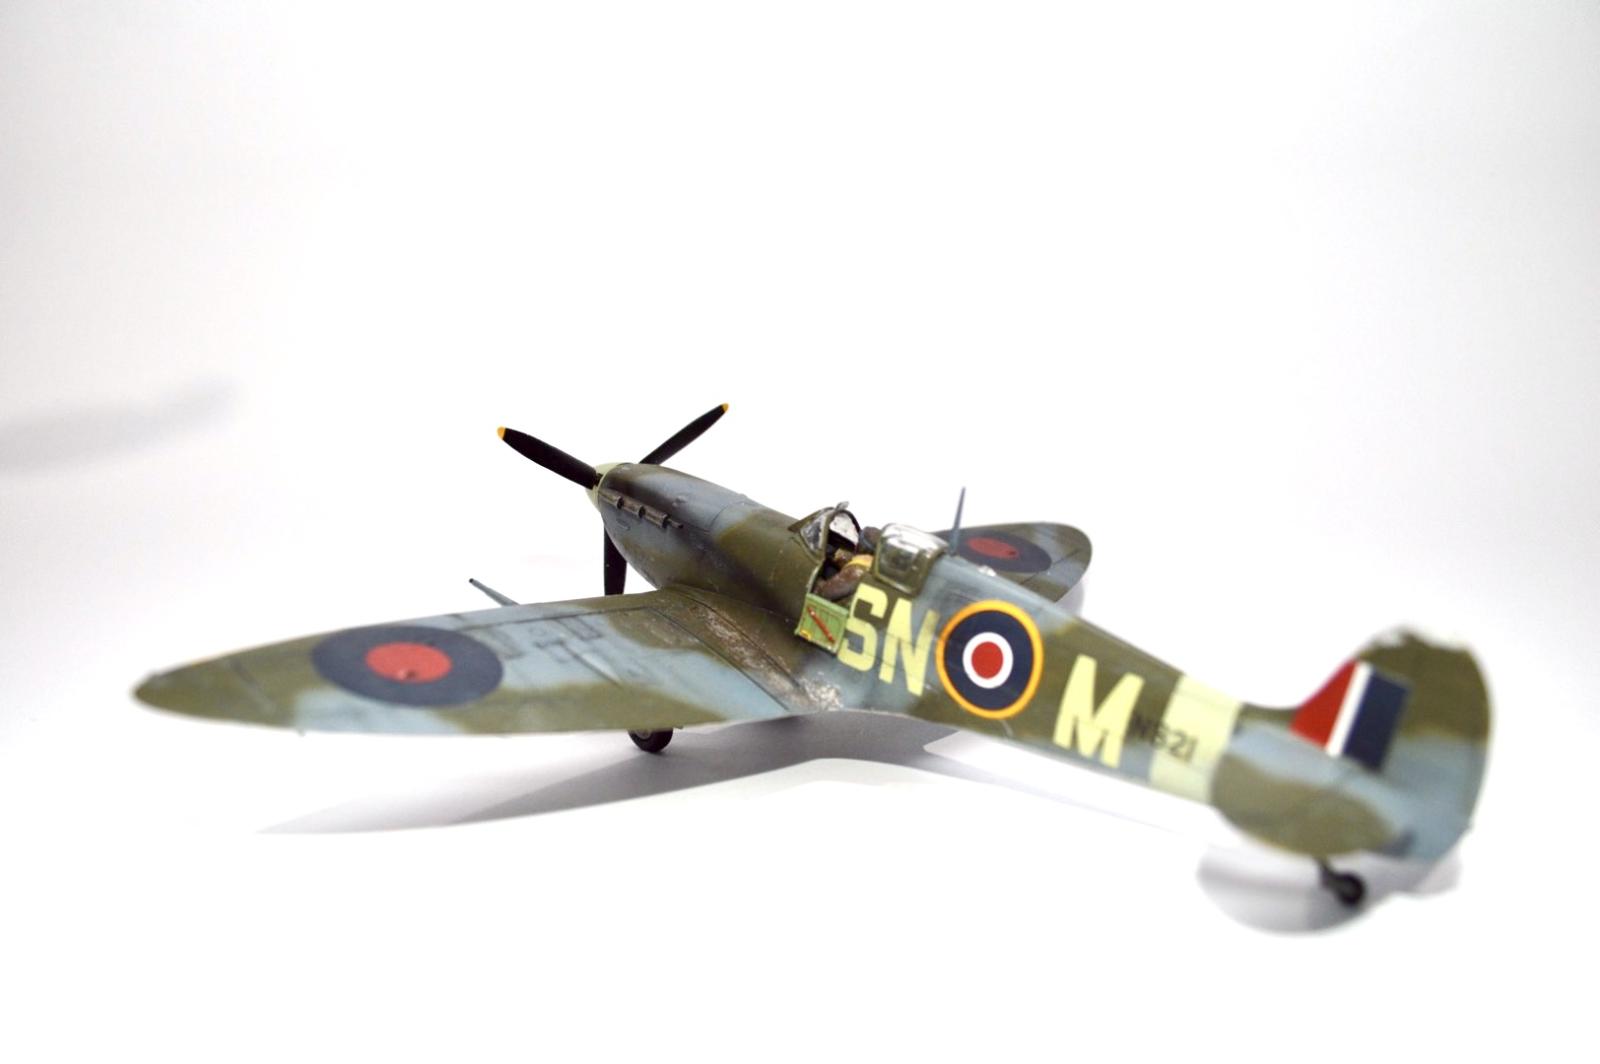
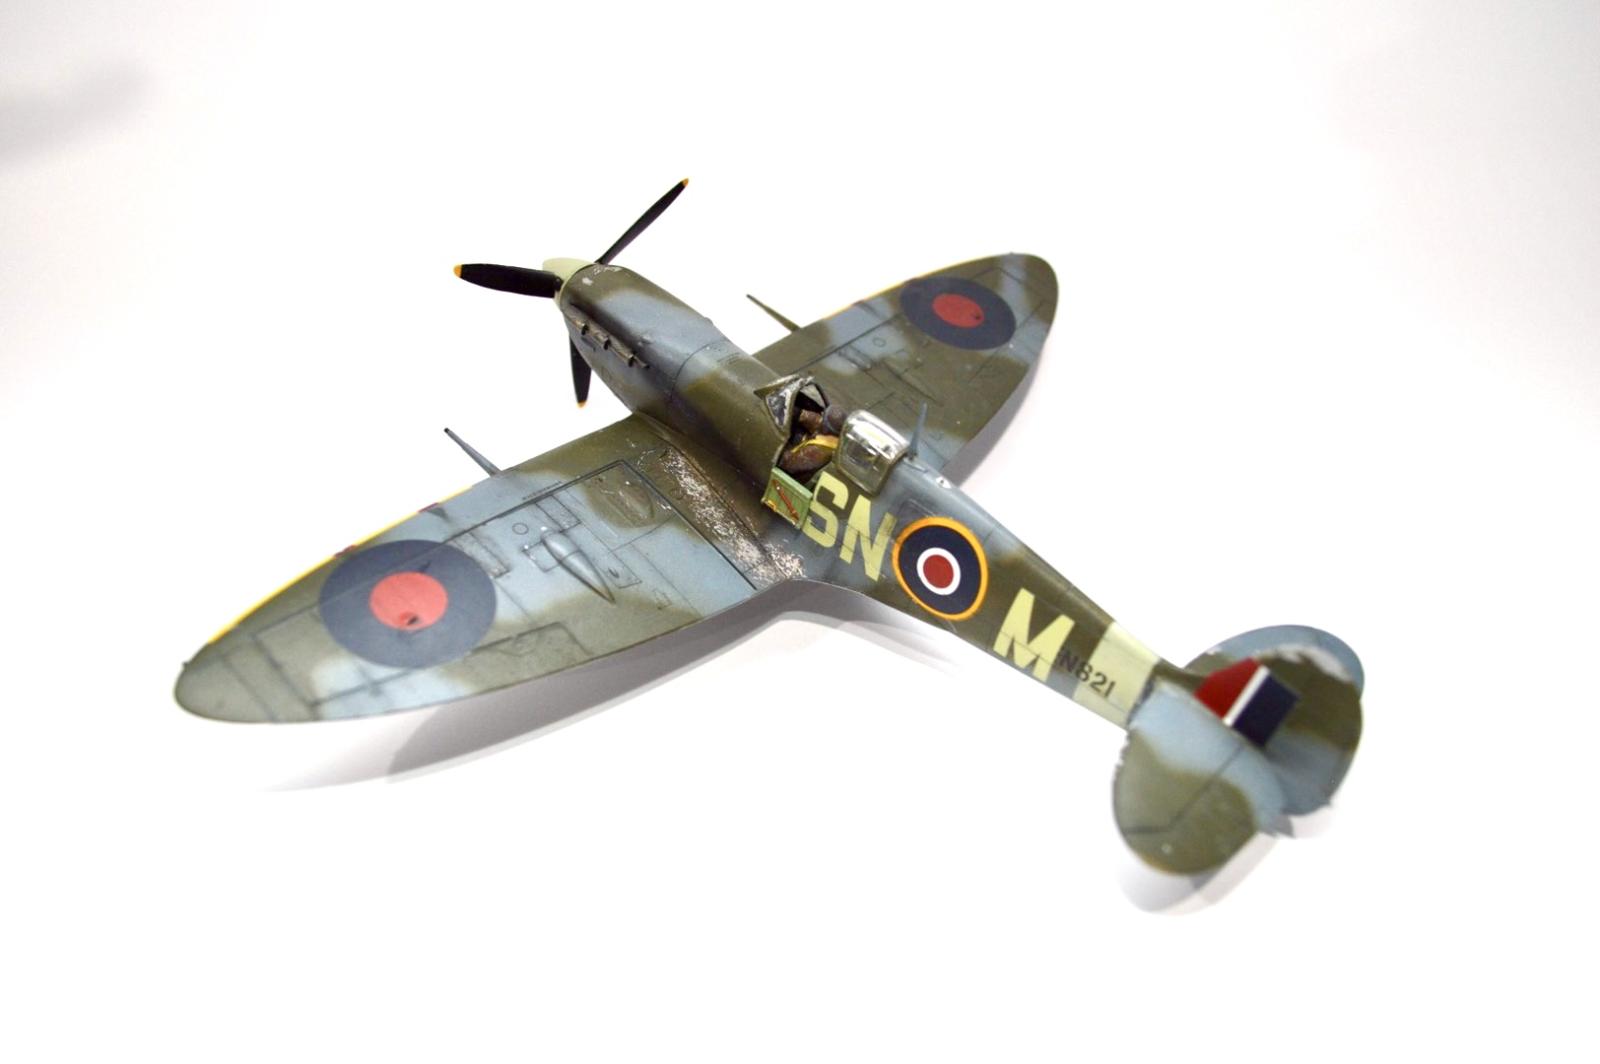
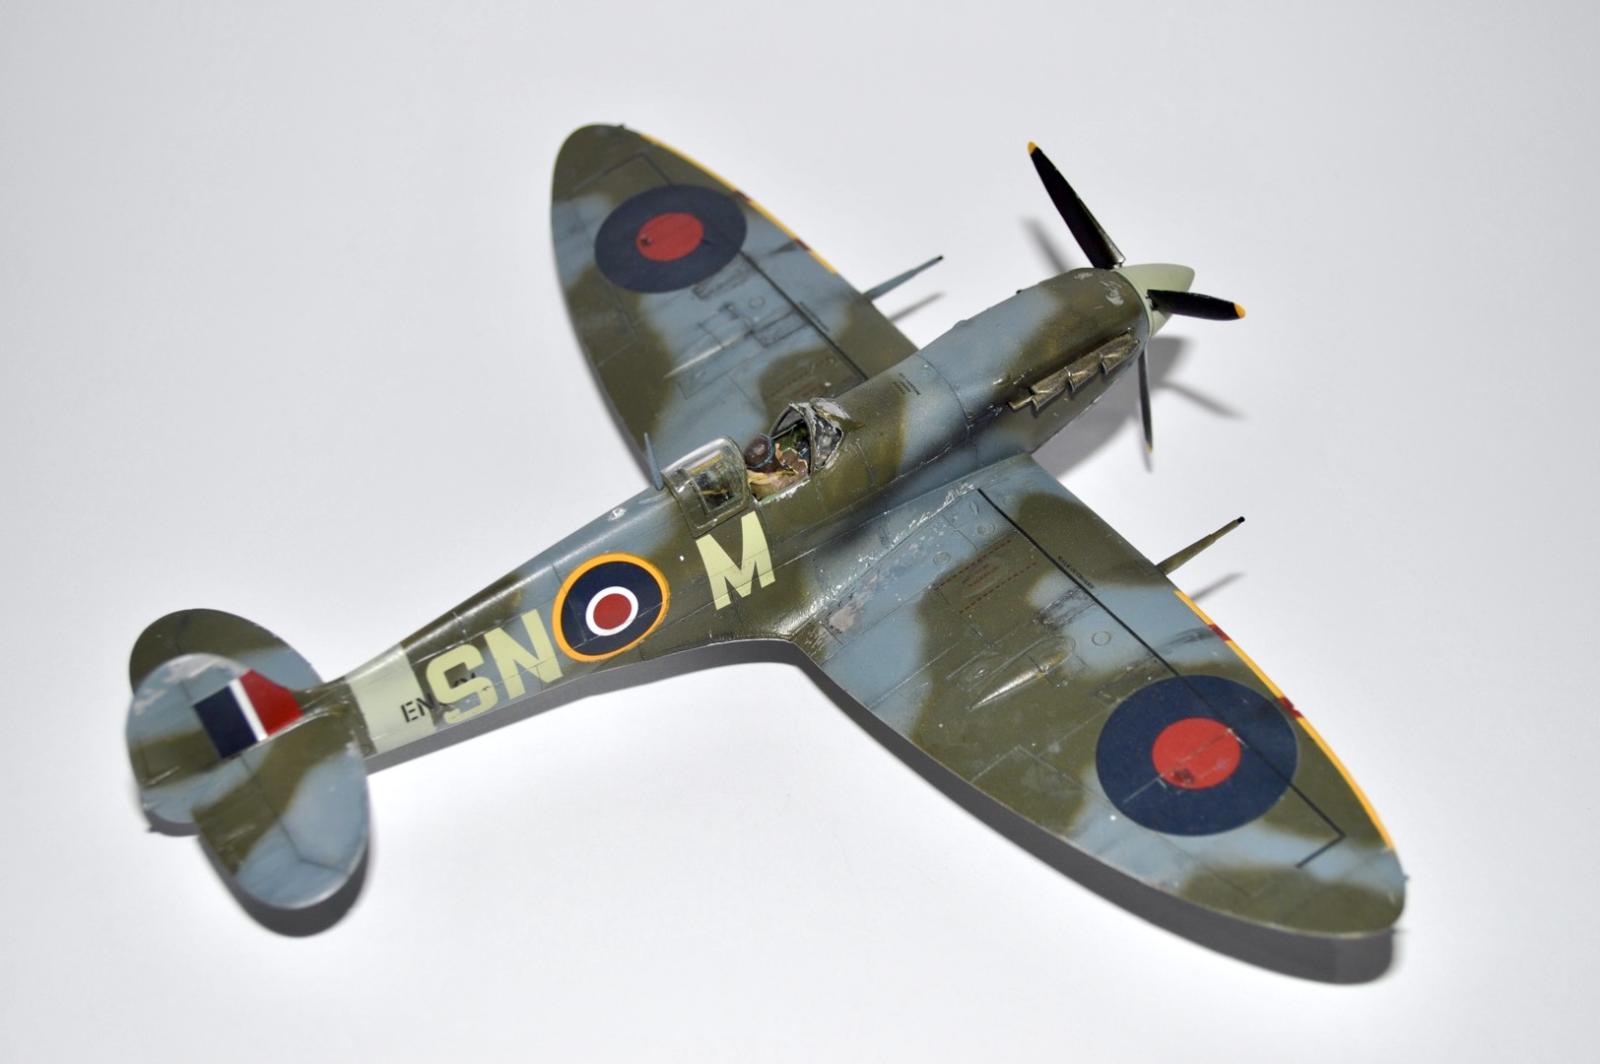
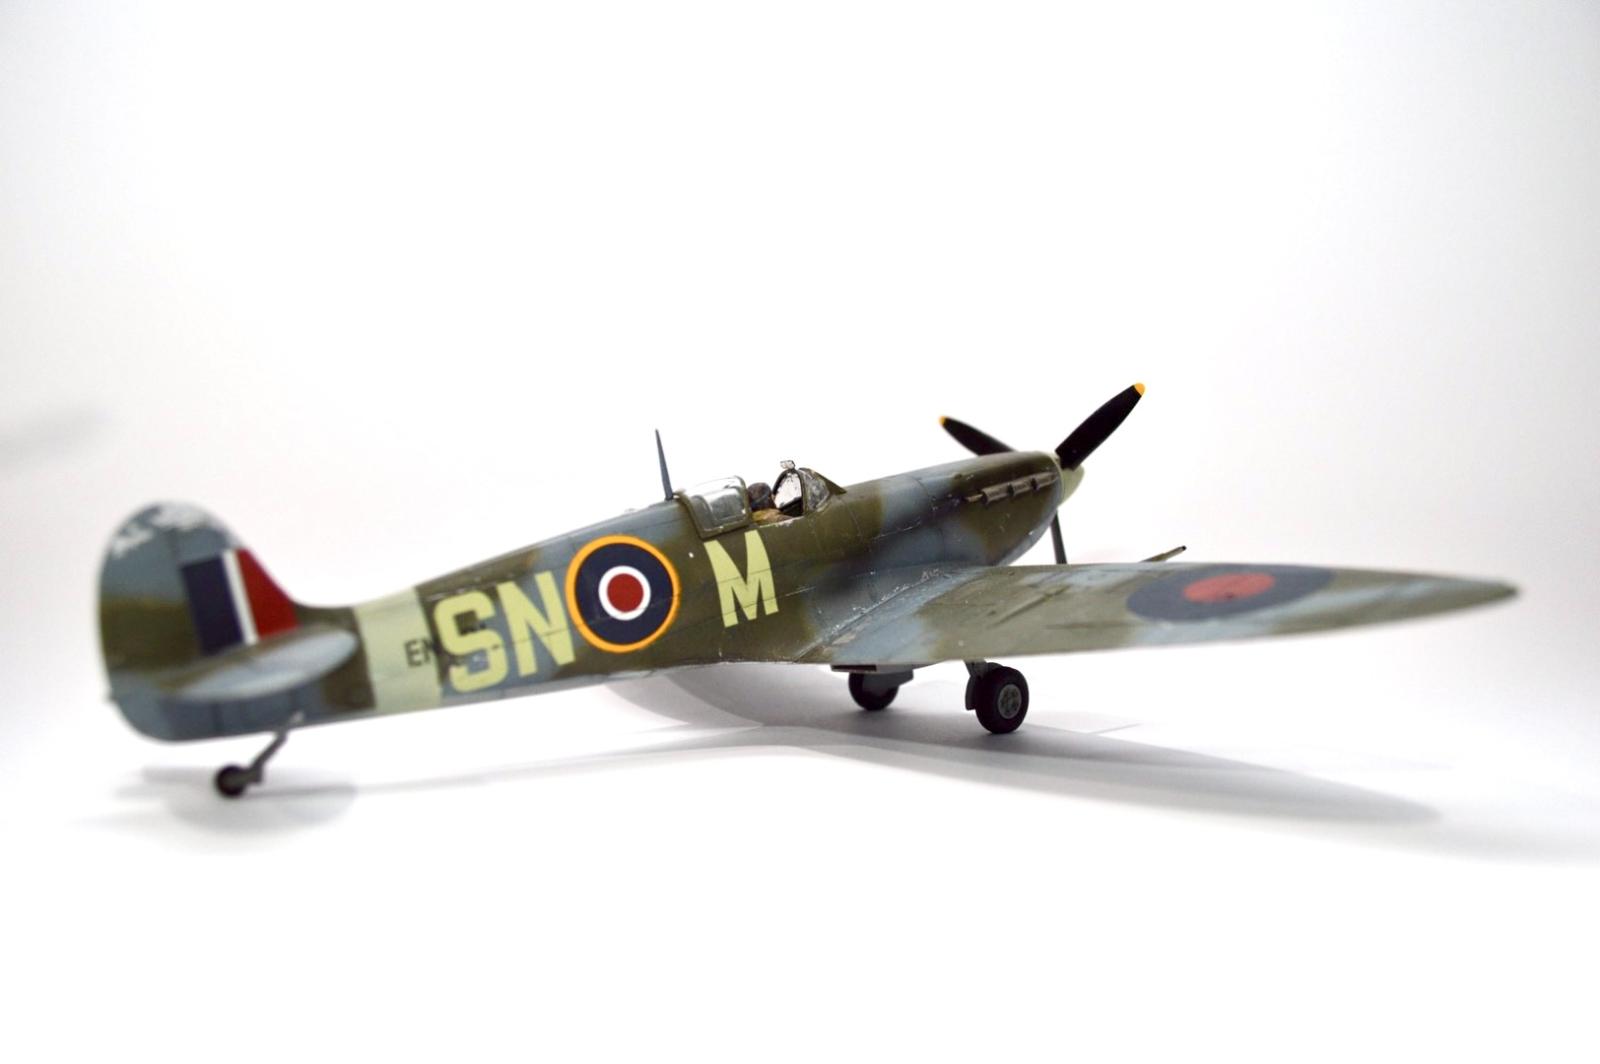
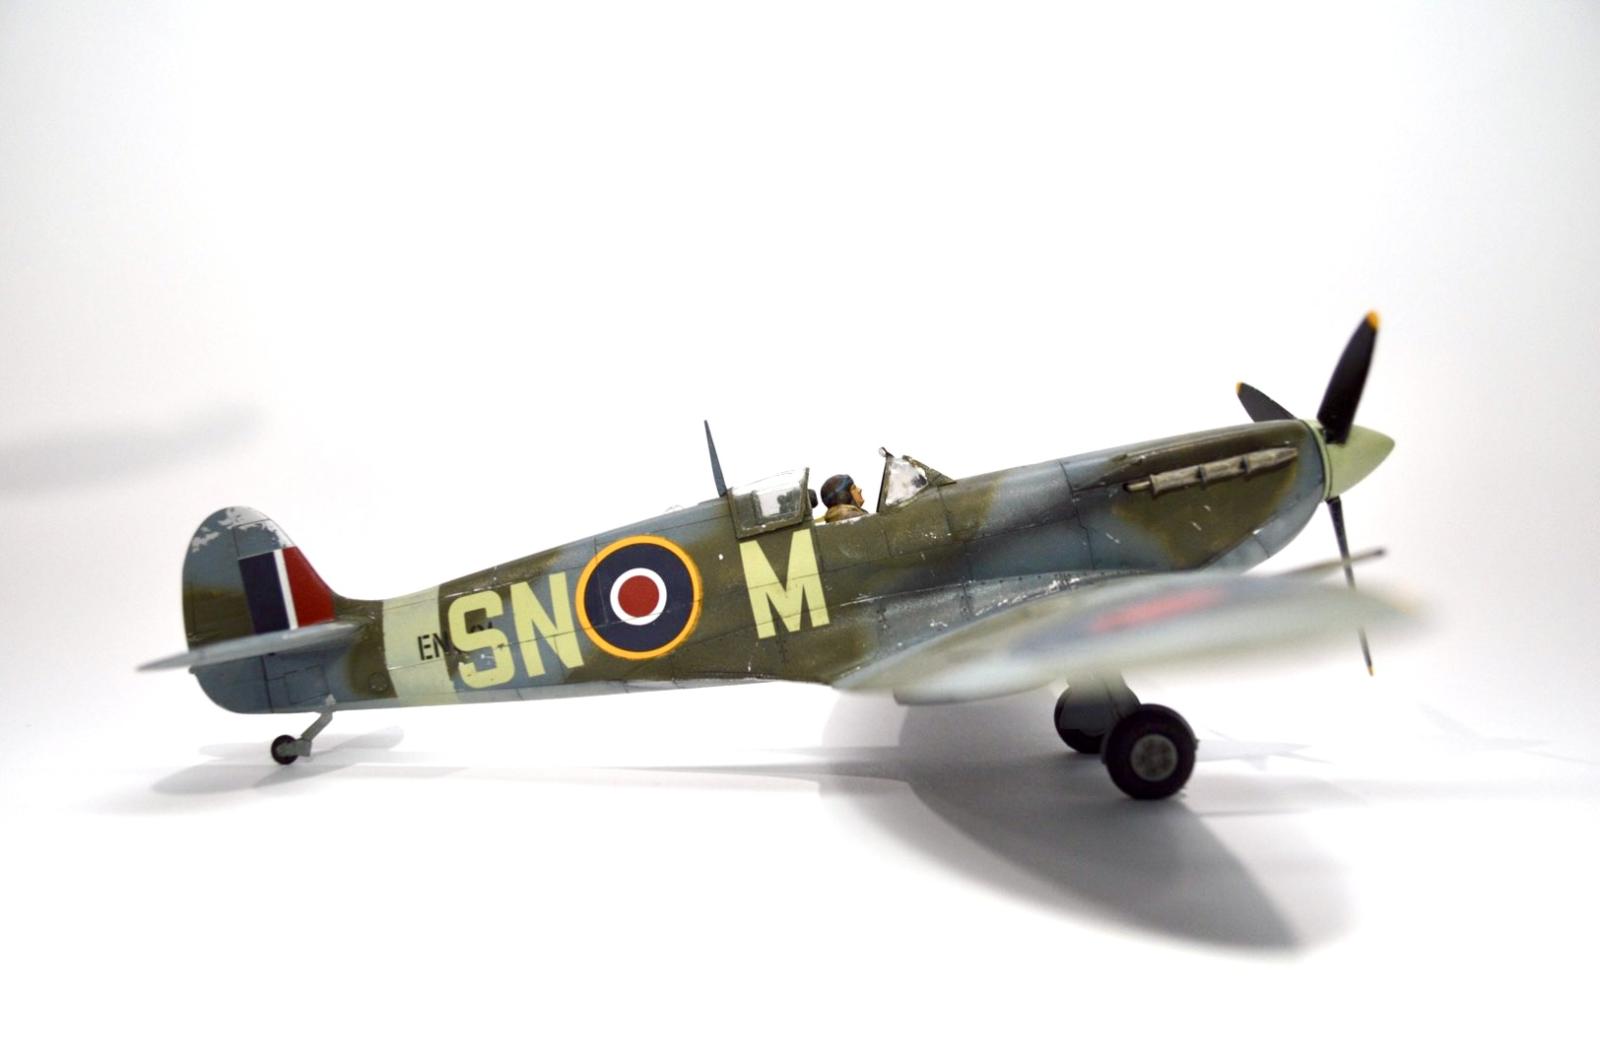
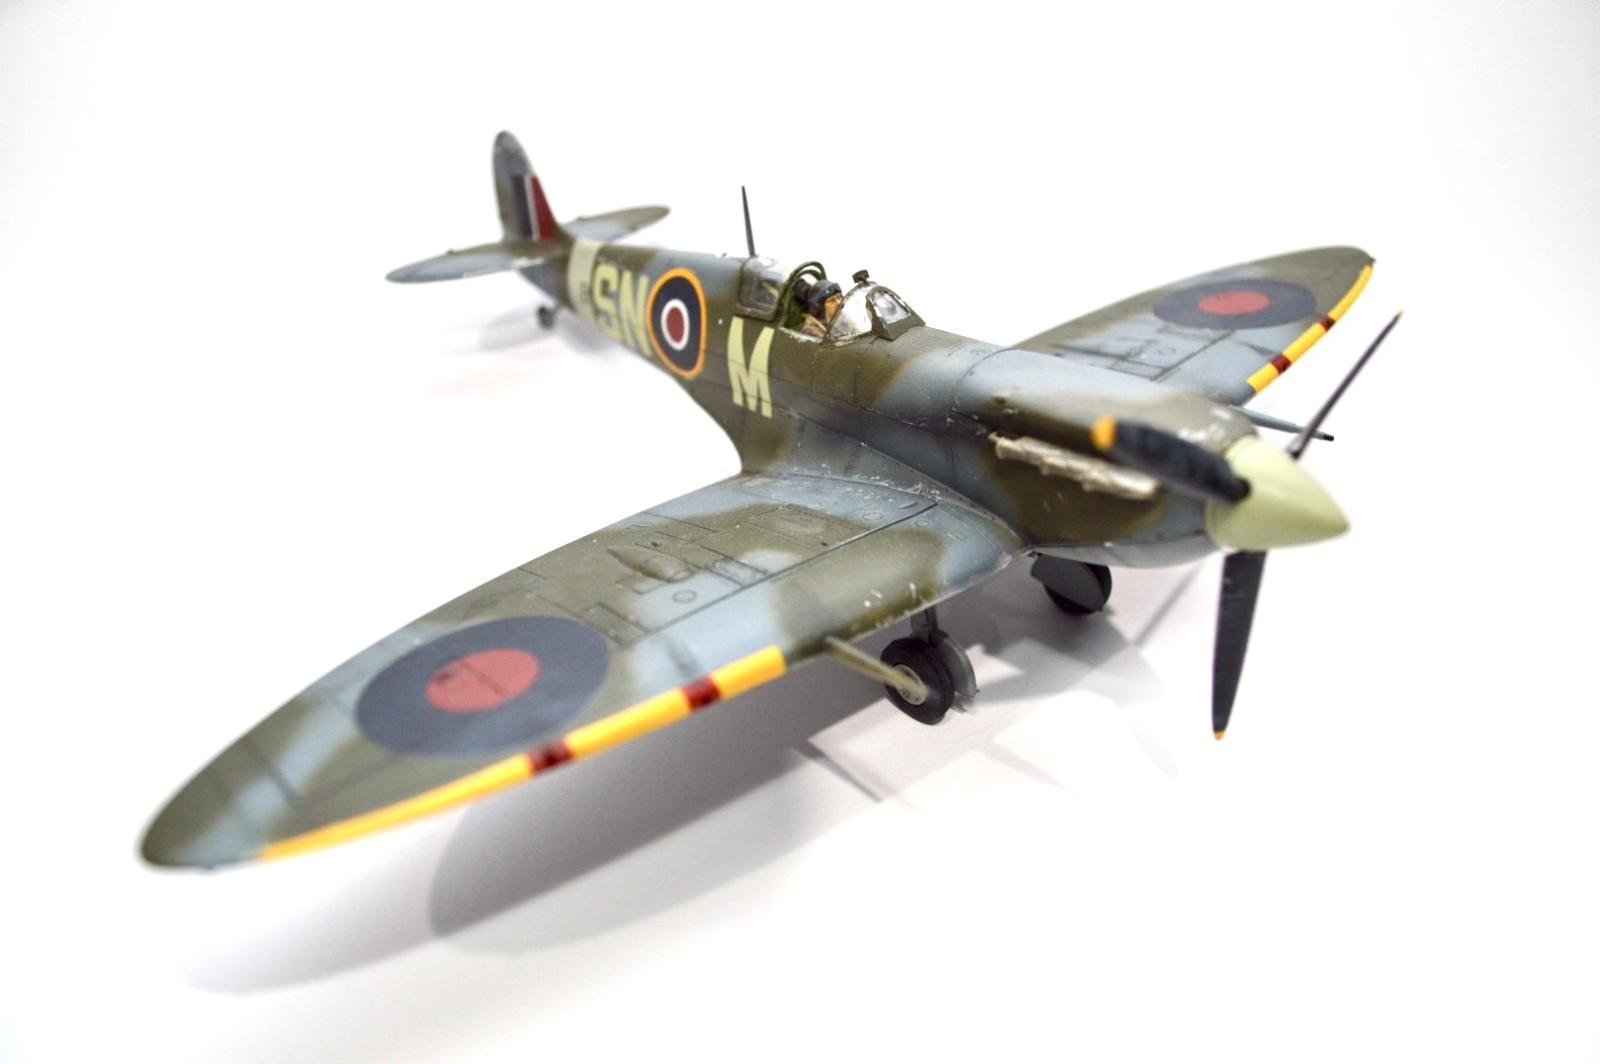
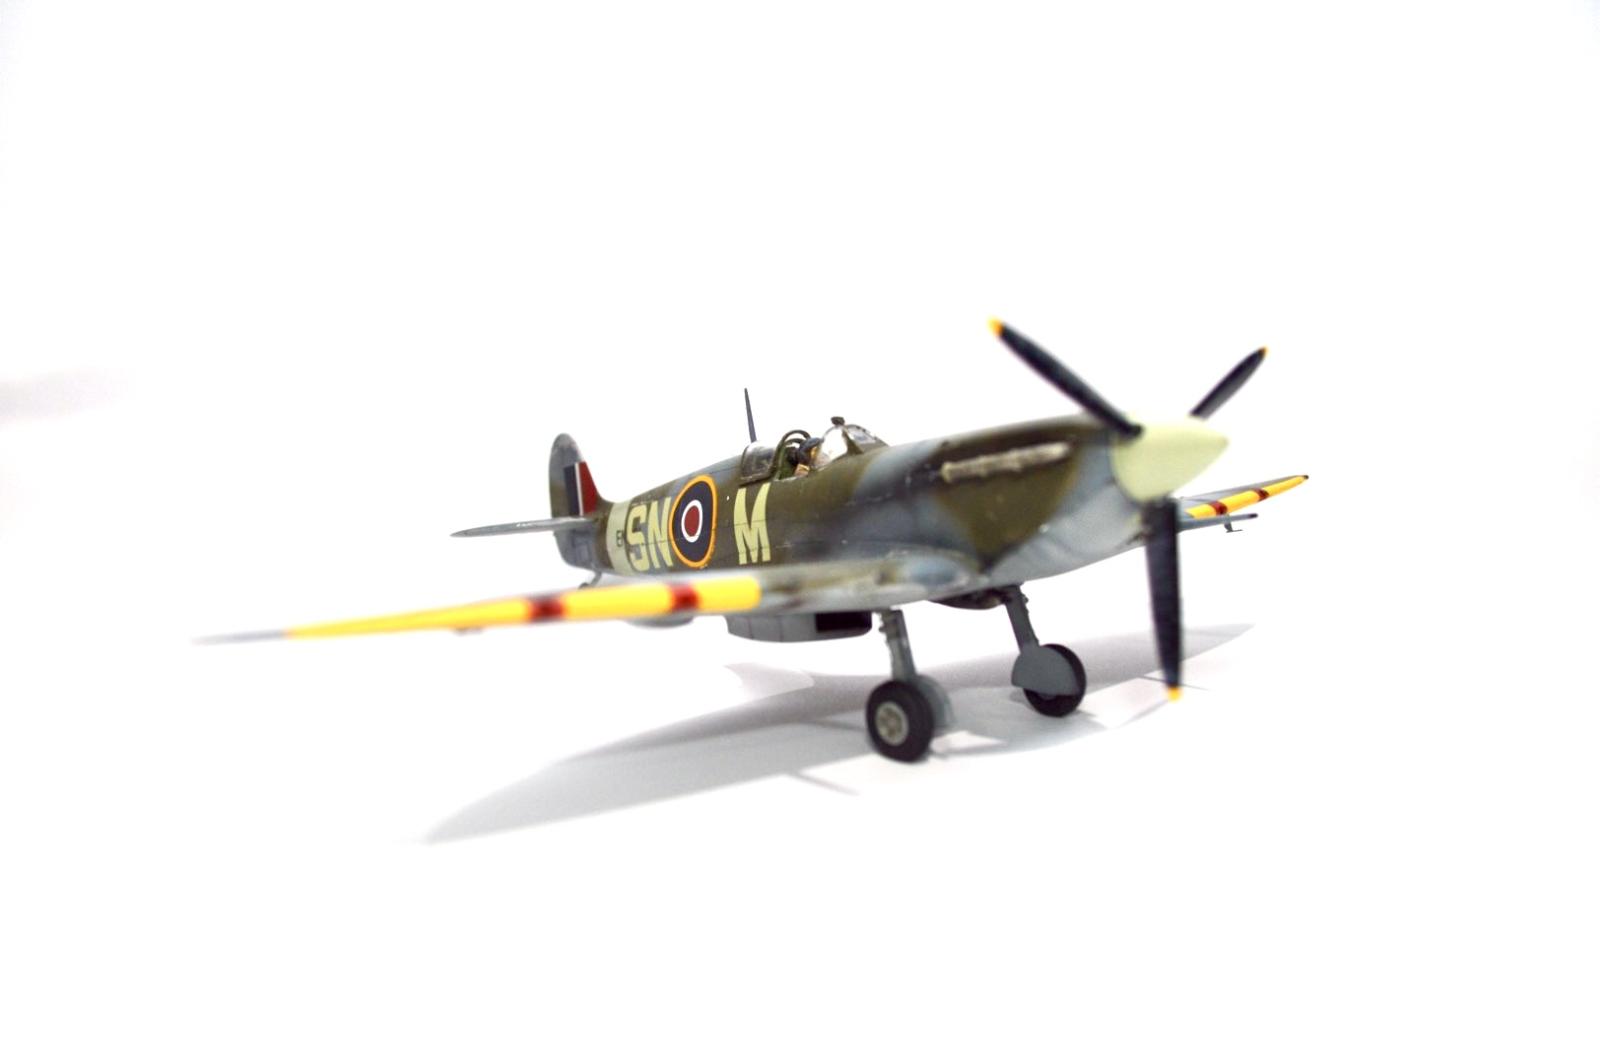
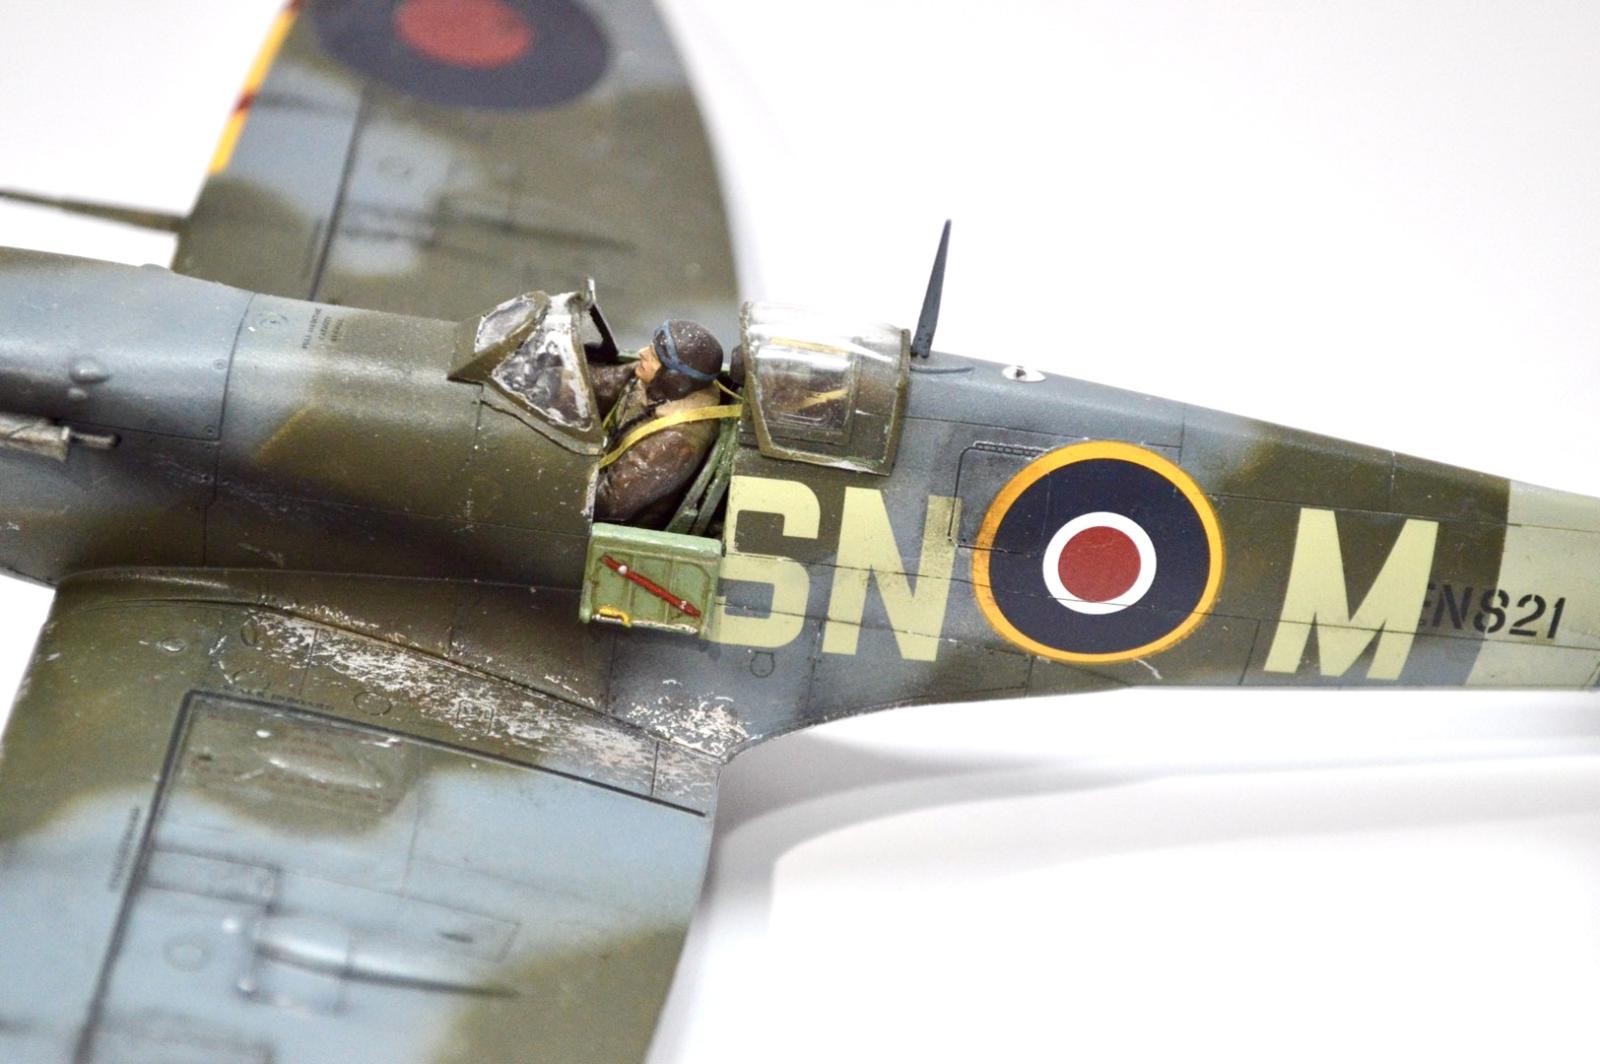
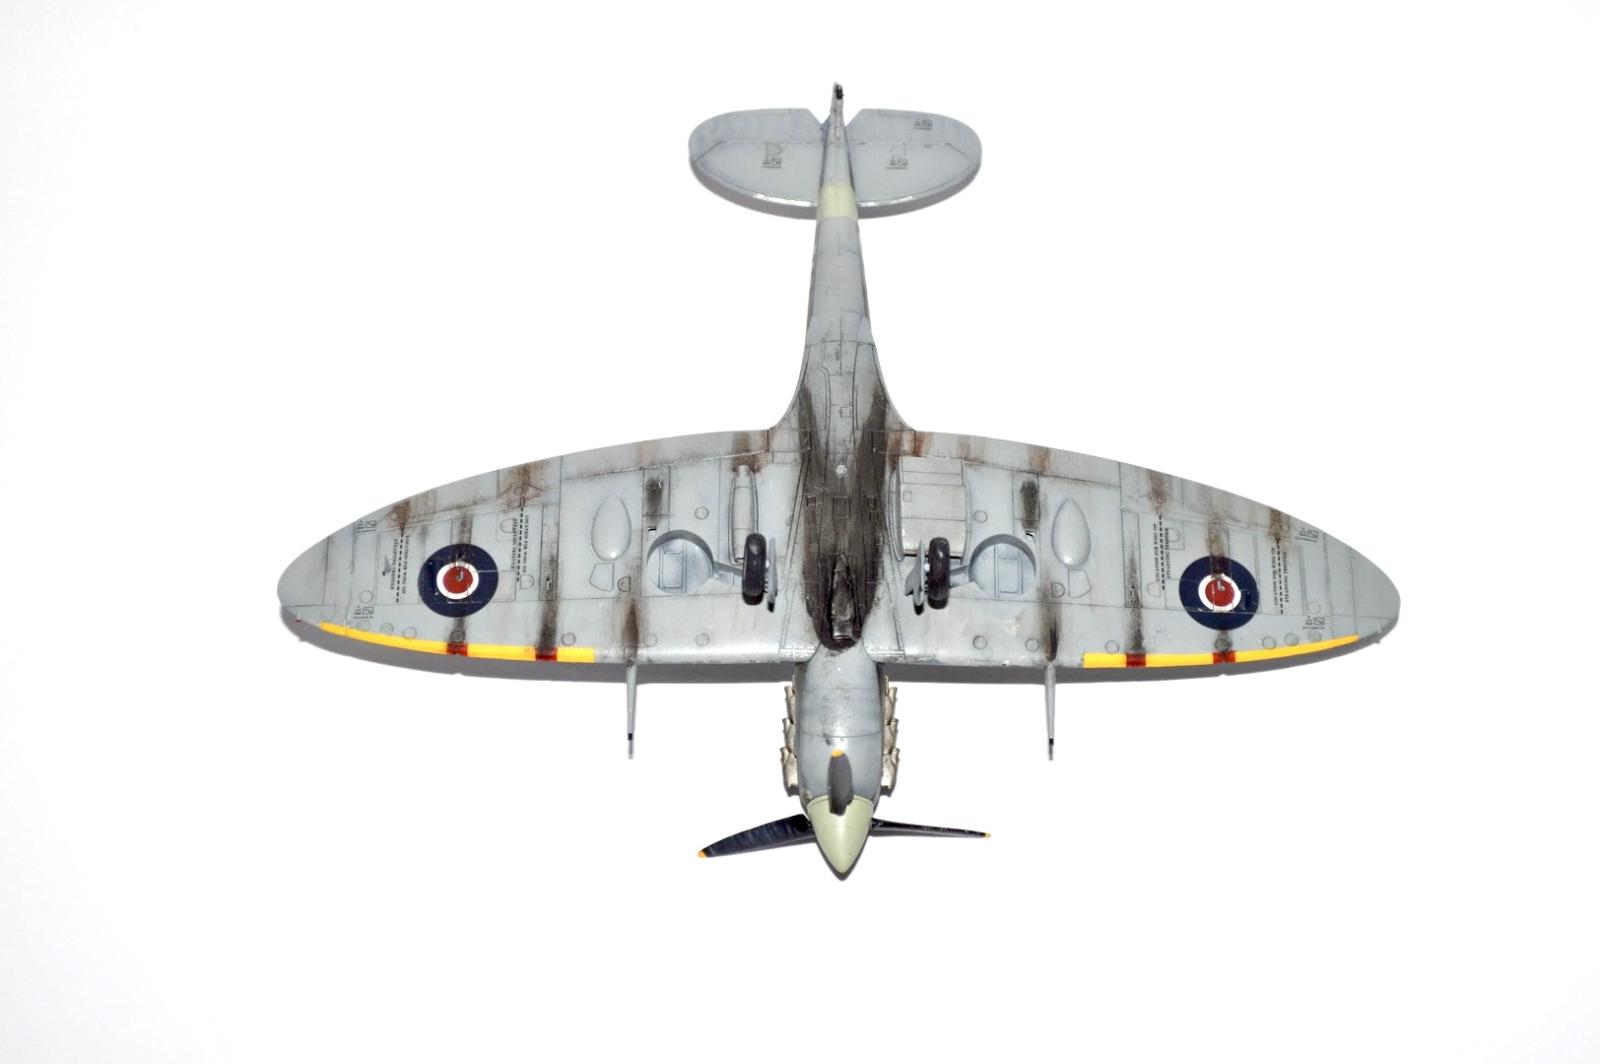
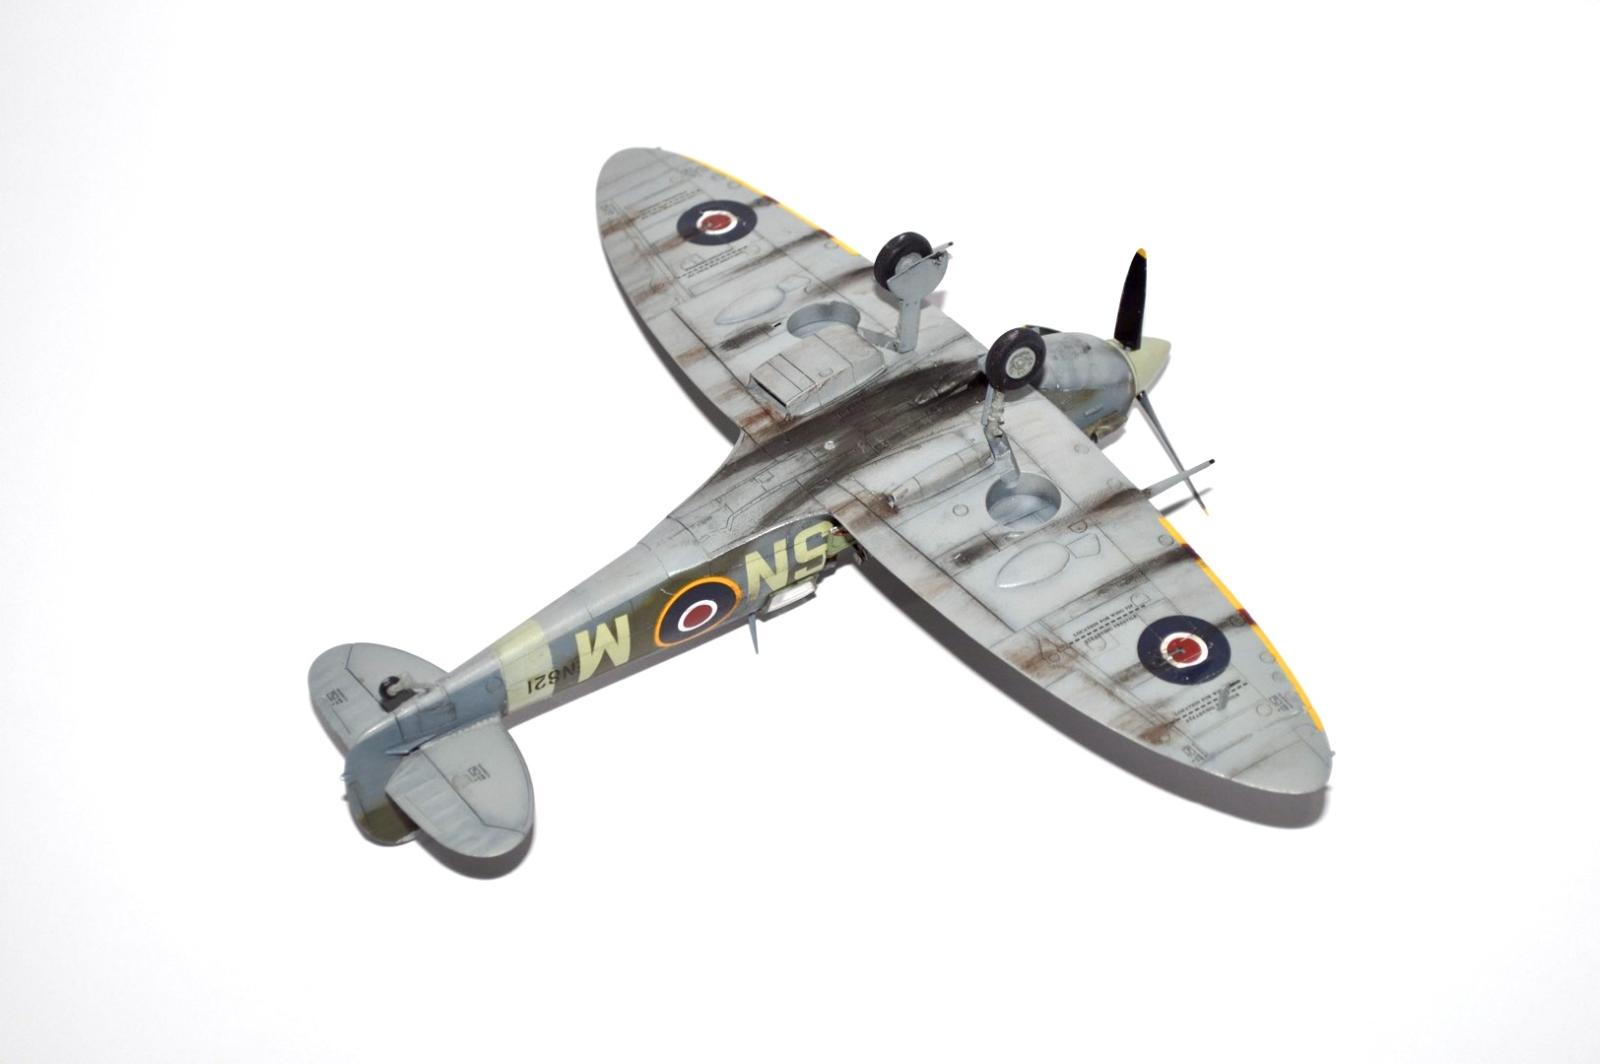
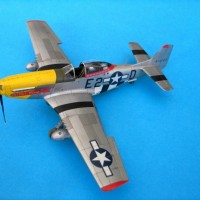
I recently got back into a childhood hobby of making model aircraft, and hopefully my adult approach is much better than my childhood approach 😂😂 I started back at it with Tamiya's 1/48 Spitfire Mk Vb. Version depicted is RAF 243 squadron, S/N EN821 SN M. Not sure of the pilot who flew this aircraft, but it was in service 1941 on I believe.
This is the first time that I've used an airbrush - using a Sparmax Max 3 on this project. I also used Tamiya Acrylics as well as some oils for the weathering effects. Some other firsts. I attempted some scratch build on this. I used some fine wire to replicate brake lines on the landing struts. Can't really see them on the photos. Also, I attempted the pilot's harness, which I mimicked using Tamaya masking tape. For the main tyres, I found a way to mimic tyre treads into them. This may or may not be accurate as some reference photos showed tyres that appear smooth and others with treads. For the experience I decided to add treads. If you're interested to know how I did that, get in touch. For the paint chipping effects, I went with laying down a bare metal paint layer prior to the camo scheme, and then used a cocktail stick to chip away the top colour to reveal the bare metal colour below. I also applied pre-shading to the panel lines on the bare metal paint layer prior to putting down the camo scheme.
I've thoroughly enjoyed building this model kit and I'm very pleased with how it turned out. There were many mistakes along the way, but I'm ok with that. It's all good experience. I'm at the tip of the iceberg 😂
I went about attempting to create this aircraft as it would have looked in active service, worn, used, flown in anger against the enemy so to speak. I didn't want a factory fresh look. Let me know your thoughts as I'm always happy for any feedback.
Looking forward to sharing with you my next project which I hope to complete shortly...
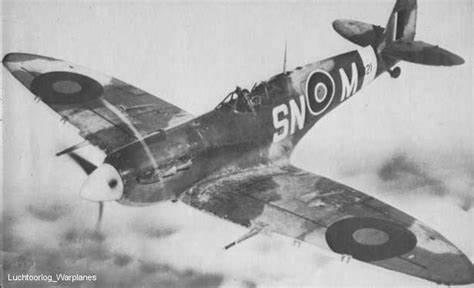
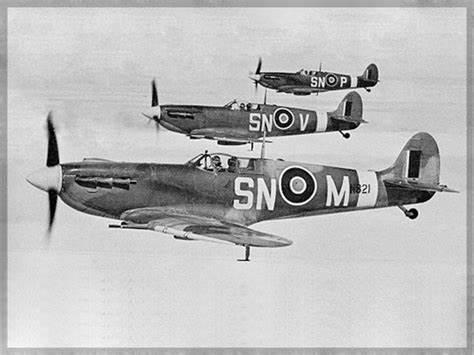


Welcome to the forum. A fine looking Spitfire flown by several pilots but lost in 1944
45MU 16-5-42 243S 'SN-M' 27-6-42 65S 28-10-42 FACB 15-12-42 Scottish Aviation VASM 28-6-43 fuel syst mods wing stiff S Type pt MkIII IFF bomb carrier Cunliffe-Owen 4-11-43 RNDA Lee on Solent 9-2-44 as trainer 886S 3-44 808S Lee 3-44 D-Day hit by EA dived in sea nr Le Havre as pilot tried to climb out Cat Z 6-6-44 (S/L HA Cogill killed)
Hey George. Thank you George for the welcoming and thanks for insightful info 👍🏻
Nice looking MkV! Welcome aboard, I'm fairly new here myself and you will definitely find a outstanding bunch of people here with lots of inspiration, insights, and advice. Lots of great tips and advice too. Looking forward to seeing more of your builds.
Hey Clint. Thanks for the welcoming and comment. I’ll be sure to check out people’s posts and be more involved myself 😀
Great first post, Scott! Nice looking Spitfire.
Welcome back to the hobby and welcome to iModeler. Looking forward to seeing more of your builds.
Hi Gary. Appreciate that and thank you 🙏🏻
Very impressive first effort!
Thank you Emberson😎
Welcome, Scott. that's a very nice result for a first back at th hobby project. Proof it is like riding a bicycle.
Here's a couple suggestions for your next project. When airbrushing, spray at around 15-18psi (get a pressure regulator, it helps a lot). Thing the paint 60 (paint) - 40 (thinner) or 50-50. Use a fine tip, and tighten the nozzle down to where the line of paint is about as thick as a #2 pencil line. Air brushing is an art - I've been at it 50 years and still learning new things, but those two points are foundational to further success.
Hi Tom, thank you for your help 👍🏻
Currently, I have been spraying at around 10-15 psi and mixing my paints 1 parts acrylic to 3 parts acrylic thinner. Although sometimes I experiment with a 1 parts paint and 2 part thinner ratio.
Just curious, the pressure you set the regulator to, is that the pressure before the pressure drop when air flows through the airbrush?
Hey Scott @scottiya I'll add to the great advice Tom offered. I also spray at 18psi, the pressure when the trigger is pulled. Ratios depend on how much paint I have left in the bottle; lot of paint, 3:1 paint/thinner and a bit of paint, 1:1 without problems. Two things to add. Get yourself a paint mule. At the end of a spray session I have some paint left over so I practice mottles and free hand on this
Also get some poster board from the Dollar Store for your background. Besides the blue above, I have black, grey and white
That’s awesome @blackadder57 George. Thanks for that. 😎
Hey George @blackadder57, I took your advice and re did the photos of the spit with poster board. Thanks for that.
Really pops out now Scott @scottiya Get a few different colours. This link will take you to an article I posted here 3 years ago. I never changed camera settings, the poster paper did all the work
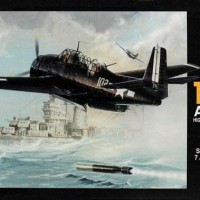
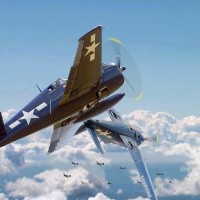
Excellent. I am fairly new here too and have only posted a few. Back at the hobby after 4 or 5 decades away. Really relaxing now. I learn so much from this group. I have an SBD 3 coming here soon.
Hi Mark. Thank you for posting.
Good to hear you’re back at it. If you don’t mind me asking, what’s an SND 3?
Pretty sure he meant SNJ - that's "Navy" for "T-6."
I actually meant an SBD 3 Dauntless but my careless typing got in the way.
I had to look this one up Mark. It kind of looks like a cross between a Thunderbolt and a Corsair!
Looking forward to seeing your completed Model.
You chose a good kit for your return and seem to have made a fine job of it, welcome to iModeler.
Thank you George 👍🏻
A very warm welcome to this forum, Scott @Scottiya
You re-entered the hobby with a beautiful result on this Spitfire.
Some for me, re-entered the hobby after a too long break since childhood, also started with airbrush and as said by Tom @tcinla, airbrushing is an art, I'm still learning a lot about it here on the forum.
Looking forward to see some more of your work.
Hey John.
Thank you for your welcome and kind words. I’m looking forward to seeing more of yours and others work too.
It’s good to learn from others triumphs and challenges as well as our own hey😀
For your first model on your return, you certainly did okay, Scott (@Scottiya). Welcome aboard! This is the best place on the Internet to learn.
Hey Matt @matthewfdyer
Thank you so much 😊
Scott, that's a really fine effort for your first time with an airbrush. Welcome to the iModeler community. My advice: Treat this place like a sponge. In other words, soak it all in. Visit daily, leave comments on other people's work, post your own work as often as you can and explore everything this site has to offer. If you're really passionate about model building, then you should make iModeler a part of your daily routine...and you won't regret it.
Well said, John @jdtruby! 👍
I like it John @jdtruby and thank you for your welcome and words of encouragement. 😎👍🏻😊
Excellent spitfire, Scott!
Hard to believe this is your first airbrush job, looks really great! With experience built-up gradually and with the great advice offered from the Good People here, you will get even better!
Looking forward to your next builds.
Welcome aboard!
Hi Spiros @fiveten. Thank you for your encouragement. Really appreciate it 😎
I have a lot of exploring to do on here and lots to learn.
Thank you for taking the time to post 😊
That's a great return, Scott @scottiya! 👍 I came back to this hobby around 1987 when I bought the Monogram 1/48th A-10 and a Paasche Model H airbrush and it's been a fun and educational journey ever since. There is not much advice I can add to what you've been given but I will add my encouragement and support; keep at it, try new techniques and materials, learn from mistakes (boy howdy, do I get plenty of "learning" from those to this day! 😉 😄) and have fun while doing it!
And, welcome to iModeler! 😊
Hey Gary,
Thank you for that and your encouragement. Great to hear from you 😊
Welcome, Scott! Can’t go wrong with a Spitfire!
Thanks John.
Truth be told, The Spitfire model was a gift 😂
Funny how that happened as I had considered getting back into modelling but hadn’t mentioned it.
Welcome aboard! Excellent first project. Way to jump into the deep end with airbrush and weathering! Keep watching and learning and your skills will grow, but keep in mind we are all improving with each new project: new tools, new paints, new weathering products, new techniques.
Hey Greg,
Love that. Thank you ☺️
Excellent results for your first post and re-entry to the hobby. I think you'll find that now is a great time to be a modeler with all the great new stuff coming out and the vast amount of help and info available from experienced modelers online.
Hi Chas.
Thank you and yes a great time. Exciting 😎 This group is amazing too.
Very nicely built. I am also practically new here and have also returned to this hobby after many years. So welcome and I wish you many more beautifully built models.
Hey Milan and thank you for the warm welcome. May you build many more beautiful models too. I will definitely get to exploring what you and others have created 😀
🙂 ... Greetings ... 🙂 :
A very humble welcome to this forum Scott, friends a plenty.
Well executed Spitfire model and very good painting.
Greetings my friend and thank you for the kind words and warm welcome 👍🏻👍🏻
Nice one. It's interesting coming back from the dead to modern modelling isn't it? So many different ways to skin a cat and be relieved of your hard earned.
I started again in lockdown. Wasn't going to build a Spitfire (I have 3 in the stash I wasn't going to have🤣).
The paint pressure and thinning thing, honestly, they are just guides and time spent with your gear and materials will give you a good feel.
For instance IF you were going in close you would thin more and use less pressure. A needle stop is really handy there.
I only really use lacquers so can't really comment too much but one useful tip is to keep the air flowing constantly then bring the paint in. It prevents spatter etc.
I would also usually look to get a wet coat. Not swimming but wet. The thing is that the majority of it will evaporate and without the wet layer you may well get graininess on the surface as the stuff dries mid air (also happens too far away). The wet layer should allow the paint to level properly. I have seen the results of a "Friday afternoon" job on the full size (to be fair it was the underside with barely room to crawl). Sand texture😩. Good flat surfaces aid decal fixture. Depending on the situation you can spray a thin layer of thinners onto a job to improve/level the surface.
Another tip is that when we painted the full size we added lightness...we only put on what was necessary. A lot of modern kits (1:72 from Arma and IBG in particular) have exquisite fine surface detail, so a good strategy helps retain it. You see people putting on layer after layer "because it's the done thing"...
But do you really need that extra layer? If the wash you are using works fine without a clear coat then why do it? Less is more, particularly with weathering (I am no expert) but it is much easier to add small amounts than it is to remove an overjob. Weathering builds at different rates. Wear and fading fairly slowly. Spills and soot fairly quickly. Like it or not rivet counters, we maintained the things in action and cleaning is part of maintenance. Some gimmies, radials usually use total loss oil systems so the stuff gets lost overboard (over everything) and c**p sticks to it. Inline exhaust stubs usually don't see soot/Ash on the first one, just the rest in the c**p stream.
Have you considered using oils for rendering? You can achieve all sorts of effects with a small handful of oils and mineral spirits (not enamel thinners). The beauty of oil washes and dry brushing is that it can easily be removed or sealed in later with clearcoat. A few relatively chap tubes of Winton oils will last decades (I have just killed a tube over 30 years old because the lid stuck). Various companies are selling all sorts of snake oils whereas you can pick up pastels, acrylic inks, inktense pencils, oils and archive ink fine liners online for a fraction of the price.
Paint mule (practice piece) is an excellent idea as it taking notes. Plastic spoons are also good for tests and not being flat, they test your technique.
Another gold mine is you tube. There are some very helpful videos from the likes of Doogs models, Will Patterson, Martin Kovak (night shift?) Who try things so that we don't have to. Some of the airbrushing demos are superb.
Finally (if you are still awake) don't forget it's subjective. If you like it it's good. If things are not going 100% don't flog it to death, walk away, think about or, chances are it's fixable. OK, the outcome may not be perfect but take away the positive and as long as we know why things don't work out, we learn.
Just don't build a Lynx with droopy blades right...😳
Sorry, got carried away but its stuff I wished I knew a year or so back.
Be lucky mate, enjoy.
Hey Chris,
Thank you so much for your post. I very much appreciate the time you’ve taken to share your experiences and strategies.
It’s always great to realise that I’m on the same track as you and others here. I’m experimental and will have a go at different techniques.
Presently I’m spraying on Tamiya acrylics as my local model shop has a really awesome stock of all the colours and a respectable choice of model kits.
So far I think I’ve found the ideal set up for me with my airbrush, but no doubt as time goes on, what I think is working now possibly isn’t. Rather than spending heaps on having various airbrushes, what I’m doing is having a second needle for my existing brush. So my airbrush is a 0.3mm needle as standard and I’ve bought a 0.2mm needle (with cap and nozzle to suit). Looking forward to experimenting with that and see what difference this will make to the more detailed work.
I am making use of oil weathering techniques but wow, this is a whole new world to me, so much to learn now and building up my experience will be key. I have spent many hours on YouTube and will continue to.
One of my favourite YouTubers is The Inner Nerd.
Great to hear from you and thanks again for your help and sharing your passion.
Stay lucky too mate.
Ciao welcome and congratulations for your kit; bravo 👏
Ciao Tarantino and thank you for the welcome. I appreciate it 😊