Review: MiniArt 1/48 P-47D-25RE "No Guts... No Glory!"
78th Fighter Group ground crewman Warren Kellerstadt recalled: “They didn't tell us when D-Day was going to be, but the night before we could smell something in the wind. They closed up the base tight and wouldn't let anyone on or off and right after supper on June 5, they ordered black and white stripes painted around the wings and fuselages of the planes. We armorers were kept busy all night lugging bombs from the dump out to the dispersal area to stack next to the planes. I worked til midnight, then had guard from 0200 hours. All night long the bombers went out, first the RAF, then ours. They all had their navigation lights on because there were so many of them they had to worry about collisions, and the sky looked like a Christmas tree, full of red and green lights.”
The 78th cranked engines at 0320 hours for the first D-Day mission. Rain was pouring and visibility was so bad pilot Richard Holly remembered that when Colonel Gray's first section took off, “He just barely cleared the end of the runway before he was out of sight.” When his flight lined up for magneto check Holly instructed the other three pilots to set their gyros on his and follow him. “It was the only instrument takeoff I made in the war and also the only one I made with water injection all the way because we were so heavy.”
The 78th was heavily involved in air support for the invasion over the month of June, flying multiple missions almost every day in marginal weather. By month's end, the group had flown 45 missions, during which they claimed 20 aerial victories, one ground victory, and thirteen locomotives, for a loss of 16 pilots killed and one evader, the heaviest monthly loss yet experienced. The 83rd Squadron flew 639 sorties with 14 aborts including eight failing to take off successfully with their heavy loads. They fired 78,000 rounds and dropped 79 tons of bombs; the pilots averaged 78 flying hours each, also a new record.
As losses mounted and new pilots arrived in the unit, some proved to be different from the veterans they replaced. Crew Chief James Tudor recalled, ‘Some young pilots coming into the unit gave us mechanics a fit. While flying your plane on a mission, they would get as far as the Channel when all of a sudden the engine would begin to act up, so back to base they came. The write-up in the Form One was familiar: “Engine runs excessively rough,” or “Prop surges at a given altitude.” Some of these guys we hated to draw once we got to know them, because you could predict an abort with a high degree of accuracy. Some overcame it after a few trips, others never did.'
19 July saw both success and tragedy for the 78th. Major Ben Mayo, 84th Squadron commander, led 78A group on the first deep-penetration escort mission since the invasion. Weaving over the lead bombers, a German airfield full of airplanes was spotted at Eutingen. Ten minutes later when their relief arrived, the Thunderbolts went back to hit the field. Dropping low 20 miles out per standard doctrine, they made a sweeping pass over the field, which was only lightly protected by flak. Mayo - flying his new P-47D-25, which he had named “No Guts No Glory” - saw the attack was successful and called for a second run which was more successful: 11 pilots had blown up 17 Ju-188s, Do-217s, Ju-87s and Me-410s. As they pulled away from the burning field, 82nd Squadron commander Major Doug Munson, flying his fourth mission of his second tour, spotted another airfield at Freudenstadt. Leading his squadron in an attack against Ju-52s, he destroyed two. Again the defenses were light and Munson called for a second run. As Jim Kinsolving remembered, “He got good hits on a second Ju-52, and then he appeared to take a flak hit and nosed down. He struck at a slight angle and burst into flame.” While both the 82nd and 83rd squadrons went through several commanders due to combat losses, Mayo continued - seemingly indomitable - until he failed to return from a dusk mission to Arnhem on 18 September in support of the surrounded British paratroopers; whether it was flak or an enemy fighter popping out of the clouds in the strange misty light, no one ever knew. Mayo was the only loss.
THE KIT
The MiniArt P-47D-25RE was announced this past Spring and began drawing interest when CAD drawings were released that showed they intended a kit far more detailed than the Tamiya P-47s. There are two kits that have now been released, the “Basic Kit” that is reviewed here, and an “advanced” kit that includes a fully-detailed engine and accessories section and full gunbays and ammo compartments in the wings. The kit has petite surface detail similar in quality to the Eduard P-51D series of kits.
CONSTRUCTION
Like all other modern kits designed with CAD, parts fit is very precise, and a modeler must be certain all mating surfaces are “as clean as a hound's tooth” to avoid cascading fit problems in construction. The kit is detailed with lots more pieces than the Tamiya kit has, and a modeler is well-advised to take the revolutionary act of reading and following the instructions; they are not “somebody's opinion.”
Construction starts with the cockpit, which is much more detailed than the Tamiya kit. I painted the main parts with Tamiya Dark Green (RLM-70) a good replacement for Dull Dark Green, then painted all the other small parts before assembling them. I departed from a fully OOB build by using Eduard seatbelts. Once the cockpit was assembled, I installed it in the right fuselage half and proceeded to assemble the other detail parts for the fuselage, then glued the two halves together. Fit is so tight that all I had to do to lose the centerline seam was a light scrapedown, followed by rescribing rivet detail across the seam with my pounce wheel. The gear well in each wing is made up of individual pieces. I painted these with Mr. Color Yellow Zinc Chromate.
From my experience with the first kit, I decided not to install the gun barrels at this stage, but to attach them individually after construction, painting and decaling was complete.
All the control surfaces are separate, and the flaps cannot be dropped; this is actually the proper way they should be. Several pilots in the 78th group who I interviewed for my books told me that the fine for not raising flaps immediately after touchdown was 10 Pounds - $70 out of a 2nd Lieutenant's pay at the time of $250; as one said, “you only forgot once.”
The wings do not have carry-through spars like the Tamiya kit, but the extended spar on each side will help align them properly and the part design won't allow a close fit without the wing being properly aligned. If you are going to have the underwing pylon and the rocket tubes, be sure to open the alignment holes before gluing the wing halves together.
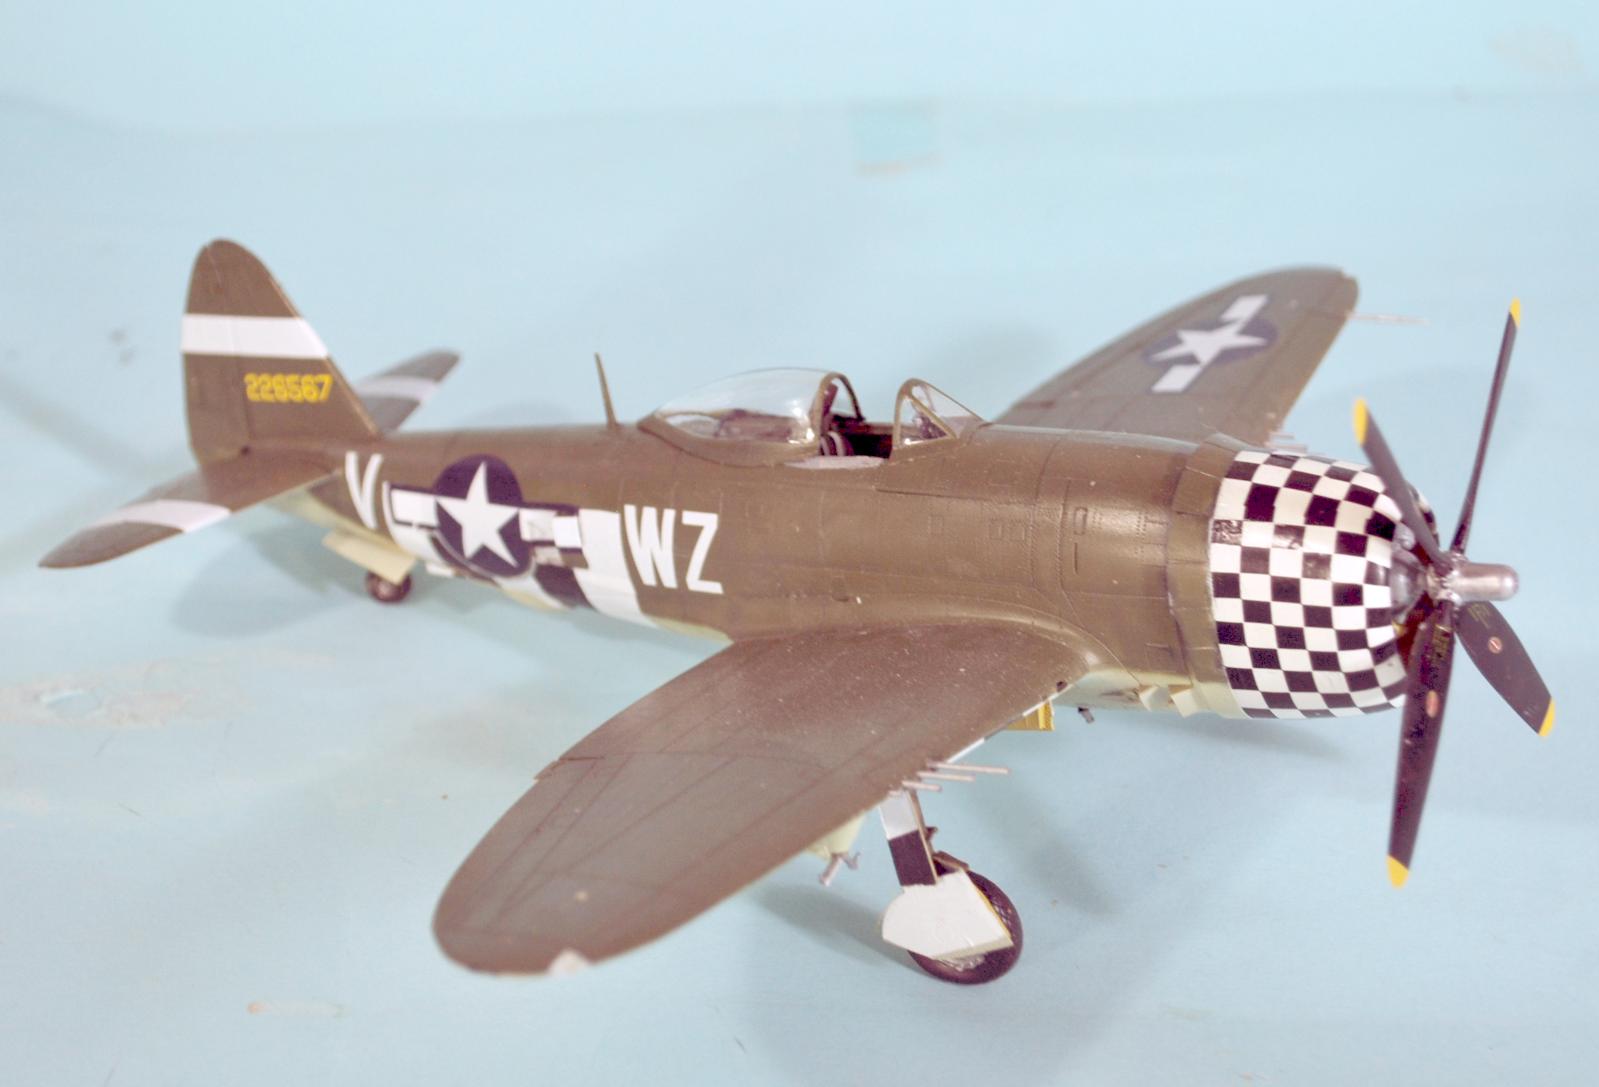
The R-2800 engine in the kit is the best I have seen as an injection-molded plastic part. There is more detail in the engine and the assembly of the cowling than in any earlier kit. For this kit, one only uses the two piston rows and the front parts of the engine, leaving the very complete exhaust system on the sprue since that is for the “advanced” kit. I had no problem assembling the engine cowling accurately, following the kit instructions as to the sequence of attachment.
COLORS & MARKINGS
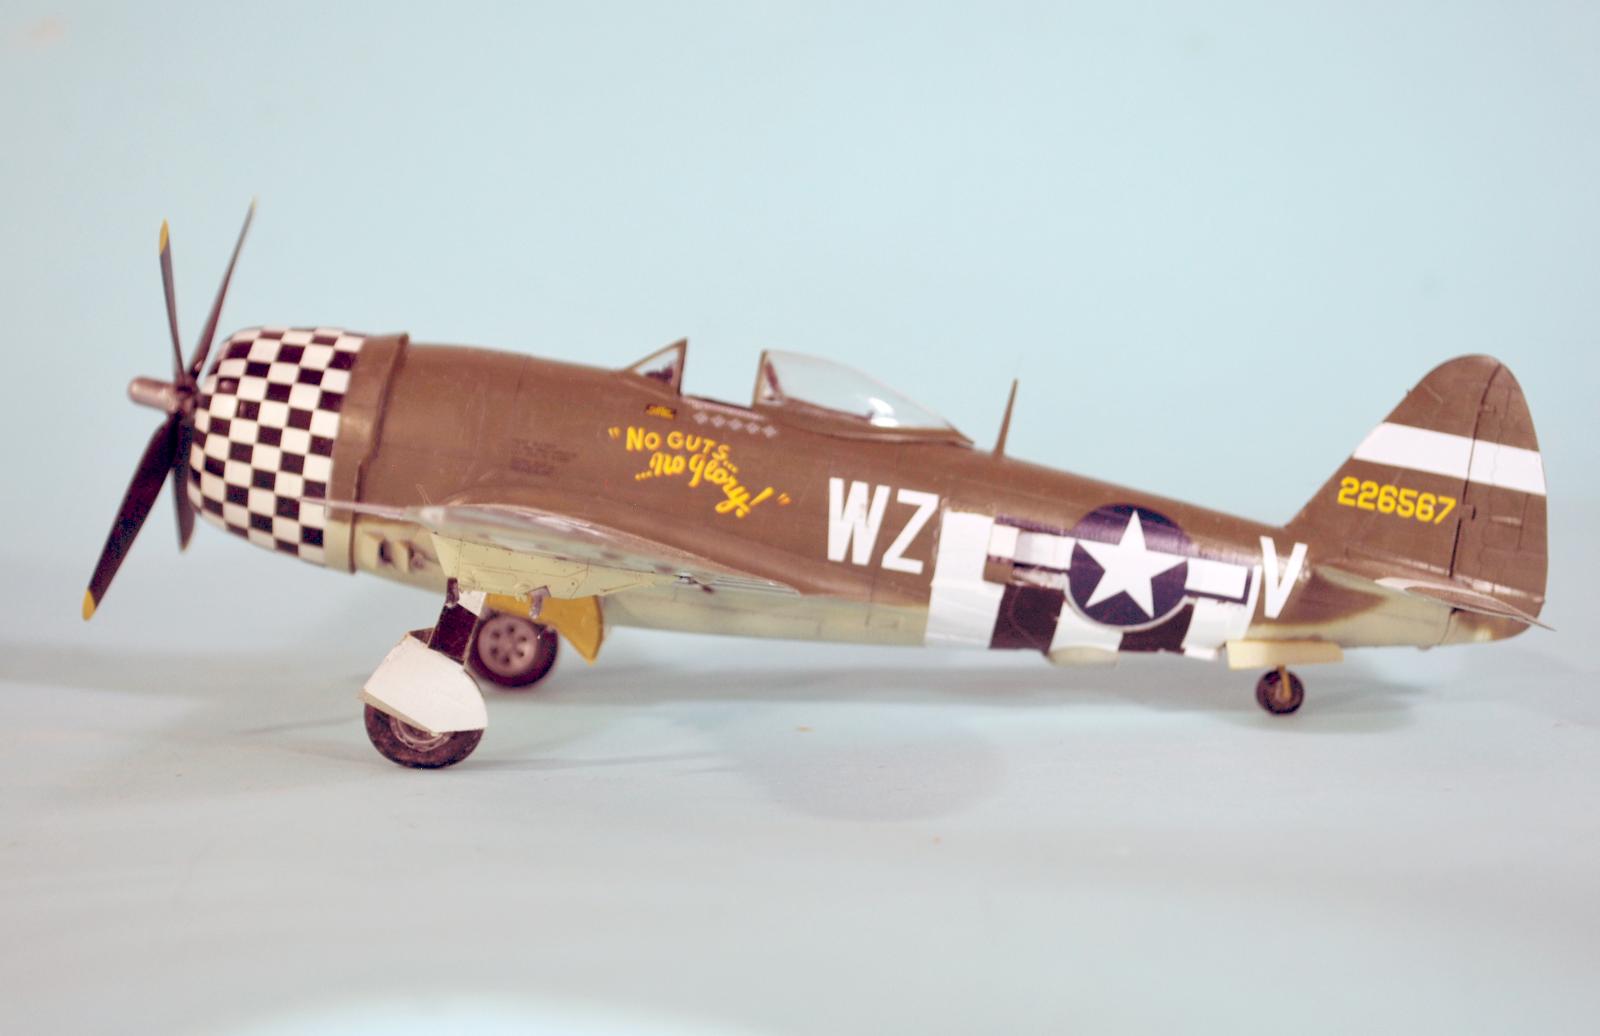
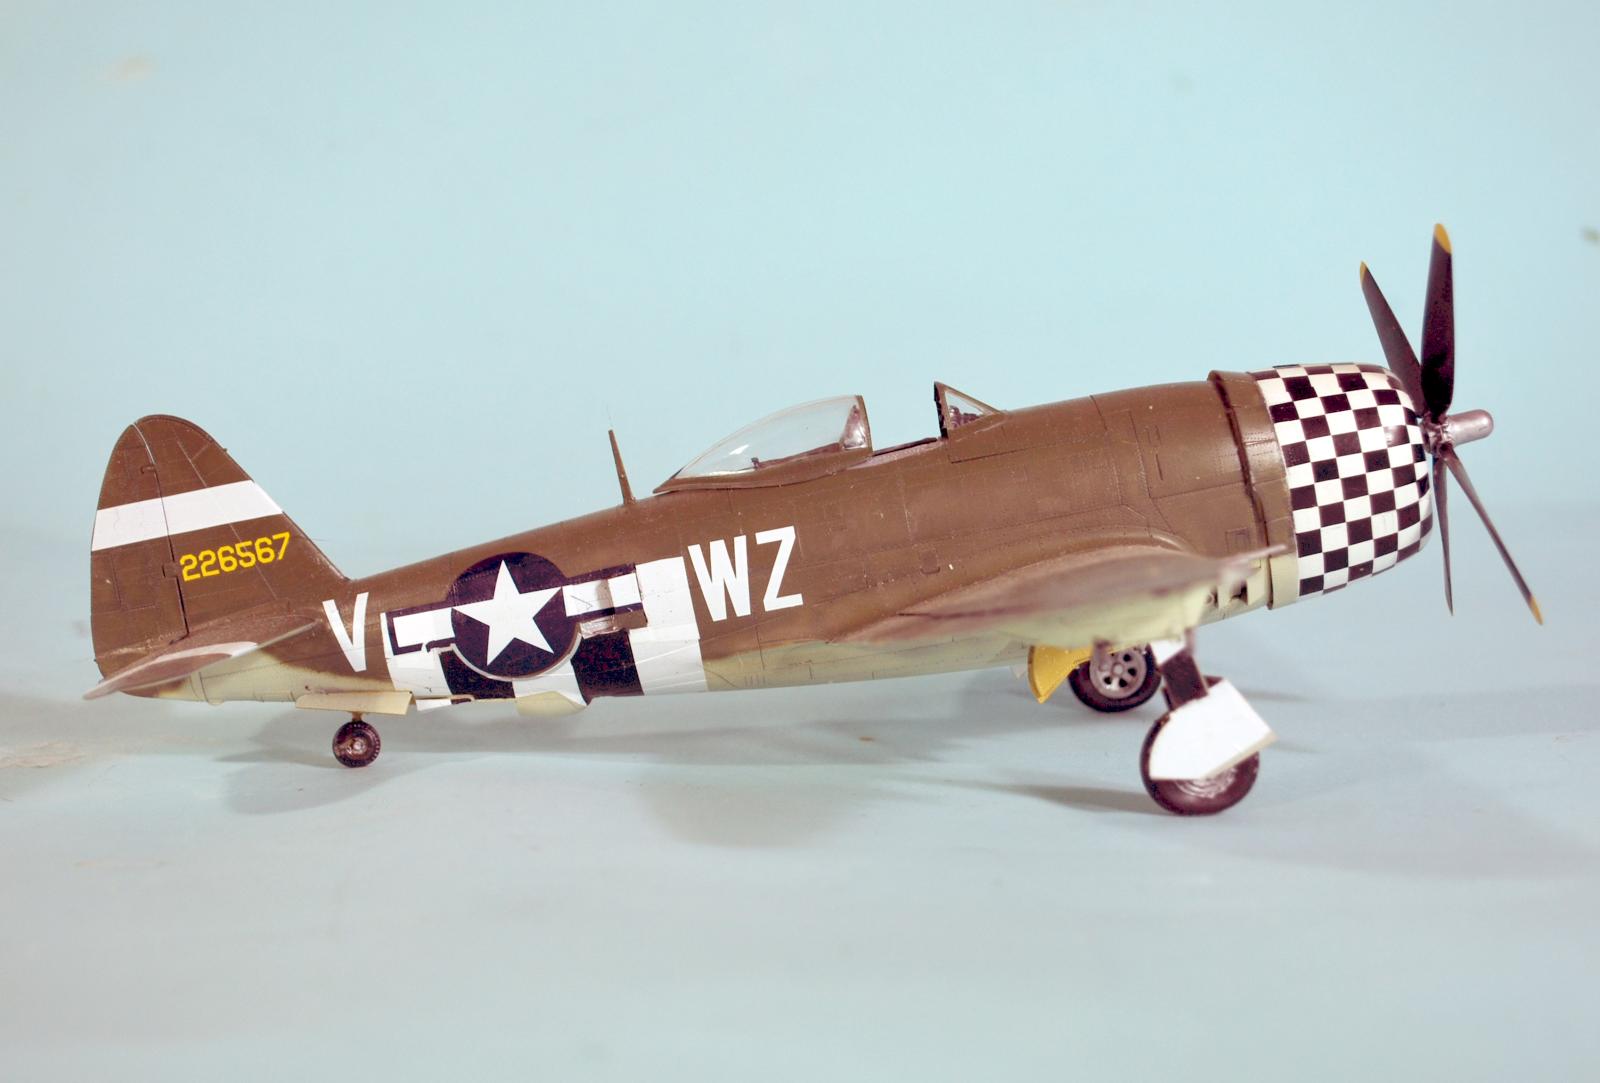
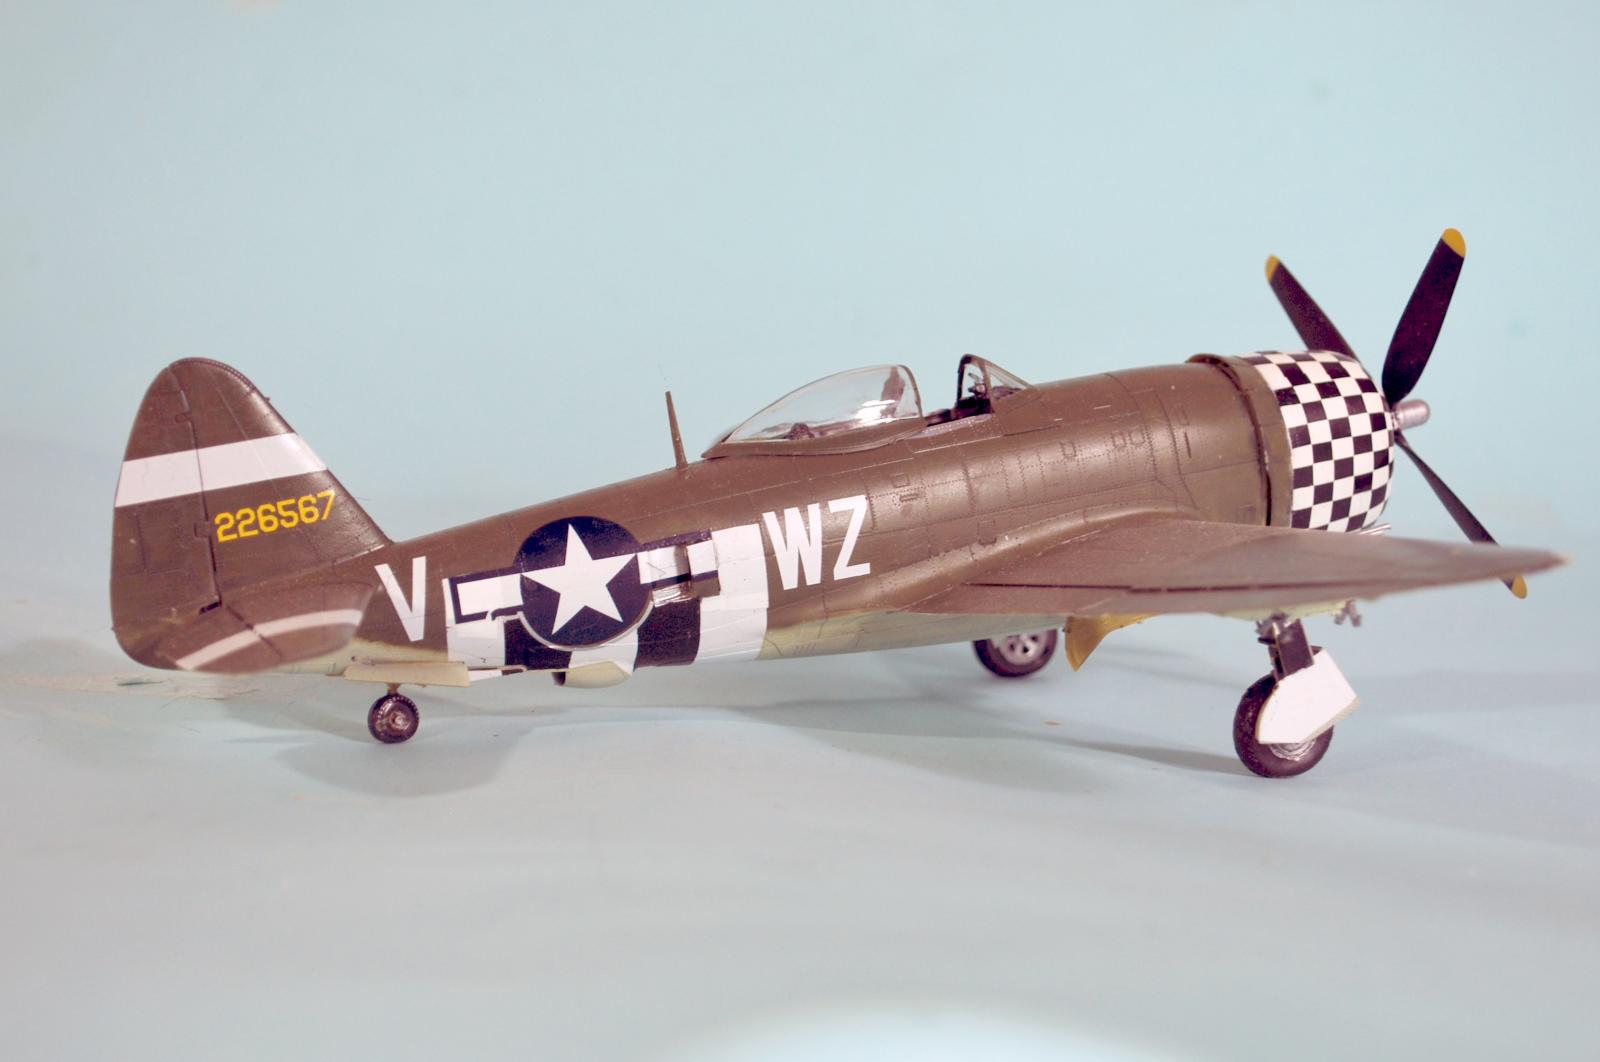
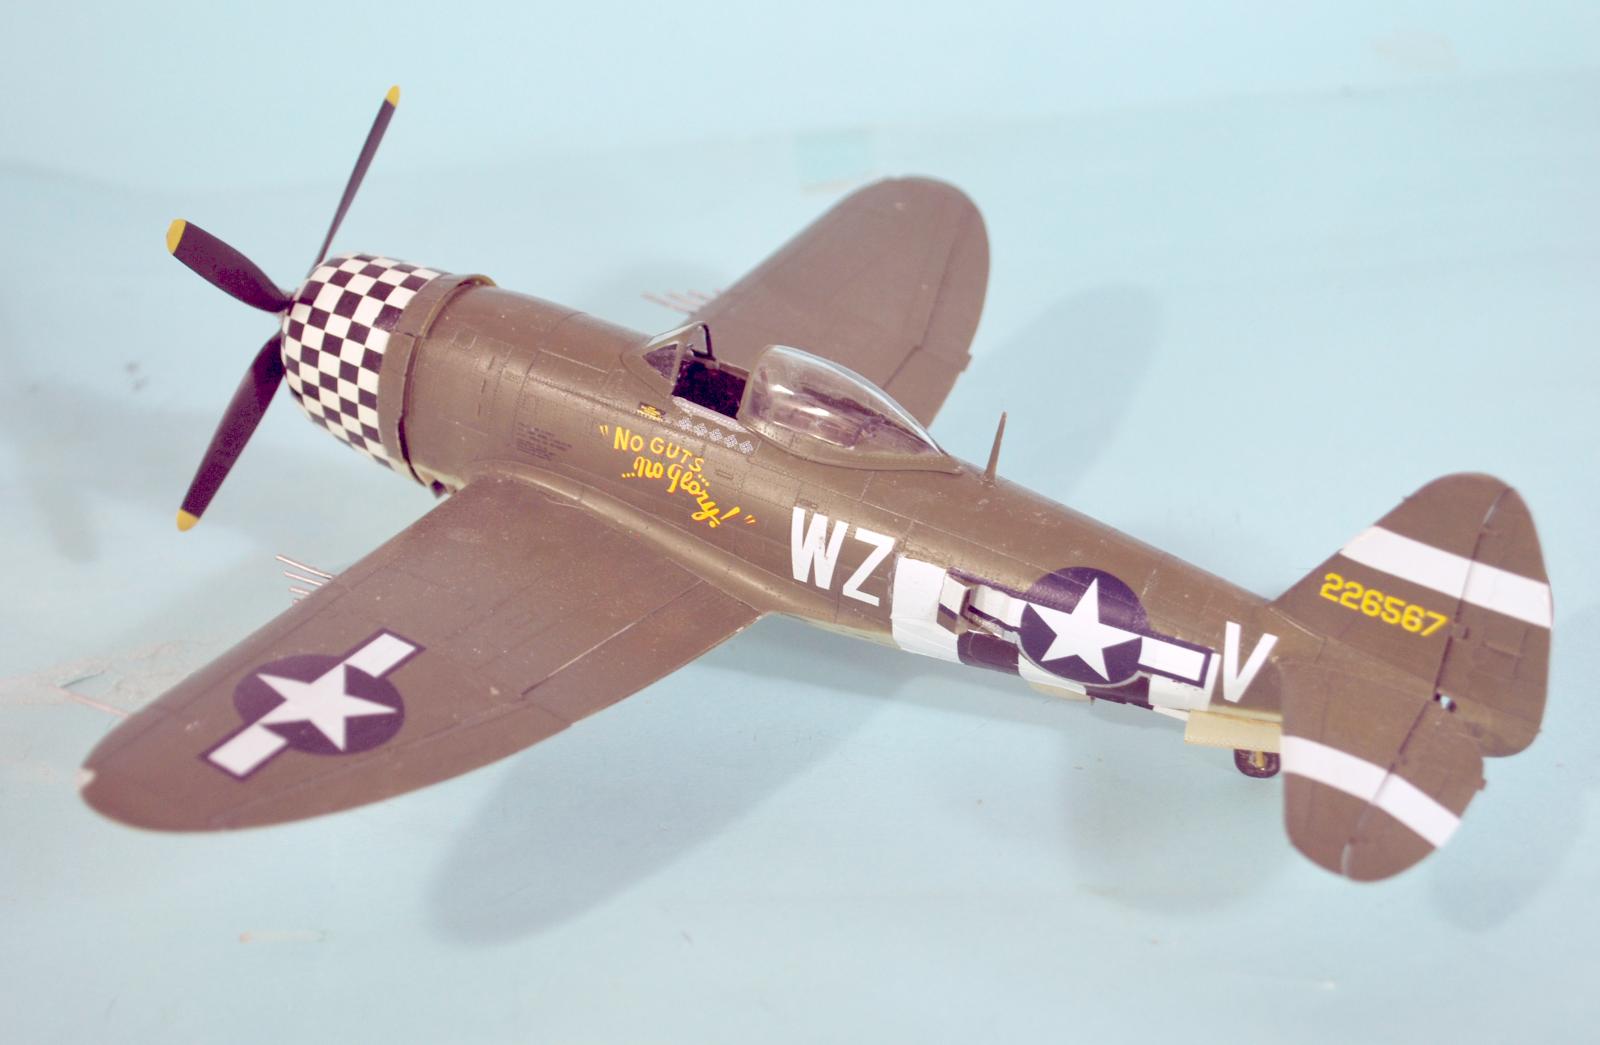
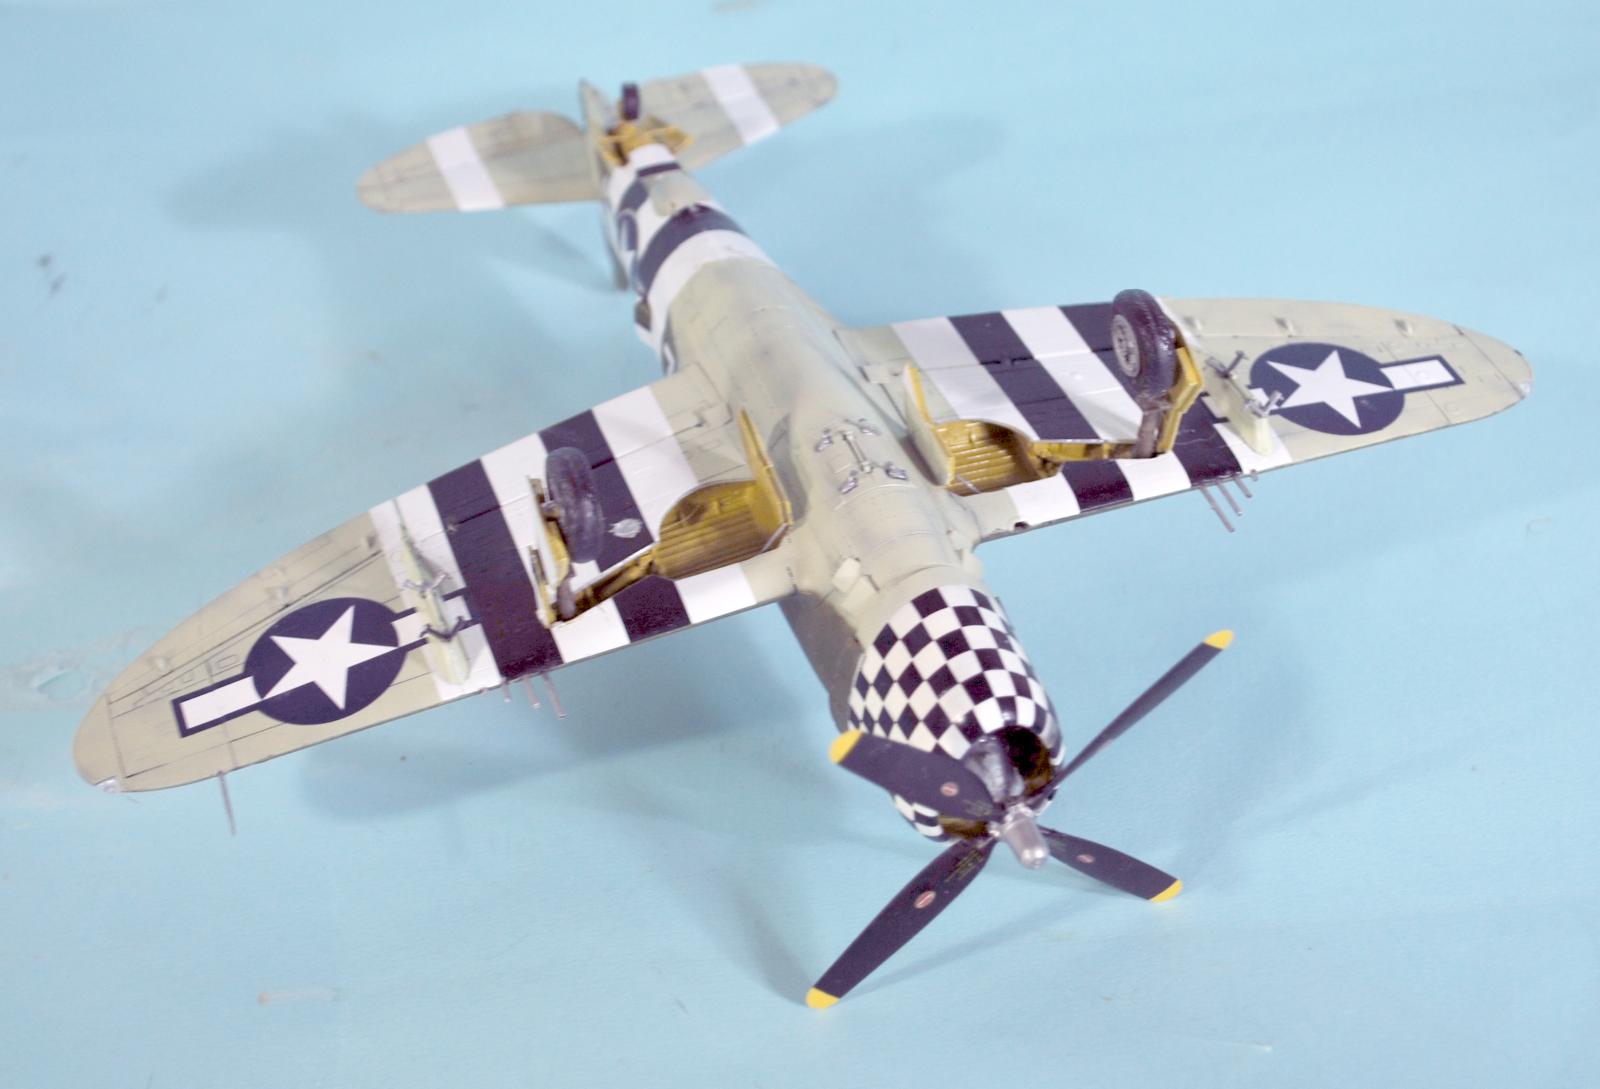
I decided to do Ben Mayo's Thunderbolt “No Guts No Glory” from the 78th Group's 84th Squadron, as seen in the summer of 1944 during the Battle of Normandy. I decided to use Tamiya's D-Day stripe decals, as well as the ID stripe decals in the Thundercals sheet. Thus I only had to paint the cowling white and paint the overall camouflage.
The cowling was painted with Tamiya Gloss White X-2. I then masked that off and preshaded the rest of the model along panel lines. The 78th Fighter Group used RAF paints for camouflage, with the upper surface in RAF Dark Green and the lower surface in RAF Sky. I used the Mr Color paints for these colors.
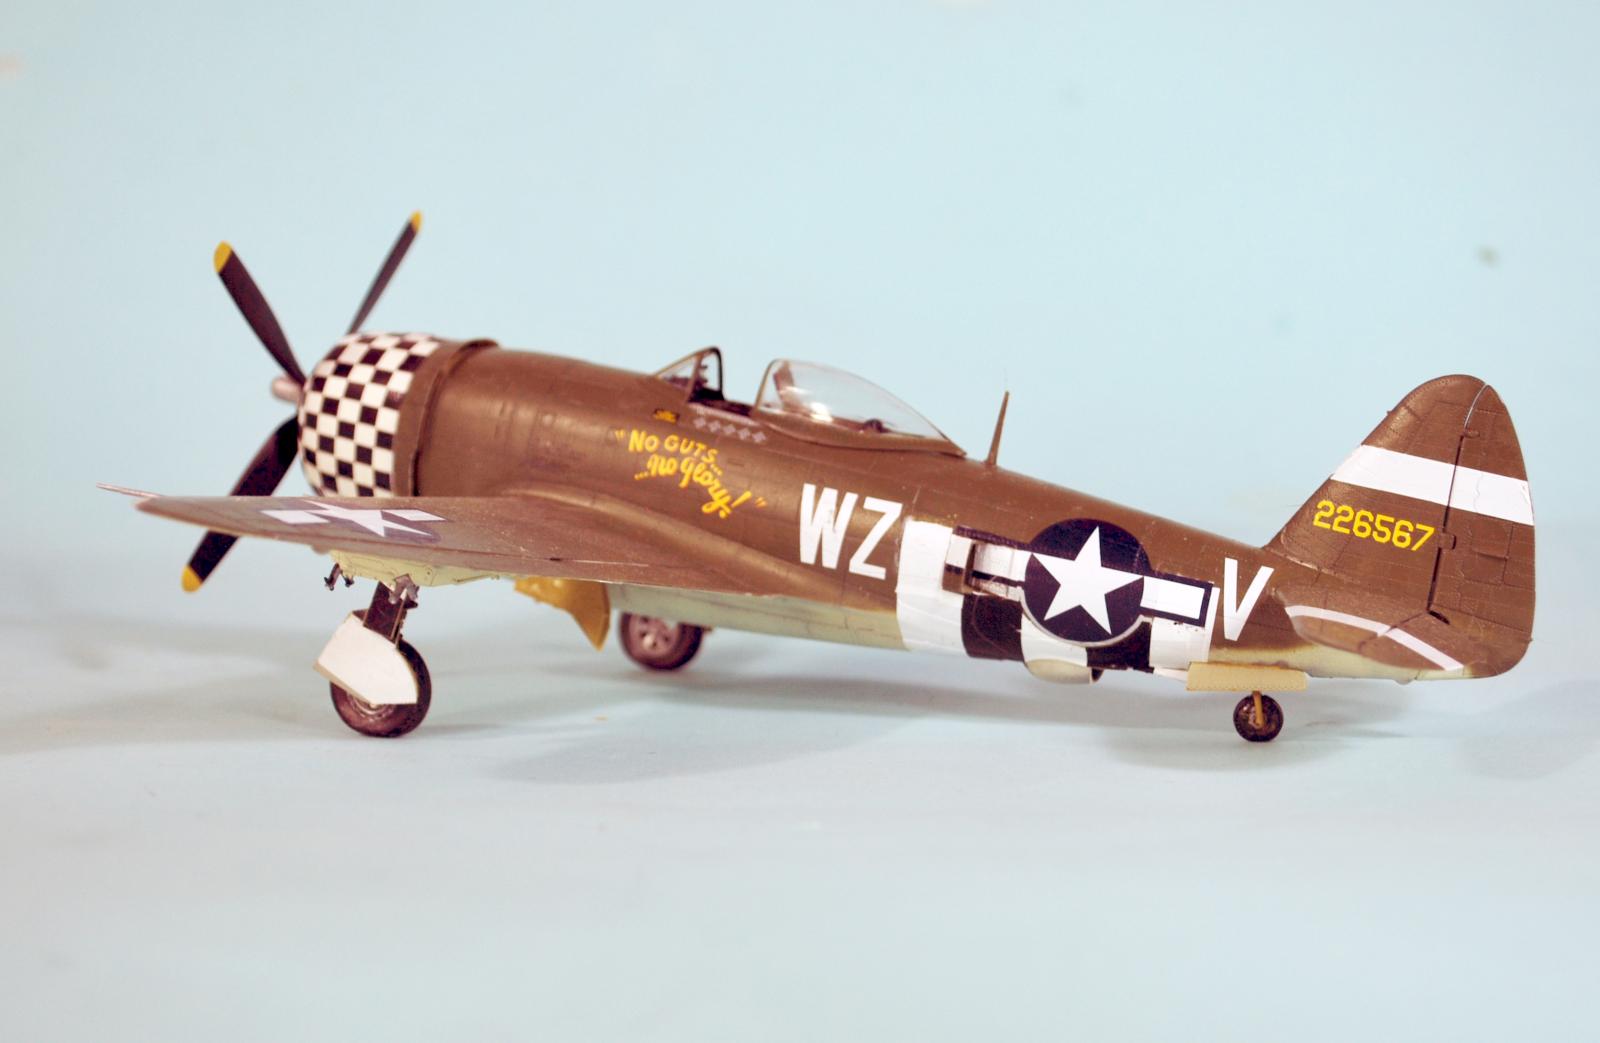
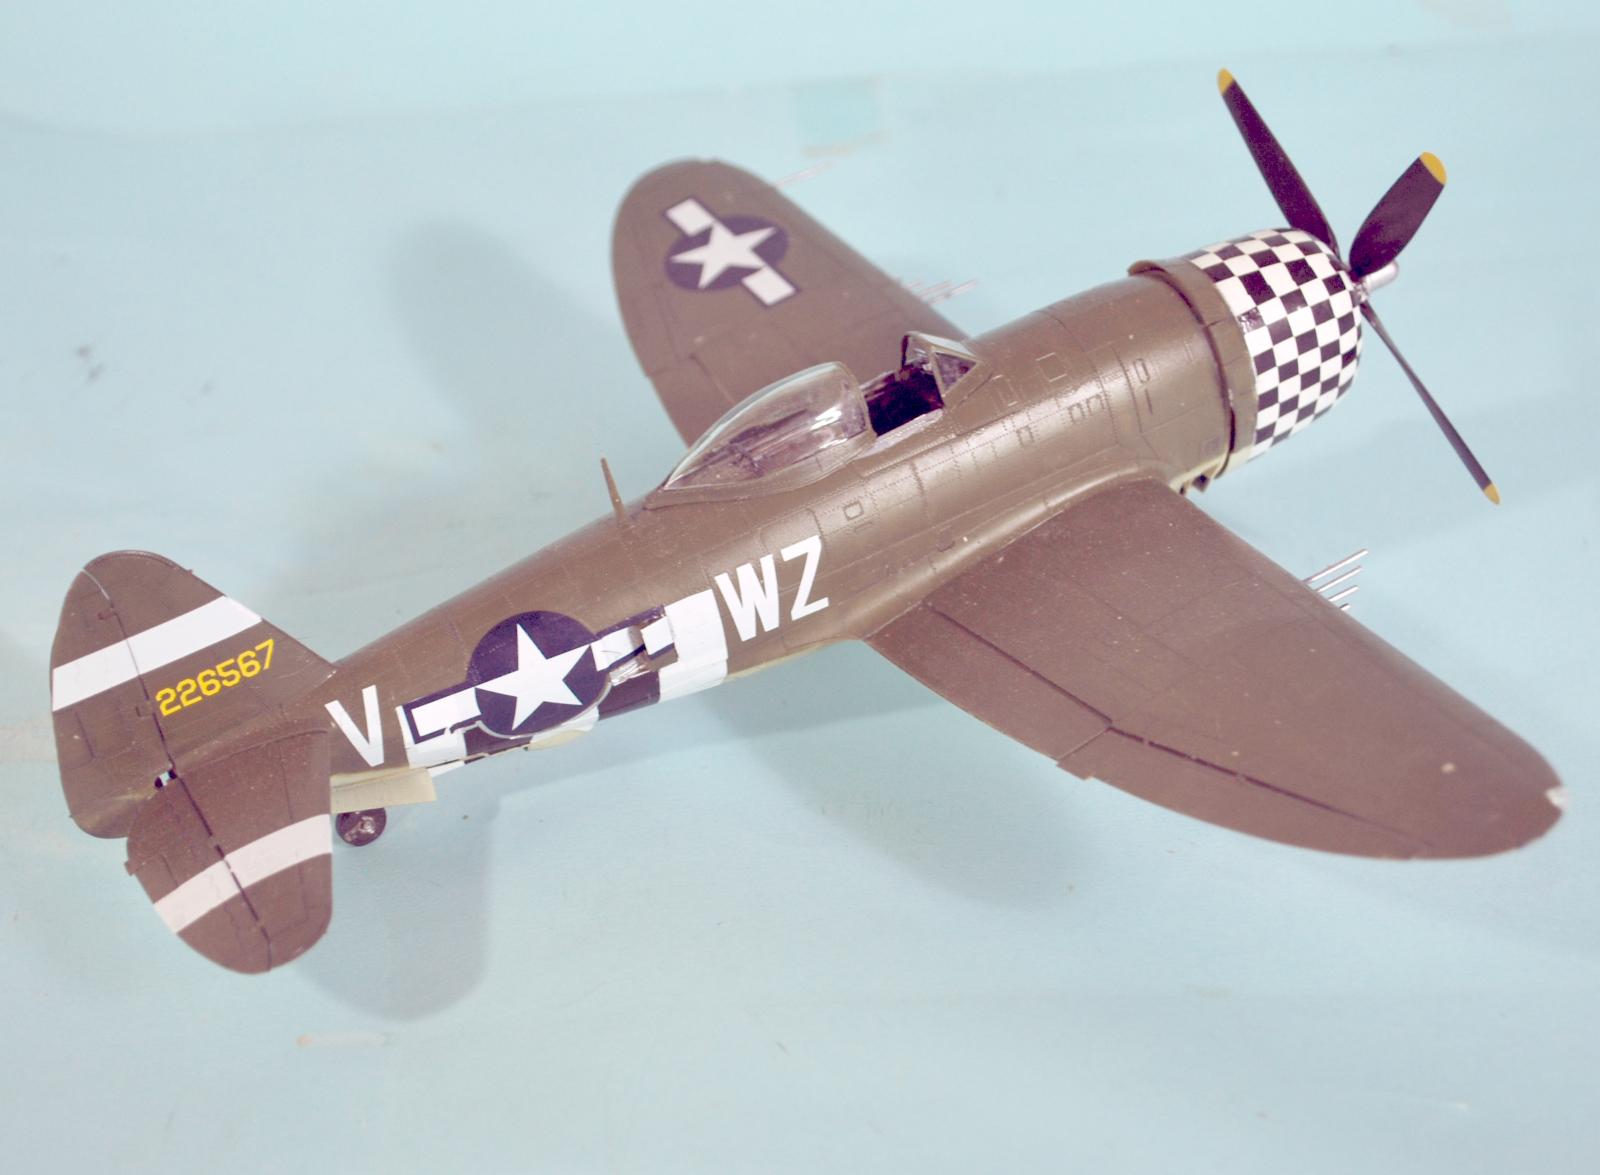
Fortunately, I had two decal sheets from the Tamiya Bubbletop kit, which greatly helped when doing the D-Day stripes. The Tamiya decals are thick, but after repeated attacks with Solvaset, they melted down into the surface detail perfectly. I also applied the ID stripes on the vertical fin and horizontal stabilizers. I used Fundekals 45" US National insignia for the lower wings, and the Thundercals national insignia for the rest. The Thundercals personal and individual aircraft markings went on without trouble. These airplanes did not have stenciling after the camouflage was applied. After the decals set up overnight, I gave the model an overall coat of Micro “Satin” clear varnish. Photos of Mayo's P-47 show it well maintained so I didn't ding it.
I attached the landing gear and the underwing pylons and the prop. I unmasked the canopy and posed it in the open position.
CONCLUSIONS
The MiniArt P-47 is the best P-47 kit available in any scale. I know I will be doing more, since the new P-47D-30 release arrived the day I finished this model. If you take care to follow the instructions and take your time to get assembly right, you won't use any filler and you'll have a really nice model of the P-47, whatever markings you put it in. Highly recommended to any experienced modeler.


So, these are convincing pictures of a masterful model - and they are also convincing of the new MiniArt Thunderbolt! As always, your text is a treasure trove, and I'll remember the remark about the fine for not retracting the flaps and quote it often. Thanks also for this argument in favour of displaying the flaps "up".
Nice Bolt, Tom!
Tom Cleaver (@tcinla)
I read your article yesterday over at MM. I thoroughly enjoyed it. My basic P-47D-30 MiniArt kit arrived a few days ago too, and I couldn't resist the urge to open it up. Mine was ordered as a Pre Order from Squadron. When Brandon sent me the email it was en-route, I was overjoyed. I was SO happy to get it, I posted an in depth kit review, and we had a good conversation about it.
Just like you said, the parts do look very good in the box. I will be building it soon, and I'm going to be doing a Tamiya kit at the same time for a comparison. I'll be sure to post a detailed journal of the process along the way.
I have been working on a few of these Tamiya P-47's lately, ( I'm making another P-47 "Kindergarten"), and the Tamiya Thunderbolt kit fits exceptionally well and looks fantastic. So if this MiniArt one is even better, we will definitely have a winner on our hands for sure. It's really hard to believe the Tamiya P-47 can be beat.
Thanks for posting this for us.
@lgardner - The major difference between MiniArt and Tamiya Thunderbolts is there is a greater level of small detail in the MiniArt kit.
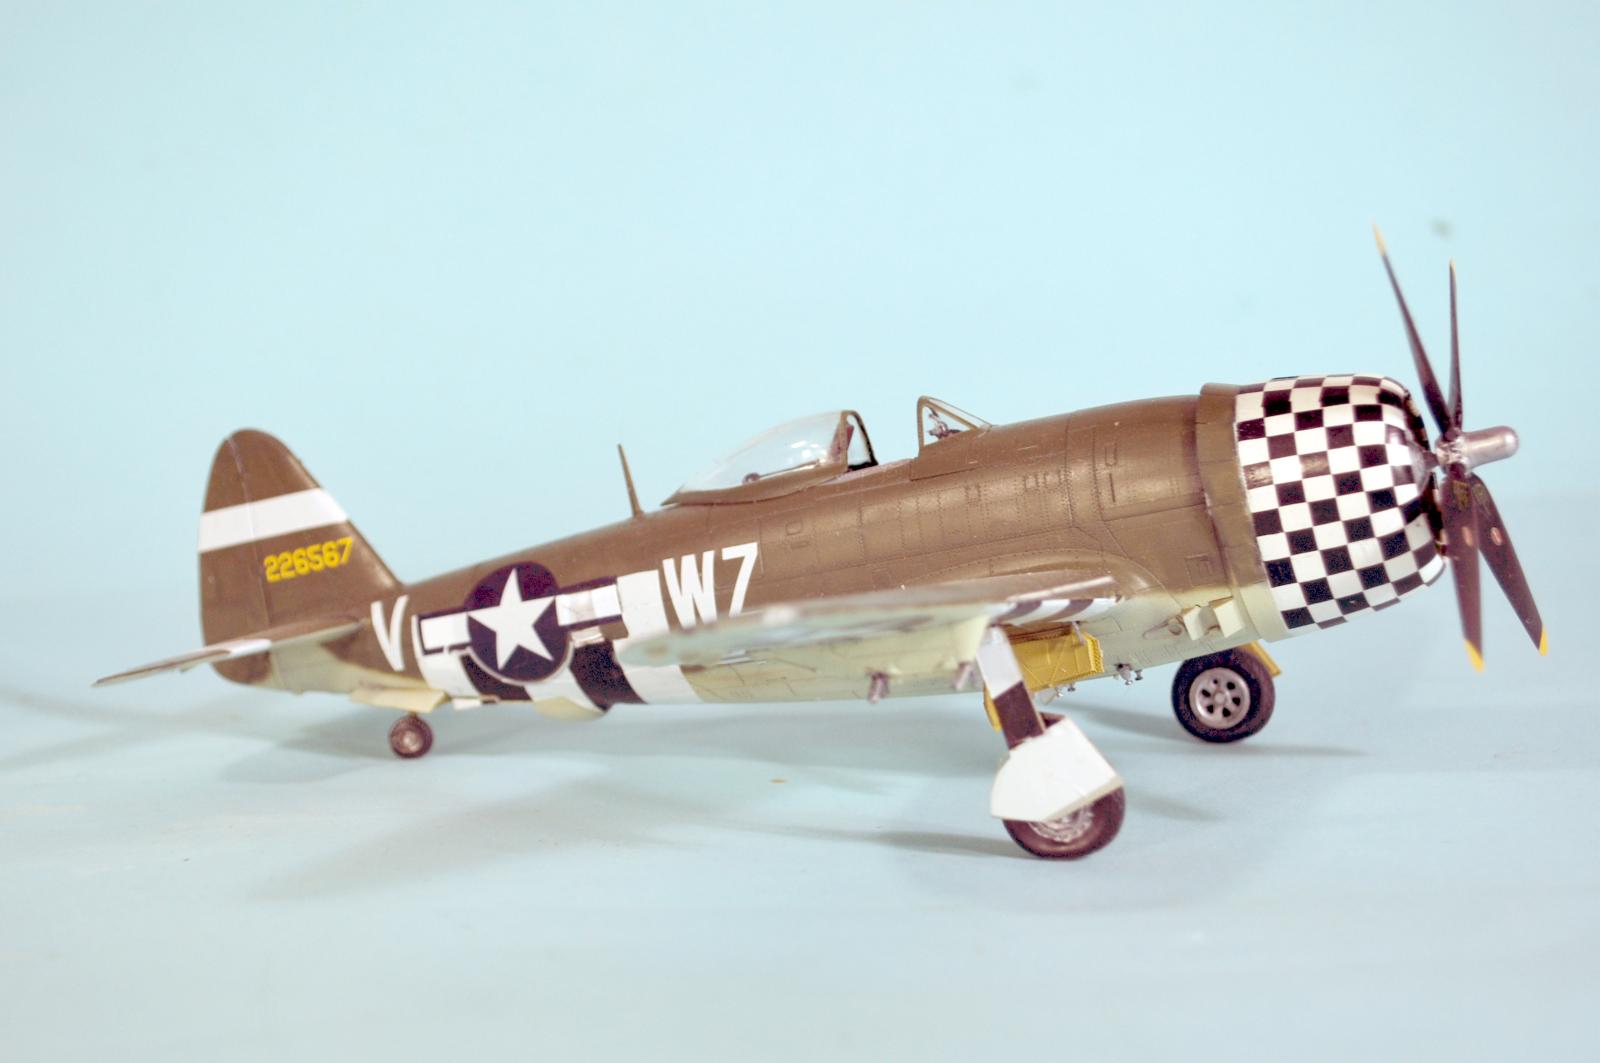
When I did the first one, I thought the prop was too big when I compared it to the Tamiya Ham-Standard. So (since I have files of all the specs for the P-47 "bookazine" I did for Key Pubs last year) I measured it, and it was dead on. So, not only is the hub of the Tamiya prop too big (as has been noted forever), it is about 4 scale inches too small in diameter. The blade size carries through on all four props - toothpick, C-E paddle blade, Ham Standard and C-E Asymmetric. This isn't a deal-killer unless you put a Tamiya and MiniArt P-47 next to each other, built up. It's obvious at certain angles. So if that amount of accuracy matters (it doesn't stop me from building the Tam kits here), there you are. There's more detail in the engine and inside the cowling, but I never count that as major since once fully assembled, I can never see it. The bombs and rocket tubes for the MiniArt kit are among the best anywhere and better than Tamiya.
But overall, sitting next to each other with the viewer a few feet away as we normally are, they both appear to be P-47s. 🙂
Nicely done, Tom ! My MiniArt Jug arrived last week...planning a dio with all the included detail.
If I was you, I would wait for the "advanced" kit, since it is designed to be opened up, which will make such a diorama easier.
Excellent model - Tom and once again fascinating history.
Looks great Tom, I will have to pick one of these up for sure. Your stamp of approval is all I need. Thanks for the write up!
Excellent sir
Excellent result, Tom and an equally excellent writeup, all as always! It really feels great to see better kits coming along, we do live in the golden age of modeling!
A superb result on this Thunderbolt, Tom @tcinla
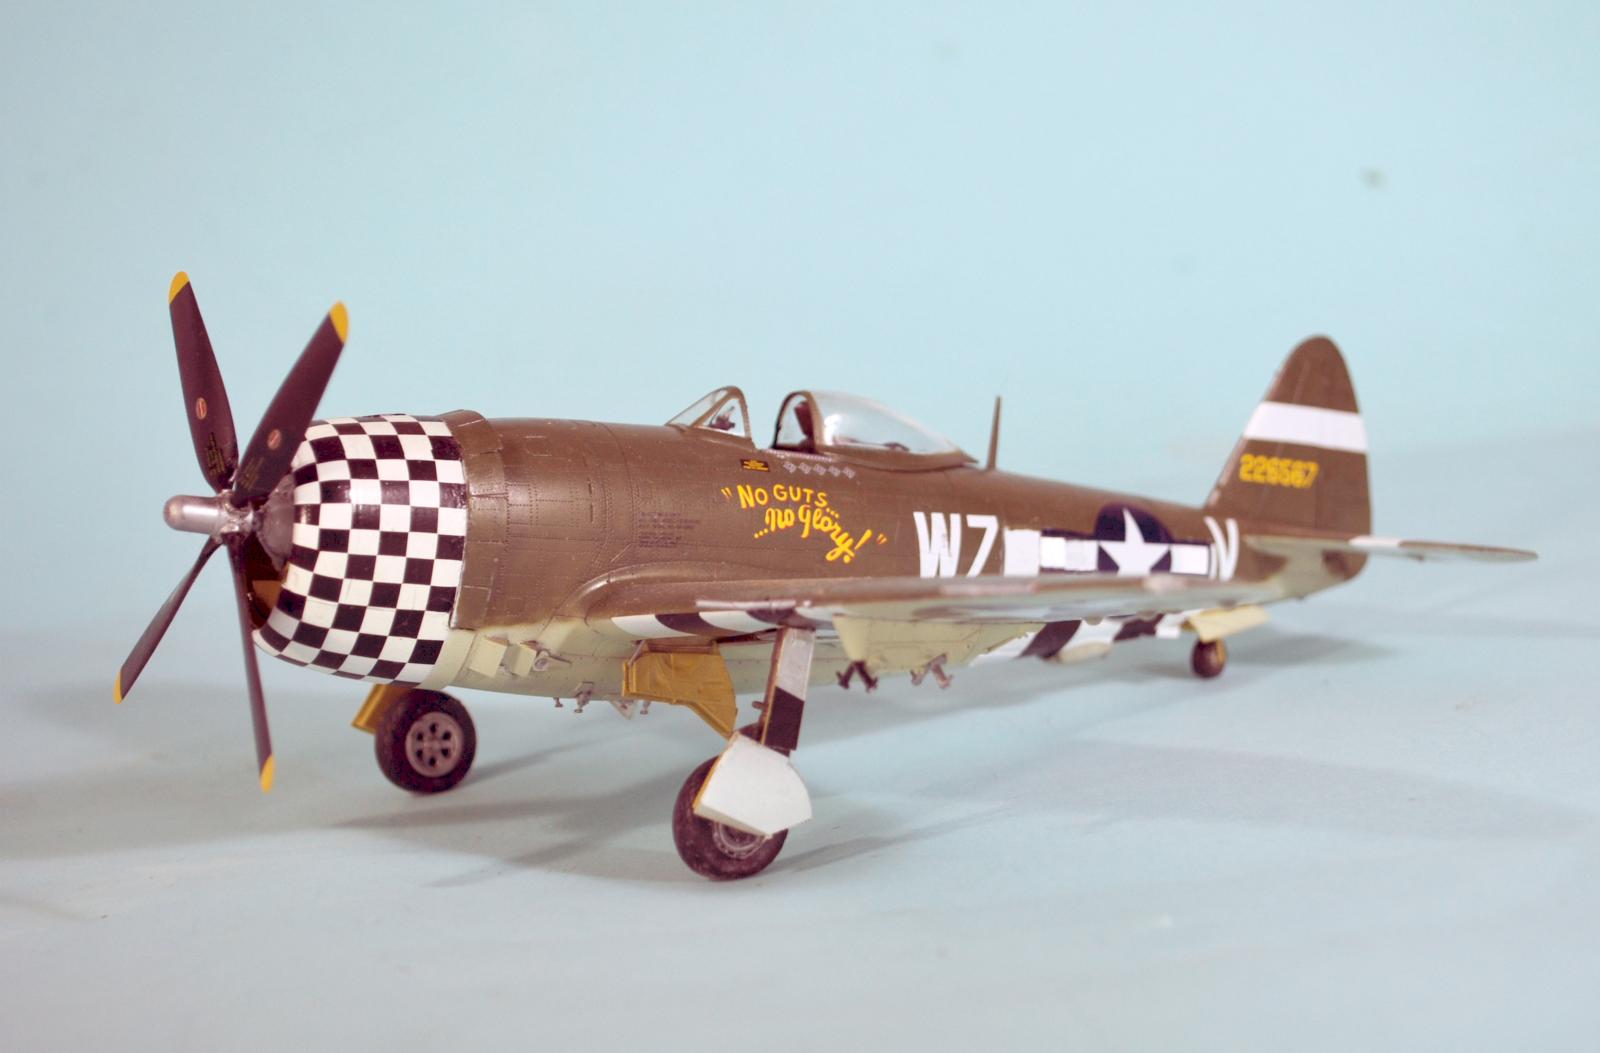
The chosen scheme is nicely done, especially the checkerboard pattern around the cowling.
As always, a nice to read supporting article as well.
Thunderbolt is my favorite plane. Even though I only do the big war, ever since Mini Art released it, I've been thinking about building it. Your beautifully built model brought me even closer to this idea.
Get one!
The analogies I use, the more you know about the subject matter and can appreciate in the subject the more you can look for and want in a kit. The Tamiya kit is comfort food the meat and potatoes of a meal. While the Mini-craft kit provides a meal that includes a desert and a good brandy. A little more expensive but you can appreciate the finer details of the meal/kit.
I also, think of the manufactures and the people who design and builds these kits. Unfortunately, companies make a commodity but, it be great if some of the individuals were recognized. Mini-craft has some faceless rock stars in my book. So does Tamiya or they have teams of people that fall under the umbrella of a company label. Like children who are scene but, never heard from . . .
Interestingly, the MSRP of this kit is only $5 more than the MSRP of the Tamiya Bubbletop kit.
great! Invasion stripes was painted?
As is in the review, I decided to try the Tamiya decals for the stripes.
Superb build. Now that I've built all the Tamiya P-47s thinking I had the cream of the crop, some new model company comes along and makes me want to bust open my piggy bank again!
A man can't have too many P-47s. 🙂
I’ll have to pick up one of these MiniArt jugs after all the good things you have said about this series, TC @tcinla. I am building one of MiniArt’s newly released 4 x 4 vehicles and I have to say MiniArt has stepped up to the plate big time recently with exquisite detail and precise fit. However the kit I’m working is not an easy build with lots of tiny parts that need cleaning up for a good fit and seems a tad over engineered to me. Definitely not appropriate for any one but an intermediate or above modeler. Did you find this to be true with this 47 kit?
A couple things are "over-engineered," the seat being one. The way the gear wells are done compared to Tamiya's mold. But I think both could be the result of people in Ukraine not having access to top end Western production machines.
Tom, @tcinla, Good to see this review and learn more about the kit. I am a huge fan of the P-47 from when I was a kid. I have built many of the Monogram kits, the Otaki kit and of course the Tamiya kit. I really need another kit like I need a hole in my head, but from your review and others I have read I am thinking I need to get at least one! (Probably the Advanced) Then I can use the Tamiya one for the Halberd conversions. Your results with the kit look great and very nice work with the checkered cowling.
The cowling was decals from the Thundercals sheet, which do the checkerboard the way the 78th FG did them.
A great-looking Jug Tom! Up to your typical standards!
Outstanding information, and a great build! You never fail to impress and inspire me, and I always look forward to seeing what's next.