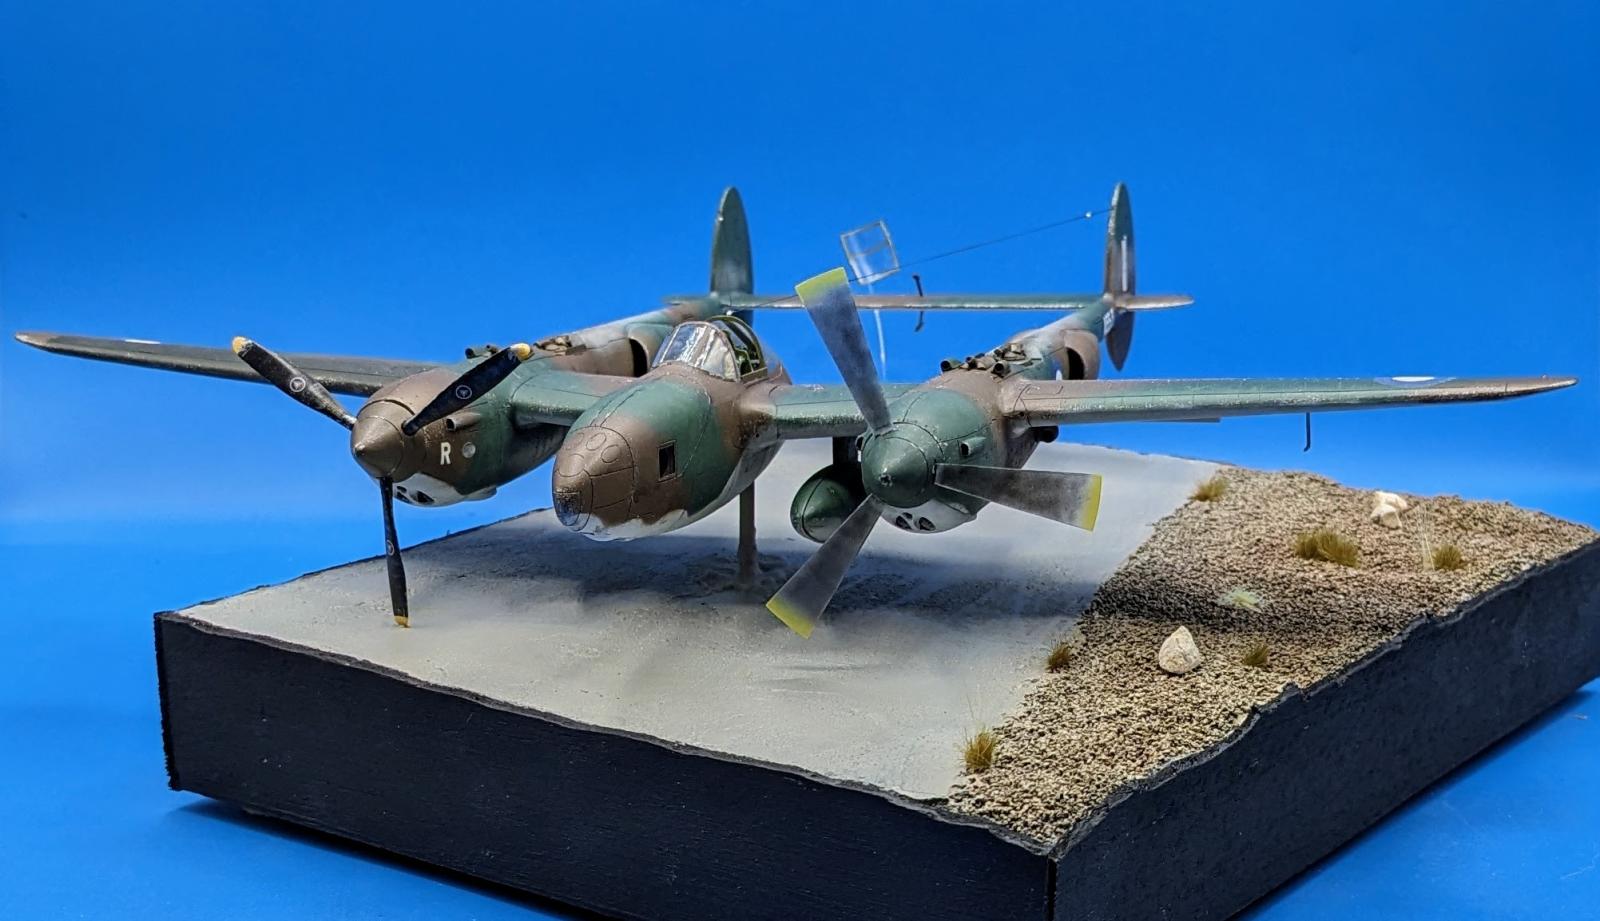
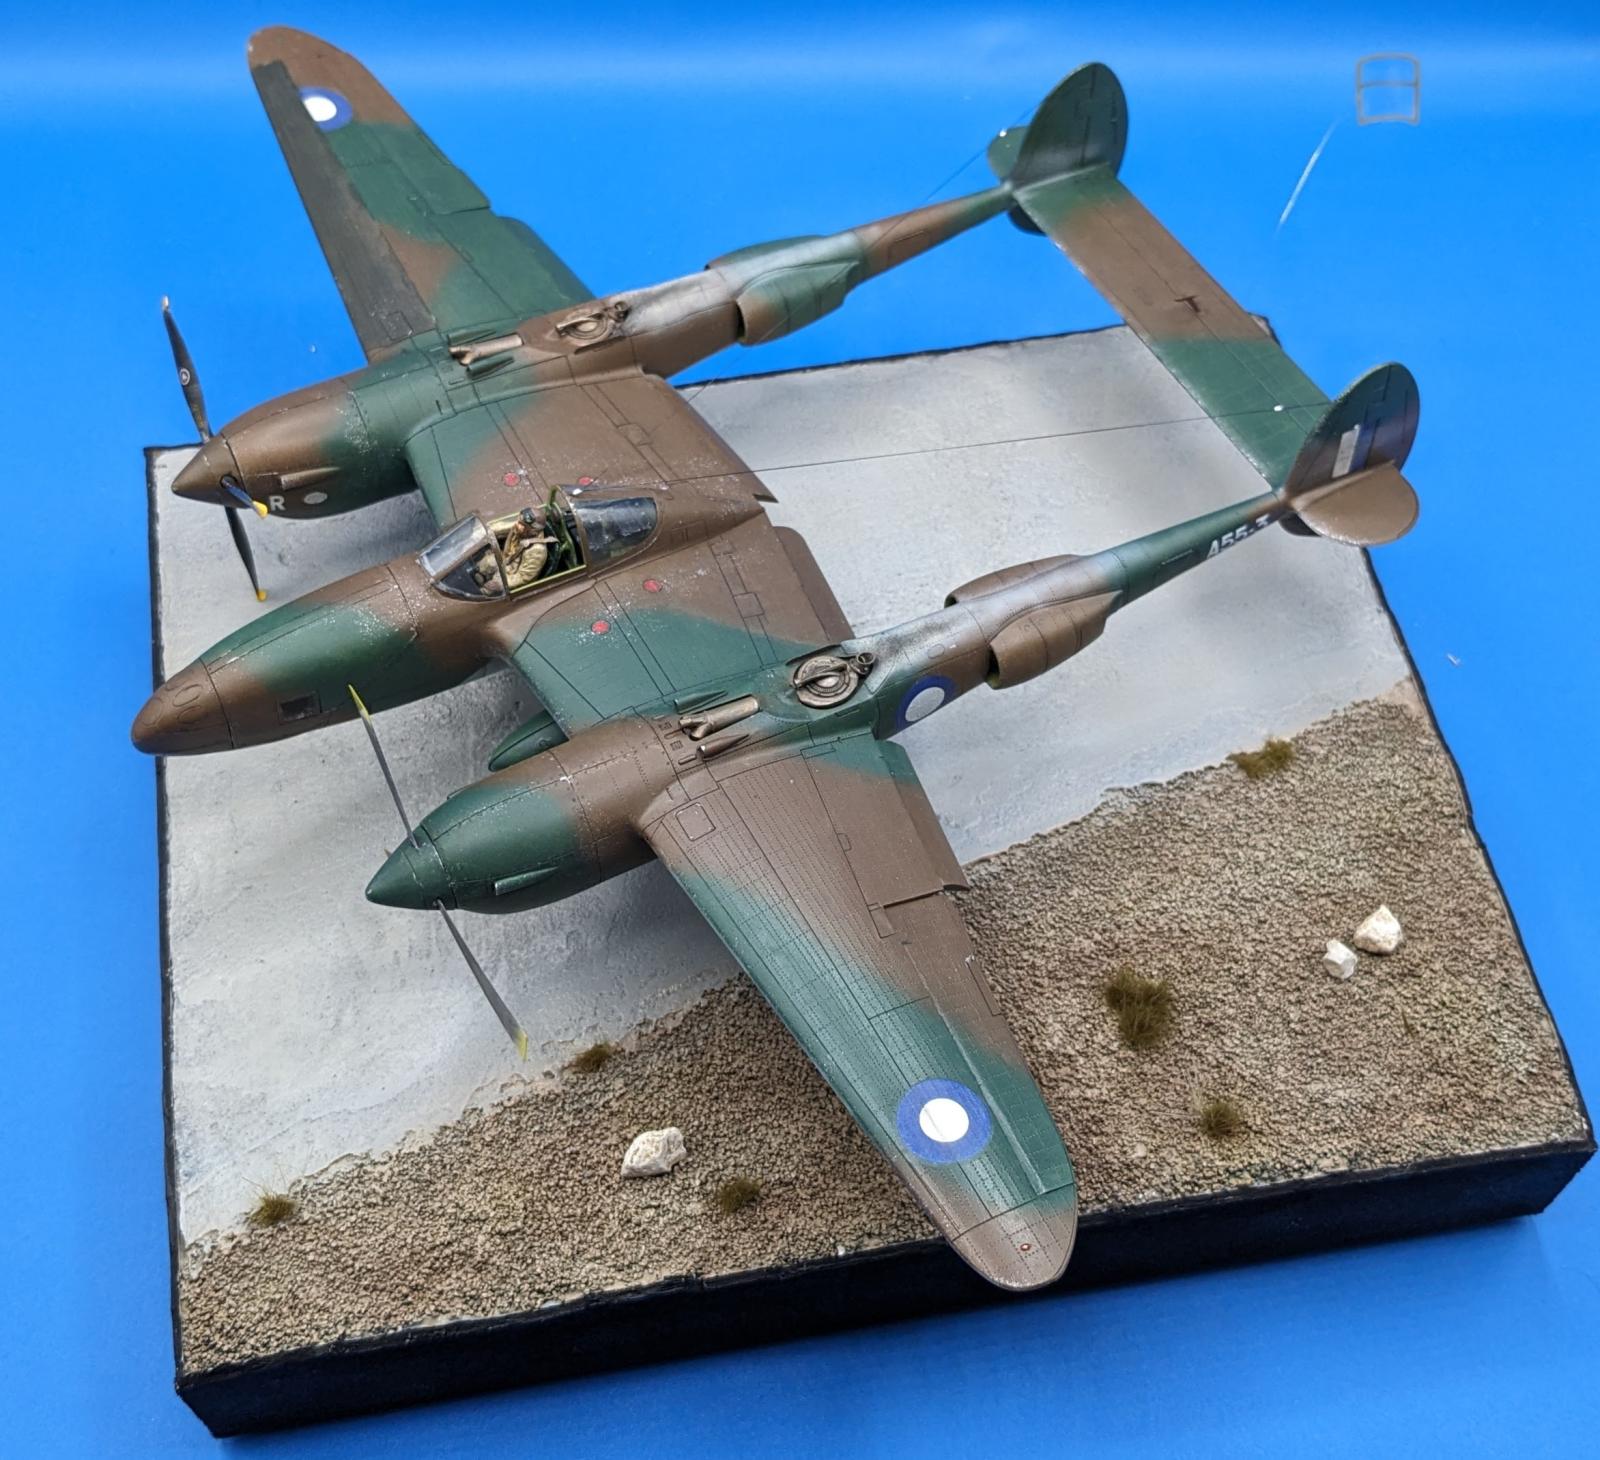
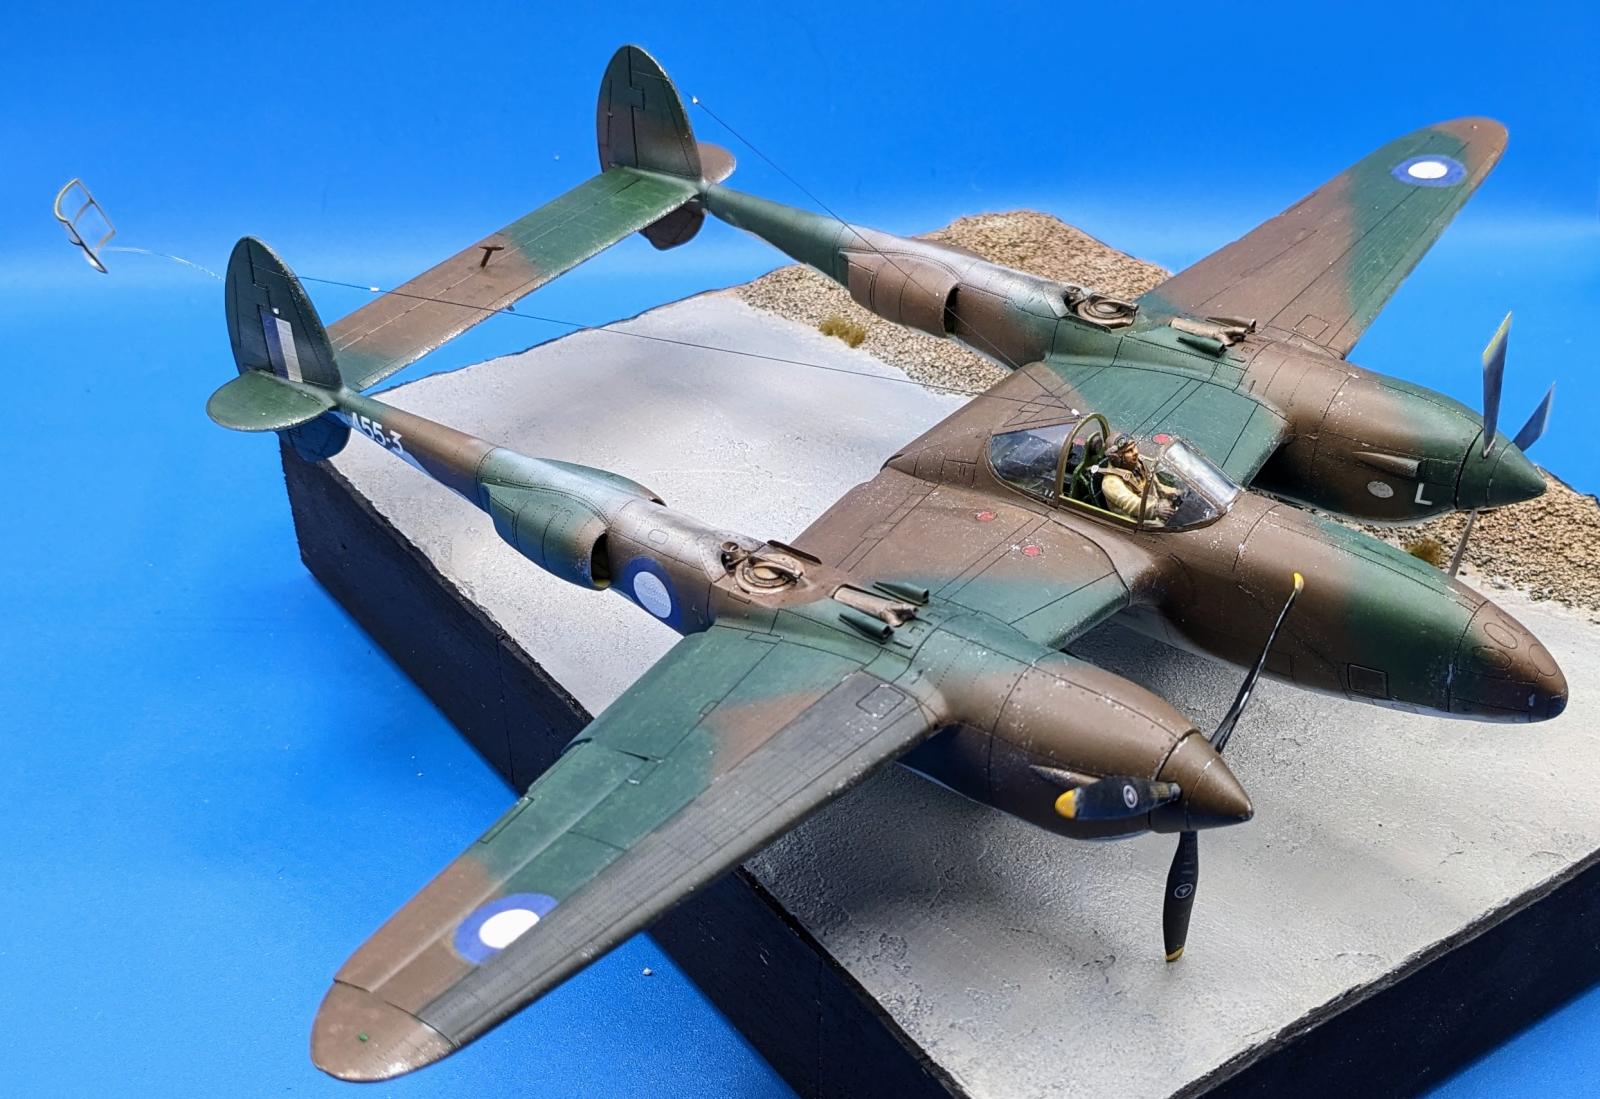
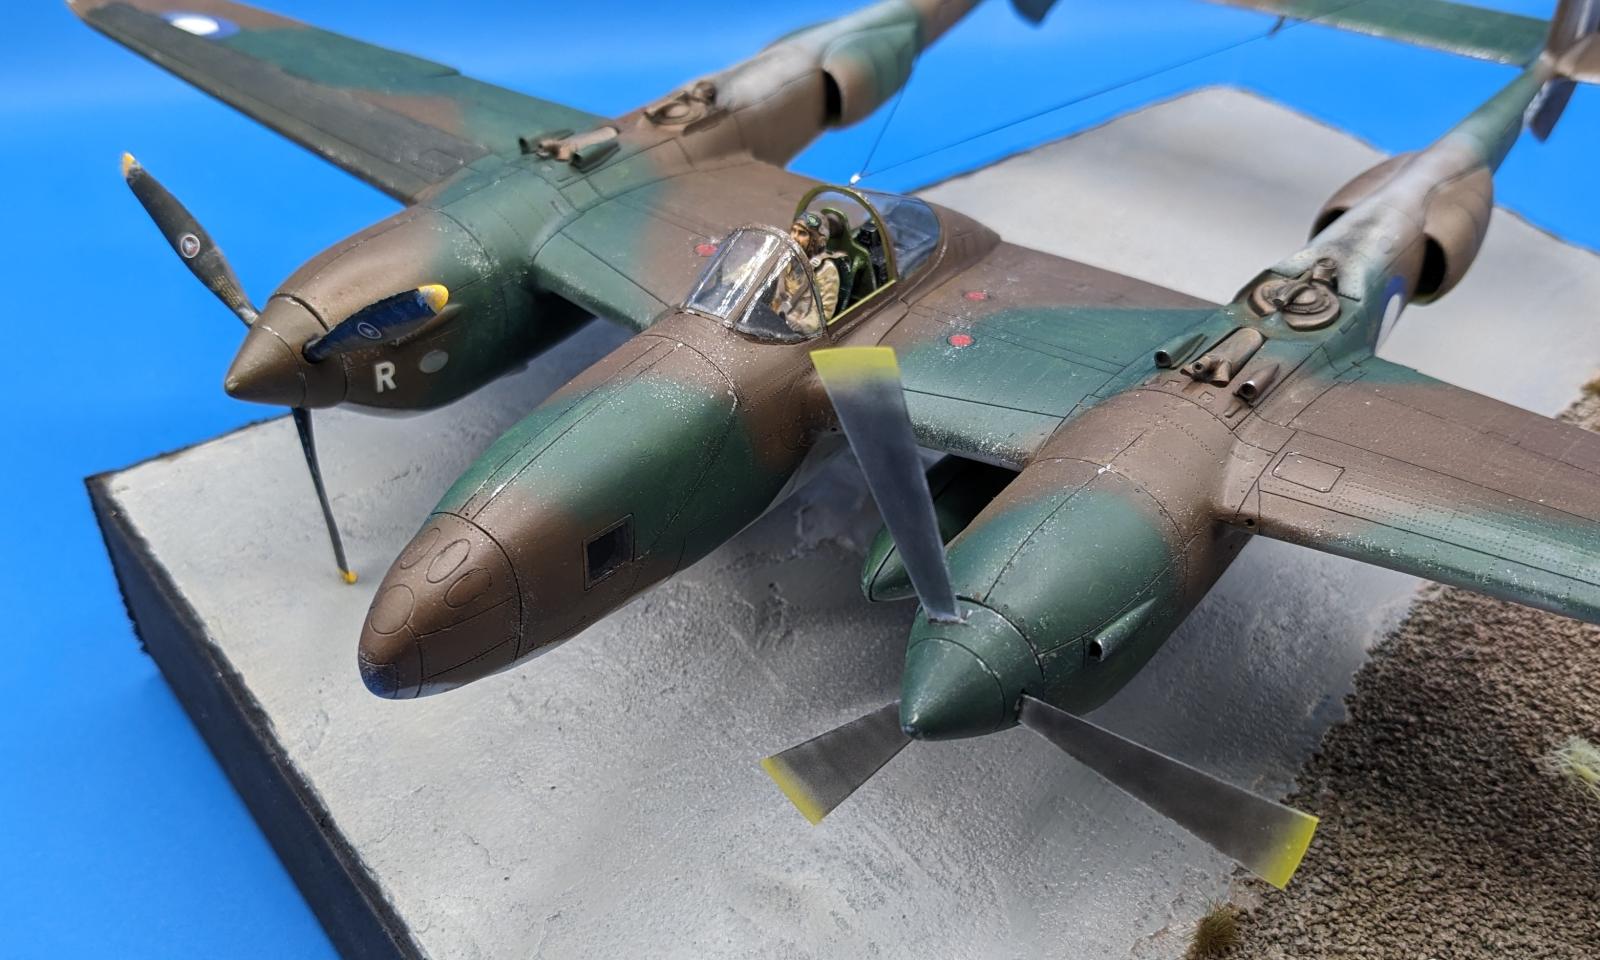
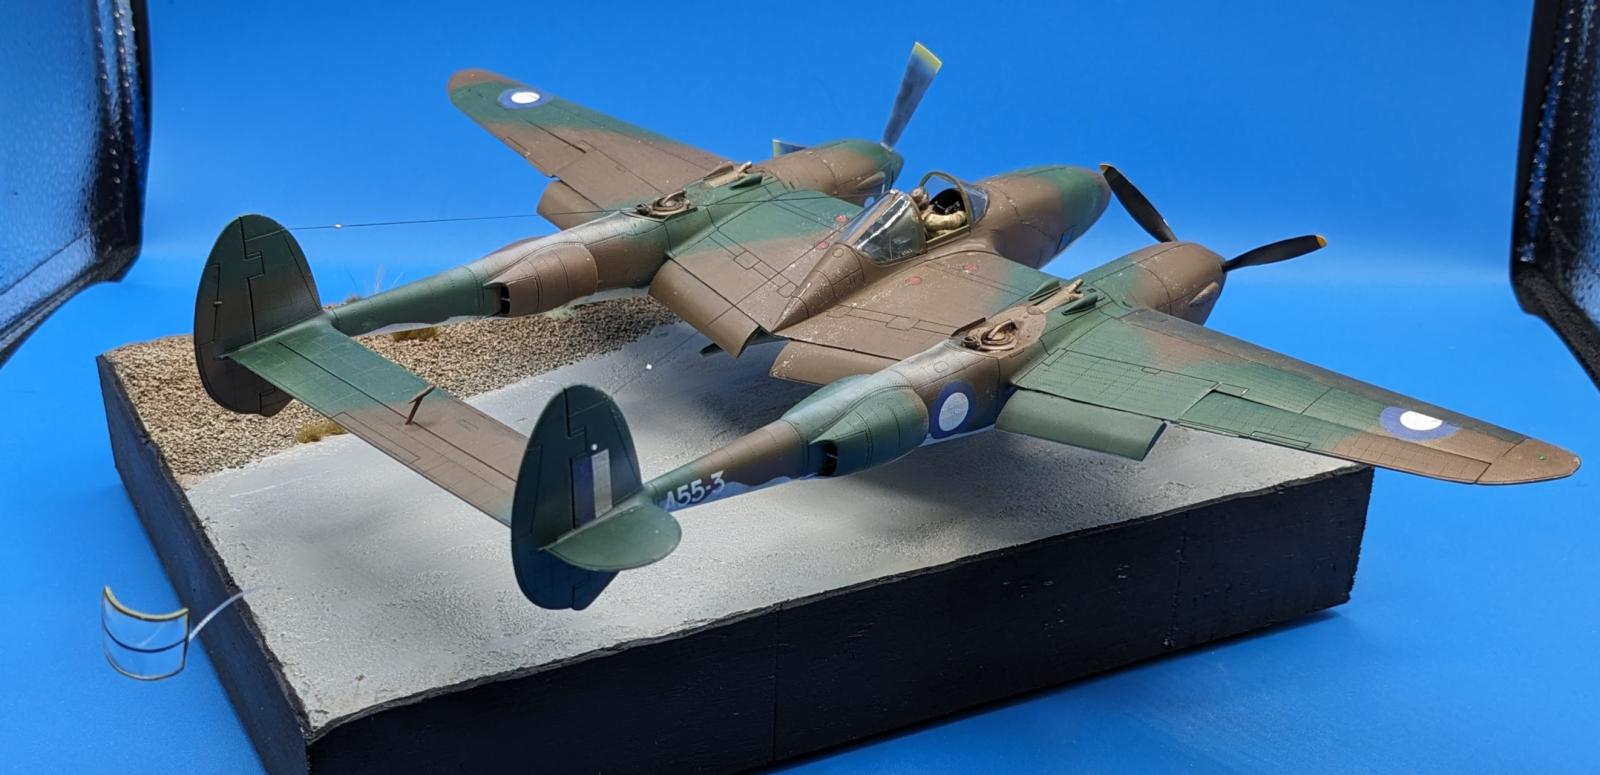
RAAF Lockheed F-4 Lightning Photo Recon
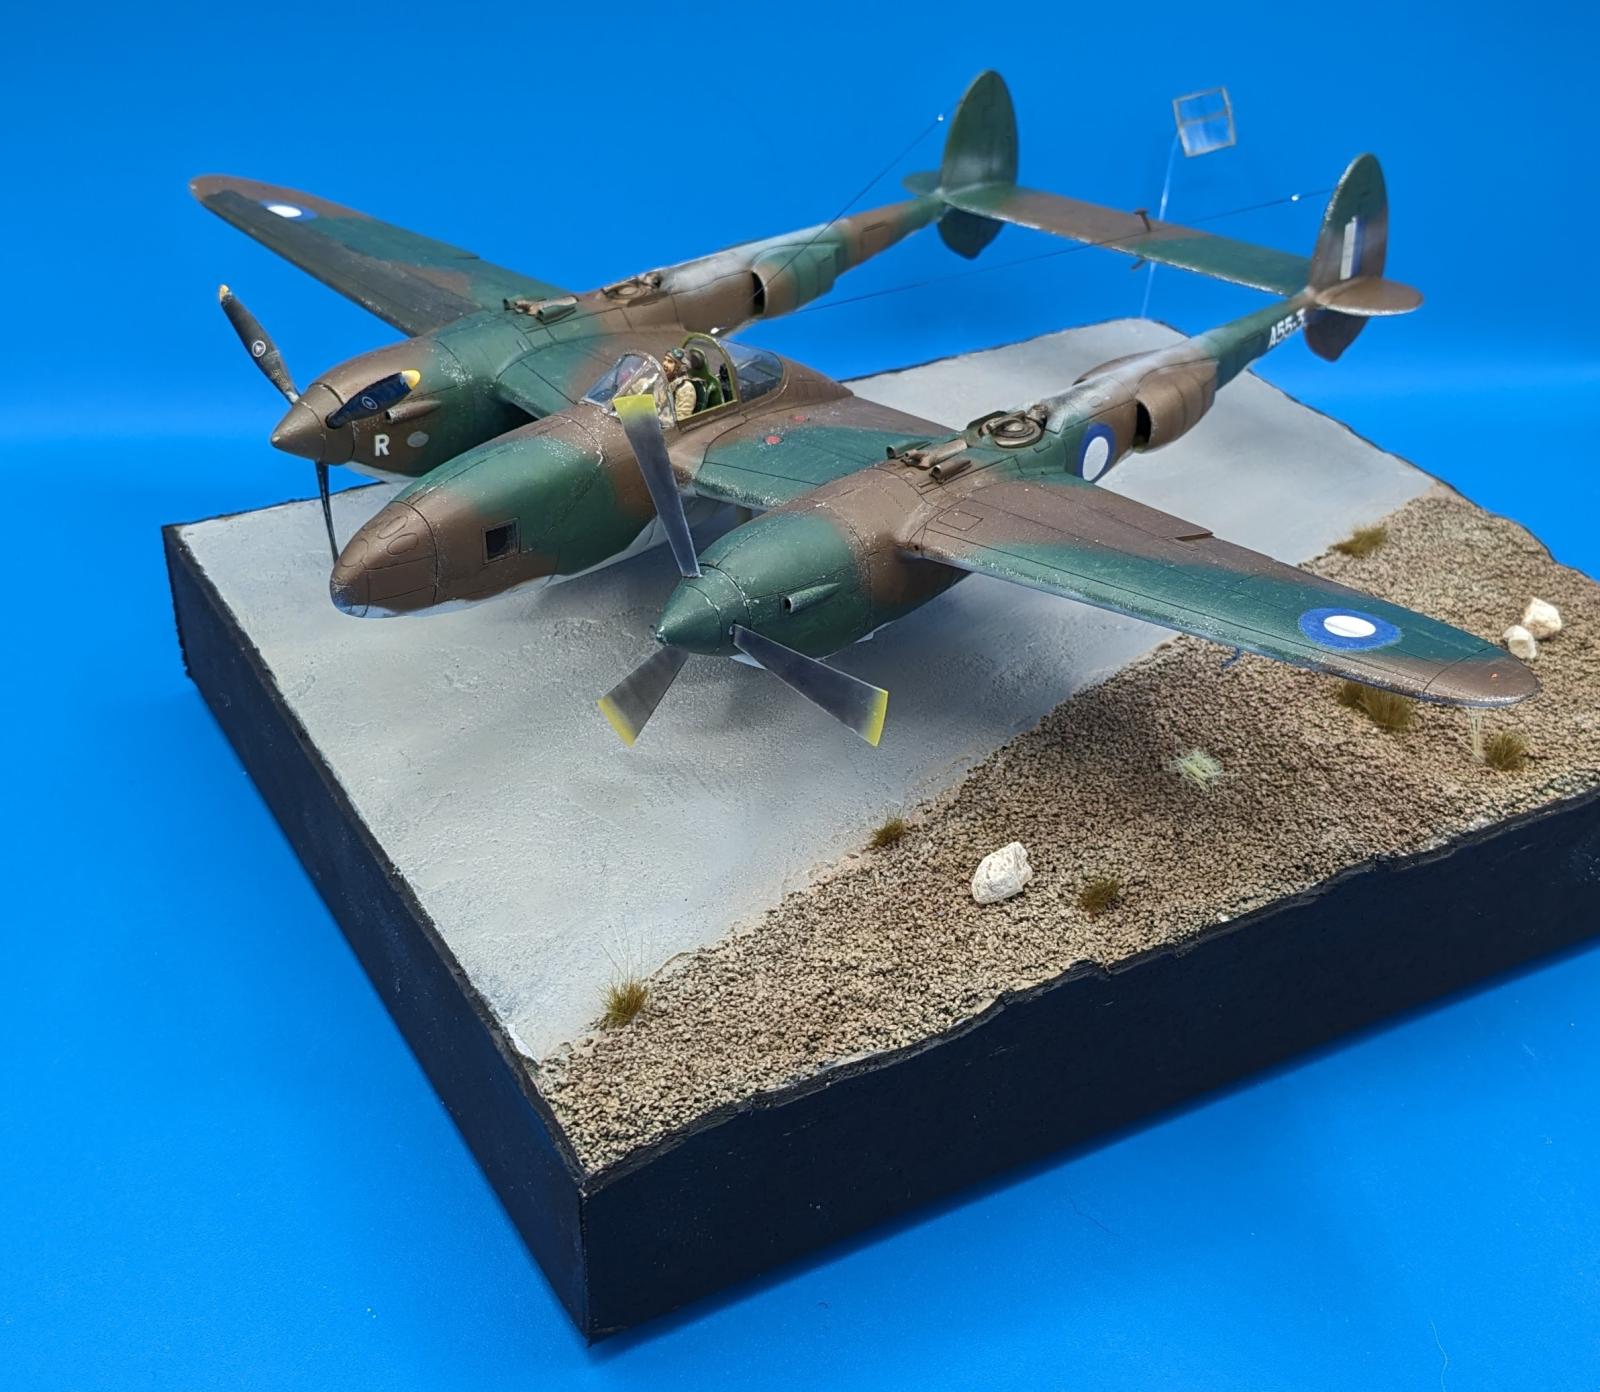
I've completed my build of the photo reconnaissance version of the P-38E Lightning. The particular version I built was an F-4 Lightning (versus F-4A as often seen) used by The Royal Australian Air Force in 1943.
This has been a fun project that I originally started in 2019 when attempting to build a herd of P-38 kits in 1/48. That effort got as far as completing HobbyBoss's P-38L as a conversion to the P-38M Night Lightning which I completed last year. I had also started this Academy P-38E kit and a Monogram P-38J kit conversion to the Droop Snoot Lightning, both in 2019. The Droop Snoot is still in work. The other three Lightnings have not been started yet except for some minor cockpit work.
I finally came back to this late last year, then switched gears for a while to complete my Airfix Lockheed Hudson project after about a month of working on it.
The Aircraft And A Brief History:
This aircraft started life as P-38E Lightning serial number 41-2144. I am not sure when the conversion to a photo recon bird occurred but it would have been in 1942. Due to the RAAF being woefully short of aircraft at the beginning of the Pacific war, the US Army Air Force at Eagle Farm in Brisbane transferred two F-4 Lightnings to the RAAF #1 PRU Squadron in early 1943 or possibly late 1942.
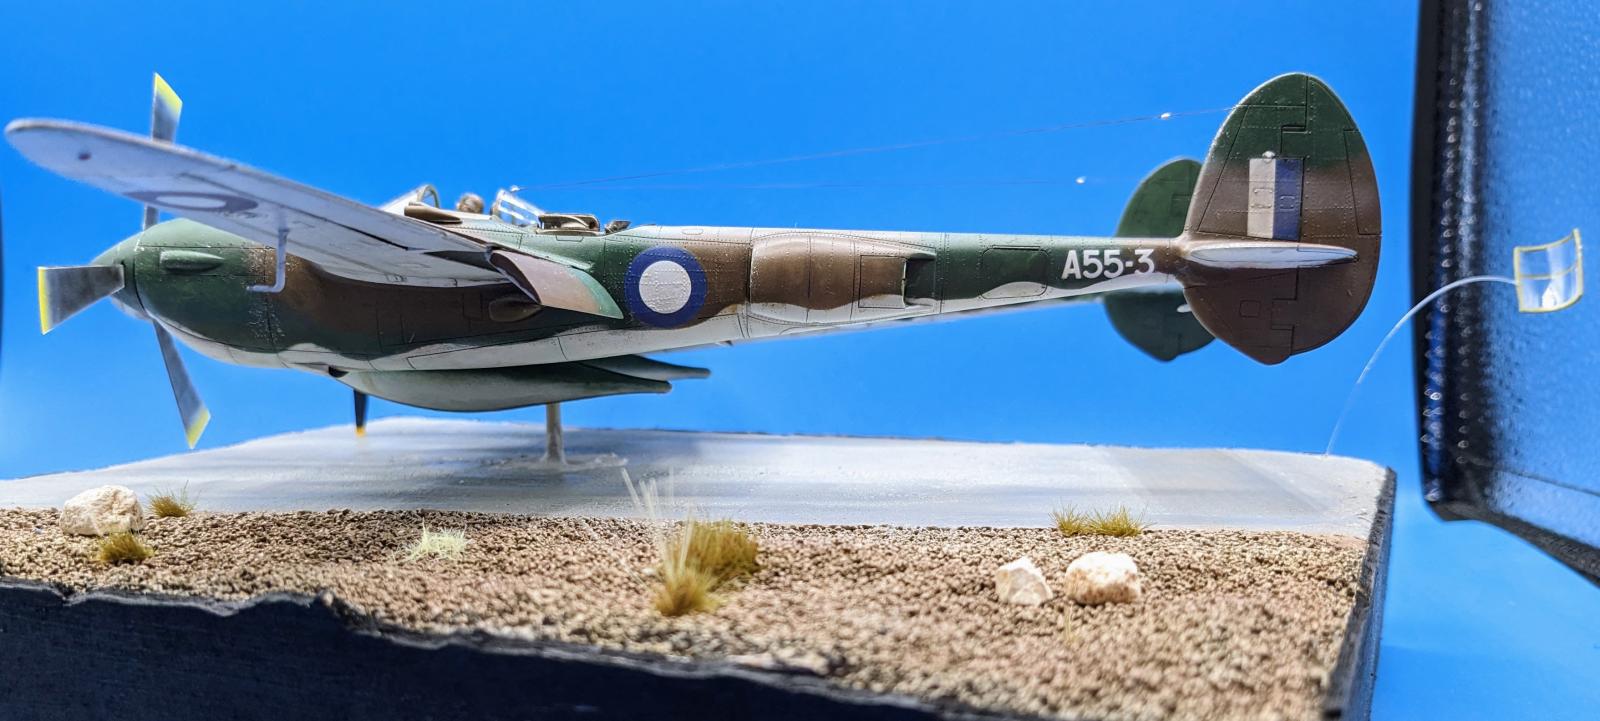
Serviceability issues with these two aircraft (designated A55-1 and A55-2) led to the request for a third aircraft which is the subject of this build and this was designated A55-3. There is a bit of confusion about the serial number of this aircraft as the status card for A55-3 states it was 41-2122, however there is enough evidence shown in the article on https://www.adastron.com/lockheed/lightning/serials.htm that I believe the 41-2144 serial is the correct number.
A55-3 was transferred to Coomalie Creek, Northwest Territories on March 16, 1943 and test flown four days later. Photo recon missions began immediately after that, but by March 22, there were indications of serviceability issues with the intercooler system. This is believed to have been a problem with all the early Lightnings due in part to their complex nature and requirements and the poor conditions at Coomalie Creek.
RAAF HQ had signaled that the intercooler system was unserviceable after only 16 hours of flight time on March 22. I am not sure what happened in the immediate aftermath of this as additional flights were made during the remainder of the month and into April when A55-3 was grounded for leaking intercoolers.
From available evidence, it is believed that this is when the starboard wing leading edge intercooler was replaced. Photographs taken of A55-3 in May show the wing leading edge has been replaced with what is a darker color part. It is believed this leading edge intercooler was sent from USAAF stock in Eagle Farm and retained the original Olive Drab coloring. You can see in the photos that the Australian national insignia was not resprayed after this replacement.
After this repair, the aircraft continued flying missions as well as other flights (including several test flights indicating other maintenance issues) from May 8 through September 20 including a photoshoot from a Wirraway trainer in late May. This photoshoot is where all the great shots of this aircraft come from.
On September 20, the aircraft was transferred to Townsville for repairs and returned on November 2. Material available on the Internet has led to some confusion about a possible belly landing on Nov 1, however more recent evidence as well as the fact that the aircraft flew operationally on November 5 has more or less proven that false.
Additional missions were flown until December 10 when the aircraft was forced to belly land due to a hydraulic failure not allowing the gear to extend down and lock. The crash damaged the aircraft beyond the ability of the facility to repair and it was designated as a component aircraft, to be used to keep other aircraft serviceable.
On February 8, 1944, the aircraft was condemned and salvaged. Supposedly, the wreckage had been transferred to the Darwin Aviation Museum, however, I wrote them and have not been able to verify this.
The Kit:
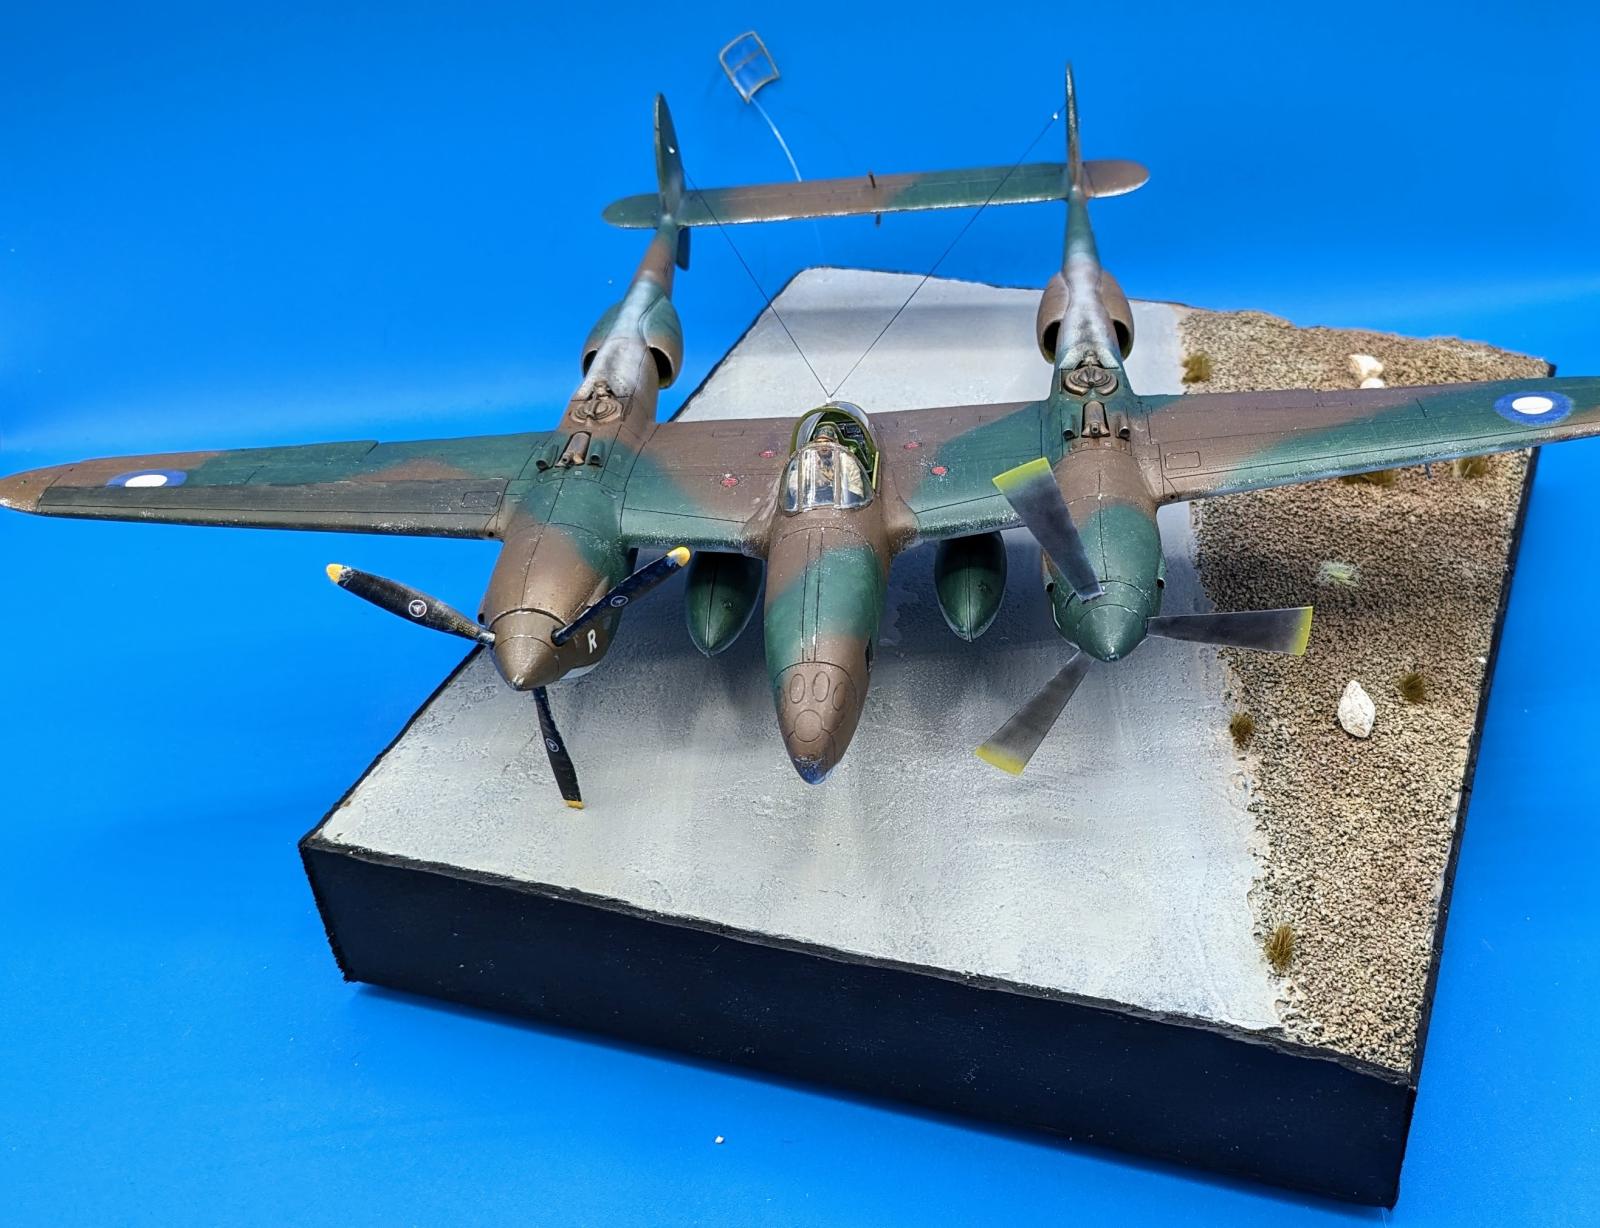
I built this project from the Academy 1/48 scale P-38E Lightning, using the CMK F-4 Lightning PR nose conversion for the Tamiya P-38F kit. An Aires cockpit was substituted for the kit cockpit which was weak on detail. Quickboost turbochargers and small boom intakes replaced the kit parts as well.
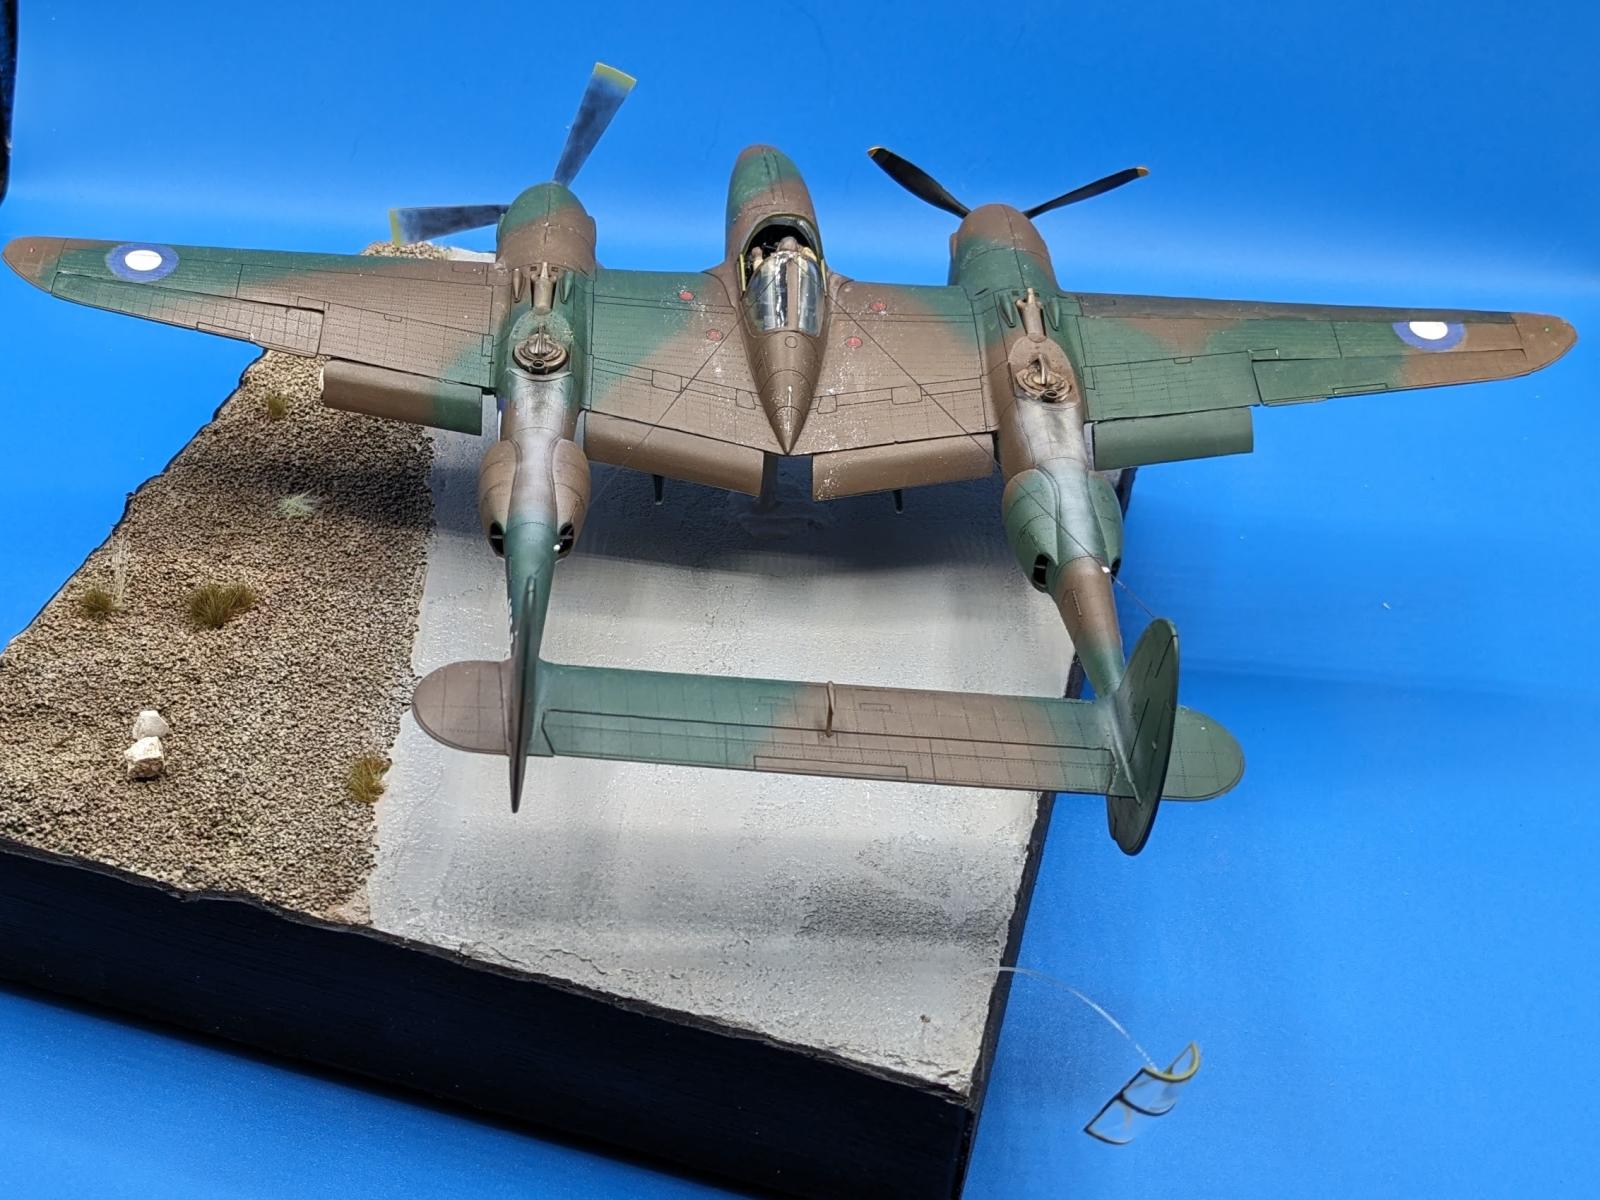
Because the aircraft is displayed in flight with the gear doors closed, the weakly detailed landing gear wells were not a problem. The boom oil cooler intakes below the propellers are simple depressions on the model. There is no detail in the boom radiator housings.
Surface detail is limited to panel lines and a few fasteners. The model is fairly easy to assemble and except for a lack of detail, fairly accurate.
The Build:
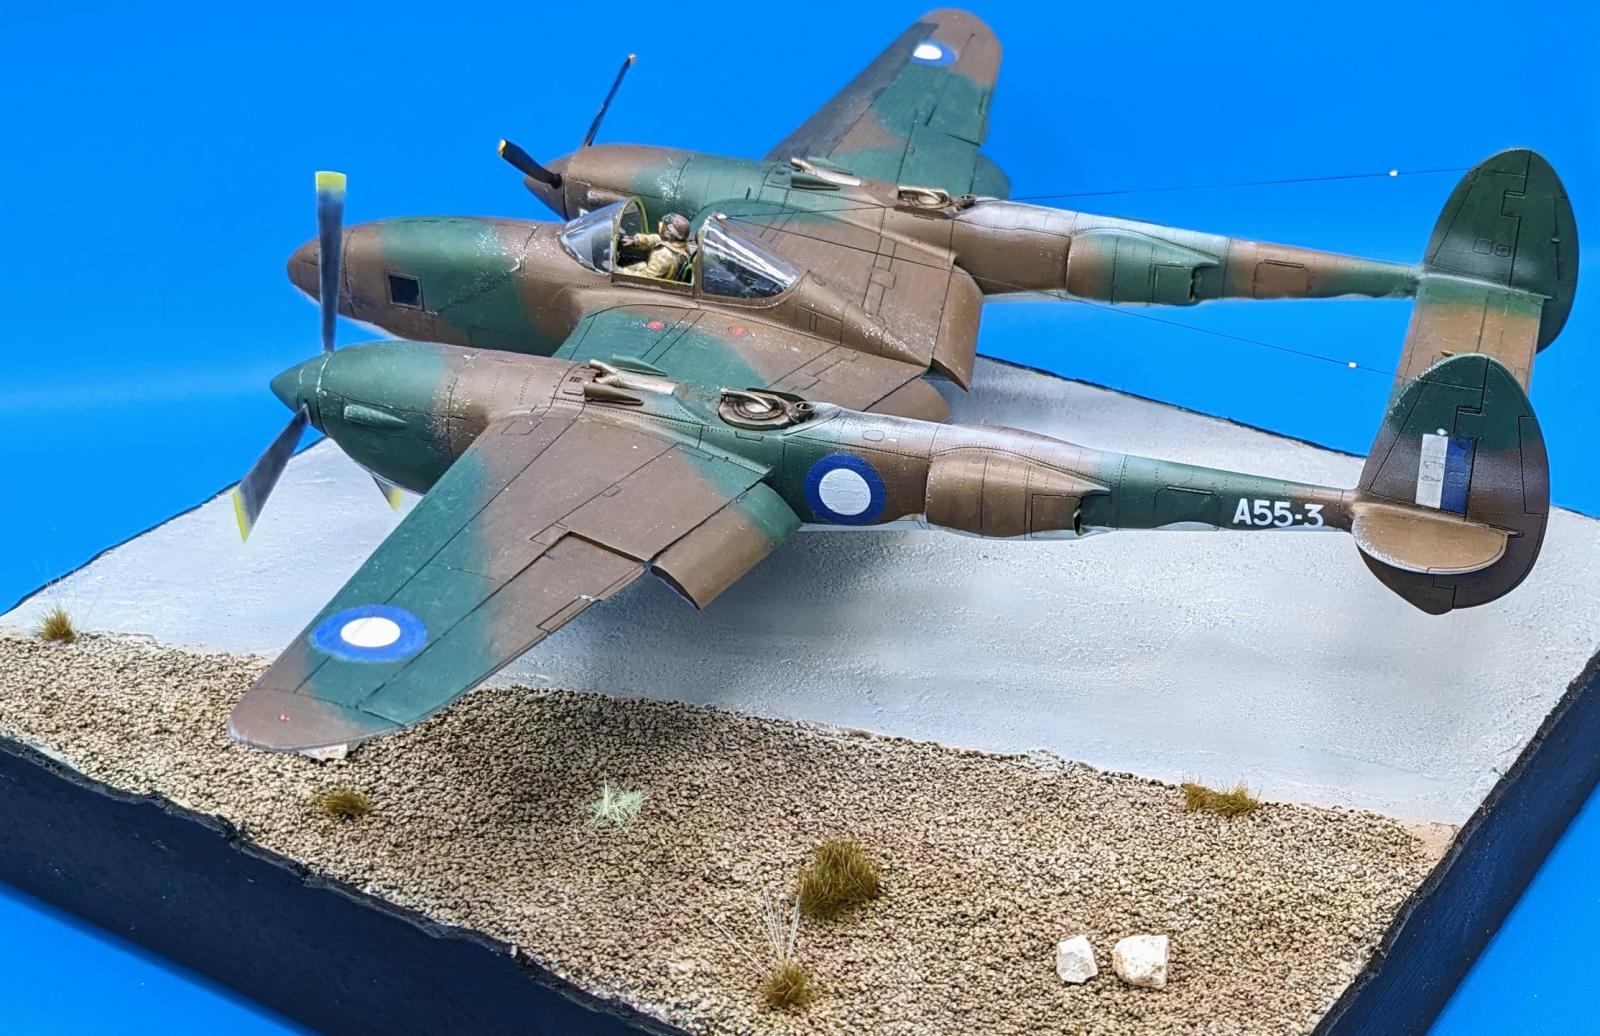
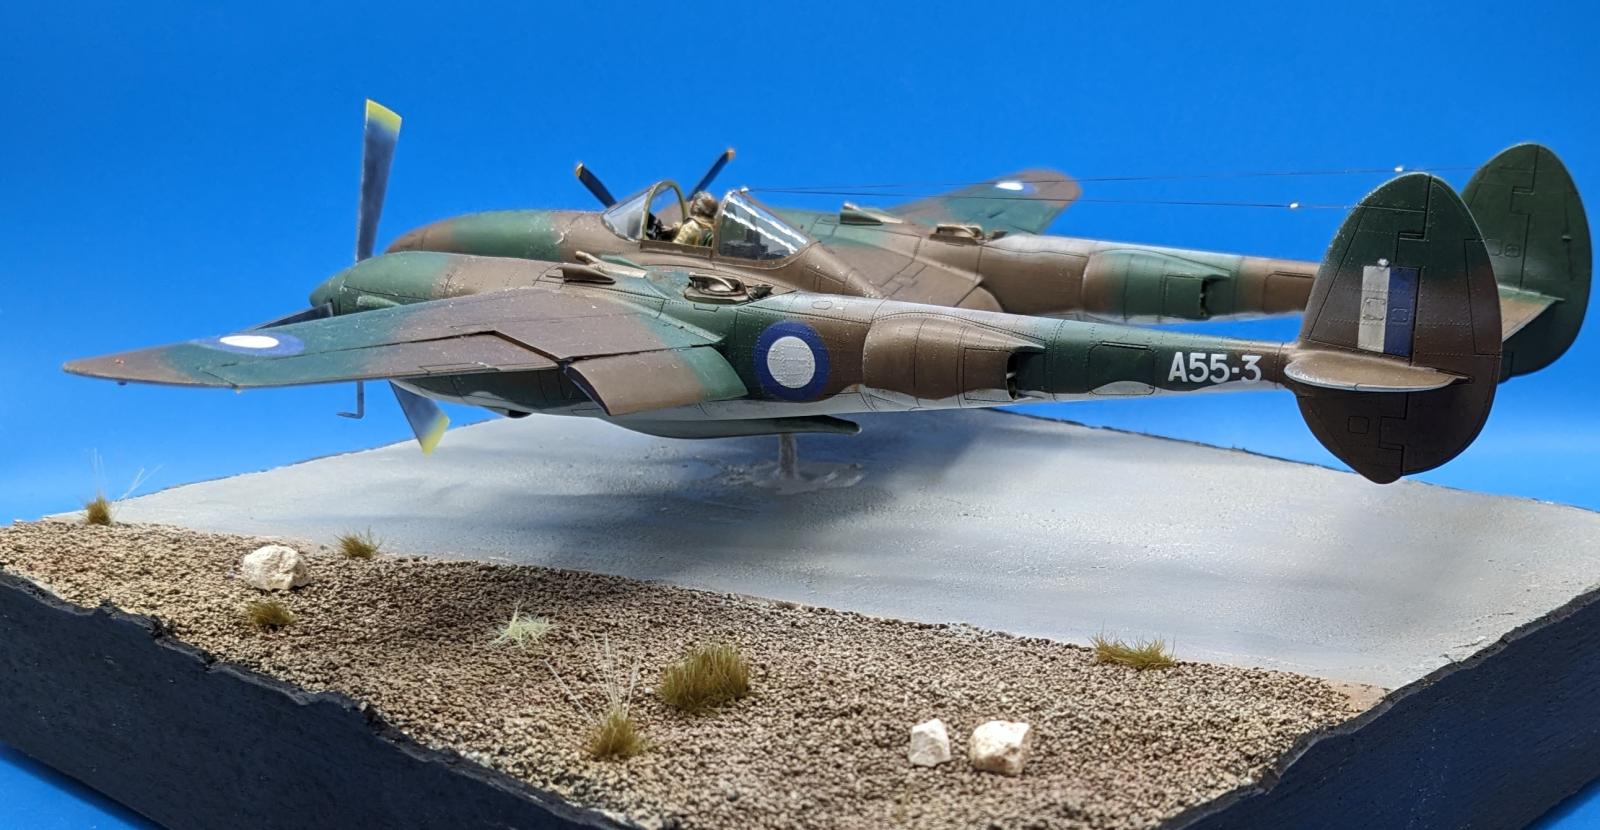
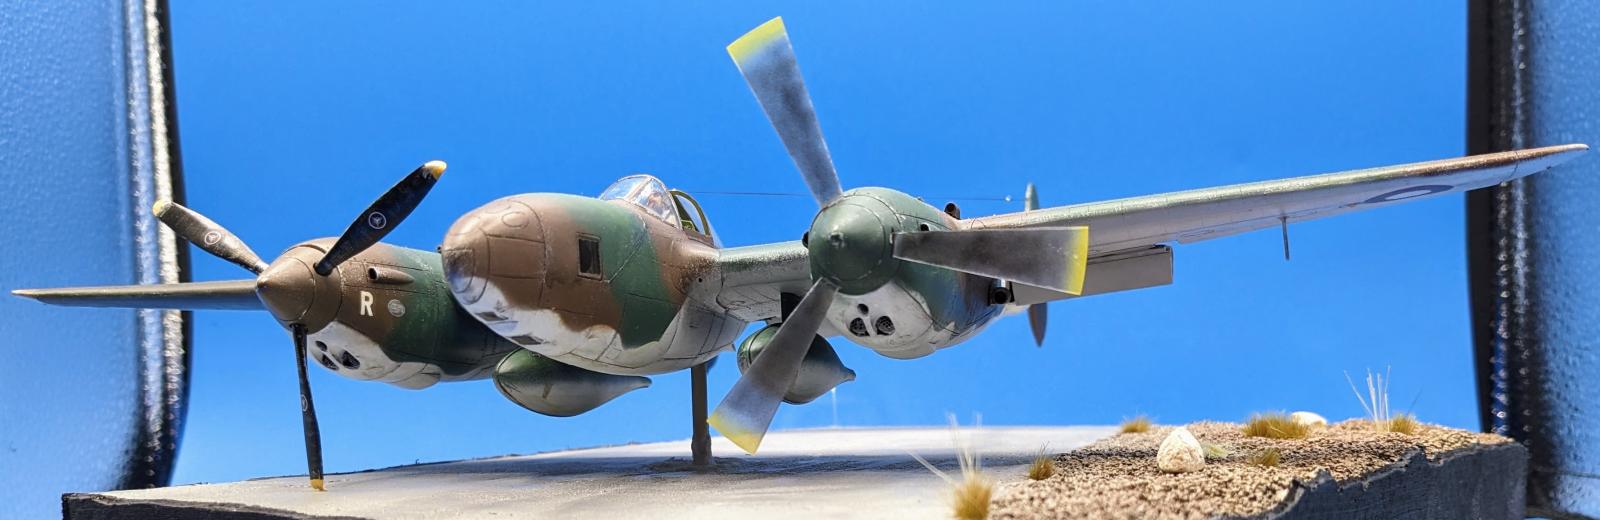
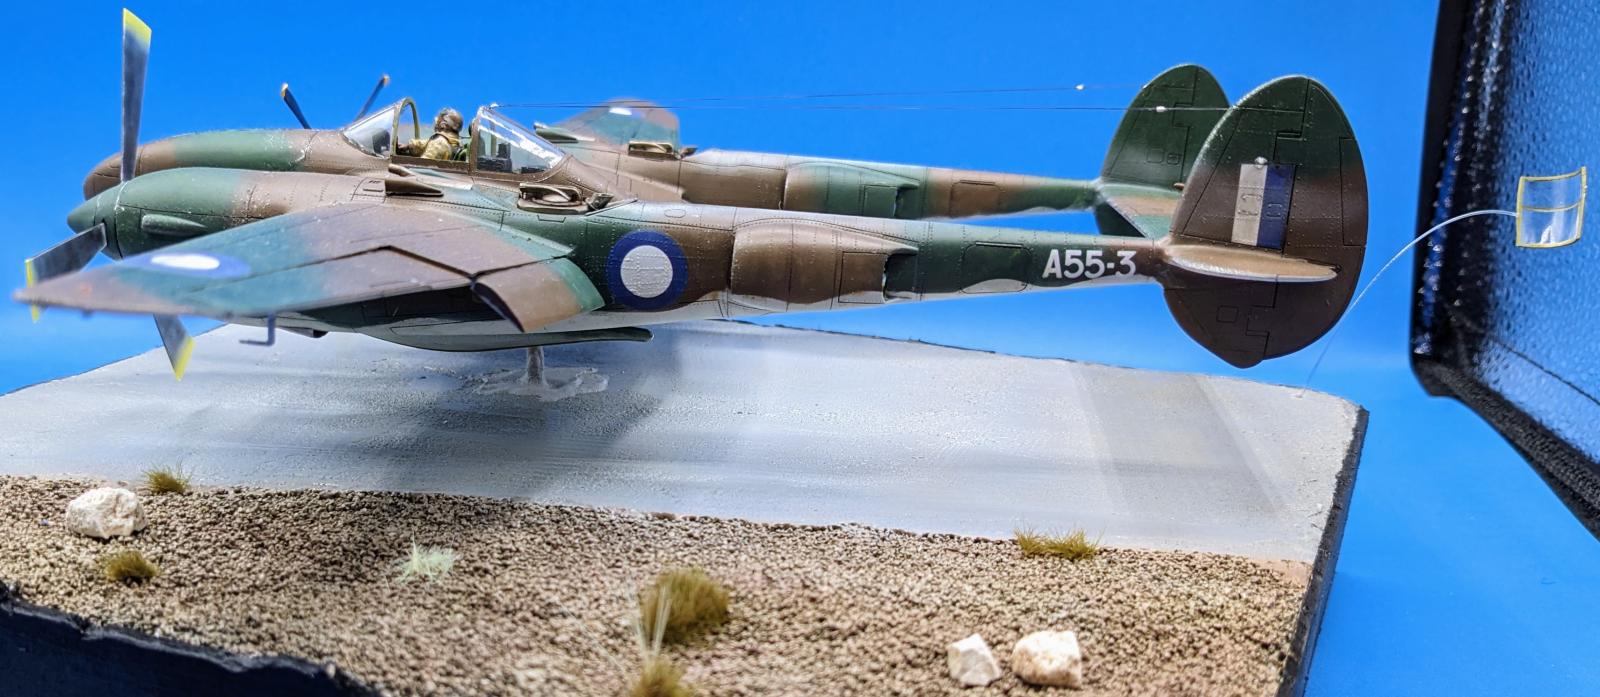
I wanted to depict this Lightning in the final stages of its last flight as the pilot is attempting the belly landing. The starboard engine has just stopped after the prop has hit the ground and the blades have begun to bend at the tips. I took a bit of artistic liberty here because I do not know the actual circumstances of the crash other than what I relate here.
The maintenance manual states that the main canopy top should be jettisoned prior to landing and the windows rolled down to aid in egress from the aircraft after it has stopped moving. It also calls for dropping the belly tanks but photographic evidence shows that the drop tanks are still in place on the downed aircraft.
Because the aircraft is landing, I had to modify the model to have extended Fowler flaps. The lack of external detail on the kit caused me to want to add riveting which was accomplished using scans of rivet decals made for the Tamiya P-38F as a measurement guide for laying out the patterns and then performing the riveting using a rivet wheel.
The oil cooler intakes were opened up and screens added to better detail this area. The radiator housings on the booms were given some detailing on the inside to spruce them up. The Tamiya pilot from my recent P-51B Mustang kit was modified to fit in the Aires cockpit. To give the appearance of flight, the port propeller was modified to simulate spinning blades using clear acetate and lightly sprayed with black and yellow.
Getting the Aires cockpit to fit, like most Aires cockpit sets, was a challenge requiring lots of grinding away of the resin and the kit nose gear well. The CMK resin nose fit fairly well, but a few shims were needed to get it to align on the Academy fuselage and some shaping of the nose to blend into the fuselage. The mounting surface on the resin was different from the matching area on the kit, but represented a better opening for the nose compartment access, so some plastic was added to the kit to fill in the empty spaces.
For the base, I glued two pieces of pink insulation foam together and then from that cut out the final size of the base. The edges were sanded square on a bench belt sander and covered with balsa sheeting after the top landscaping was added, painted, and weathered.
The landscaping was added by covering first with Sculptamold (probably unnecessary, but I am new to dioramas). Then AK landscaping acrylic pastes (Light Earth and Concrete) were added. After these dried, I covered the dirt area with thinned PVA glue and used a sandy medium I found at Michael's Art Store. All of this was painted with Mr Surfacer 1500 black and then painted with various brown and gray Tamiya paints. This was overcoated with a gloss clear and the oil washes were used to enhance details. A flat clear finished it off and then a small amount of dry brushing with lighter colors. Finally, I added some tufts of grass from various supplies I had on hand as well as a few small stones from my yard.
Because the model is supported by a brass rod, I had to first embed a piece of wood in the foam before doing the landscaping. This provides the necessary strength to properly support the model. Milliput was added behind the cockpit in the model for the other end of the brass rod. This was done before the fuselage was closed up.
Additional photos of this project can be found in the Pacific Theater group at https://imodeler.com/groups/the-80th-anniversary-of-the-attack-on-pearl-harbor/forum/topic/raaf-lockheed-f-4-lightning/
I hope you all enjoy the photos of the build.


My first thought was "Isn't that a bit short for a Lightning?" and I was a touch confused. Didn't know the RAAF had a couple of recce birds so that was new.
Now that I see the whole thing (and read the article) I get it now. Good job on the airborne dio and unique scheme.
Thanks Dan (@dbdlee). The Lightning is one of those planes that just begs to be seen in flight.
that is a pretty cool vignette. Nice job and clever idea!
Thanks Ramon (@anvil6). I keep calling this a diorama, but I guess it really is a vignette!
Very cool
Glad you like it George (@blackadder57)!
Great idea for a project, and I like seeing that unusual scheme for a Lightning - well done!
Thanks Greg (@gkittinger). I saw the original well done photos and just knew I had to do this one.
A cool diorama, Carl @clipper
Very interesting history of this aircraft as well.
It was a pleasure to follow you along with the build of this subject, I really loved it.
Thanks John (@johnb), I appreciate you following the build in the group. Although these aircraft had short service lives in the RAAF, their camouflage paint schemes are very nice to look at and lend themselves well to the Lightning.
What an awesome result, Carl @clipper! A really unique subject, perfectly rendered! It was pure pleasure to follow your build and seeing your techniques.
Congratulations!
Thanks for the kind comments Spiros (@fiveten). I want to give credit for all the techniques I know to those who have made it possible for e to learn them, namely everyone who gladly shares their own skills and tips on the Internet.
Very cool build! I have an 8th PRS F-4 on my to-do list with the CMK conversion. Glad to see it works with the Academy kit too, looked like it might with the F-5E kit I built. I was an instructor in the 8th FTS (Flying Training Squadron) which is descended from the 8th PRS, so I’m planning a few Recon Lightning builds.
I'm glad you like it Beau (@you-two). I am always glad to get compliments from flyers, I must be doing at least something right! 🙂 The nose does need a bit of shaving down, so it will be necessary to restore some surface detail, but it does fit fairly well. I am not sure about their F-5 conversion.
Good looking airplane and diorama, Carl (@clipper). It is nice to see an unusual airplane in seldom-seen paint scheme. Great history and article along with the model.
Thanks George (@gblair). I felt the same way when I first saw the photos and acquired the P-38E kit. I knew that I had to do this scheme. Thankfully, there is the article (I linked above) that has considerable information about these aircraft.
Very cool, Carl. Nice to see one in non-US colors.
Glad you like it John (@j-healy). As I mentioned to George above, this is one of those schemes that just cries out to be done.
Well done, looks good in Aussie colors!
Thanks Chas (@chasbunch). I quite agree, camouflage and Aussie markings look good on this plane.
Great idea for an interesting and slightly different build, the whole diorama is very convincing.
Thanks George (@chinesegeorge). I am finding this new approach (for me) to modeling to be quite a neat experience.
G’day Carl (@clipper),
I enjoyed watching your build and all the modifications to fit the nose and modify the flaps. What a great idea for a diorama.
Liked!
Thanks Michael (@michaelt). These flaps were the first time I've attempted that type of flap. It helps that as an ex aircraft mechanic, I worked on exactly the same types on P-3 Orions.
I would like to add my thanks to everyone who responded and everyone who clicked on the various emojis. It's nice to be able to share one's work with others.