Kiwi Avenger
Subject
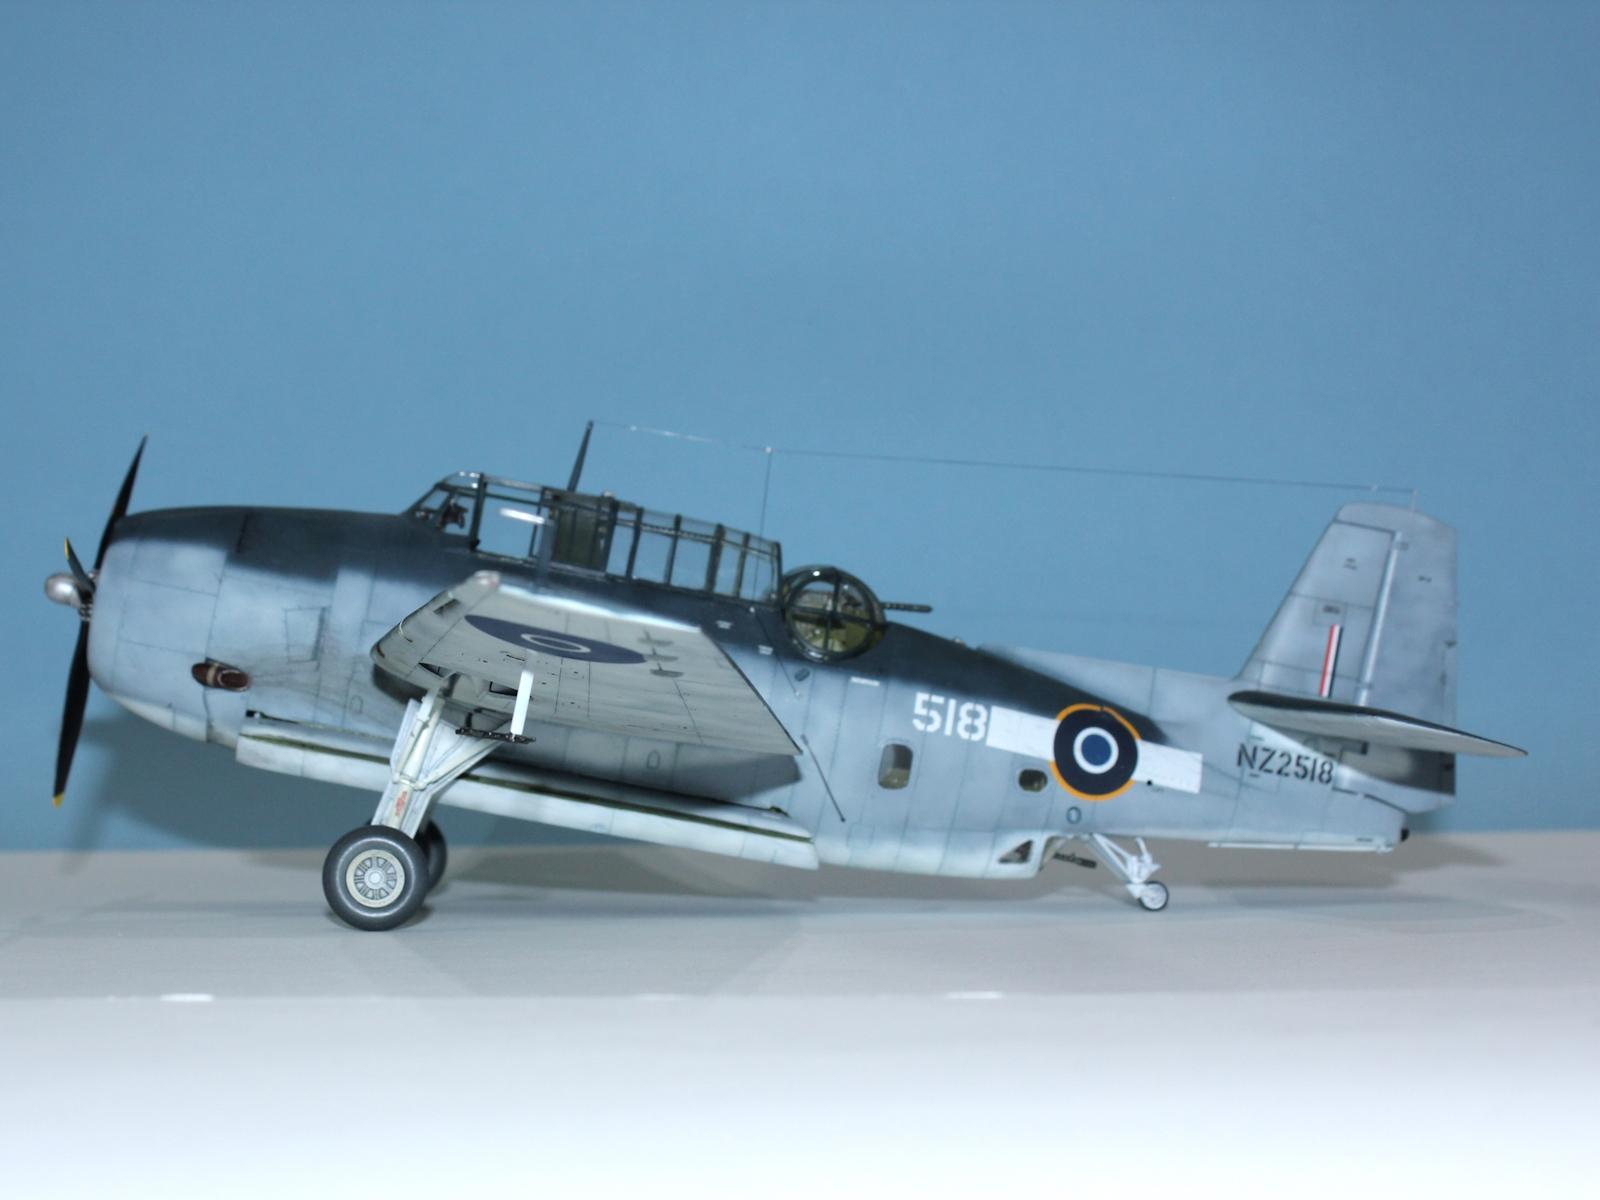
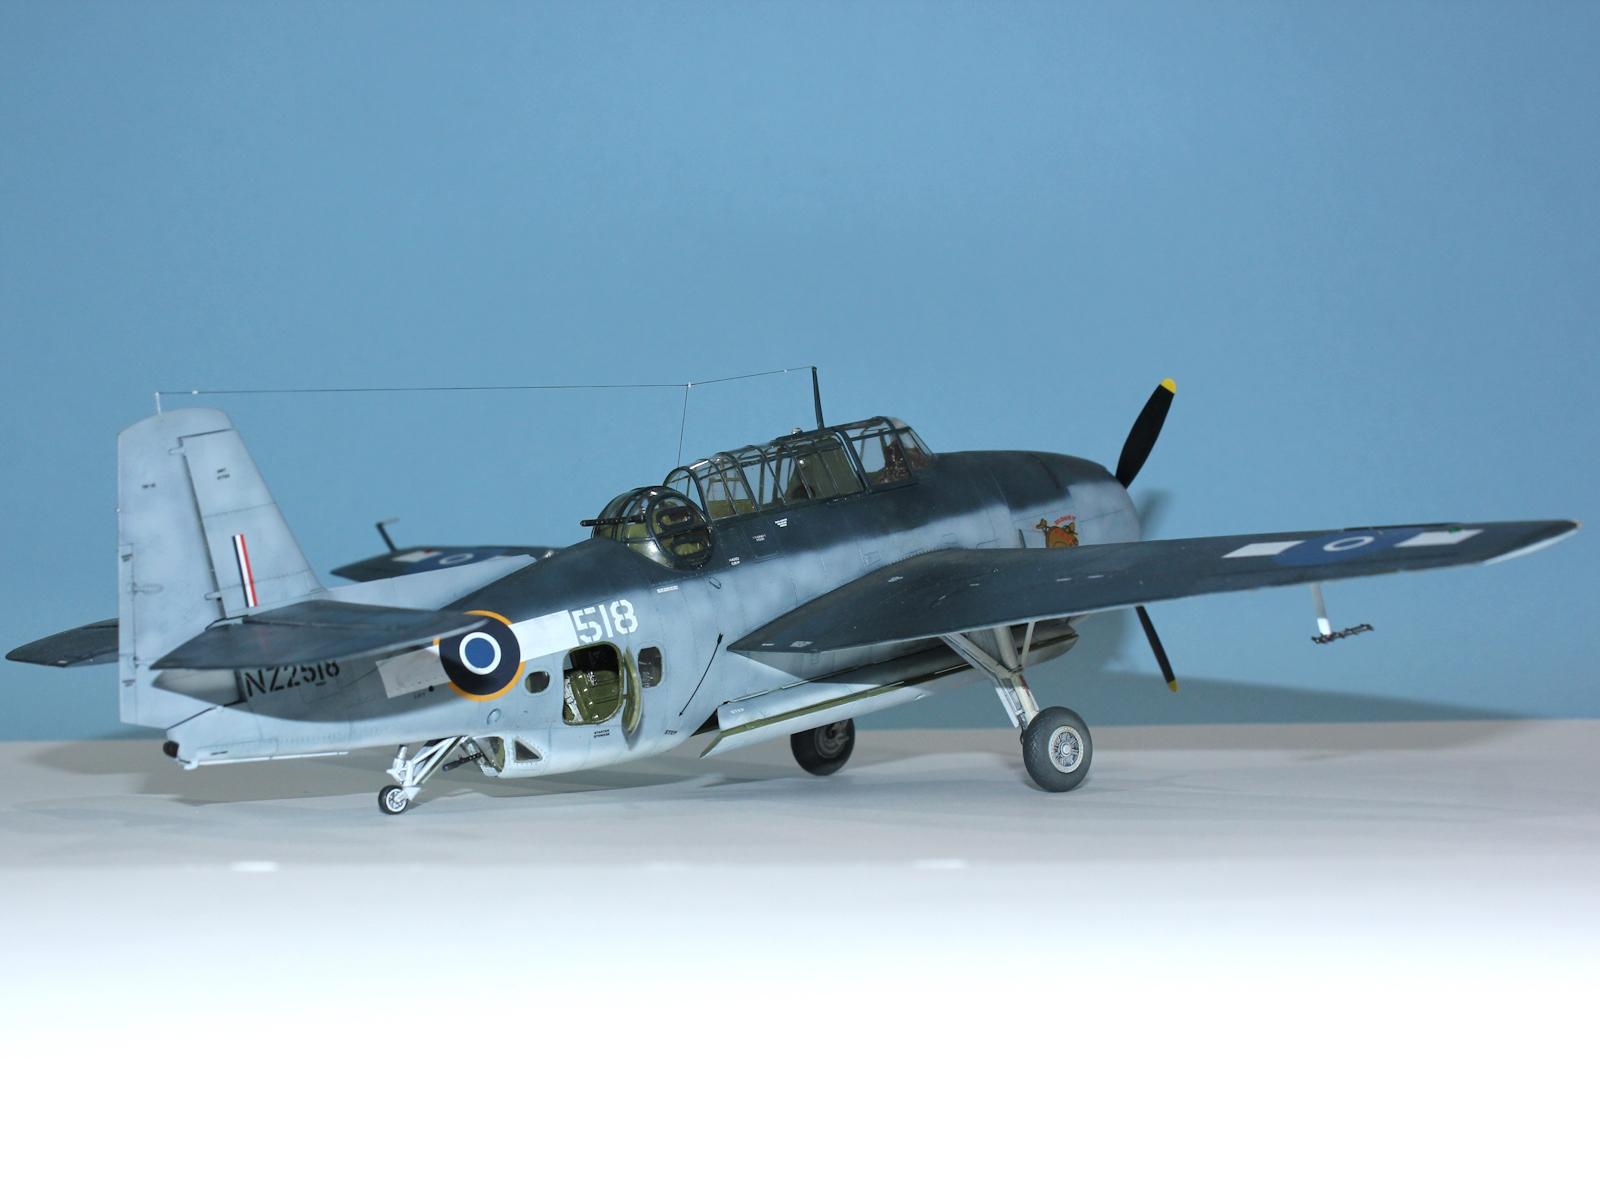
The RNZAF took delivery of their first six TBF-1 Avengers in September 1943 and these were regulated to a training role. The next 19 Avengers, delivered in October and December, were TBF-1Cs that were considered more suitable for operations and assigned to 30 Squadron. These were given serial numbers in the range NZ2507-NZ2525 and, as a morale exercise, permission was given to paint individual nose art on the aircraft and a sign writer was engaged.
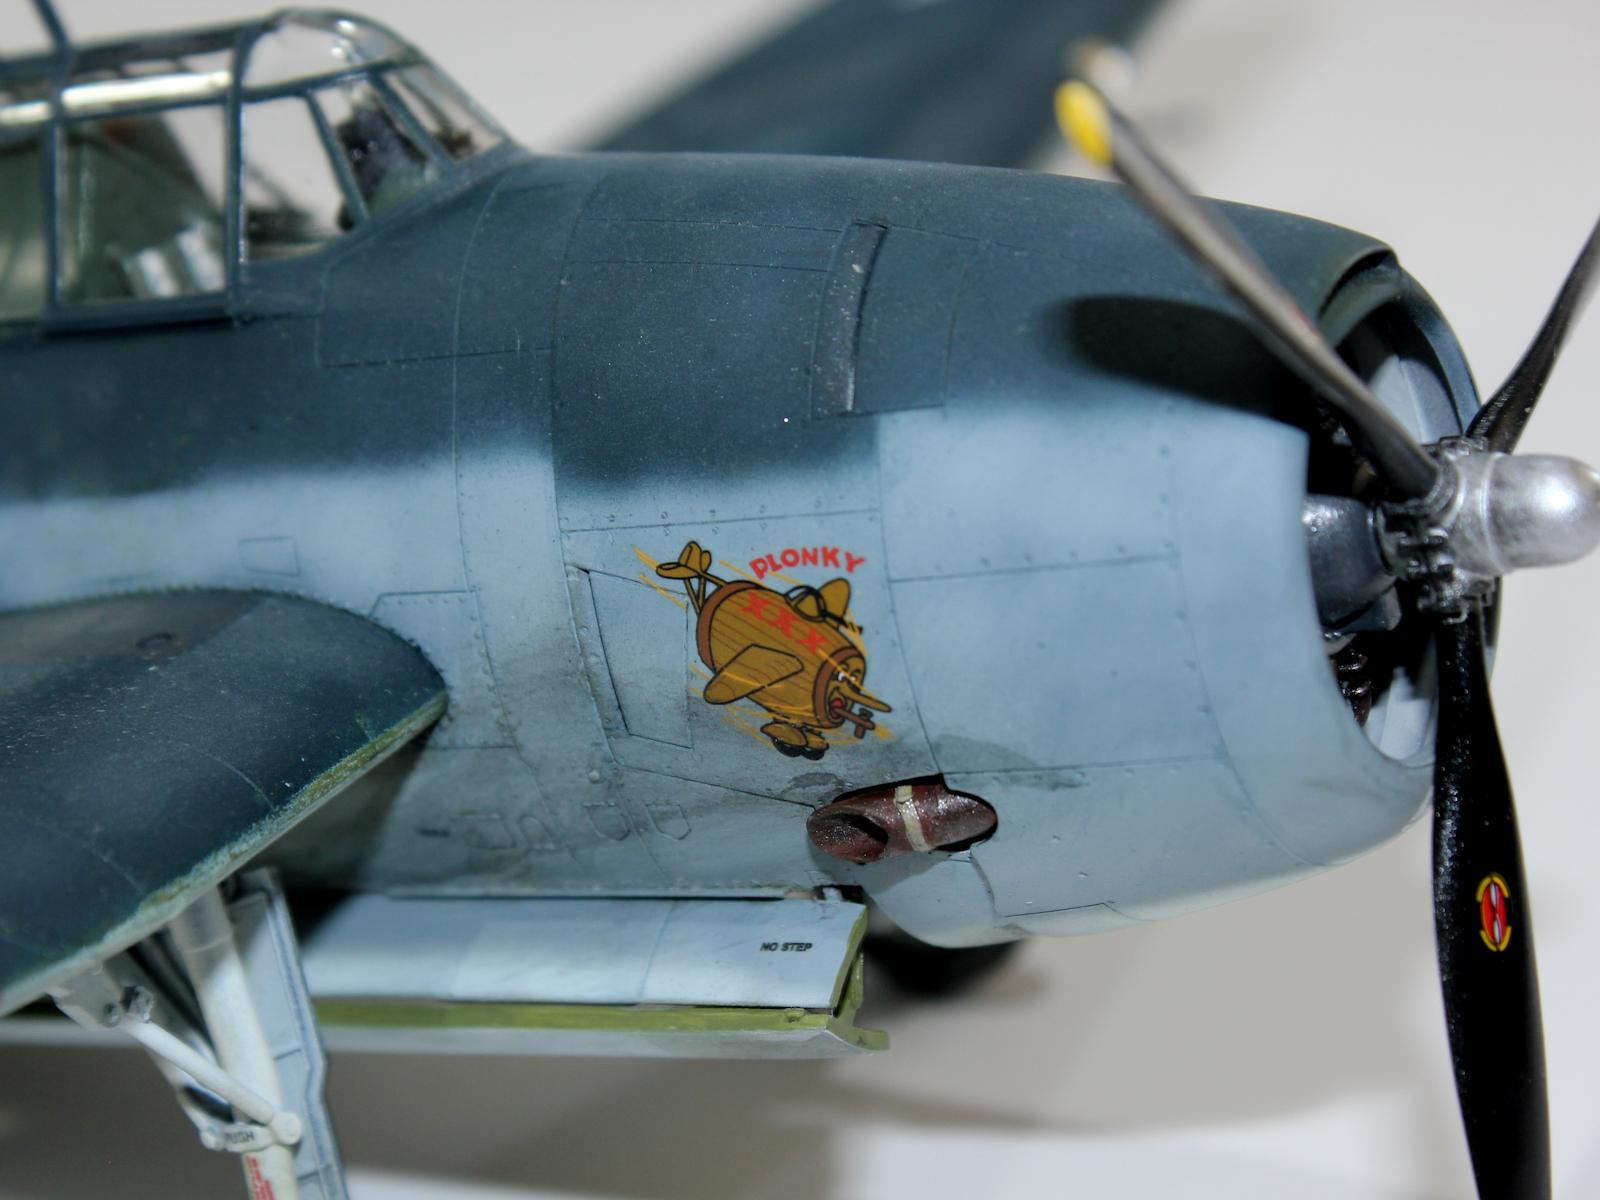
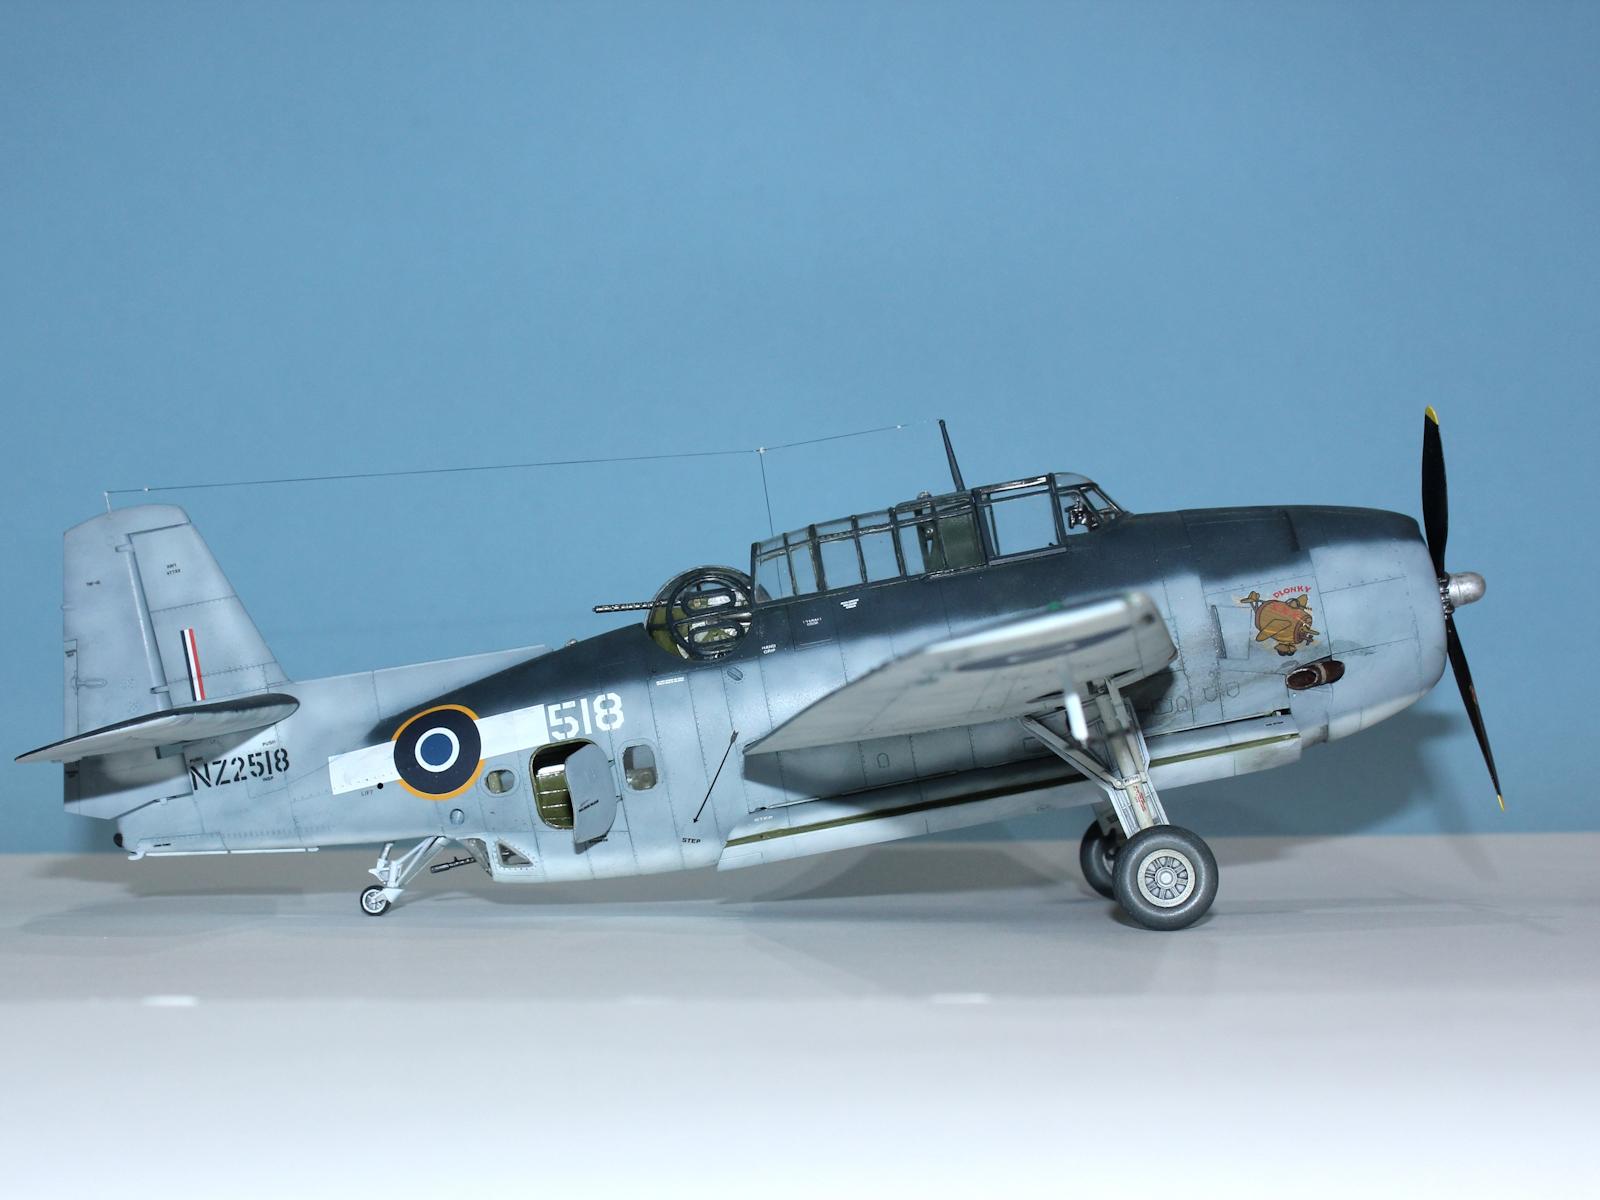
Most of the aircraft nose art was of Disney characters or similar, but the pilot of NZ2518, Flt Lt Fred Ladd, had his own idea. Ladd was a teetotaller and thought that the Avenger looked like a beer barrel so had the image of a flying beer barrel pouring beer (on the Japanese) painted on his aircraft and christened it “Plonky”.
In late March, 30 Sqn commenced operations from Bougainville, Papua New Guinea against Japanese airfields and forces on and around New Britain and New Ireland. 30 Sqn flew 573 combat sorties and lost three aircraft up to May. Ladd and his crew survived their tour and, along with the rest of the squadron, handed their Avenger over to 31 Sqn on the 25th of May, 1944.
The new 31 Sqn crew were Flt Lt Charles Prior, F/O Sydney Clayton and W/O Theo Scarlett. On the 5th of June “Plonky” participated in a raid on Rapopo Airfield, New Britain, during which she was hit by flack and crashed, killing the crew.

Construction
This is the Accurate Miniatures kit re-boxed by Italeri with new a decal sheet with six options, four USN, one British FAA and one RNZAF. The kit instructions use the original AM schematic diagrams but don't include the AM descriptive text which caused a few issues as described later, and which were resolved by finding the original instructions on scalemates.com.
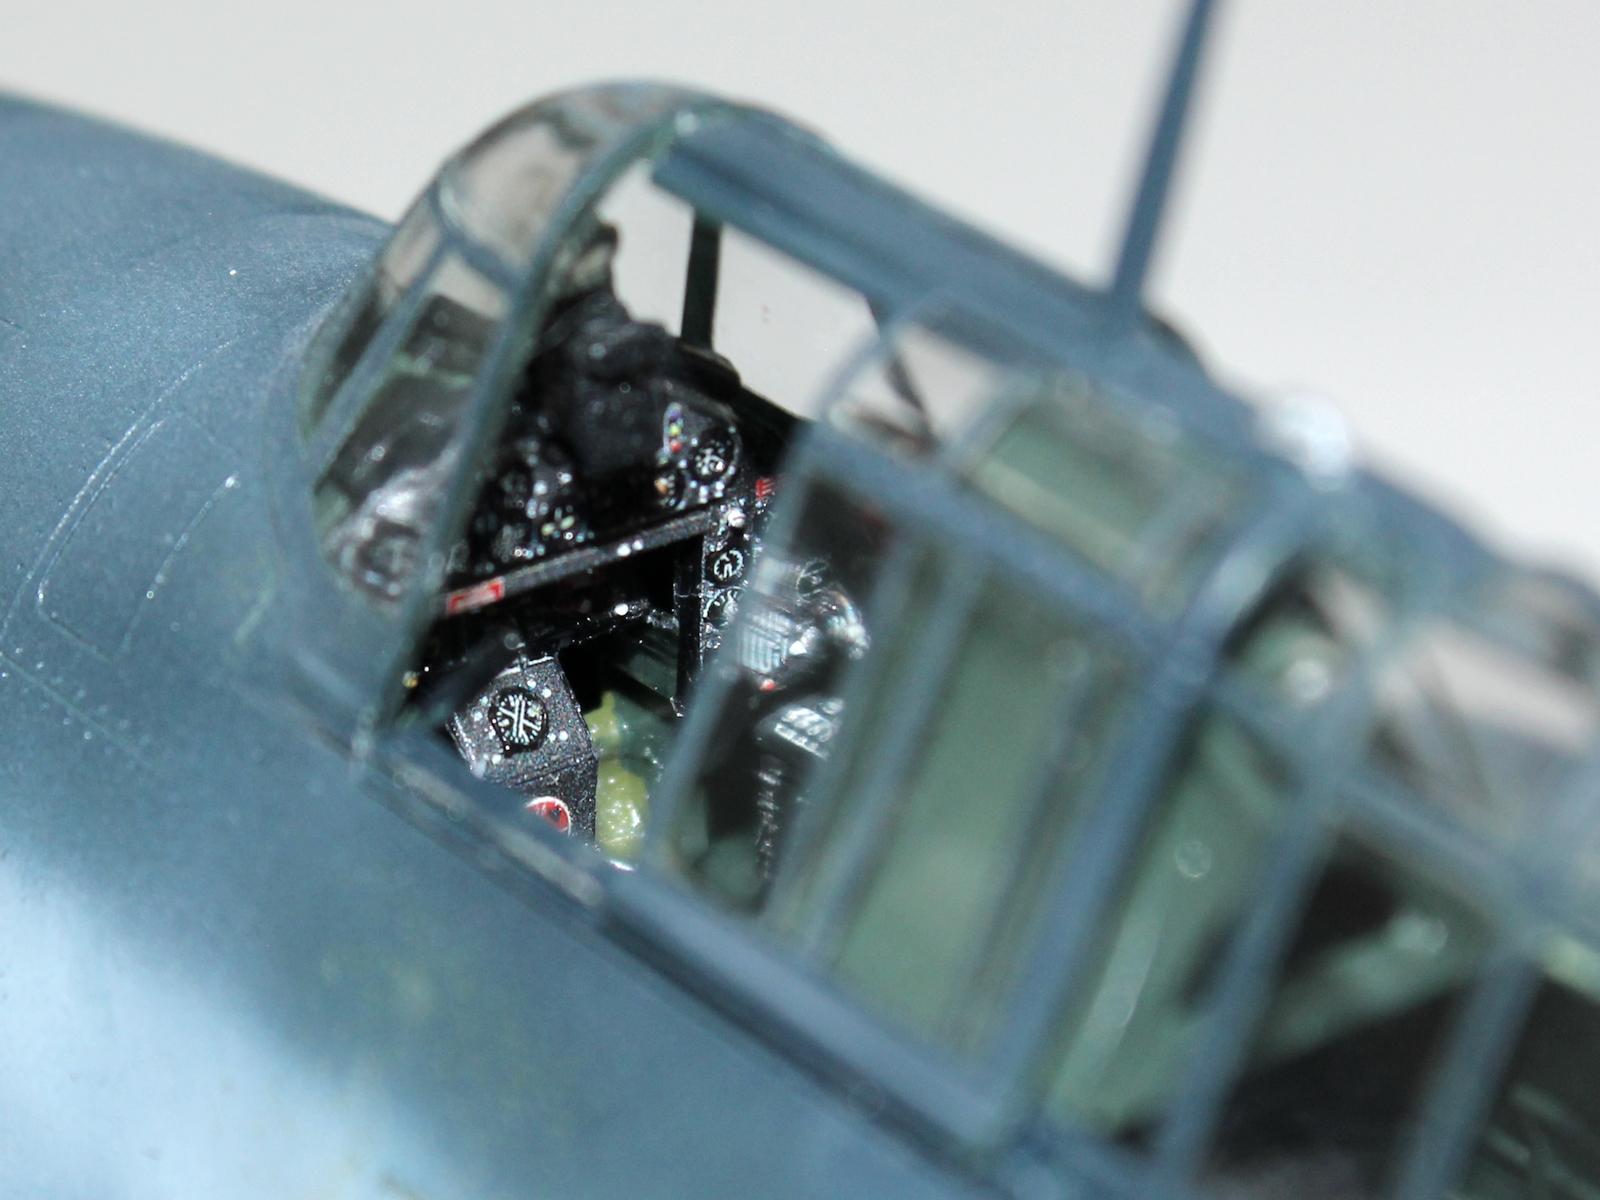
The other thing that Italeri don't provide is decals for the instrument panel. AM moulded the part in clear plastic with the intent that a reverse printed decal is applied to the back. This means that the instruments are flat glass without any detail. So, I purchased a Quinta Studio cockpit interior which included then instrument panel, seat belts and various panels, placards and other pieces.
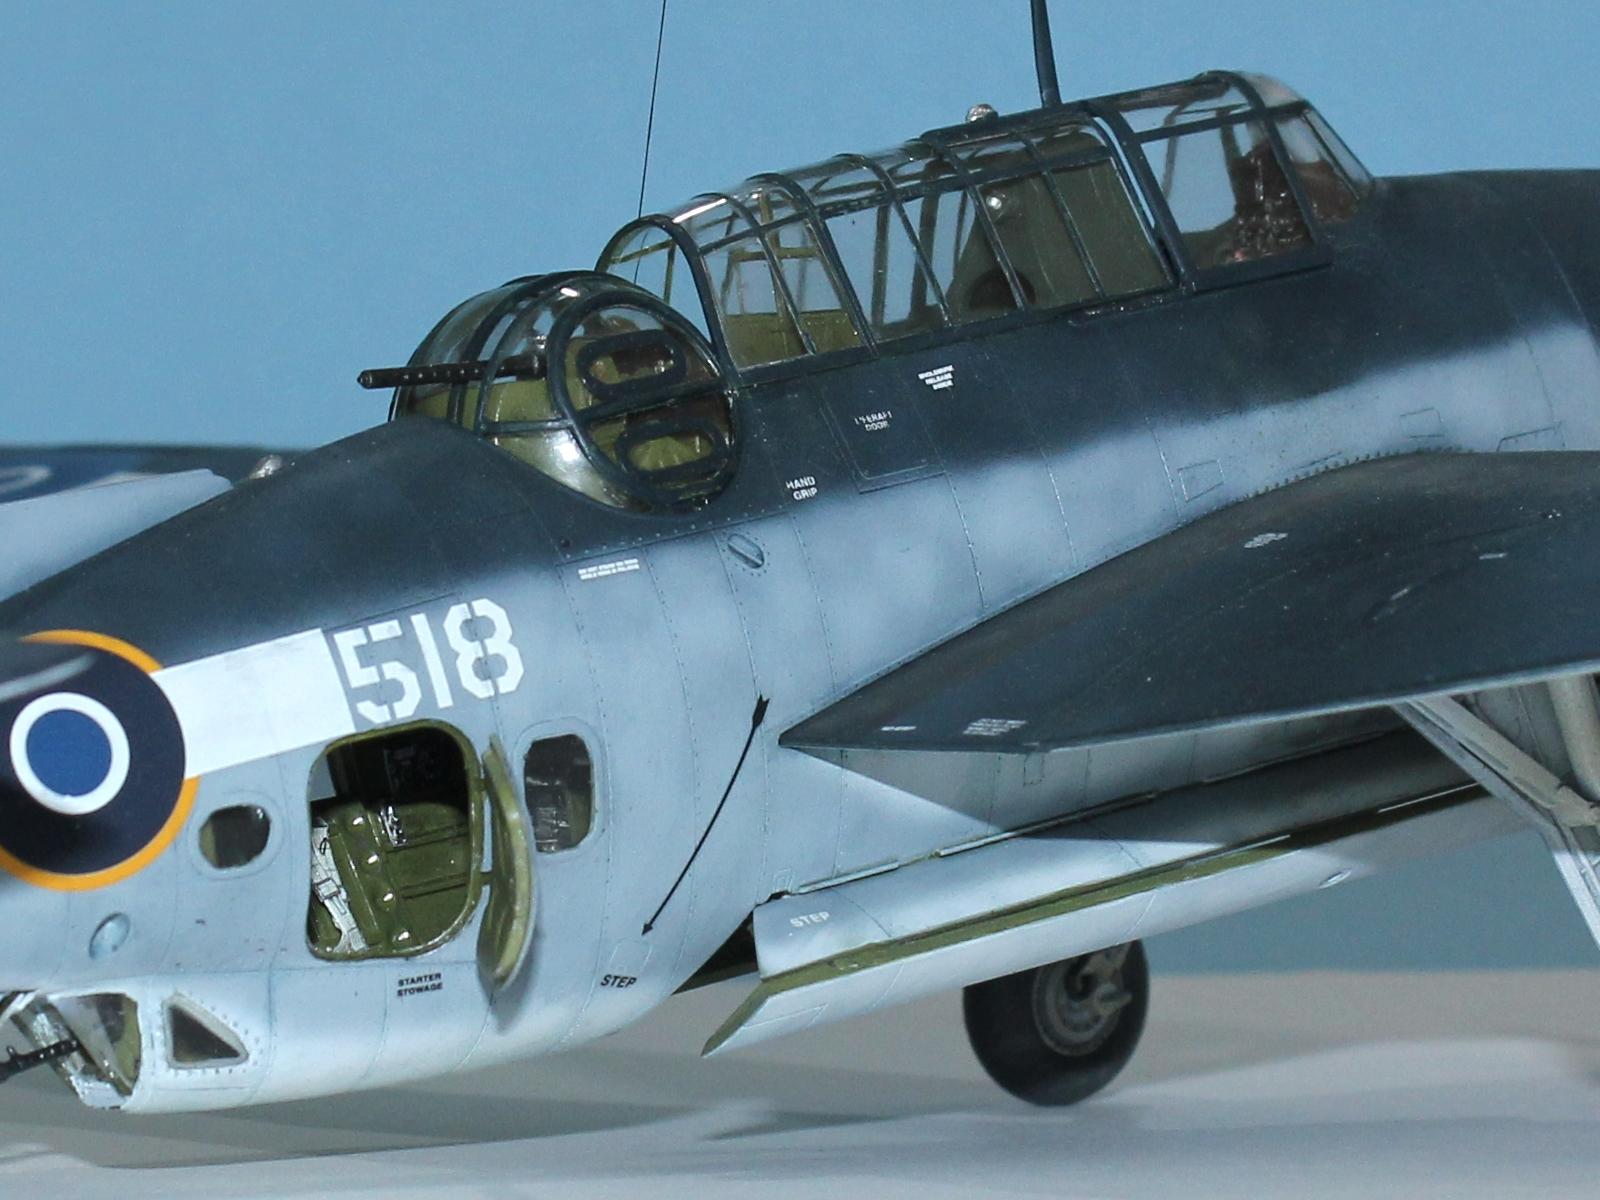
I also decided to install the navigator/lower gunner seat in the vertical stowed position as this is how it would have been to allow the crew access into the rear fuselage. This wasn't completely straight forward, as I had to cut the seat back off and lay it flat on the seat itself and then add the lap belts as though they were hanging in the vertical plane.
Most of the construction was straight forward but a couple of parts were a puzzle. The first was the location of the flare tubes in the rear fuselage with just a vague arrow pointing to their location, but the AM instructions describe how they fit.
The second problem was how to install the turret at the end of construction. Again, the AM instructions came to the rescue. The turret is perhaps the most difficult part of the build. It requires the two clear halves of the turret to be glued together and the internal parts attached via two small contact points. This then has to be squeezed and twisted into place in the fuselage.
Once the fuselage was fully painted and done, I tried to insert the turret. The parts came apart and I had to re-glue the turret back together and try again, which thankfully worked. Then I added the pre-painted canopy.
The wings and horizontal tails insert neatly into cavities and this allowed me to fully assemble and paint these, including adding the main landing gear, before finally attaching them to the finished fuselage.
Painting and Markings
The colour of the cockpit and crew areas had a bit of an evolution during Avenger production. Early Grumman built Avengers (TBF-1s and TBF-1Cs) were painted Interior Green in the rear crew area and Bronze Green from the cockpit back to the bulkhead before the turret. The bomb bay was also painted Interior Green and the engine compartment was light grey.
Later production Grumman aircraft replaced the Bronze Green with Dull Dark Green while Eastern Aircraft Division built TBM-1C and TBM-3 had all internal areas painted Interior Green. I chose to paint the cockpit Dull Dark Green, for which I used Gunze Sangyo H302 Green FS 34092, and the rear crew area Gunze Sangyo H58 Interior Green.
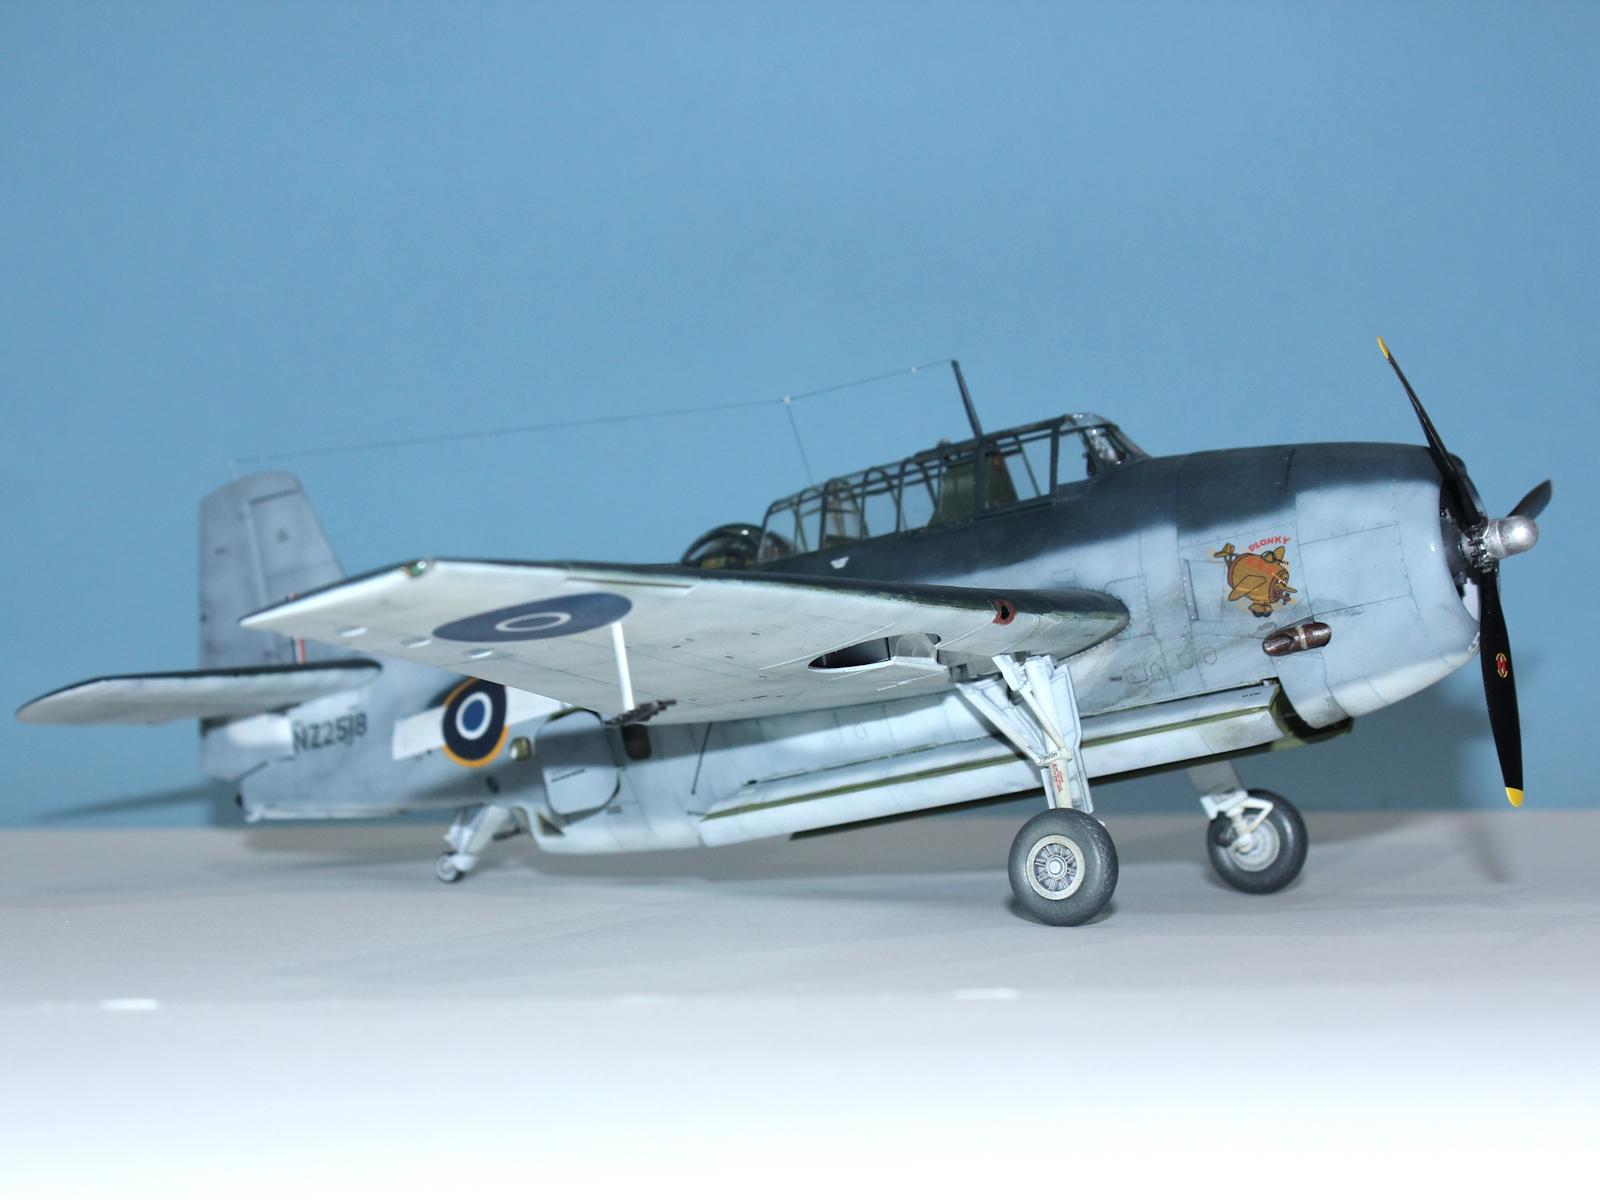
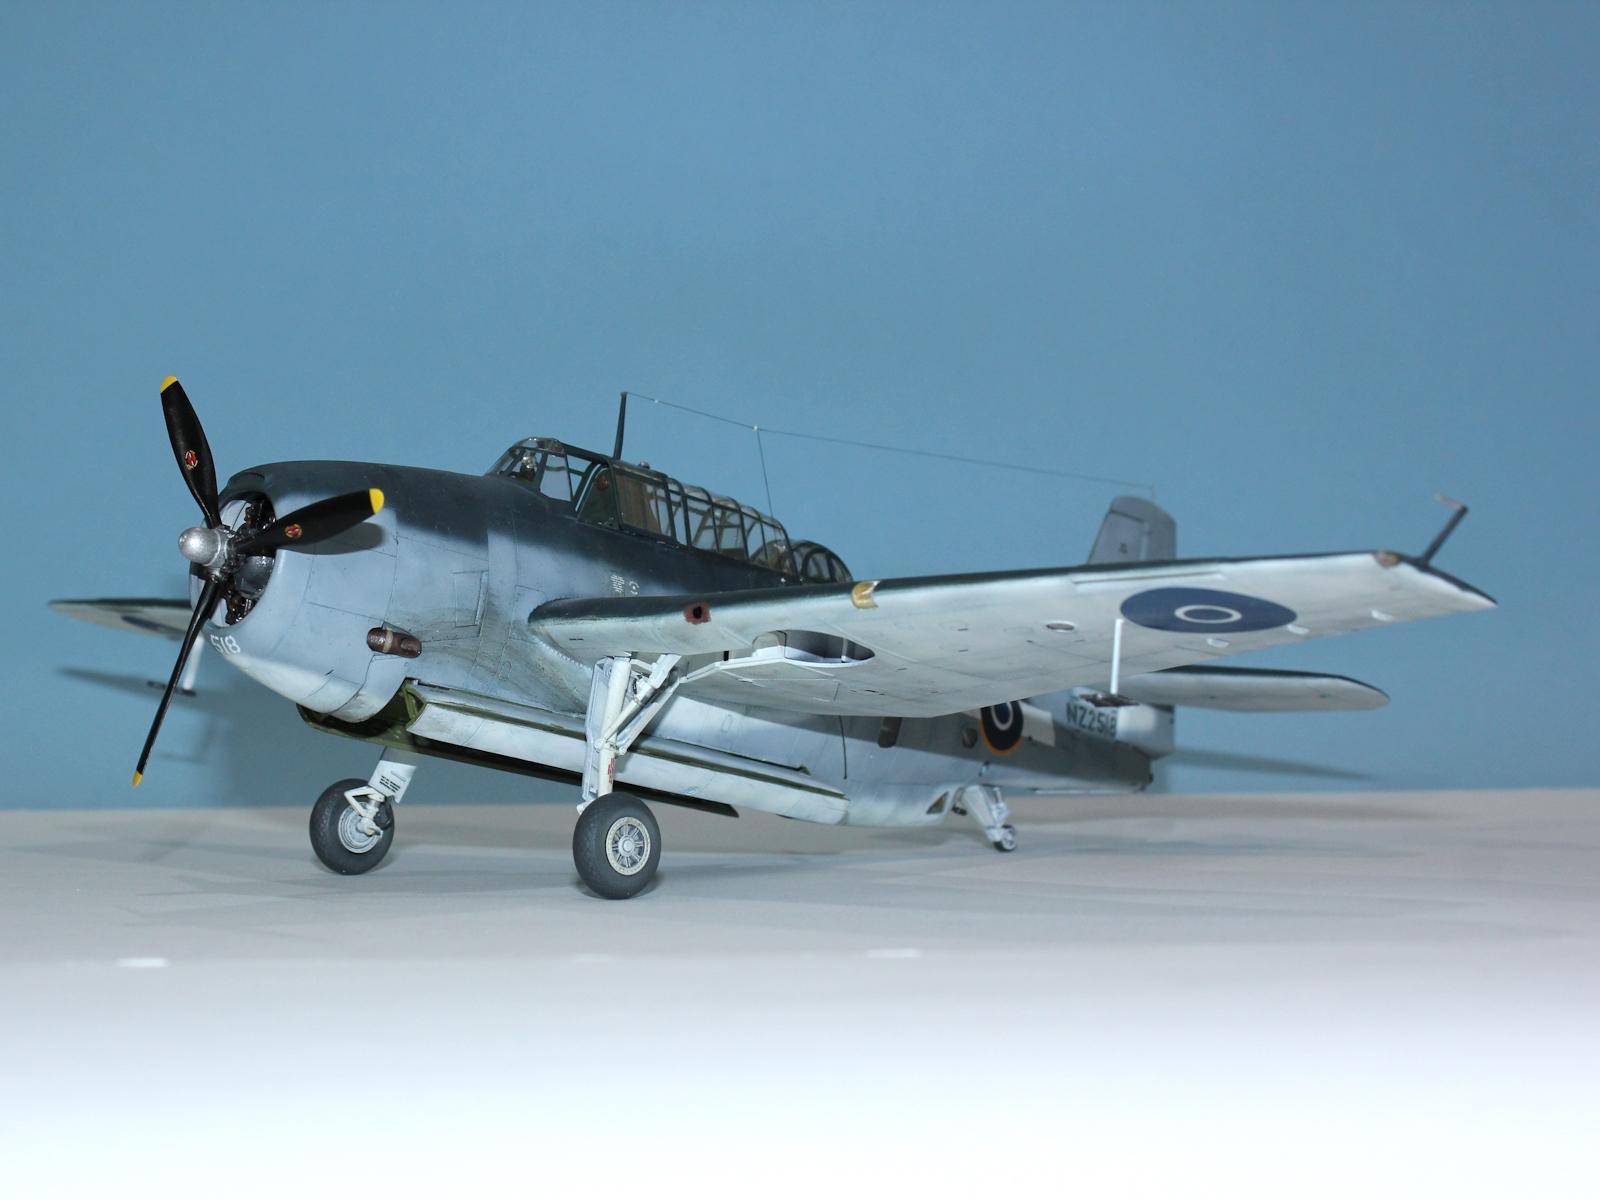
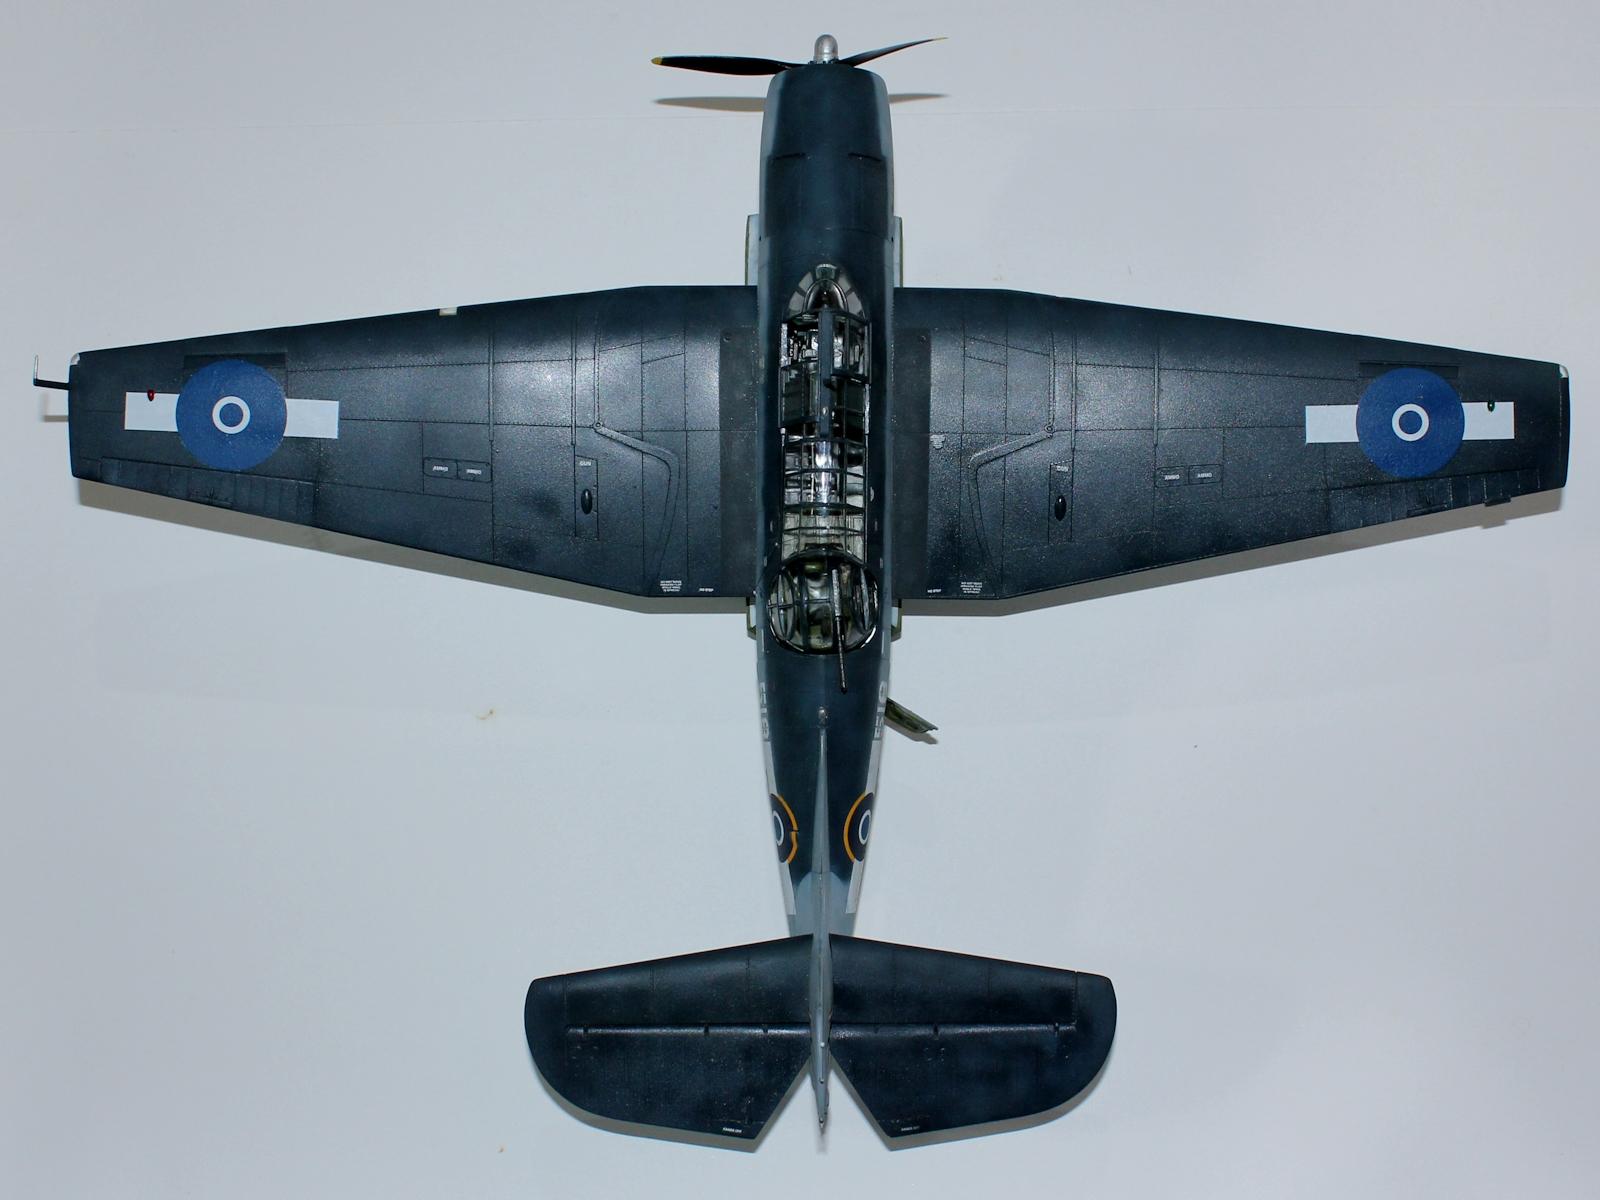
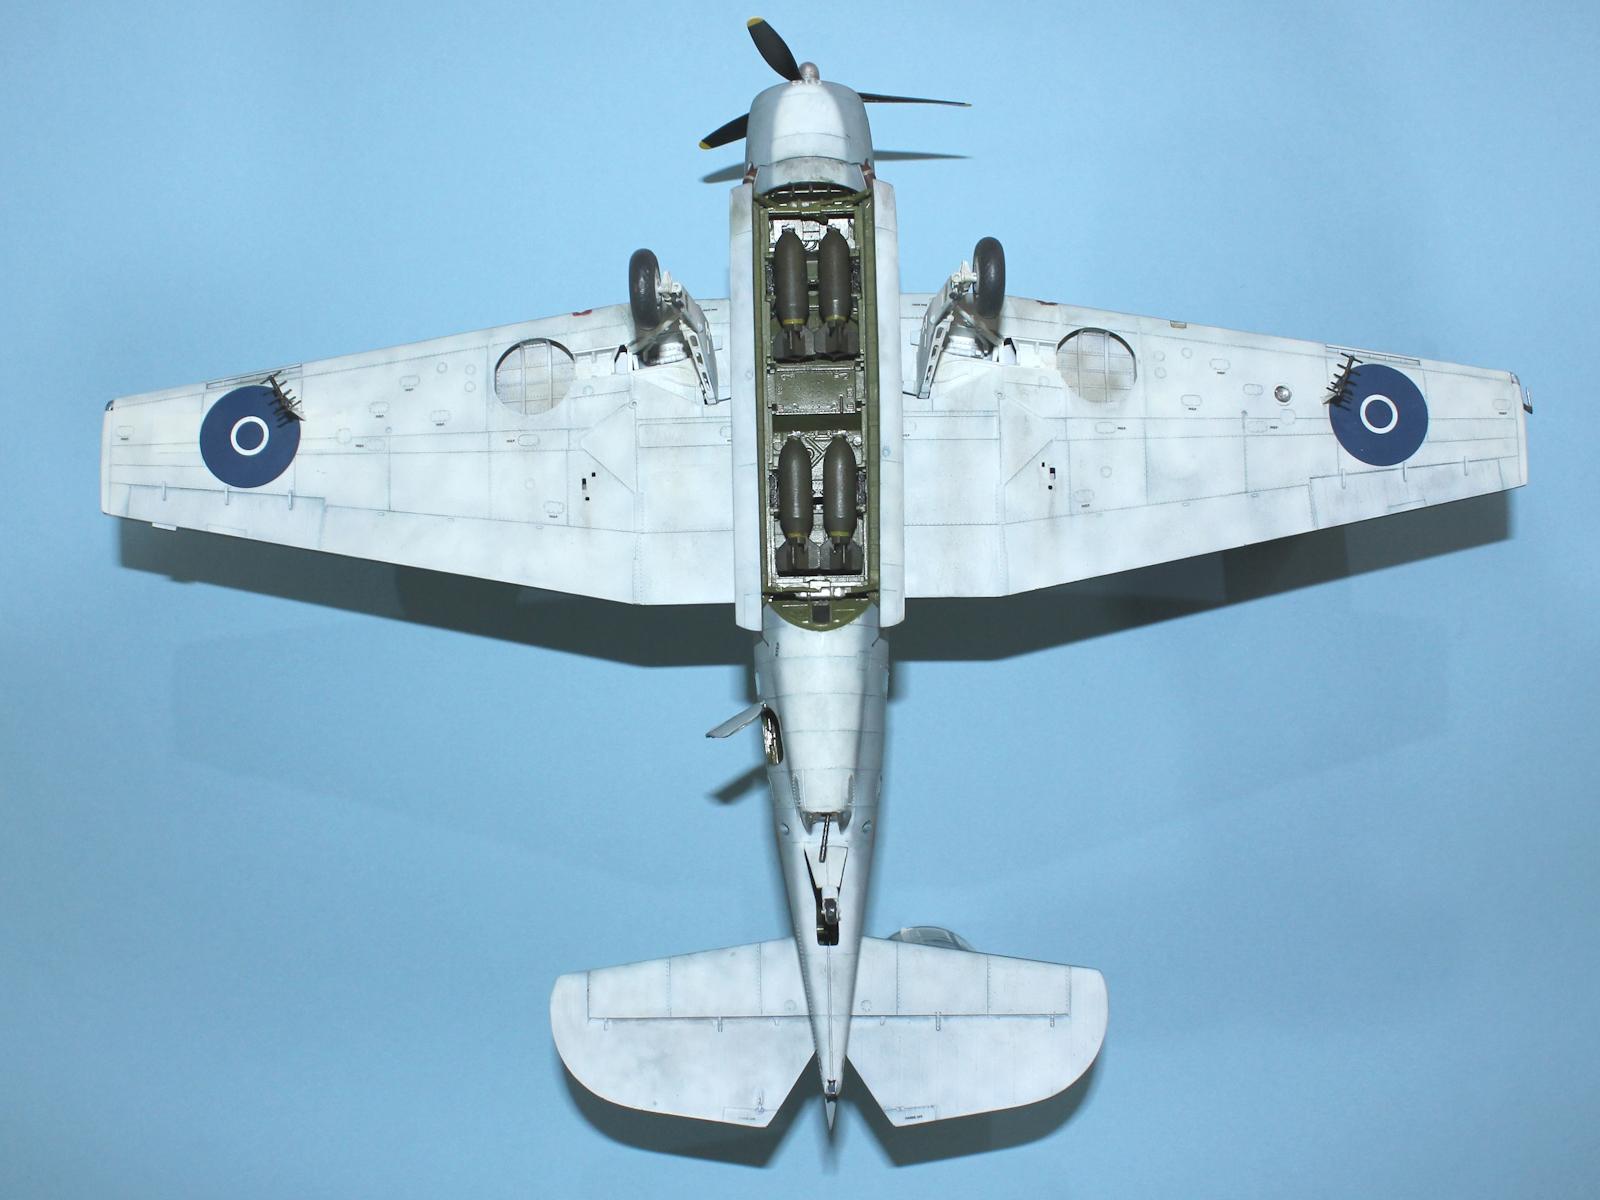
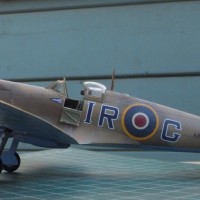
This aircraft was delivered in the standard USN mid war scheme of Semi-Gloss Sea Blue (ANA 606) on the upper wings and tail, Non-Specular Sea Blue (ANA 607) on the upper fuselage and wing and tail leading edges, Intermediate Blue (ANA 608) on the fuselage sides over Insignia White (ANA 601) undersurfaces. The main wheel wells were painted in the underside Insignia White.
I experimented with a different technique for this build. After painting the aircraft all over SMS Surfacer Black I sprayed a coat of Gunze Interior Green by concentrating on the centre of the panels, leaving traces of the black along the panel lines.
Next, I painted the white undersides. I intended to paint a random scribble pattern, using SMS PL72 Insignia White FS 17875, that I would then paint a light coat over. This the first time I have used SMS paints for the full camouflage and they took a little getting used to and, as a consequence, I didn't get as tight a spray as I wanted. However, I liked the end effect and painted the undersurfaces in one go without the need for a unifying coat. You can still see traces of the black and green under the white, giving a worn and weathered appearance.
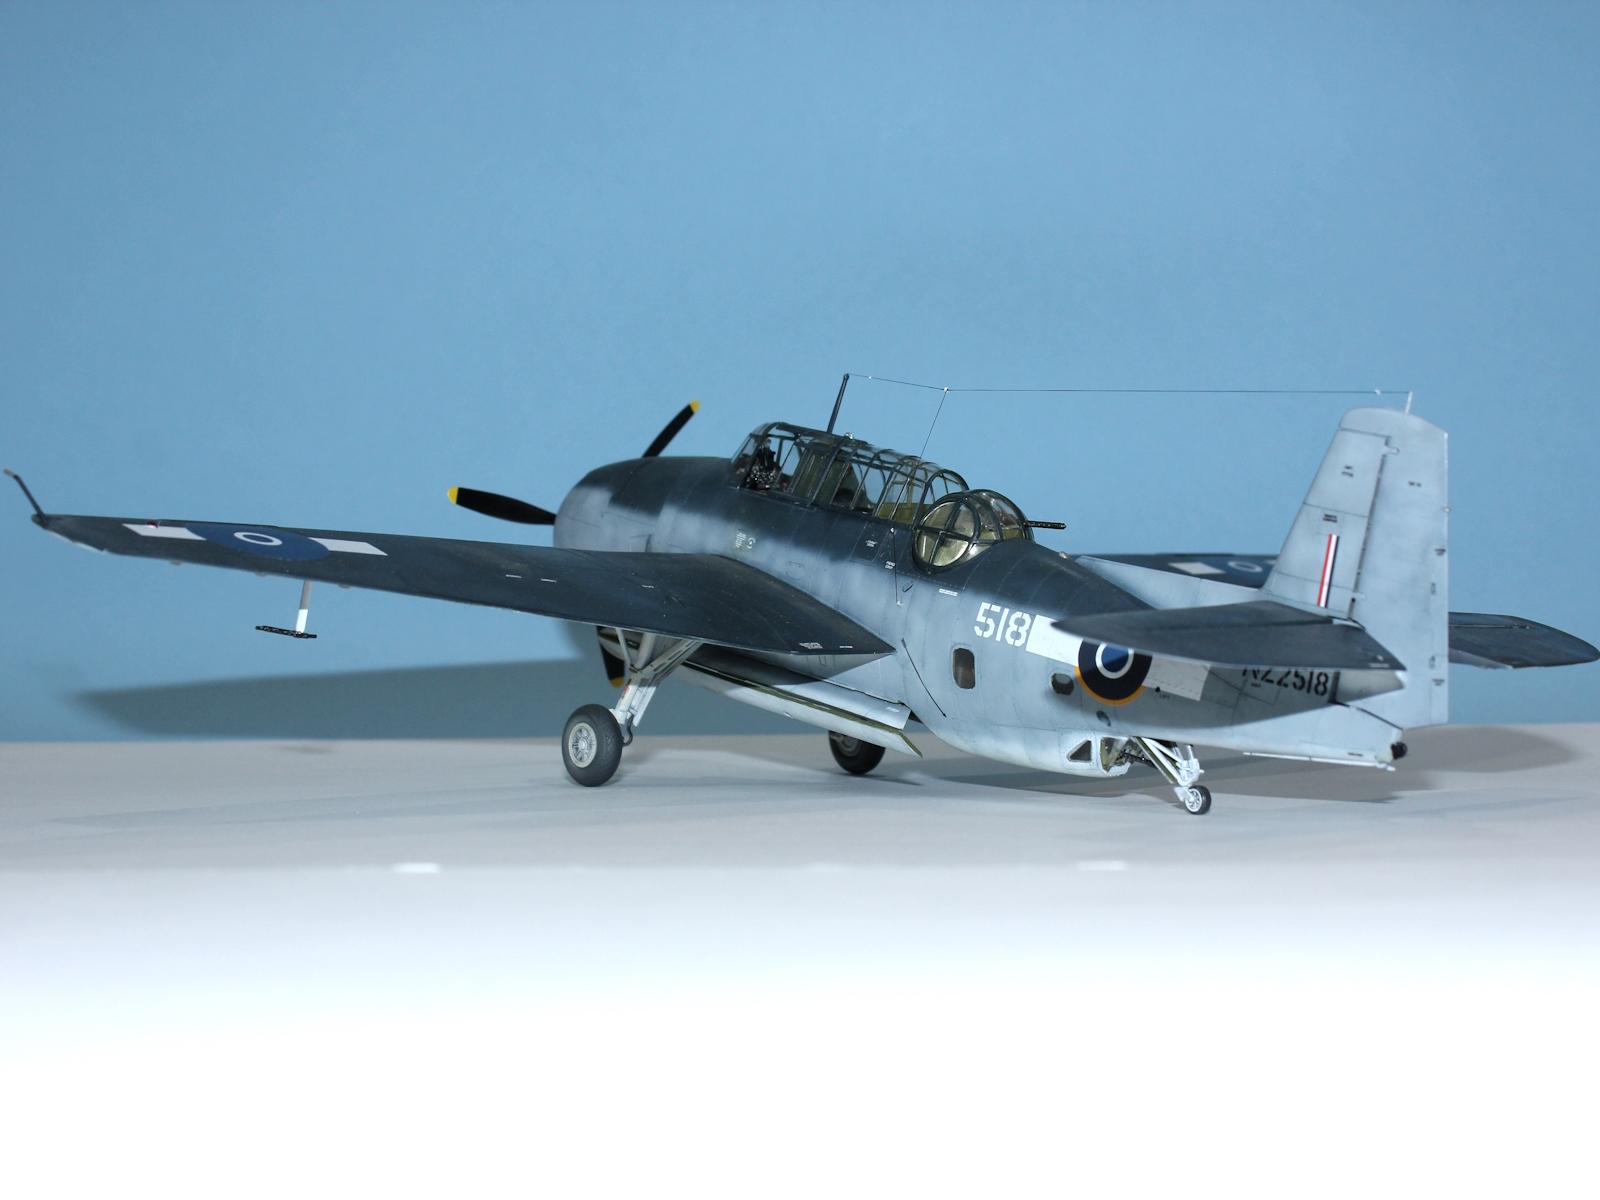
I used the same technique to paint the wing and tail upper surfaces Semi-Gloss Sea Blue using SMS PL163 Dark Sea Blue FS 25042. I added some Insignia White to the blue and sprayed a random pattern in the panel centres. The result has hints of the underlying green in a strong light.
I decided to mask and spray a more solid white to replicate an overspray of the original US insignia as I had seen in one photo of a RNZAF Avenger.
SMS PL157 Dark Ocean Blue FS 35042 is their version of Non-Specular Sea Blue and I used this to paint the upper fuselage and leading edges of the wing and horizontal tail. Predictably, there is no noticeable difference between this and their Dark Sea Blue apart from the gloss level and this disappeared once the clear gloss coat was applied. Again, I added some white and faded the panel centres.
On the fuselage, I painted the blue half-way down to meet the white. I then repeated the random squiggle technique with SMS PL164 Intermediate Blue FS 35164 on the fuselage sides and the vertical tail. This resulted in traces of the underlying colours showing through for a worn appearance.
The upper wing walkways were masked and sprayed Tamiya XF69 NATO Black.
I applied the decals over an SMS Super Clear gloss coat and then applied a Gunze C182 Flat Clear coat, the first time I had used this, too. Next, I applied a pin wash of Vallejo Blue Grey wash on the Intermediate Blue and White surfaces, another first for me. I'm not a fan of heavy emphasis of panels and this wash colour is light enough not to overpower the surface colour. A light sand on the wing leading edge and top surface revealed some of the underlying primer and I used a fine sponge to dab some of the primer colour under the pilot cockpit.
The exhaust was sprayed using a mix of grey and brown paint that I had at hand.
The general weathering was my usual method of a mix of Vallejo Brown Wash and Black Wash dabbed on panels and then streaked back with a wide, clean paintbrush. Because the upper surfaces were so dark, I sprayed a fine mist of Gunze H336 Hemp to simulate dust from the ground crew walking on the wing to arm the guns. After the kit was completed, I used a Tamiya Weathering Master set A to dust some light sand over this area.
The upper wing surfaces are semi-gloss, for which I used Gunze C181 Semi-Gloss Clear, again the first time I have used this. However, even though I thought I had mixed it well, this sprayed matt. So, I sprayed a light coat of the SMS clear gloss again.
At this point I attached the wings and tailplanes to the fuselage and unified the weathering.
Next, I inserted the painted bombs into the bomb bay. This was a bit more difficult than I had anticipated as there is little room between them and they had to be inserted horizontally into the bomb bay side wall structure. I then added the painted bomb bay doors assembly, which is a bit on the delicate side and had to be trimmed to fit.
The radio wire runs from fin to mast and I knocked the former off early in the build so I replaced it with copper wire. The lead in runs down to the port side below the canopy and then on the diagonal down to the mid fuselage just above the wing trailing edge. I used Infini Models Fine 1/48 Aero Black Rigging (0.082mm) for this and the build was done.
That's a great looking Plonky there Michael - great job 😀
G’day Scott (@scottiya),
Thanks for your kind comment.
I’ve sent you a PM, too.
Excellent allover job, Michael!
An awesome Avenger!
Thanks, mate (@fiveten).
One sharp looking Avenger.
G'day Dan (@dbdlee),
Thanks for your kind comment.
An impressive Avenger, Michael @michaelt
I like it with those hatches open so you still can see the work you did on the interior.
G’day John (@johnb),
Given some of the not inexpensive Quinta Studio set is for the rear interior, having the hatch open means I can reassure myself it was money and effort well spent. 😊
Nice work on this, @michaelt. A solid result.
G’day Tom (@tcinla),
I’m very happy with the result and some of the new (to me at least) techniques I applied.
Excellent write-up on the history, build, and painting and weathering techniques, Michael, all resulting in a very convincing model.
G’day George (@chinesegeorge),
For me, the history of an aircraft is almost as important as the scheme itself. Plus, I’ve learnt a lot of things from this community, so documenting and sharing what I did is a way of giving back and a record for my iwn reference.
Thanks for looking And your kind comments. 😊
Very nice Avenger in other than the usual US markings.
G’day David (@tolss),
Thanks. And NZ is a close neighbour, which is an additional reason.
Michael, you hit the sweet spot and it's a home run. The modeling, photography and article are a easy read. Looking forward to seeing and reading more of your gifts and talents.
G'day Stephen (@stephen-w-towle),
Thanks for your kind comments.
Hopefully we will see more of your work soon, too.
Lovely build Michael. I too struggled with the repop until I downloaded the Academy instructions
G'day George (@blackadder57),
I've just read your Avenger article. I'm glad I didn't try and put the turret in after the rest of the canopy.
You would think that someone would have read the instructions before they decided the text wasn't needed. Thank goodness for Scalemates.
And thanks for your kind comment.
Outstanding build. I did "Plonky" a few years back when AM first released it. Your paintwork and article is inspirational.
1 attached image. Click to enlarge.
G'day Chas (@chasbunch),
Thanks for your kind comments.
Your build looks great.
I found this photo of "Plonky" and based my paint scheme on that.
That's a very nice Avenger, and the paintwork looks awesome!
G'day Greg (@gkittinger),
Thanks for looking.
Really Great build! I love South Pacific planes!
G'day Lis (@lis),
Thanks. I'm going through a Pacific war theme with my build plans at the moment.
Having now built a Kiwi P-40 and Avenger, I have a Dauntless to do and a Corsair to buy.
Plus some US, Jap and Aussie planes...
I have kiwi dauntless too in stash ☺️