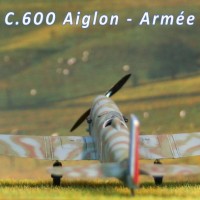
Review: P-51B "Little Jeep" – experimenting with Super Metallics
The P-51 in China:
Between 1942, when the American Volunteer Group was disbanded, and 1944, US air forces in China were a shoestring operation at the end of a long supply line, operating in a theater of operations that was considered secondary by the Allies. That began changing in the fall of 1943, when it was decided that the B-29s of the 20th Air Force would commence operations against the Japanese Home Islands in 1944 from bases in eastern China. The bomber bases would need defense, since Japanese forces in China were unlikely to leave them alone after their presence was revealed. The China-Burma-India Theater was reorganized as Southeast Asia Command, and substantial reinforcement started to arrive in December 1943.
In China, the 23rd Fighter Group, which was the descendant of the AVG, was still flying P-40 Warhawks, which had been largely replaced in other combat theaters. Former AVG ace David “Tex” Hill, now a Colonel, returned to the group in late 1943, with a promise that the group would receive P-51 Mustangs to replace the P-40s.
P-51s first showed up in May 1944. The aircraft were primarily early-model P-51B-1s that were taken from training squadrons in the U.S. These were followed by P-51Cs coming straight from the North American factory in Dallas, and P-51D-5s from the Los Angeles factory between June-August 1944. The P-51s eventually equipped the 23rd and 51st Fighter Groups that had long been in China, and the 311th Fighter Group formed in India and later transferred to China. The 23rd FG was reinforced in July 1944 by the 118th Tactical Recon Squadron equipped with P-51C (F-6C) and later P-51D (F-6D) aircraft. At the end of 1944, the 3rd Chinese-American Composite Wing became the first ROCAF unit to exchange P-40Ns for P-51Ds.. The three other ROCAF fighter groups exchanged P-40s for P-51Ds in March and April 1945.
AVG ace Charles Older returned to China in June 1944 and became Deputy Group Commander under Tex Hill. Hill returned to the United States in December, replaced by another AVG ace, Ed Rector. The experienced AVG leadership, with new units and better aircraft that rejuvenated the air war in China with their long range and superior performance to most of their opponents..
The Mustangs arrived in China at just the right time. During the summer of 1944, the Imperial Japanese Army began what would become Operation Ichi-Go, a series of offensives between July and December that overran US air bases in eastern China, forcing the removal of the B-29s, which relocated to the Marianas. The period saw the most active part of the air war in China of the entire war since 1937, as the Americans fought to blunt Operation Ichi-Go, which finally began to slow in mid-November and stopped by the end of the year.
This is the least-known of the major air campaigns of the USAAF in World War II, with only the first six months of 1942 and the AVG - popularly known as the Flying Tigers - entering popular awareness.
The kit:
In addition to the Royal Class and D-Day Mustangs releases, Eduard took note that most modelers who would purchase their new P-51B/C kit already had P-51 decal stashes. The result was the release of the P-51B/C Overtrees kits simultaneously with the D-Day Mustangs kit. I had Eduard send me several of these, which will be showing up in reviews over this summer.
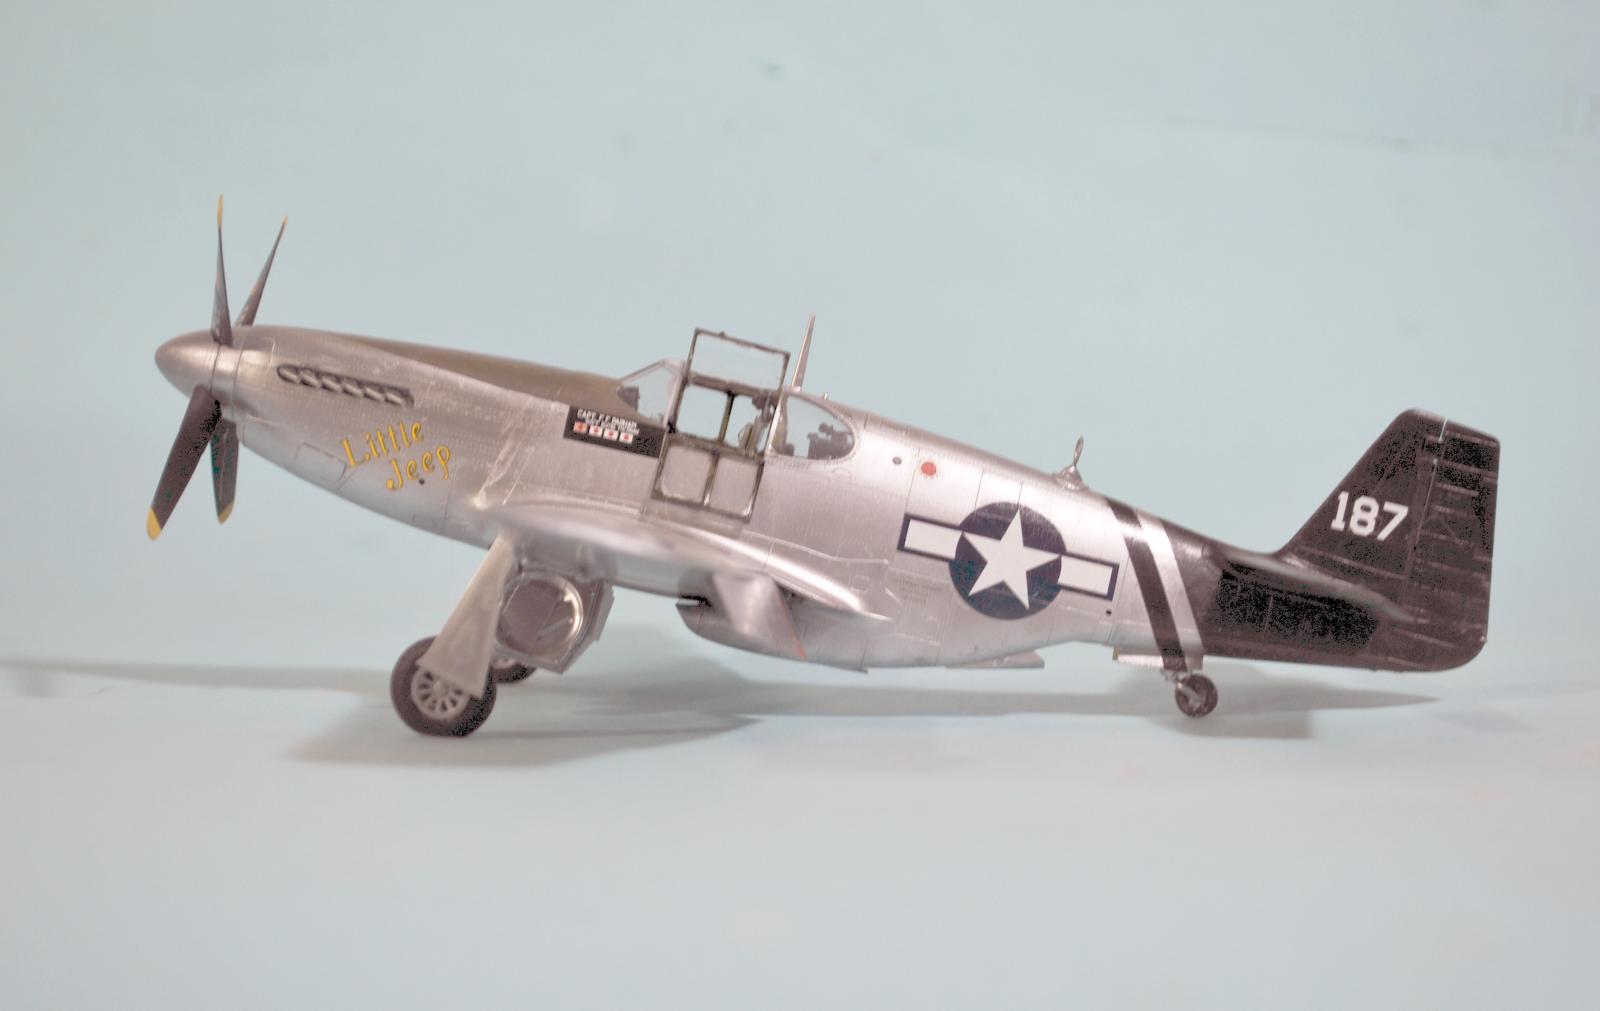
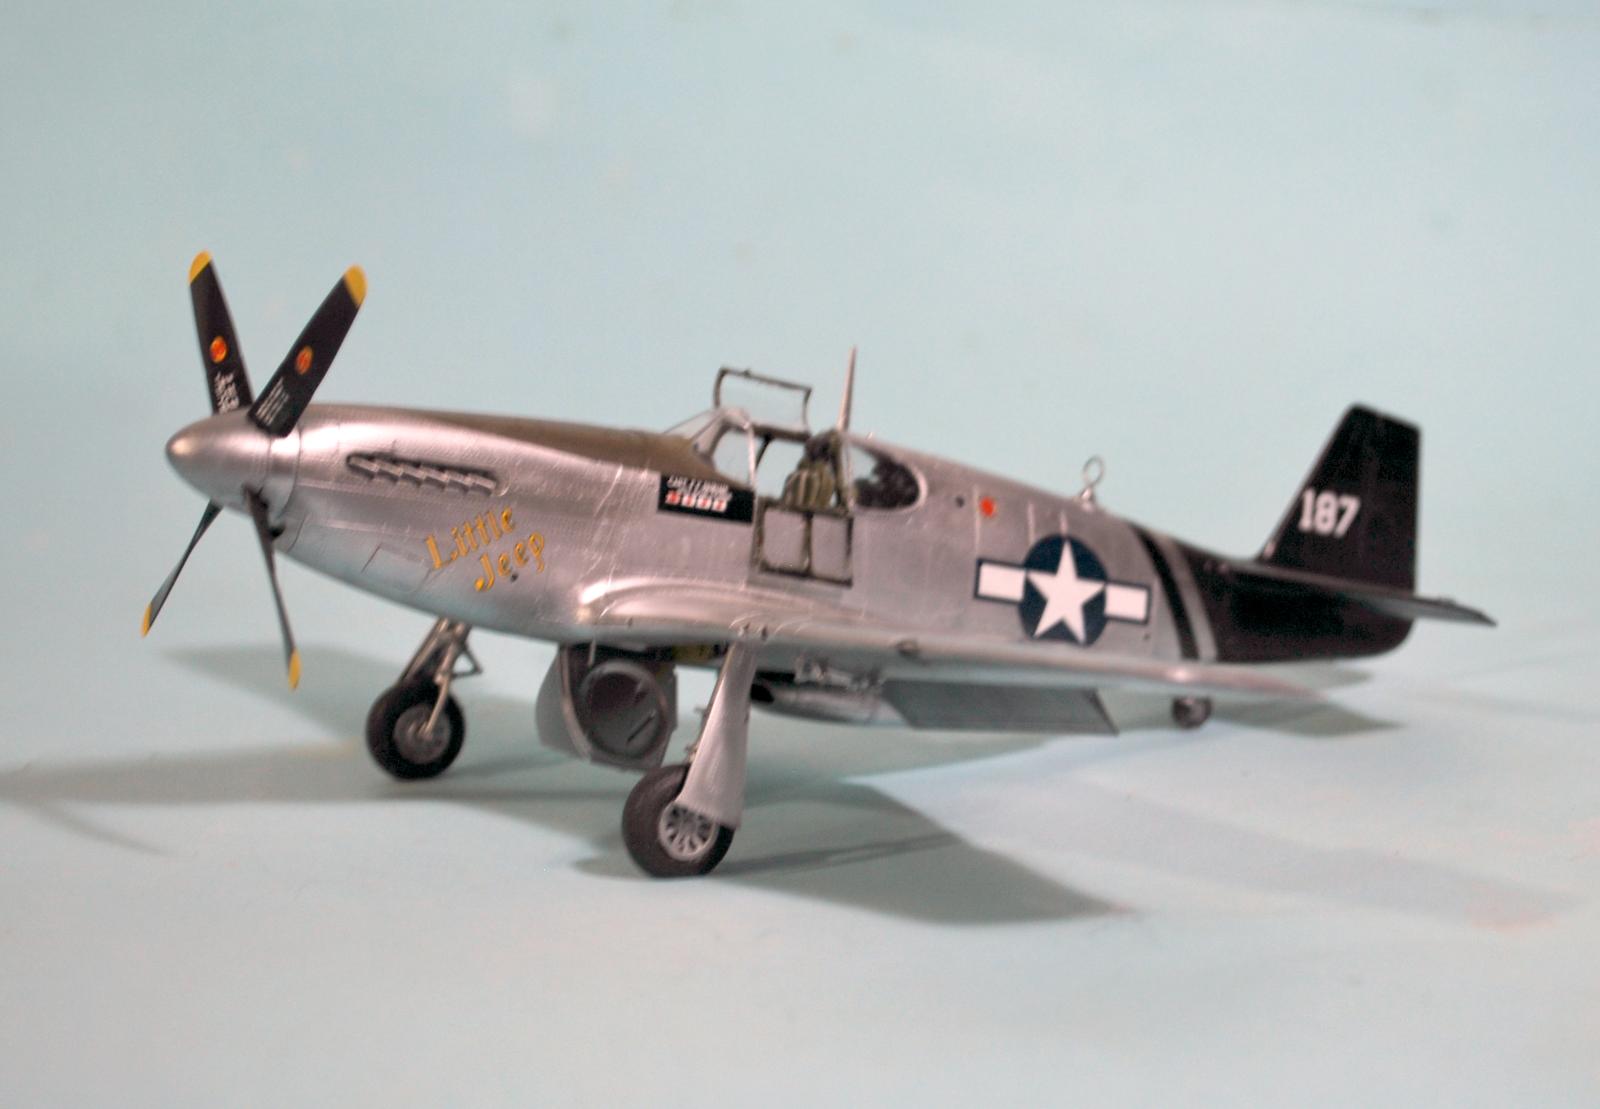
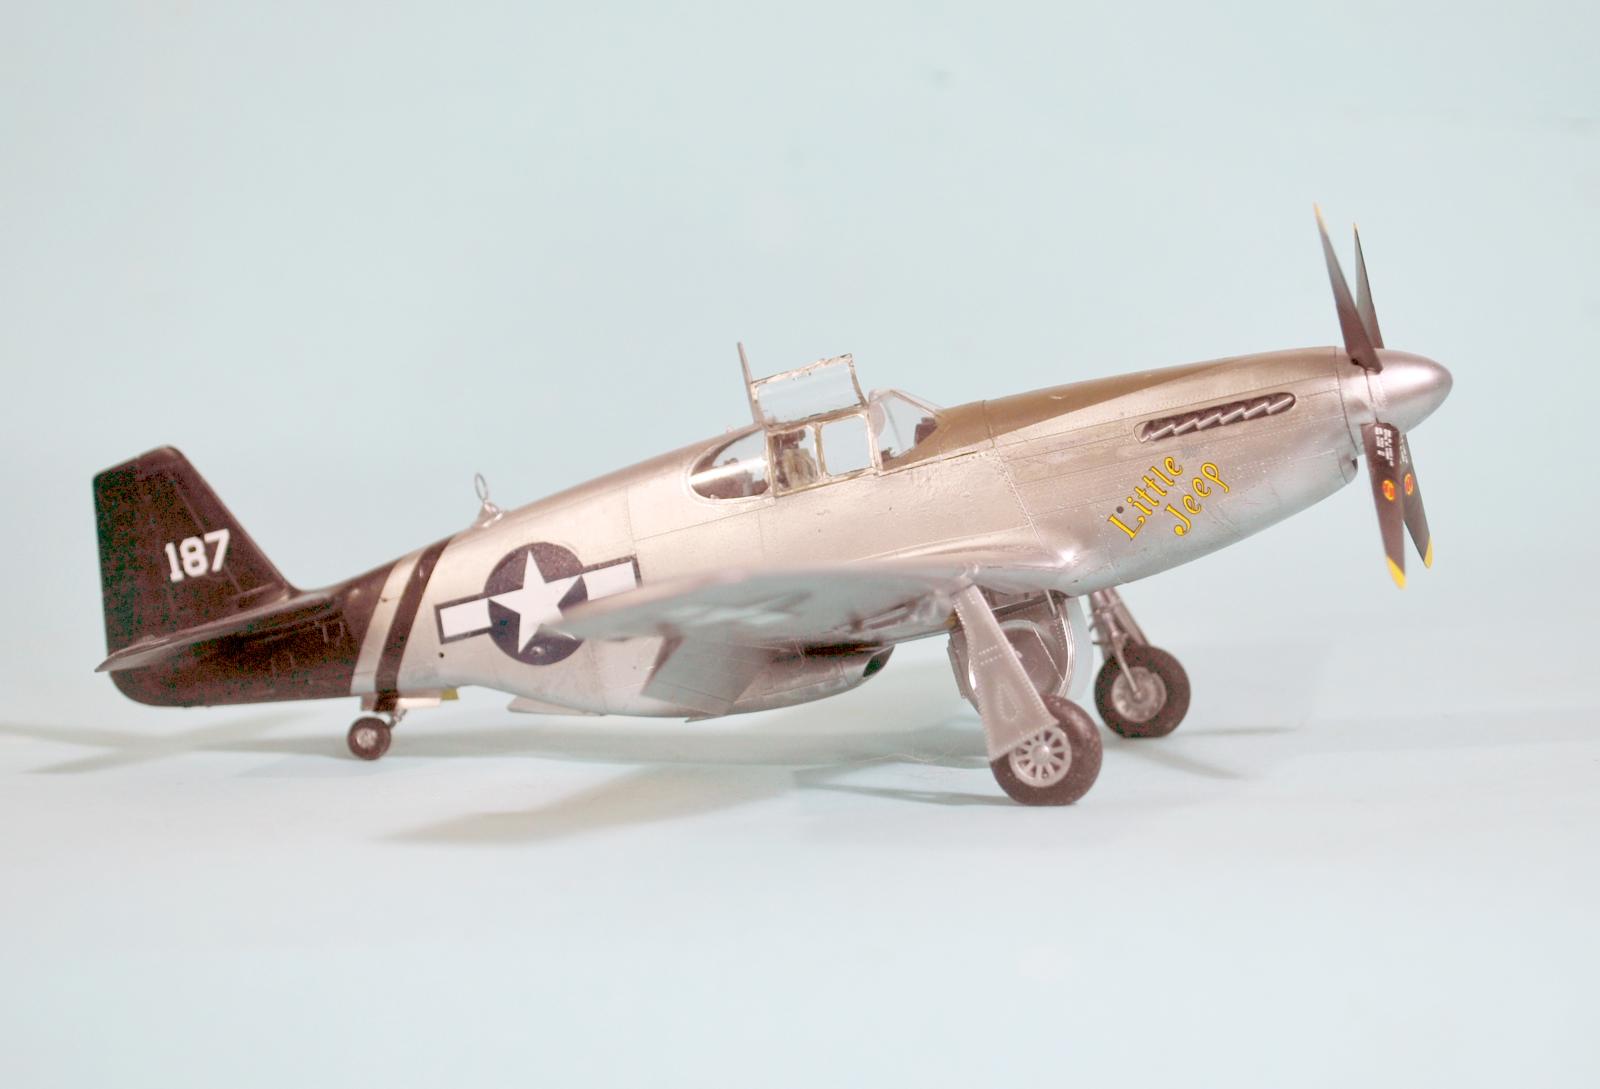
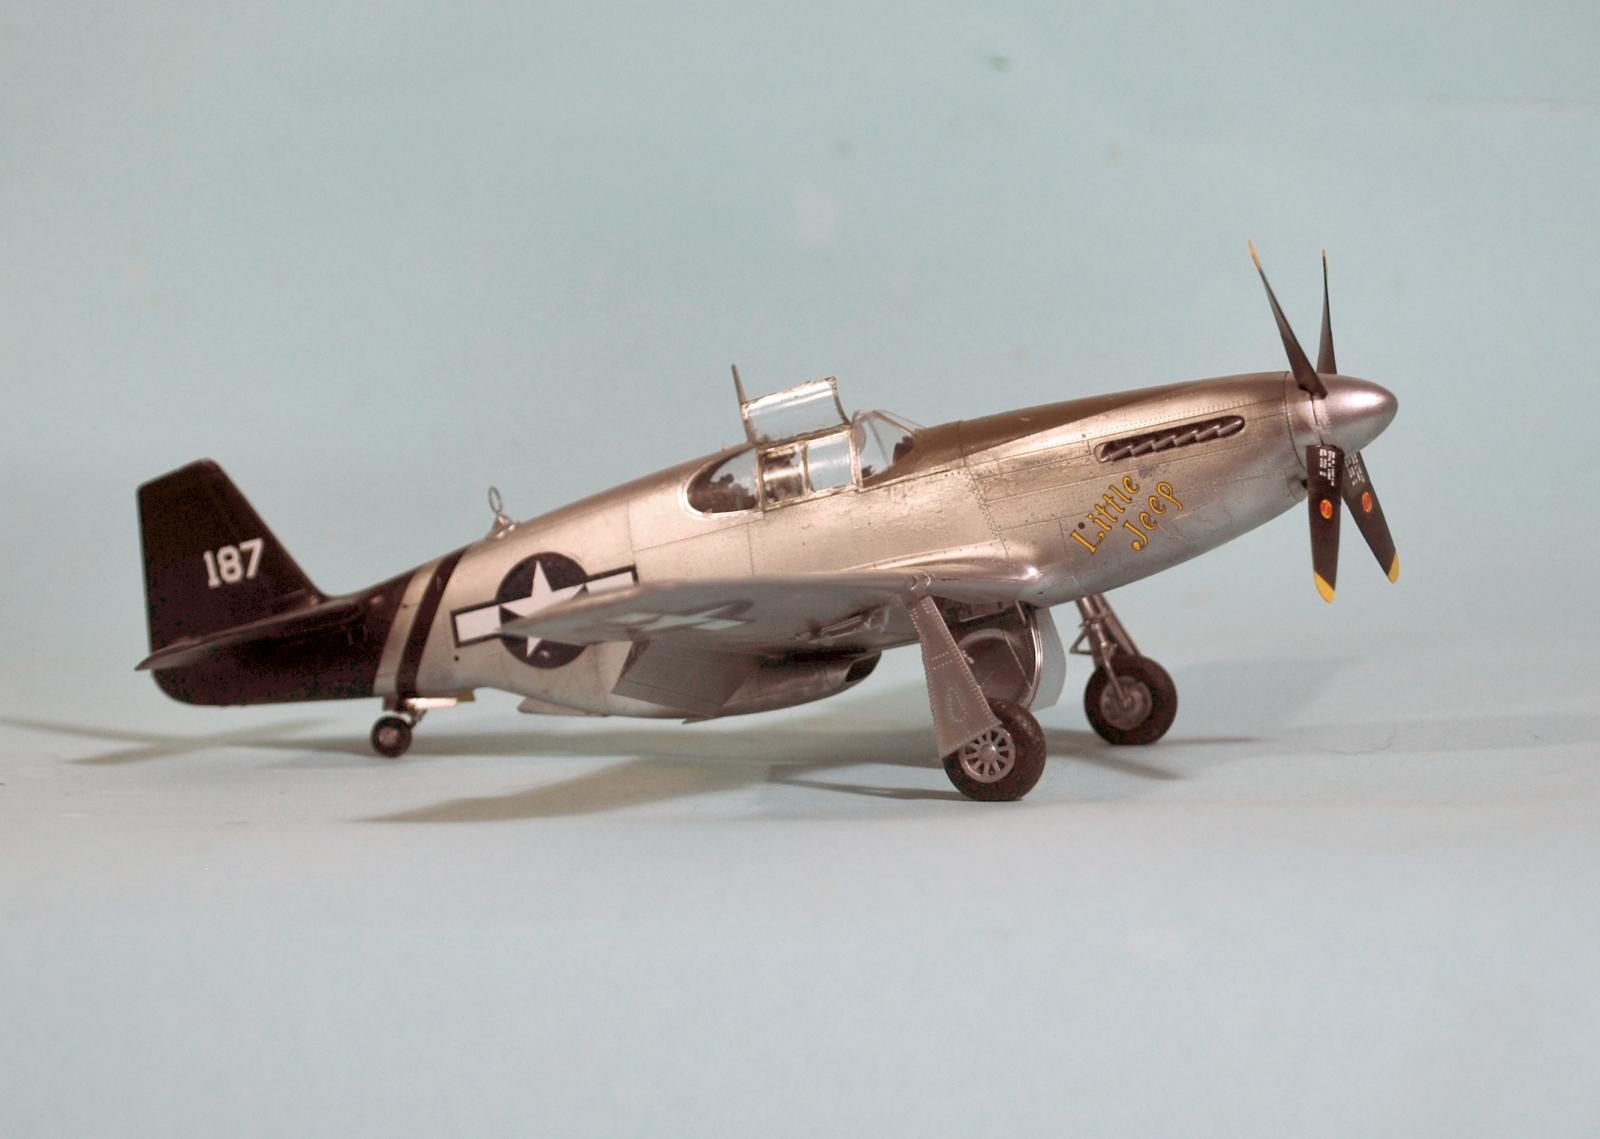
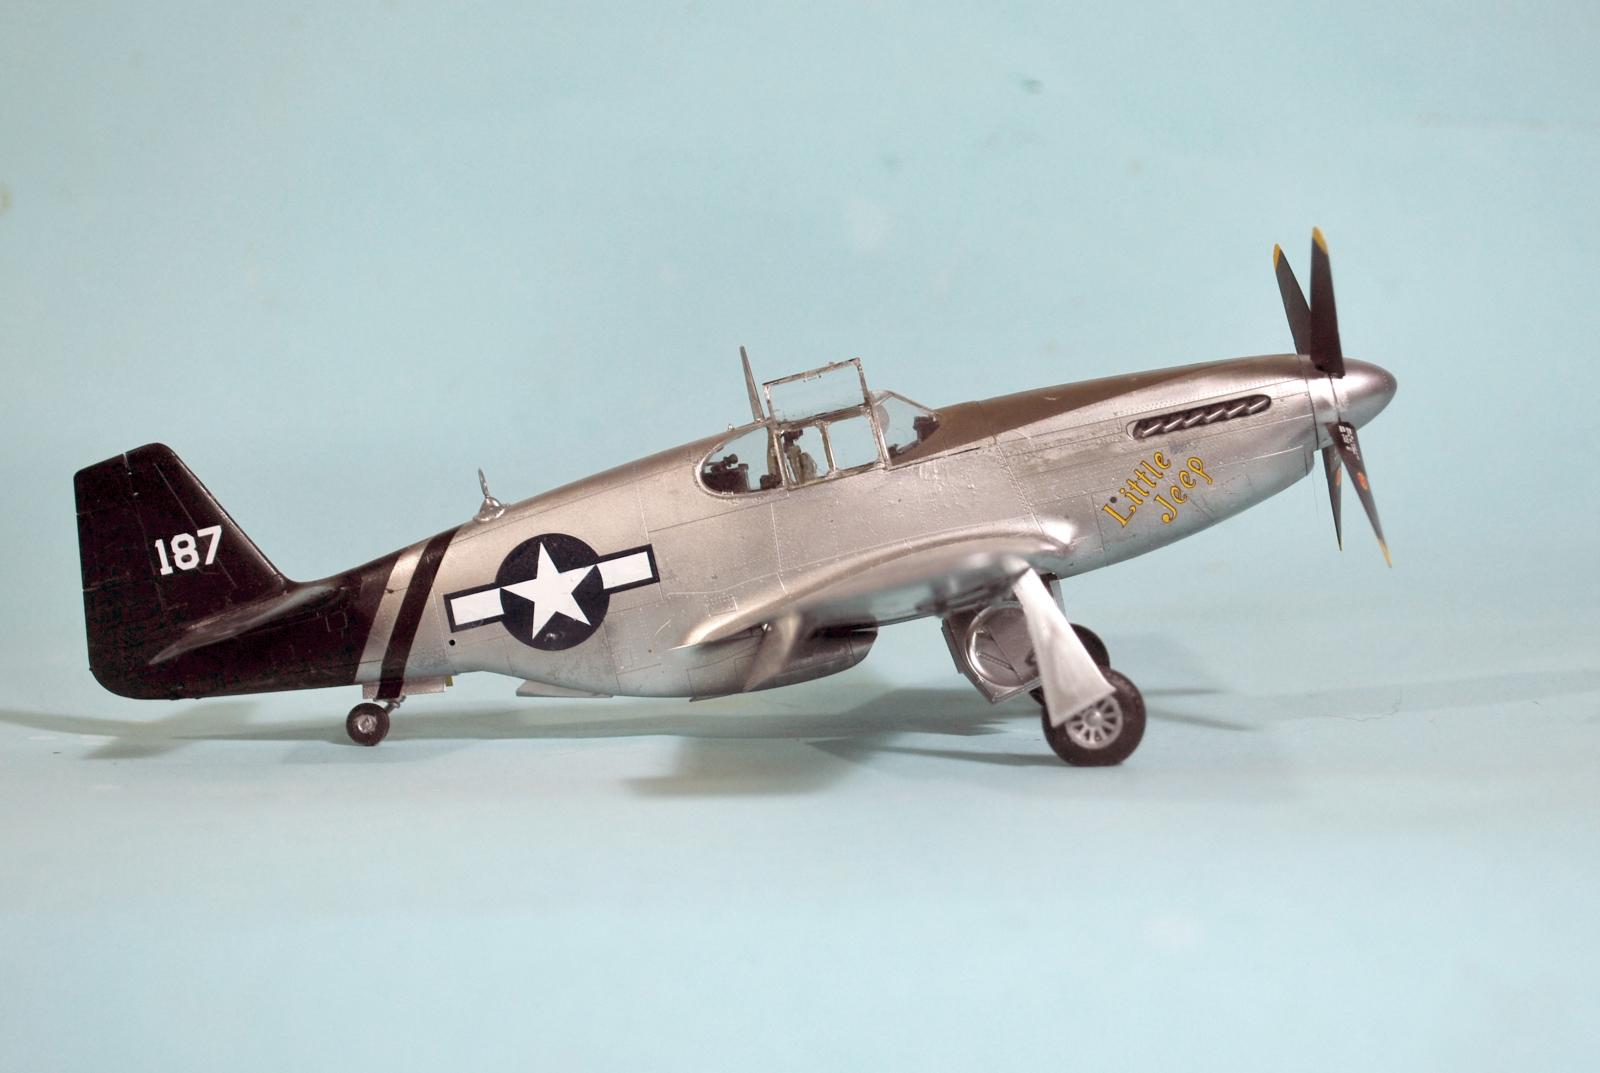
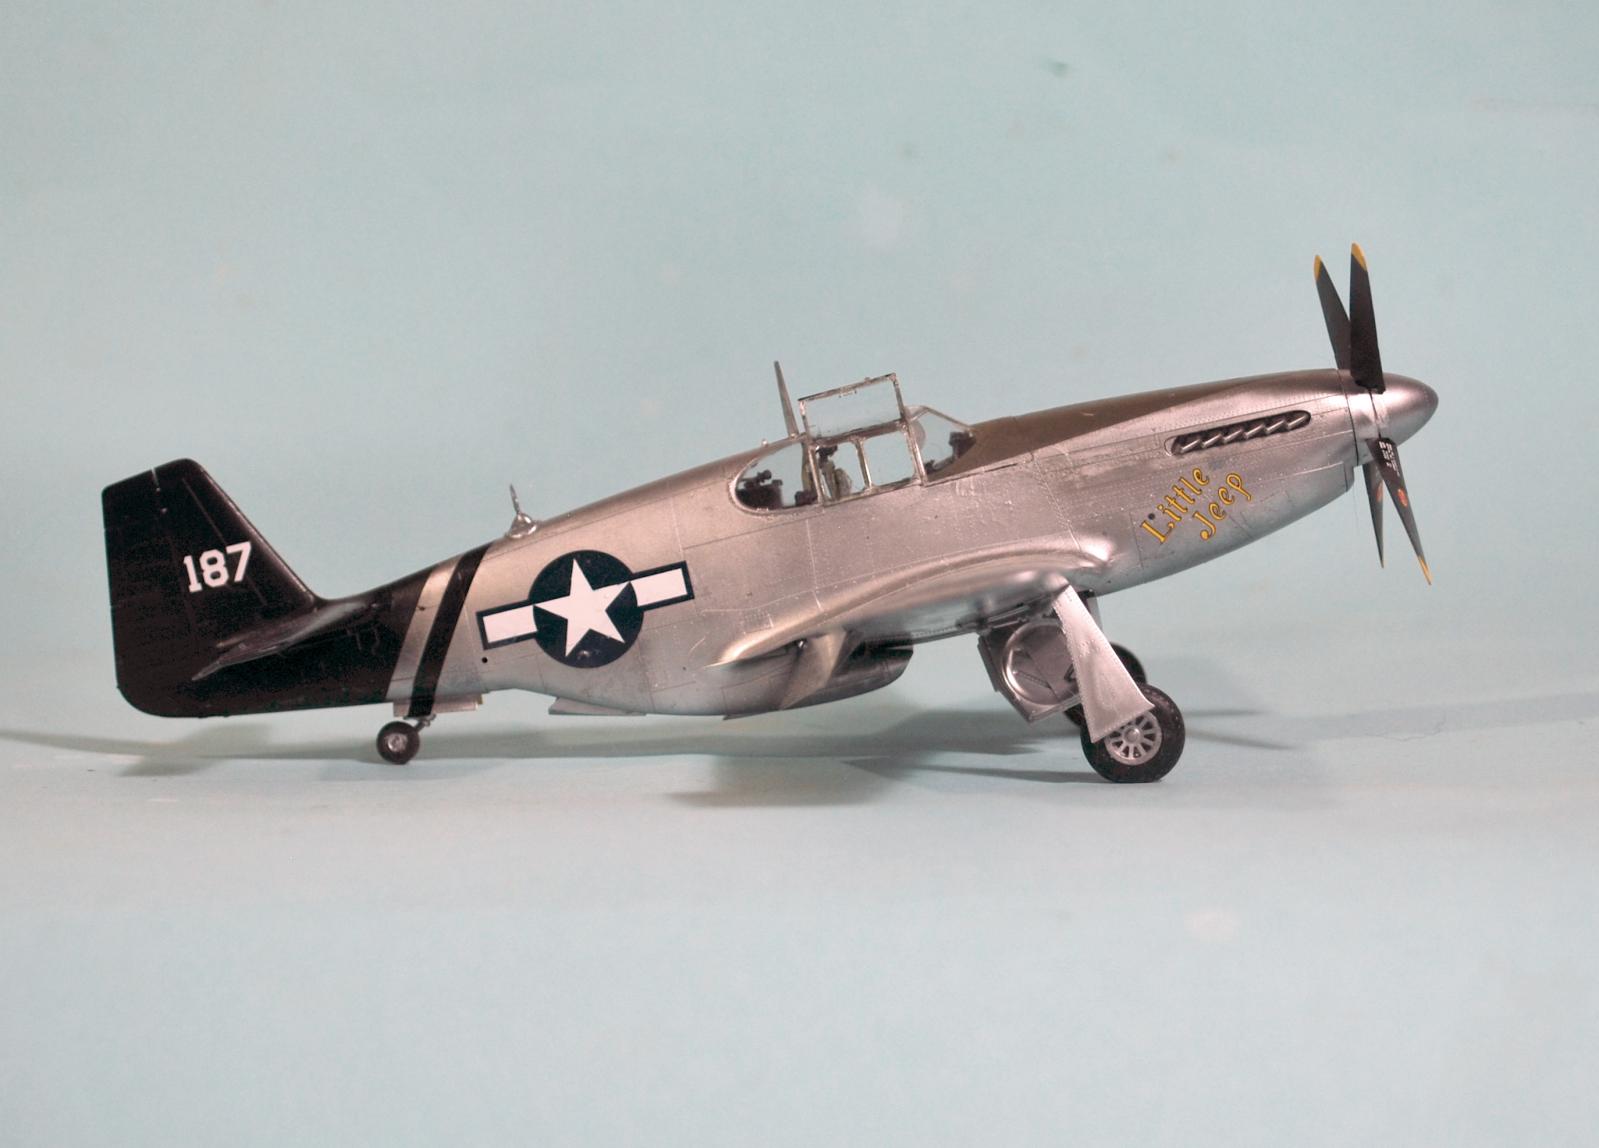
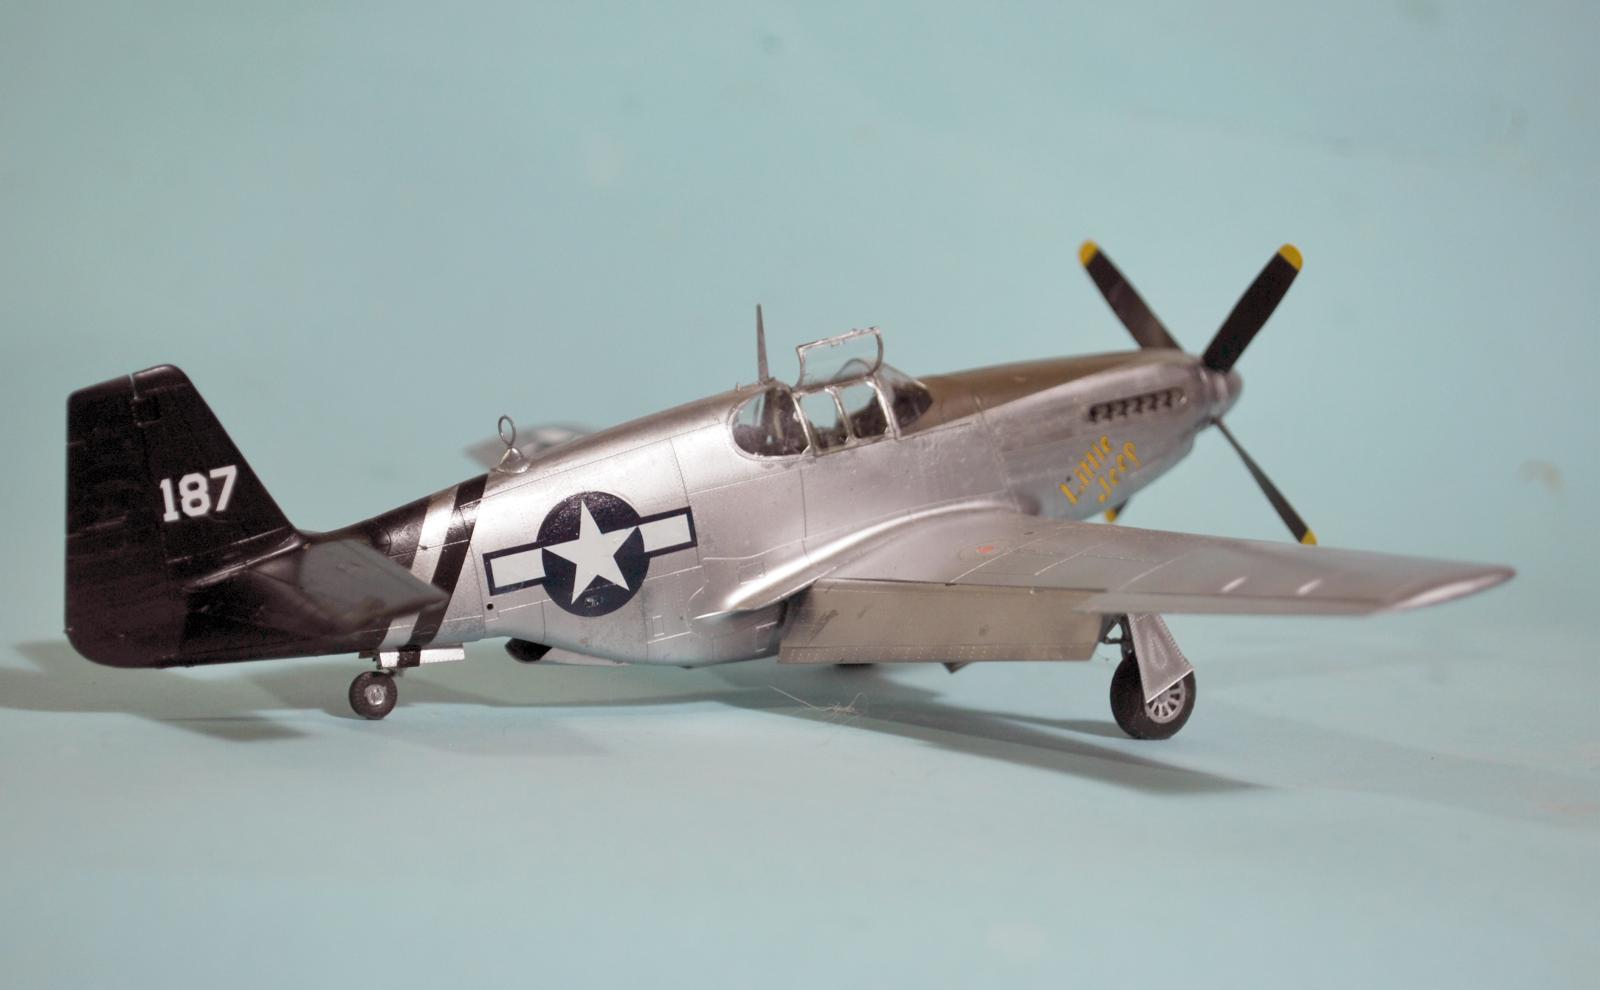
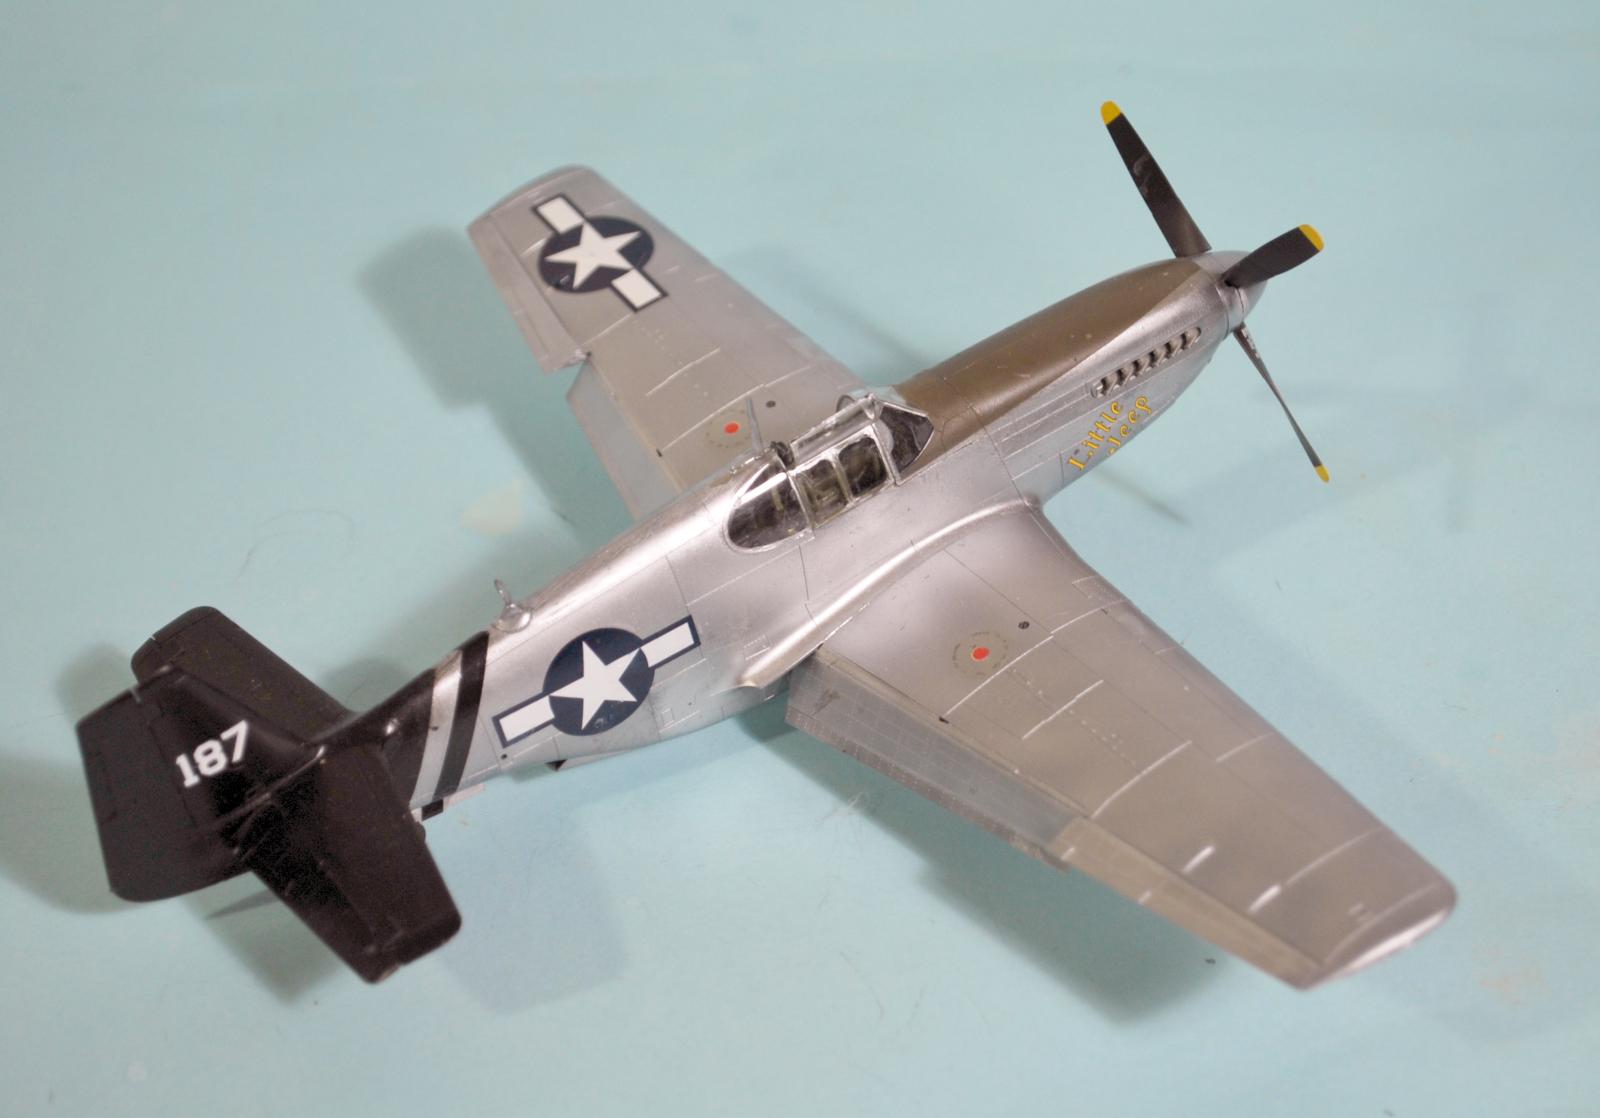
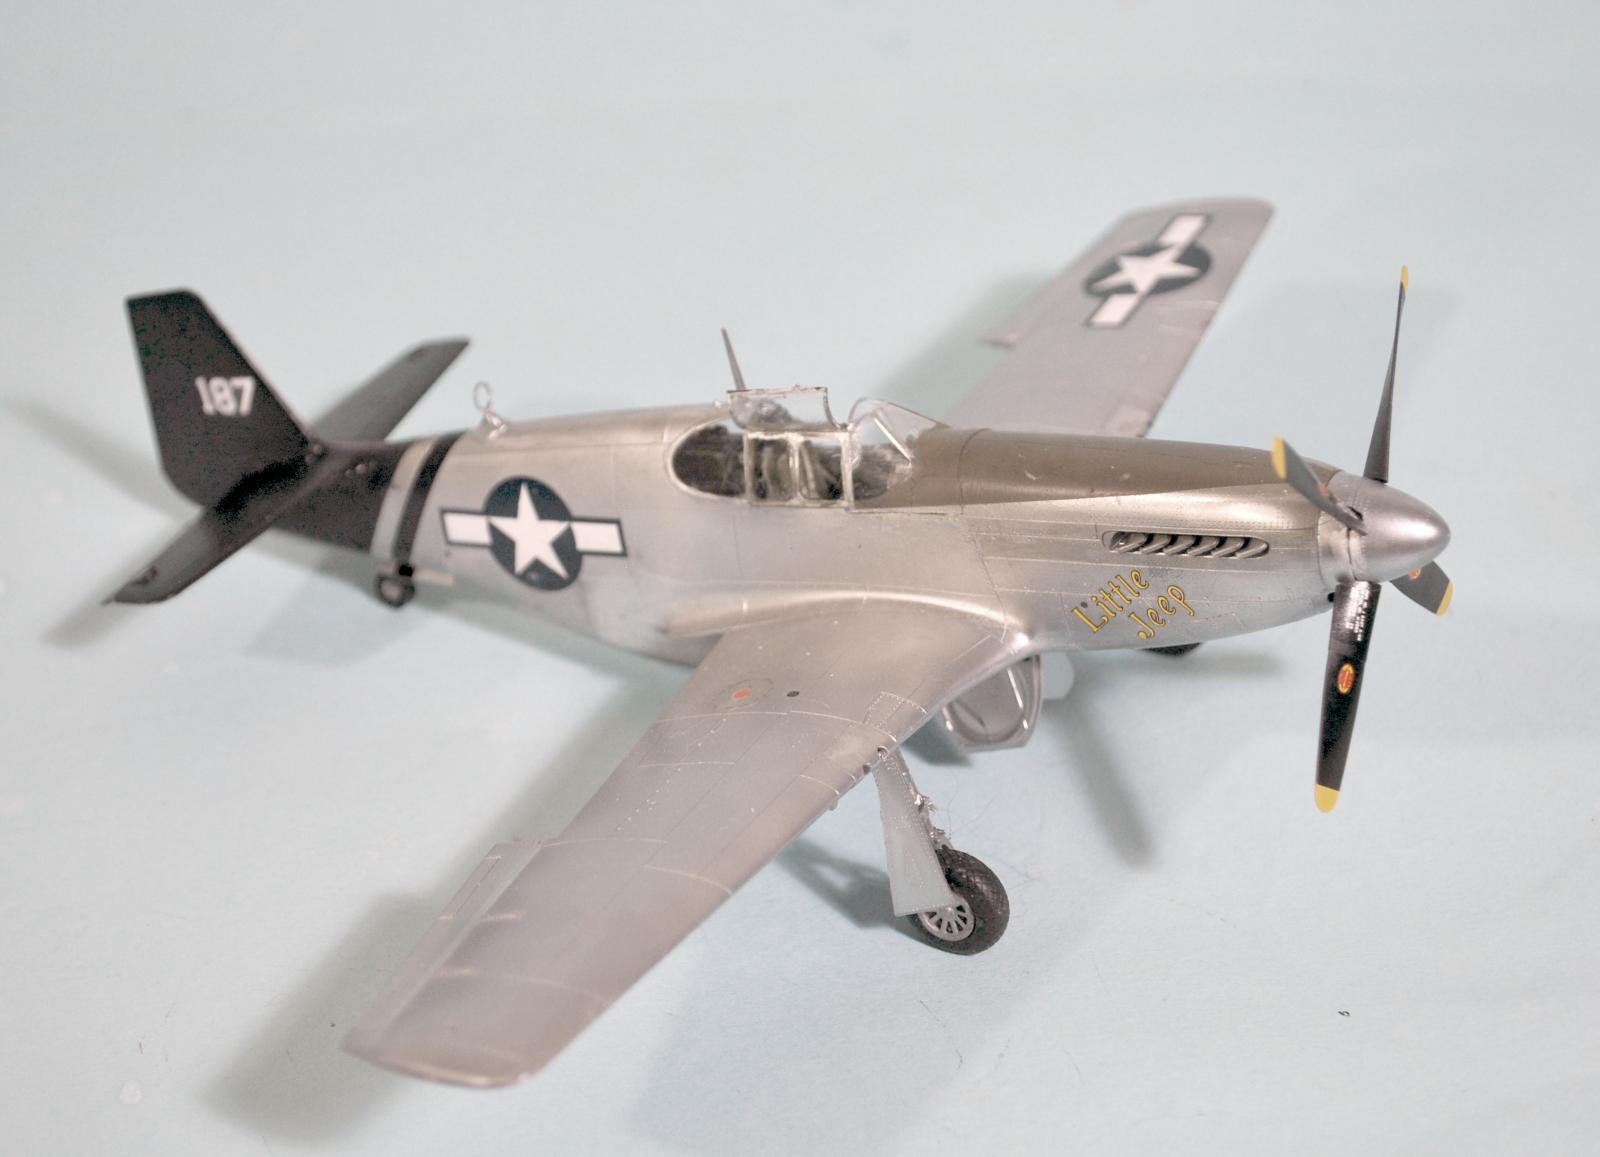
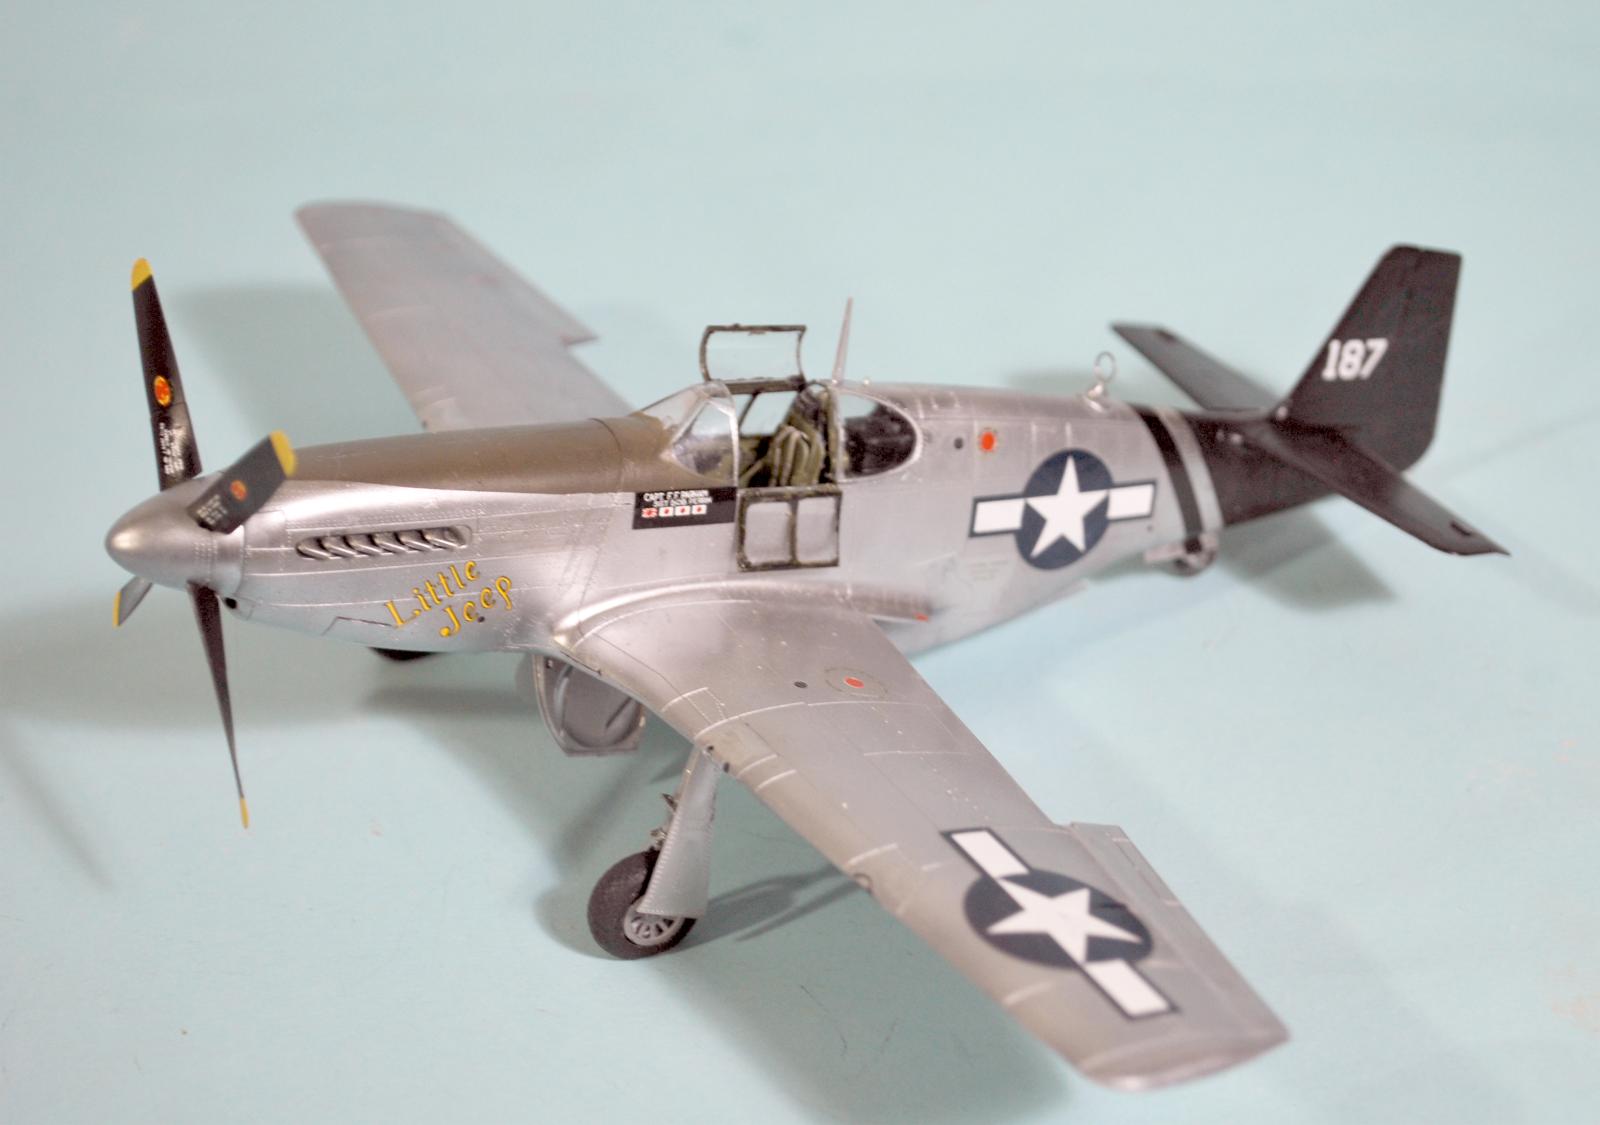
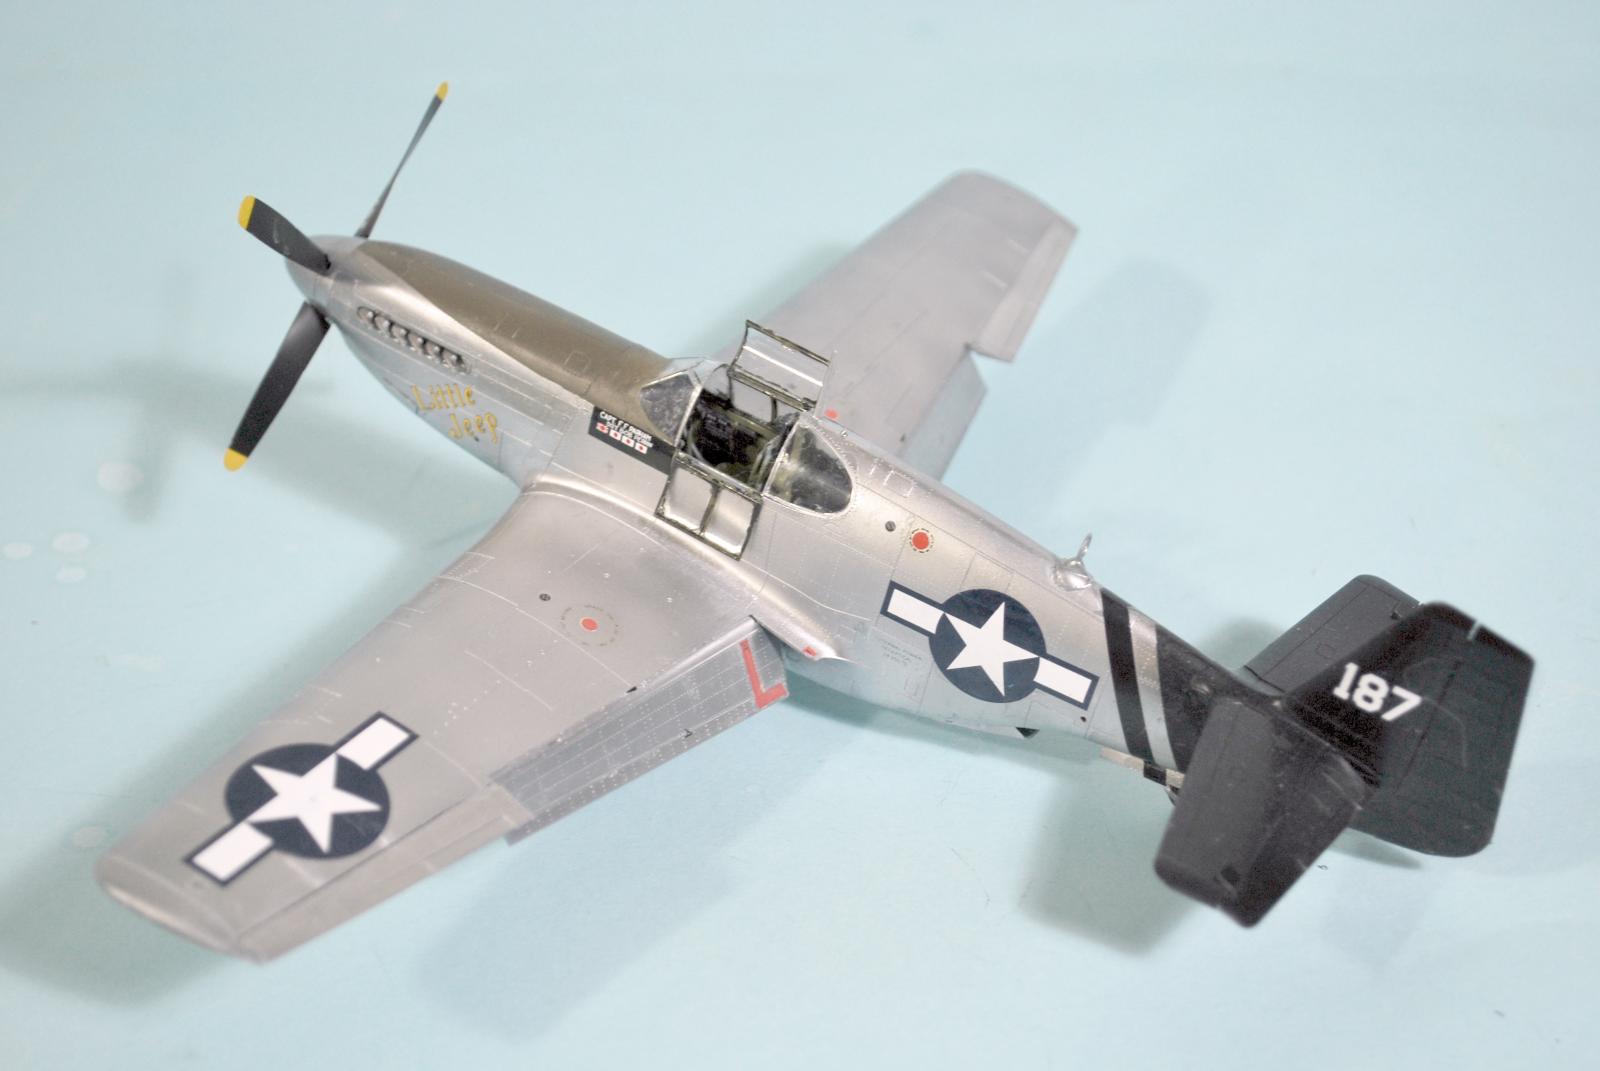
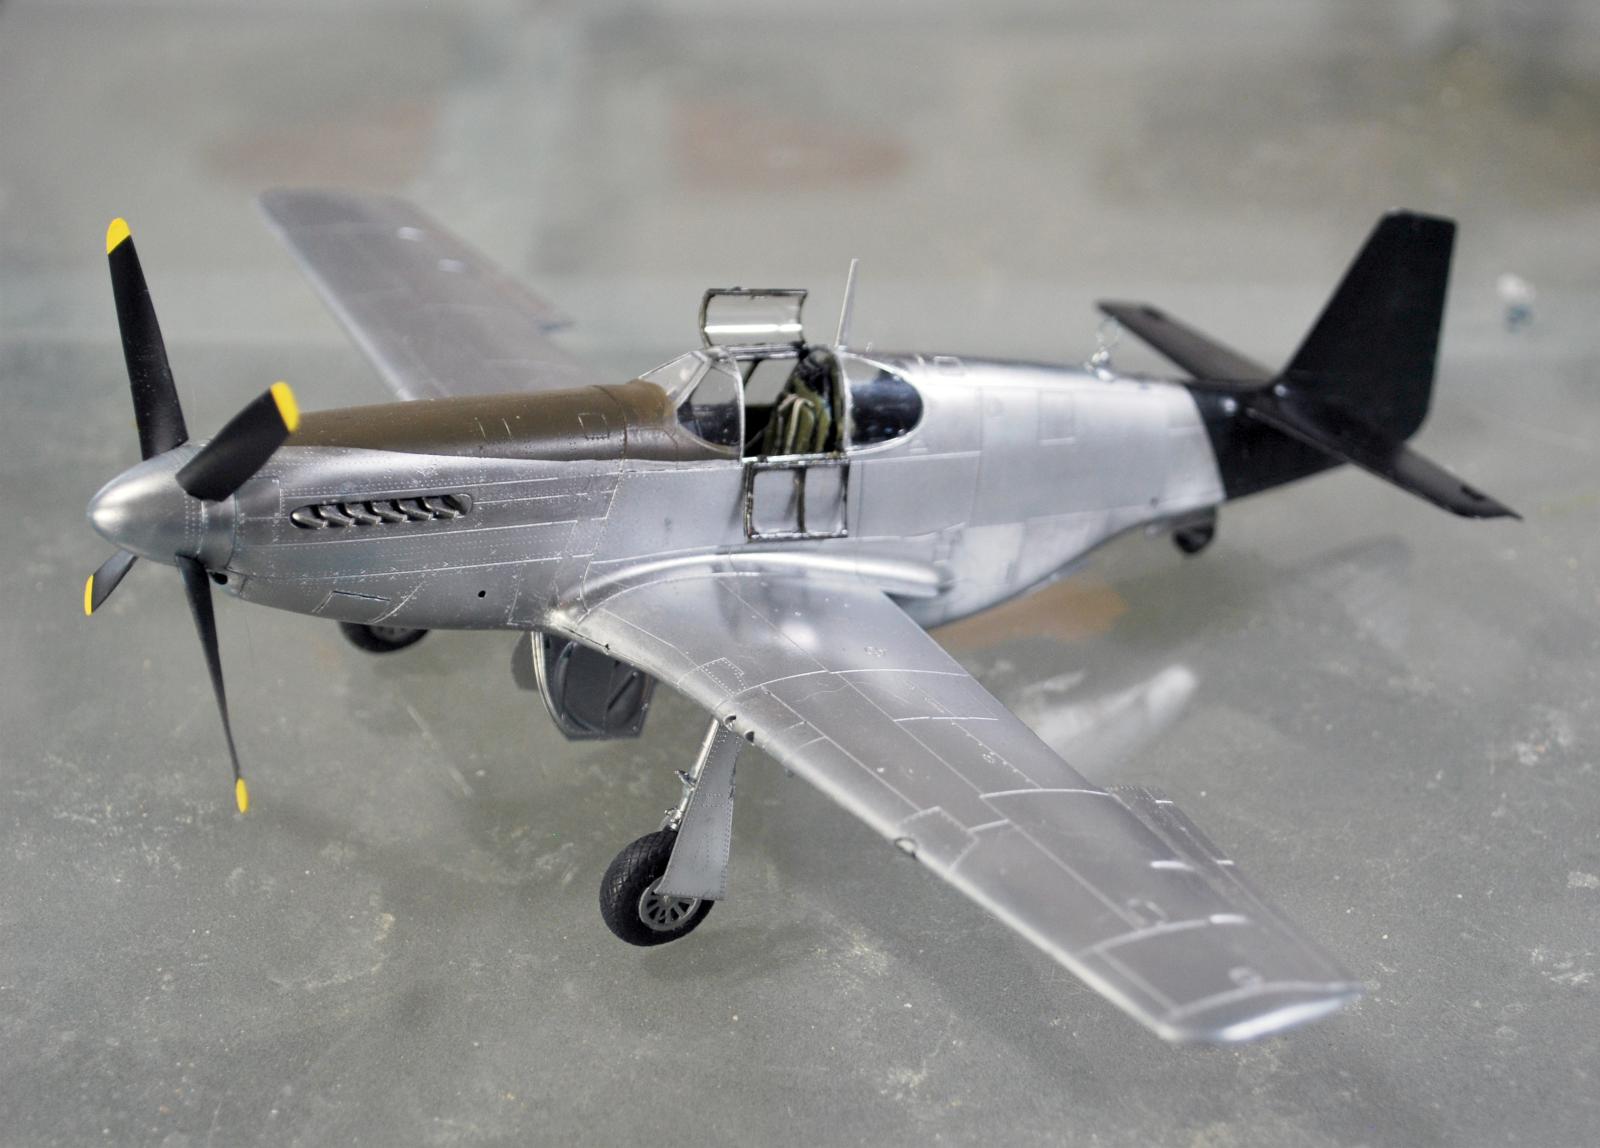
For this kit, I chose to do the P-51C flown by Captain Forrest “Poppy” Parham, a five-victory ace with the 75th Fighter Squadron. Parham served initially as an Army Tank Corps 2nd Lieutenant before requesting flight training. He arrived in China in February 1944 and flew P-40Ns before the group converted to the P-51. He had scored his five victories by the time he was assigned “Little Jeep” his second P-51 in November 1944.
My prinmary reason for doing this specific aircraft is that it was in a natural metal finish, which would allow me to experiment with doing a multi-hue finish with the new Super-Metallics and Tamiya lacquer Metallics.
Construction:
This kit went together easier than the first one, since I knew the areas of “fiddly” to deal with. I still say that the best way to assemble the cockpit, which is the major fiddly area, is to slice off the guides on the fuselage sides, assemble the cockpit on the floorboard, then attach the side detail panels to the cockpit assembly in order to get them properly aligned, then glue this entire assembly into the fuselage. Everything came together very easily.
Painting:
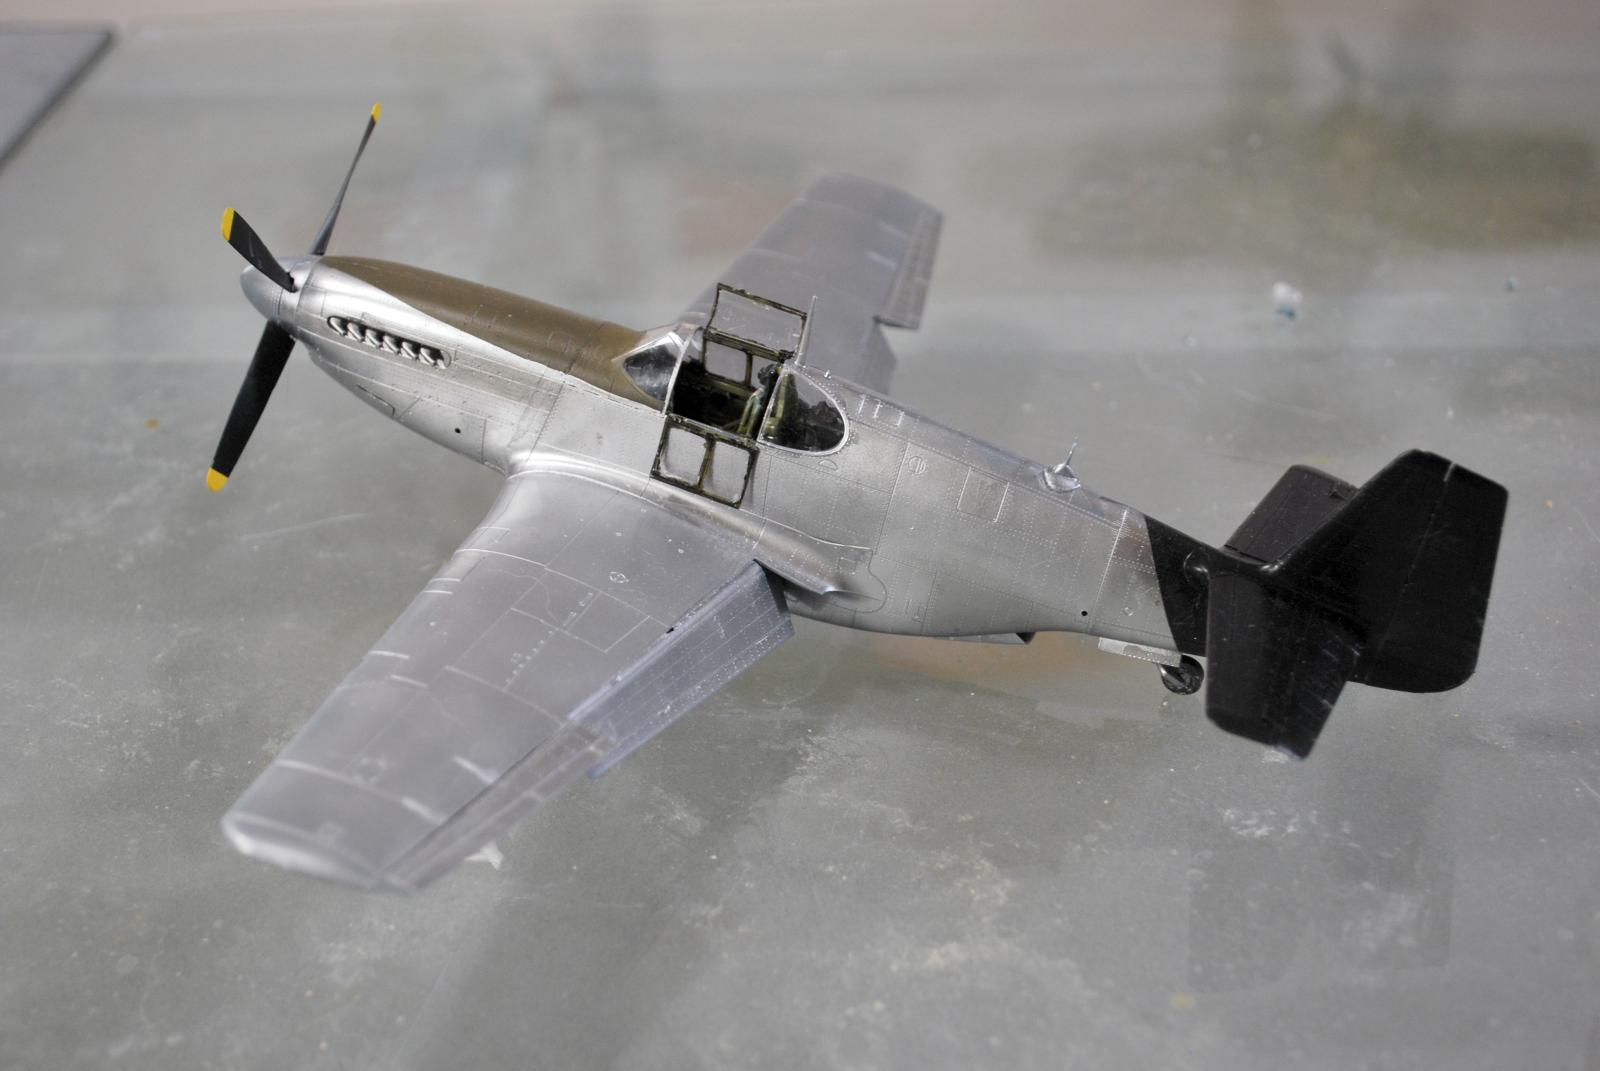
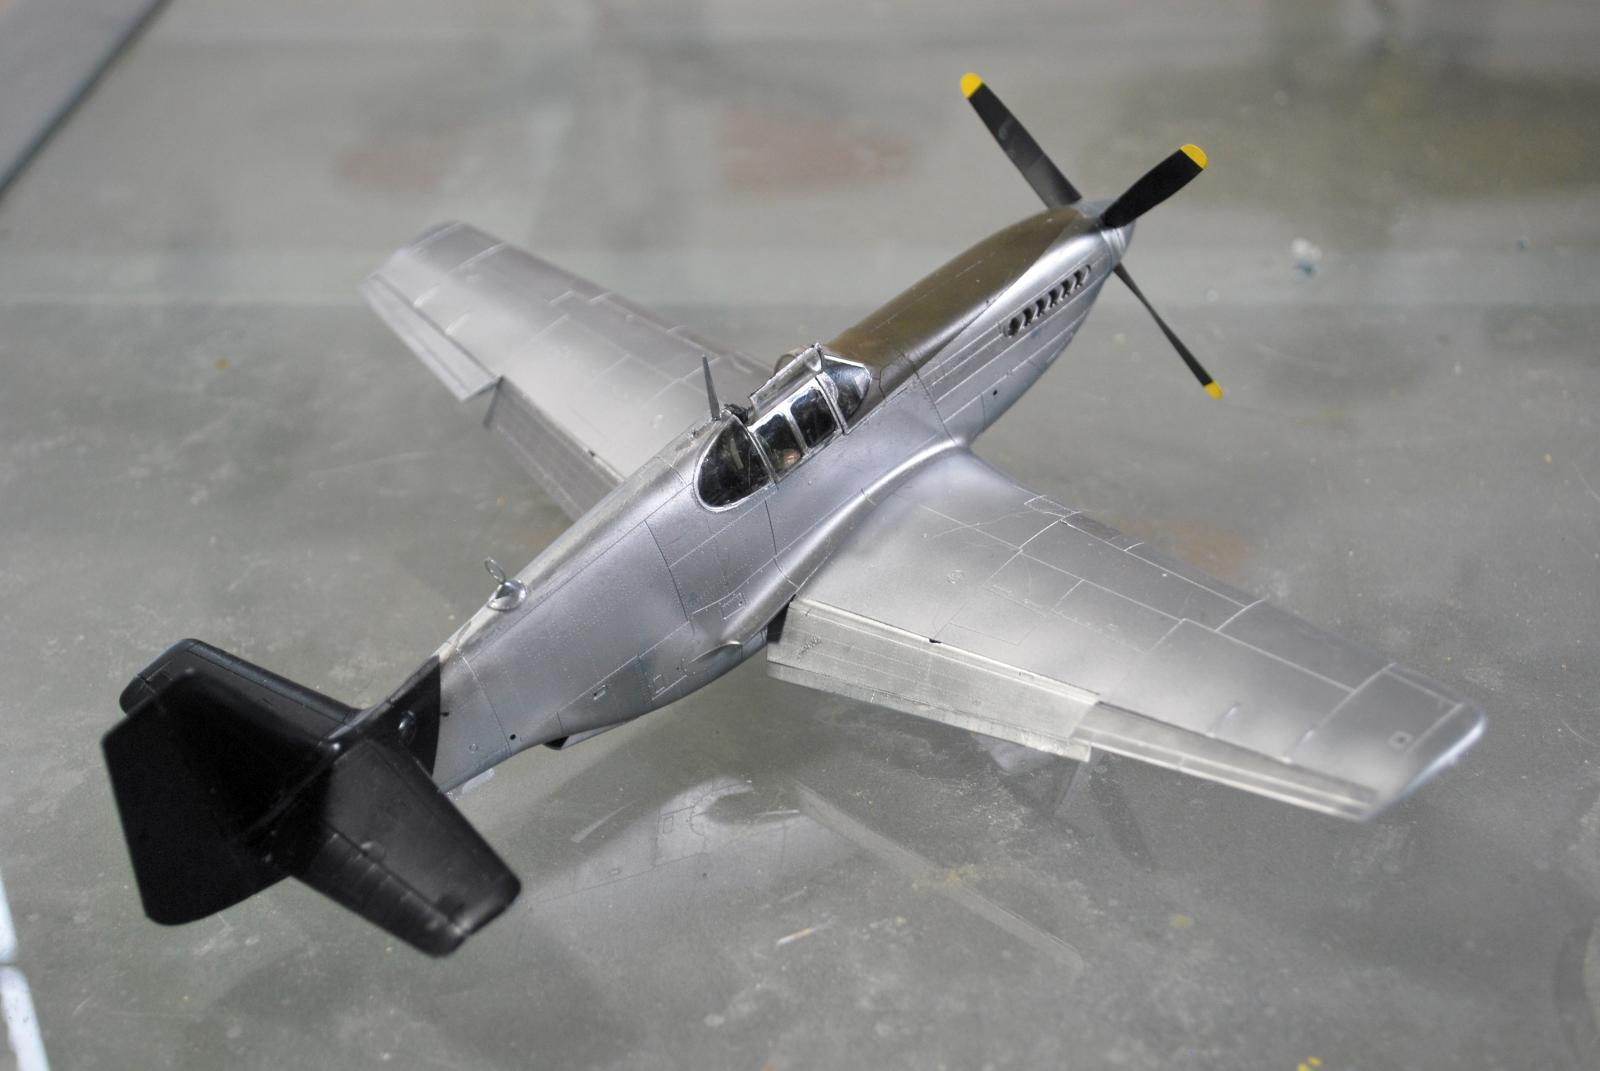
I first painted the rear fuselage and tail surfaces with Tamiya LP-5 “Semi-Gloss Black,” then masked that off. I painted the air-glare in front of the cockpit with Gunze-Sangyo “Olive Drab 2" aqueous acrylic and masked that off.
I applied the Super Metallics without a primer.
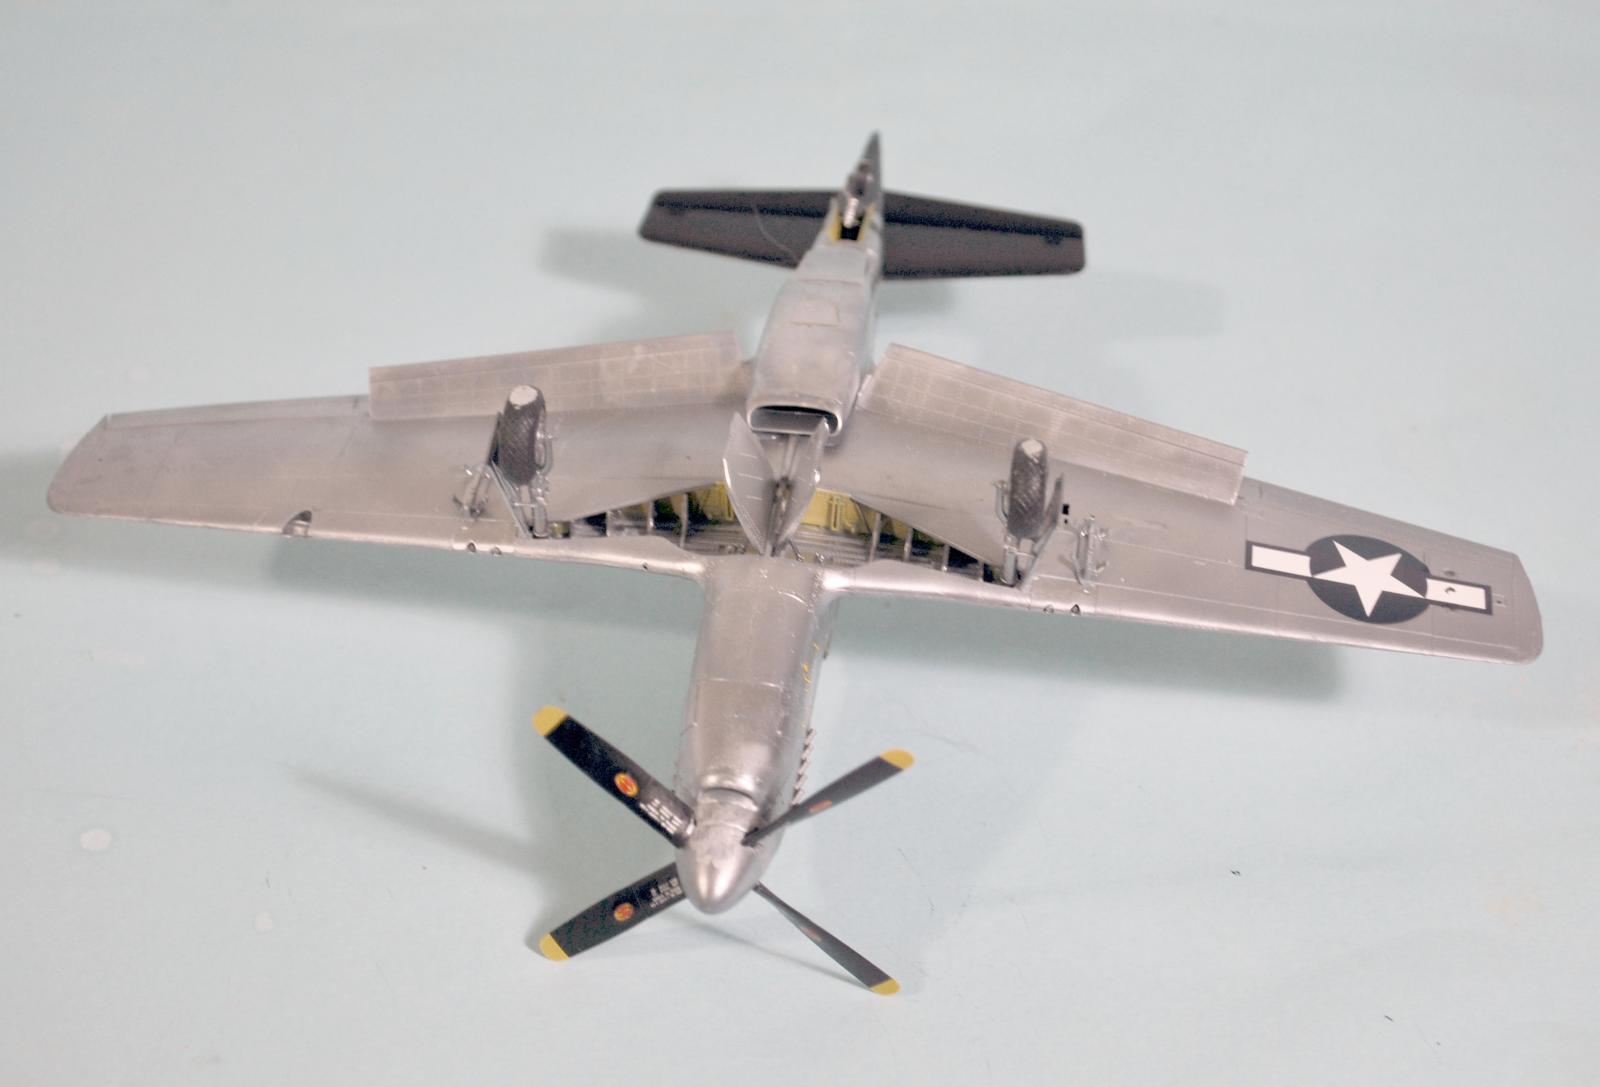
I first painted the wing with Tamiya LP-70 “Gloss Aluminum.” this was thinned 40% paint, 60% Mr. Color Leveling Thinner 400, which resulted in a semi-gloss finish. The Tamiya metallic lacquer can be masked with drafting tape after setting up for two hours without any problem of pull-up. I masked off the wing and applied Mr Hobby SM204 “Super Stainless” to the wing gas tanks.
I painted the fuselage, flaps and ailerons with Mr Hobby SM208 “Super Duralumin.” I used SM201 “Super Fine Silver 2", thinned 30% with Mr Color Leveling Thiner, hand painted, for the various panels on the fuselage. The panels around the exhaust stacks were painted with SM203 “Super Iron 2". Like Vallejo acrylic metallic paint, the Super Metallics can be brush painted if they are thinned a bit, for small areas, and there will be no brushstrokes when the paint dries.
I airbrushed the larger panels under the cockpit and on the fuselage rear with Vallejo acrylic “Aluminum” thinned 50-50. This went over the lacquer base metallics without any problem.
The result is the most accurate-looking (to me) NMF I have done. These new paints are a real game-changer.
Decals:
The Aeromaster decals went on without any problem under several applications of Micro-Sol.
Final finish and assembly:
I attached the open “coffin lid” canopy, the landing gear and the prop. I used Eduard's 3D resin “diamond crosshatch tread” wheels.
Overall:
Since the majority of Mustang models will be done with at least some NMF, it's nice to know that - with care - the new lacquer-base Metallics work without problem and provide a great result. I recommend them unhesitatingly.

That looks really good, Tom. CBI stuff always gets my attention. I finally got to spray a Super Metallic yesterday and concur, it’s awesome stuff.
Lovely work
Excellent job and ditto article, my friend @tcinla!
Yeah, that natural metal finish looks spot on. Wonderful job on this one, Tom!
A fine looking pony, Tom @tcinla
The NMF scheme turned out really well with the black accented tail
Great article as well.
Super fine paint job and a fantastic looking Mustang Tom. Thank you for sharing it along with the history too.
Nice work Tom! Cool markings and a great model.
I concur about the paints. Been using Gunze Supermetalics and MRP Super Silver and both work flawlessly- and resistant to touch after drying time.
Nice job, Tom
I have always preferred the look of the 51B to the famous D version. This one looks awesome, beautiful build Tom.
Excellent work. Like the look of the 23rd FG Mustangs.
Very clean looking Tom @tcinla. Can’t wait to get my hands on one of these kits when Eduard opens up the pipe line.I already picked up those Gunze metallics and am roaring to go.
Looks good Tom! As someone who has a complete range of the Vallejo metallics, what are the biggest differences/advantages to these new "super metallics?" Are they tougher, or is it the lack of having to use a base coat? I'm hesitant to switch unless I see a clear advantage 🙂
These are tougher than the Vallejo, which can "wear" through handling even with a primer coat. Interestingly, the Vallejo metallics can be used over these paints for an additional "shade" without any problem. The same is true for the new Tamiya lacquer-base metallics.
Excellent result and finish. I hope to build up my painting skills to be able to try these bare metal finish models. Not there yet.
Great-looking natural metal finish, Tom (@tcinla). I am still trying to get comfortable with NMF modes, and I am always looking for something that is more durable that the stuff I have tried. I sprayed some Tamiya Silver on my F-86 today, and it looks pretty good. I need to get some of the Mr. Hobby Super Metallics and give them a try. Thanks for posting the info.
An interesting discovery: If you use the Tamiya LP-11 Silver as a base coat (dries quickly and super resistant to masking problems) and then use Mr Hobby Super Metallics over the Tamiya paint, the Super Metallics will dry about as quickly as the Tamiya (which is about twice as fast as the Super Metallics) and also resist Tamiya Tape used for further masking. Don't ask me why, it just turned out that way on the latest experiment.
That is a great tip. Gracias, TC @tcinla
Excellent result, looks good. Looking forward to my B/C model.
Really nice work on this one Tom , it looks great.
Beautiful!