Eduard: 1/48 A6M2 Zero Type 21

I built Eduard's Zero strictly OOB, nothing added except for brake lines, because this ProfiPak edition doesn't need a thing more. It's all here in the box to build a near perfect looking A6M2 Type 21 with no rough spots or frustration hurdles on the way to the finish line.
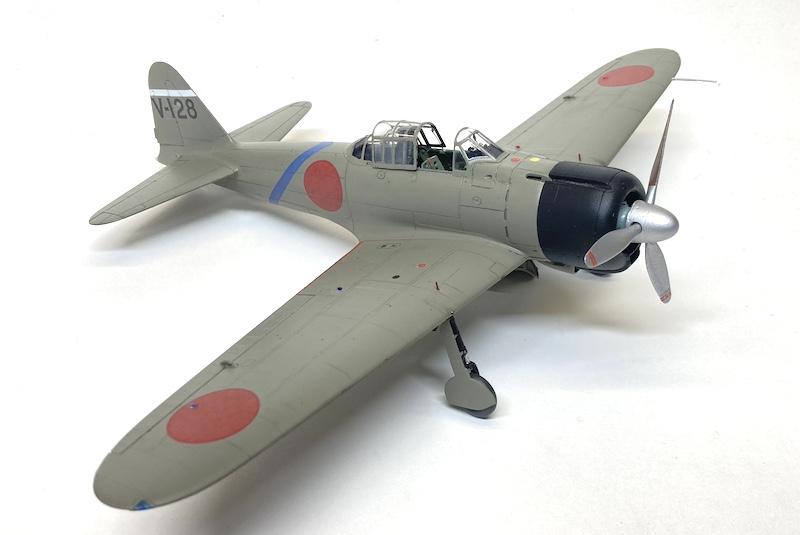
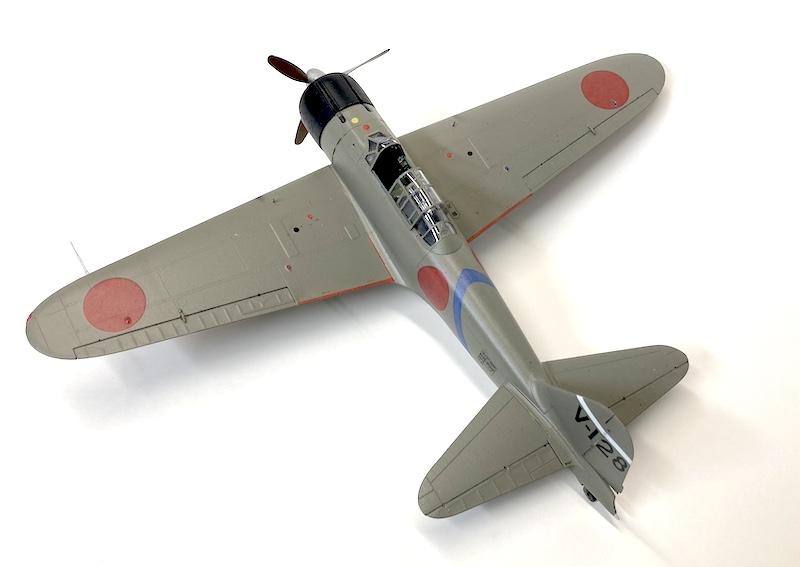
I choose to model the box art Zero piloted by one of Japan's best known fighter pilots, Saburō Saki, color scheme B in the instructions. Rabaul, New Britain Island, August 1942.

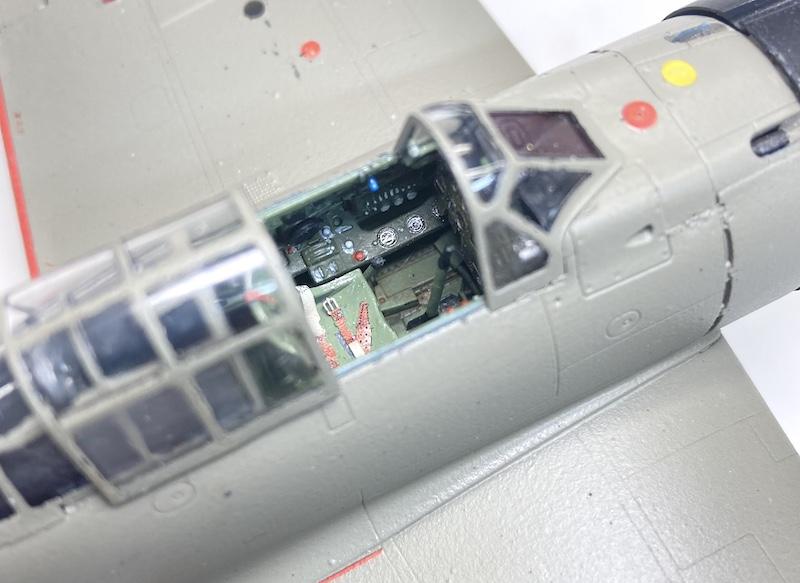
Construction was relatively easy peasy and rather quick, being this kit is extremely well thought out and not as fiddly as other Eduard models I've built. The kit provided jig for assembling the 5 piece cowl is absolutely brilliant. Kudos to whoever dreamed that up! I followed Eduard's instructions to the “Tee” but I did leave off some of the tiny PE parts and sprue pieces that are hidden and one will never see. The assembled cockpit is absolutely gorgeous but once again, most of it is almost invisible once installed.
But I know it's there.

Brake lines made from stretched sprue:
-

- 1. brake lines both wheels
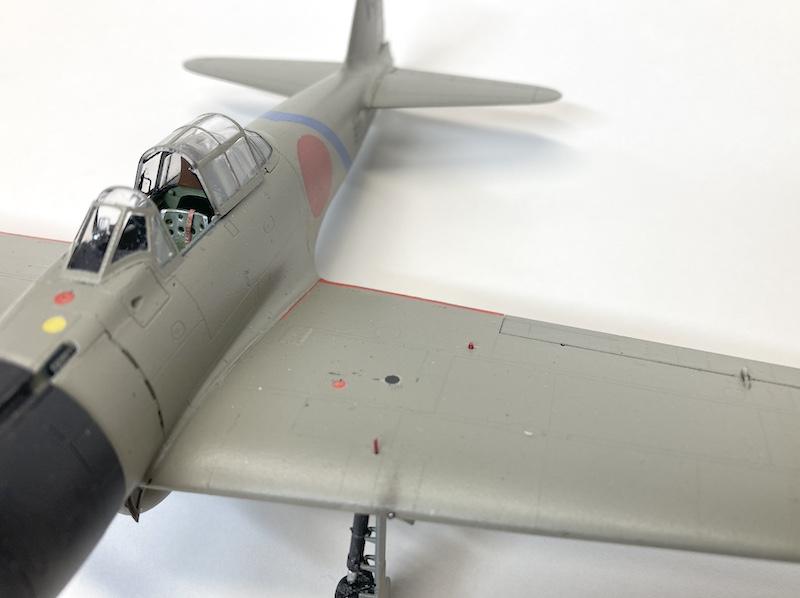
The finely printed decals (Eduard) seem to be the new ones everyone was talking/complaining about recently. They are very thin and settled down perfectly just like paint. Yes, what looks like annoying excess carrier film can be wiped away although after drying it's not noticeable. The only decal issues I encountered were the thin red wing walk lines and some of the tiny stencils. They basically disintegrated on me which is why some of the red lines are missing. One has to be very careful when applying these. Don't over soak them and work swiftly because they settle down quickly and then fall apart if you try to move them or straighten them out.

Paint-wise I used Tamiya acrylics thinned with Mr. Leveler lacquer thinner. The basic fuselage color is a mix of Tamiya XF-76 “IJN Grey 2" with XF-51 “Khaki Drab” in a ratio of three parts XF-76 to two parts XF-51. Thanks to TC for that formula. It looks right right on the dime to me.
I decided not to use any blue green Aotake anywhere since most of it wouldn't be seen. The only real glitch I ran into was self inflicted. For some reason the AK Gauzy clear coat I've used many times before, orange peeled just enough to irritate the heck out of me and screw up the finish. Final clear coat is Alclad II Klear Kote Semi-Matte.
Because the Zeros at this time were almost factory fresh and kept clean, I didn't do much in the way of weathering.

Eduard really nailed this kit. I will be building their Rufe very soon.
Thanks for looking.

Eric, your Zero looks awesome. Thank you for passing along that paint mix. It really looks spot on to me, and I think I'm going to use it on a couple of the early Zero models I have.
Thanks Clint.
Look up Tom Cleaver’s iModeler builds of Eduard’s Zeros. I used his paint mix formula. I have to say it does look dark and light in different lighting situations yet Eduard’s box art looks more like dope white. The instruction paint callouts are more accurate far as I can tell. Fellow iModeler Louis Gardner has also posted a thorough study of WWII Japanese fighter colors on this site well worth checking out.
Nicely done, Eric.
Thanks Gary @gwskat. A very enjoyable build.
Your Zero looks fantastic, Eric!
Well done!
Always appreciative of your positive comments, Spiros @fiveten
This Zero is a true gem, Eric @eb801
A good idea to keep it clean. I do hope you will display the Rufe soon.
Thanks, John @johnb. I built this Zero first to see how the kit goes together before tackling the Rufe. Soon as I finish my Sabre build, the Rufe will be next. Stay tuned.
Beautiful Zeke - well done!
Gracias, Greg @gkittinger. Maybe Eduard will release a Zero some day as nice as this one is in 1/72th.
Excellent! Eduard nailed it and so did you.
Thanks Chas @chasbunch. DoraWings needs to issue a Zero in 1/72.
Very nice, Eric. Good work and a great result.
thanks, TC @tcinla. Your paint formula made it happen.
Great looking Zero, Eric @eb801! 👍 She's a right beauty and so well done! 👏
Good to hear from you, Gary @garybrantley. Gracias. Eduard's Rufe is next!