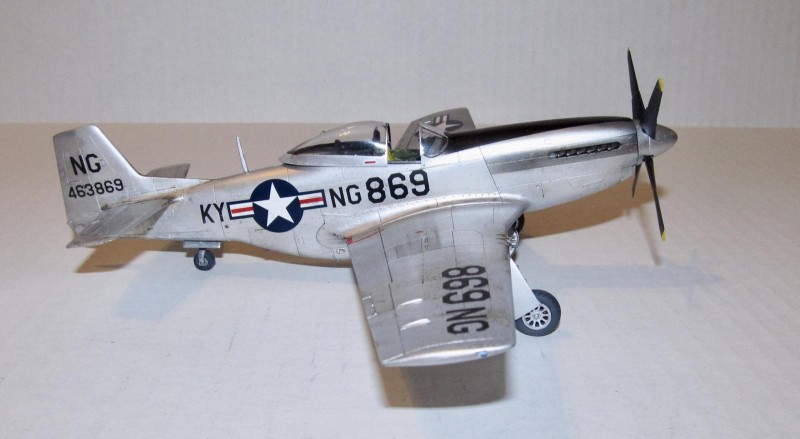
F-51D From The Mantell Incident
Introduction
The Mantell Incident began in the early afternoon of January 8, 1948 when the Kentucky Highway Patrol reported to the authorities at Godman Army Airfield at Fort Knox that they spotted a circular object about 200-300 feet in diameter hovering near Madisonville, Kentucky. Around 1:45pm, Sgt Quinton Blackwell observed the object in question from the airfield tower. There were other reports coming in (from Wiki)
Colonel Guy Hix, the base commander, reported an object he described as "very white," and "about one fourth the size of the full moon ... Through binoculars it appeared to have a red border at the bottom ... It remained stationary, seemingly, for one and a half hours." Observers at Clinton County Army Air Field in Ohio described the object "as having the appearance of a flaming red cone trailing a gaseous green mist" and observed the object for around 35 minutes. Another observer at Lockbourne Army Air Field in Ohio noted, "Just before leaving it came to very near the ground, staying down for about ten seconds, then climbed at a very fast rate back to its original altitude, 10,000 feet, leveling off and disappearing into the overcast heading 120 degrees. Its speed was greater than 500 mph (800 km/h) in level flight."
These descriptions were of the same UFO.
Flight C of the 165th Fighter Squadron of the Kentucky Air National Guard was airborne at the time and sent to intercept the UFO. One F-51D turned back as it was low on fuel while the remaining three F-51Ds began to climb up to intercept the UFO. There was a problem as only one of the three F-51Ds was equipped with an oxygen system and despite this they climbed up past 20000 feet. Two of the F-51Ds (including the one equipped with oxygen) turned back at 22000 feet while Captain Thomas Mantell's F-51D continued to climb in pursuit. At 25000 feet, it is theorized that Thomas Mantell blacked out from hypoxia and witnesses said the Mustang spiraled right down into the ground. Later others told fantastic stories/rumors/”theories” about how Mantell's aircraft was shot out of the sky by the UFO with an advanced weapon that blasted his Mustang into small pieces no larger than six inches, that the Mustang remains were radioactive or that Mantell was incinerated/shredded by alien bullets (the rumor the Mustang was shot down was treated as fact in a UFO comic book that caused this review writer to be scared out of his not too swift nine year old mind about killer UFOs and became the inspiration for this build.) Truth was Thomas Mantell's intact F-51D crashed down near Franklin Kentucky and his non radioactive body was pulled from the wreckage by firemen.
Project Sign (1948) and Project Blue Book (1952) would investigate the incident. At first, they claimed that Mantell was chasing the planet Venus, but that theory was shot down because Venus was not visible at that time of the day. The same academic who wrote the original hypothesis changed his hypothesis in 1952 to Mantell was chasing a balloon from Project Skyhook, a then top secret US Navy weather ballon project whose balloons had some of the same physical characteristics described in the incident reports. However, there were some questions as to whether or not Skyhook was operating in that area and had launched a balloon at the time.
The Mantell Incident would be later fictionalized in the pilot episode of 1978's Project UFO, a Jack Webb Production that aired on NBC about the various Project Blue Book UFO incidents. The writers changed the year of the incident to during the 1970s and had an F-102 or F-106 involved instead of an F-51D.
At this point no one really is sure what Thomas Mantell chased to his death that January day. /cue X-files theme/
The Pilot
Captain Thomas Mantell was a 25 year old former C-47 pilot who dropped paratroopers from the 101st Airborne during D-Day and won a DFC for bravery during Operation Market Garden. He survived the war and returned home to Kentucky. In 1947 he joined the newly formed Kentucky ANG's 165th Fighter Squadron which was then flying F-51D Mustangs. Despite his many hours of flying he was new to single engined fighters which is different than flying a multi-engined transport. No one can say for sure whether or not this inexperience lead to his death. In 2017, a memorial to him was laid down near the crash site.
Construction
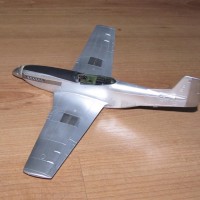
It all began with the wings. During the test fitting I realized that the top of the wings don't line up with the fuselage. After test fitting plastic card pieces of varying thickness, I found that when I added 1/16” thick plastic card strips about 1/2” long placed on top of the wheel wells helped raise the top of the wing to line up with the fuselage.
The cockpit was painted dark green (Tamiya XF-5 Flat Green) while the instrument panel was painted flat black. When dry, the various details were brush painted or painted using toothpicks (white, yellow, silver and red.)
The various intake and exhaust parts plus the tail wheel were painted and glued in place. Once done, the fuselage was glued together using CA glue for the visible seams and Tamiya extra thin for the hidden seams. When the CA glue dried I dealt with the seams with various grades of sandpaper. This took longer than I thought as I had a lot of divots in the seams that only appeared after polishing. Several fill/sand sessions to deal with the seams to my satisfaction. Next I used a pin in a vise to etch important details on the plastic (the Hasegawa P-51 is missing the prominent seam on the top of the nose.)
I glued the wings onto the fuselage then deal with the seams. The area around the gun nozzles required a lot of careful filling and sanding to remove the seams (here I was spoiled by the Airfix, Meng and Eduard kits here which wisely made that wing guns on the leading edge a separate part.) Once the seams were dealt with, I added the stabs into their slots.
The canopy and windscreen were masked off and ready for painting.
Colors and markings
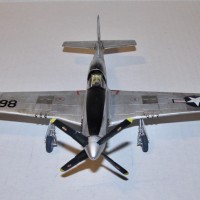
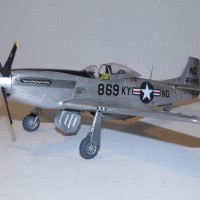
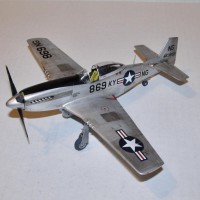
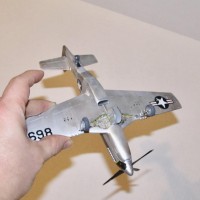
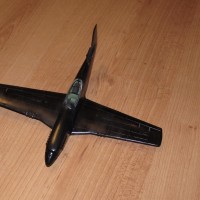
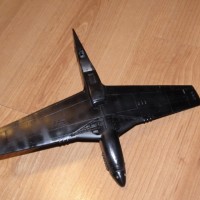
Mantell's F-51D has a NMF surface which requires a lot of work to get right. I masked off the cockpit and primed the model with Badger Stynylrez acrylic flat Black Primer shot through my trusty airbrush. Unlike Vallejo primer, this self leveling primer has a strong enough grip on plastic to be polished using polishing cloths without too much problem so as to make the surface smooth for Vallejo Metal Color Paints. I polished each primer coat with polishing cloths ranging from 3200 to 6000 grit. I did these two steps three times to get a nice smooth base. The final primer coat was actually Tamiya gloss black which got a final buff using 8000 and 12000 grit polishing cloths.
Without Stynylrez primer, polishing the surface was impossible with my earlier Mustang builds using Vallejo Metal Coat paint because of the headaches I had trying to polish/feather/smooth out Vallejo primer which is actually very difficult. I don't recommend using Vallejo primer unless you have some magic touch and can actually polish it smooth without ripping it off the surface.
The CA glue filler used in the area in front of the windscreen coaming proved to be stubborn and required more sanding and polishing.
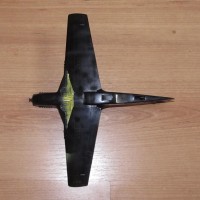
The rear of the wheel well was painted a 1:1 mix of Tamiya flat yellow and yellow green then masked off before the metallic colors were painted on.
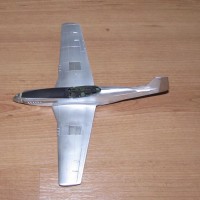
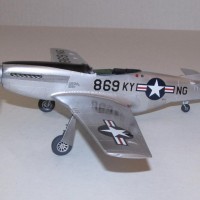
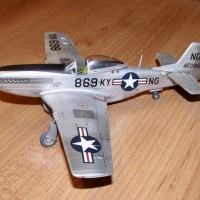
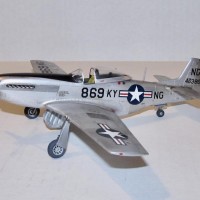
I sprayed down the various Metal Colors on the model: aluminum for the wings; white Aluminum for the majority of the fuselage and canopy; pale metal exhaust, magnesium and dark aluminum for the various masked off panels; chrome for the prop hub; finally, Aluminum Lacquer for the rudder.
This required several coats as the various imperfections or mistakes (mostly mistakes) had to be polished away.
Meanwhile the prop blades were painted flat black and the tips painted yellow. The tips are masked off then painted flat white then flat yellow. They were gloss coated and decaled with prop markings at the same time as the plane.
The canopy was painted flat black (Badger Stynylrez) and then painted Vallejo White Aluminum. After i removed the tape, I noticed that I somehow scratched the clear areas both with sandpaper and a knife. Good job... sigh.
Decals
Since there are no decal sheets of Mantell's KY F-51D, I had to cobble things together from several decals sheets and the kit stencils. The numbers and insignia came from various 1/48 Caracal decal sheets covering WW2 lettering and numbers of various sizes as well from the Caracal Air National Guard F-51Ds Part 2 decal sheet.
The Caracal decals did not cause any problems with a little help from MicroSol/Set decal solutions.
NOTE: After I had posted this article on Modeling Madness, a reader pointed out to me that Mantelll's P-51D lacked the national insignia on the fuselage and showed me a photo. If one wants to make an exact correct replica of Thomas Mantell's P-51D then you will have to omit the US Stars and Bars unlike this model.
Weathering
My intent was not to make a dirty F-51D but one whose metal was slightly weathered. A couple of photos found on the internet were of the Mustang when it was originally with the 355th FG, 358th Fighter Squadron. Hard to confirm 100% if the metal surface was weathered, but it appears to me that it has the look of weathered metal. In another article, it was mentioned that during the immediate post WW2 era the KY ANG detachment of the 165th Fighter Squadron had a bit of a country club atmosphere and the equipment was well maintained. Based on that, I wanted something in between pristine and Korean War weather beaten.
I used a combination of mix of watercolors (burnt sienna and black with a drop of dishsoap) and Tamiya enamel washes to darken seams and wheel wells.
Final Coat
I used an alternating spray of Xtracrylix Satin and then Gloss mixed with 10-15% water. This was a brain dead mistake on my part. Not because the coats were bad, but because I completely forgot about the wash being watercolor and it ran way more than it was supposed to. I wiped off the worst of the running watercolor paint before the final coat dried. I ended up spraying again, but fortunately the final coat was wet enough so that there were no obvious marks on the surface.
When the final coat was dry, I sprayed the prop blades with Tamiya Flat clear.
Final construction
It took a while to get the prop hub and blades attached to the shaft. I don't like the way Hase designed the prop to make it spin. Tamiya's poly cap method is a much better way. I drilled out the hole for the Ultracast prop hub using a 1/8” drill bit and expanded it width wise with a 3/16” drill bit. This exposed the attachment holes for the prop blades. Each prop was glued carefully in with a drop of CA glue while I made sure the prop could spin. What should have been a simple task took an hour to do as I had to remove prop blades repeatedly and carefully trim the ends so they would fit and then jiggled the blades before the CA glue set so they were aligned vertically/horizontally.
I cut six lengths of brass tubing approximately 3/32” to replace the plastic bits used to represent the .50 caliber gun barrels. These were dipped with bit of CA glue and inserted into the expanded holes in the wing. I then brush painted them with Tamiya X-10 gunmetal.
The Ultracast seat was painted using acrylic paints, weathered using Tamiya enamel washes and then secured in place with a dab of CA glue.
As per my clumsy ways, I tend to break the tail wheel of my Mustang models with stunning regularity. In this case, I knocked off the wheel bracket and couldn't find it. In what should be the modeller's creed, I chose to improvise, adapt and overcome. The extra landing gear (kit origin unknown) donated its wheel bracket because of its similar size and shape. It was sanded and polished then painted silver. Next it was glued onto the remains of the tail wheel gear and the tail wheel was glued in place. Not perfect, but better than any alternative I could think of.
The canopy, windscreen, painted lights and antenna were glued on. I was about to go through the motions of making a radio aerial out of Uni fly fishing thread when I reviewed the real life pictures and found no such thing (whew.)
Conclusion
The Hasegawa P-51D is an okay kit that has been surpassed by the newer P-51Ds including the Tamiya P-51D which was released five years after it. The kit has some glaring issues for me; the biggest nits were the prop attachment and the shallow landing gear well. In my opinion in some ways it is better than the Tamiya kit especially the cockpit, the seams on the underside of the Mustang and how it deals with the angle of the wings. In the end, the Haseagaw kit still looks like P-51 so it will make a nice looking model in the hands of a competent modeller.
Neat model, great story. TY for talking about the some of the points to the Hasegawa kit - Haven't added a P-51D to the stash yet, this review helps. Remember watching the "Project UFO" show when it was on TV.
Great looking model and a fantastic story. Regarding the broken tail wheel. I don't know why some manufacturers insist on installing this at the beginning of the build but this is my solution when that happens. Its not pretty but it works. Just need some toothpicks around the tail wheel and then tape. Of course, the toothpicks don't need to be that long. Haven't lost a tail wheel since I started doing this
Thanks and thanks for the tip. I'll give that one a try.
Nicely done!
Thanks!
Great story together with a great build.
Thank you. The story itself makes for interesting reading.
Great Mustang, Dan.
Equally great story, too.
Thanks I enjoyed building and writing it.
Nice looking pony Dan, I heard of this story but not in as must detail as you've posted here. Well done.
Thanks. Way more accurate than the comic book I read as a kid.
Lovely Mustang - nicely done!
Thank you.
@Doug
Thanks. Hope the review helps.
Dan, I really enjoyed the story, I had never heard about this incident so you had my interest from the start. I also really like the look of your build, and the paint scheme. Some may call it kind of blah, but a silver bullitt paint scheme can really look nice, like what you've done here. Well done !
Thanks! I prefer a more colorful scheme, but I just really wanted to model the plane from the incident.