Soviet Seagull: The Beriev Be-12 Chaika in 1/72nd scale
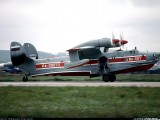
The Beriev Be-12 Chaika (Seagull) is an amphibious aircraft designed for antisubmarine warfare, maritime recon and rescue, and are now being used for fire fighting. It is a successor to the Be-6 "Madge" and first entered service with the Soviet Fleet in 1968. It uses 2 Ivchenco AI-20M turboprop engines and is usually armed with antisub torpedoes, mines and sonobuoys, with surface search radar in the nose and the very prominent MAD boom in the tail stinger.
I have a copy of "Soviet Wing" by Alexander Dzhus in my book collection and the last two pics in this large coffeetable picturebook is of the Chaika. I was hooked! Such an unusual looking aircraft, a throwback to the 40's, and Just.So.Russian. But alas there were no decent kits of this bird until recently with A-Model's 144th scale kit and RVSP's (?) resin effort that was out of my price range. Enter Modelsvit, a Ukrainian modelmaker, to the rescue. As soon as I saw an in-box revue in Cybermodeler I ordered it and in just a few weeks had this kit in my hot hands...
The Good...It's a Chaika!
The kit comes in a surprizingly large top-opening box with great photos of a Ukrainian Navy bird and is chock full of parts. Each of the 17 sprues are individually wrapped or grouped together. The instructions are outstanding and very clear, using cad drawings throughout, with color illustrations of the 2 schemes included in the kit, one each for either the Soviet or Ukrainian Navy. The Decals are beautifully printed and very complete, with great color density and extensive instrument decals for the interior.Also included is a small PE fret with elevator horns, nose bulkhead and windscreen wipers, very nicely molded rubber tires and best of all...a sheet of vinyl masks for the extensive glazing on this bird. The parts are well molded with very petite panel lines and details that should look just right under a coat of paint. Overall a very quality offering in the box. So far so good...
The Bad...Its a limited run kit. As such, every part must be checked for mold seams, sprue attachment points and general fit before glueing. Every single part has to be checked to make sure the sprue attachment points have been cleaned up or the fit will be affected. Also, there are no alignment pins on most of the parts and what few there are need to be drilled out before joining. Some of the joints (like the outer wing panels) are in the middle of a panel a la 70's Hasegawa. As assembly progresses each subassembly needs to be checked for fit to the next assembly to avoid any unpleasant surprizes
The UGLY...The fuse is molded in 6 pieces, 2 for the nose glazing, 2 main fuselage parts to just past the wing trailing edge and the entire after section including the empenage, and all of this is BUTT-joined! The forward fuse halves are slightly dished at the mating surfaces which will require extensive filling to level things out. Finally...the canopy is molded in 3 parts; the top and each side, and simply cannot be assembled together before putting in place...
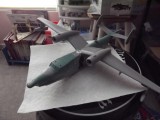
Soooooo...first things first. I laid out the fuse parts on a flat surface and carefully cemented the 3 pieces together being very carefull to keep the alignment as true as possible. I then reinforced the joints with with strip styrene. I found the the front and rear sections of the fuselage were not quite the same size, so, Oh YeS, there Will Be some serious sanding/blending cursing and knashing of teeth in the future...
Wings: I checked the fit of the floats to the wing before anything else, and had to carefully enlarge the slots and shorten the tabs for the floats so everything would fit right. Got the main wing pieces together and joined to the central gull section, cleaned up the joints then on to the engines... these require extensive trimming to fit properly, especially the engine to wing fairing. The exhaust is a long tubular affair that must be fitted carefully and if not fitted just right will interfere with the engine to wing fit. Like I said...its a limited run kit...but...Its a Chaika! With some patience I got the fit adjusted and was able to get the engine-wing joint smoothed out
Fuselage: After assembling and painting the interior parts, I decided that due to the thickness of the clear plastic I would leave out the radar operators controls and panels simply because test fitting revealed they would make the nose too cluttered and affect fit. The cockpit is reasonably well appointed with bang seats, instrument panel, center console and control yokes. Note that the IP needs to be reduced in height because it will interfere with the canopy fit...you have been warned... The rear compartment for the observer is sparse, with only a seat showing thru the bubble. I did install the pe bulkhead in the nose as it is very prominent thru the glazing. So after painting the interior with some leftover Russian interior blue-green, the halves were jointed and carefully aligned...and Groan...even with the careful alignment the front and rear fuse halves didn't quite align. Here is were I discovered the joy of White Miliput! This stuff is great! After applying and allowing to dry overnight I was able to completely eradicate the front-rear joint in a matter of 20 minutes!
Moving forward, I joined the wing to the fuse and found another very poor fit, so out came some more Miliput to fair the wing shoulder to the fuse top, as well as fill the top forward fuse gap and get everything blended nicely. The beauty of Miliput White is that it can be sanded to a feather edge and polished. I cut and used a variety of different grits of wet or dry sandpaper, sometimes cut to fit the tips of my fingers to get to the hard-to-reach places throughout the build. Adding the cockpit canopy was a lesson in patience, as I had to carefully sand the front and back of the center piece to fit in place. I then fit the side pieces and adjusted the fit until it all looked somewhat right then cemented it all in place with Tamiya extra thin cement. Then it was sand sand sand to get the canopy to look reasonably accurate.
I should note that before proceeding with all the work on the clear parts I went ahead and applied the vinyl masks to all the clear parts and the maskes performed Extremely well...they stick well, stay in place thru all the sanding and handling and don't leave a residue...Well Done Modelsvit!
Ok, getting closer now...I then proceded to the main landing gear and this is where Modelsvit excelled with this kit. Each gear comprises 11 separate parts, some of them quite small and all requiring careful cleanup but once assembled the gear really looks the part and is actually quite strong. The wheels are molded in a hard rubber or vinyl and at first I didn't think I was going to be able to insert the hubs into the tires without splitting something but one strong push with the thumb and Presto! one very accurate looking mainwheel! The mainwheel shafts on the gear is tapered however, and some carefull scraping with a scalpel is needed to fit the wheels on properly, but the main gear is a highlight of this plane and Modelsvit did a great job with this feature. I really looks the part! For the tailwheel I used so Albion tubing to articulate the tail yoke. make a strong axle for the wheel and pin the trunnion to the fuse for a very strong joint.
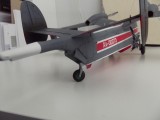
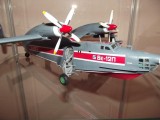
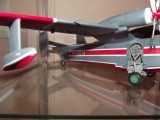
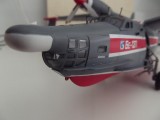
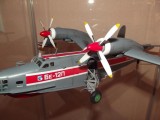
By now I have the plane assembled, sanded and smoothed out and ready for paint. I was set on doing the UkN scheme when I discovered that Caracal Models had just released a decal set (CD72038) covering six different markings for the Chaika, and I couldn't resist doing the very attractive Be-12P Firebomber demonstrator scheme in Gray, Red and White. These decals are amazing, great color density and they perform outstandingly well. I chose the scheme for RA00073 as I had already added the mad boom , although the kit does include the boom cap that would allow the builder to build the RA00046 version with the even more attractive Red, White Blue and gray scheme. Caracal even directs you to there reference section with lovely photos of the real birds, nicely done Caracals!
I used Tamiya paints throughout. First I painted all the areas that would be red with flat white both as an undercoat and for the pinstripes, then masked all the white pinstripes and used Tamiya Gloss red for the uppersurface and the hull, After all that was masked off, I chose Tamiya Ocean Gray for the dark gray areas. After all was dry, I gave the Gull a coat of Pledge floor wax and applied the decals and all the remaining parts. I used AK Blue/Gray panel line wash, gave me the effect i wanted, hilighting the panel lines subtly without overpowering the lines. Next was a semi matt clearcoat. Pictures of the Chaika in operation show that the turboprop exhaust is sooty and the lower portions of the vertical fins would be almost black from the exhaust. I used a very thin mix of Tamiya flat black and red brown to simulate this weathering. Finally i fashioned 2 HF antennas from some Aeroclub airfoil stock per the photos, attached the gear and I was done!
I have to say that even though this was not the easiest kit to build, I had a ton of fun building it! Hats off to Modelsvit for a well thought out kit, well detailed and well worth the money spent for the sheer enjoyment factor. I'd happily build another one...but I got a bunch of other kits calling my name right now...
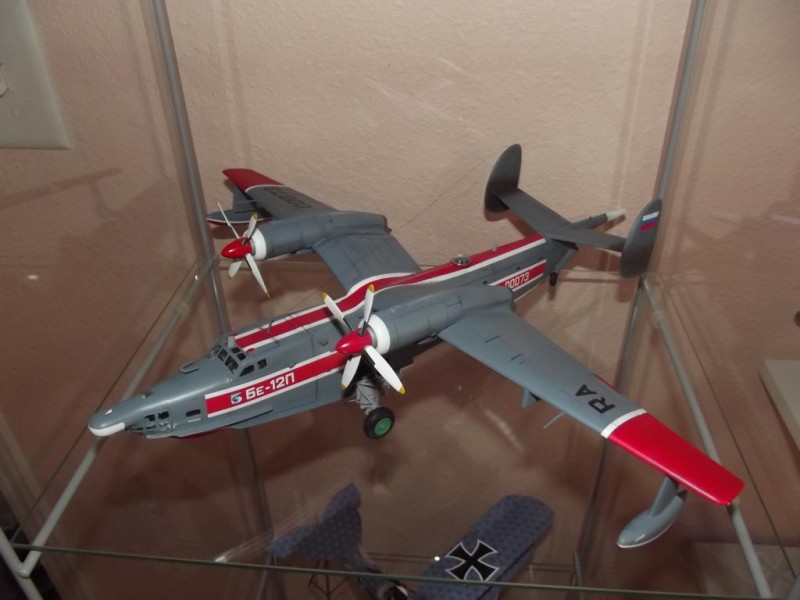
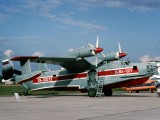
A triumph of stubbornness over material.
Great "build review" of a pretty one-of-a-kind kit, I would think. It turned out spectacularly, given the 'bad' & 'ugly' description(s) given. I'd venture to say there probably isn't another one to be found on anyone's shelf any time soon. Quite a modeling feat, sir...I commend your "stubbornness".
Thank you for the comments! I don't know about the "stubbornness " part but I Really Really wanted a Be-12! I find that a break from the Tamigawarfix kits is good mental floss, helps keep my skills up!
A true love story, and it has a happy ending!
Another outstanding product from the Benitez art works, but so small (for you that is).
Juan, never thought I'd see one, period, let alone seeing one built. You did a wonderful job on it, given your description of the multiple parts and butt joints involved. I admire your patience and perseverance.
A unique aircraft, I remember seeing one in a magazine back in the 60s and being taken by it.
Thank you for showing it to us.
Well done Juan, great article, great photography and an outstanding model ?
Nice result Juan, of a very interesting subject. I have been tempted to get the 1/72 Be-6 from Trumpeter after seeing Drews Manton's build, then reality of realizing that it would be a lot of money for something I "might" build.
Very nicely done! I built an old Revell Be-6 Madge that took some imagination (see my blog if you want a peek), but it was nothing compared to what you had to do to assemble this beast! My first though on seeing the pic (and scale) was that I had to get one, but after reading your post, I'm not sure I'm up for that challenge - at least not yet! Congratulations on a great-looking build!
I don't want to leave everybody with the impression that this is a dog of a kit...on the contrary, overall this kit is very well done overall, It just requires a good dose of basic modelling skills. The review is a case of "the devil you know", to help get over some of the more difficult aspects of this kit. Thanks all for comments!
So ugly it's beautiful. A really good job on this unusual subject, Juan.
Like
Good work! Fascinating aircraft.
Russian. in the dictionary says see Benitez.
Unruly build that turned out a rare plane nice job
Not bad for being my very first foray into Russian aviation...thanx for the comment and yes I will I will be rebranding myself...:-)
Make a nice company name, Unruly Models. Nice turn of phrase, that.
Actually, seems to me I've had some that were just that.
We all need an Unruly Model from time to time...keeps us honest! And...oh yes...I will rebrand myself! 🙂
In the "I beat it into submission" category, as opposed to "It's still on the shelf of doom", or "I threw it across the room, whilst using those words I learned in the Army, and on the loading dock".
One of the guys in my IPMS chapter calls his the "Closet of shame". I told him I'm using that one.
Outstanding effort and result! A very cool looking aircraft to my eyes.