148 Trumpeter Hawker Sea Hawk FGA 6
A review from 2007:
The Hawker Sea Hawk was the first completely successful British jet-powered carrier fighter. It was roughly equivalent to the U.S. Grumman F9F Panther, with which it shared a powerplant - the very successful Nene centrifugal turbojet - and of similar performance to the U.S. Navy's jet mainstay of the Korean War. While the Sea Hawk began its development process two years prior to the Panther, it first flew in the same year as the XF9F-2, and yet it entered service with the Fleet Air Arm in 1951, three years after the Panther had reached the same milestone. Even so, it was the most successful British jet of the to be developed in the immediate postwar period, a time marked by a strange technological lethargy in the British aviation industry.
The P.1040, as the Sea Hawk was initially know at Hawkers, began as a proposal for a single-engine jet fighter in the fall of 1944, which was not acted on until nearly a year later when it was rejected by the Air Ministry in favor of maximizing production of Meteors and Vampires. In January 1946, the design was proposed to the Admiralty as a carrier-based fighter; this resulted in an order in May 1946 for three prototypes, the first of which flew September 2, 1947 - within a few months of the XF9F-2 in the U.S.
The most original feature was the bifurcated engine exhaust, which neatly solved the problem of excessive loss of thrust associated with early turbojets when a longer exhaust pipe was used. While the casual observer might think the Sea Hawk was a twin-engine design like the McDonnell F2H Banshee, it had a single Nene at the center of gravity, which greatly aided its handling in flight. Pilots enjoyed the outstanding handling characteristics of the Sea Hawk, which were in direct opposition to the Supermarine Attacker, the other naval jet fighter under development at the time. Pilots particularly liked the fact the cockpit was as far forward as it was, giving good visibility for both combat and carrier landings.
The Sea Hawk F.Mk.1 was ordered into production in 1949. The outbreak of the Korean War gave added impetus to the need for the airplane, but Hawker was now deeply involved in the problems associated with creation of the Hunter. Production was shifted to Sir W. G. Armstrong Whitworth Aircraft, which had responsibility for further development and all production past the first 35 F.Mk.1s, the first of which flew November 14, 1951.
Service trials with the Hawker-built aircraft occupied most of 1952 while production hit its stride at Armstrong-Whitworth. 806 became the first operational Sea Hawk squadron in March 1953.
Following production of 60 Mk.1s, 40 F. Mk.2s appeared with powered controls. The demand for increased operational versatility was met with 116 F.B.Mk.3s which could carry bombs in place of the underwing drop tanks. The 97 FGA Mk.4s appeared with a "4 store" wing and the ability to carry rockets outboard of the pylons, but performance suffered. The Admiralty decided to upgrade the FB Mk.3s and FGA Mk.4s with the Nene 103, offering an increase in power from 5,000 to 5,200 lbs of thrust, to be known as the FGA Mk. 5 and Mk.6 respectively. Few were re-engined, but 87 new-build FGA Mk.6s were taken into service. When the last of these were delivered in January 1956, production of the Sea Hawk for the FAA came to an end. The FGA.6 was the first variant of the Sea Hawk to see combat action, providing close air support for the Anglo-Israeli-French Suez operation, Operation Musketeer, in November 1956.
Previously, the Hawker Sea Hawk has been available in 1/48 scale in a vacuform from Falcon first released in 1986, and a limited-run injection kit from Classic Airframes released in 2004. This new kit from Trumpeter effectively makes these other kits obsolete. The kit comprises 89 parts on four sprues of light grey plastic and one of clear plastic, with decals for three aircraft, two flown during Operation Musketeer and one flown from HMS Centaur in 1960 at the end of the Sea Hawk's career with the Royal Navy. The decals are sharp and printed in register and look to be opaque enough to look good when applied. The black and yellow “Suez stripes” are supplied as decals, which should please those who are “stripe-o-phobic” when it comes to painting and masking these.
Where both the Falcon vacuform and the Classic Airframes limited-run kit had major fit issues, test fitting of the parts in this kit shows no difficulty whatsoever with fit. The surface detail is petite engraved panel lines, with no frickin' rivets! Interior detail is good. The cockpit is not highly detailed, but then it's going to be painted black so there won't be that much to see anyway. The injection-molded multi-part ejection seat looks better than the resin seat provided by Classic Airframes. The internal detail for the wheel wells, intakes and exhausts are very good.
The fuselage breaks down in the same way the other two kits are designed: the fuselage forward of the exhausts is divided horizontally, while the rear fuselage is split vertically. Unlike the other kits, the tail fits well to the forward fuselage along a panel line without difficulty.
The wings have the option of being displayed in the raised position. Additionally, the dive brakes and flaps may be posed deployed. Under wing ordnance includes 8 60-lb RPs and two drop tanks.
Weight will have to be supplied and installed around the cockpit tub and in the area of the forward fuselage forward of the wings.
This is one of those models that wants to get built. Unlike the C-A Sea Hawk, which wants to send you screaming into the darkness. I had the model assembled after only a couple hours' work. One thing: don't assemble it the way the instructions say. If you do it as I describe below, you'll use a lot of filler and such.
Do this:
-
If you are doing the flaps closed, assemble each half to its respective wing half first, and glue from inside - that way you get nice panel lines outside.
-
Attach the upper and lower wing halves to the upper and lower forward fuselage halves. Put some evergreen sheet inside to strengthen the joint.
-
Assemble the rear fuselage.
-
Assemble the wheel wells, intakes, exhausts, to the lower fuselage half.
-
Then attach the rear fuselage to the lower forward fuselage, getting the joints nice and tight.
-
After painting the cockpit, glue it in the upper half of the fuselage. Then add weights behind the cockpit as necessary. You can test fit the upper fuselage to the rest of the assembly to confirm you have the necessary weight, and then remove it to add more if you need to.
-
Glue the upper fuselage to the lower fuselage, and the wings to each other.
Voila: everything fits and the only place you will be using any seam filler is long the forward fuselage horizontal centerline and the rear fuselage vertical centerline. I found after I had applied the pre-shading that there was a need for more Mr. Surface along the forward fuselage seams than I had expected. I think if you take your time in fitting the upper and lower fuselage halves together, you may not have this problem.
I decided that since there was not a lot to be seen in the black cockpit, I would assemble the canopy closed, since it improves the overall lines of the model.
Also, I was able to use small fish weights that I clamped flat, and get them all into the nose and the area just below the cockpit tub, so I was able to use less weight and still get the model to nose-sit.
Someone posted at another forum that the vanes in the intake should be curved. However, when you have the intake area painted Extra Dark Sea Grey as it should be, you can't see any detail in there and it is not apparent the vanes are straight. This is one of those over-detailing bits not to overthink.
I glued the main gear legs before painting, so that the model would sit clear of the bench when painted. Since the nose gear leg is there when you assemble the rear bulkhead of the nose wheel well, this also allows you to sit the model in a way that won't lead to breaking that off.
Painting:
I masked the canopy with Tamiya tape, and then “preshaded” the model by airbrushing flat black over all the panel lines. I then painted the upper surfaces with Xtracrylix “Extra Dark Sea Grey.” When that had dried overnight, I painted the lower surfaces with Xtracrylix “Sky.”
When I went on to apply decals, I discovered to my horror that the Suez stripe decals don't fit right, at least not on the fuselage. This required me to mask off the area of the stripes, paint that with Tamiya Flat White, then paint the stripes. I used Xtracrylix British Trainer Yellow for the yellow stripes and Tamiya Semi-gloss Black for the black stripes. This is much easier to do if you apply the stripes before painting the rest of the model, since you can mask them off without worrying about overspray. Sorry, but those who are “stripe-o-phobic” can either have incorrect decal stripes, or paint them on correctly.
One thing to note when painting: all the restored Sea Hawks I have seen photographs of have the gear wells, interior of the gear doors and the landing gear in the same color as the lower surfaces, not aluminum. This is standard FAA practice. Photographs of Sea Hawks confirm that the color is Sky, since even in black and white the gear is not a different shade than the surrounding lower areas of the fuselage.
I gave the model a coat of Xtracrylix Gloss Varnish before applying the decals.
Decals:
Since I had already done a Sea Hawk from 894 Squadron on HMS Bulwark during Operation Musketeer with my Classic Airframes Sea Hawk, I decided to do this one as a Sea Hawk from 810 Squadron aboard HMS Albion. Be very careful: these decals are very thin and if you don't apply them right you will wreck them easily. Let them loosen off the paper to the point they are just about to float. Move them around on the paper so the glue comes off a bit. Then put water on the area where the decal is going, and slide it off very carefully. Blot it with tissue paper, and then apply setting solution. These decals do not need a lot of setting solution. The national insignia are not completely opaque, but they are opaque enough for the white area to go over the yellow stripe on the fuselage without it being real apparent. If I was doing this again, however, I would apply a white circle decal to that area first, then apply the national insignia.
I attached the wheels and gear doors, then attached the drop tanks. These fit very tight against the main gear doors, so do not attach them first. I decided not to use the antenna parts provided, since they are too thick, and replaced them with stretched sprue. The rockets are not that good, and are the least-good British RPs I have found in any kit in a long while. If I'd had others, I would have cut these off their rails and replaced them. These are really my only complaint about the kit.
I unmasked the canopy and attached the wingtip navigation lights, and the model was finished. Fleet Air Arm aircraft of this period were very well-maintained, so I did not do any weathering past the pre-shading in the painting.
This is the best 1/48 kit yet released by Trumpeter. The mad riveter has been sent to some Chinese gulag to repent of his crimes, and the panel lines and overall crispness of molding establish this kit as being in the same class with any release from Tamiya or Hasegawa. The production design is excellent and allows easy assembly. The canopy is a little thick, but can be posed open, and it has the right shape (which the Classic Airframes kit missed). Overall this is the best kit yet of this interesting and important Fleet Air Arm airplane, and fans of British naval aircraft will probably want more than one. Highly recommended.
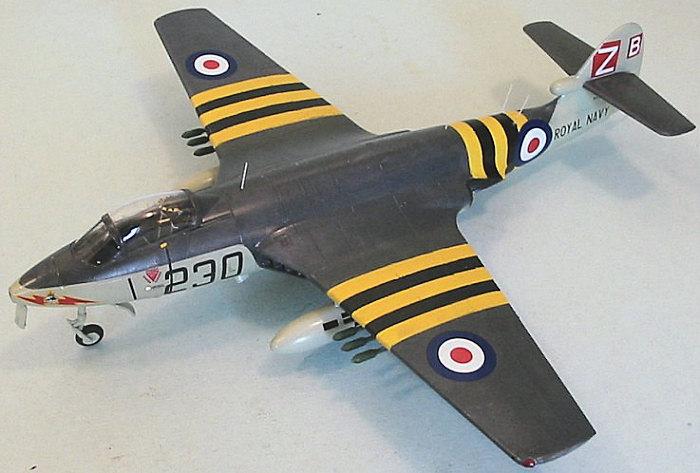
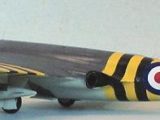
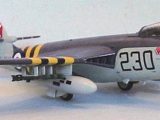
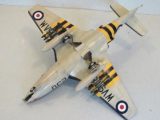
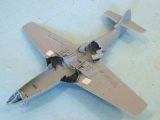
Nicely done...I like it.
Another seldom seen build. Assembly tips included. Looks great !
Tom, good looking model of a good looking jet. Thanks for the tutorial, I hope I can remember it when I start hacking on mine. Run into the darkness, huh? I've had a couple of those! Great turn of phrase! Descriptive of the anguish of bad kits.
Ah but you know, I'm a joy-killing something-or-other, since "modelers just want to build models" (as the hack from Dragon's website described people when I said their P-51D didn't qualify as a doorstop).
A great build review. I especially like the history you add before the build instructions.
Great looking a/c, Tom.
I remember this review! Another one I read before tackling the same kit. I'll post mine as soon as I get some decent sunshine to take some photos. Another great job Tom.
Another nice one Tom! I also put the stripes on my Sea Hawk - just adds some great color. I do like the decal details included in this kit - my 1/72 build was lacking that variety!
Like !
Always love the history included Tom and thanks for the heads up on the stripes. I didn't even attempt the decal stripes on the Wyvern
Hello Tom,
Thanks for the full report on history and build. Looks great.
In those days aircraft had a short life cycle. Between 7 to 8 years. And up popped another model.
Regards, Dirk / The Netherlands.