Starting to paint figures.
I have been adding figures to my models to crease the look and feel. I have practiced and now I am satisfied with my style and way of painting figures. I do not do it the most artistic way. At first I sat with a book and webpages open to figure painting tutorials, painting with a base color and two or three shades lighter, and darker to try to create depth and detail. It was an excercise in frustration, especially the figure faces. I painted over and over the same figure until the paint built up and destroyed the detail, and I was left with what looked like a manaquin. They were flat and lifeless. So I searched out videos on YouTube. Surely my brethren model builders had some shortcuts and tips. Everyone has their own style. I took what I liked from one person and disregarded what I thought was a waste. Finally it came together in a simple way to give me a look that I like. Finally I was able to paint the dreaded iris of the eye, first with a toothpick, and eventually with a 0000 brush.
Here is what I have learned about figure painting. I was using Model Master Enamel Paints, and that was a mistake because they are too thick and get gummy. I changed over to Vallejo Acrylic paints and you can get them much thinner and blend them easier than enamels. I also love the fact that Vallejo Acrylics do not have any offensive odor. I also spent a bit more on brushes to get Windsor Newton Cotman line 0000, 1, 2, and 4 size brushes. What a difference!
More about the face. I have learned a simple way to get a decent result on the faces. I use a primer coat, then base coat of Vallejo Dark Flesh mixed with either Brown Rose, or Red Leather depending on what type of flesh I want. I use darker shades for the rough looking tankers. Then when the base is dry, I Drybrush Vallejo flat flesh on the center of the face, starting on the brow and going in downward strokes to the chin. I paint the eyes with German Grey, and eye brows the same color as the hair. I use a darker version of the base flesh for lips. I use a dark wash to get the shadows, it flows right where you need it to be into the lower surfaces. Using a wash for shadows is much easier than using three shades of dark, especially on a 1/35 scale figure.
I gave up trying to use three shades of highlights on the body of the figure as well, and cut back to using a base color, and highlighting with a lighter shade by Drybrushing. I use the same dark wash method to shade the body as I do the face. I am painting mostly tank crews and infantry assault troops. I want to be somewhat realistic with my effects. That means the figures are dirty, haggard, and weary to the bone. They are in a fight for their lives and look it.
Like I stated above, I do not use these methods for artistic results. I use them because I can get a decent look. There are many ways to paint these figures, and my way is certainly not the best or most artistic, it is what works for me. It makes me happy in the hobby I enjoy and I have none other to please, but myself. I hope this may help those of you who are intimidated by figure painting to try to add another dimension to your models with the addition of figures. It takes practice, but the rewards are worth it.
wishing you all the best,
John.
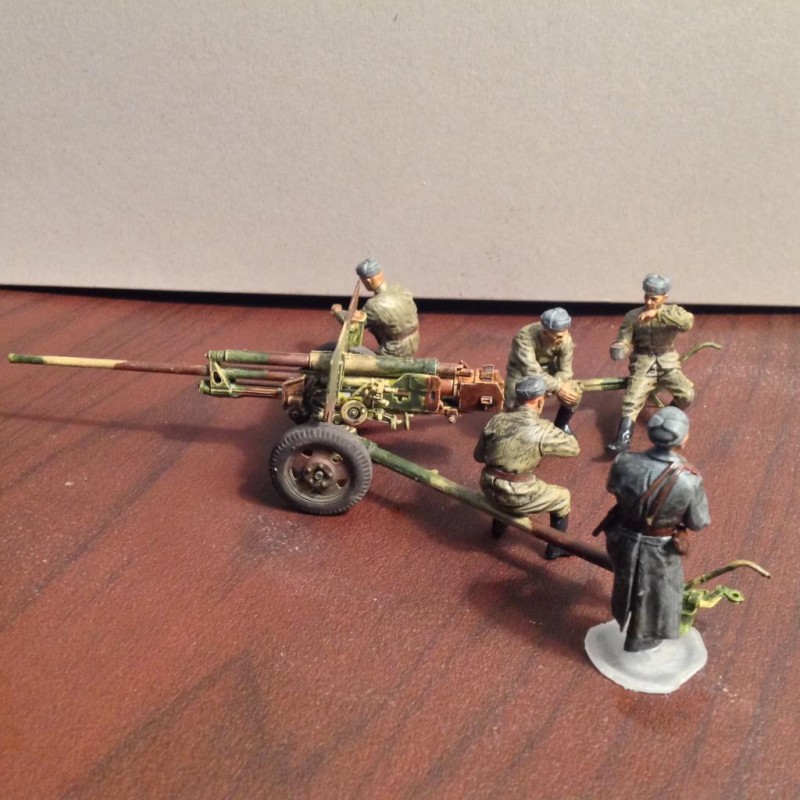
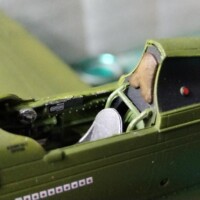

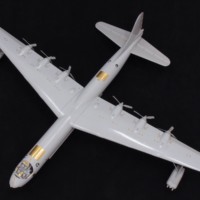
It so seems you are off to a good start. As a modeler, one works in way's and styles that best fit their ways. The important thing here is that YOU enjoy the hobby and your time. Hope to see them ( the figures and model ) in a diorama.
Thank you DE4EVER
If this is an indication of "starting" to paint figures, you're well on your way, sir. I've been trying to paint figures for years, and I'm still not satisfied with the results I achieve. Nice work, John.
Thanks for the kind comments Craig
John, your basic skill set is certainly in place.
A couple of things that may help also:
Use deionised water to mix/thin your Vallejo paints (As used to fill irons for steam ironing.) This because a lot of household mains supplies have a high mineral content.
You might want to try using Vallejo Glaze Medium (matte). It's in the same sized bottles as the paint, and when you mix a little with the paint it gives the paint a creamy consistency. You can of course thin the paint with water as you prefer afterwards.
PS after establishing the acrylic base with highlights/lowlights you can 'fine tune' the process using artists oil paints thinned with white spirit (not distilled turpentine as it's too strong).
Thanks for the tips Rob
Like
I personally, use military enamels and some oils to paint my figures. However, I do not go the whole artistic route either as I use figures to add interest to whatever vehicle or aircraft I am placing them with. While the artistic route is necessary for a "Stand Alone" figure, such a figure would detract interest from a well built vehicle or aircraft. I try to paint my figures to look reasonably realistic. I do not go over the top with highlights, midtones, lowtones, and all that nonsense. To each their own and if acrylics work for you, stick with them. If you are happy with how your figures turn out, splendid! It is only you that you have to impress. Nice work on your figures. One suggestion, try drybrushing a little semi-gloss on the high points of the face (cheek bones, bridge of the nose, point of the chin, etc). Such a little thing really brings the face to life.
Hey Sheamus, thanks for the tip about the semi-gloss, and the kind comments.
I think you make a fair point that many modellers just want something that gives a sense of scale to their aircraft or armour model, and a simple figure will certainly fit the bill. That said, manufacturers take a lot of trouble to produce detailed, accurate figures in a variety of scales, whether plastic, resin, or while metal. I always try to apply the same standard of painting to all, with 'all that nonsense', even though I know the smaller scale items perhaps won't really benefit from the attention to detail. ?
I
I am glad for the detail that has been produced and is getting better with newer kits. It makes it much easier for me to paint the figures with crisp details. I have also just been informed that Tamiys, and Edward, among some other companies make deals and transfers for Rank and other uniform, cap, and helmet insignia for 1/35 scale. That makes me very happy. I would like to be able to paint on the details such as the Collar Litzen, chest and cap eagles and deaths heads on German uniforms. It was challenging to paint the 3rd army patches on some American Tankers I did lately, but the decals would be much better. I only did the three colored triangle without being able to paint the cannon inside the patch.
I think Authentic Decals, Microscale and Tamiya already do decals in 1/35 like these, and I think also a few others I've seen. I think in the UK they're available from Hannants and maybe Historex.
Actually, your best bet is Archer Fine Transfers. They do all kinds of uniform insignias. Check out some of the figures in my dioramas, all the ranks, patches, etc are Archer Fine Transfers.
I really appreciate this conversation (as well as your work). My club (Tulsa Modelers Forum) has been asking for a demo on painting figure faces, especially for 48 and 32/35 scale as most of us are armor or aircraft builders, not larger figure modelers. There are some GREAT tips in this post.
Since I only build 72 scale, I may not be able to attempt all of the tips here, but I think I picked up a few that will even make figures that small pop out a little bit more. I also always build my aircraft in-flight, so it doesn't seem to pay to put too much detail into them, BUT, I figure if I'm going to do the work to create a realistic-looking cockpit for the plane jockey, I may as well treat the jockey as well as I can! As as was stated - it's as much for me as for anyone else, so I know what went into it, even if it's not that visible!
Again - great and useful post by all of those who contributed!
Thanks Greg, I searched out tutorials on Youtube. That is how I began to narrow down my style. I found what works for me. It takes me a lot of practice and experimenting to find out what I liked and how to get it. I hope your club can get someone to demo for you.
A last point from me if I may, even if you don't usually paint or use figures in aircraft, it's worth setting them aside as interim projects, e.g., painting practice. I have a few 1/32 and even 1/24 pilot figures that came with kits but were never used. The detail is really nice and worthy of attention if you want to sharpen your figure painting skills.
What a refreshing and informative post, John, many thanks for your (and everyone elses') tips, keep it simple!
These figures look good John, very interesting post. I also like to add figures such as to indicate size and add some drama!