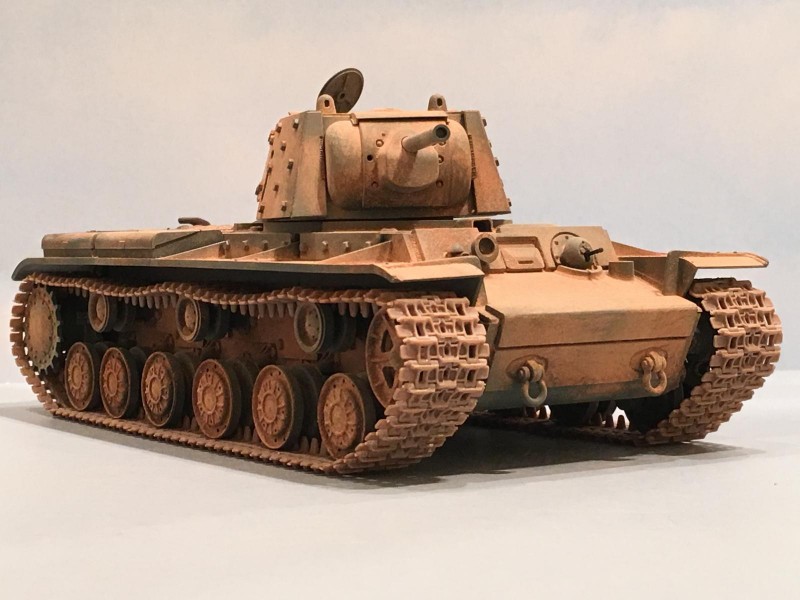
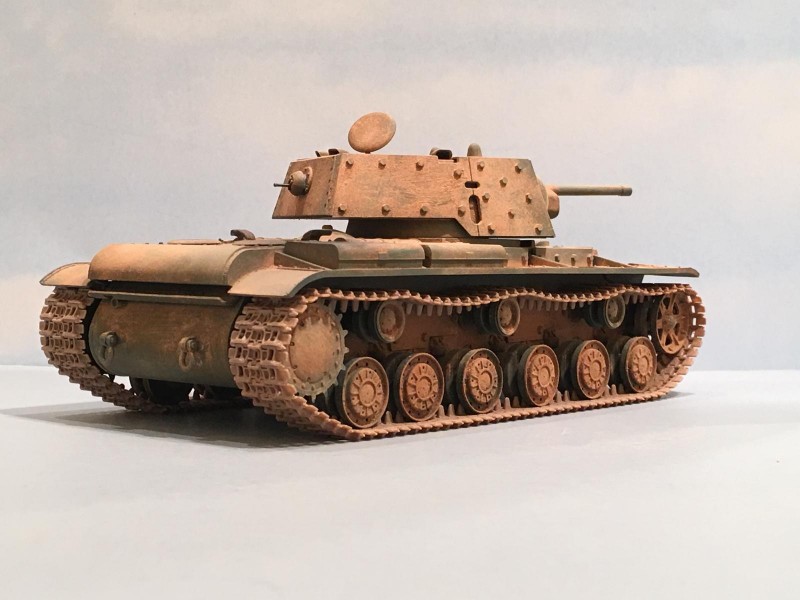
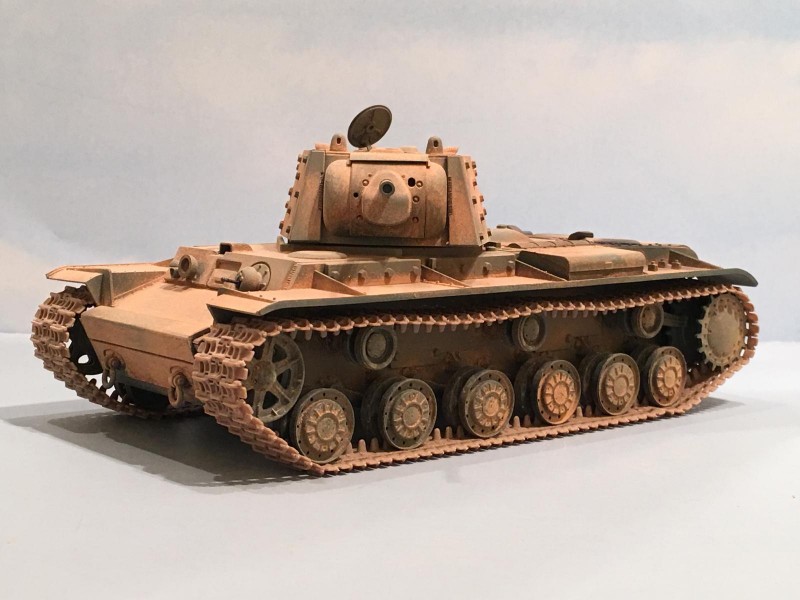
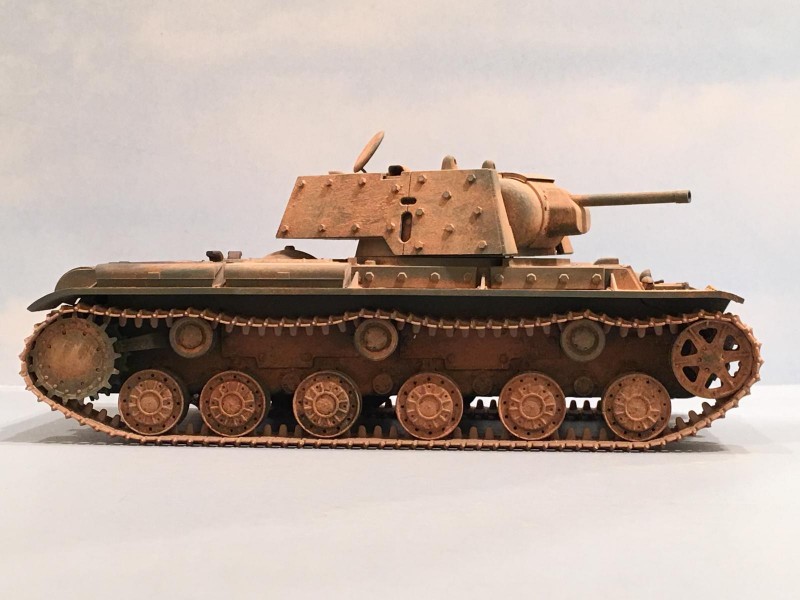
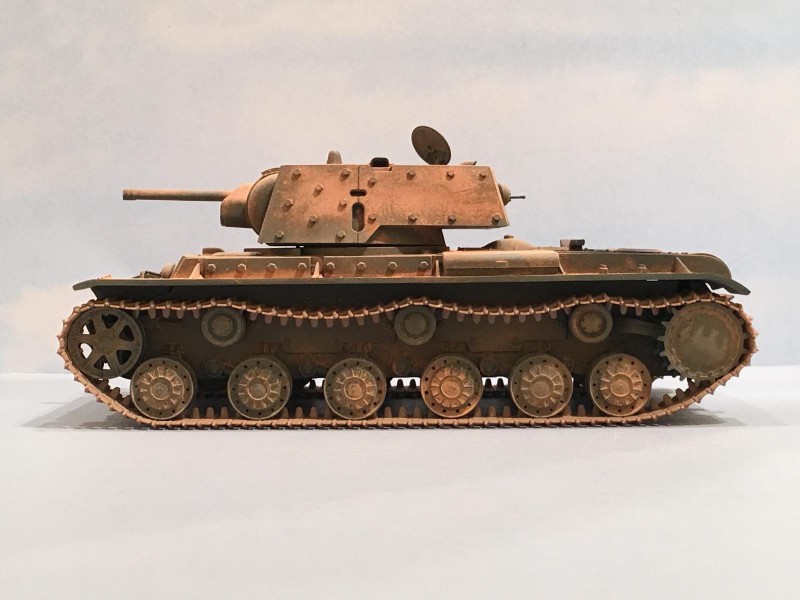
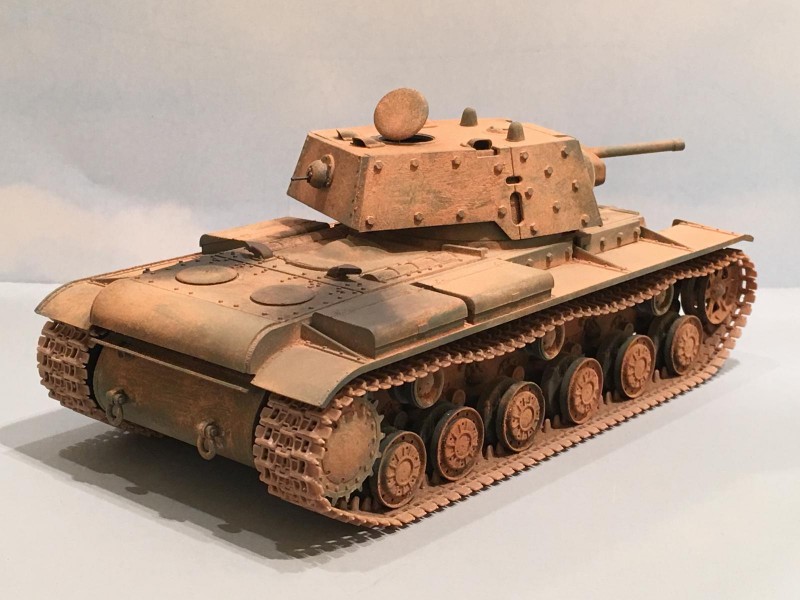
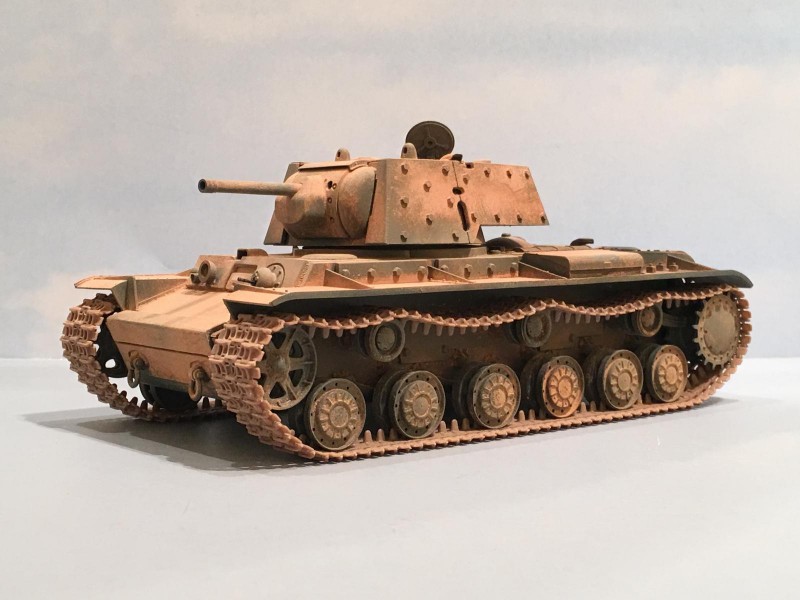
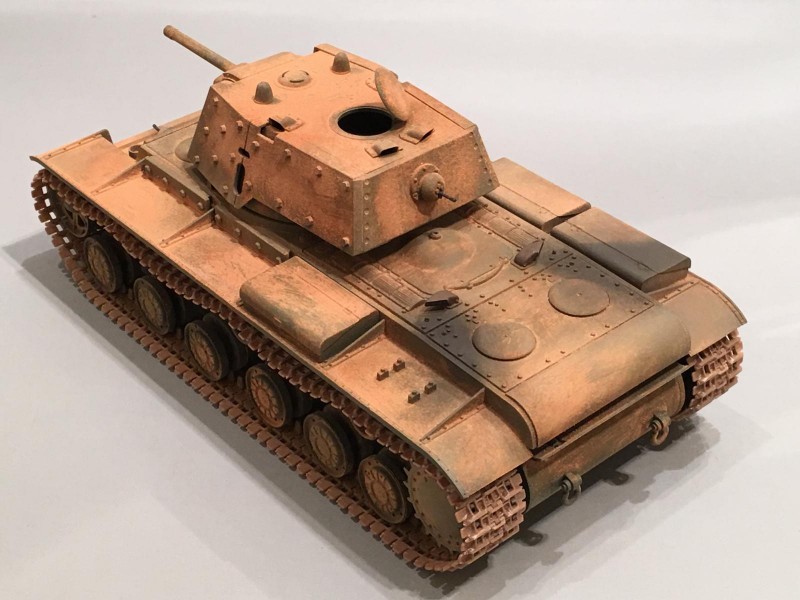
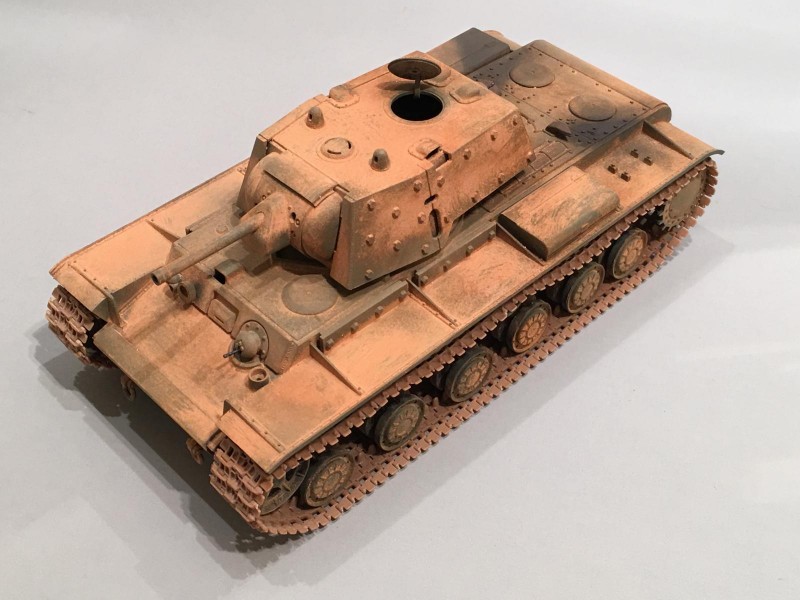
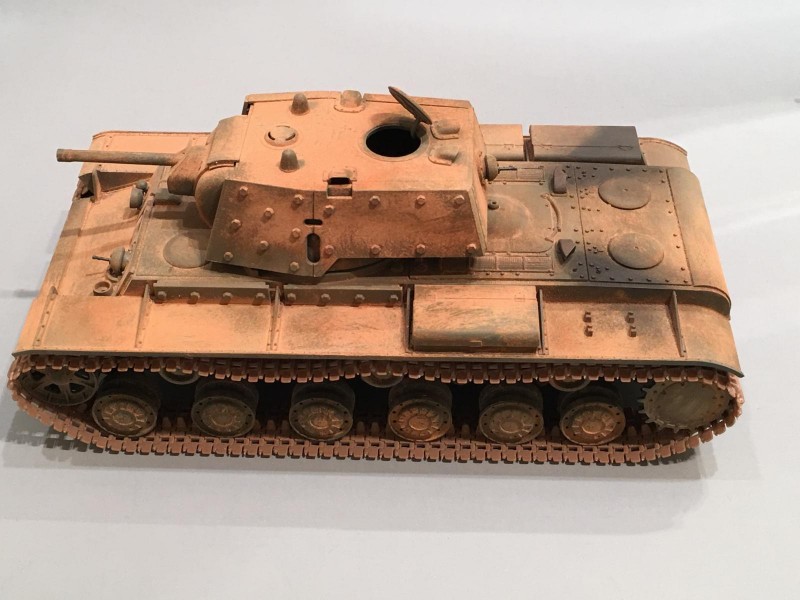
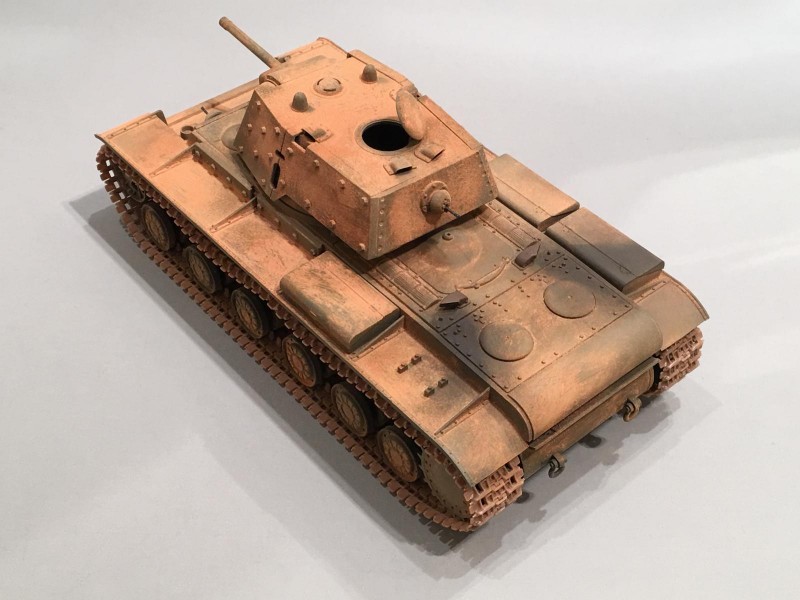
1/35 Tamiya KV-1 Russian tank with Bolt on Armor
This KV-1 was a monster of a tank for it's time... and it caught the Germans by nasty surprise when they first encountered them in combat on the Eastern Front. In fact this tank is probably one of the reasons (along with the smaller / lighter T-34) that the Panther and Tiger tanks came into existence.
The feared German 88 MM Anti Aircraft gun was the only weapon in the German arsenal at the time of these first encounters, that could penetrate the armor on this beast. The largest weapon in use on German tanks at the time was a short barreled "low velocity" 76 MM main gun, which was found on the Panzer Mark IV. The 76 MM armor piercing round simply bounced off the armor of the KV-1, unless you were at a point blank range.
The more numerous (and smaller) German Panzer Mark III had an even smaller 37 MM main gun. As a result, the later Panzer Mark III Ausf. F through the J, were up gunned to a 50 MM long barrel main gun as the main anti tank armament, which still had a very limited effect on the KV tanks, (and might be able to knock off a track on the KV, if they were lucky).
By 1942, the Germans had up gunned their tanks to a longer barrel higher velocity cannons in both the Panzer Mark III (50 MM) and Mark IV (75 MM). These improvements were necessary, but still the KV was a hard one to crack open.
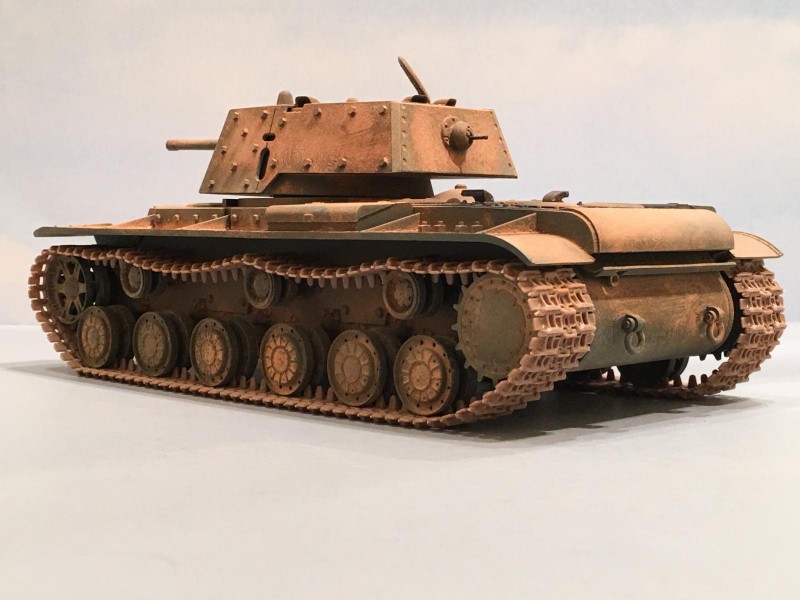
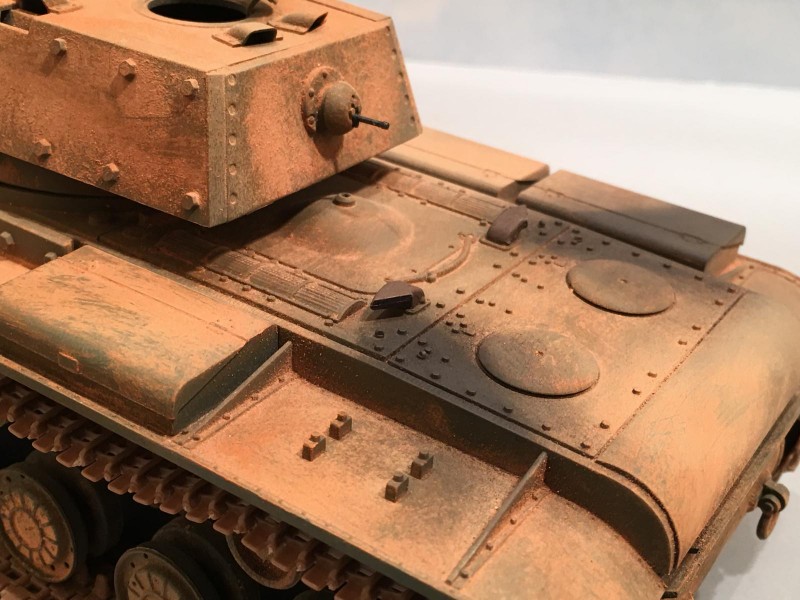
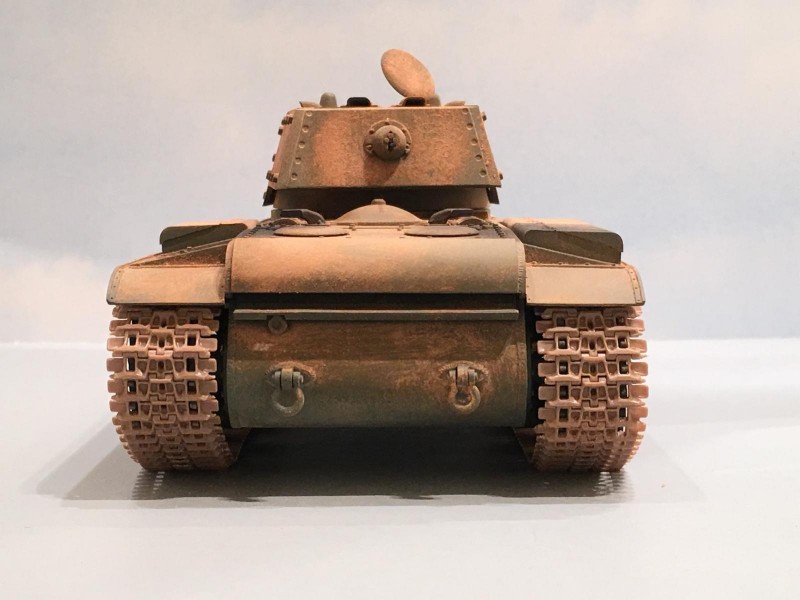
The best way to knock out one of these monsters was from a shot to the rear or sides, as seen in this photo below. Another option (that required a very skilled gunner) was to hit the tank in between the turret and hull, where the two parts joined.
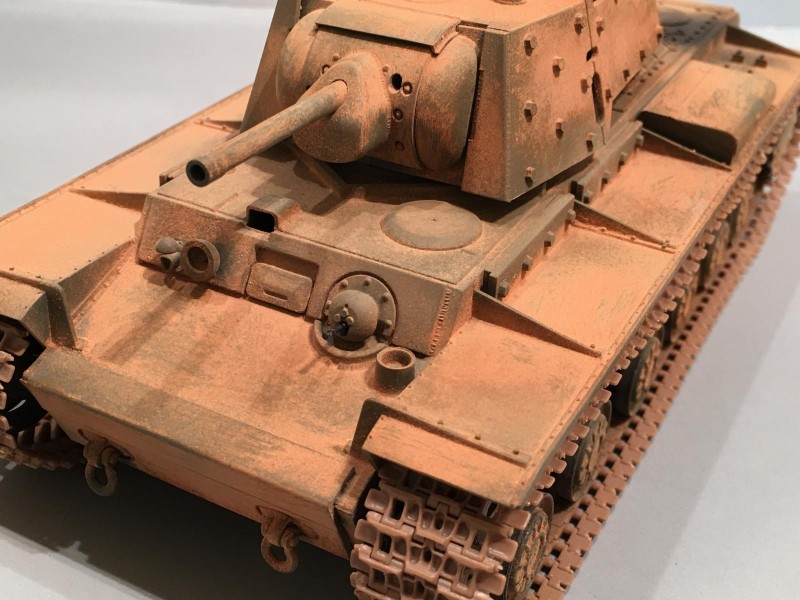
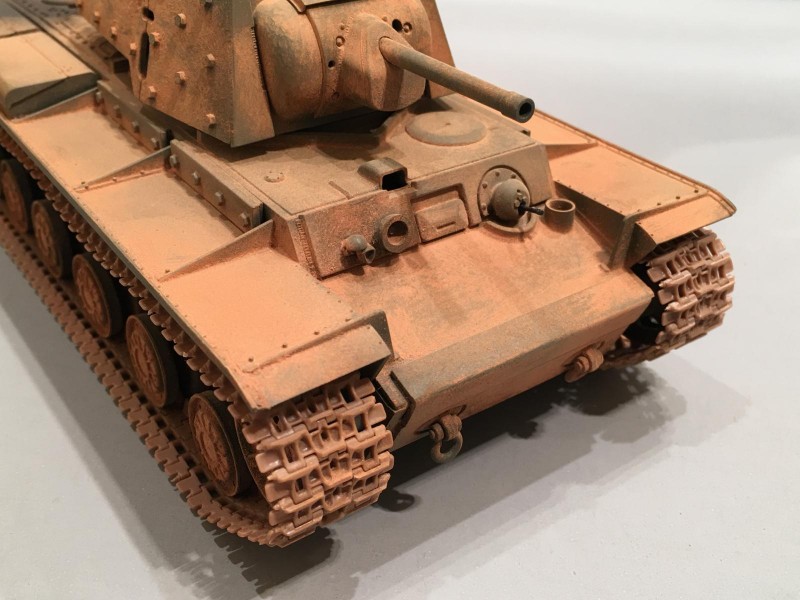
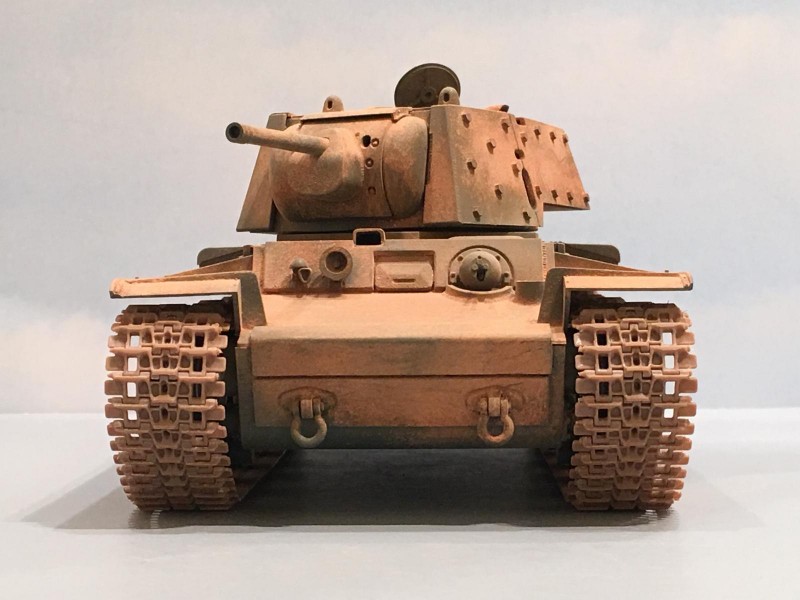
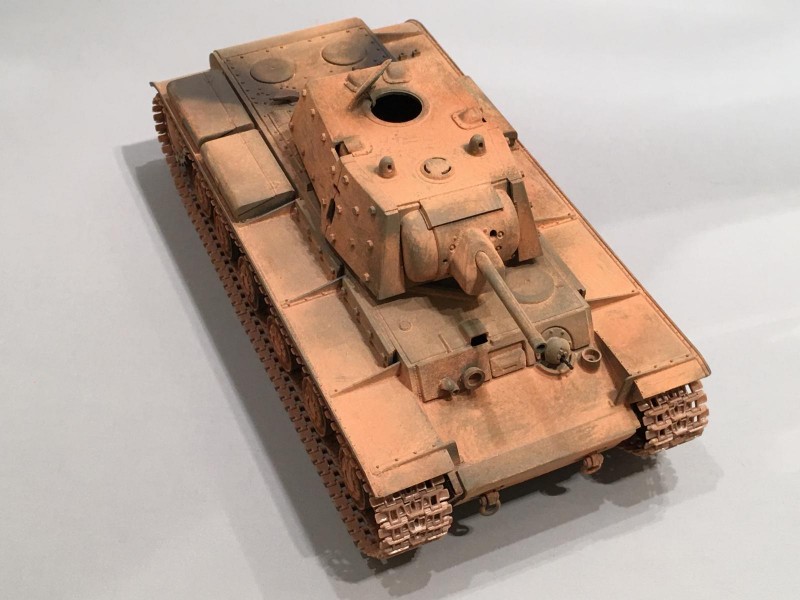
The front armor was practically impenetrable.
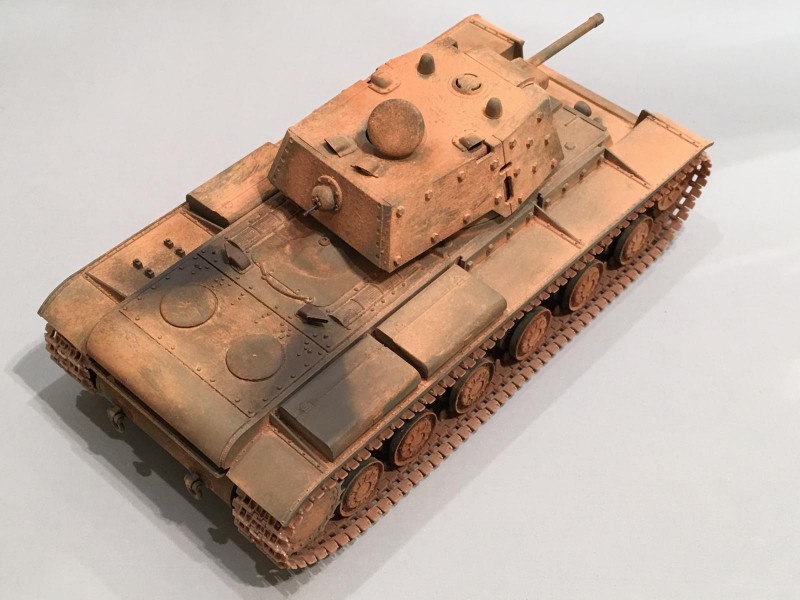
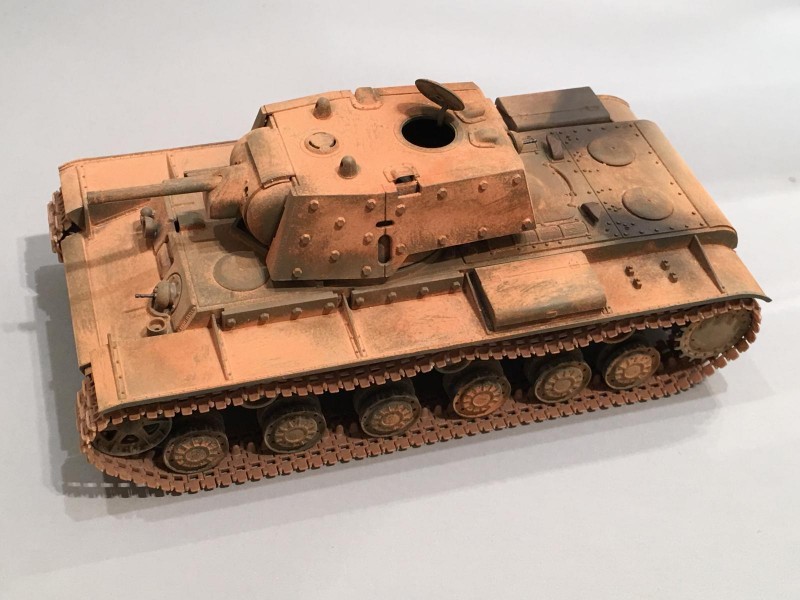
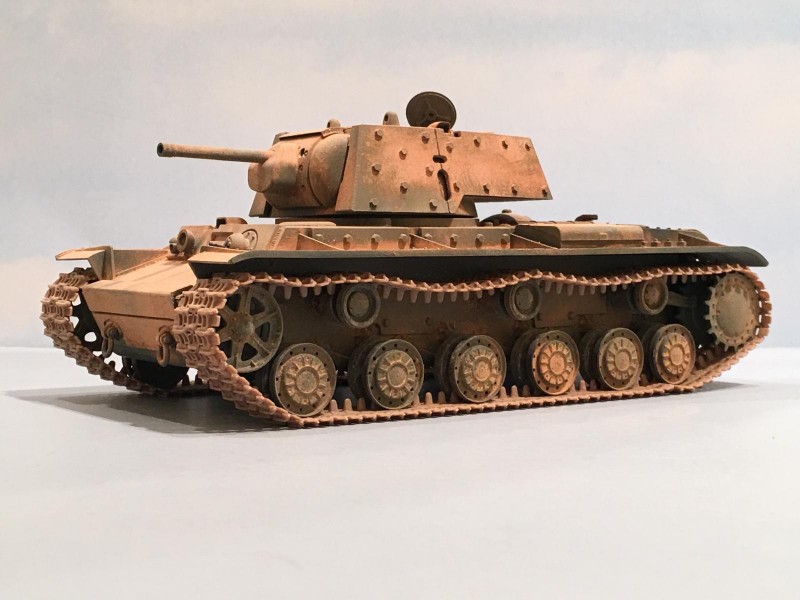
In order to counteract the new up gunned German tanks, the Russians simply bolted on additional "Applique" armor which you see here on my model.
There are various stories from the Eastern Front, where a single well positioned KV tank would halt the advance of a German unit.
The KV, (which stands for Kliment Voroshilov) series of tank was produced from 1939-43. Over 5,200 of them were produced, and they were used in service until the end of the "Great Patriotic War". The type was no longer produced after 1943, so the numbers dwindled through attrition.
This one weighed an astonishing 45 tons which was unheard of at the time. One drawback of the excessive weight became apparent, when it was time to cross a bridge...a lesson the Germans also had to learn later on.
It's main gun armament was a 76.2 MM short barreled weapon, which was also used later in the T-34 tanks before they too were up gunned to an 85 MM main gun.
The KV series of tanks eventually became the JS (or IS series depending on your source) series of tank, named after Joseph Stalin. The chassis was also used in the "SU-152" of which 704 were built in 1943.
The KV-1 tank had it's shortcomings though. It was very heavy, which meant that it was also very slow. It's top speed on level ground was 22 MPH (or 35 km/h). The tanks with the "add on" bolted armor were even slower than this, since no improvements to the engine were made to make more power.
The KV-2 with a 152 MM howitzer mounted in it's "tall turret" was even slower and could only achieve a top speed of 17 MPH (28 km/h) on level ground.
The typical thickness of the armor was 90 MM on the front slope, 75 MM on the sides, and 70 MM on the rear. The transmission was an old "Caterpillar" design and had been in use for 20 years before it was placed in service in the KV type tanks. Because of this, the tank was hard to steer.
However, on the plus side, the tank used a torsion bar suspension, which is what most current tanks today use.
Some stories talk of Soviet drivers having to literally use a hammer to get the transmission into gear by beating on the shifter ! The vision looking out of the periscopes was poor, as were the crew ergonomics.
The T-34 was a far superior design with sloped armor (and had the same caliber weapons as the KV) ... plus the T-34 was cheaper to manufacture and easier to build as well.
The KV tanks could be knocked out easily from the air. The Germans used the Henschel HS-129 (and Junker's Ju-87 Stuka's) to shoot at / bomb the tank from above. The top of the turret did not have the same thickness of armor, and was a weak spot that allowed easy penetration of armor piercing rounds.
In typical fashion using the "field expedient method", many tanks were camouflaged like this one is... The crews simply took some local soil, mixed in some water, and smeared the mud on the outside of the tank using whatever means available.
When the mud dried, it became a very effective method, since it matched the surroundings perfectly.
The KV series of tank used a diesel engine that made 600 horsepower. Diesel's give off a nasty black exhaust, which leave soot on the surrounding areas.
I used an aftermarket set of "Model Kasten" individual track links for this build. They actually match the color of the dried mud fairly well, but I may go back and do something different with the finish on them after looking closely at these pictures.
Other than the individual track links, the kit was built right out of the box. Eventually I may go back and add a figure in the open turret roof hatch.
The model as sprayed in overall "Soviet Armor Green" using Model Master enamels. The dried mud finish was achieved by mixing various shades of ground chalk powders together.
I used Model Master "Dull Coat" from a spray can directly over the "Russian Armor Green". While the Dull Coat was still wet, I literally brushed on the chalk dust mixture.
No decals were used on the build, as they probably wouldn't have been seen under the dried mud finish. Most of the pictures I found online of KV tanks show them to be in what appears to be a solid mono tone finish, devoid of markings.
As the tanks would have seen service in the field, it would have became even more dusty / dirty or even muddy, depending on the terrain it travelled through. These natural elements would have even further obliterated any markings if they were present.
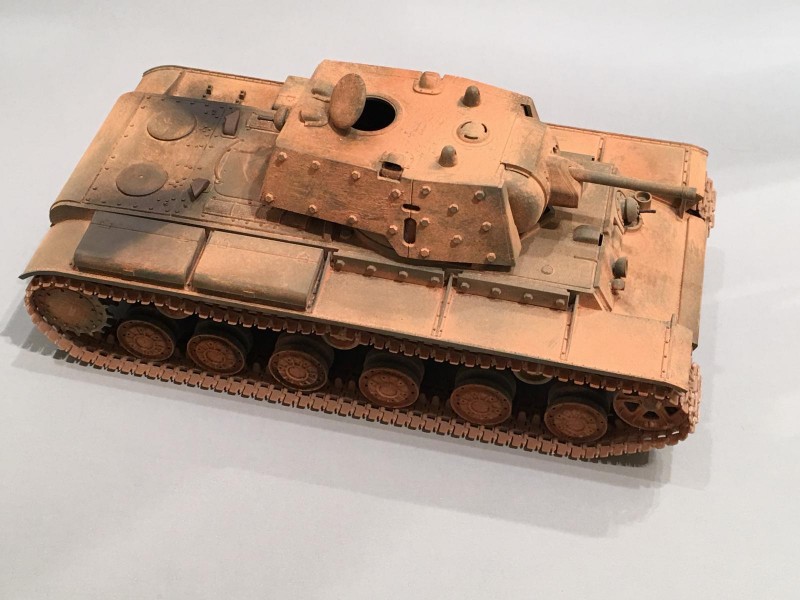
The sagging appearance of the tracks is something that was regularly seen on both Russian and German tanks in WW2. As shown in this photo below, the tracks would have a fairly large amount of sag to them, which was caused by the sheer weight of the steel track blocks, and by having the track tension set loose.
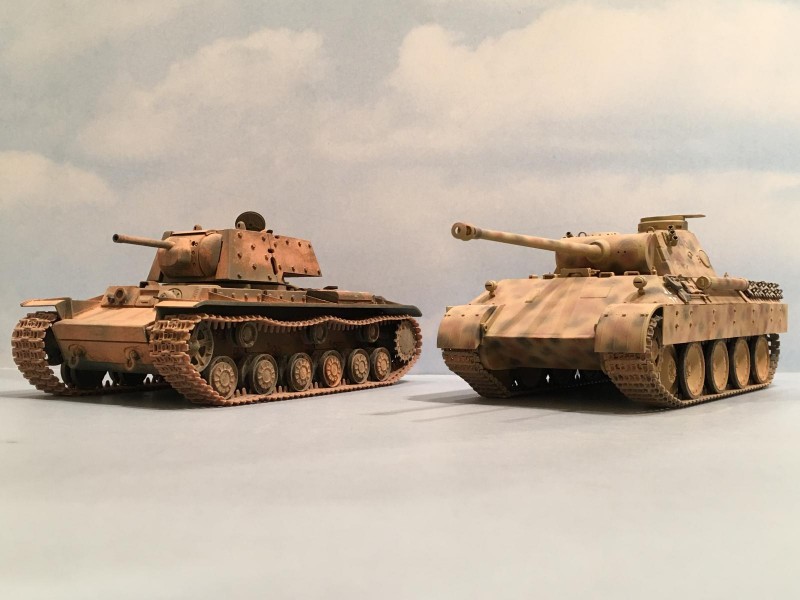
As a comparison for size, I have placed the KV tank model next to my German Panther D model tank. You can see just how close these two are in overall dimensions... The Panther is on the right side of the photo, while the KV is on the left in this picture shown below.
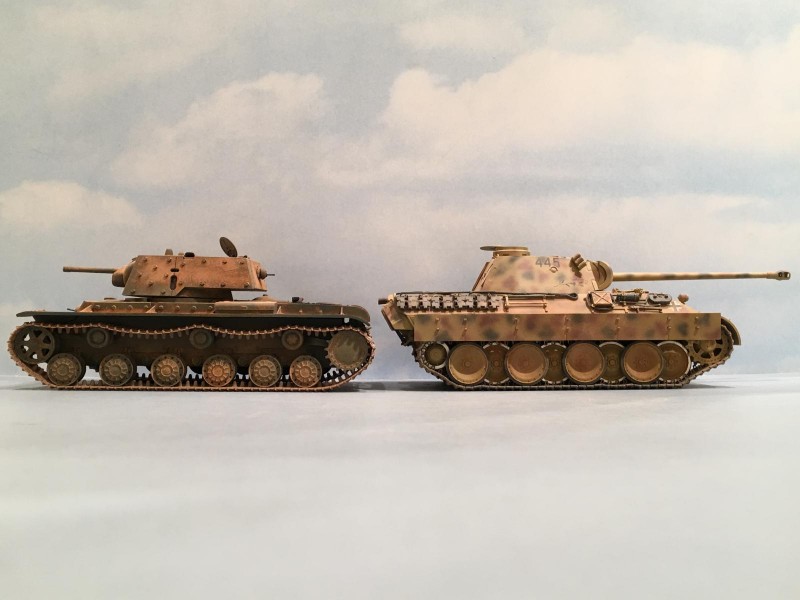
Here in this last picture, it shows a side view of the Panther (on the right), and the (KV-1 on the left). They were almost the same in weight, but the Panther had a much more powerful main gun, even though they were almost the same caliber weapon. This was due to the fact that the Panther had a much longer main gun barrel, and the main gun shell casing held a lot more gun powder, since it was a longer round overall. These two things caused the Panther tank to have a very high velocity main gun which was capable of penetrating much thicker armor. The days of the KV ruling the battlefield were over.
I just finished both of the monsters last night. The Panther will be the subject of another future article... so please stay tuned.
Thanks for reading all of this, and as usual, comments are encouraged.
Very comprehensive history, Louis - and quite interesting as well. Your build description was quite helpful to those who are unfamiliar with the KV series (such as myself, for instance). A most excellent series of photos accompanying the informative narrative. Thanks for taking the time to present a nice looking kit.
Thanks Craig. I'm very pleased to see that you "liked" the article as well. I'm glad that you enjoyed this one my friend...
Awesome report, Louis mi amigo! As Craig mentioned, the write up with the history is outstanding and the accompanying photos are great, as well!
You said: "There are various stories from the Eastern Front, where a single well positioned KV tank would halt the advance of a German unit." Sounds like what sometimes happened to US troops (and others) when they encountered a lone Tiger I (or II) placed right in the line of advance.
Like most modern tanks, the rear & top were the weakest points and aircraft (rotary wing & fixed) were & continue to be a tank crewman's worst nightmare. As you pointed out, the junction of the turret to the hull is a gunner's best target, but like you said, that took an outstanding gunner & crew.
Again - great job, Lou! Thanks for sharing!
Thanks buddy ! (and thanks for "liking" the article too).
You're absolutely correct about a single well placed Tiger... Michael Whitman was a good example of this just before Villers Bocage in Normandy.
Your statements about the thickness of the armor, and aircraft are spot on too... I can remember watching A-10's do their thing and being thankful that they were on our side...
Our crew were trained to hit the spot where the turret and hull meet, just like I'm sure that yours were too. Some could do it, some couldn't. I'm not bragging, but my time in the gunners seat brought home "Top Tank" bragging rights twice. Once at Troop level and another time I shot the highest score in our Regiment during tank gunnery exercises. I was pretty darn good at hitting the "spot"...with a stationary target while we were on the move, and even when both the target and our tank was moving. Once we fired 6 rounds in 18 seconds... all with first round hits. But we trained hard, knew our tank inside and out. I firmly believe that we had the best crew, (not that I'm biased or anything). Plus we had excellent NCO's (which I think was the ticket).
Now that's what I call a real tank, what a monster. The finish you've achieved is very convincing, although I'd agree that the tracks could possible do with some extra work, they look a bit clean. Another nice posting from you, Louis, keep up the good work.
Why thank you George, it is a beast for sure ! Yes the tracks definitely need some attention. I wasn't aware of just how clean they looked until I saw the photos of it posted on line. So I picked up a container of Vallejo Environment "Crushed Grass" and will be adding this to the tracks. Hopefully it will help.
Thanks again for the compliments, and I'm pleased to see that you have "liked" the article too !
Excellent job! love the finish technique.
Thanks Bob for the kind words.
Very nice build, and detailed article as well. An interesting technique to consider for the mud overcoat process - I've been wondering what I'll do to get the German and Russian aircraft whitewash effect done, and might do something similar. Some of the armor builders in our club have been singing the praises of using Humbrol DecalFix for this same purpose - brushing on some DecalFix and then applying pigments. What they like most about this is that if they want to make changes or corrections, all they have to do is add some more DecalFix and it all loosens up again to be reworked.
Thanks Greg.
Now I wish that I had the tracks in order. Like George mentioned, they are too clean, even if the color is very close.
I'll have to try some of the DecalFix if I can locate it. That sounds pretty cool being able to change it up by adding some more. I have a Stug III with some Ostketten that I want to try a white wash on. This stuff you mentioned may just be the ticket...
I have simply used some thinned down flat white paint and a wide flat brush to white wash a T-34 and a Stuka that I built a while back. It seems to look the part but you have to allow a little of the original under colors to show through. Hope this helps.
Thanks for the tip, and for the compliments my friend.
Impressive building skills... Thorough research... Enjoyed your post! ?
Thank you Roberto ! I'm glad you enjoyed this one my friend.
Nice ekhranami Louis. You did a great job on the classic Tamiya Kit. Well done!
Thanks Laramie. You had me there for a while. I had to look up "ekhranami". Translation is a KV-1 with screens, referring to the bolt on armor. Good stuff ! Thanks again.
This is a great article, many thanks