Tamiya Type 74 1/35
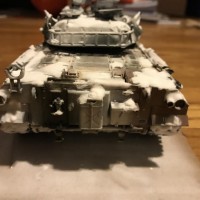
I've always liked the Type 74. Part of the reason was that this tank was similar to the Swedish S tanks that could alter the hull's angle and height with its hydroneumatic suspension. The kit went together well. The only issue I had was me temporarily misplacing the sledgehammer and one of the decals disintegrating. Painting and making the snow on the other hand is a different story.
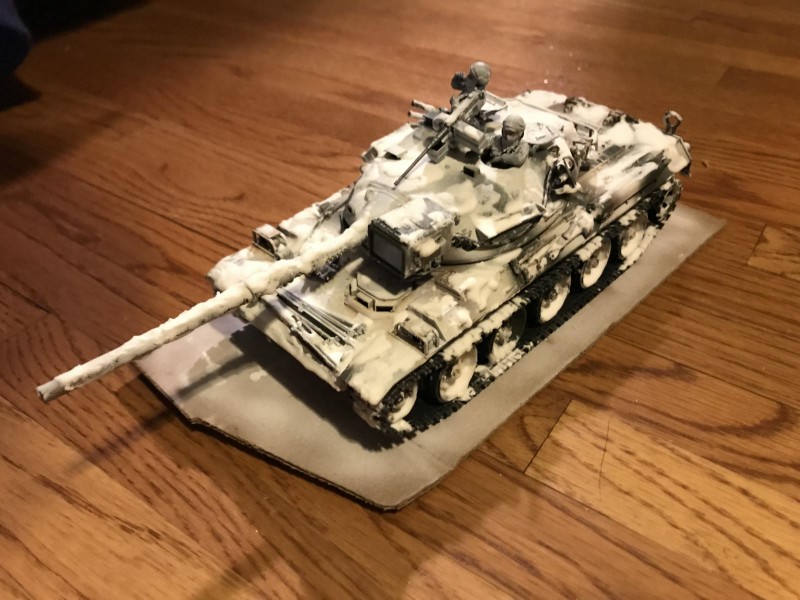
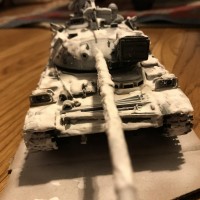
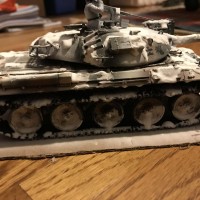
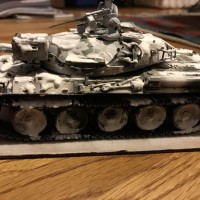
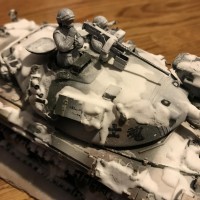
Once again, I throw the kit together nicely and fall on my face with every step after that, or at least stumble. The painting guide called for JGDSF Green and Flat Earth. I had left over JGSDF OD so I used that instead. The Flat Earth didn't quite look right so I did some blending with NATO Brown. Putting the white on top was a mess. Long story short a few poorly timed shivers resulted in a lot more white than I wanted. I probably would have benefited from just spraying everything white and then doing the camo over again, but instead I was a little lazy and just resprayed some OD over the white and then misted white over that to get the soft white edge and light speckles.
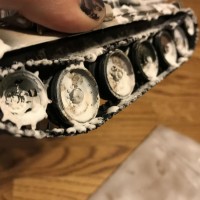
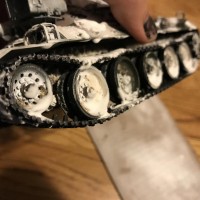
Weathering and putting the snow on was an experience. I bought the Mig Streaking Grime. I've seen a lot of people use it where they put down a layer of enamel thinner than dots of the grime. They wait a second then brush gently spreading the grime and picking up excess. What I failed to realize is that no one I've watched ever put it on a white surface. So what was a comparatively small amount, almost looked like I sprayed Tamiya's Clear Red over the entire model. Panic ensued, but sensibility returned and some more thinner on a cloth allowed me to wipe most of it off while still faintly leaving the effect. Behind the road wheels I used pigment fixer for the first time. It made the pigment dissolve into more of a stain. The color was much different than when the pigment is dry, or even wet with the brown wash or water that I've been using. Perhaps if I let the pigment dry it would have looked more like what I'm used to. There also could have been an issue as the Vallejo pigments say they can be mixed with water and acrylics where as the mig pigments say they can be fixed with enamel thinner or pigment fixer. I used the Vallejo pigments. This could be the issue or this could be the intended result or possibly my method of wetting the surface with the fixer and stippling the pigment produces a different result than what I'm used to. Either way, I do like the stained look. I put a little of the Mig Wet Mud on top of this dirt.
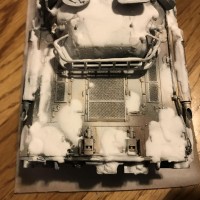
Making and applying the snow was a much larger ordeal than I thought it would be. The first batch of snow I made to test came out fairly well. I went equal parts baking soda, white paint, and white glue. I put this lightly over the mud and it looked good, for a few hours then when it fully dried, it looked like just the cheap white acrylic paint. This wasn't necessarily a bad thing as there would, or at least shouldn't be intact snow crystals after it gets mixed with mud and run over by a tank. I tried to use variations of this mixture for the rest of the tank, but it all looked too flat, lacking any individual crystals of the baking soda. I tried just glue and baking soda, but that still looked a little odd to me. I ended up oversaturating water with baking soda and adding a little glue.
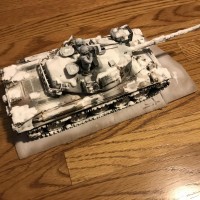
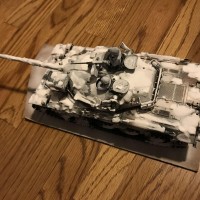
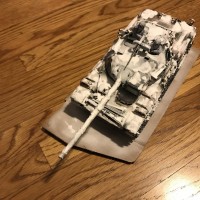
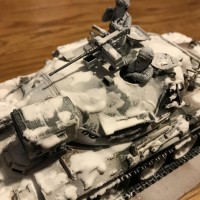
I don't know how snow melts. I've seen it for about a total of 6 hours when I was visiting a national park. I know that the engine deck stays warm for quite a bit after running so I assumed that any snow that would have at least start to melt. There should probably be a little less snow at rear as that is still part of the engine deck and warm, but I wanted to put something on there. Thinking somewhat logically having the extra weight of snow on the gun probably isn't a good thing so I tried to make it look like that some of the snow had been brushed off. As I was smearing the snow on rather than sprinkling it on, I went for a image where there was light snow, but that snow has now begun to melt especially since the tank has been driven a short distance. There probably shouldn't be as much or any snow on the mufflers and as of writing this I am just realizing that I have left off part of the mud flaps on the back. It is also somewhat unfortunate that by me sagging the tracks, most of the snow and mud is hidden.
All in all, its a good kit. I'm learning the lesson I should probably buy a styrene sheet test out how the weathering stuff looks. Also those figures still need some work. I sprayed a fairly thinned white over them to get the paint to pull to the edges and leave the center fairly light. This did show that even though something is smooth to the touch, it isn't completely smooth as seen with the gathering of the white paint on the seam line and burr.
I shivered when I saw all that snow! So you aren't very familiar with snow, right? Some would say you're very lucky. You have a good start here, William. You're right about the back deck being warm from the engine. A lot - probably MOST of the snow would be gone.
When I had a chance for some "shut-eye" I usually preferred the back deck of my M1s. Having a turbine engine, the back will stay quite warm for 6-8 hours and the desert gets VERY cold at night. I've gotten some good sleep on the back of my steel horse - even though you might not think that's possible! The cold winter day I arrived in Saudi's main airport it was 97 degrees F. That same night it was 22 degrees F! A 70 to 75 degree drop was quite the norm in the desert and yes, we did get some ice and even a wee bit of snow, but it was gone about 5 minutes after the sun rose!
Nice one, William. Keep 'em coming.
The biggest reason there’s snow on the engine deck is to hide the seam where the engine deck meets the rear. Instead of having poly caps to hold the top and bottom together, this has more of a snap fit where you have to bend the rear back so that the top half can slide in and catch a lip at the front. The rear would then be pushed forwardcatch a lip just below the engine deck.
Also I’ve heard about sleeping on the engine deck. I found a guy on YouTube who goes to museums and talks about the tank and often gets inside and shows the interior. He always comments about the size of the engine deck because a bigger deck allows more comfortable sleeping. He said it was quite a shock going from the Abrams to the Bradley as the amount of sleeping space turned to almost nothing. I always took this with a grain of salt as I assumed it would go cold 4 hours later and whoever was sleeping would wake up on a cold steel plate, which seems not all that fun.
Thanks for comment and information.
Hi William. Just out of interest, this is the view 10 minutes ago outside our sitting room (london).
Love your '74'. As Jeff says, "keep 'em coming"
Nice job on that tank, sir...I like it.
"I don't know how snow melts ,I saw it once for six hours", I would give my left doodad to be able to say that , my garden looks just like David L-S 's and I can tell you it is hateful stuff and bloody cold as well here in leafy Cheshire...I currently have the boiler on ,the gas fire on and all the burners on my cooker going as the temperature outside drops to a balmy -5c !
Nice Tank by the way William ,well done.
N.
Hi Neil, for the last seven years I've spent the winter in north east China where the winters are severe, -5C would indeed be considered balmy, temperatures regularly drop to -30C and never go above freezing from November through to April. This year I decided I'd had enough and moved south for the winter, no snow or ice, temperatures dropped to +12C once, people here have never seen snow. The problem is that it's too hot in the summer, so I have to go back north again, it's a crazy world.
William, clever idea to use snow to cover the seam. What did you use for snow? Looks great. Oops, now I see. Woodland Scenics (model railroad dio stuff) has snow in their lineup. I've seen discussions in the past about using flour (brings the wee creatures) chalk, ground pastels and artists medium.
He mentions that he used some baking soda as well. Those railroaders have a lot of great ideas !
Here I am again, William. I had to laugh when you talked about the guy moving from an M1 to an M3. There's hardly any room to lie down in or on a Bradley. The back deck of an M1, with the gun traversed over either side, can sleep the entire crew of 4. However, my driver preferred to sleep on the front slope or in the driver's seat itself. It is a VERY comfortable seat that reclines. But to ME, it's only comfy for about 2 to 3 hours. Then I have to move around some. HA! My driver was only 19, so he was less than half my age and being young, he was quite limber and could get comfortable wherever he was ! I would sleep over one of the air gratings for the transmission oil cooler. I had a light, quilted blanket of sorts - it was actually an Army-issue Poncho liner, and with that blanket and my feet over that grating, I could stay quite cozy and warm for hours. I once woke with 2.0 to 2.5cm (3/4"-1") of snow after sleeping for 3-4 hours. (Which didn't happen often !) I didn't even notice the snow until I got out from under my poncho liner. You are right about regular engine covers / decks only being warm for a few hours. If the tank (or other vehicle) hadn't been maneuvering hard or long there might be no heat to speak of at all !
Pardon me for the long dissertation about getting comfortable on an Abrams tank. Great idea about using the snow to hide unsightly joints ! Great Tank build, my friend.
Your crew looks like that they are cold, that's convincing enough for me, great job!
You persevered until you got the effect you were after, well done, and, you managed to get yet more old tankers' stories in the comments.
Really nice Tank model. Like the snow effect. Great article!