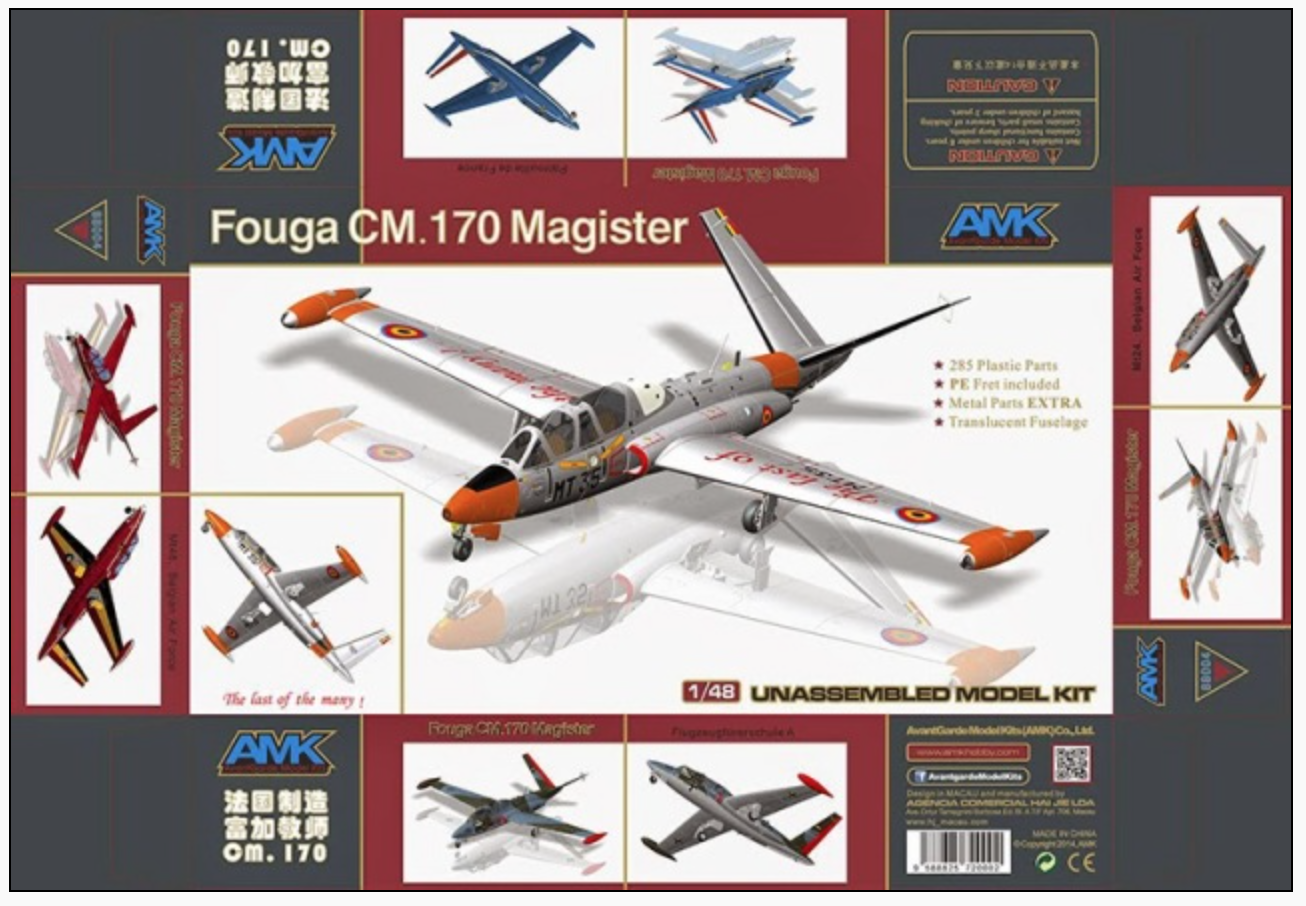
New Build: AMK 1/48 Fouga CM.170 Magister
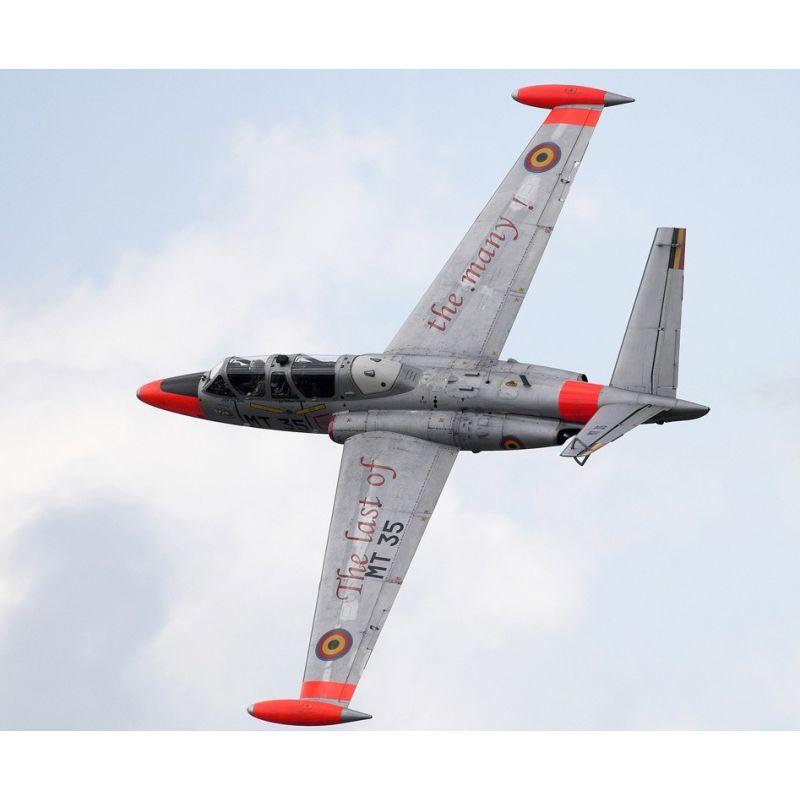
The Fouga CM.170 Magister is a 1950s French two-seat jet trainer aircraft, developed and manufactured by aircraft company Fouga. Due to industrial mergers, the aircraft has been variously known as the Fouga CM.170 Magister, Potez (Fouga) CM.170 Magister, Sud Aviation (Fouga) CM.170 Magister and Aérospatiale (Fouga) CM.170 Magister, depending on where and when they were built.
In 1948, development commenced at Fouga on a new primary trainer aircraft design that harnessed newly developed jet propulsion technology. The initial design was evaluated by the French Air Force (Armée de l'Air, AdA) and, in response to its determination that the aircraft lacked sufficient power for its requirements, was enlarged and adopted a pair of Turbomeca Marboré turbojet engines. First flying on 23 July 1952, the first production order for the type was received on 13 January 1954. Export orders for the Magister were received, which included arrangements to produce the type under license in Germany, Finland, and Israel. In addition, the related CM.175 Zéphyr was a carrier-capable version developed and produced for the French Navy.
While primarily operated as a trainer aircraft, the Magister was also frequently used in combat as a close air support platform by various operators. In the latter capacity, it saw action during the Six-Day War, the Salvadoran Civil War, the Western Sahara War, and the Congo Crisis. In French service, the Magister was eventually replaced by the Dassault/Dornier Alpha Jet. After its retirement by the French Air Force, Magisters were purchased by several private-owner pilots in the US and have since been operated in the experimental category.
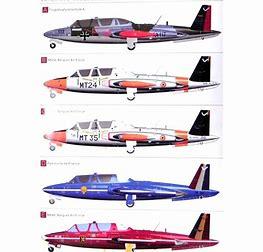
After building the AMK 1/48 Kfir, my 1st build of an AMK kit, I have been a fan of this fairly new model company. Therefore when they released the 1/48 Fouga CM.170 Magister my interest was peaked. I did not push the "Buy Button" at 1st release. I waited for it to go on sale and purchased at a highly reduced rate from the Dragon USA on-line vendor. It was purchased at under $20.00. When the box arrived and it was 1st opened I realized what a bargain it was. This is because it was packed full of plastic styrene, photo-etch, and a whole separate box full of die-cast pieces. The surface details appeared outstanding, no flash was present, the instruction booklet was nicely produced with full-color glossy pages, and it was well packed. Looking at the attached picture showing the color profiles you can see the 5 variants which can be produced from this kit. To accomplish this the decal sheet appeared impressive and provided enough decals to produce a very colorful plane with minimal painting.
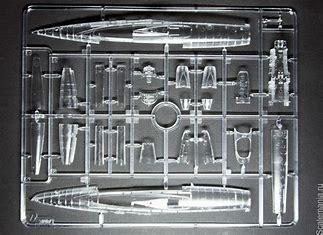
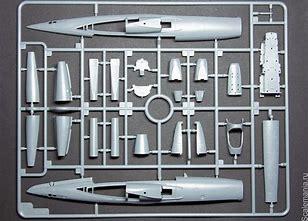
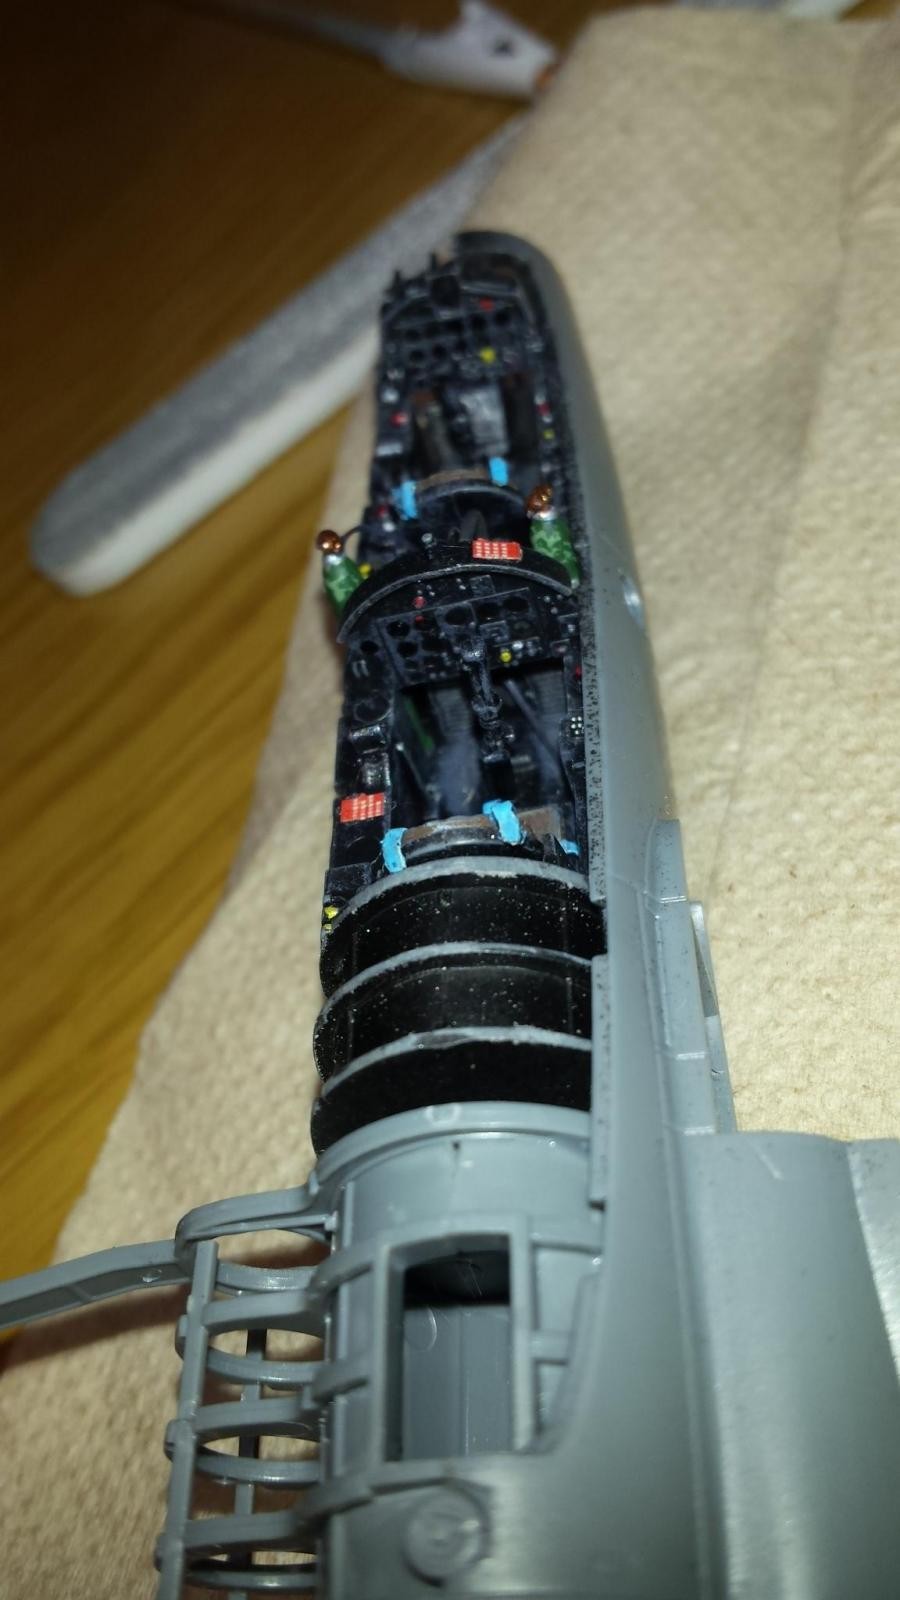
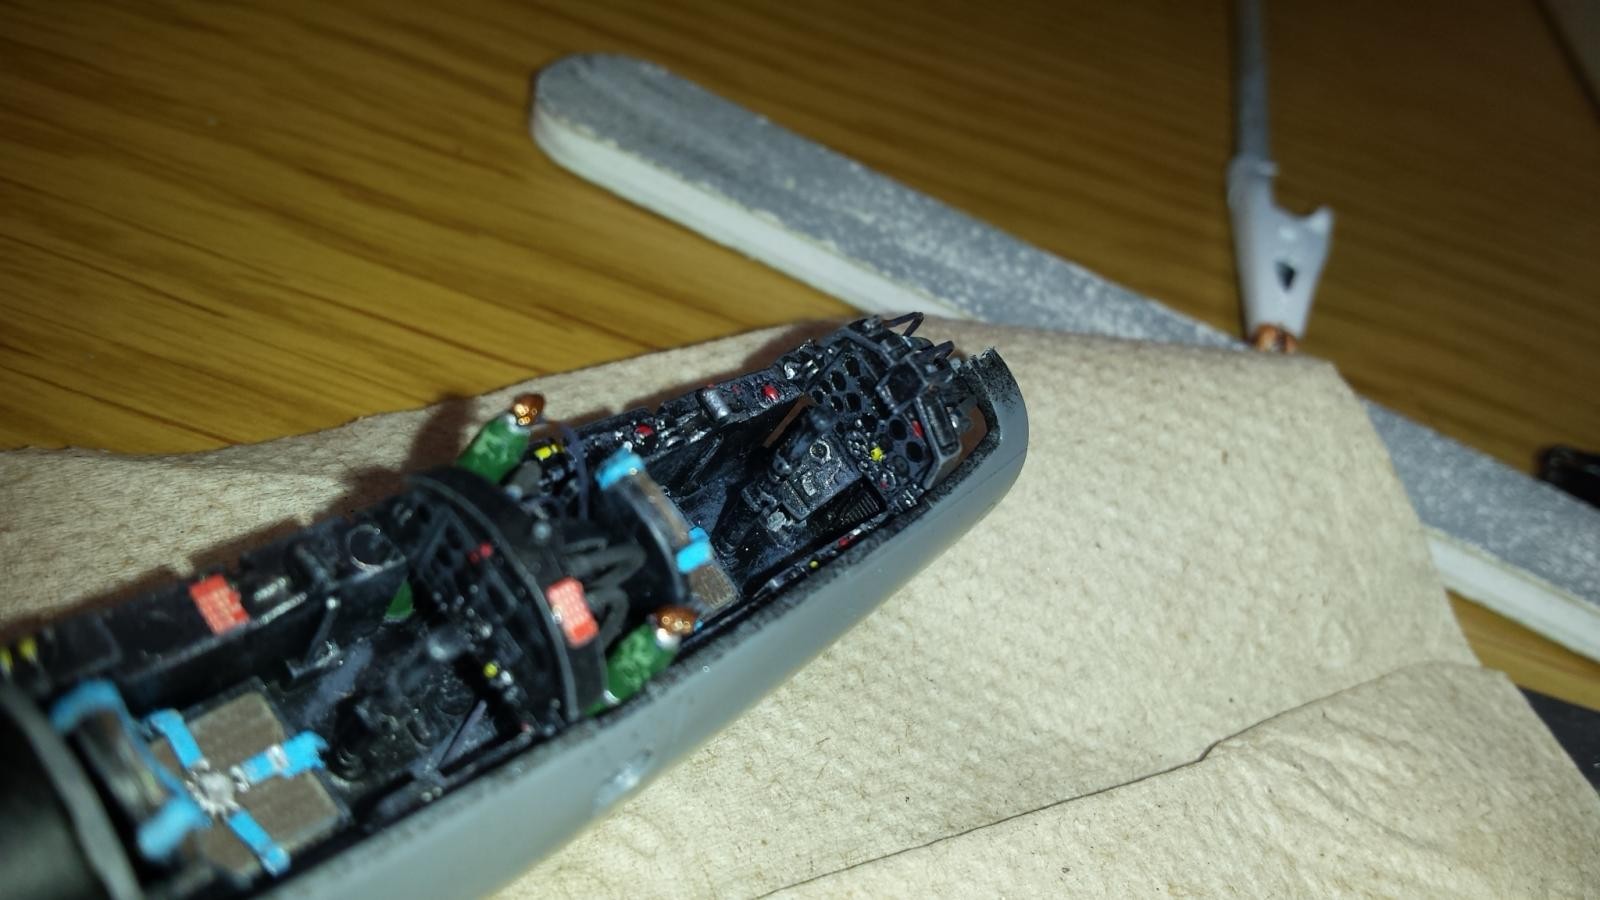
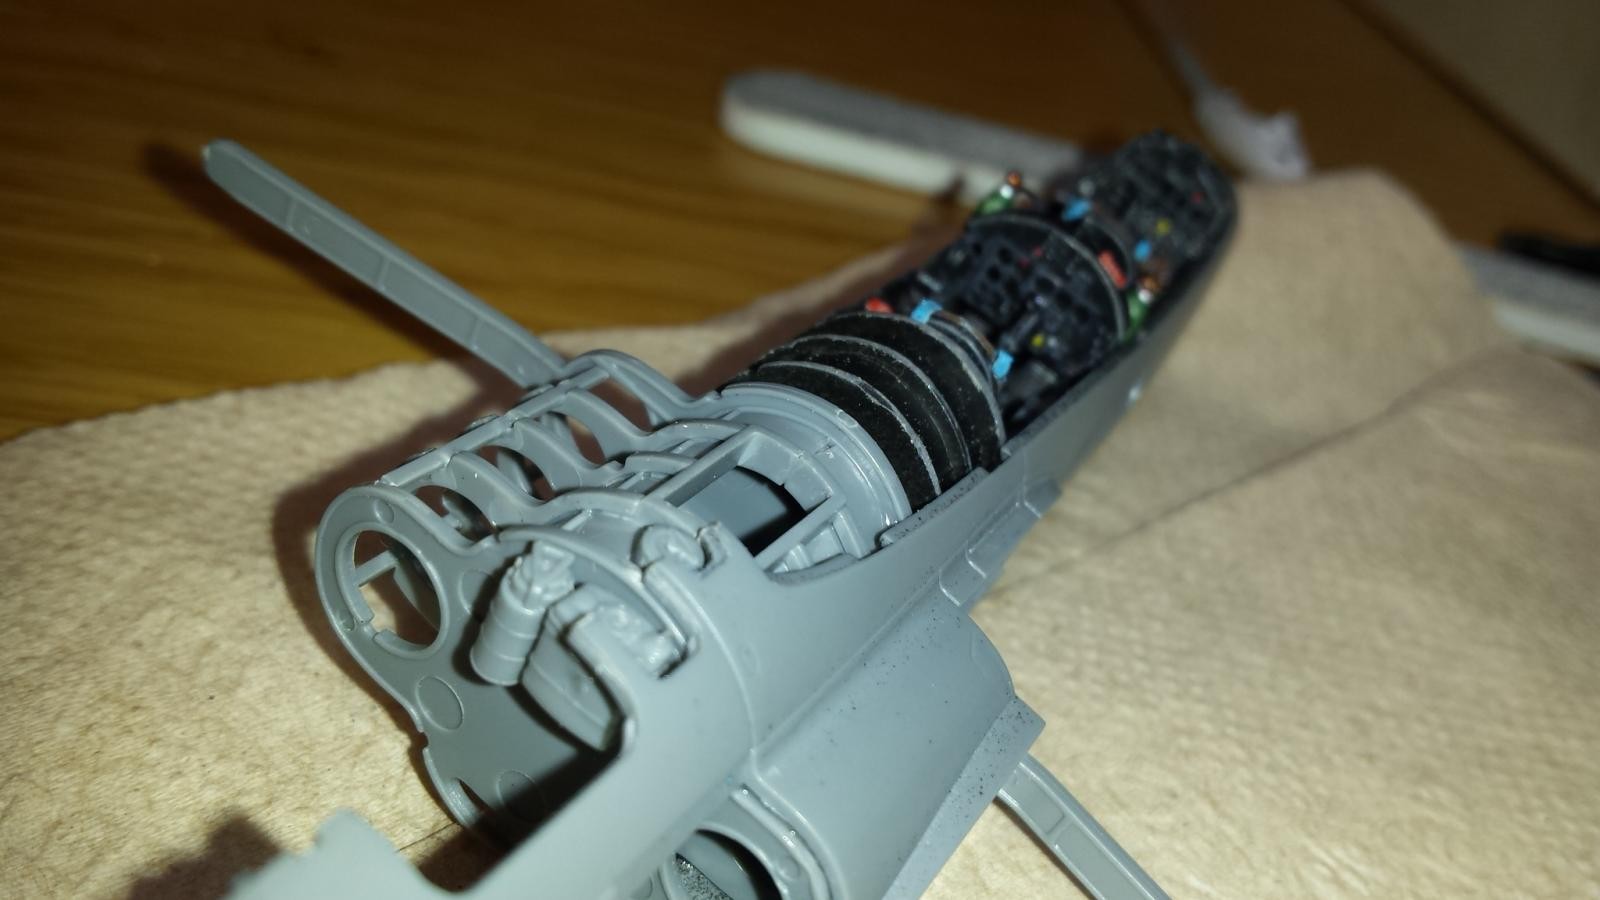
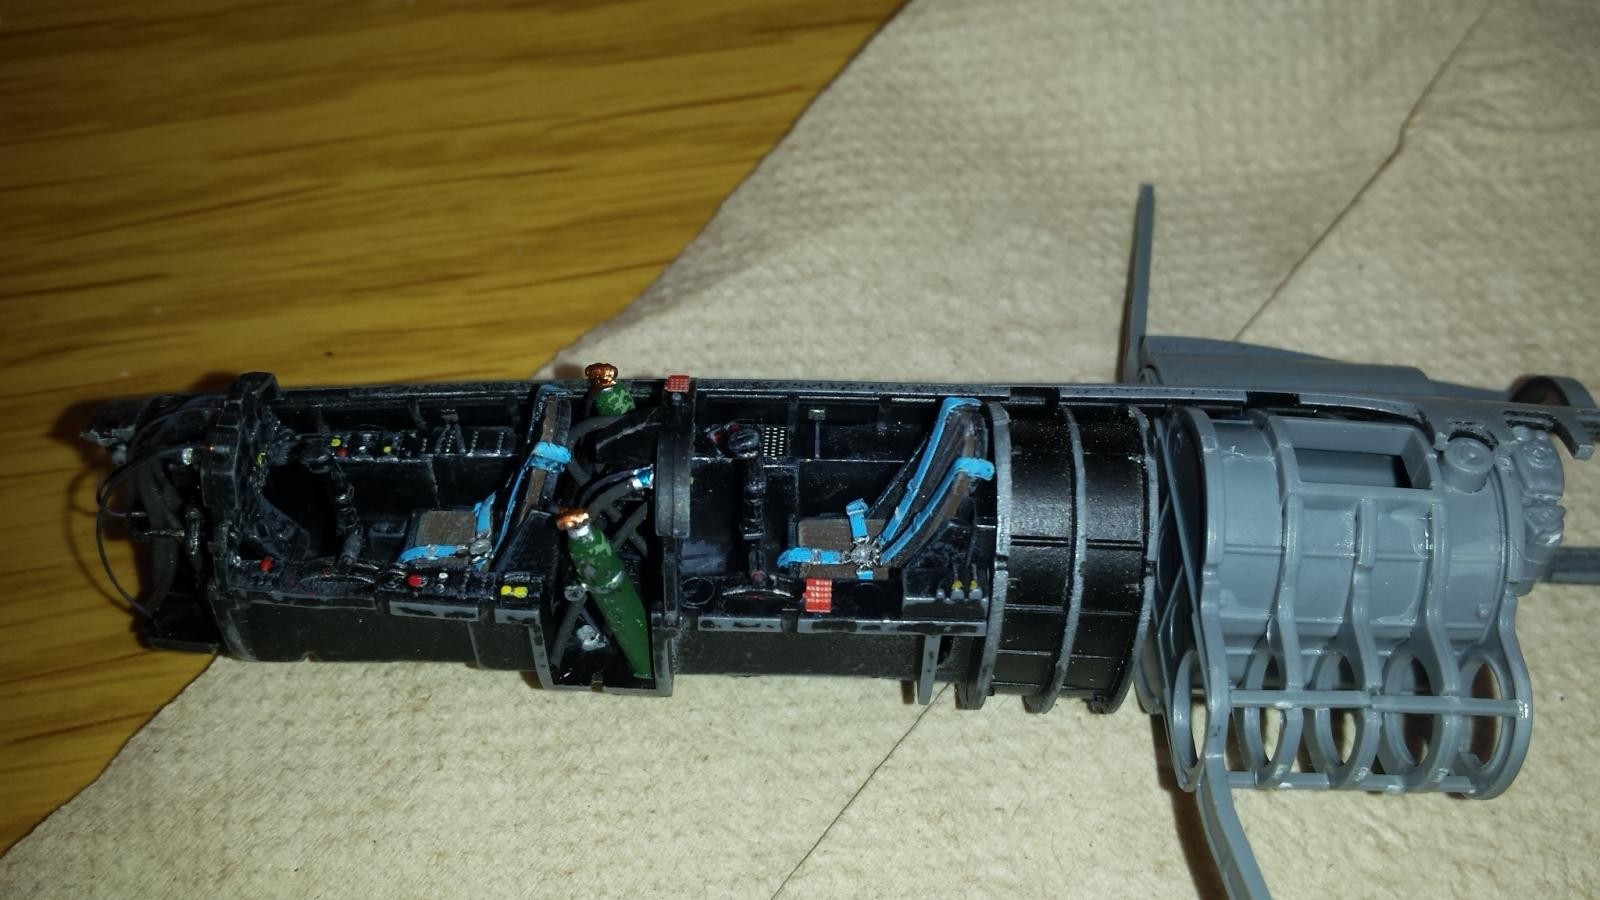
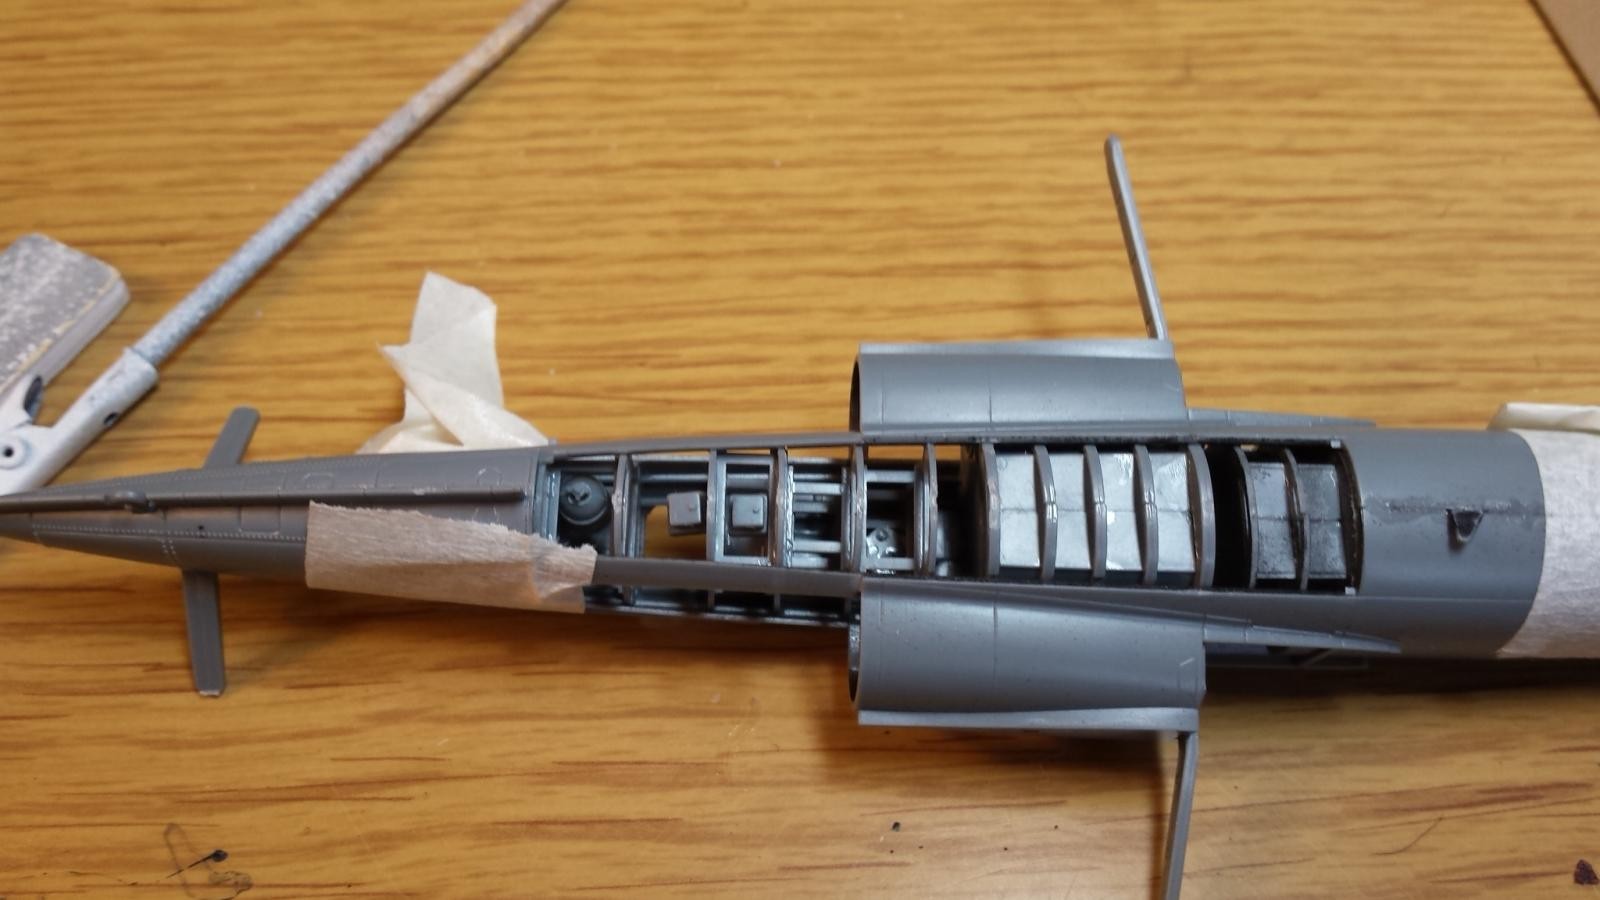
Another interesting aspect of the kit is the high number of pieces that are needed to complete this little 1/48 trainer jet. This may be a positive, or a negative depending on your taste and preference for high parts counts. In this case the count is high b/c this kit has the potential to build many of the internal components of the real aircraft. The kit is "extremely" detailed and no after-market parts are needed to produce a masterpiece. The kit not only includes a highly detailed cockpit, but it includes features such as internal steel structures, ribs, stiffeners, etc. It includes the primary, and secondary internal fuel cells, avionics equipment bay, nose gun bay with twin cannons, twin complete detailed engines, and several other interesting details.
Many times when a kit includes this level of detail it is disappointing when the builder discovers that all this work will be hidden when kit is fully assembled. Not in this case. AMK provides a whole extra parts-tree with transparent parts to include the major structures such as cockpit tub, fuselage halves, etc. If transparent parts are not your thing, they are not mine, you do not need to use them, and you instead may leave off the multitude of supplied panel covers including engine covers. It makes for a great maintenance diorama.
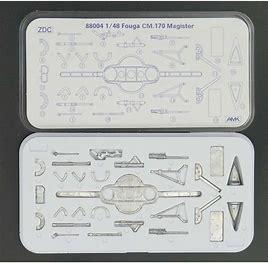
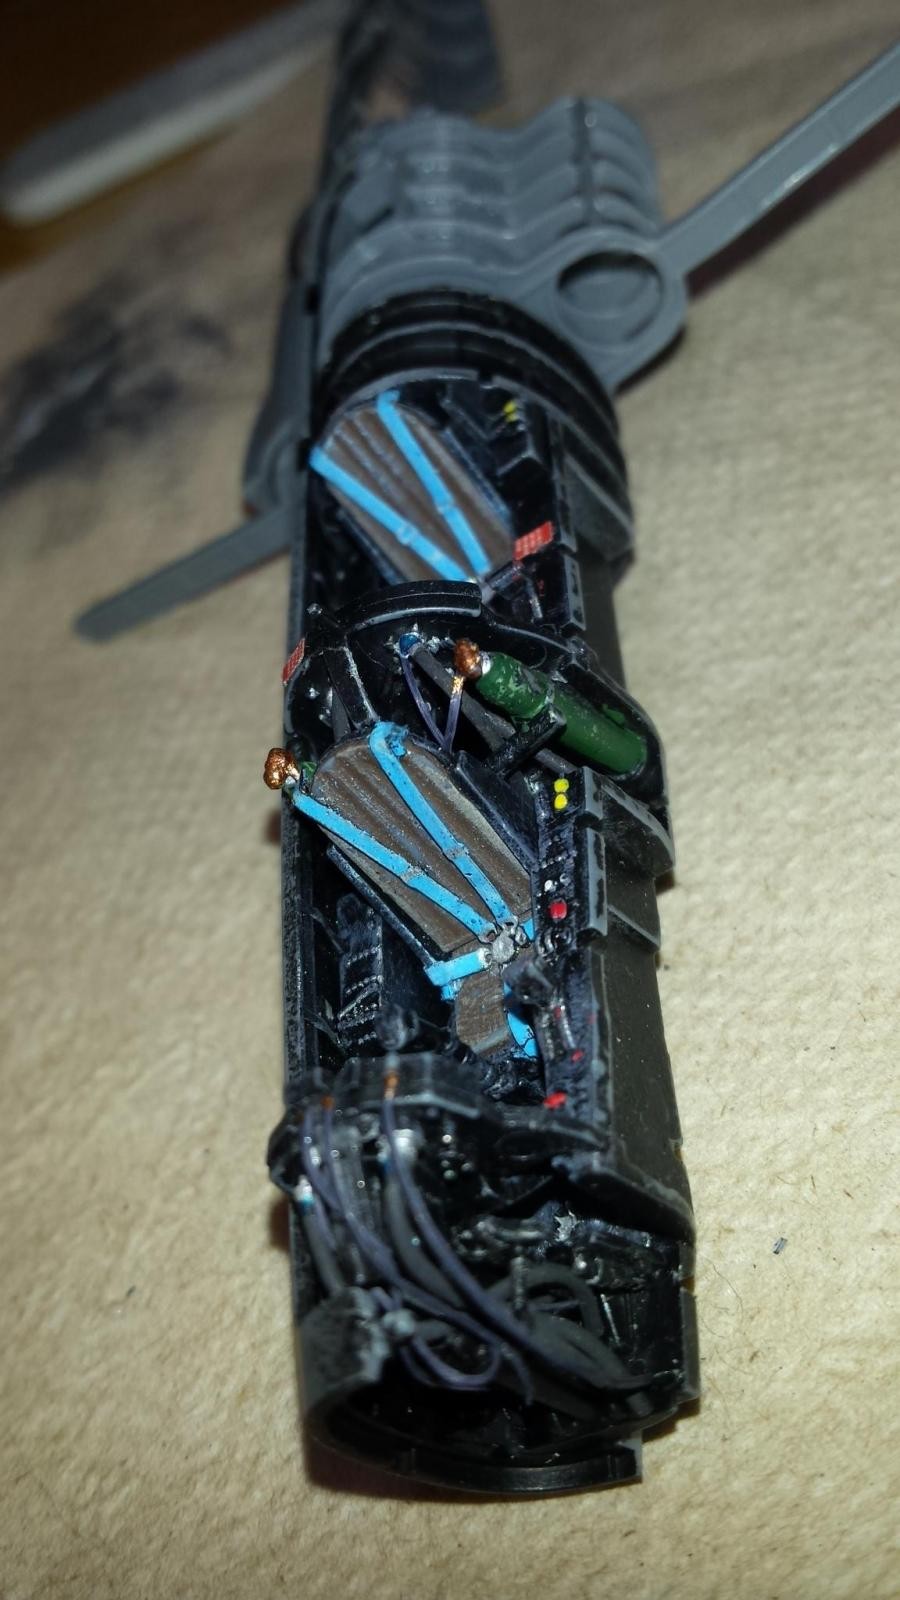
The option of die-cast metal parts is sort of cool, and unique, but also odd. Why are they there, and why use them. I decided not to use most of them except for when I could justify their use such as for pitiot tubes, various antennas, front gear, and nose internal structure (those plastic parts are very delicate and may break easily). I am not a fan of die-cast due to how easily they bend. The photo-etch parts are very nice and include among other things the very thin wing air-brakes, and seat-belt harness. I liked the seat belt harness design b/c they were all one piece and just needed detail painting. Although I do not recommend the need for after-market details I would suggest you provide some plumbing/tubing, and wires if leaving the panels off, to significantly improve realism. I only did this in the wide-open and very visible cockpit area. Oh, almost forgot. It also includes to metal weights which fit perfectly under the cockpit tub. This will be a tail-sitter without the weights!
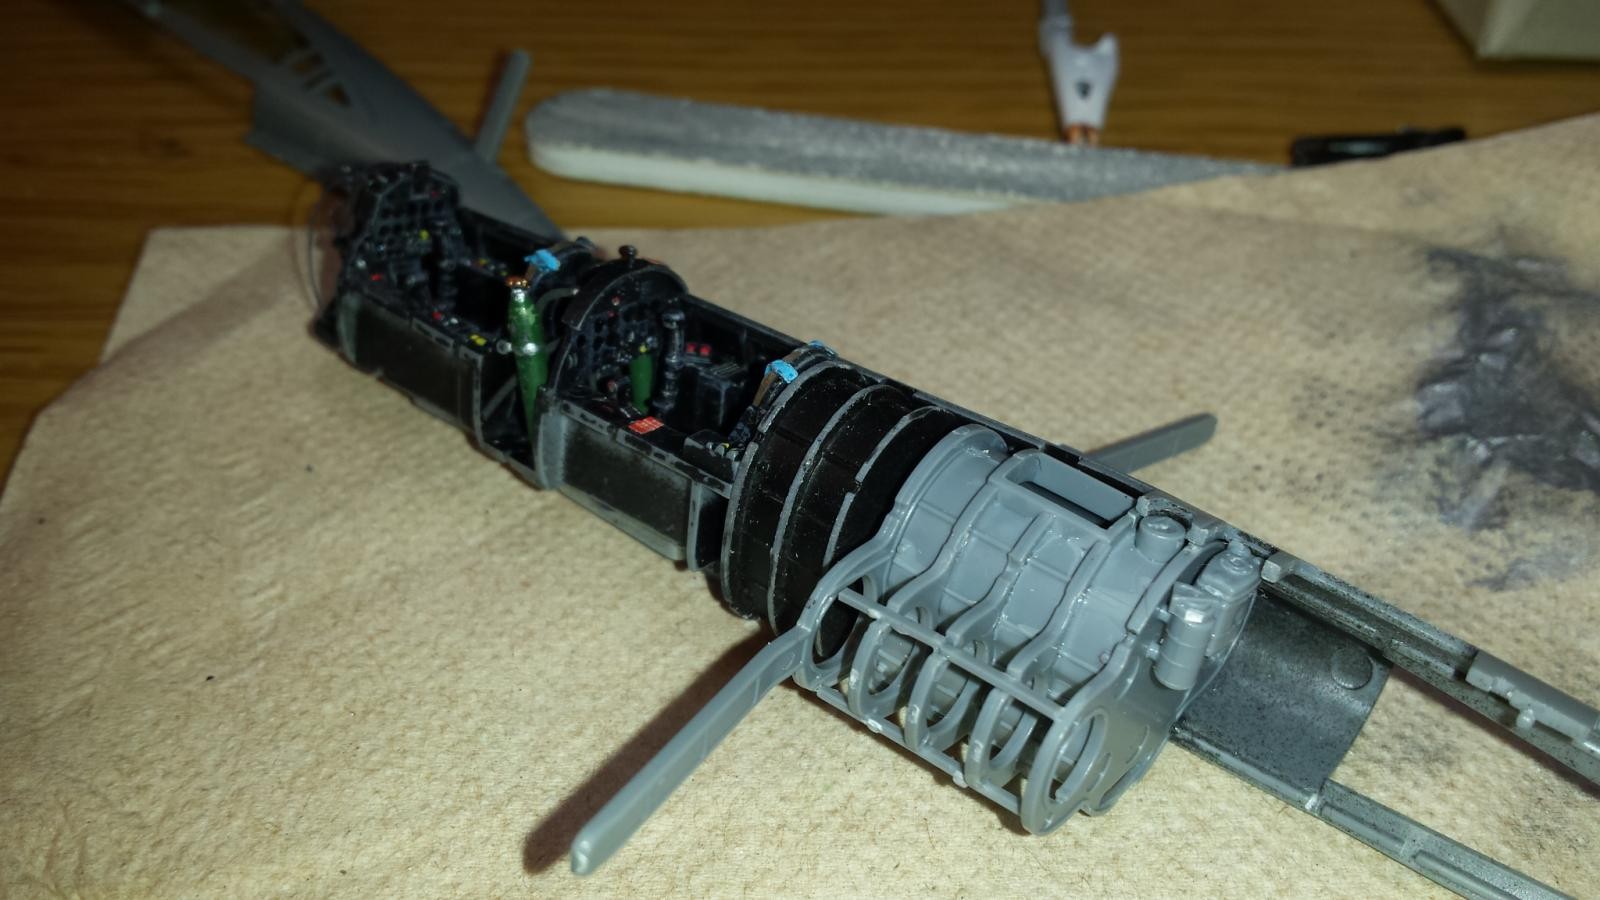
So I started the assembly process using the included detailed instructions. Some of the instruction steps could be better illustrated to show exact parts placement. I have not completed this build yet but have assembled most of the major structures. There are some minor challenges were one needs to be strategic and think ahead to reduce headaches and insure good fit. Also the instructions show the option to eliminate many of the internal structural elements if you are not going to display them, or you just want to simplify the build. This model will build very quick without those internal features. I did not plan to include all the open panel features, nor did I use the clear parts, but out of curiosity, and because the parts were included, I needed to assemble and install all these parts. I just did not bother to paint them. Painting all the internal parts for display is a huge challenge, and headache, but would be worth it if displaying. My original plan was to keep this build moving quickly, and keep it simple. To my amazement all this internal detail came together nicely with decent fits, and solid engineering. I was challenged a bit with the intake assembly. They appear to be to long and required modification to fit correctly in the fuselage. Even after this modification the fit was very tight, and once assembled they still did not sit correctly. I may have screwed up on this somehow, but I do not know how. One side fits perfectly with perfect alignment inside the fuselage with no gaps, the other side would not rest properly inside the intake structure supports and when you look into the intake there is a significant gap. The fit is so tight I did not need to use glue to permanently install and once installed they cannot be removed. Trust me I tried! The panel covers are not the best fit, and because I did not paint the internal structures I needed to close up these panels. They left some gaps, and did not sit flush into their openings. I did a lot of sanding to smooth it all out but lost some surface details. They now just fit "OK", but not perfect. The fuselage halves closed up fairly well despite all the internal details. I even included a tremendous amount of plumbing/wiring exiting the instrument panels and this will all be very visible.
Overall this is a fascinating model subject with many unique features produced by a new, high-quality model company. Compared to many other products in this scale it is a good value when you take into account all the neat features, and good engineering. It is not a significantly challenging build, but is complex due to the high parts counts, and many internal details. If you eliminate the optional internal structures it becomes a quick typical build. I do not recommend this build to real beginners due to the complexity, but if you have some building experience you should be OK, especially if you dont use the internal and/or transparent parts. Use caution with the internal intake assemblies. I will post more pictures of my progress in a follow-up article.


Excellent looking progress, Paul...gonna be a beauty, I can tell.
Looking good Paul.
The Fouga triggers some childhood memories because I has some BD books whose name I can’t remember (Tango & something...), that evolved around 2 French pilots, and often the Fouga and the Mirage were their mounts. It’s a lovely design
I have this kit, so am going to be interested in what you discover.
Most of the civil-owned Fougas - at least here in the States - are now ground-bound due to their inability to meet contemporary noise limits. There are three occupying space in the parking area at Chino Airport that I know of. I'm surprised it never acquired the nickname "screech owl." Amazing that engines that small can make that much noise.
I did not know that they were so loud and therefore a problem. Years ago I worked at an airport and there was one sitting in the Civil aircraft hanger un-touched for a very long time. All red, looked like a toy to me...very basic in many respects. Peaked my curiosity that was for sure...I did not know what it was. Anyhow, its a good model...no real problems. I was a bit hasty with the assembly b/c really just wanted a quick build so should of picked another subject. I wasted all the potential this model had to offer by not painting interior, and just closing it all up. It reminded me a little of those new SWS kits with all the internal structures.
Great pick Paul, I have had my eye on this kit for a while - looking forward to the next post!
Really nice kit with lots of potential for those who really want to make something of it. I was a bit hasty with my build. I think it was one of the most detailed 1/48 Jets I ever made but did nothing special with it...should of worked the interior and opened her all up. Just my funky mood at the time.
It was actually 95% complete when I wrote this article...I just did not have any updated pictures to share. It is completely painted and mostly assembled. Today I will do a panel wash and weather a bit. Attach the tires and open canopies and it is done. The decals are excellent and easy to apply.
Hi Paul. It's a fantastic looking machine, something of the 1960's sci-fi design about it. Certainly sounds like a unique kit that will give plenty opportunity for creativity and maybe stretch the modeller a bit. Does it have the in box capacity to regrade to a Zephyr? Or would you have to mod it?
Your first sub-assemblies look great, very neat and beautifully detailed. Look forward to more...
Sorry, dont really know a lot about this aircraft or the Zephyr to comment on your question. It is a very neat looking and unique subject...another reason I picked it. Lots of opportunity to do some really special stuff with her and I sort of got hasty and just closed it all up and blew a nice super-detailing opportunity. It was actually 95% complete when I wrote this article...I just did not have any updated pictures to share. It is completely painted and mostly assembled. Today I will do a panel wash and weather a bit. Attach the tires and open canopies and it is done. The decals are excellent and easy to apply.
The Zephyr was the slightly updated carrier version of the Magister, a very cool (can we still say that these days) looking aircraft need.
Looks great, nice review.
Thanx Robert. Glad you liked it.
Yep - lots of details in there! Coming along nicely...
The French Bonanza jet. Cool looking aircraft.
Grounded because of noise. BS! It's a JET! What do they expect?!
I just don't get the mind of some politicians, sometimes.
Great looking model Paul ... and for only $20! Awesome bargain! I wonder if ALL models could be so inexpensive if the middlemen would allow it ... They CAN'T be making much money from that sale!
Never seen such a unique aircraft before. Glad you bought the kit for us to experience a new build for most. Look forward to more works in progress updates.
Wow, fantastic work on the Magister, and what a kit it is. Amazing. Nice little jet aircraft, and got some in 1/72 waiting in the stash, not as detailed as this one. Looking forward to your progress.
Hello Paul,
Excellent replica of this workhorse of the France and Belgium Air Force (To name just two)
It took the Belgium 47 years to get rid of it.
http://www.belgian-wings.be/webpages/navigator/photos/milltarypics/post_ww2/Potez-Air%20Fouga%20CM170%20Magister/Fouga%20Magister.htm
Regards, Dirk / The Netherlands.
Thanx for the interesting history links and pictures. Really nice reference. I am glad you liked the model.
Amazing detail! Love the shot of it airborne 🙂