Pilatus PC 21, 1/32 Scale Scratch Build, Part 15
Sitting here in the DRC at the moment, missing Family and the work bench, I was going through my build pictures for the PC 21 and realised I did not post the vacuum forming of the cockpit. well here is a brief description :
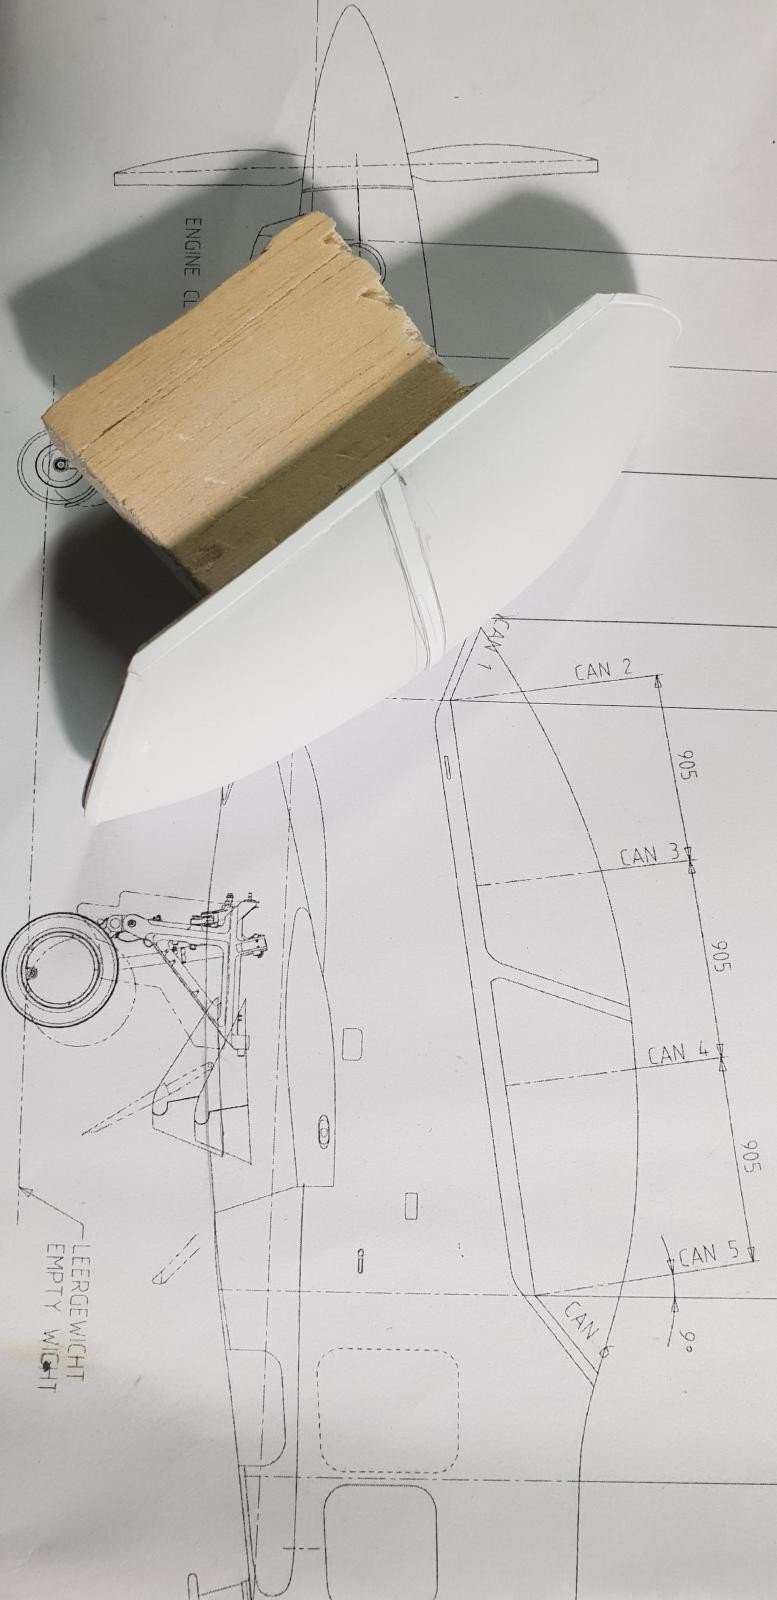
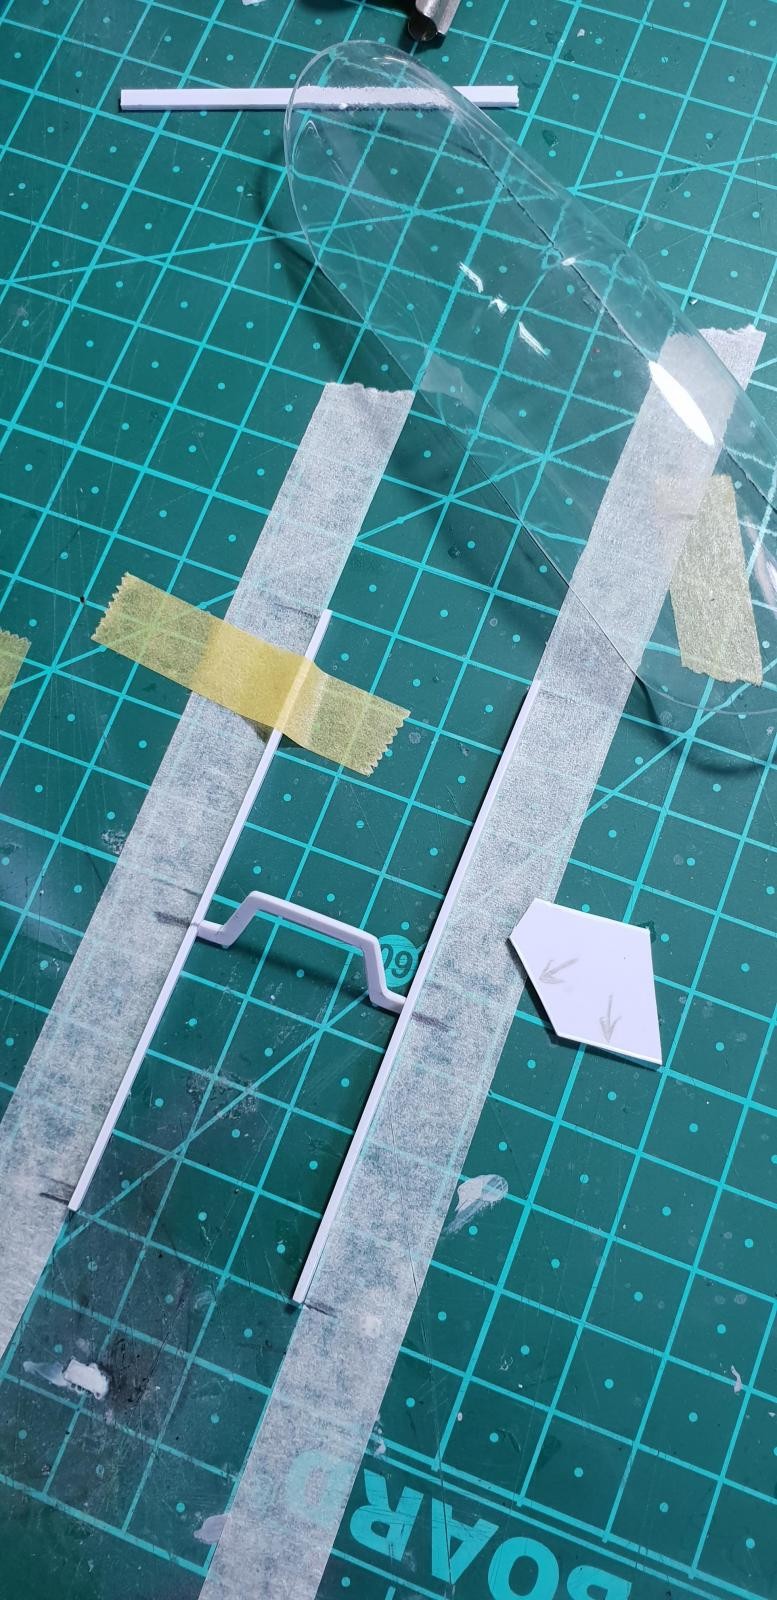
Started with cutting out all the ribs for the cockpit, this was made easy as they are on the drawing, I then glued them onto a piece of plastic card that was cut to the same size as the cockpit opening. ( I constructed this in the same manner as when I made the molds for the fuselage halves).
I then added the balsa wood and sanded to get the shape using the rib sections as a guide.
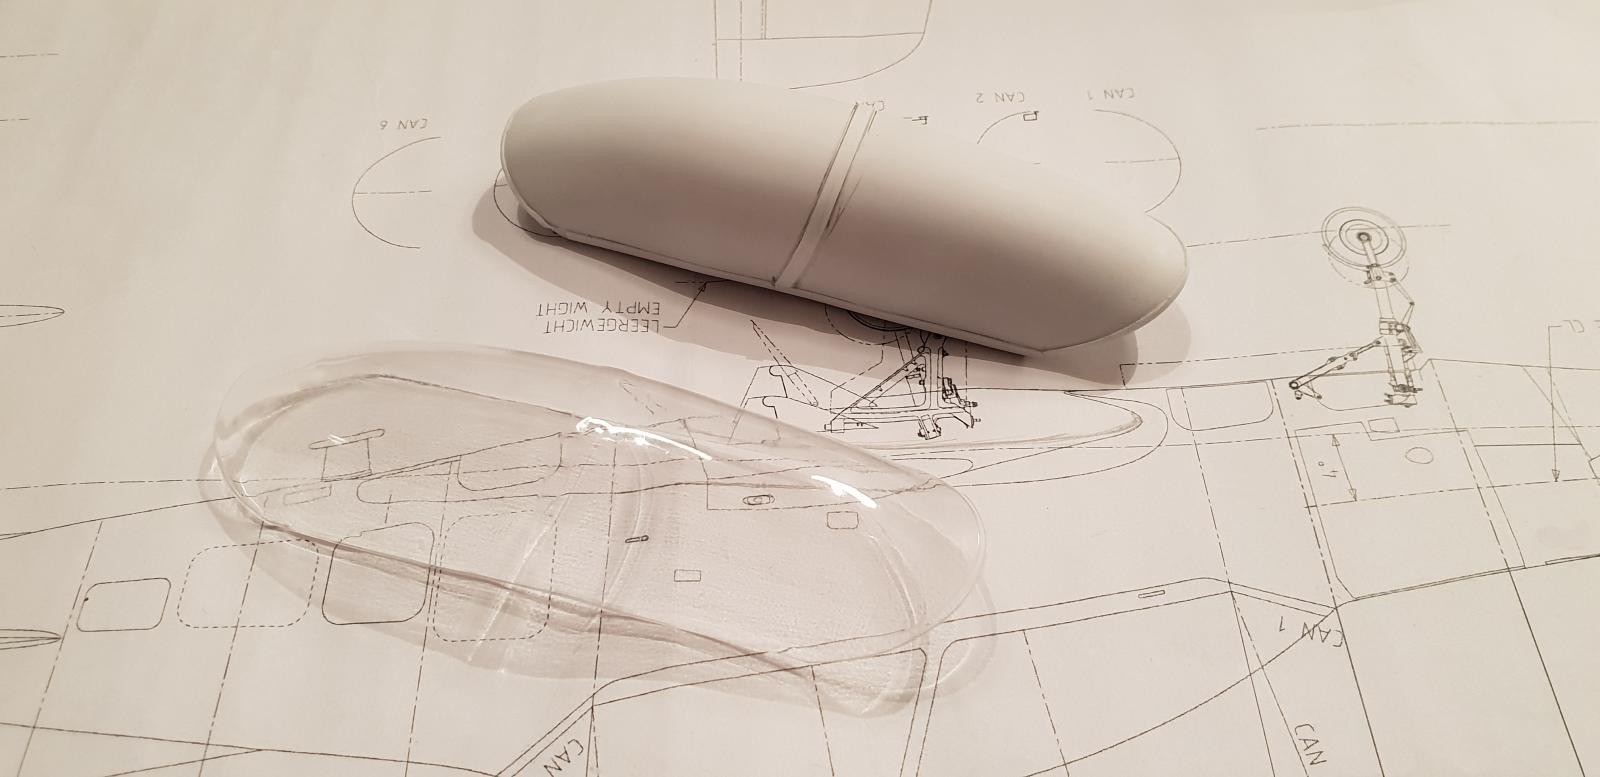
When I had finished the sanding, I vac formed the cockpit in white plastic card, 0.3mm thick. I then sanded any defects out of the canopy, glued plastic strip on the white canopy, and used a very fine sandpaper to remove any small scratches.
I then placed the white canopy back on the mold, removed any dust and vacuum formed the clear plastic canopy. I used a PET-G clear plastic, 0.5mm thick, I also used a heat gun to keep the plastic heated while vacuum forming to make sure that the plastic folded around the mold properly, and that the framing I glued on earlier would show on the finished canopy. The heat gun really worked well. I was really happy with the final canopy. I usually have to make 2-3 canopy's before I am satisfied. This one worked out first time.
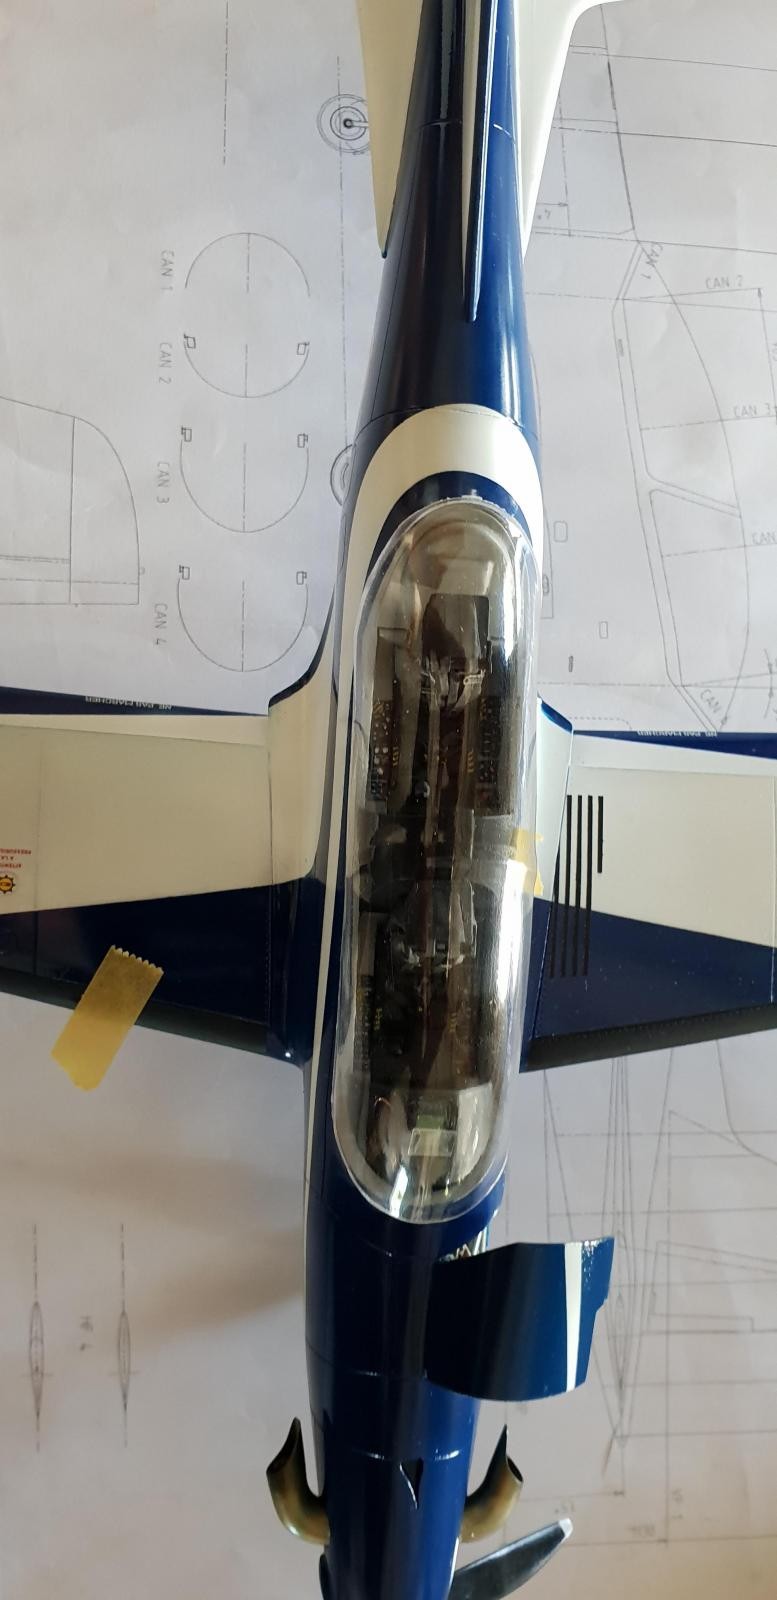
As you will see on the final pictures, I have started with the internal framing of the canopy, this will be painted black and then glued into the inside if the canopy.
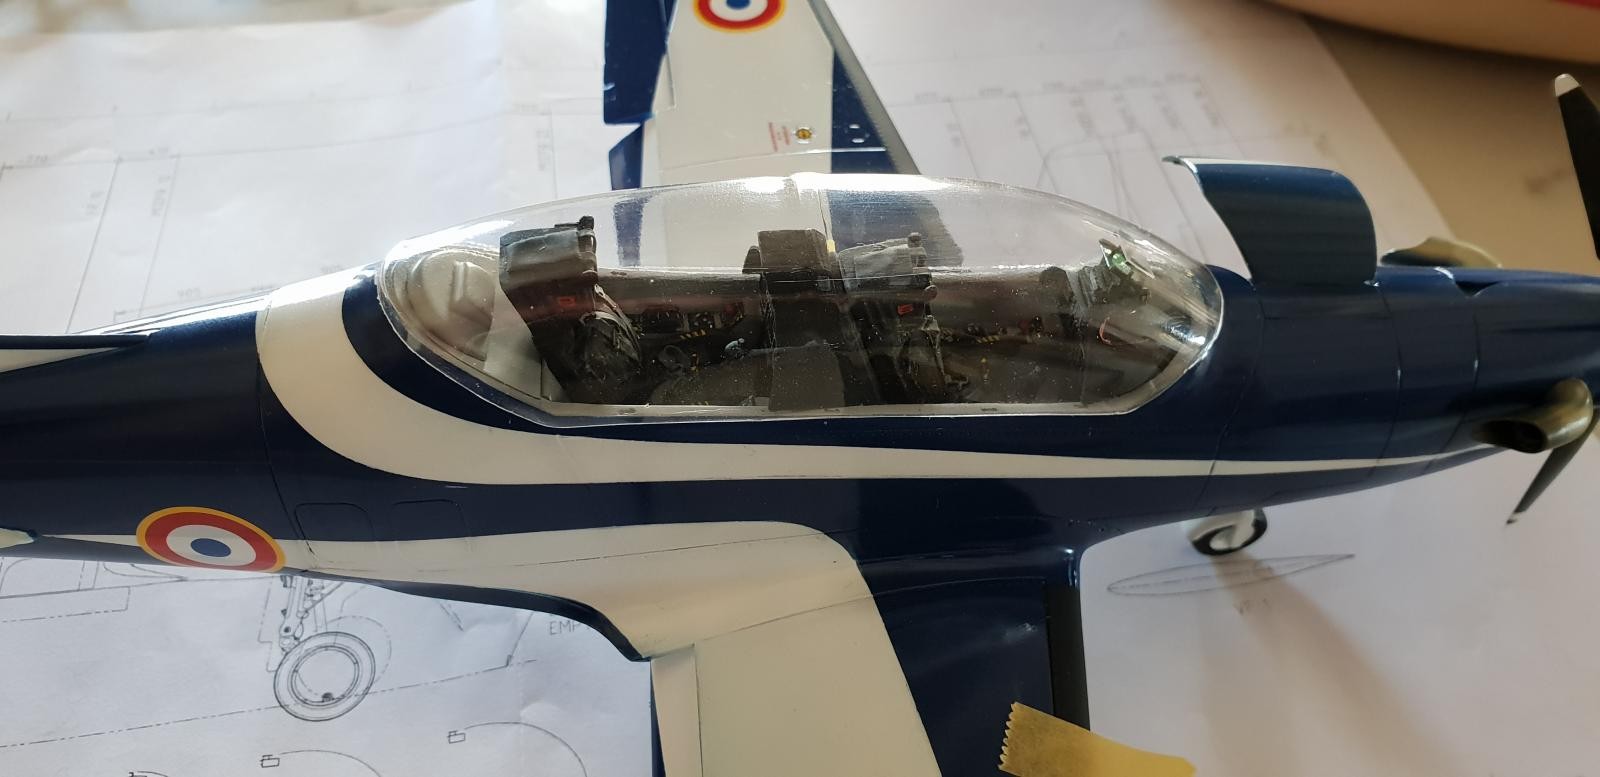
Its not the final build pictures as promised, but I thought you might find it a little interesting.
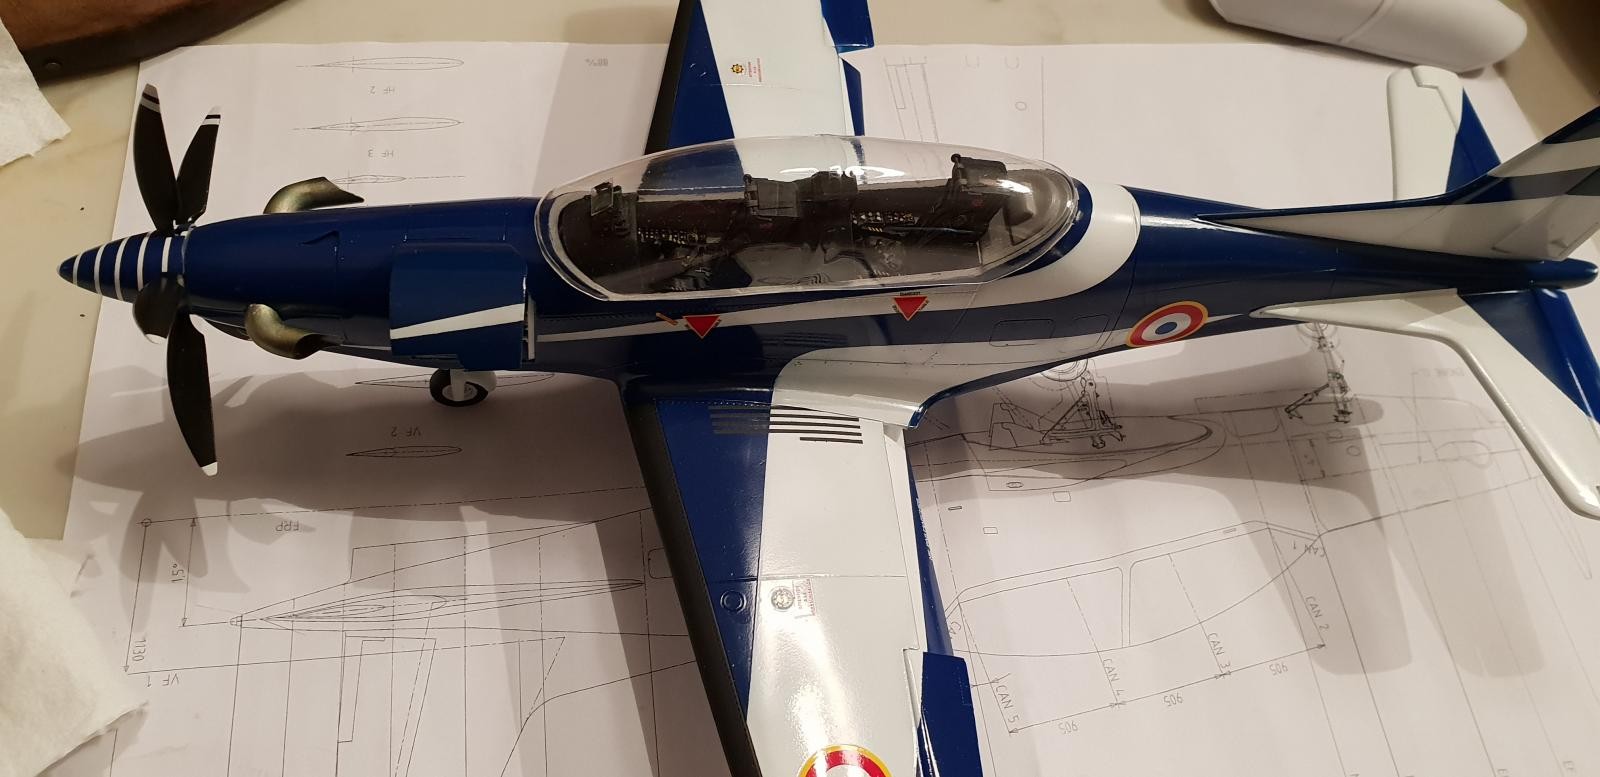
The pictures show the cockpit in position, as you will see it needs to be shaped and sanded to get the proper fit. The cockpit framing, when glued in will help to get the proper fit.
Nearly there, just need to get home and do the final finishing then I will post the completed model.
Cheers from the DRC.
Marc


Amazing work Marc, a real beauty you made there! Congratulations and you have my vote for best model of the month!
Hey Michel, thanks for the comment.
It looks AWESOME Marc. A WINNER for NATS 2019.
Thanks for the comment, Busy getting reference for the next project... Mirage F1 AZ. in 1/32scale, or thinking about 1/24 scale. What do you think...
I think you're finally ready for that padded room and the jacket with the extra-long sleeves! 🙂
As long as the leave a roll of plastic card and some glue with me.
Marc - Looks up to the standard we've all come to expect from your projects. I particularly like the tip about perfecting the canopy shape by making a white plastic "undercoat" that allowed you to perfect the clear plastic. The heat gun's also a great tip and would perhaps have avoided a few attempts to get fuselage halves without the sand dunes that I got round the bottom of the moulds when I had a go. Great work all round! Paul
Thanks for the kind comment Paul, yip, the heat gun has solved a lot of problems. Going to keep using it for the next project.
Modelling from another planet, Marc!
Thanks for the comment Johannes.
You are doing things others wouldn't dream of - I have loved the updates - this is on another level, and that will surely be recognised wherever she goes! Congratulations, Marc!
Hey Paul, thanks for the kind words, everything done by trial and error, and a little perseverance.
Hello Marc.
You have definitely constructed another excellent model from scratch. Your skills amaze me !
Well done my friend, and I thoroughly enjoyed reading the in progress journal.
I like it !
Glad you like it Louis, after all the work I have put into it, I am quite attached to the model as well. I think I will hang on to this one. Thanks for you kind comment.
Great result Marc - a great post - fascinating to see how you did it!
Hey David, I am glad to hear that most of you have enjoyed the post as much as I have enjoyed posting, all your comments have inspired me. Thanks.
Just going to have to add to all the accolades! Loving it...
Hey there Greg, always good to hear from you, thanks for the comment Mate.
Beautiful work, Marc. I like this a lot.
Hi Tom, nearly there, thank you for your comment.
just ridiculously fine
Cheers and thanks a mil Bob.
Very inspiring.
Thanks a mil Bill.