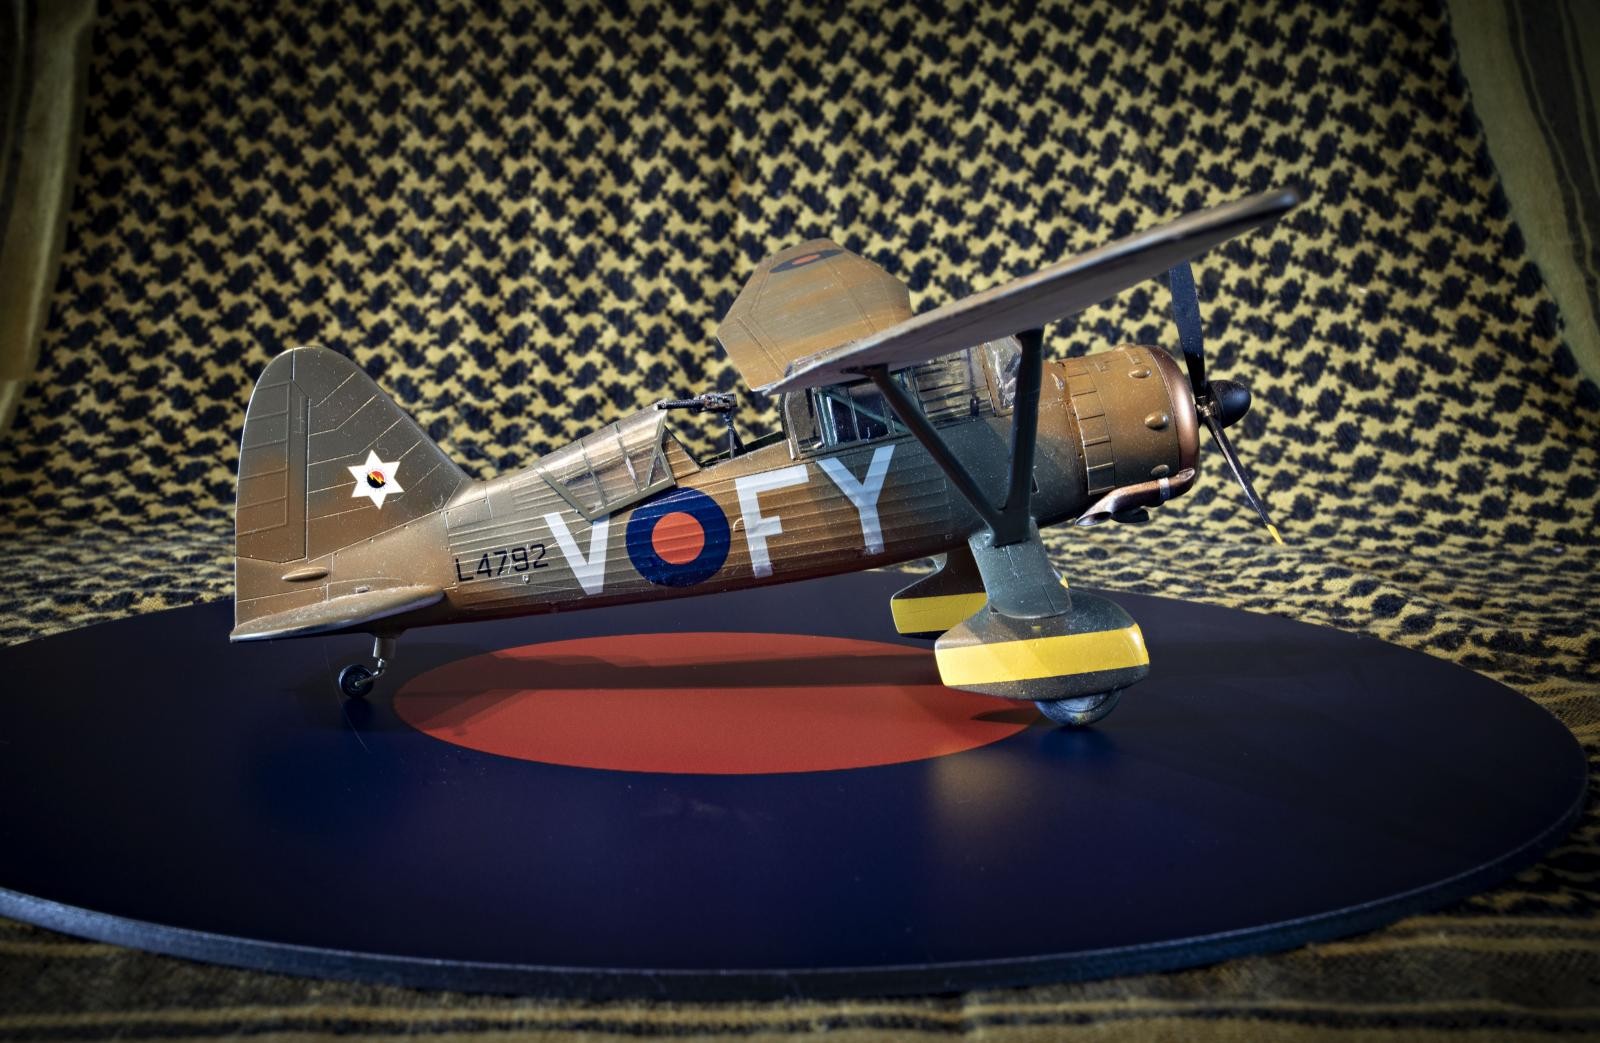
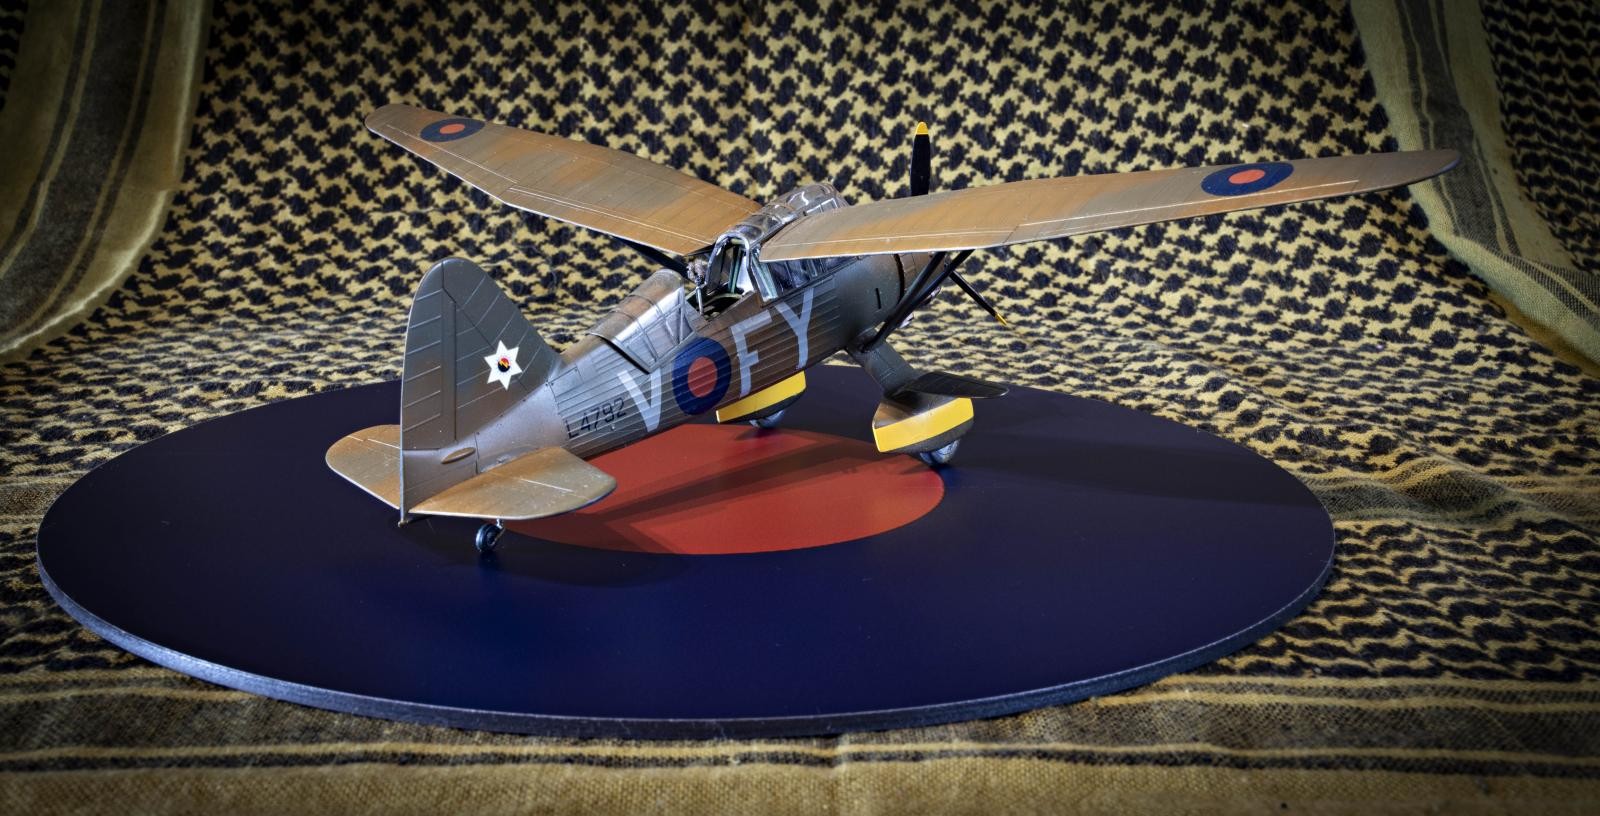
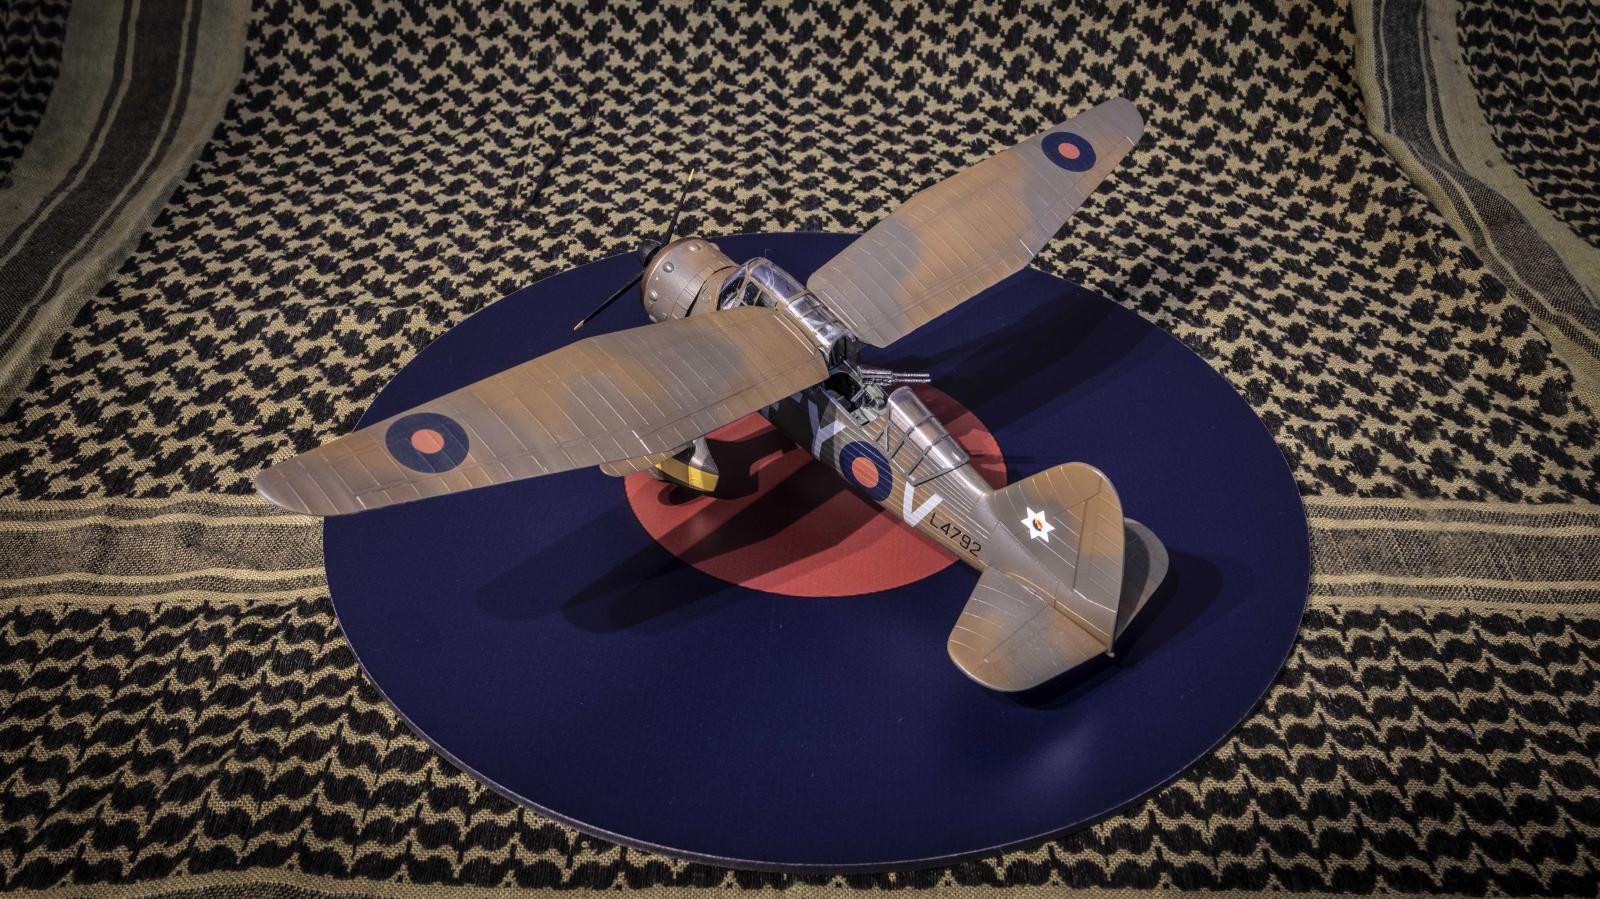
RAF 100 Group Build: Westland Lysander. No 4 Sqn, Eduard (Gavia) 1/48. Where was the RAF at Dunkirk? (Part One).
This article is part of a series:
- RAF 100 Group Build: Westland Lysander. No 4 Sqn, Eduard (Gavia) 1/48. Where was the RAF at Dunkirk? (Part One).
- RAF 100 Group Build: Hawker Hurricane Mk 1. Willie McKnight, No. 242 Sqn. Airfix 1/48. Where was the RAF at Dunkirk? (Part Two).
- RAF 100 Group Build: Supermarine Spitfire Mk 1. Sailor Malan, No. 74 Sqn. Airfix 1/48. Where was the RAF at Dunkirk? (Part Three).
When war was declared on September the 3rd 1939, No. 4 Sqn was ordered to prepare to move to France under the umbrella of 50 (Army Co-operation) Wing as part of the Air Component of the British Expeditionary Force. The order was given to relocate, on the 23rd of September. By the 24th, the Lysander Squadron reconvened at Mons-en-Chausee, about twenty miles east of Amiens. This was the exact location the Squadron had flown above 20 years earlier in The Great War.
Photographic missions started immediately, with recon flights being used to train Squadron ground crew as unofficial air gunners. The area covered by patrols was from the Belgian border to the Maginot Line. Familiarisation of the area was helped by Belgian gunners who shot at the Lysanders if they crossed the border! Through the winter most flying was curtailed by dreadful weather.
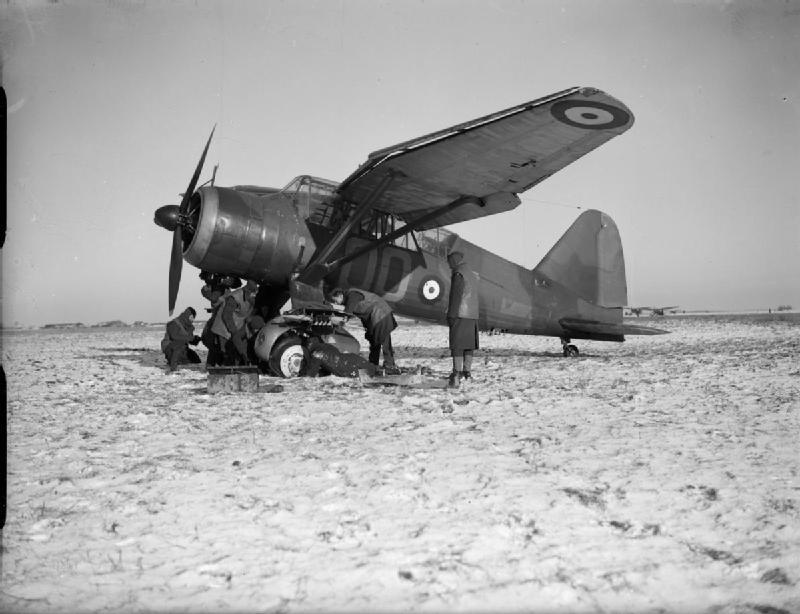
The above photo is of a No. 13 Squadron RAF Lysander, on the frozen ground at Mons-en-Chaussee, France, as ground crew investigate a deflated tyre on the port undercarriage (Imperial War Museum).
Congestion at Mons-en-Chaussee led to No. 4 Sqn being relocated at the satellite airfield of Monchy-Lagache on the 3rd of October, and the squadron settled down to the routine of the "Phoney War". A popular pastime to stave off the boredom, and a cheap way of getting cigarettes, was to write articles for cigarette manufacturers, recounting adventures of British troops in France. These highly exaggerated ‘ripping yarns' were paid for with tins of fifty.
Hitler's November 12th deadline for the offensive into France passed, unbeknown to the Allies, postponed by the continuing foul weather. In spring 1940, an increase from twelve to eighteen aircraft boosted No. 4 Squadron and operations recommenced. On the 10th of May 1940, at first light, German formations attacked along the borders of Holland and Belgium, punching through the armies of those countries and heading for the Channel ports and the French border. The BEF units moved forward into Belgium and engaged the German army as far inland as they could.

The 'blitzkrieg' started at dawn for No. 4 Sqn as the airfield at Monchy-Lagache was raided by a Heinkel bombers. Little damage was caused, and there were no casualties. With the BEF II Corps moving into Belgium, No. 4 Sqn carried out reconnaissance and contact patrols and as soon as the ground units moved, aircraft from 4 Sqn crossed the border into hostile airspace in Belgium, four hours ahead of Allied troops. The RAF had been taking significant losses at this stage, but no Lysanders were lost by 4 Sqn on the first day.
An airfield at Aspelaere was found not to be marked as a landing ground on any maps, so a Royal Engineer construction company travelled to the site. The squadron relocated and plans were also put into action to disperse aircraft back to Monchy every night, so decreasing the chances of losing all the aircraft on the ground in a bombing raid.
On 13 and 14th of May with II Corps dug in along the River Dyle, No. 4 Sqn commenced reporting on enemy movements, and lost two planes and crew, and had two more damaged. On the 16th of May 1940, the whole Squadron moved from Monchy to Ronchin, a small field by a crossroads. Disastrously a German spotter aircraft saw the Lysanders landing, and the aerodrome was immediately attacked by a large formation of Stukas. The ground was also within range of German artillery. Miraculously there were no causalities and no planes were lost. After this lucky escape the Lysanders were able to attack and destroy a forward recon unit of German troops on motorbikes, although such gains were rare.
The Squadron received orders to withdraw to Boulogne, and formed convoys. The groundcrew got away quickly, but the aircraft were caught soon after take-off by six Bf110s. The majority of Lysanders escaped, by flying slowly and turning so that the 110s overshot, and one 4 Sqn crew even claimed an enemy fighter. 2 more Lysanders were shot down, and crews lost.
The convoy was next bombed by ten Heinkel 111s, but avoided casualties. On arrival at Boulogne, the Squadron was moved to Clairmarais to operate from there. Improvised anti-aircraft defences were devised, with some .303 Browning machine guns which had been salvaged from the unrepairable wrecks of Lysanders which littered the airfield now being erected on twin mountings built by Squadron riggers.
Although replacement aircraft and personnel reached the Squadron, the rate of attrition was overwhelming and compounded by a two day long artillery barrage . Damage and casualties were high and retreat to St Omer was preceded by destruction of heavy equipment to prevent it being captured.
With a lull in the shelling on the 22nd of May all remaining serviceable Lysanders headed for Clairmarais. However a bombing raid on the airfield followed, and the Lizzies ran into about fifty enemy aircraft; Dornier Do 17 bombers and their escort of Messerschmitt Bf 109s and 110's. The surviving 4 Sqn aircraft were forced to scatter and this marked the end of B and C Flights as an effective combat force.
'A' Flight ground crew and the Headquarters section reached Clairmarais and met up with three aircraft which had found their way out of the fighting over Ronchin. From there 4 Sqn continued to support the British withdrawal as best it could, absorbing the survivors of A Flt of 13 Sqn, which had also been decimated in the previous two days.
The survivors were ordered to abandon all transport on the airfield, destroy all documents, and withdraw to Dunkirk. Convoys moved off at midnight on the 22nd of May, and reached Dunkirk at 830am. They were attacked six times by Heinkels on the way and as the convoy approached Dunkirk it was bombed by a formation of Stukas, with severe loss of life. The survivors, under the command buried their dead in a field beside the wreckage of their transport and continued into Dunkirk on foot. That night they embarked on the SS St Helier, arriving at Dover at 2130 hrs.
The remainder of 'B' Flight went to Clairmarais. On their arrival the flight set about salvaging what equipment they could, and flew recon missions. The British position in France was however impossible, and on 24th of May news came that a large number of tanks were about to overrun the area. All aircraft were flown off and the ground crew were withdrawn to Dunkirk. A final recon flight was made as soon as the convoy had cleared the airfield, and some Squadron members returned to Clairmarais to destroy everything left behind, including 5,000 gallons of fuel.
From the 10th to the 23rd of May 1940, No. 4 Sqn had flown 106 combat sorties, and had lost all but eleven of their aircraft and all of their technical equipment and transport. Nine aircrews (18 members) had been killed, the groundcrew had sustained over 60% casualties. Decorations which were awarded to 4 Sqn included DFCs to Flt Lts Campbell-Voullaire and Barton, Plt Off Langley and Capt Hill, and LACs Allen and Drewitt both received the DFM.
On arrival at Dunkirk the remaining 4 Sqn Lysanders, the last operational British aircraft in France, were withdrawn to Hawkinge. Eventually the ground crew embarked on HMS Wild Swan for the return to the UK.

The first answer to the question ‘Where was the RAF at Dunkirk?' is bleak. Some were fighting their way back from France under heavy German enemy fire.
No. 4 Sqn regrouped in Manchester and waited for news of their next consignment of aircraft. They hoped for Blenheims or Defiants. They were distraught to find out they would be getting more Lizzies! For the next chapter of the war, the Battle of Britain, they flew recon and sea rescue missions over the channel. No 4 Squadron went on to fly Recon Spitfires and Mosquitoes, and Tomahawks and Mustangs later in the war; Harriers over Port Stanley during the Falklands conflict; and currently provides fast jet training including preparation of airmen to fly F-35s.
Per Ardua ad Astra, indeed!
Espléndido reportaje, Paul ! .Una información muy interesante.El Lysander está muy bonito y real
con una presentación digna de museo.
Thank you Julio - the full story is available in the Squadron history.
Paul that's an outstanding looking Lizzie! Great history lesson as well, really like the way she looks in that camo scheme . Job well done Paul.
Thank you, Tom.
Nice work, Paul! Excellent history provided too.
Thanks, John. As above, the history is all there online - it certainly spurred me on to choose a Lizzie!
Looks great! I love this plane, built the old Hawk kit when I was a kid.
Thanks Robert, the Gavia kit that Eduard reboxed takes a bit of thinking through, but overall it was fun!
Beautiful build Paul. Nice photography too. And of course a good history lesson tops it all off.
Cheers, Gary.
Great read. I had to go back and look at the photos of the model. Which is on par with the article. I hope that the Judges recognize not only your model Paul but, include the article and how it is being presented. More recognition for writing should be considered in the "Model of the Month" award.
Two thumbs up
Thank you Stephen, when I look at some of the builds on here I am just happy to be learning from them.
What a great story Paul, a fine tribute to crews that flew and fought against overwhelming odds. Your model does full justice to their legacy
That's very kind Pedro, I really appreciate the comment.
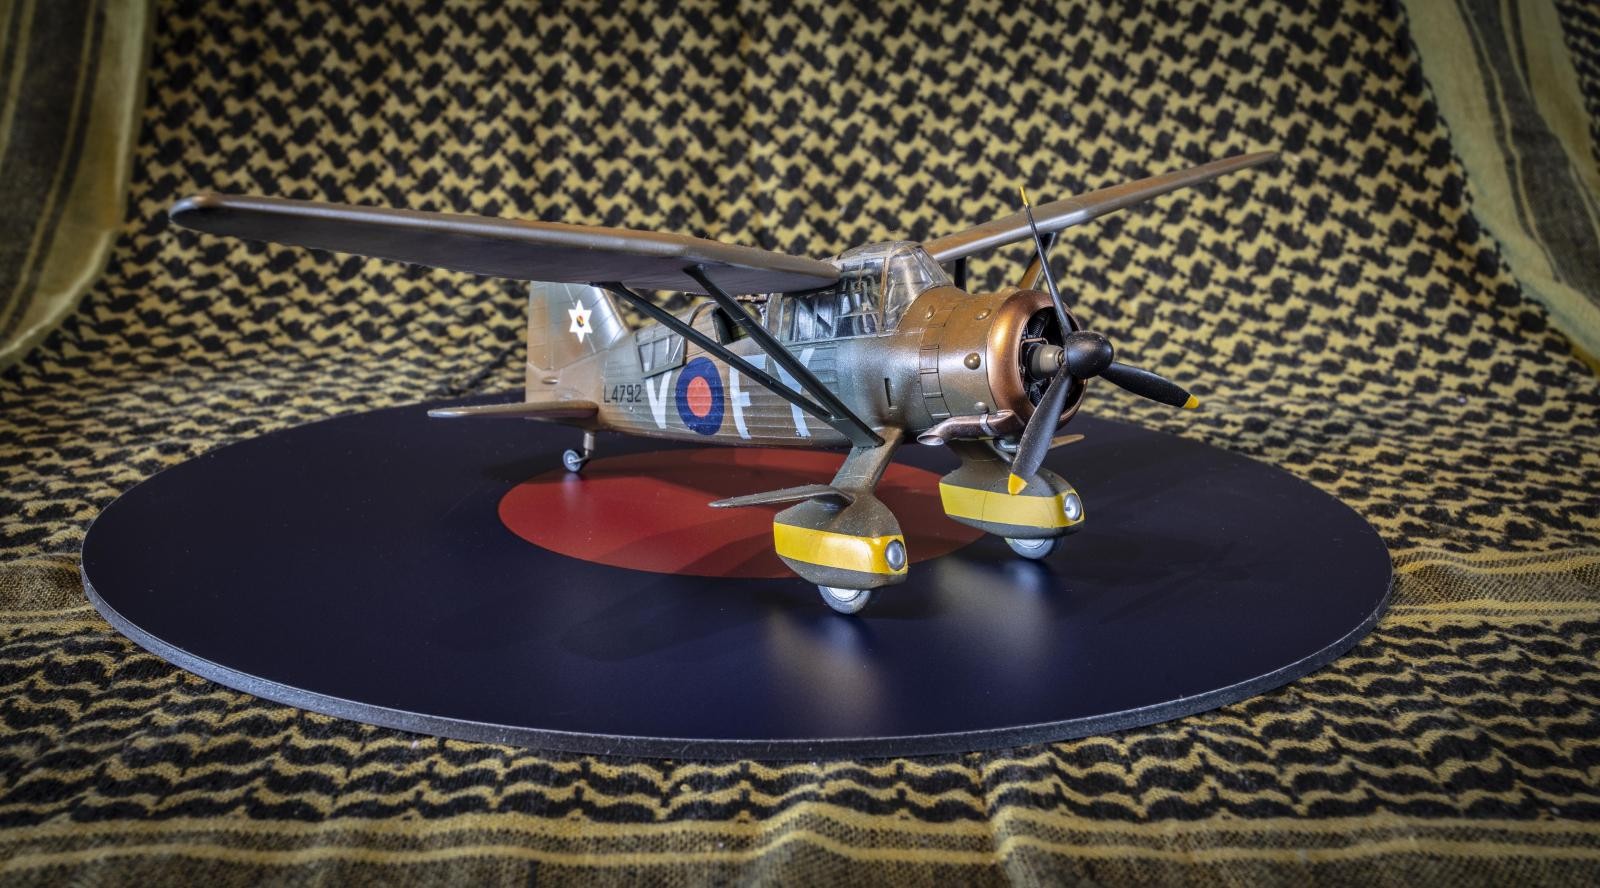
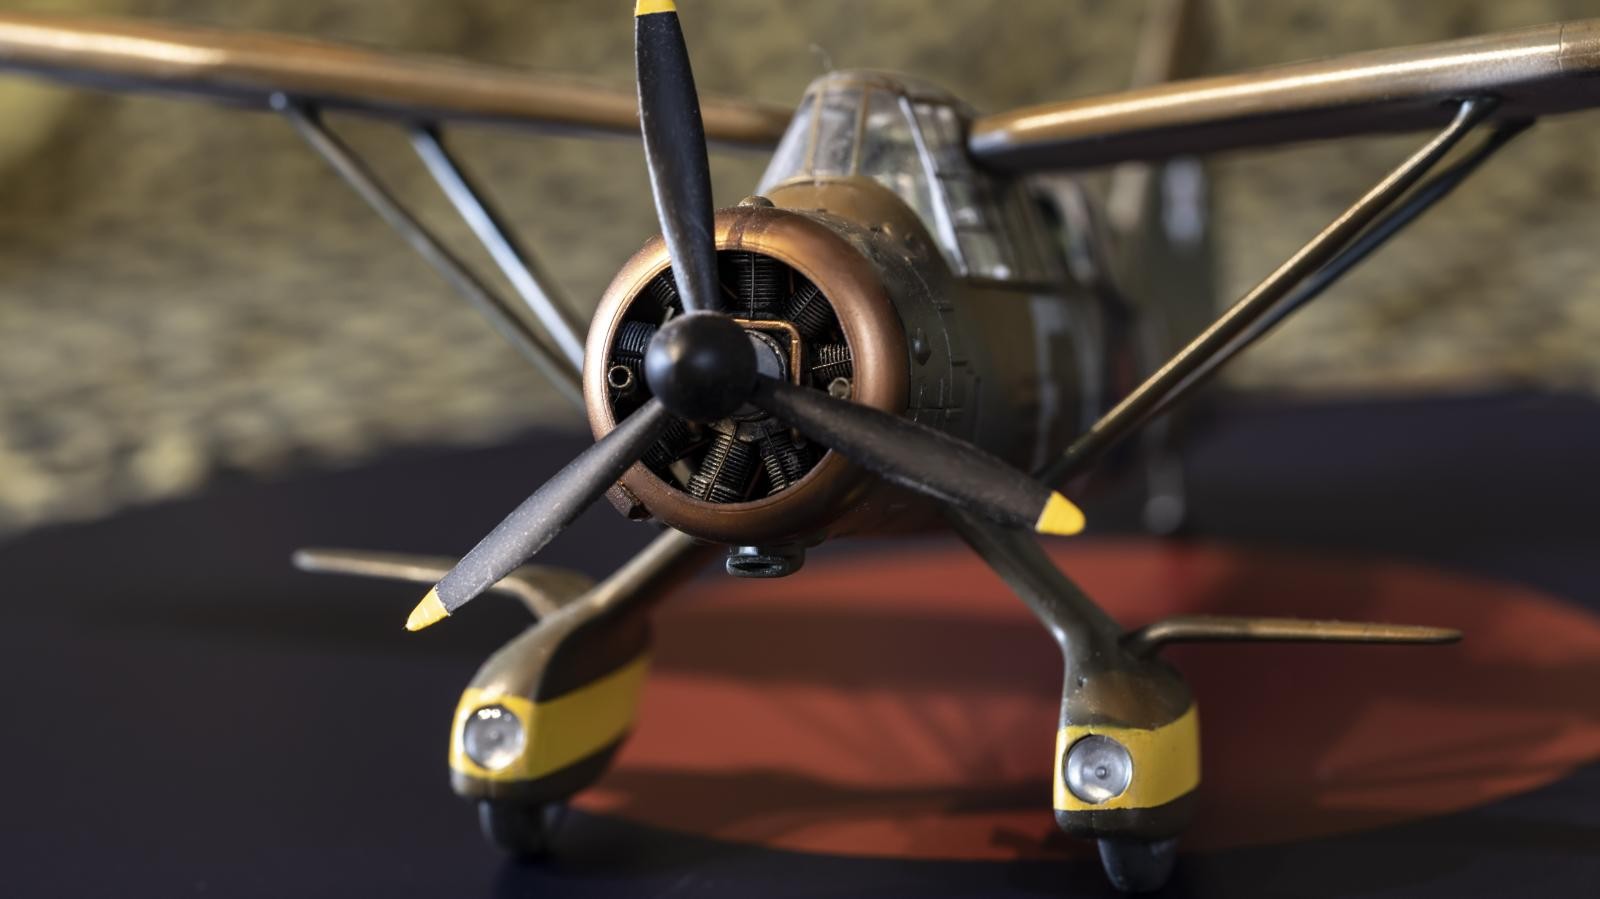
What's left to say but simply Outstanding work Paul. Hat's off to you for this fine job. Image 9 is one of my favorites. It captures a bit of gracefulness to a rather large and ungainly looking bird.
Well done!
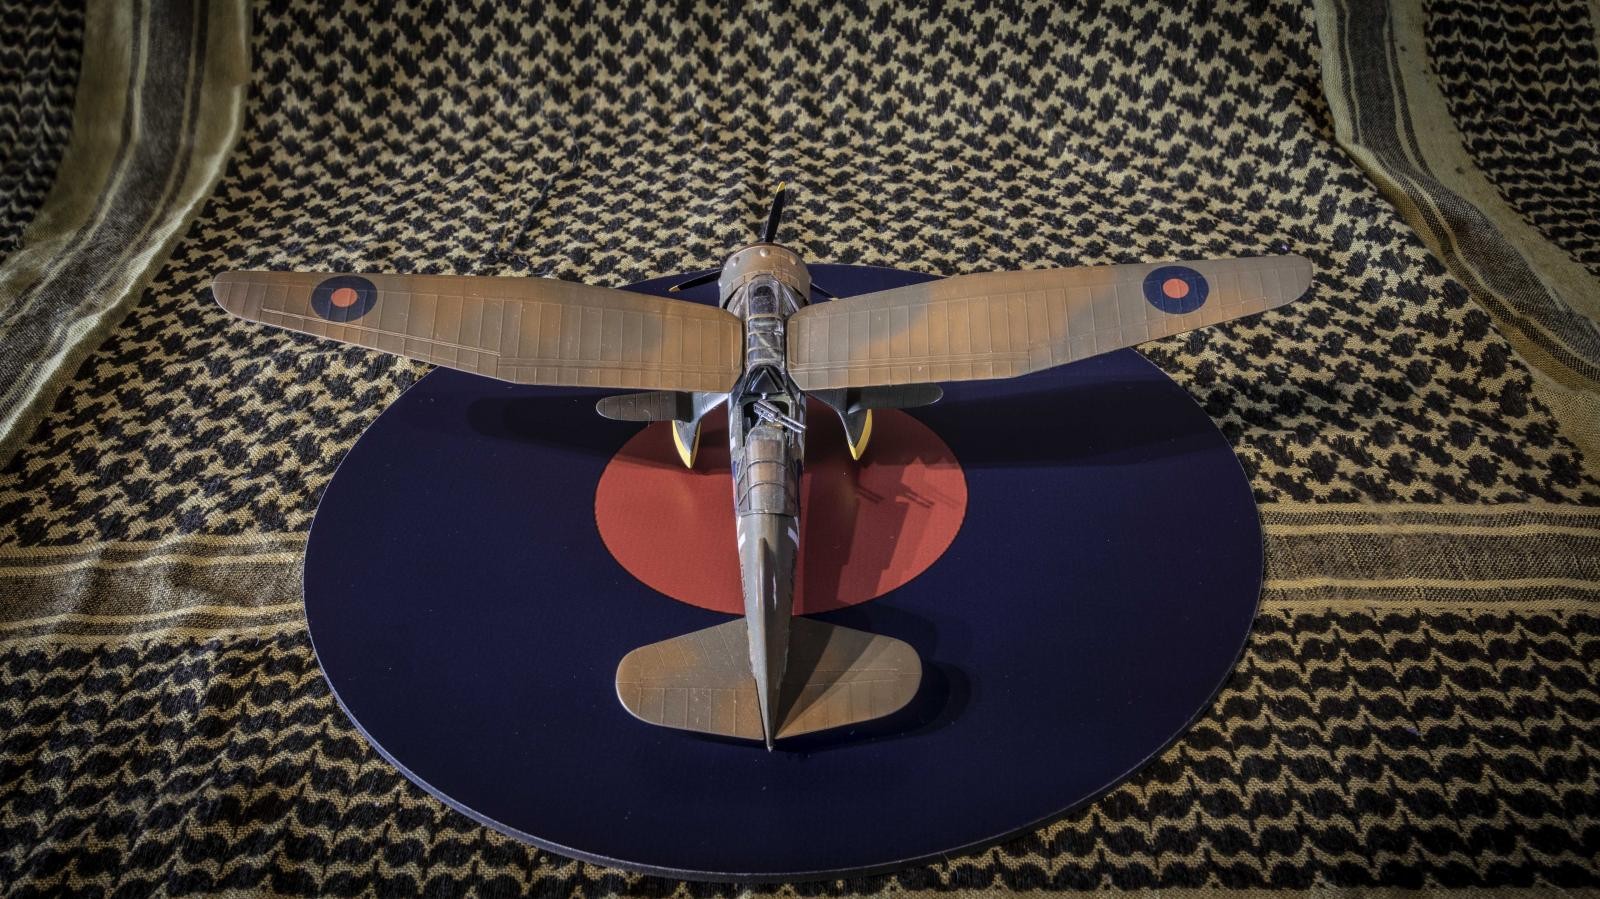
Thanks James, these basically VTOL aircraft fascinate me - very similar to the Storch - the wingspan compared to the actual length of the plane gives it a very characteristic look. But yes, having stood beneath the Lysander at Hendon, and seen them fly at airshows they are much bigger and robust looking than one might expect!
Looks good Paul !
Thanks Allan!
Excellent Lysander, Paul, and I welcomed the history lesson. Very interesting, Sir!
Thanks so much Jeff, always great to hear from you!
I'm late to the party, but I enjoyed it just the same... Well done Paul. @yellow10
I like everything about this, from the RAF Roundel base the model is sitting on to the photos of the model. The article is well written and the history lesson is second to none !
Well done on all fronts ... I'm looking forward to seeing your next postings.
"liked" 🙂
Hello Paul,
Excellent model and my compliments on your"in depth" article.
Much appreciated, makes it so more interesting.
Regards, Dirk