Priller’s Würger…D-Day, 6 Jun 1944
Eduard 1/48 Fw 190 A-8 (old mold).
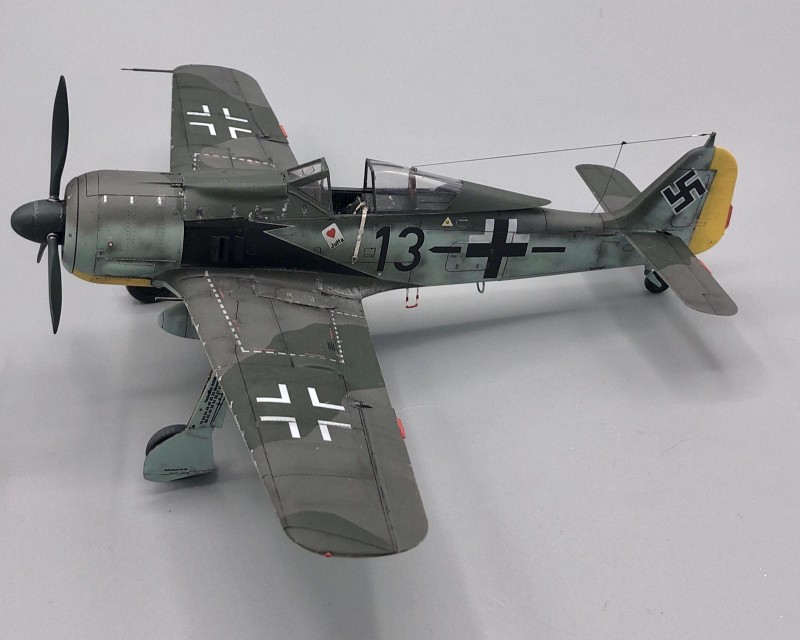
I first saw “The Longest Day” as a 14-year-old airplane nut when the movie first came out in 1962. The scene showing Pips Priller's D-Day strafing run on SWORD Beach has stayed with me since. In honor of the 75th anniversary of the D-Day landing and Priller's flight, I decided to build his historic airplane.
Tom Cleaver did a magnificent build of this same subject a couple of weeks ago using Eduard's new mold Fw 190 A-8 kit. I would refer you to his post here on iModeler to see his work and read his exceptional (as usual) write up on the development of the FW 190 and a detailed description of Priller and his flight.
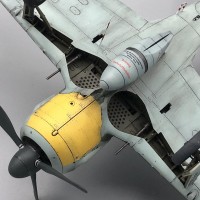
My build began life as the 1/48 Eduard old mold Fw 190 A-8 Weekend Kit. This is a very well-engineered kit for those that like to show the internal workings of an airplane. In this case you can build the kit with the engine, fuselage machine guns, and wing cannons exposed…or not. I am a pilot and look at an airplane as the sum of all its various parts and not individual systems. Because of this, I chose to do my build with all of the panels closed up and the plane ready for take-off on the early morning of 6 Jun.
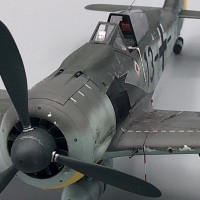
The build began, as usual, with the cockpit. I made hefty use of Eduard's PE for this kit. I modified the Revi gunsight by making the reflecting glass and sun filter out of .007-inch plastic sheeting. Next came the fun of building the fuselage forward of the cockpit. With this kit, you HAVE to build the firewall, motor mounts, and engine in order to install the cowling panels and cowling/oil cooler ring. Some internal parts that weren't needed for this were omitted like the machine gun breeches. Likewise, I only painted those parts of the engine that would be seen behind the cooling fan. It took a bit of additional “plastic surgery” to make everything fit within the confines of the cowling. Of special note is that on the real airplane, the cooling fan sits right inside the cowling/oil cooler ring and not behind it like the old Monogram kit, so “cut and fit and repeat as needed” is a major part of the game. With patience, it will work, but that's part of modeling. The next job was to close up the cannon bays in the wing roots, but this was a much easier task. I made the brake lines out of thin copper wire and the cannons and pitot tube out of hypodermic needles (I hate having them break off after I finish a build). For the cannons, I used 21 gauge needles inside 18 gauge needles to give the “stepped down” look. For the pitot tube I used 27 gauge inside 22 gauge. The rest of the build was pretty standard, otherwise.
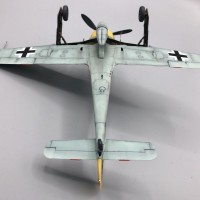
I primed the model with white Stynlrez and painted the standard RLM 74/75/76 camo using Vallejo Air paints. I used the Peddinghaus 1/48 Priller decals because they were the only ones I could find online that had the markings for this airplane. I had two complaints about them, however. First, the decals are printed as one BIG decal on the backing paper. This required carefully cutting out each individual decal. Secondly, they were pretty thick and didn't lay down into detail as nicely as I would have wished. This was, however, a blessing in disguise when I discovered that I had improperly located the "schwartz adlers" on the fuselage…after they had sat overnight following TWO applications of Micro Sol. I was able to “lift” them with Micro Set and put them in the right place without them tearing…pretty tough if you ask me. I next did some minor chipping and an oil panel line was to add some weathering. Once done, I gave it a final coat of satin varnish. This seems more to scale than matte, which to me looks more “dusty”. The radio antenna was made using my old standby…EZ-Line.
So that's my tribute to the 75th anniversary of D-Day, Pips Priller, and his Fw 190…I hope you like it.
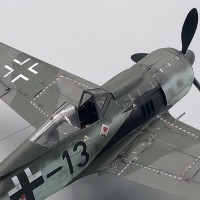
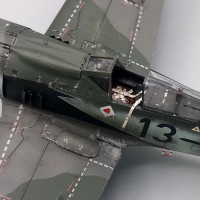
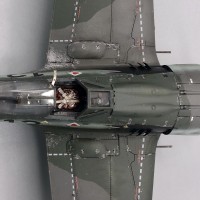
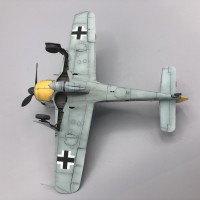

Awesome build! I can't believe you got decals to move after sitting overnight. There are times I have trouble moving decals 30 seconds after I apply them. Great paint and weathering.
I was really surprised too. The decals were actually a bit rubbery in texture. They would stretch and then bounce back into shape...odd for decals.
Simply outstanding Tom!
Very nice 190! I wasn't a pilot, but growing up a pilot's kid, I also prefer to see aircraft as they were designed to be - closed-up (and in my case, in flight)! I understand the joy of getting into all the detail work, but when I see something with all those panels laying open and the innards exposed, it reminds me of a patient on a surgical table!
Nice finishing work on this, and I too am amazed at what you did with the decals! I just messed up the first decal in a splotch camo scheme for a Tony, and just threw the rest of the set away and ordered more for a different scheme!
Thanks Greg. After I screwed up the decals, I figured the the build was over unless I ordered a new decal sheet.But I said,"what the Hell", and gave it a shot. Boy was I surprised.
Great work (as usual) Tom. Superb result.
Thanks, for all the "technical" help. Your info on the fuselage crosses saved me a lot of grief...
Nice looking aircraft
One of the best 190s I've seen. I'm sure I would have wrecked the decals trying to reposition them. Nice work.
"Liked"
Really well done, Tom!
Great looking 190.
Now that right there's a right purdy-lookin' build, Tom...nice work!
Tom, of all the builds you do, I have a sneaky feeling a little more goes into the 190’s. Conscious or otherwise they seem...to have an edge. Can’t figure out if that’s me or you; the eye of the builder or beholder.
Very much ‘liked’
I don't really know. I just keep "playing" with it til it looks right to me.
She IS a standout beauty, despite seeing so many of these.
Absolutely stunning. Wow.
I’ll just echo and say great build Tom
Tom, This is really very nice, excellent paint work. Overall a very realistic looking model. Well done !
fantastic build tom...at age ten in 62 i saw TLD ...i've never shook that scene of priller bad mouthing his superiors then screaming down that beach, mowing them down
That scene is a classic. After flying fighters in the Air Force for twenty years, I can empathize. I have had those types of moments...reason does not matter so you shut up, salute, and press on. Give the boss what he wants, but don't screw your own guys...
Nice work Tom - legend has it that Eduard's old mould Fw 190 was a beast to build, but you seem to have tamed it.
Great build a classic aircraft pin pointed in time!
Yup, I spent about two weeks building everything forward of the cockpit and closing up the cowling since the kit was engineered to have all the "guts" exposed. "Plastic surgery" and patience...
very nice job!
I’m speechless. This is a fantastic looking Focke-Wulf 190... you did real good buddy.
“Liked”
Thanks Louis, it was something I’ve been wanting to do for quite a while. I almost quit a few times during the build because I was worried I had screwed it up.
🙂 … Greetings … 🙂 :
A classy and great work on this model Tom. A nice paint job as well as a slight touch of weathering … very nice work.
Awesome build Tom!
Made me join the webiste too 🙂
Would you mind telling me - were the fuselage Balkenkreuz overpainted on the bottom part or that part was never applied?
Also - why did you decide to keep the panels for the outer wing cannons in place if the machine was "light fighter"? Don't you think those would be different on such an airframe?
I am not as good modeler as you are but I personally also prefer to keet all the things closed (even cockpits!) to show the outlines of aircraft in their full glory no matter which aircraft it is 🙂
Milos,
I do not know exactly how the Balkenkreuz were applied on the actual aircraft. The photos I've seen just show it "modified". I would assume it was normal/complete leaving the factory and modified later in the field...otherwise this would appear on other Fw 190's.
As to the outer wing gun panels...my understanding is that this aircraft began life as a "normal" Fw 190 A-8 with a full complement of wing cannons. Priller wanted those outer guns removed to reduce weight and thus increase speed and improve agility over the heavier A-8. This modification...merely removing the cannons...would have taken place in the field. Thus the wing panels would have remained as they came from the factory. To change them would have required much more work, ie. new sheet metal work and wing skins.
I hope this helps and welcome to iModeler!
Cheers,
Tom
Which Vallejo colors did you use for this, the newer "Air Wars" series? Looks superb.
I used Vallejo Air RLM 75/75/76
Great build. Excuse my ignorance but I'm not familiar with EZ Line (for the radio antenna). I take it that's a brand name? thanks
EZ Line is an elastic thread that I think was originally used for railroad layouts and ship rigging. I found mine on Amazon or ebay.