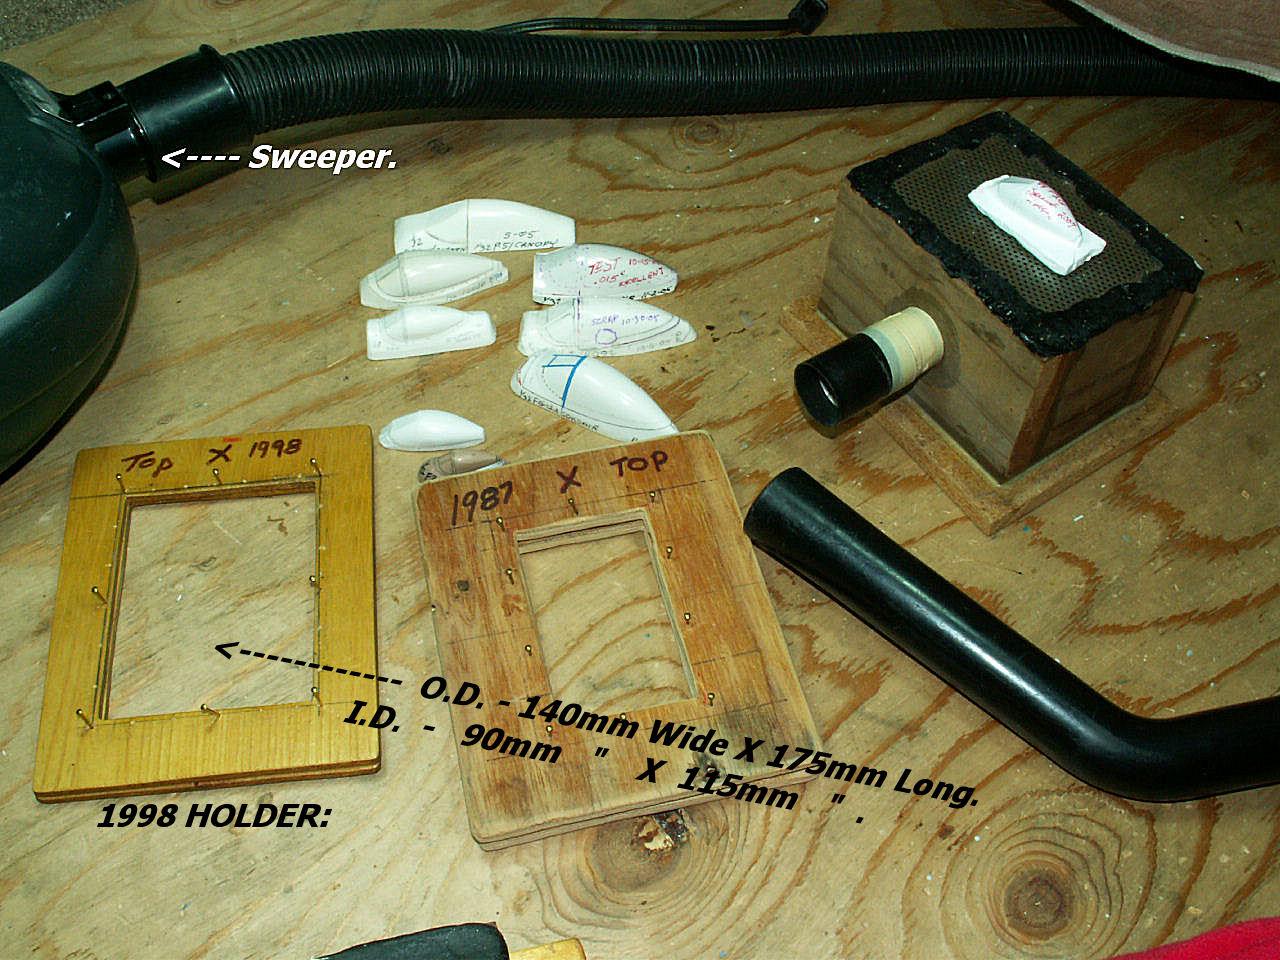
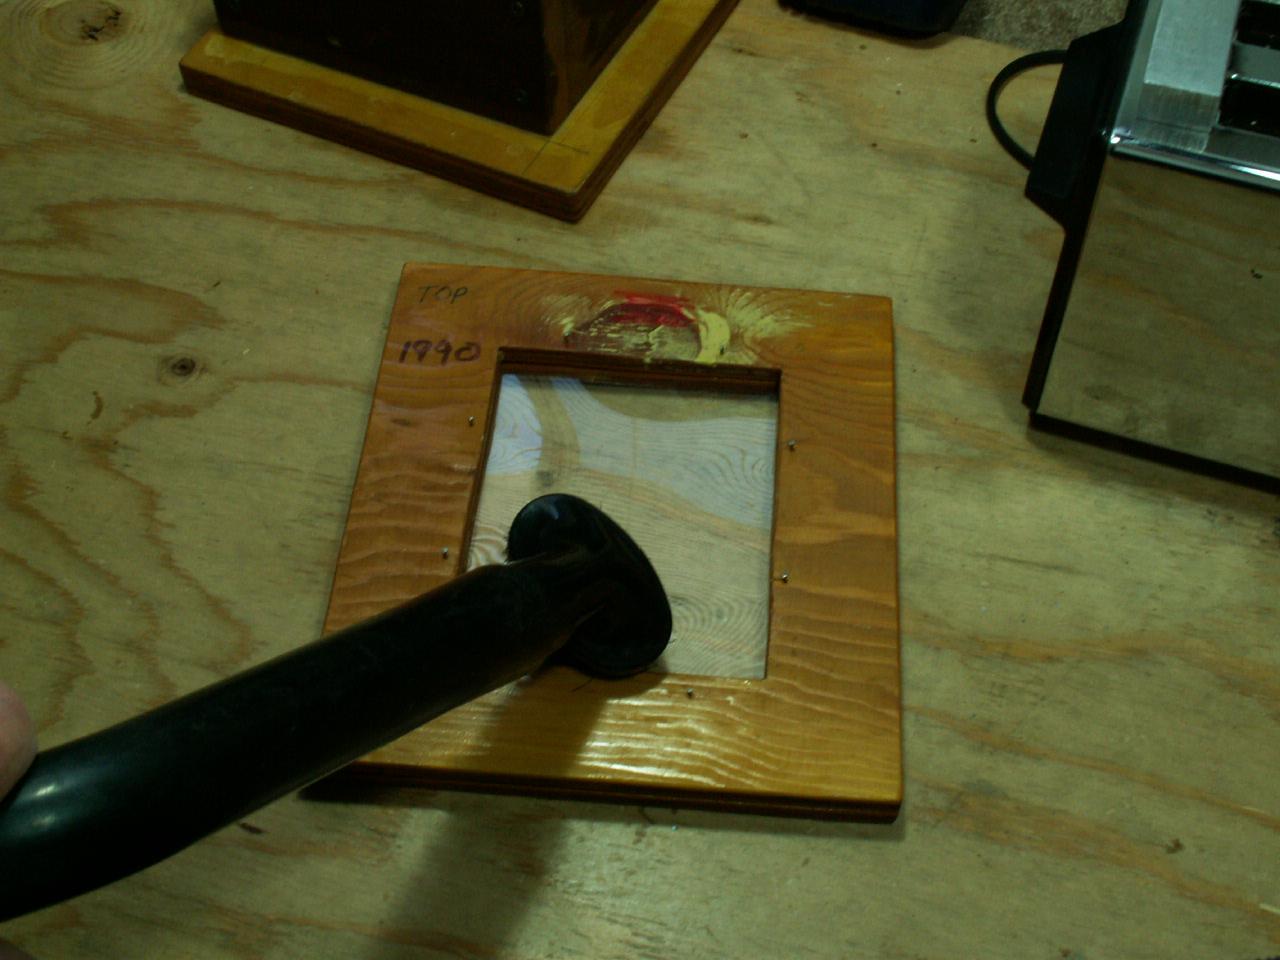
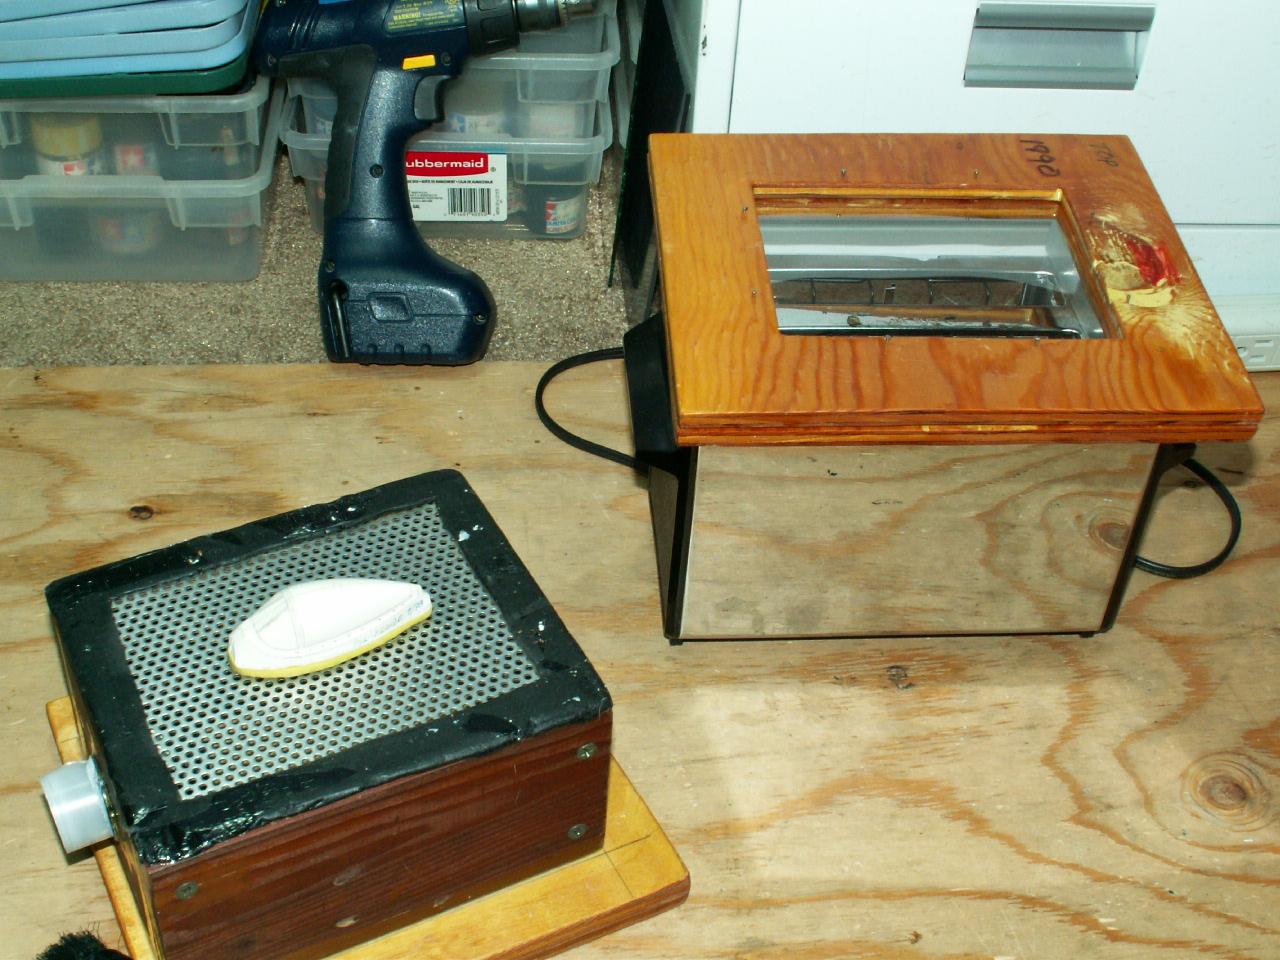
VAC-U-FORM BOX.
In 1984 I wanted to build a 1/32 scale Corsair, but there was no kit and I had no experience in what they called "scratch-building," including "vac-u-forming" parts. In fact, I had no idea what "vac-u-forming" ment.
I was told to build a box and put a screen over the top and a hole in one of the side's for my household sweeper to fit into. I could build a box 'cause I use to build houses and knew a great deal about making things out of wood.
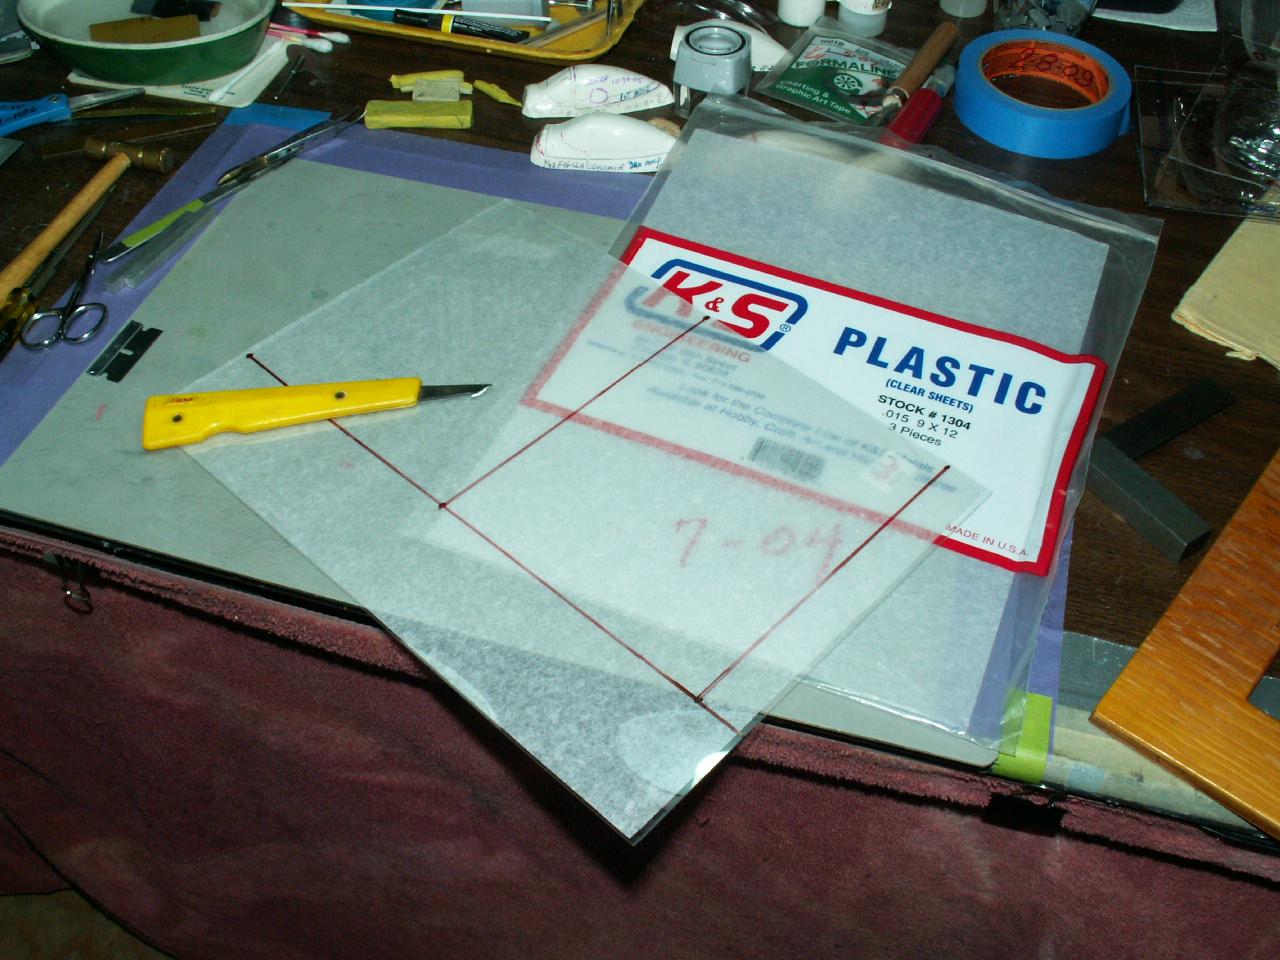
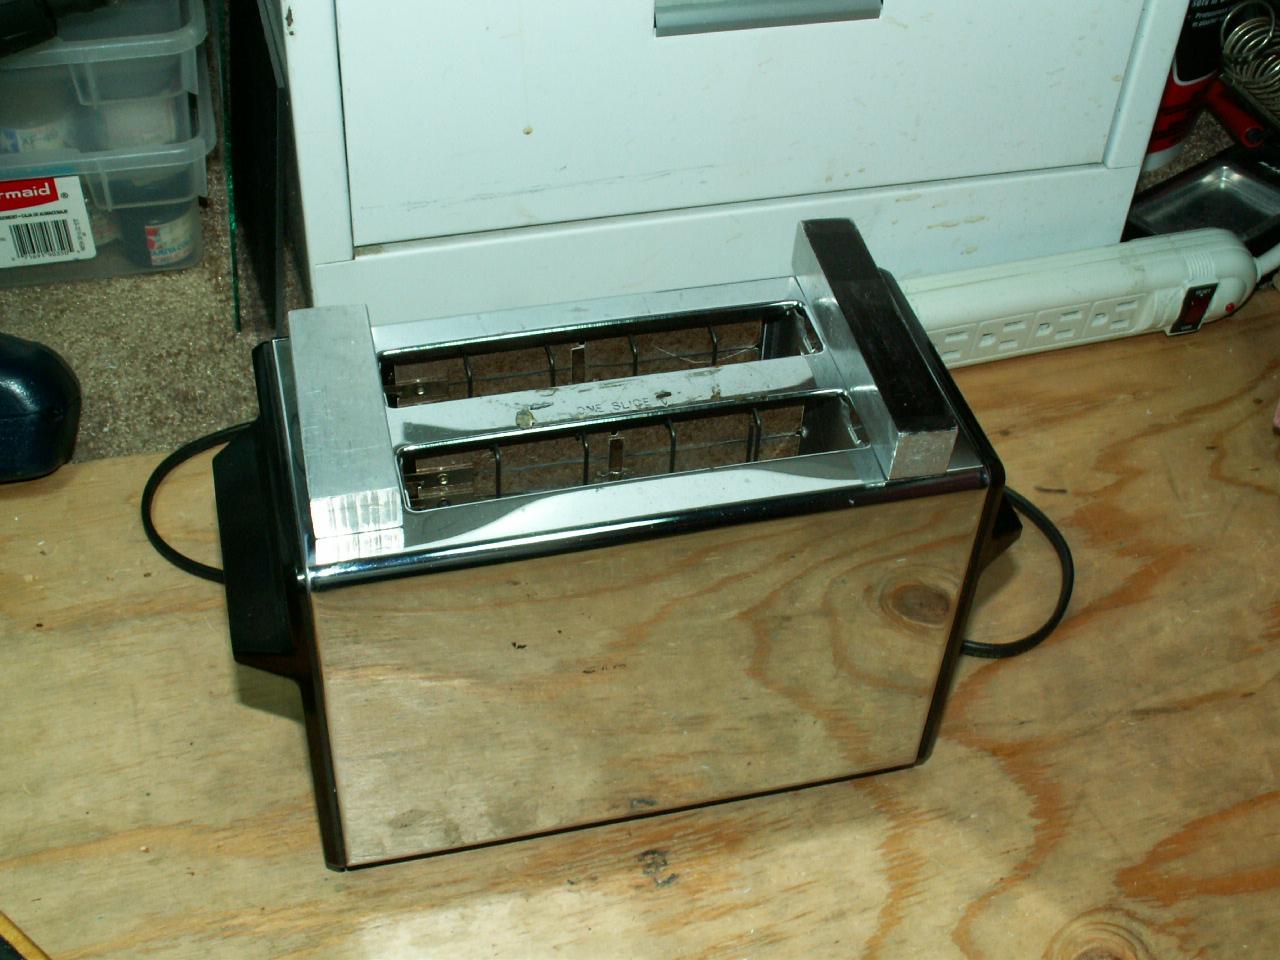
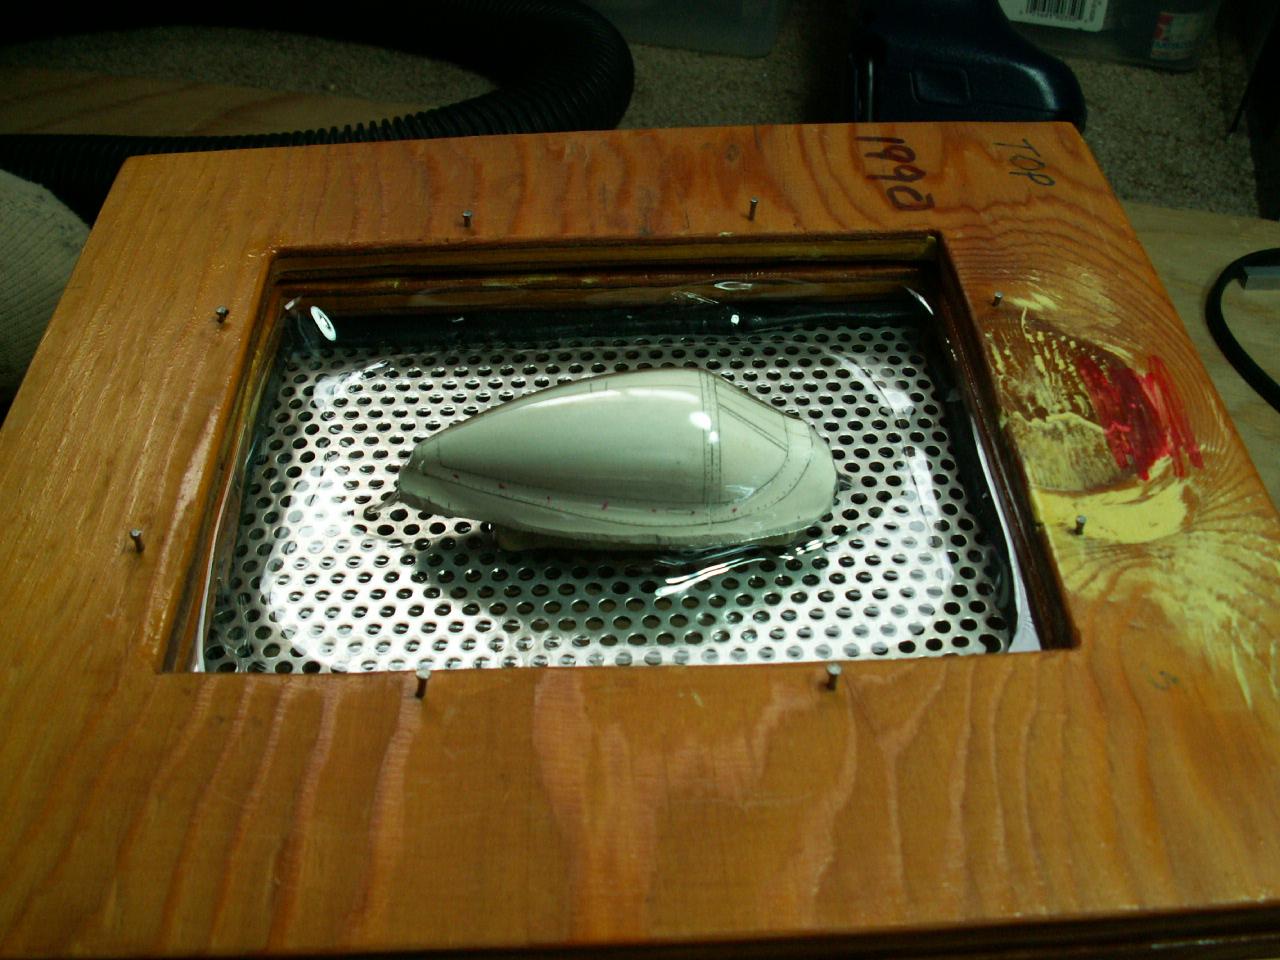
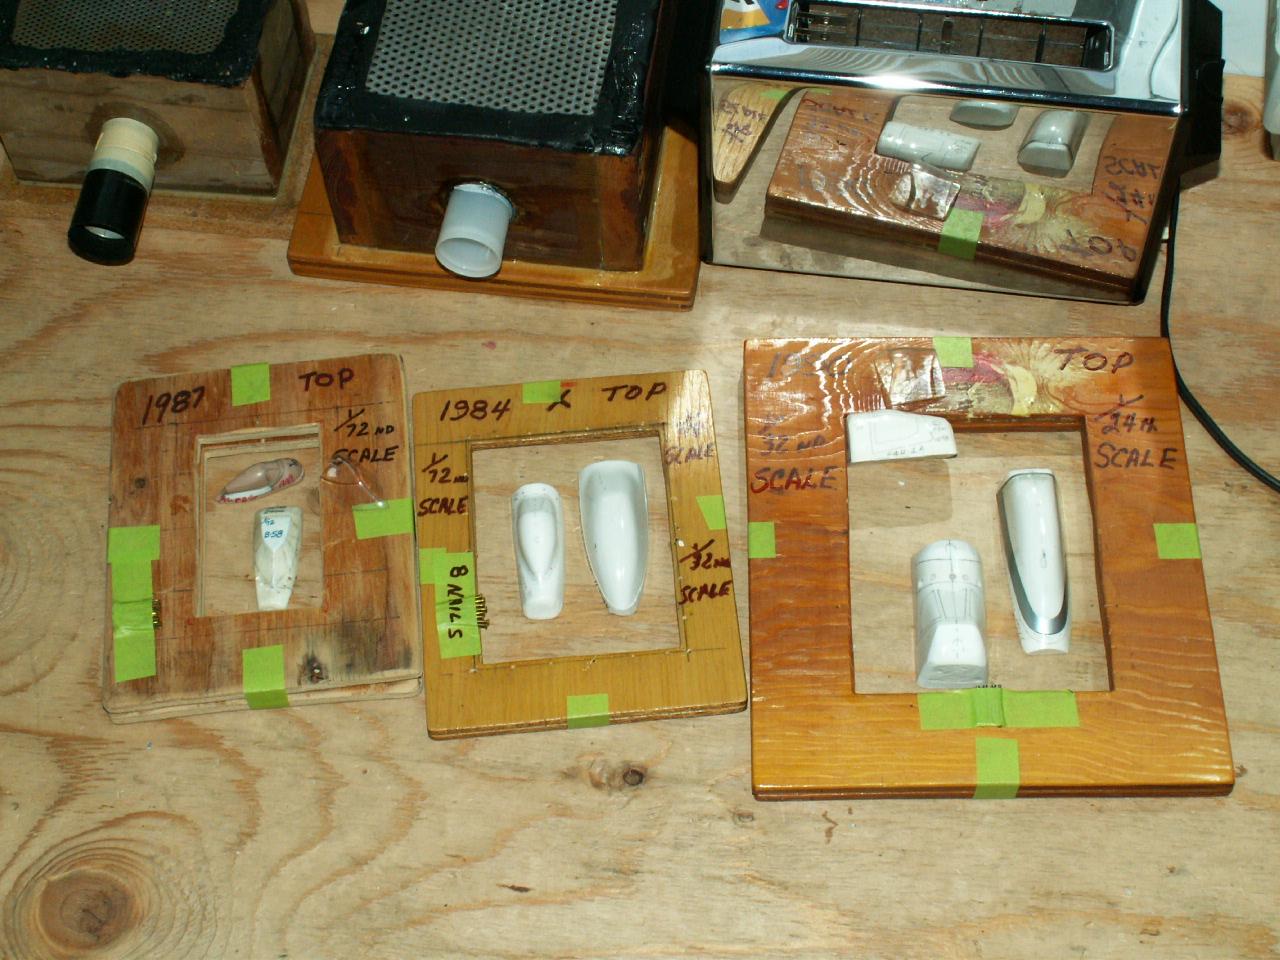
After the box was made I lined the top with some aluminum screen that I bought at a local junk yard in San Jose, California. Then I placed a row of soft black stuff that I got at a local NAPA auto parts store. I made a couple of open wooden frame items to hold the vac plastic in, so I could heat them over a new 2-slice toaster.
Attach your sweeper to the box and turn it on before you start to heat the plastic. I burned my fingers the first time I held the frame over the toaster, so I put a couple of aluminum bars on the toaster and set the frame on them.
Now comes the "experimental" segment of vac-u-forming the special type of "K & S" plastic. How long do you keep the frame & plastic on the toaster? As the heat comes up out of the toaster the plastic get hot and starts to sink down toward the toaster, but then it starts to come back up real fast. Now what do you do next? If you leave the plastic there, bubbles will form in the plastic and holes will appear real fast and ruin the plastic. After ruining a few pieces of plastic, you learn real fast how to take the plastic off the toaster and slam it down on you vac box that has the item on it that you want to make a part. For me it was only airplane windscreens and canopies.
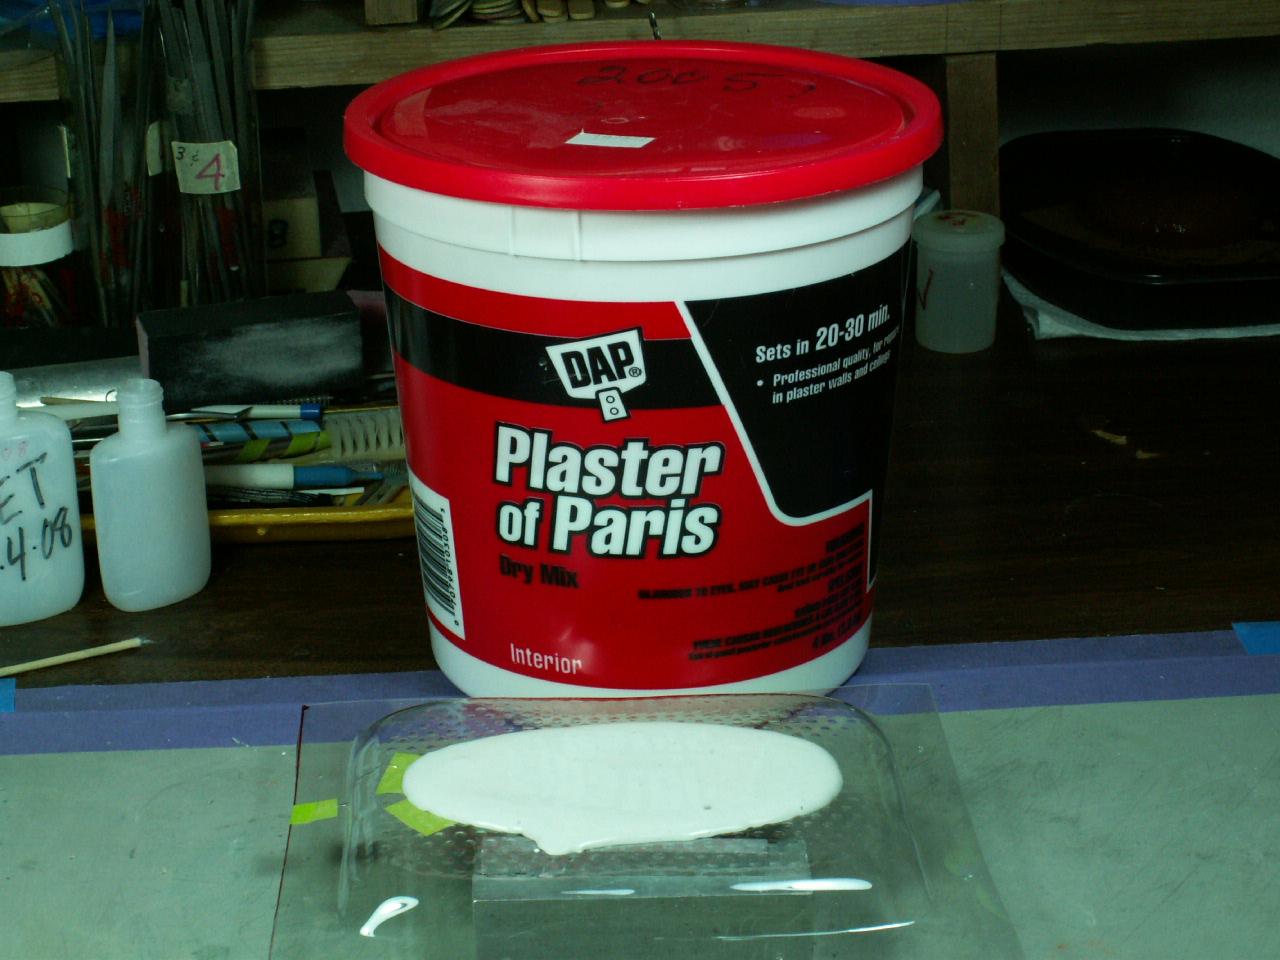
I made plaster molds using ordinary household "Plaster of Paris." I applied masking tape to my clear parts so I could cut off the excess plastic. I had to sand the insides of my windscreens and canopies and polish them with my "Blue Magic" polishing cream. They were mask off and the frame lines were painted on. Most times I attach the w/screens with ordinary Future Floor Wax.
Now it's your turn to make a "vac" box and experiment making some parts.
In my next story I'll show some of my model building tools.
If you ask any questions, PLEASE write your first name down and the country you live in as I don't like to answer what I call "Blank" emails.
Enjoy!

Hi Rodney,
Michel Verschuere, Belgium.
I wanted to understand this technique fully. What do you use as a mold for the Plaster of Paris? Is that the usual kit clear part (canopy, etc.) you use for that? In case of a full scratch build, how do you get the shape right? Can you use a block of Balsa and sand it to shape then use it as a vacuform? Where does the Plaster mold originate?
Thanks for posting, very interesting!
MIchel.
I made plaster molds from the kit's windscreen/canopy original plastic, then revised the molds to my liking. Most all my molds were made between 1985 to 1998. I have photo's of my first "Bass" wood mold for my first F2G Corsair. I'll go hunt them up.
Get off of "imodeler" and send me your email address to "[email protected]" so I can write to you direct without going to "iModeler.
This is exactly what I have been looking to build for myself. I have started collecting parts, but as many other things have been in the way, I haven't finished it yet. I also want to build up a spray booth and a photography light box.
Thank you Rodney. I'll send you an email message soon.
Louis:
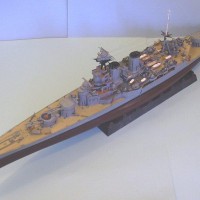
I never made a "spray booth" nor did I ever make a "photography-light box." I made a small wooden table and put it out in the garage when I lived in San Jose, California:(1984-2004) I kept the overhead door open during my paint spraying operation. I did not wear a face mask, 'cause the air coming out of my mouth and nose fogged up my glasses that I wore. I did the same thing when I lived in Colorado; (2004-2016) For a photo booth I pined flexible 2'x3' white and other colored paper to my back shelf then rolled it down flat and taped it to my 3'x6' model working table. I used one movable light on each side of the paper with a 75 and/or 100 watt "DAYLIGHT" COMPACT FLUORESCENT BULB" in each fixture. I set my models in the center of the paper and could turn them around in any direction, including upside down as a photo of the bottom of the model is very important. Your model "must" be built as good on the bottom as it is on the top. If you flatten the tires, you "MUST" scribe in the tire tread..bar none! As a local, regional and national IPMS/USA judge with over 20 years experience I helped other judges disqualify models from the winning circle because the model did not scribe in the tire treads. If you email me off "iModeler's" forum, I can send you photo's of my paint table and the desktop with a model on it being photographed.
Thank you Rodney ! This is some very interesting information especially the tire comments. I'm always learning and try to make each one of my builds better than the last. Please stand by for an email... Thanks again.
As the wonderful Paul Harvey used to exclaim, "And now you know the rest of the story!" Thanks, Rodney, you have given us all an excellent tutorial on vac-u-forming.
Nice tutorial - thanks!