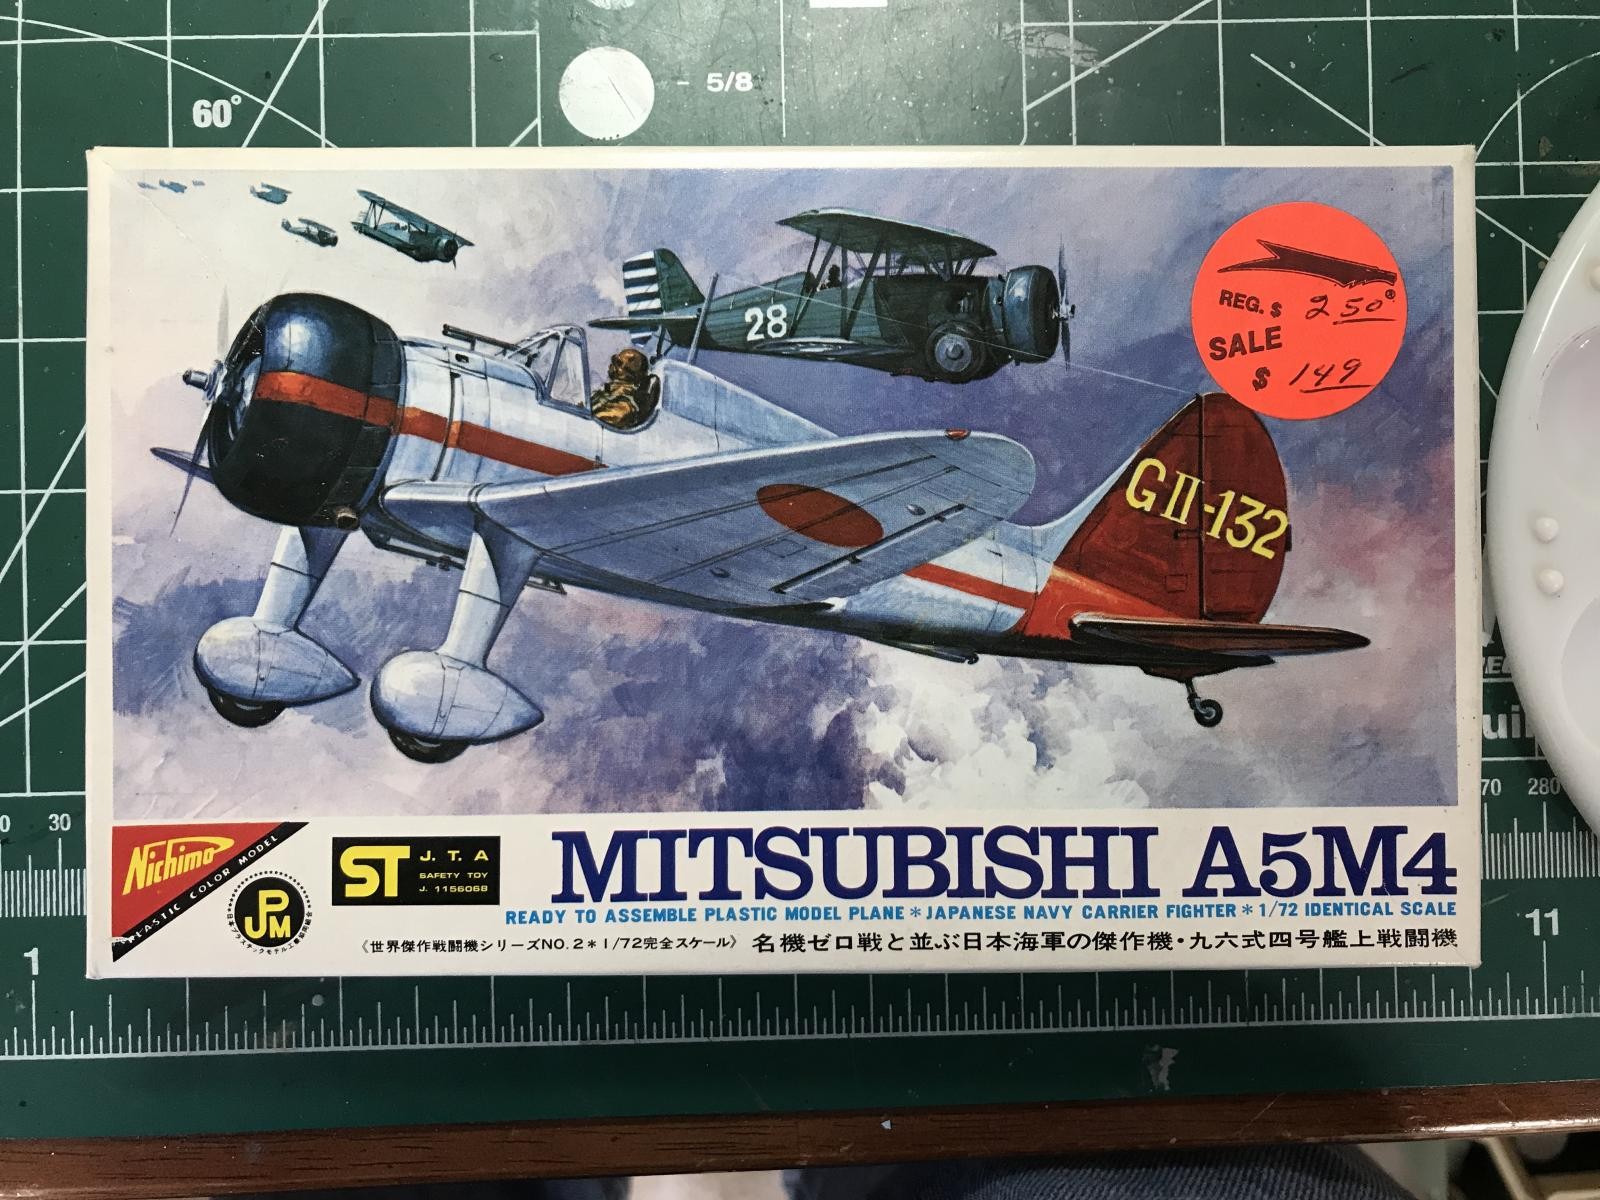
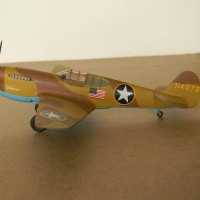
Nichimo Mitsubishi A5M4 Claude – 1/72
I had various projects (the F-2 and a Turk Phantom) in various stages of drying, so decided to pull out a small WWII kit that I could also build for our contest theme in April - "Made in Japan." I had recently seen some great pics of finished Claude models, so decided to go for the Claude. I also wanted a subject to test the new Vallejo Metal paints I had bought to use for the airbrush, now that I'm getting handy with that.
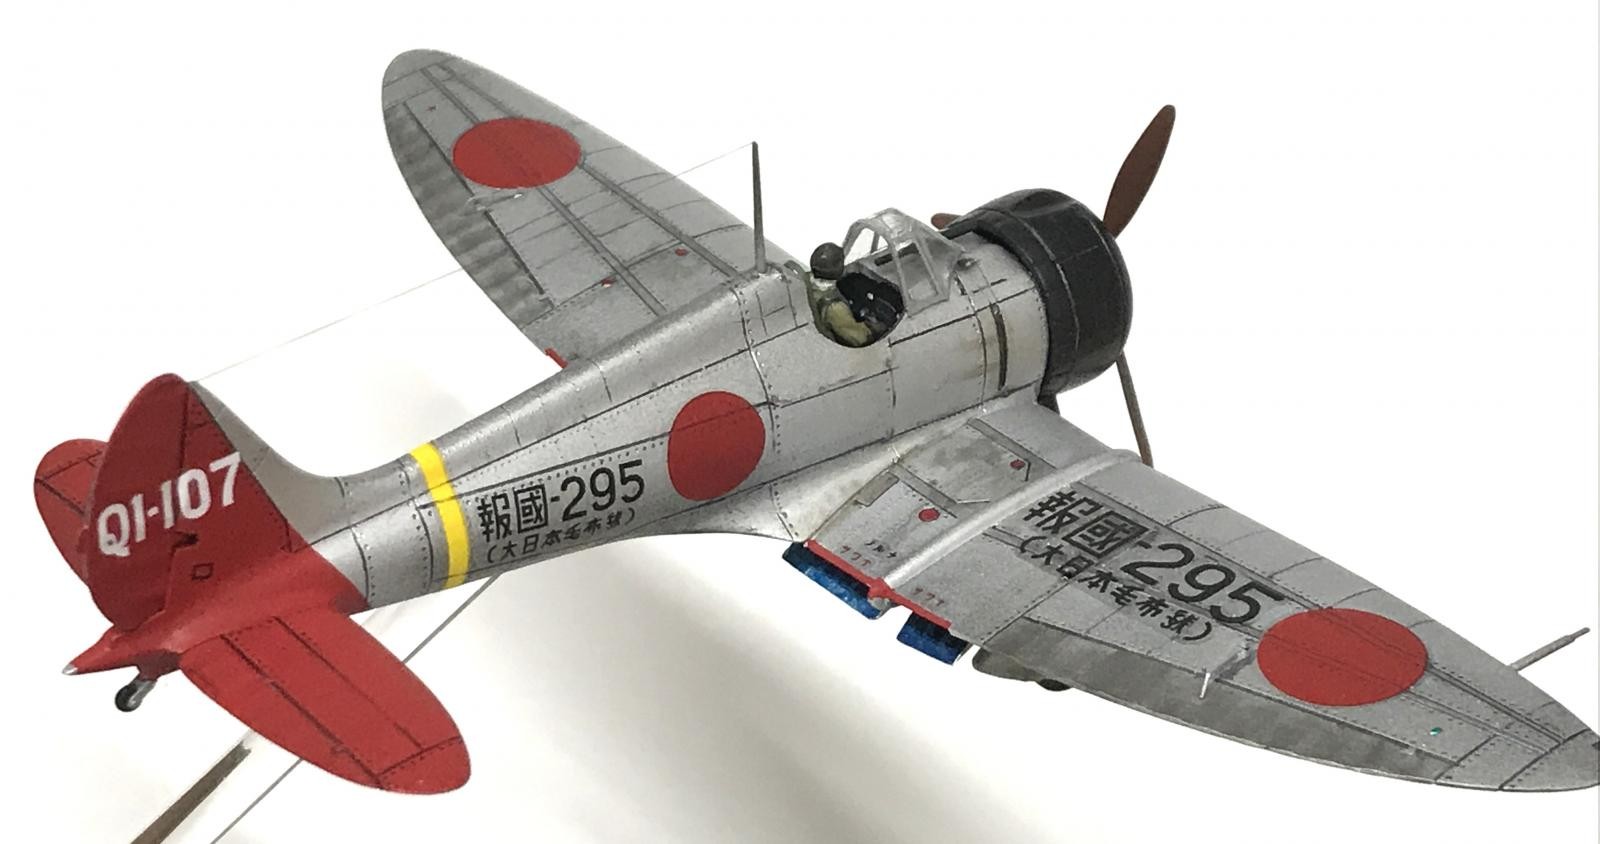
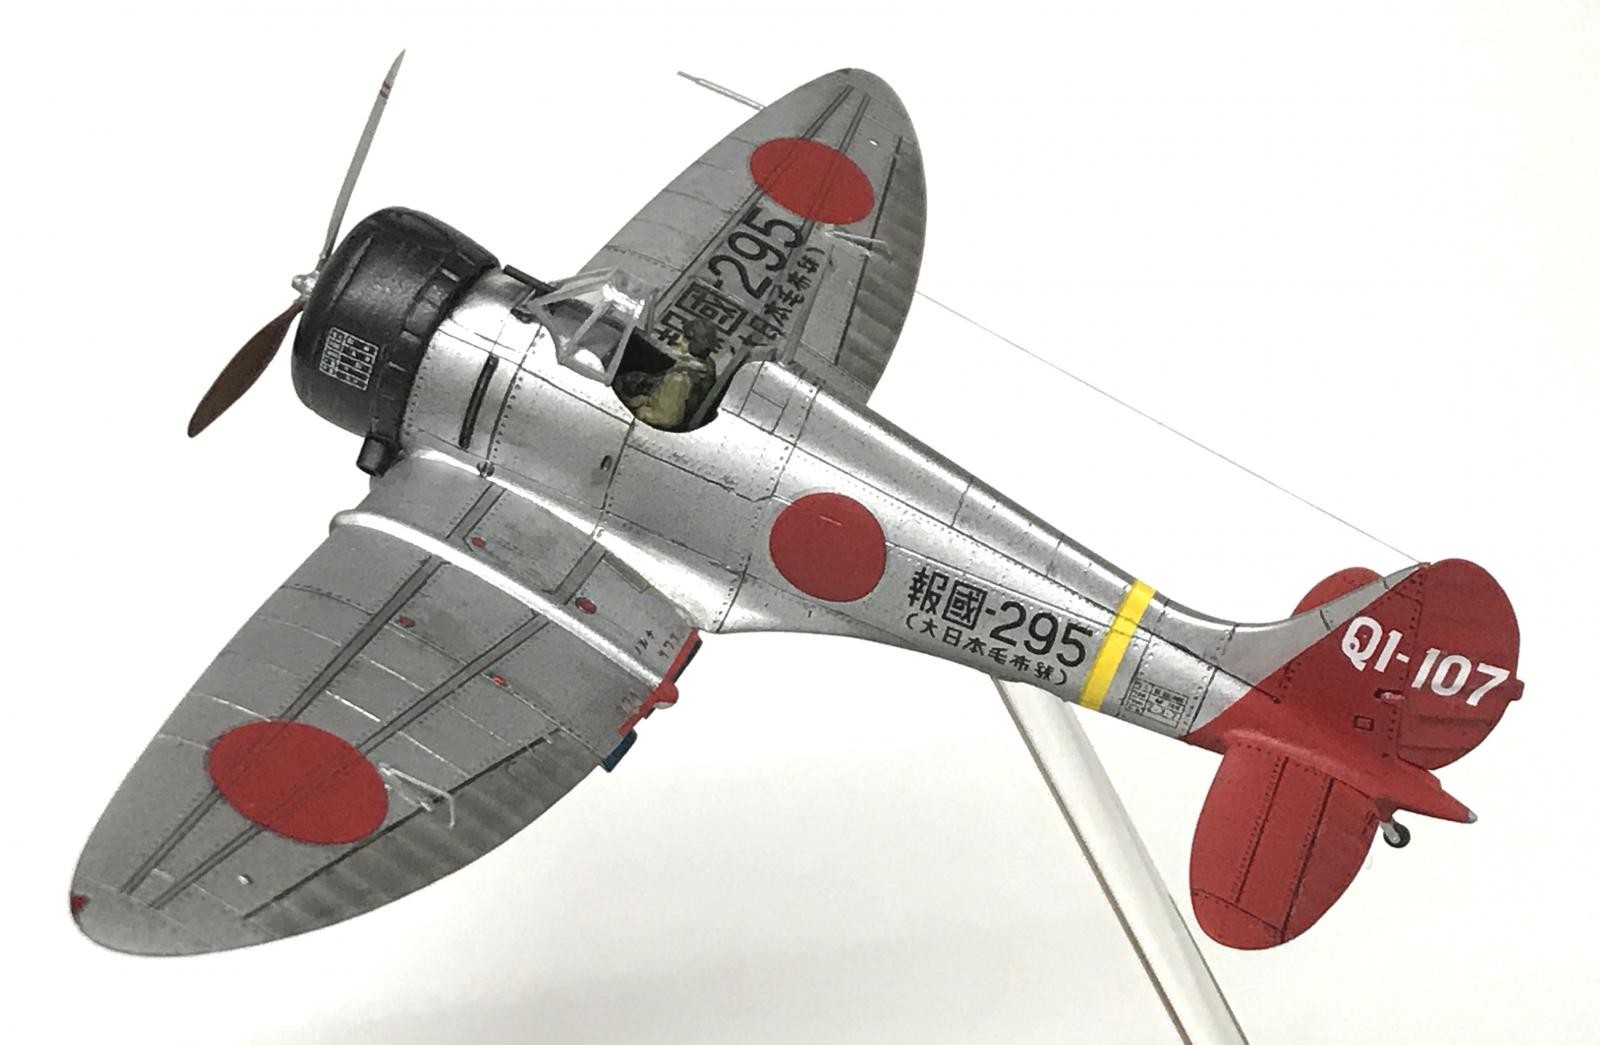
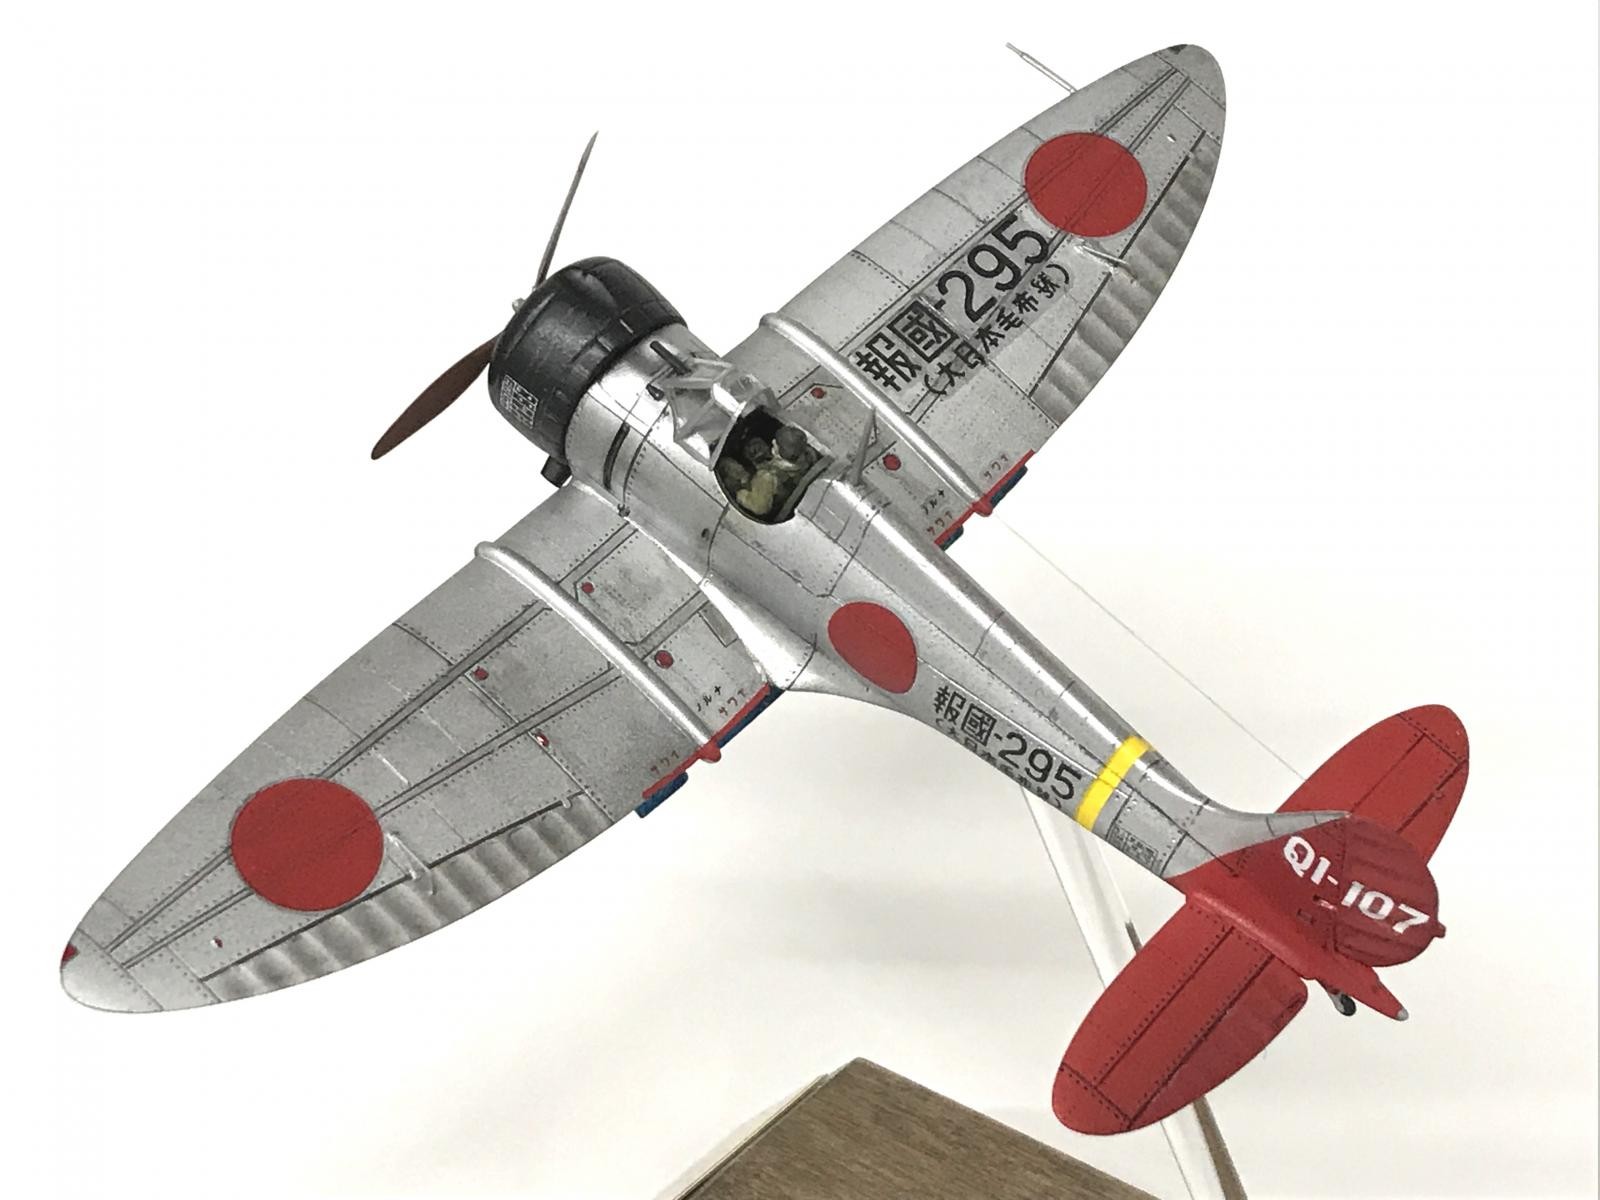
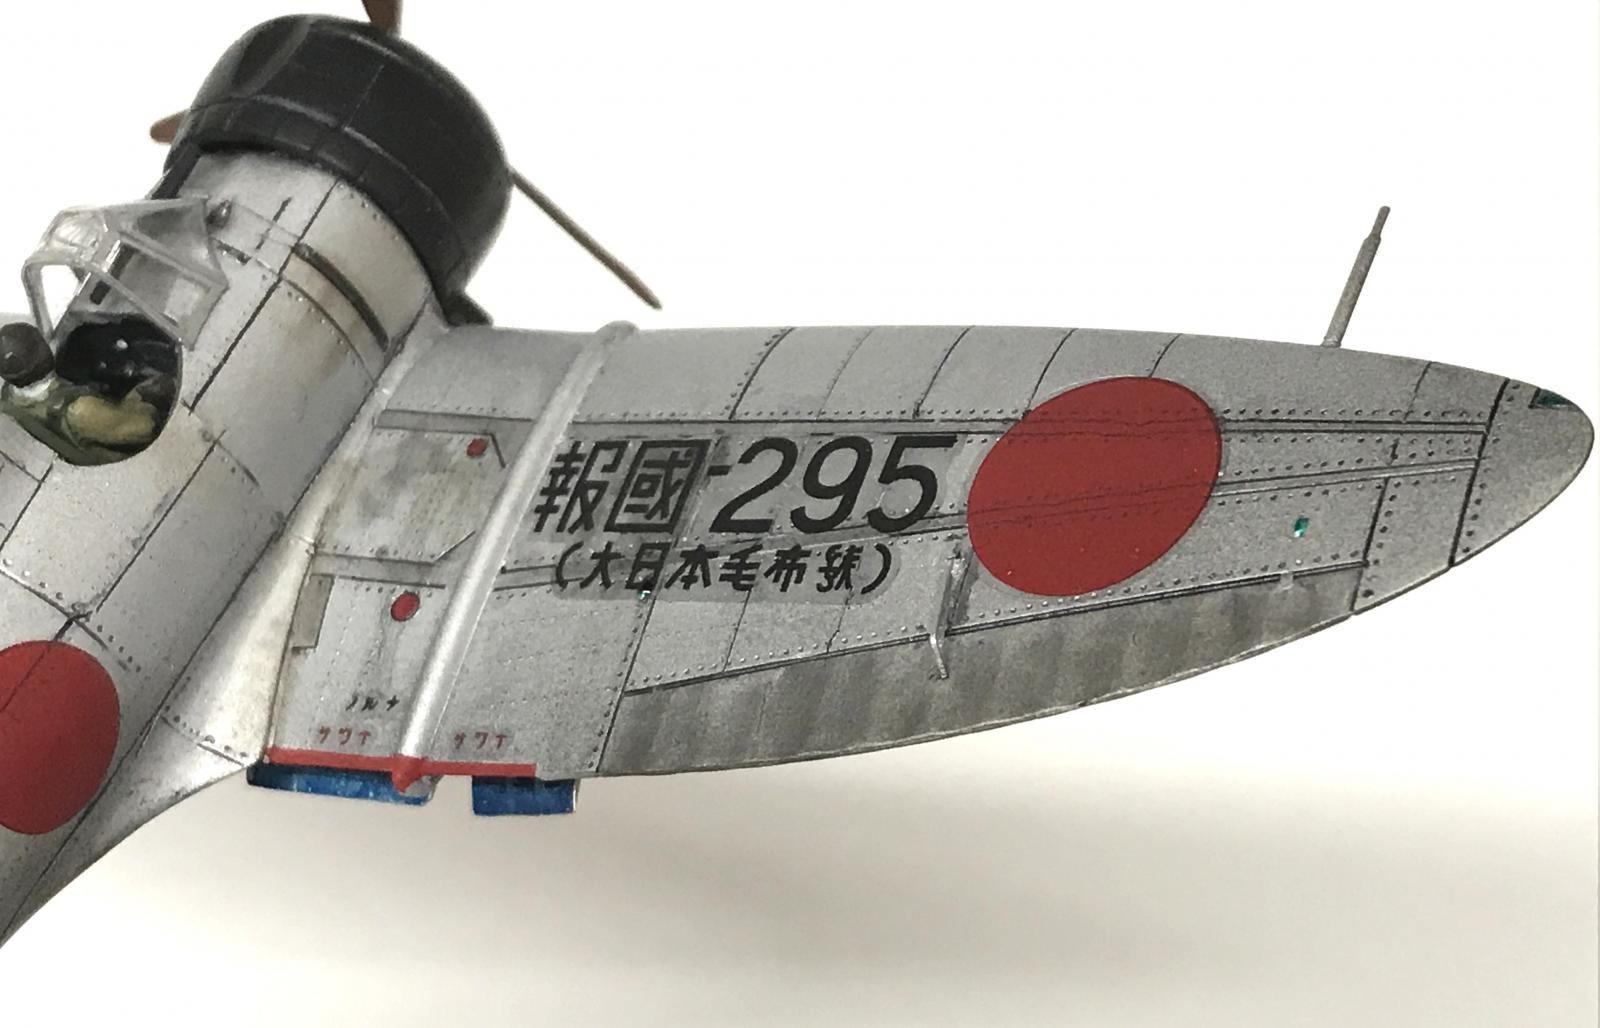
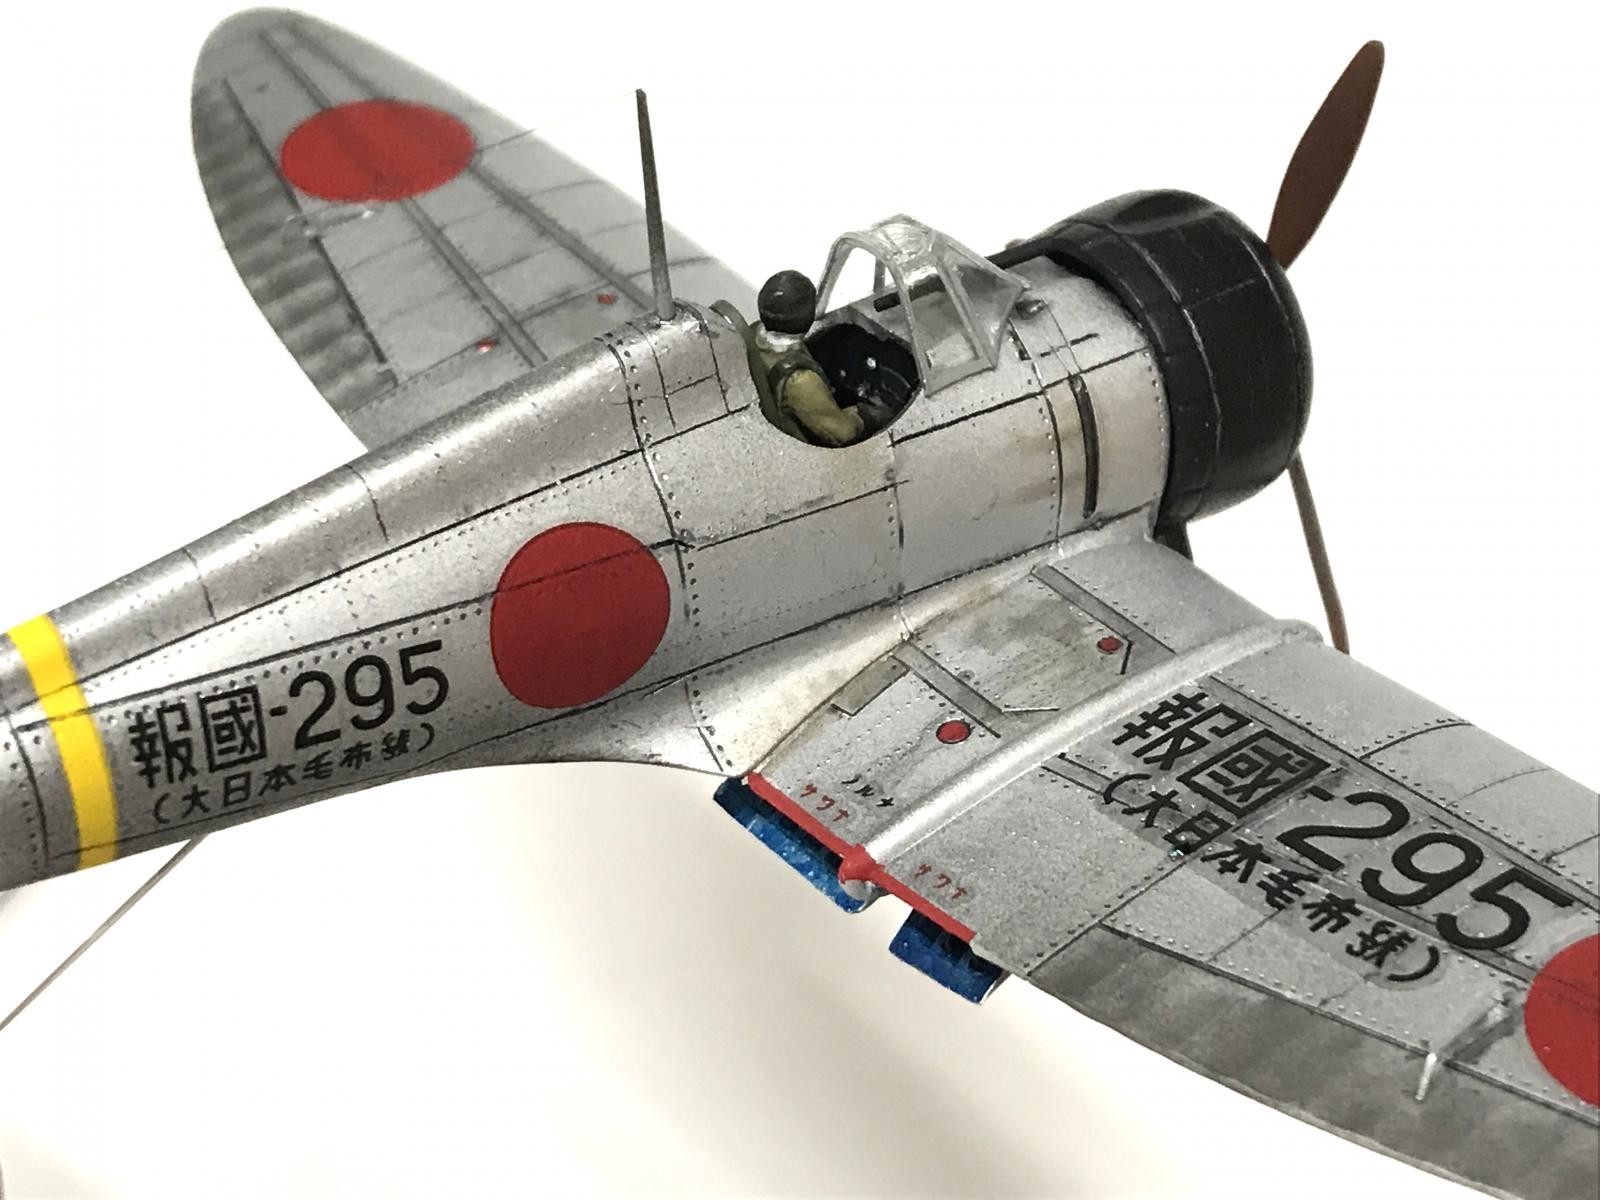
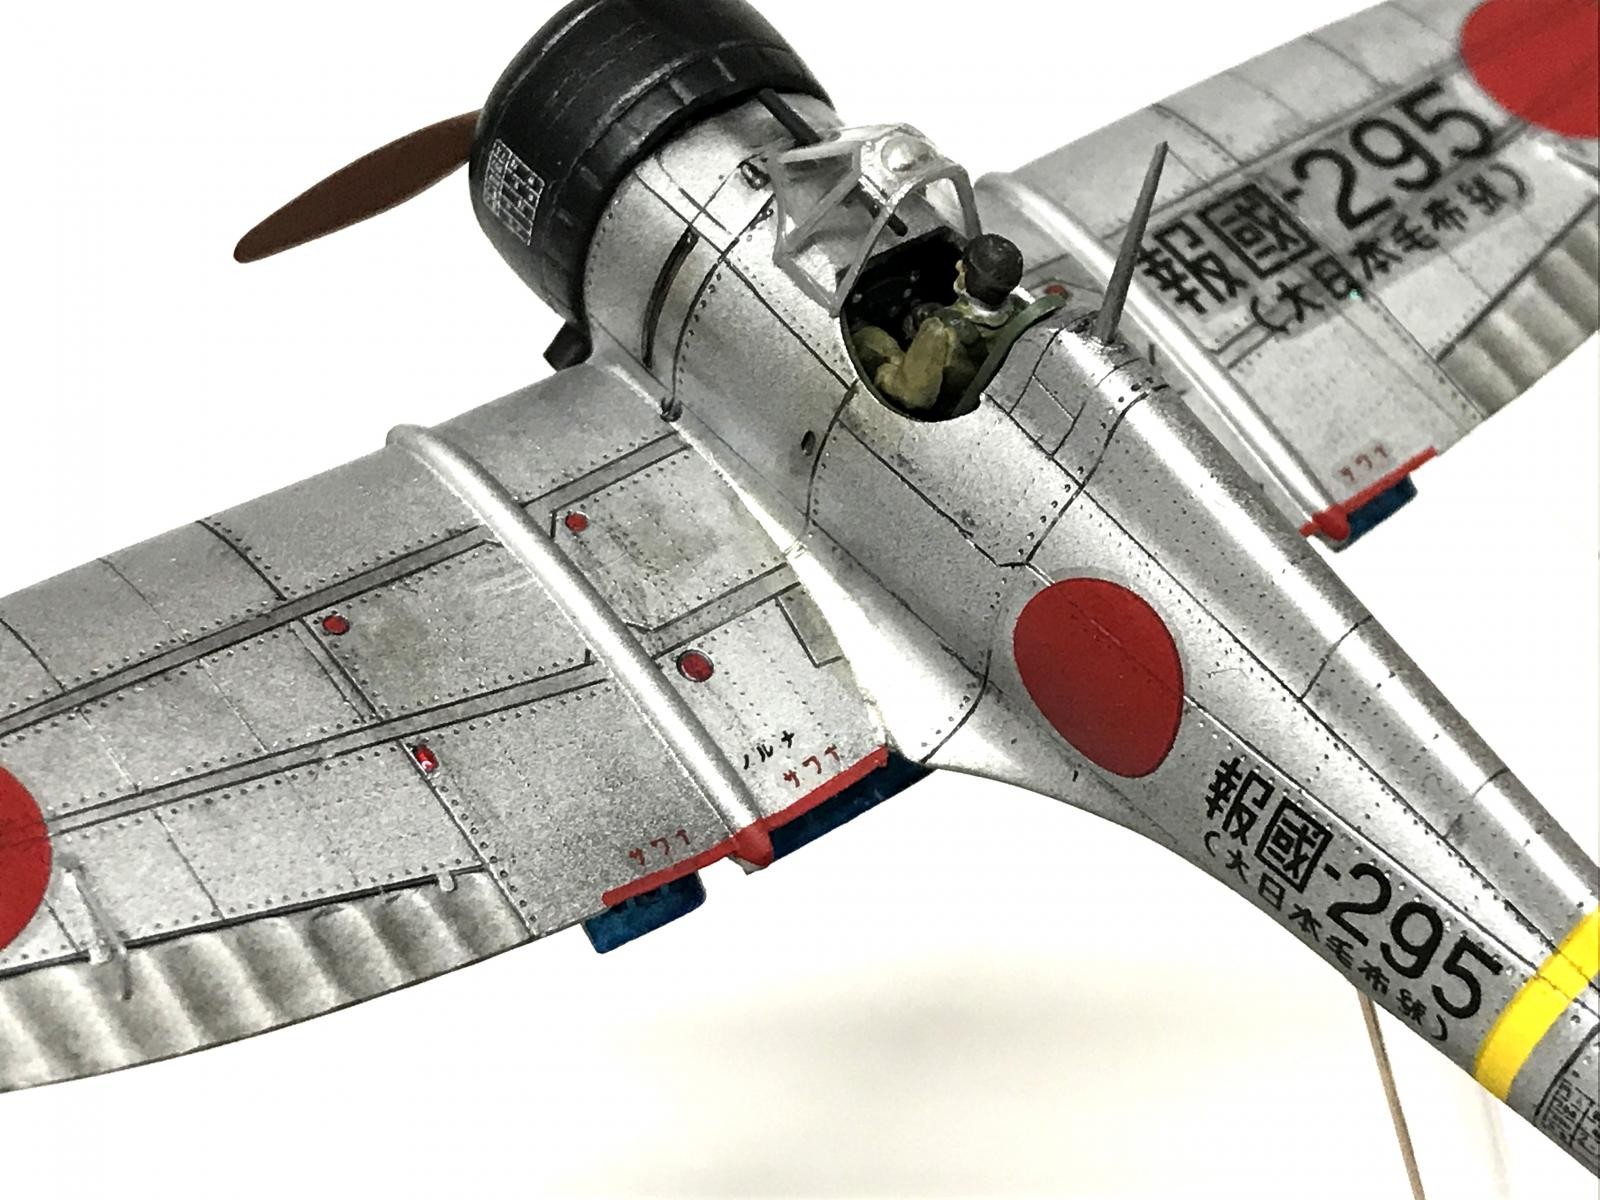
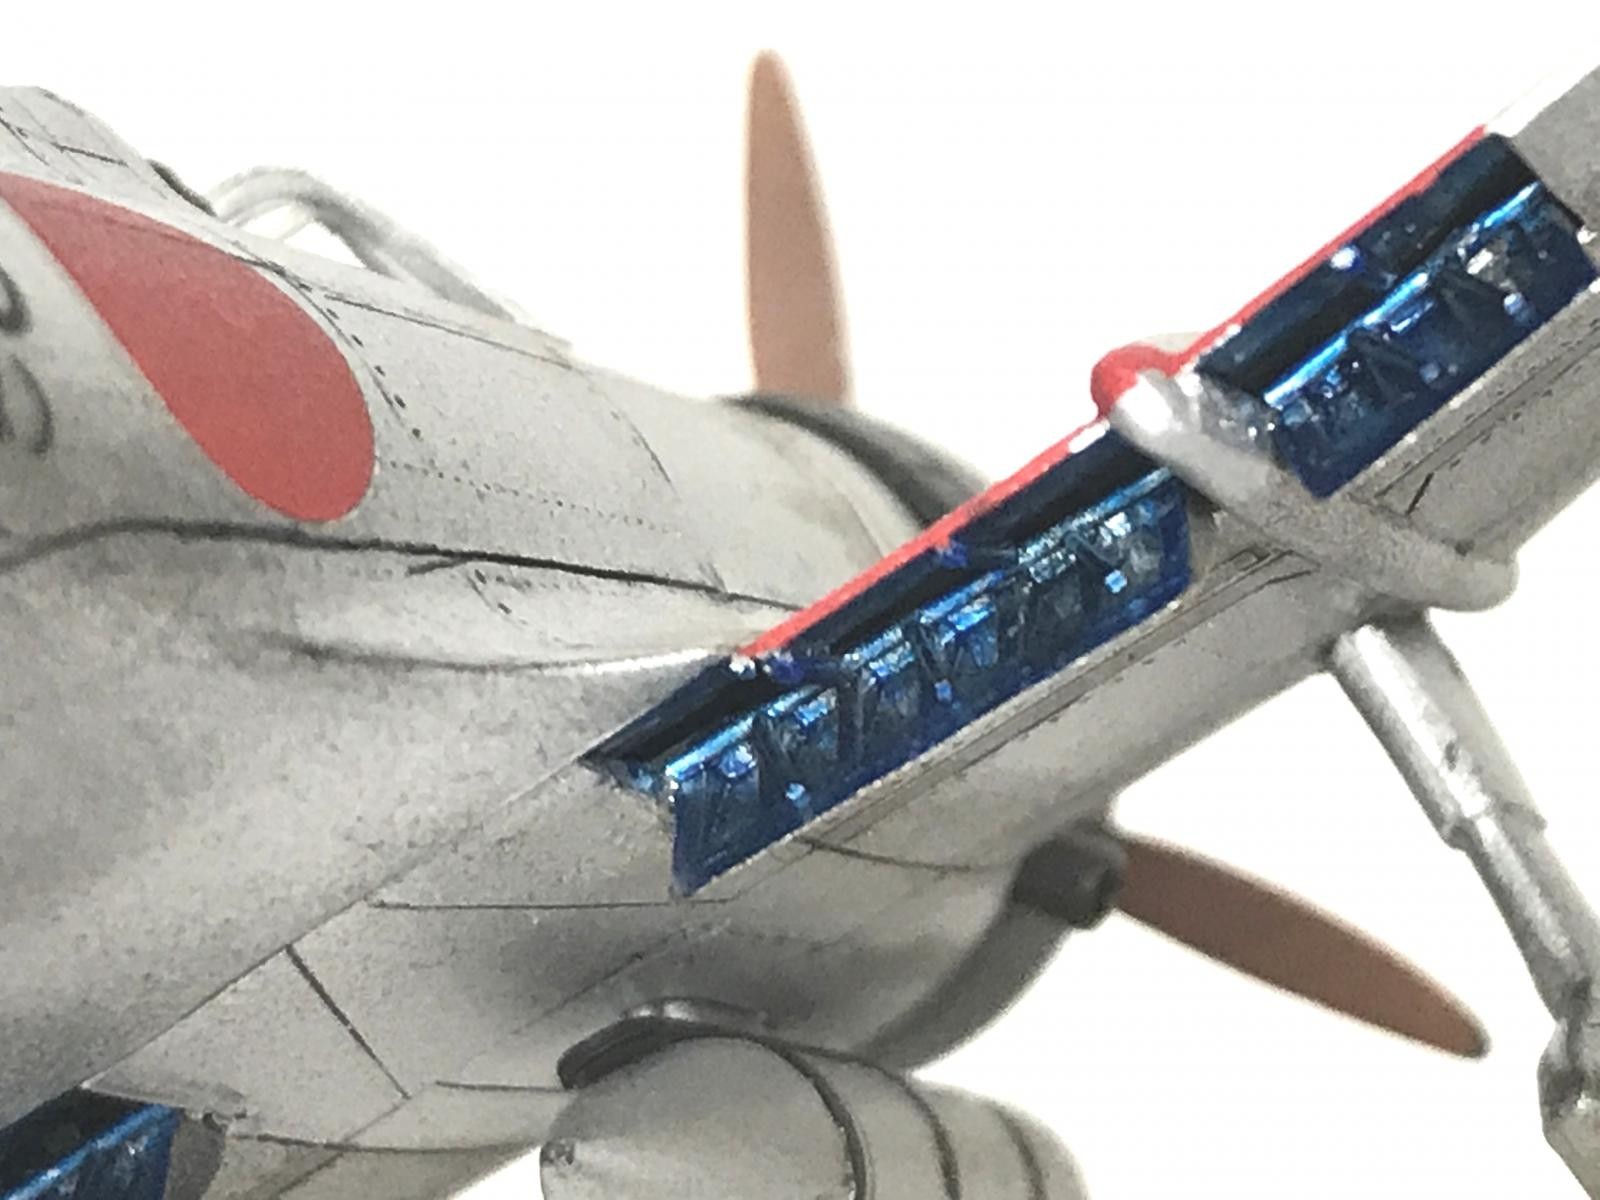
This is an old kit, but surprisingly it had some nice recessed panel lines and rivet detail. The rivets were a bit large for scale, but I decided to take out my scribing tools and rivet wheel, and finish it off with a complete set, since the NMF would show it off. In the pics you can tell where the heavy original lines and rivets were and where I added new ones.
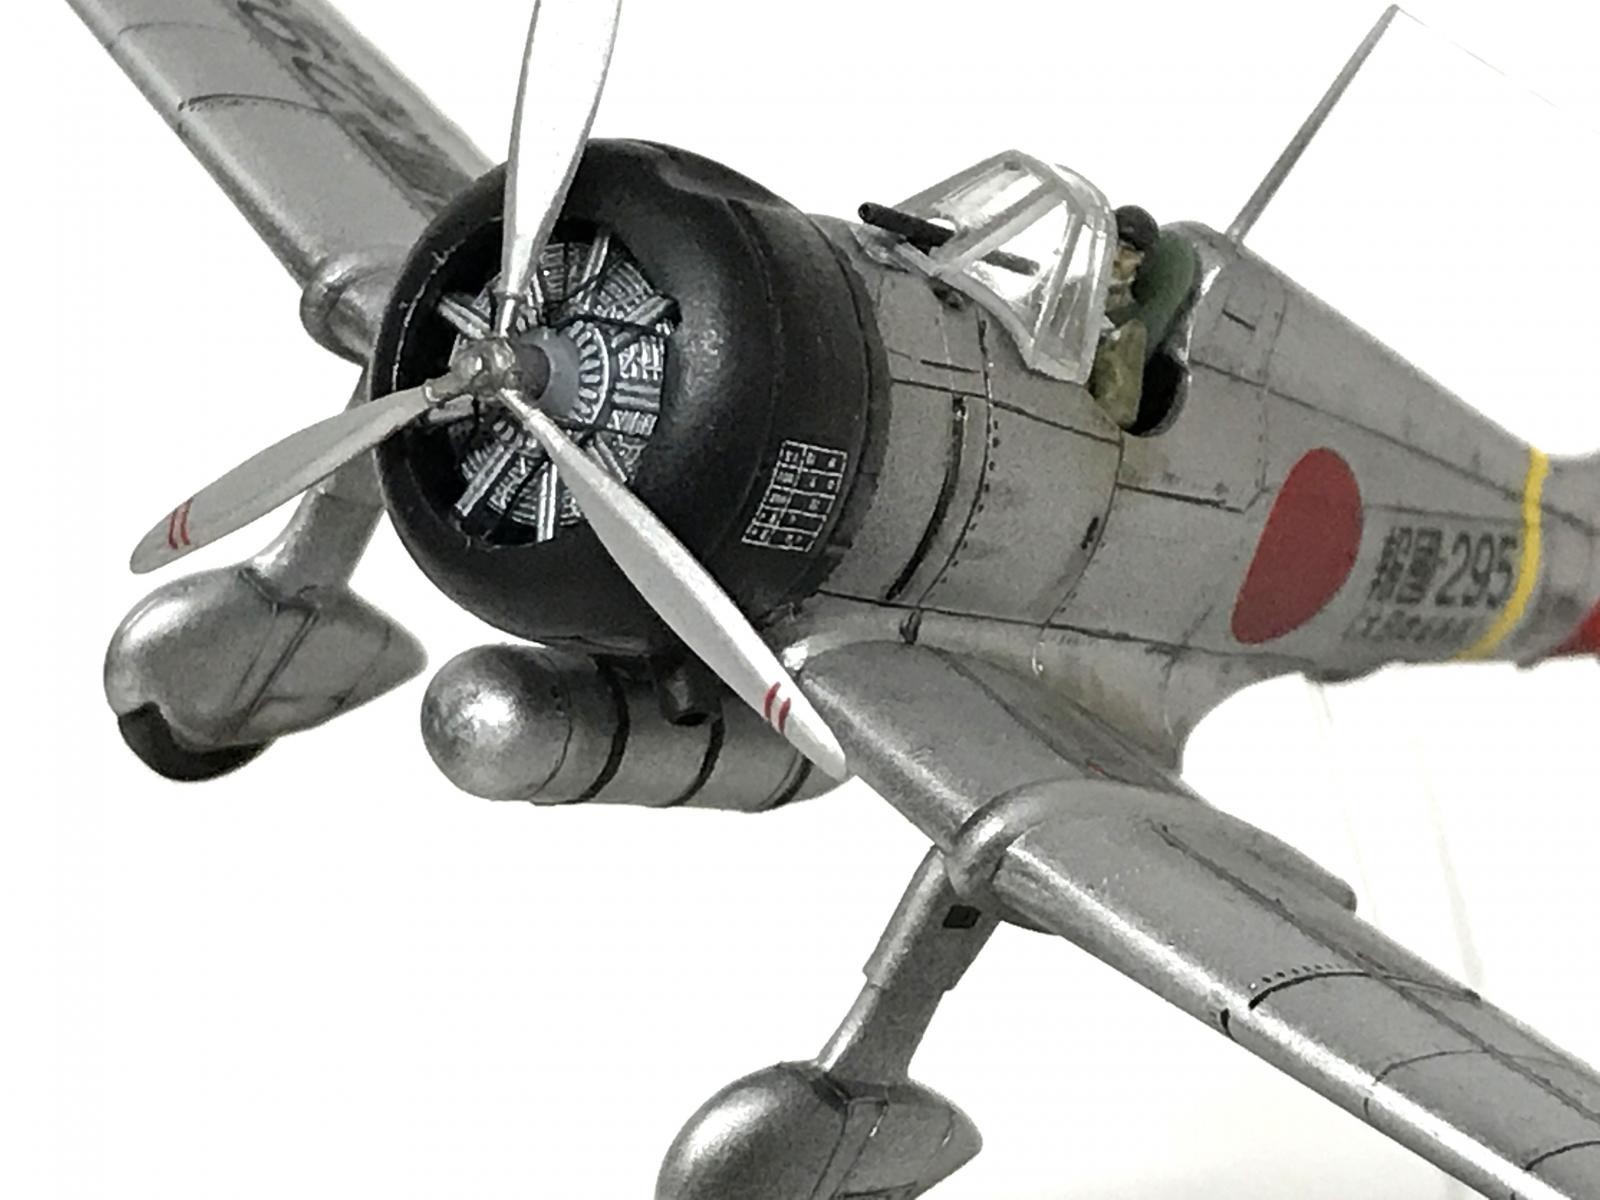
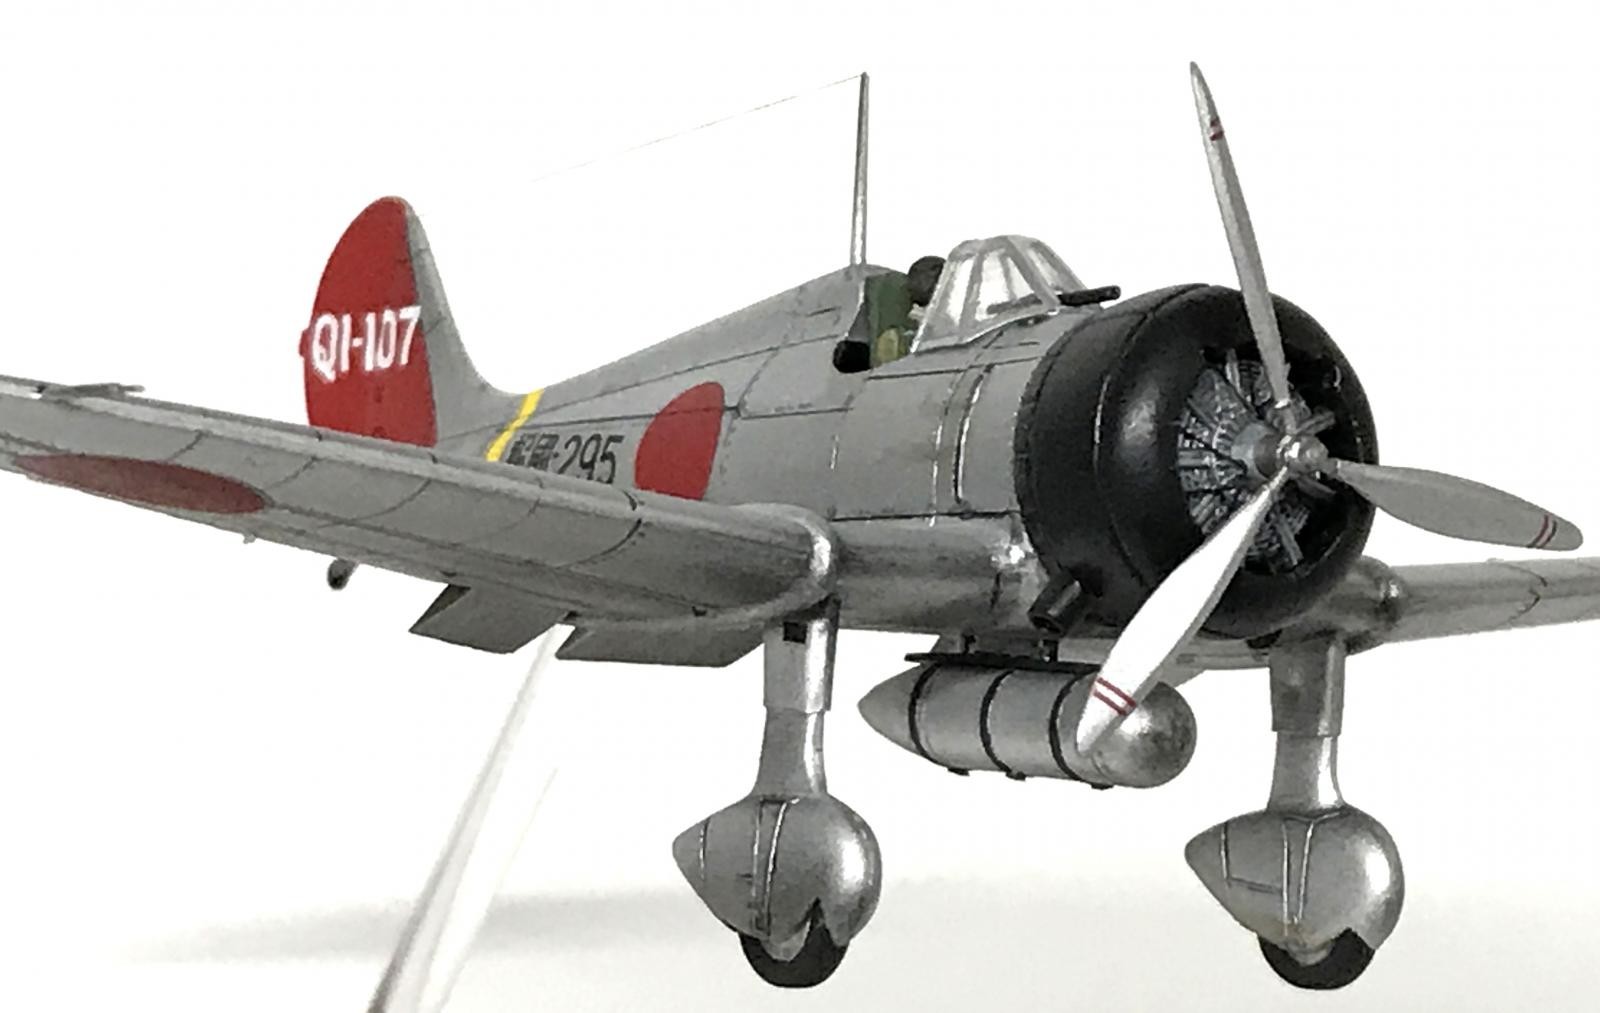
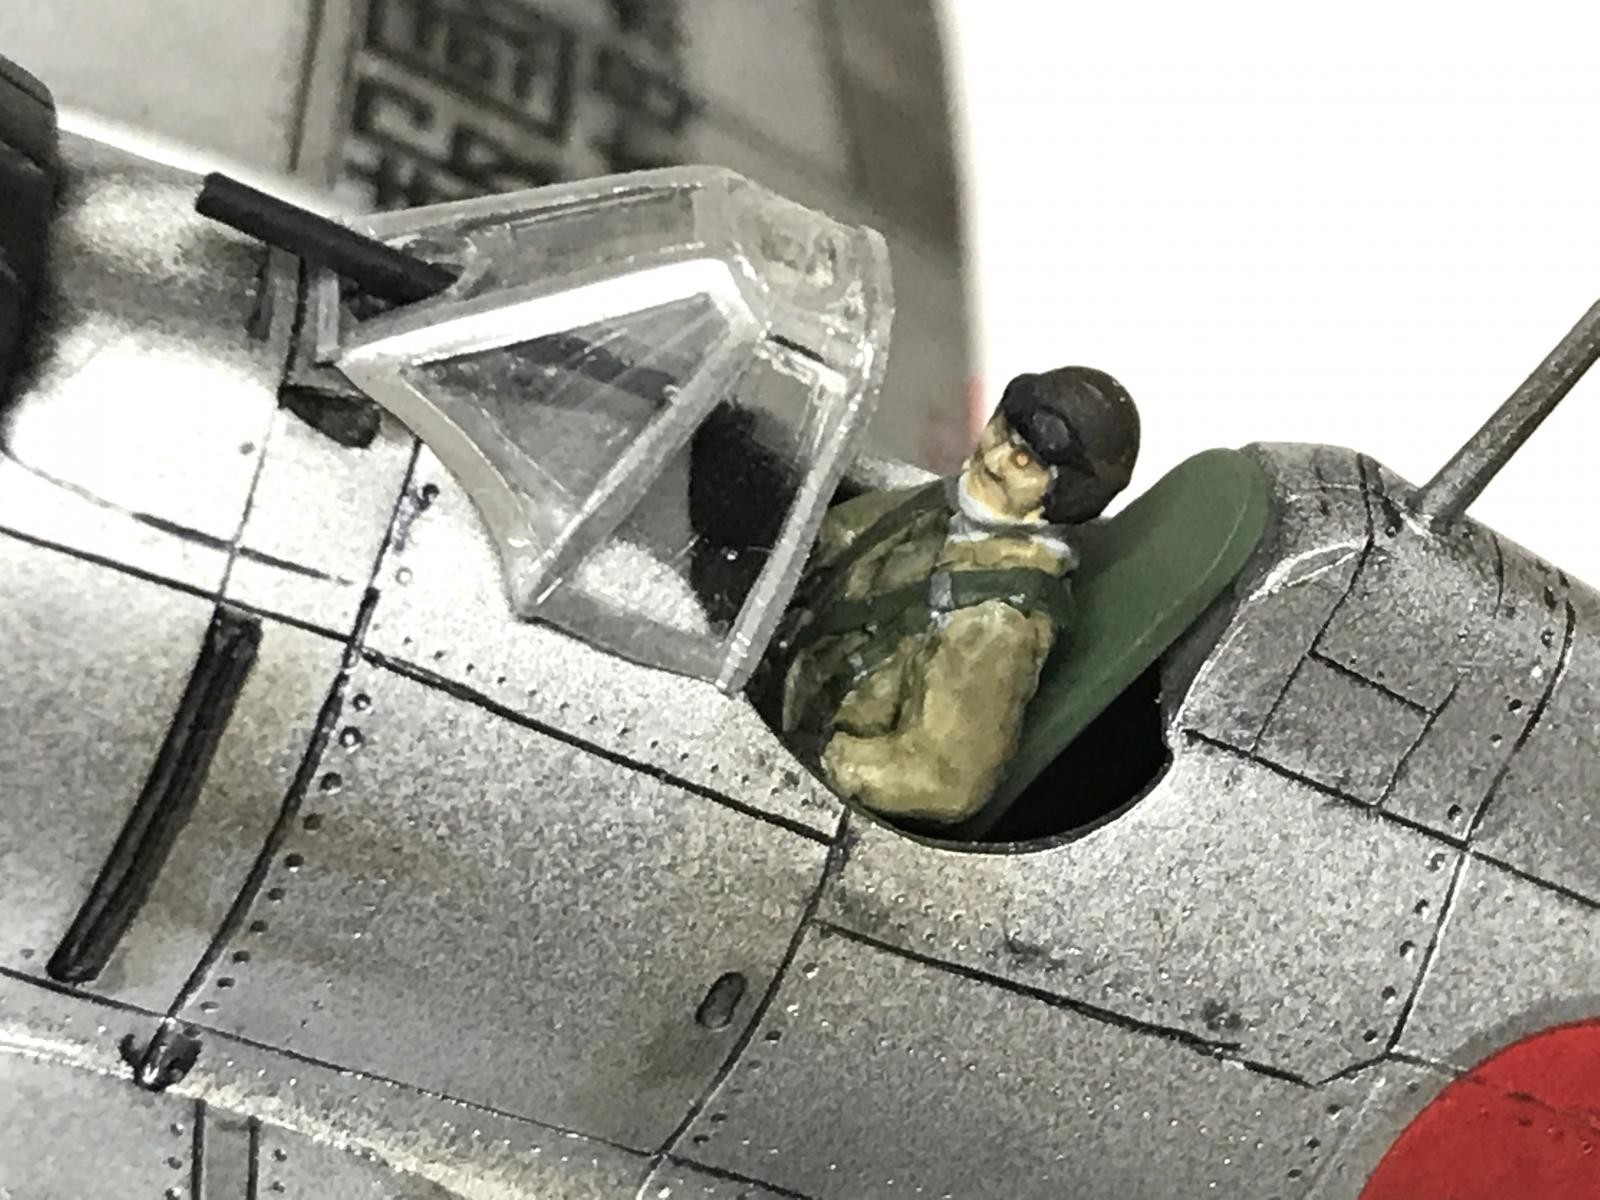
I did add some other details. There was no IP, so I just added a simple flat panel and then used paint to depict instruments. It is hidden up under the dash so it's just enough for me. In hindsight, knowing it is an open cockpit, I wish I had put in just a few cockpit sidewall details. I did use a PJ Productions Japanese pilot. I really like the detail in the PJ products, though I feel they are just a tad over scale. I really had to grind away the bottom/back of the pilot to get him down into the aircraft decently.
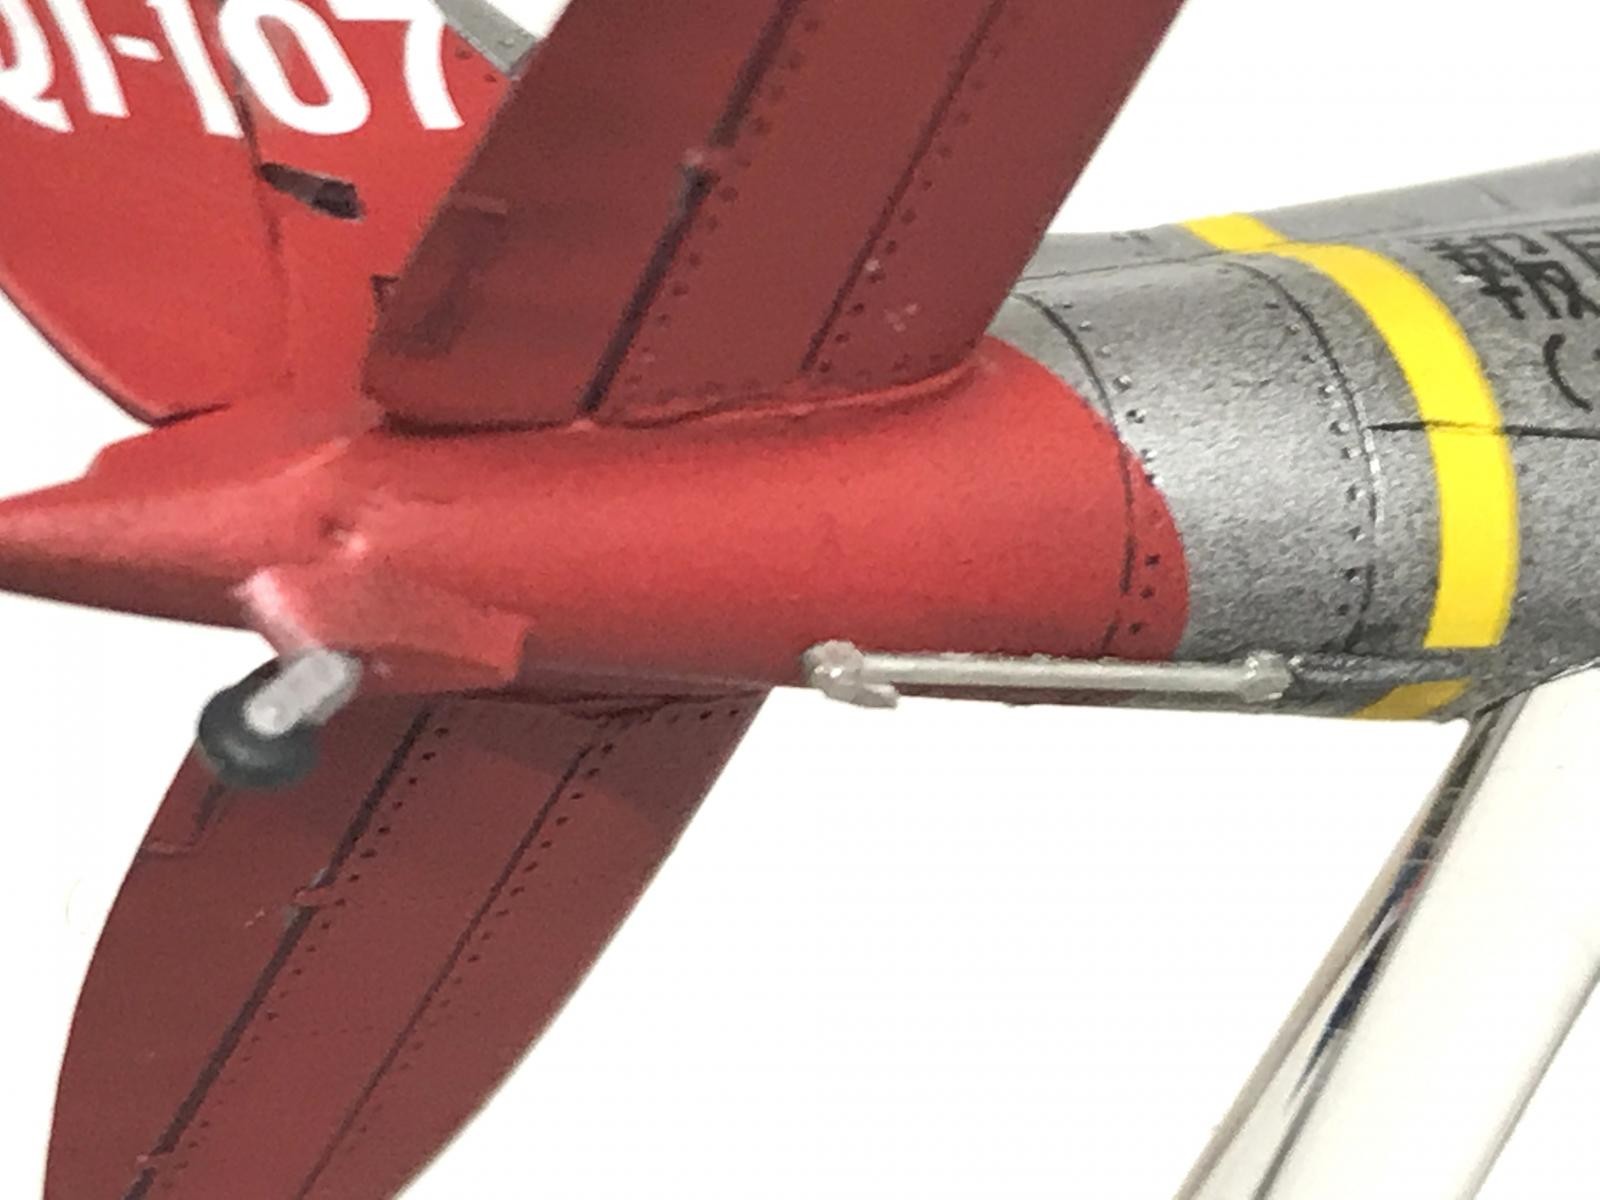
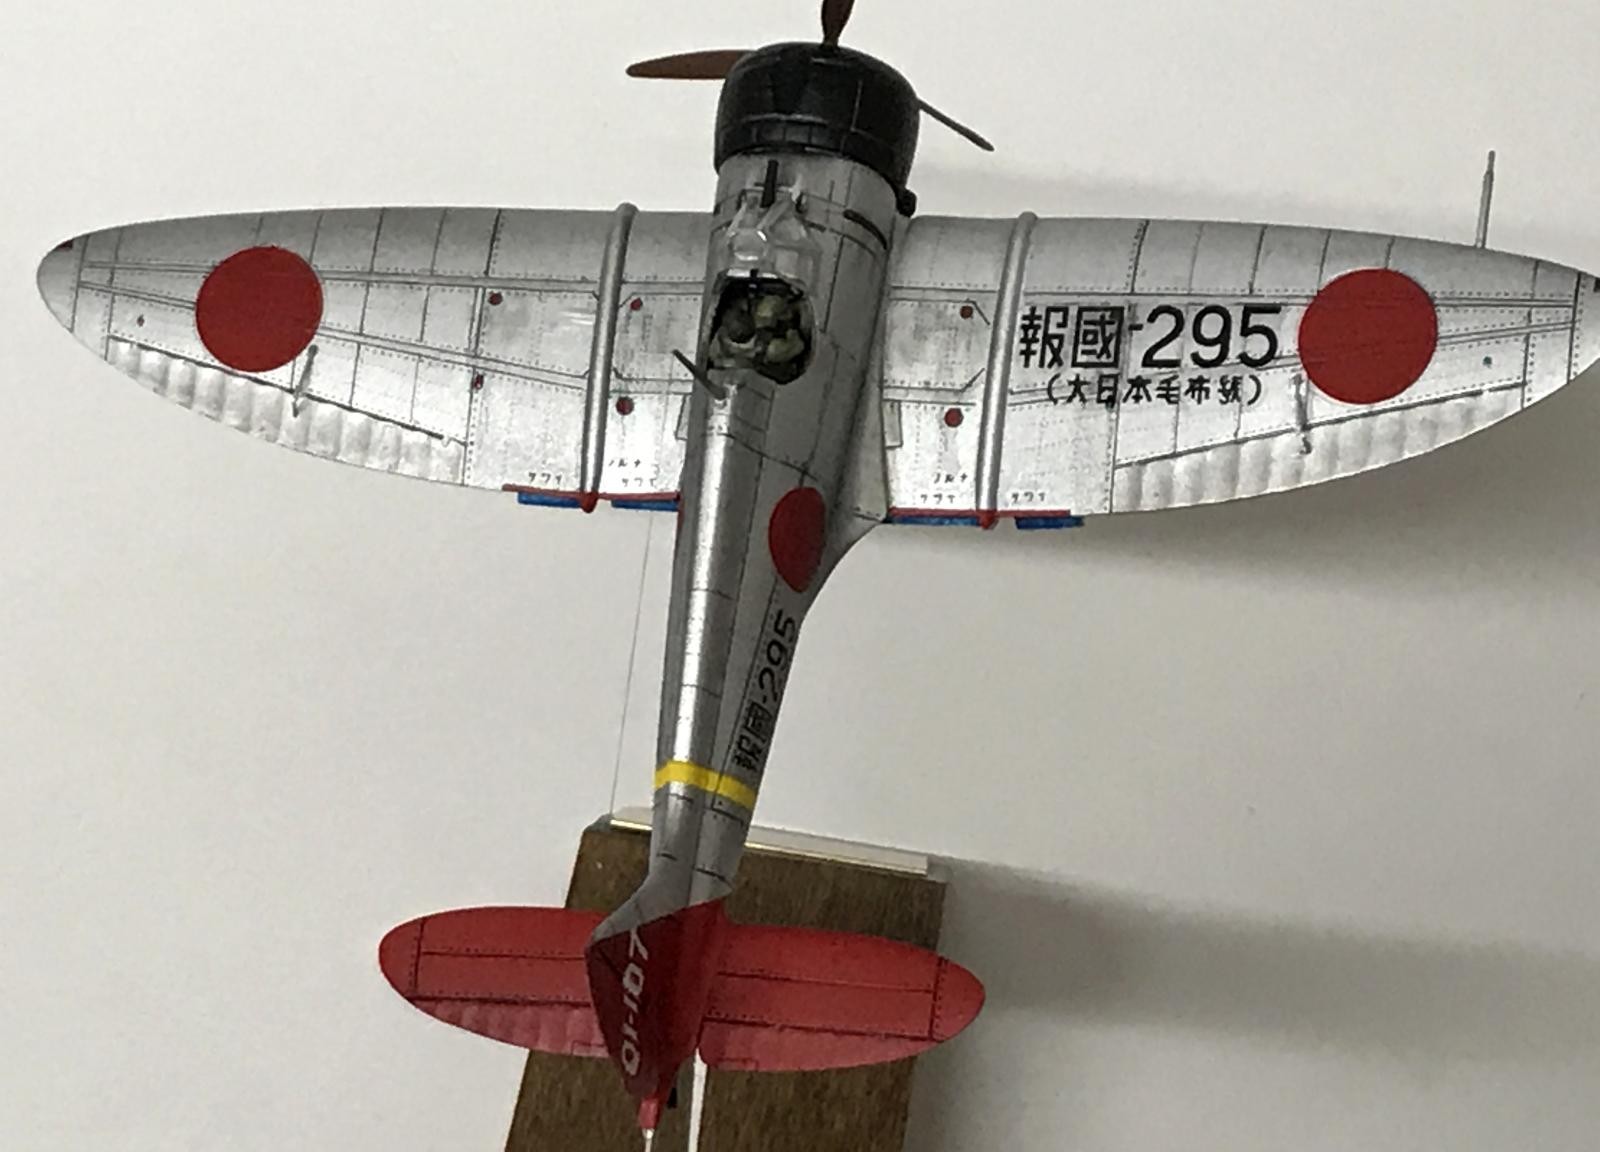
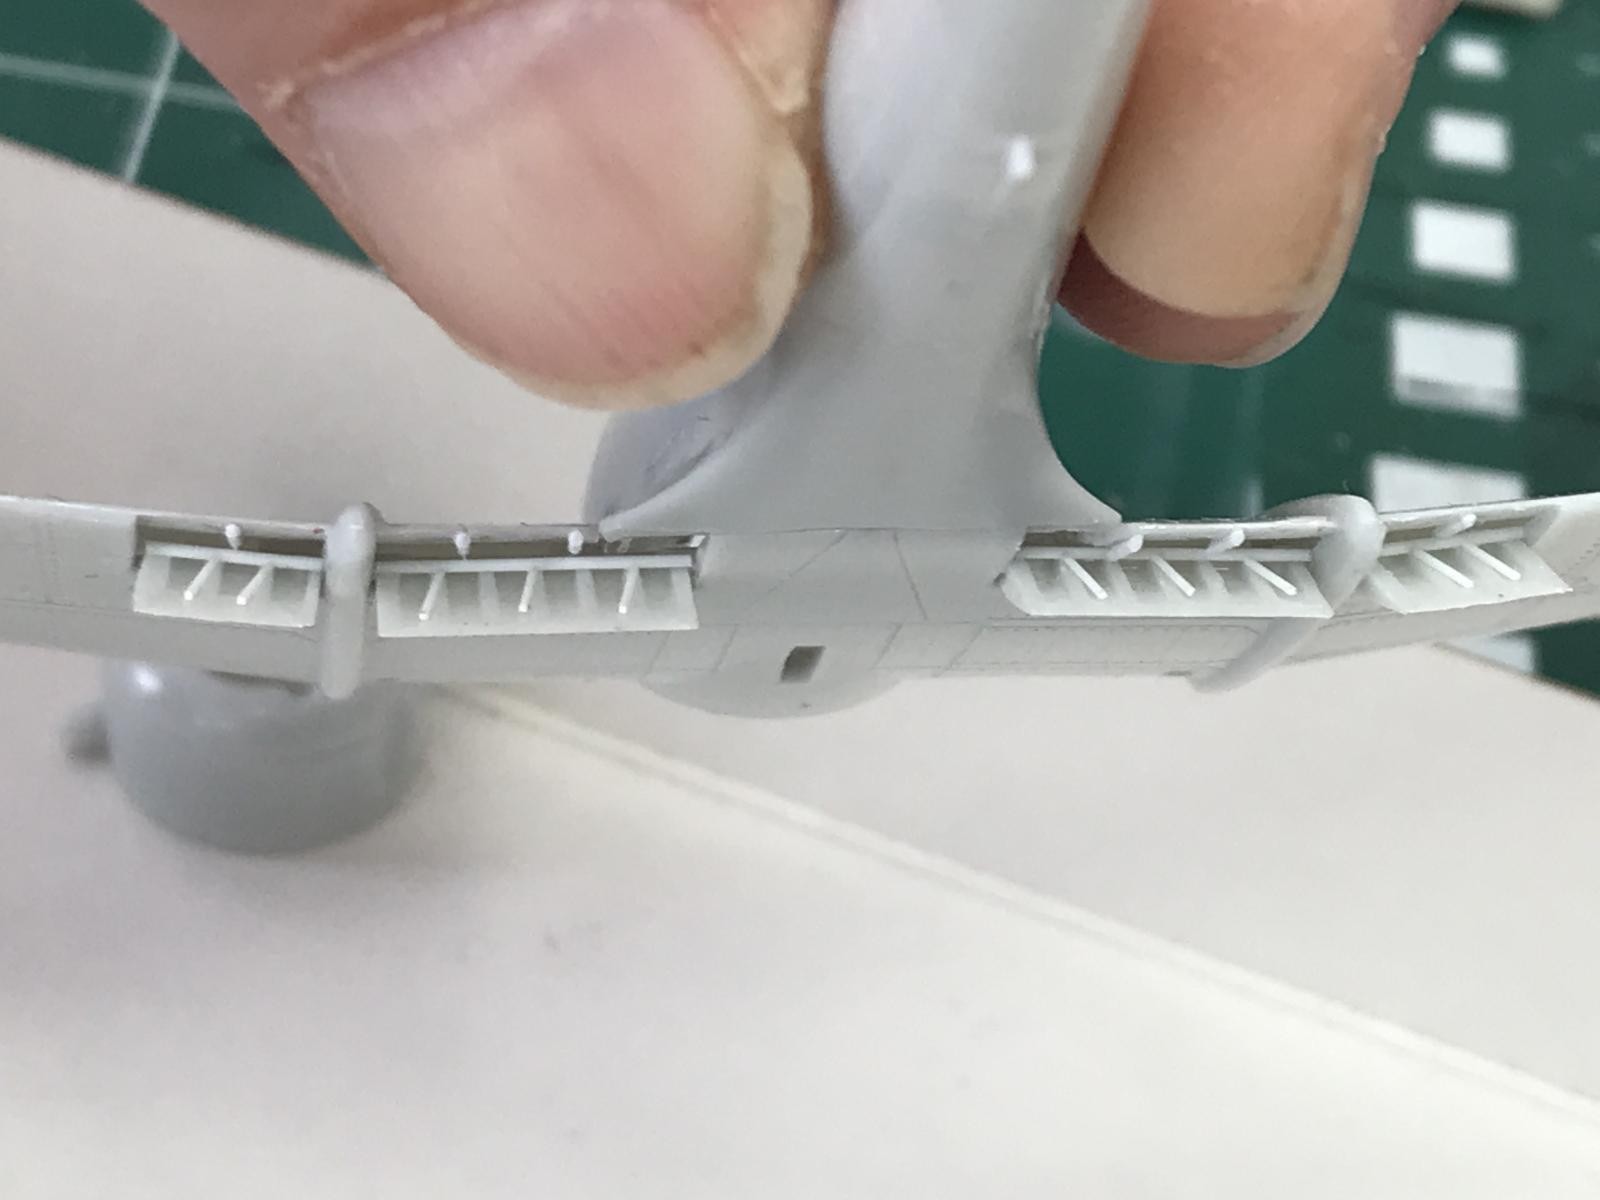
Next was the engine, and all I did there was add some wiring. The flaps were actually separate items, so I attached them dropped and then added the actuators and actuator control rods with styrene rod. I scrapped off the molded on aileron actuators on the upper wings and creating new ones out of styrene rod and bits. There was just the hint of a tail hook, so I also sanded that off and scratch built one (sorry - the pic of that is a bit fuzzy). I also added the fuel tanks straps and buckles using Tamiya tape and styrene bits. I drilled out the gun ports on the upper cowling, the exhausts and the site.
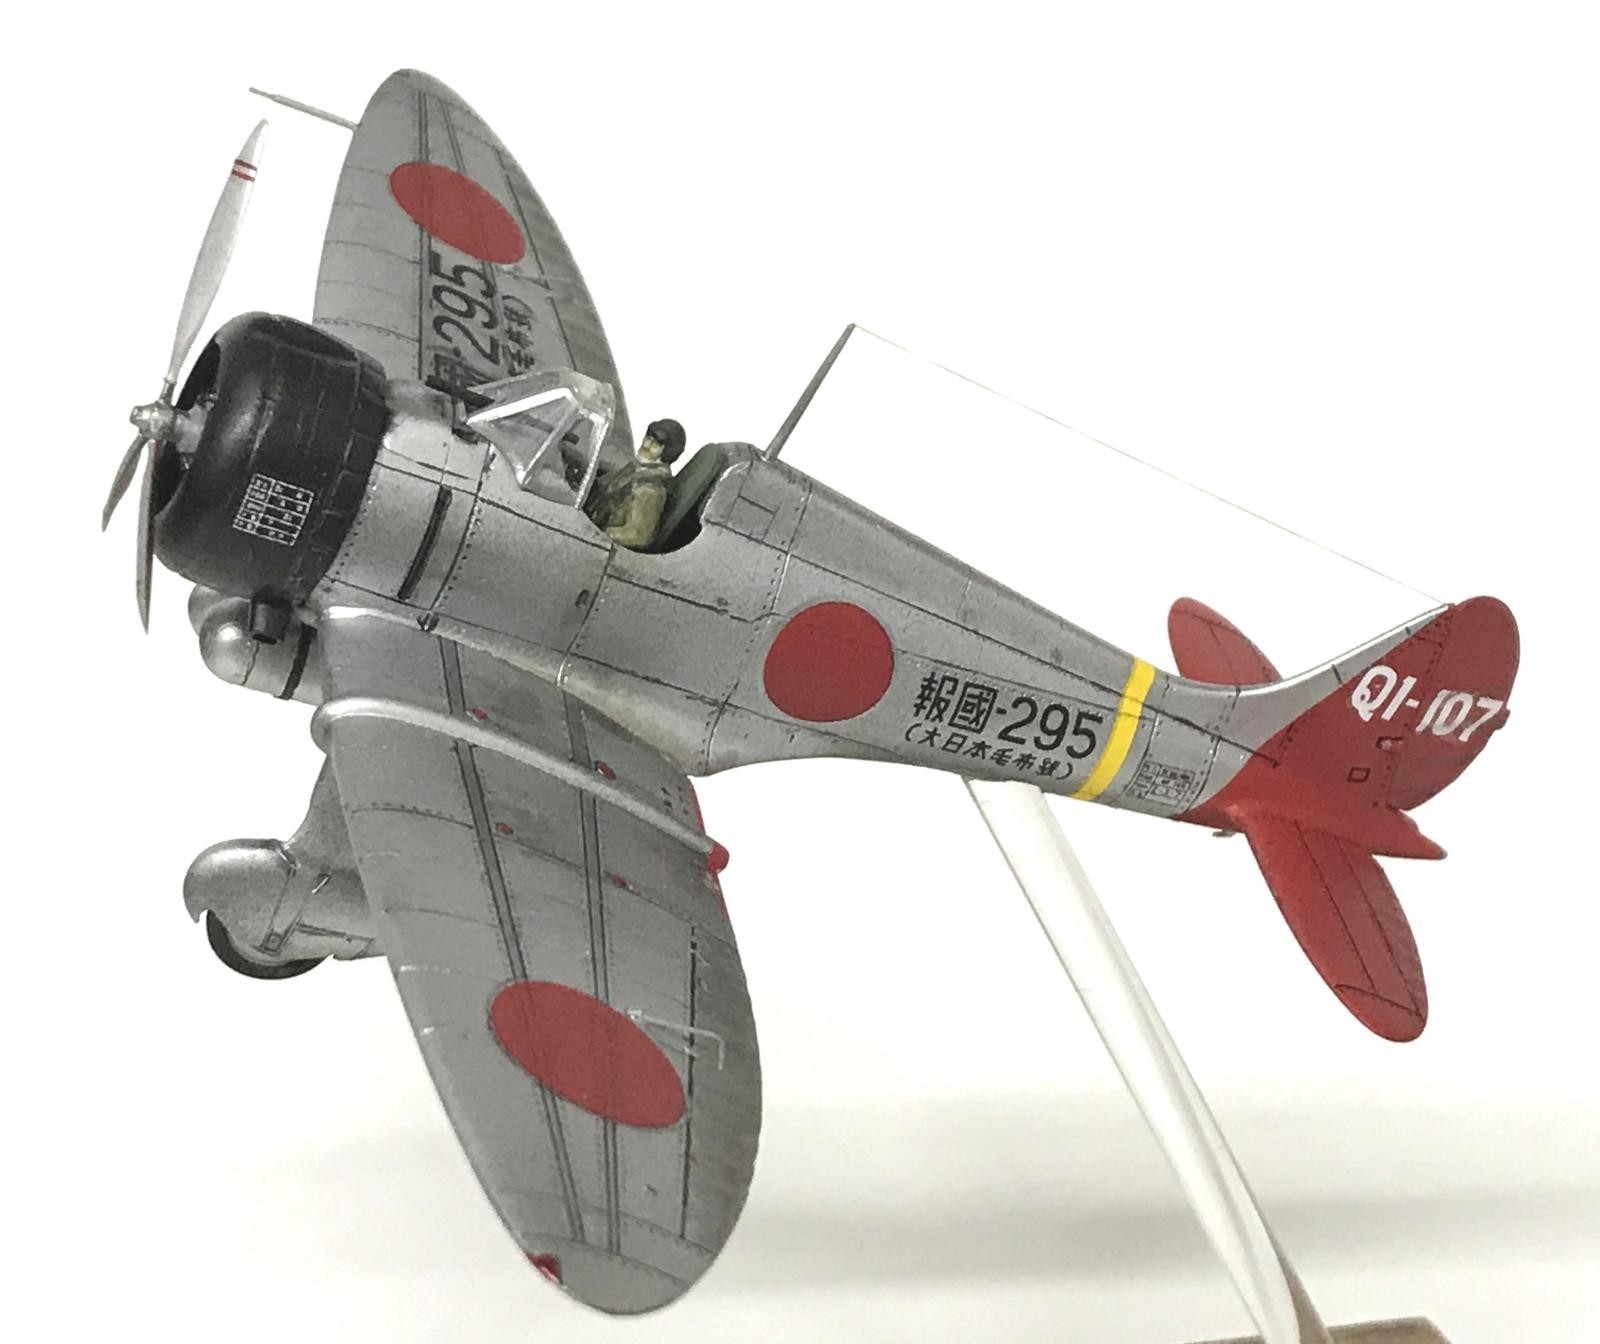
The one thing I couldn't really remedy was the too-large cut out in the windscreen where the site pokes through. I did add back a lower windscreen frame beneath the site, and thought about trying to fill the hole with Krystal Klear, but decided it might make a mess! In hindsight, I probably could have cut that section out of the windscreen and replaced it with acetate, drilled to just fit the site.
I used Vallejo White Aluminum as the base, and Duralumin for the two thin panels down each wing, the ailerons and the flaps. For the red, I had some Vallejo Model Color paint that was the closest red match to the Berna Decals set I had bought, so I used that for the tail. In hindsight I should have painted the red stripe on the fuselage also, as I had difficulty with the decals and the red stripe got destroyed. I used a yellow strip instead - which wasn't totally accurate, but I had already backed myself into a corner with the decals that were on the aircraft that didn't allow me to re-mask and paint the stripe at that point. The black cowl was Vallejo black with some Vallejo Mirage Blue mixed in, to try to get the "blue-black" on Japanese aircraft. That was just brush painted.
I used a grey panel wash to keep it from being too stark. Then used a coat of Testors Dullcoat (rattle can) to give me a finish to weather it - some pastel chalks, AK pencils, silver pencil and Tamiya weathering masters gave me what I was after. Then a final coat of Dullcoat. Although the Claude looked really nice in her shiny NMF finish prior to the dulling and weathering, I think it looks much more scale-realistic once dulled down. Uschi line for the aerial, Jade Green and Ruby Red for the lights, and it was done.


-

- 1. original lines and rivets
- 2. new rivets
- 3. new lines and rivets
- 4. added actuators

-
- 1. original lines and rivets
- 2. new lines and rivets
Nice work on this old kit - like the added lines/rivets!
Bet you got more than $1.99 worth of fun out of this build.
Despite its faults, it doesn’t look a like a bad kid, no sir. You did a good job withthis one Greg, I like the NMF shine
This is proof that even old models in hands of good modeller can looks exceptional.
I like very much details you added to basic kit.
Regards, Djordje
Another great looking build! I'm really digging all the add ons, and also the fact that this is a lesser built, older kit.
Did you spray the red on the tail? If so, what did you do to dilute it down, and how did you find that it worked?
@pb_legend - yes - sprayed the tail - thinned probably 30-40% paint and Vallejo's thinner. It looked nice, though I think you could tell it was a denser paint than what Tamiya is. Maybe pigment size...
Nice, Greg. I like the finish.
This looks fantastic Greg ! @gkittinger
and I like it a whole lot... It's such a cool little plane and you don't see too many of them built. I hope to see you join us in the next group build that will be named "The Empire of Japan" ... or something like that. It will probably last for a year or so.
@lgardner I'm looking forward to it kicking off - I'll probably use it as an excuse to build several more Japanese subjects - and may look for some unusual ones just to mix it up!
That will work ! I'm looking forward to it starting too... I'll wait until the other group builds have completed before we start this one up. So start thinking about what you are planning on doing. Thanks again Greg.
Beautiful build! Looks great.
Considering that kit comes from the time when the makers were dodging Tyrannousaurs on their way to work, this is a super result. I really like it a lot.
Tamiya Gloss Black X-1, thinned 50-50, makes a better base for the Vallejo metal paints because it's smoother than the grainier Vallejo black (also dries faster) - mist it on till it covers and it's almost glasslike, yet gives the paint something to grab onto. At least that's my experience. I love using those Vallejo paints for NMF projects.
Never heard of Nichimo until now. You did wonders with it!
Nicely done Greg, I truly believe you got your moneys worth. Nice job with those rivets as well..
Some things get better with age and experience. I 'm probably a heretic with the accuracy police ...who demand everything down to the last detail be done in scale and accurately but, some kits like a good actor can portray the look and feel or character of a aircraft. If you can suspend that fleeting moment of disbelief for a millisecond you've accomplished your goal.
A charming build Greg.
Two thumbs up.
Lovely build Greg, i don't know how you can work with these tiny things in 1/72 and get such awesome results!