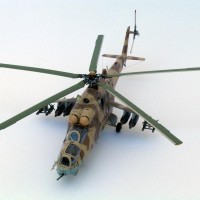
Hasegawa 1:48 Hawker Typhoon Mk.Ib (JT 60)
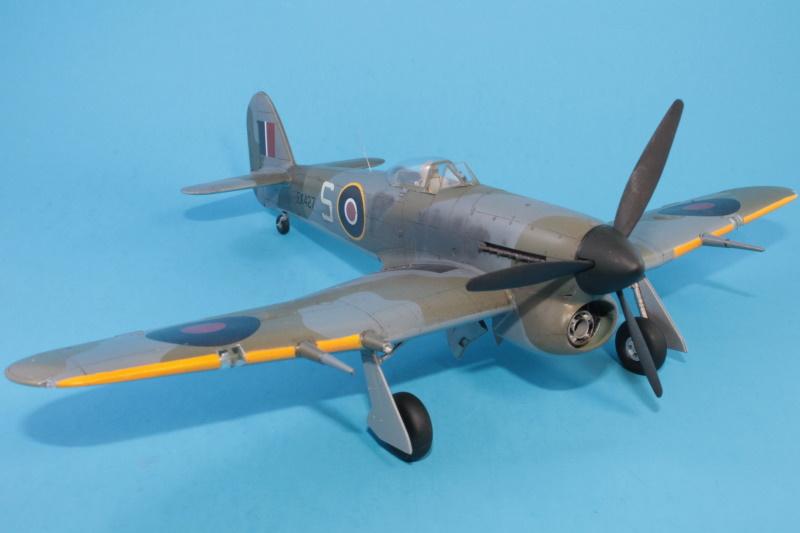
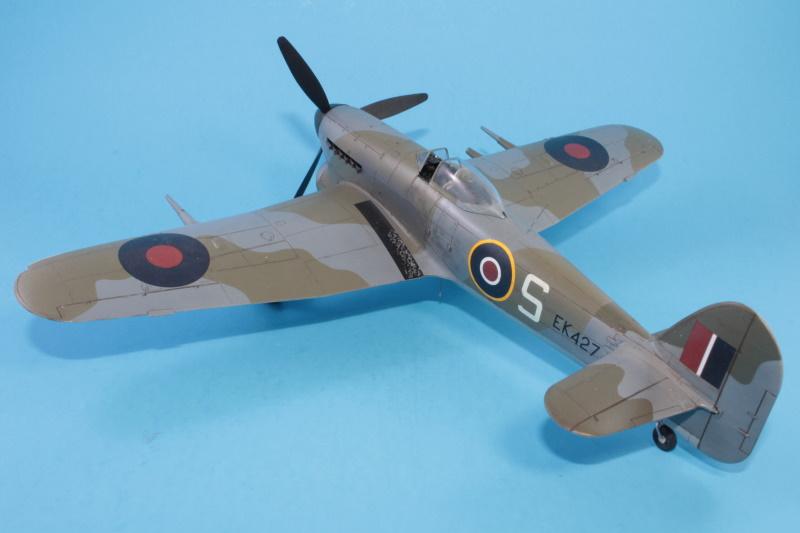
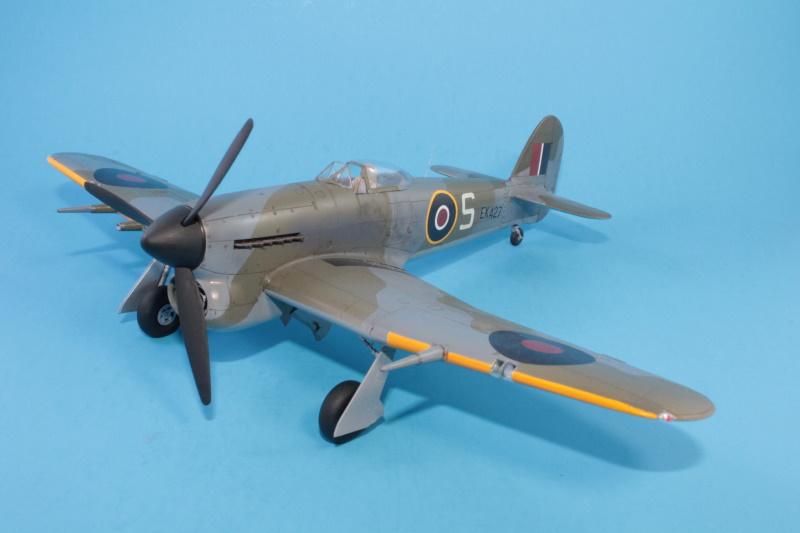
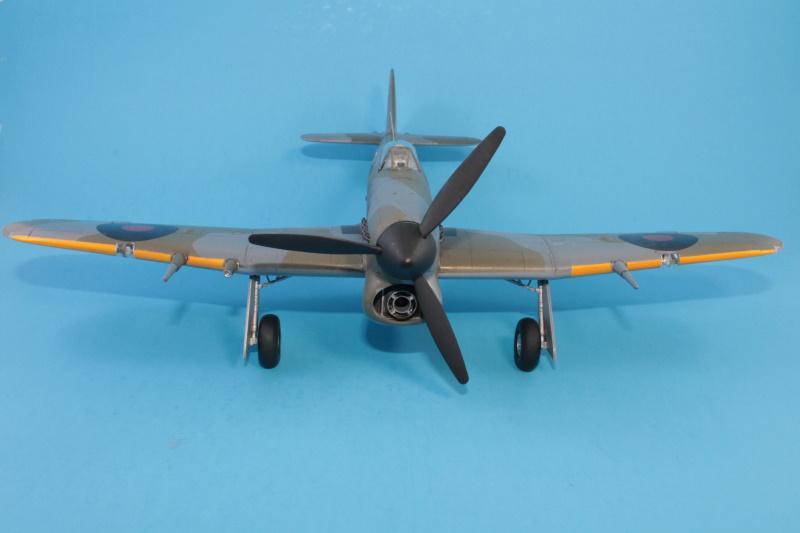
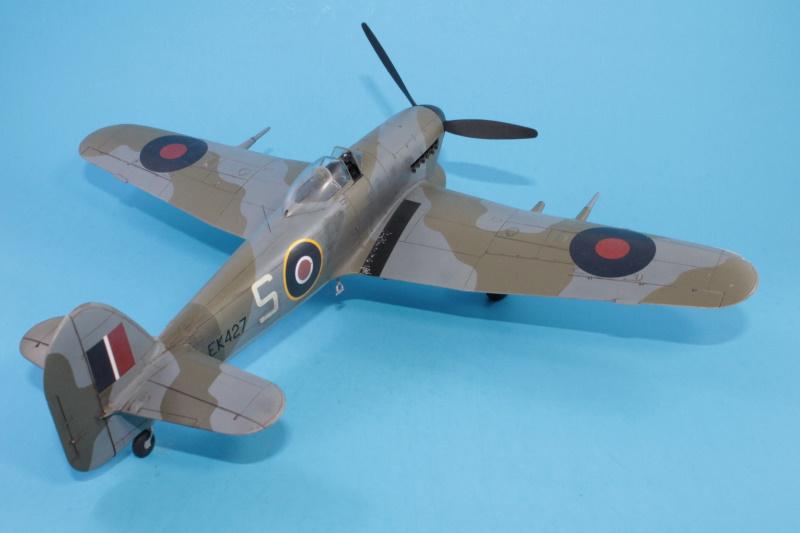
This is actually a Hawker Typhoon FR IB, the photo recon version of the Typhoon. The build was an ongoing process, and was stalled out for nine years due to the fact that I couldn't find the resin camera insert used in the left wing to make the conversion. That all changed in the summer when I found info that said that, later in life, the camera system had been removed and the area faired over with sheet metal. A cine camera had been added into the inner right barrel and the outer left camera barrel removed to compensate the weight difference. Another oddity that got to me was that the tail section, including the sky fuselage band had been repaint with fresh Dark Green. To accomplish this, I sprayed this area with Tamiya XF-81 RAF Dark Green 2. To tone it down for the rest of the camo, I added a bit of XF-80 Royal Light Grey. The rest of the camo was done in XF-82 RAF Ocean Grey 2 and XF-83 Medium Sea Grey 2. The hardest part of putting the model together was adding the fuselage inserts to both halves. I have yet to read a review where someone has achieved this flawlessly. Add each insert to its corresponding half and glue the fuselage together when the time comes. You will still have to add plastic strip and putty in front of the windscreen. A hole for the pitot tube needs to be added as Hasegawa never did this, at least on my kit. I also had to fiddle with the horizontal stabilizers. They are meant to mesh together inside the fuselage but I couldn't make it work. I ended up cutting off one of the tabs and it all went together. Other than that, a very nice kit. One other oddity that I noticed when I started to decal was the haphazard way the serial numbers were placed on the left side.


-
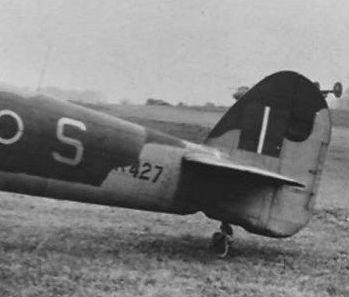
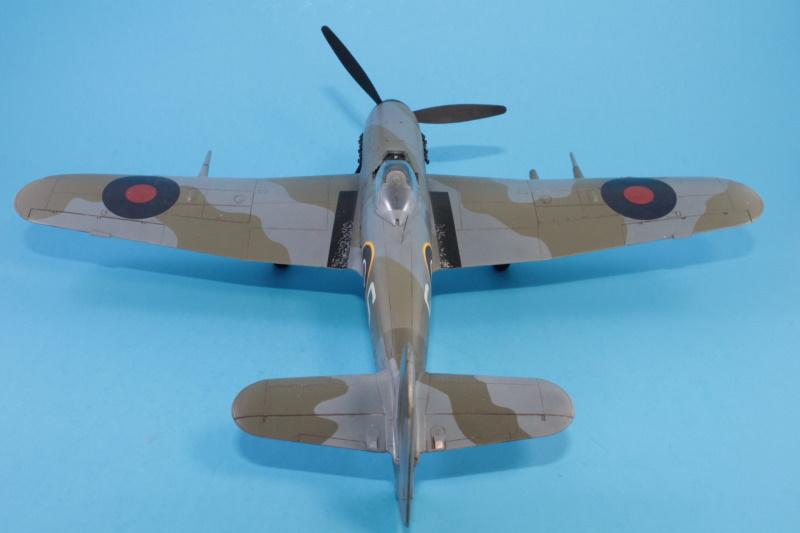
- 1. Mis-aligned serial number

Nice looking Typhoon. Great job on the camouflage. I've got both the bubble and car door version and this inspires me to do one.
Thanks Dale. This is the first time I used the instructions as templates for the camo but I haven't figured out yet how to use them on the fuselage correctly. You will notice I failed miserably to line up the demarcation with the "S" code on the left side
Nice work George. A really good result.
The Sky band on this airplane and all others in 2TAF were overpainted in late 1944/early 1945 when the squadrons were based on the Continent in order to tone them down when parked on the forward landing grounds.
You should have read my M2 review. The "Secret of the Hasegawa Typhoon" is to install the cockpit inserts to each fuselage half before proceeding further, so you can work the join from inside and out to get it perfect, then putting a strip of 10mm Evergreen plastic along the inner centerline edge of one side or the other, to close the gap. Voila! No application of filler and sanding down of surface detail. (Feel free to use this on your next Typhoon, since a man can't have too many Typhoons)
Nicely done! No negative waves here.
Nice one George
Nice work, George. I never knew the Typhoon had an FR version.
Looks awesome, George (@blackadder57). This is probably the longest build in history, but it was worth the wait.
Very nice build, George.
Good that you did finish it after all those years.
It would be a pitty to have it unfinished in a box.
Great paint work.
I had built one for a friend back in 2002, shortly after having re-entered the hobby, and I too remember fiddling around with the fuselage inserts, but otherwise it was a very enjoyable kit!
Very nic work on this, George @blackadder57!
Nice Tiffie after nine years gestation!
Nice build George. Very clean and tight camo work as well.
George, @blackadder57
This is a neat looking plane, and I especially like how you have been able to find actual photos of the real plane. I also like how you painted over the "Sky" colored fuselage band, and used a slightly different color to represent "fresh" paint. Well done ! That's a neat conversion they did with the camera taking the place of the inner cannon. I had never heard of this being done before you posted this here.
Thanks for the heads up about the fit on the inserts, and also the other problems you encountered along the way. It's a good feeling to finish up a kit that has been sitting idle for a while. I have a 1/48 scale AMT A-20 Havoc that has been sitting on the shelf of doom for at least 7 years now...Who knows ? I might actually finish it up one of these days.
I have several of the 1/48 Hasegawa Typhoon's and a 1/32 Revell kit that still remain to be built in the stash. I have built up several of the 1/48 Monogram kits, and they were a lot of fun. After seeing how good these look once completed, I'm going to take another look at mine...
Thanks for the inspiration. I also pressed the "liked" button.
Take care buddy and stay safe.
For all the trouble and the long hiatus she cane out quite well George. I like it.
All the details - including the misaligned serial - really add to the model! Great work on it - looks fantastic.
Hi George. This looks very nice.
The artistry shows in your work. Minor imperfections make for real items. not cooky cutter repetitions.
I encountered this during my career Often with designers who want to line all the elements according to grid lines. That majourly makes Rooms , or models stone cold.
Great job.
Thank you all very much