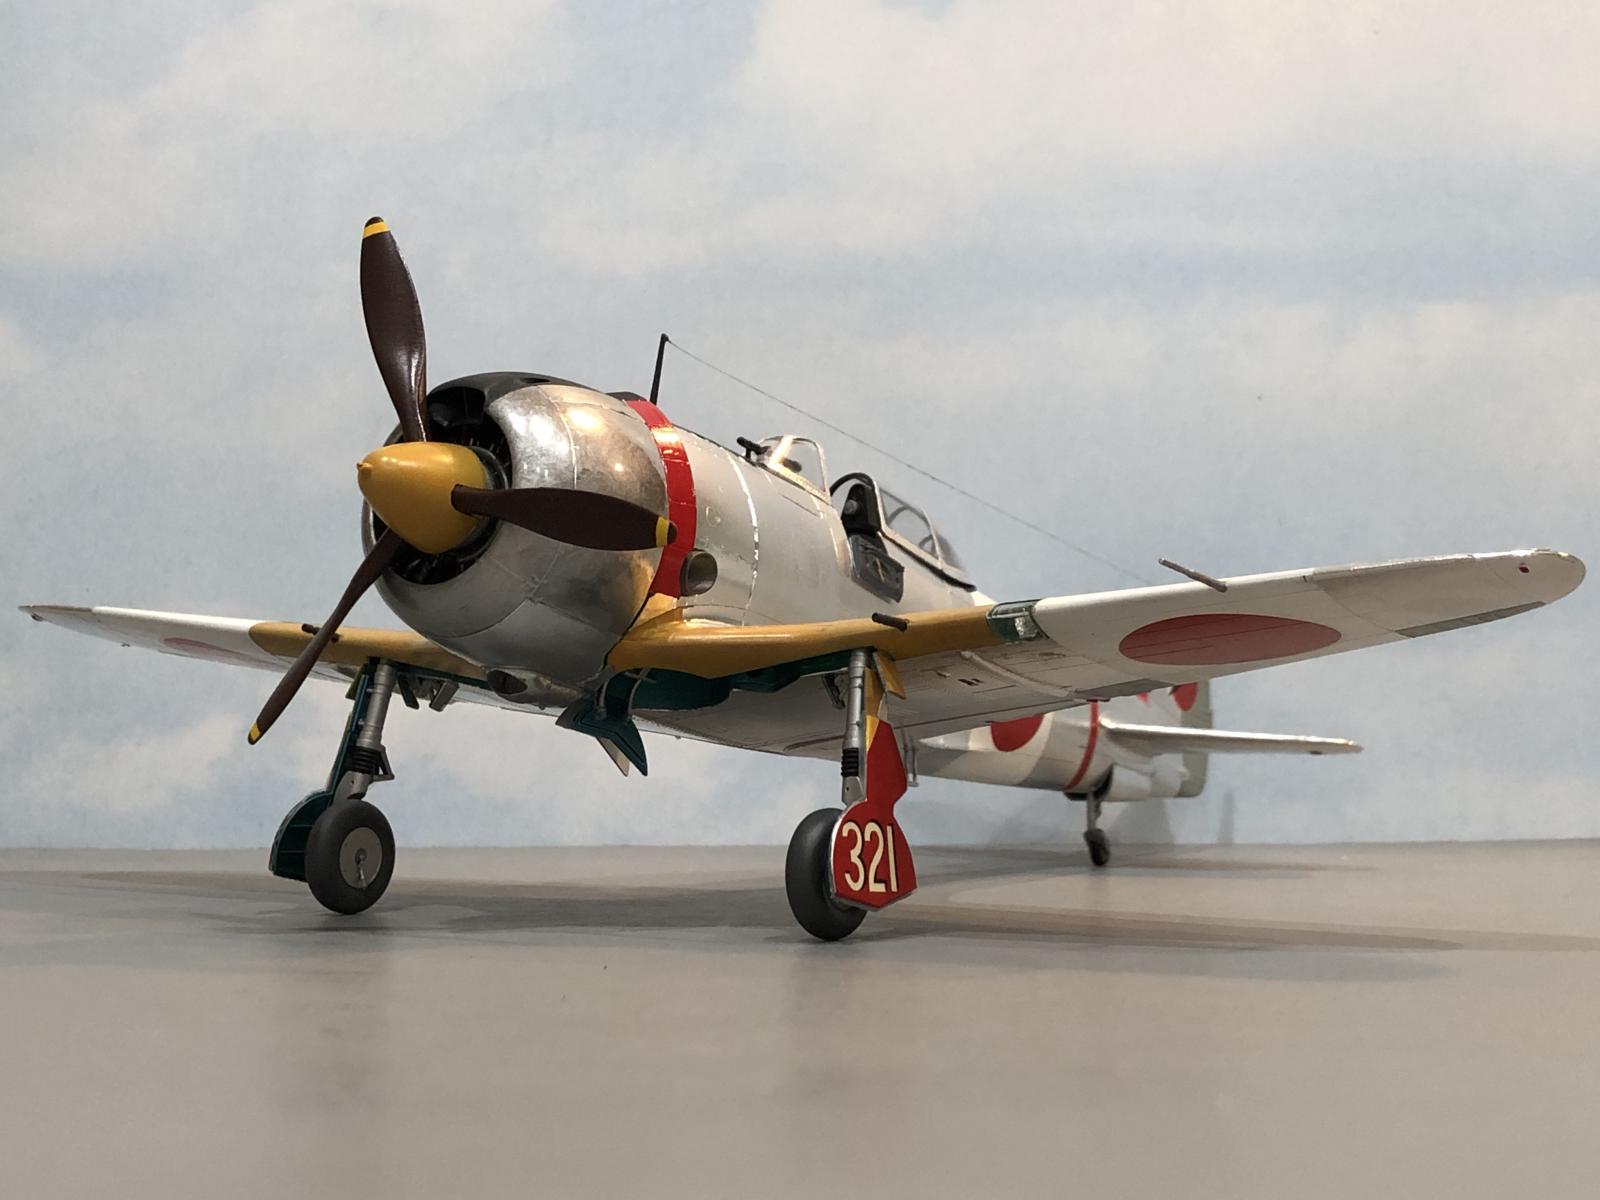
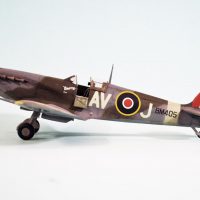
Empire of Japan Group Build, 1/32 Hasegawa Ki-44-II Hei, Shoki “Tojo” of the 246th “Flight Regiment”
This is a plane that I recently finished up.

It was built as part of our "Empire of Japan" group build. This build was started after a small cleaning accident occurred. I keep most of my stash model kits stored on wire rack shelves. I put wheels on the shelves so it's easier to move them around and clean the floor up occasionally as needed. As I was rolling the shelving around, this rack where the Ki-44 was stored on, bumped into another wire rack, where I keep my 1/35 scale Armor model kits stored. The resulting impact caused this kit to fall onto the floor. When it hit the floor, the box top opened and it spilled some of the contents onto the floor. I took a closer look at the parts inside, to make sure that nothing was damaged or missing inside.
This closer examination rekindled a "spark" of creativity, and off to the work bench it went... I started a detailed work in progress journal. You can see what all went into building this model, by following this link.
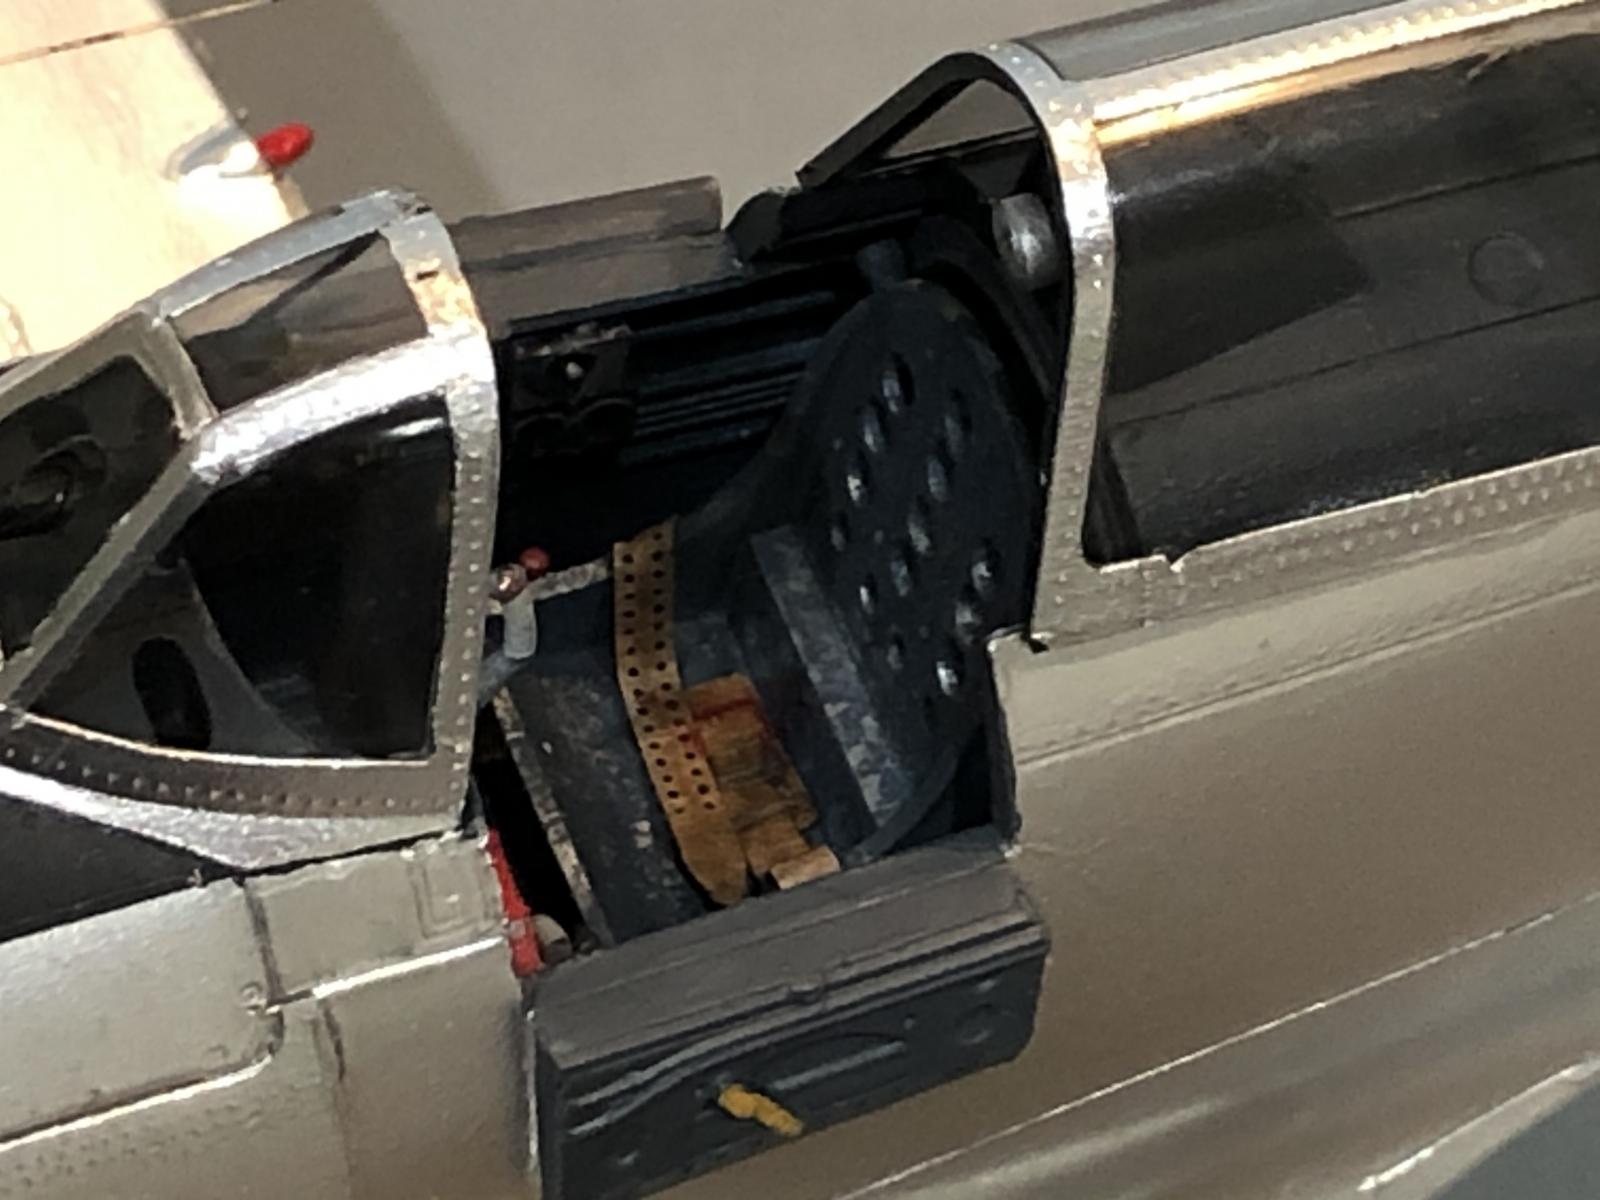
This model was an absolute joy to build. The only thing I didn't like about building this model, was how the fuselage has a small insert on each side. I believe these inserts replicate ammunition storage bins, and they're located just forward of the cockpit.
This is a build where I learned about liquefied styrene. Our good friend Spiros, @fiveten
introduced me to this stuff, and even posted a short video on how to make your own... now I'm hooked on it, and use it all the time in place of a typical filler type putty.
This Ki-44 model was constructed pretty much right out of the box, but I did make a few deviations from the plans.
First off, I used an aftermarket seat harness. This was one from RB Productions, and it had to be assembled prior to installation.
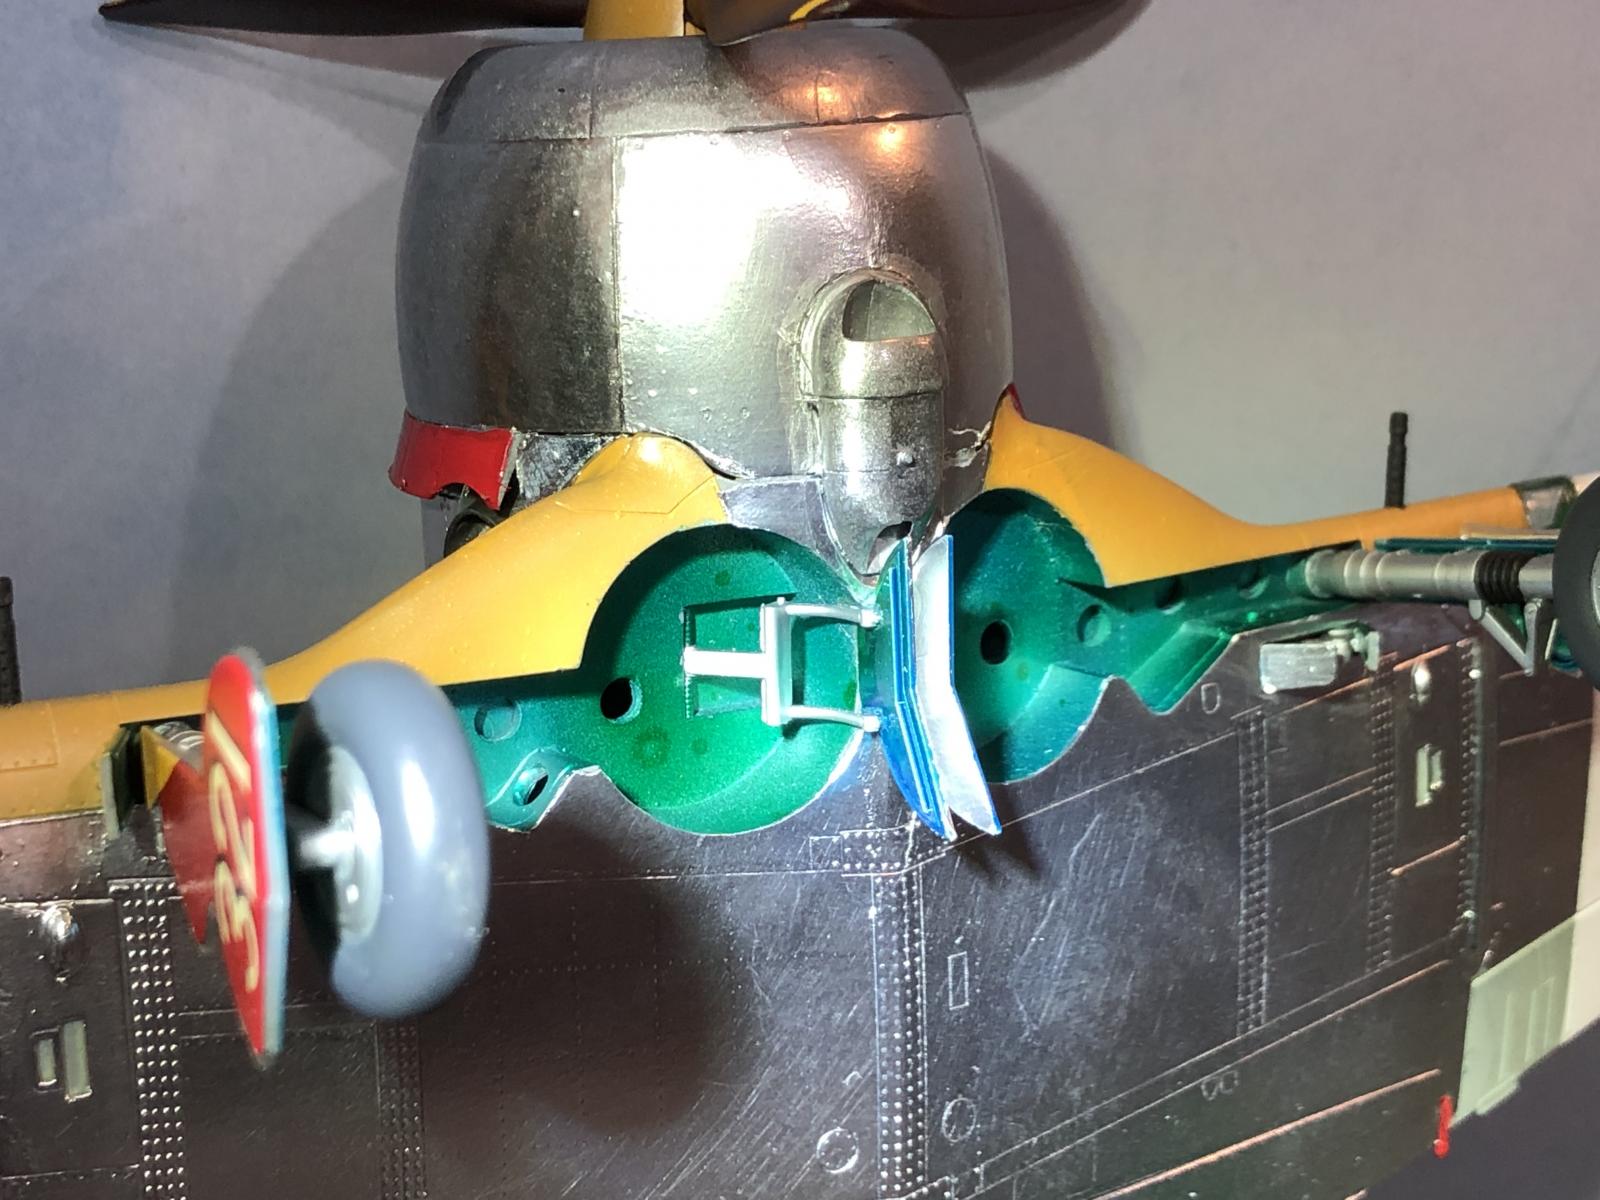
The other changes were that I added a homemade engine ignition wire harness, using fine copper wire.
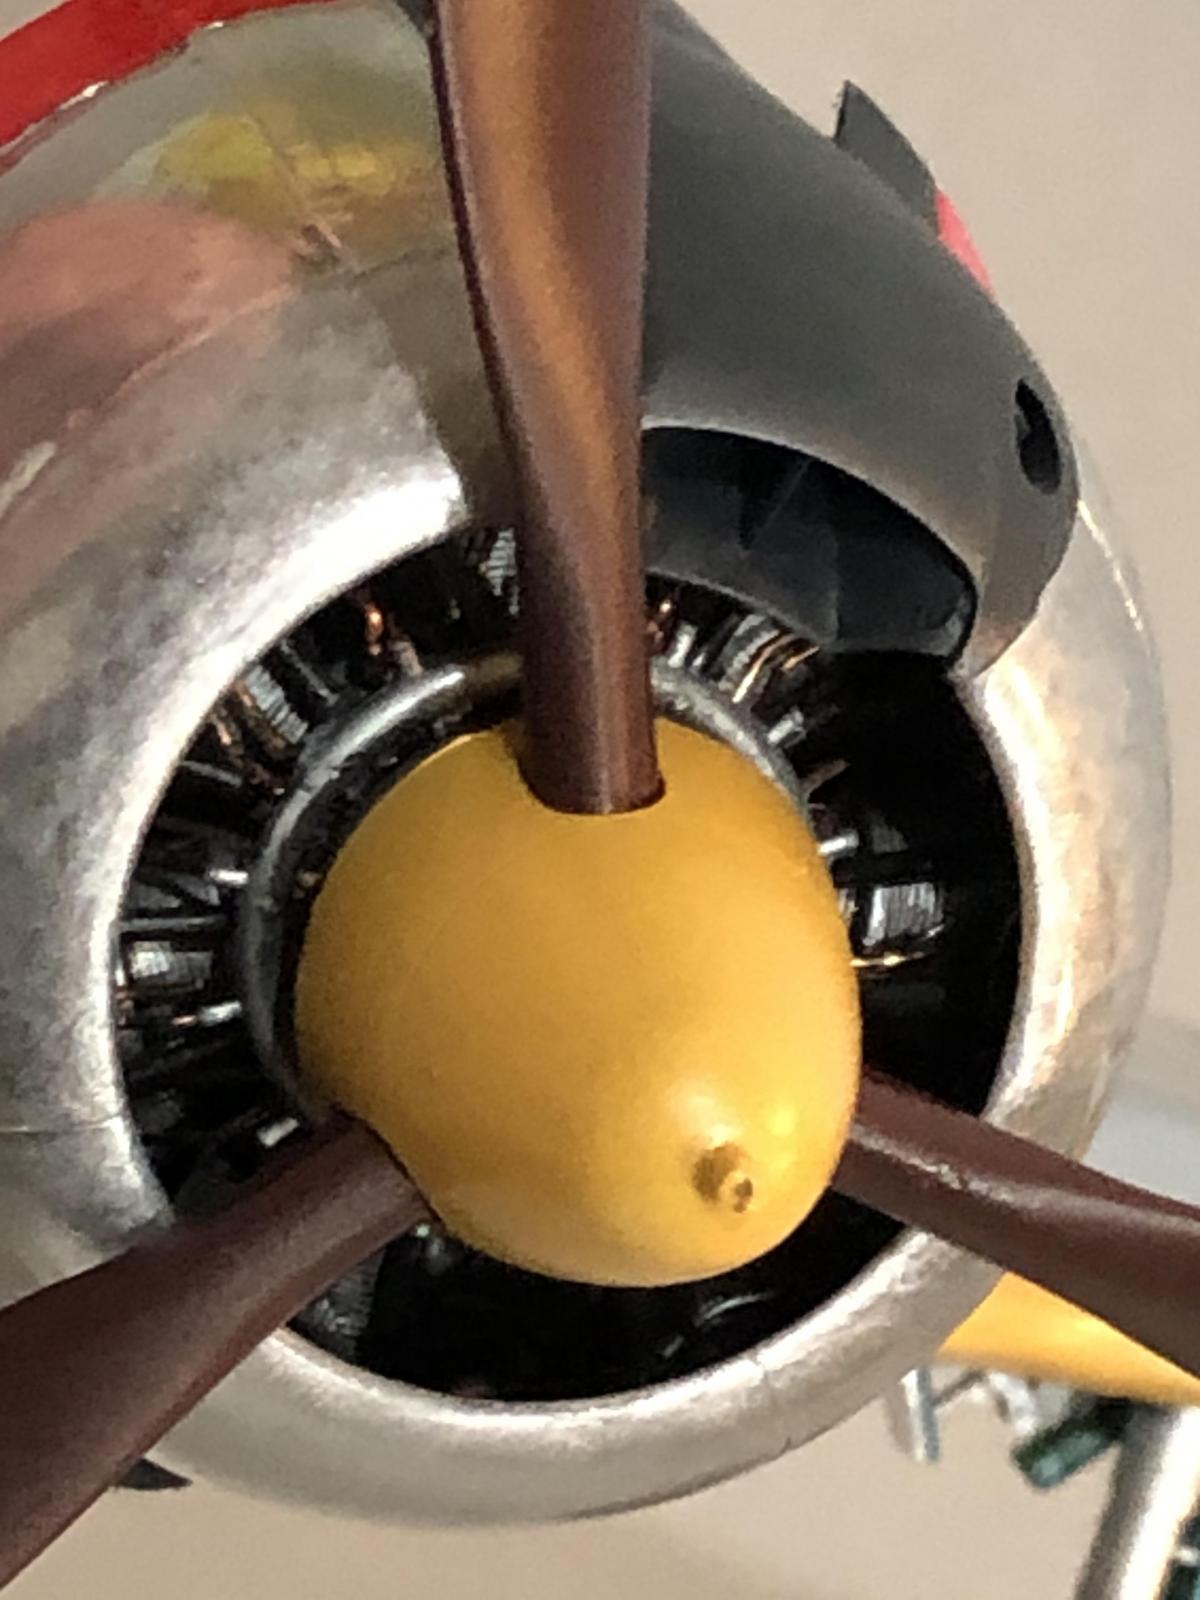
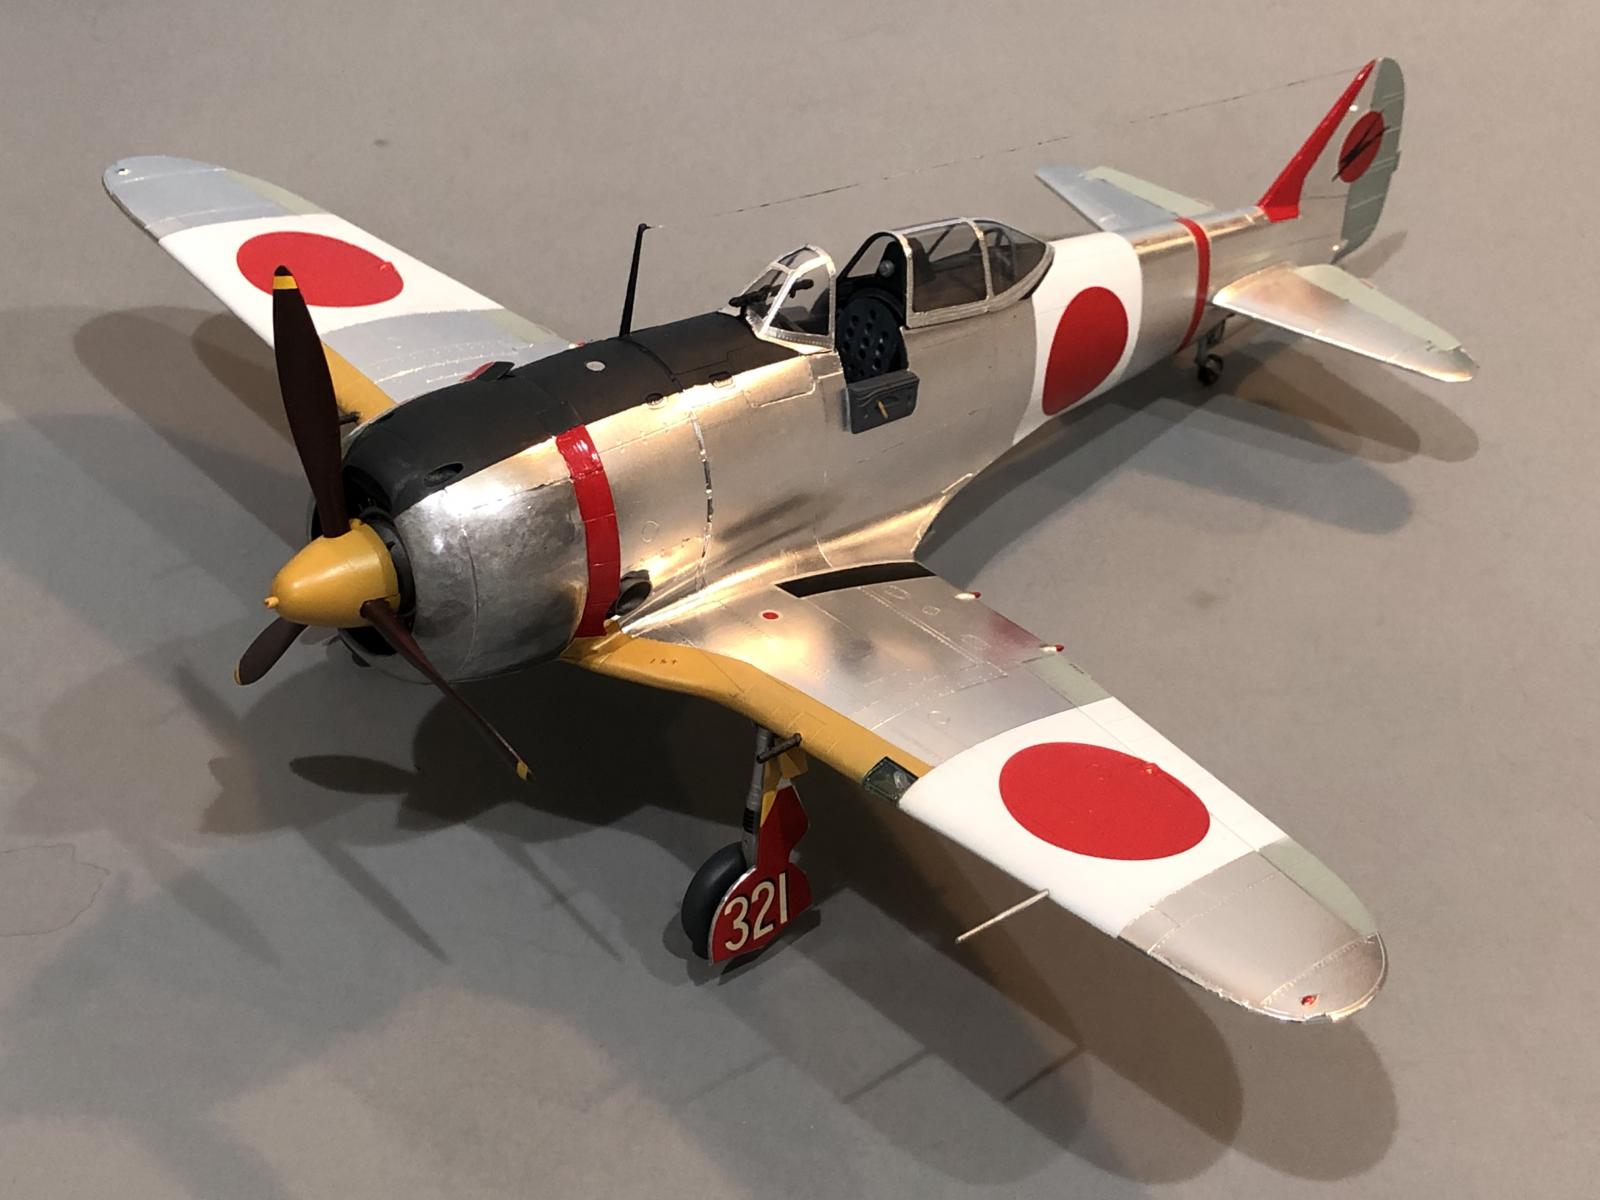
Not too much of it can be seen after the cowling was installed... I used the "Open" set of cowling flaps on the cowling. Hasegawa also supplied a "Closed" set so this gives you options.
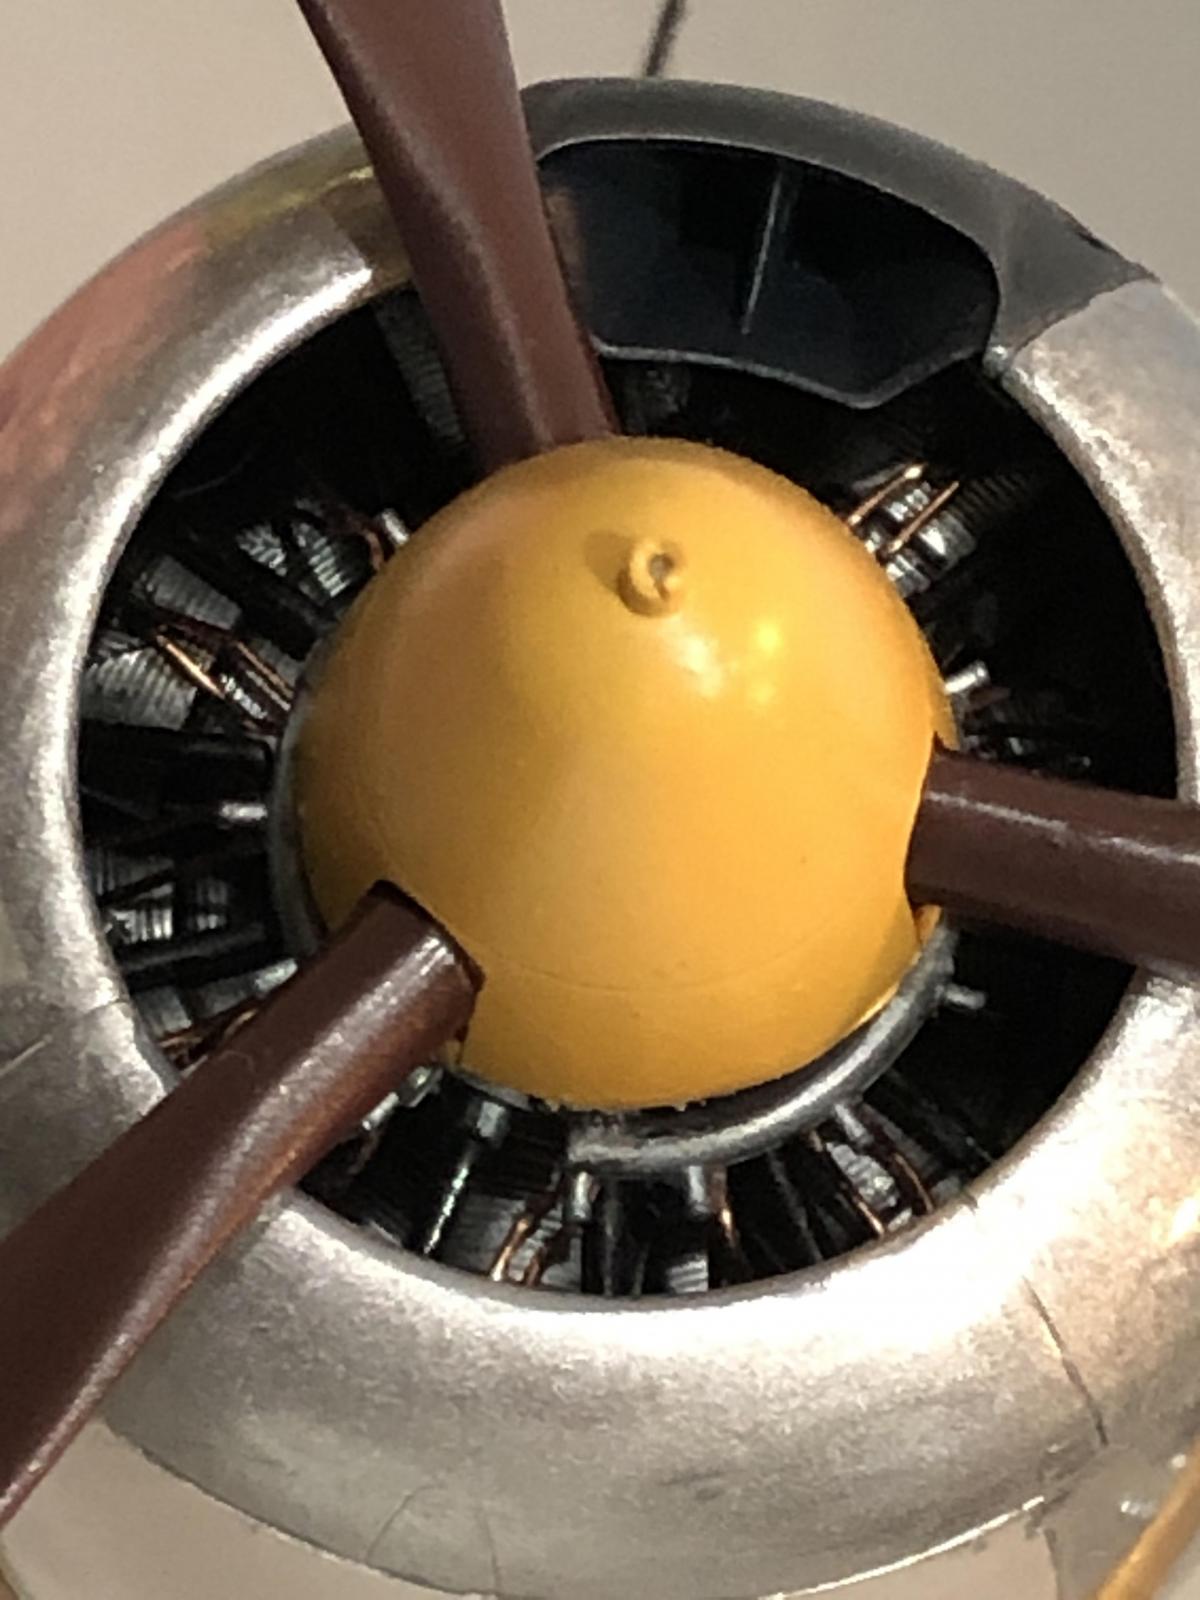
Trust me the wires are there. I added a light wash of black to make the engine details pop out a little more. The engine is a little gem in it's own right.

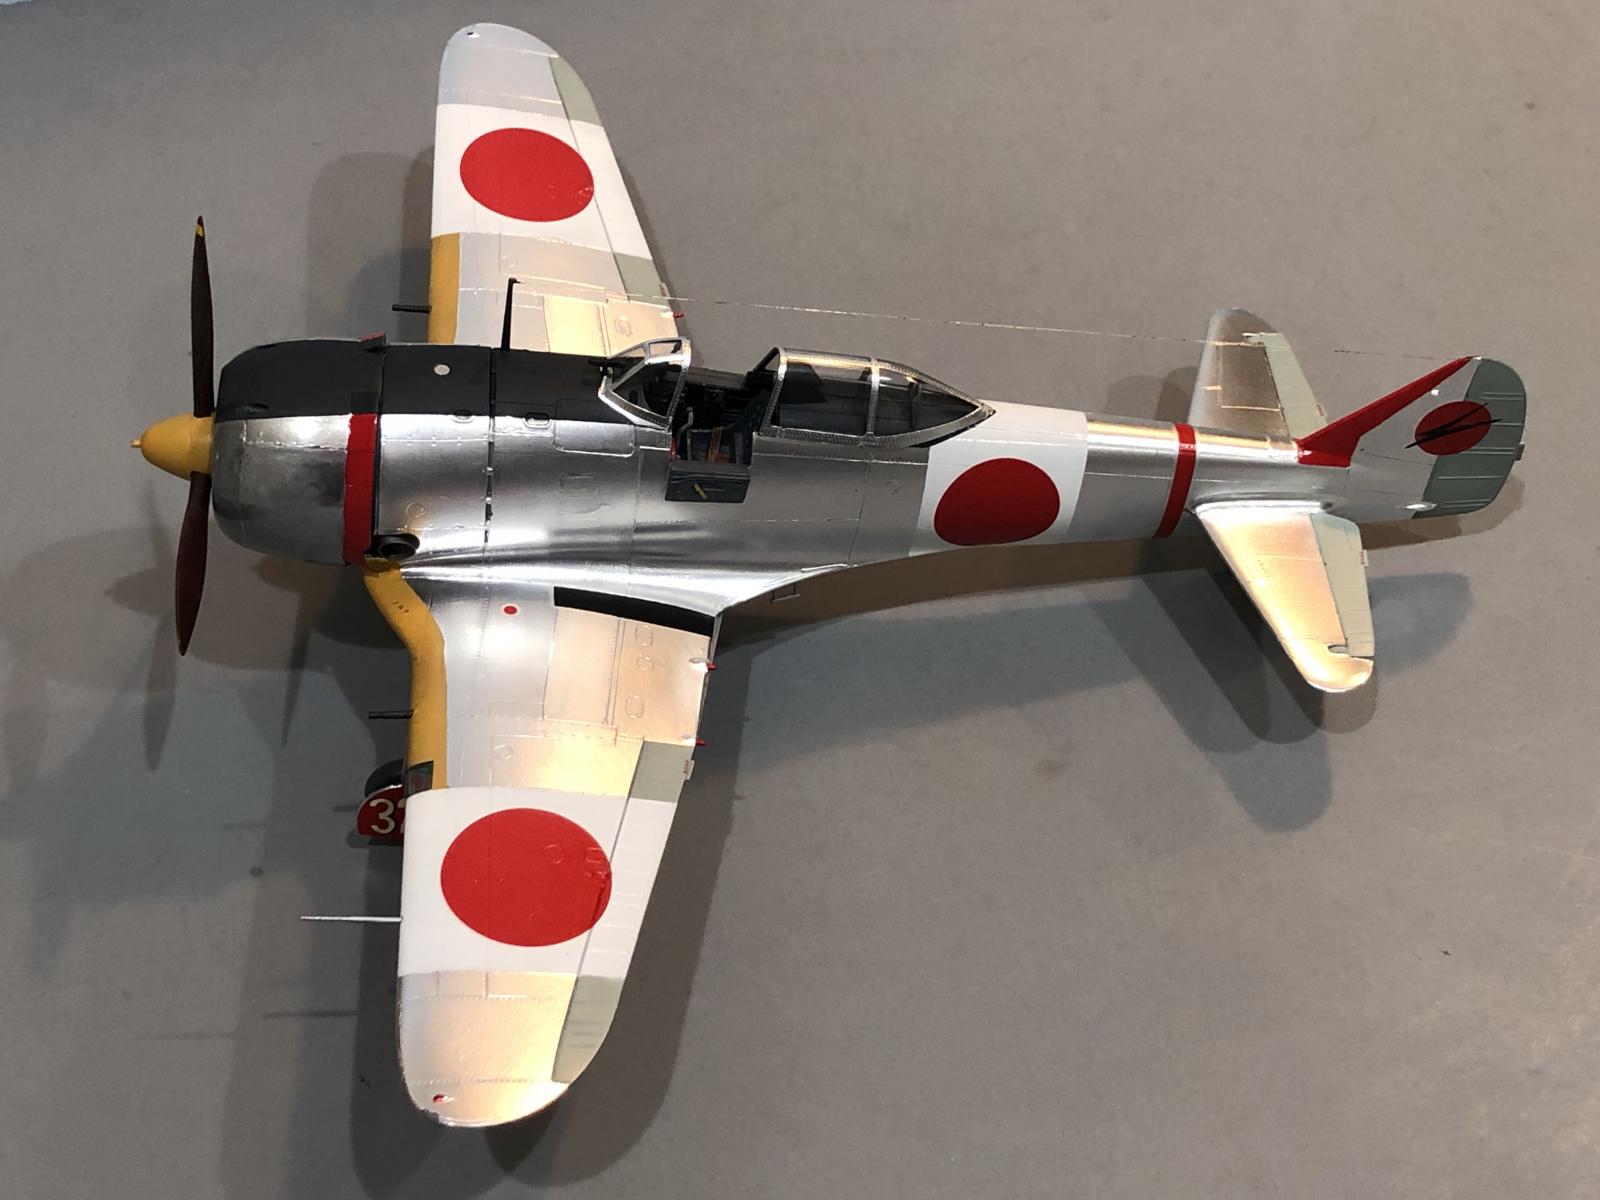
I cut away the tabs on the combat "butterfly flaps" and mounted them in the closed position. This looks more realistic, as I have yet to find a picture of a Ki-44 parked on the ground with the flaps dropped.
The landing gear wells were slightly modified by drilling out the "lightening" holes that were left closed by Hasegawa.
-
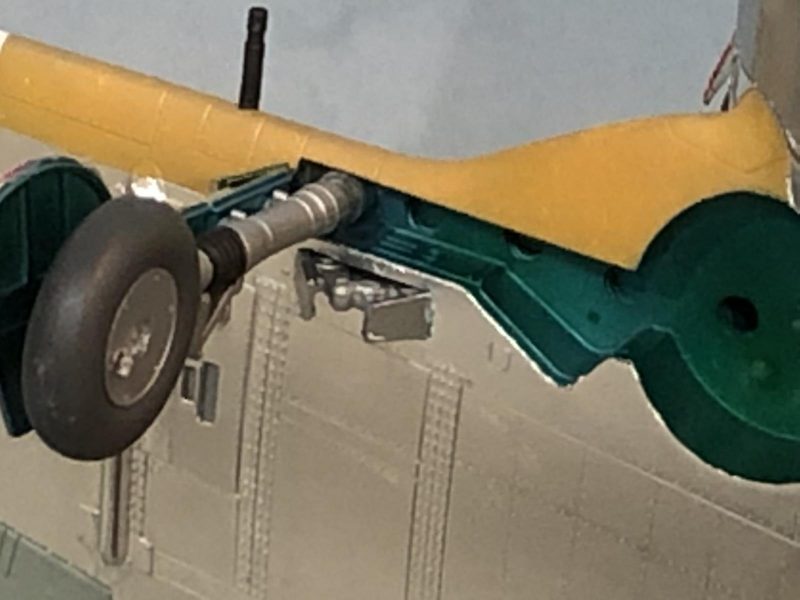
- 1. These holes were drilled out

The landing gear itself are nicely represented, but in hindsight I should have added some hydraulic brake lines.
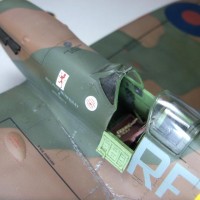
Also the cockpit side entry doors were cut away, and posed in the "Open" position. After I did all this extra work, in an effort to show the interior a little more, I learned these doors were most often left closed. They were typically only opened in case of an emergency, or if maintenance work was being performed. I even found a cool photo that showed a Japanese pilot standing on the door as he was entering (or exiting) the cockpit. This actual photo is shown in the build journal...
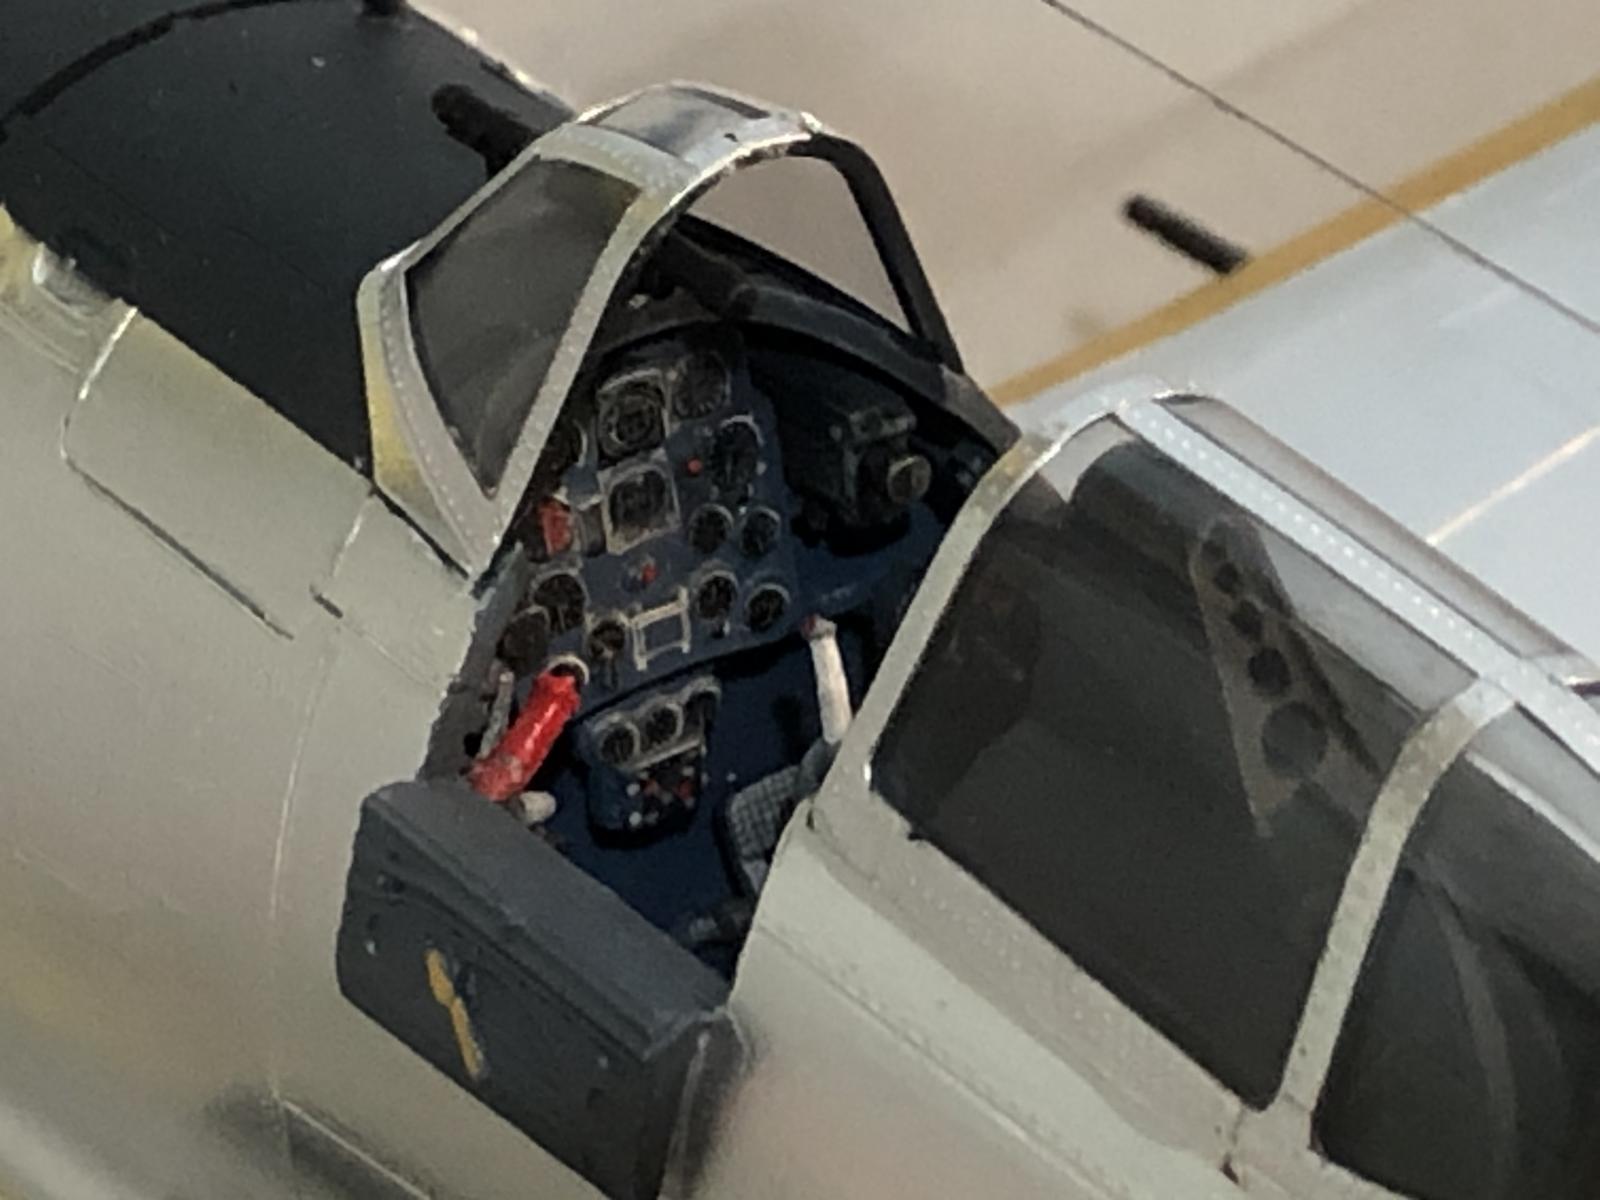
I also used a new tool I picked up called "Rosie the Riveter". I used it to make a set of rivets along the canopy frames, in an attempt to make it look a little more realistic.

I didn't notice any rivets on the clear canopy parts. Since the canopy framework was covered with foil, it makes it a little more interesting and not as plain.

I made my own mix to replicate the Aotake Blue / Green. I first sprayed the area using an aluminum color. Then I went back and sprayed Tamiya Clear Blue on top of the aluminum color. The final touch was to randomly add a little Tamiya Clear Yellow and Clear Green in various places. Here you can see the results after I sprayed on a little of each color. I used a small flash light to show you how this looks up close.
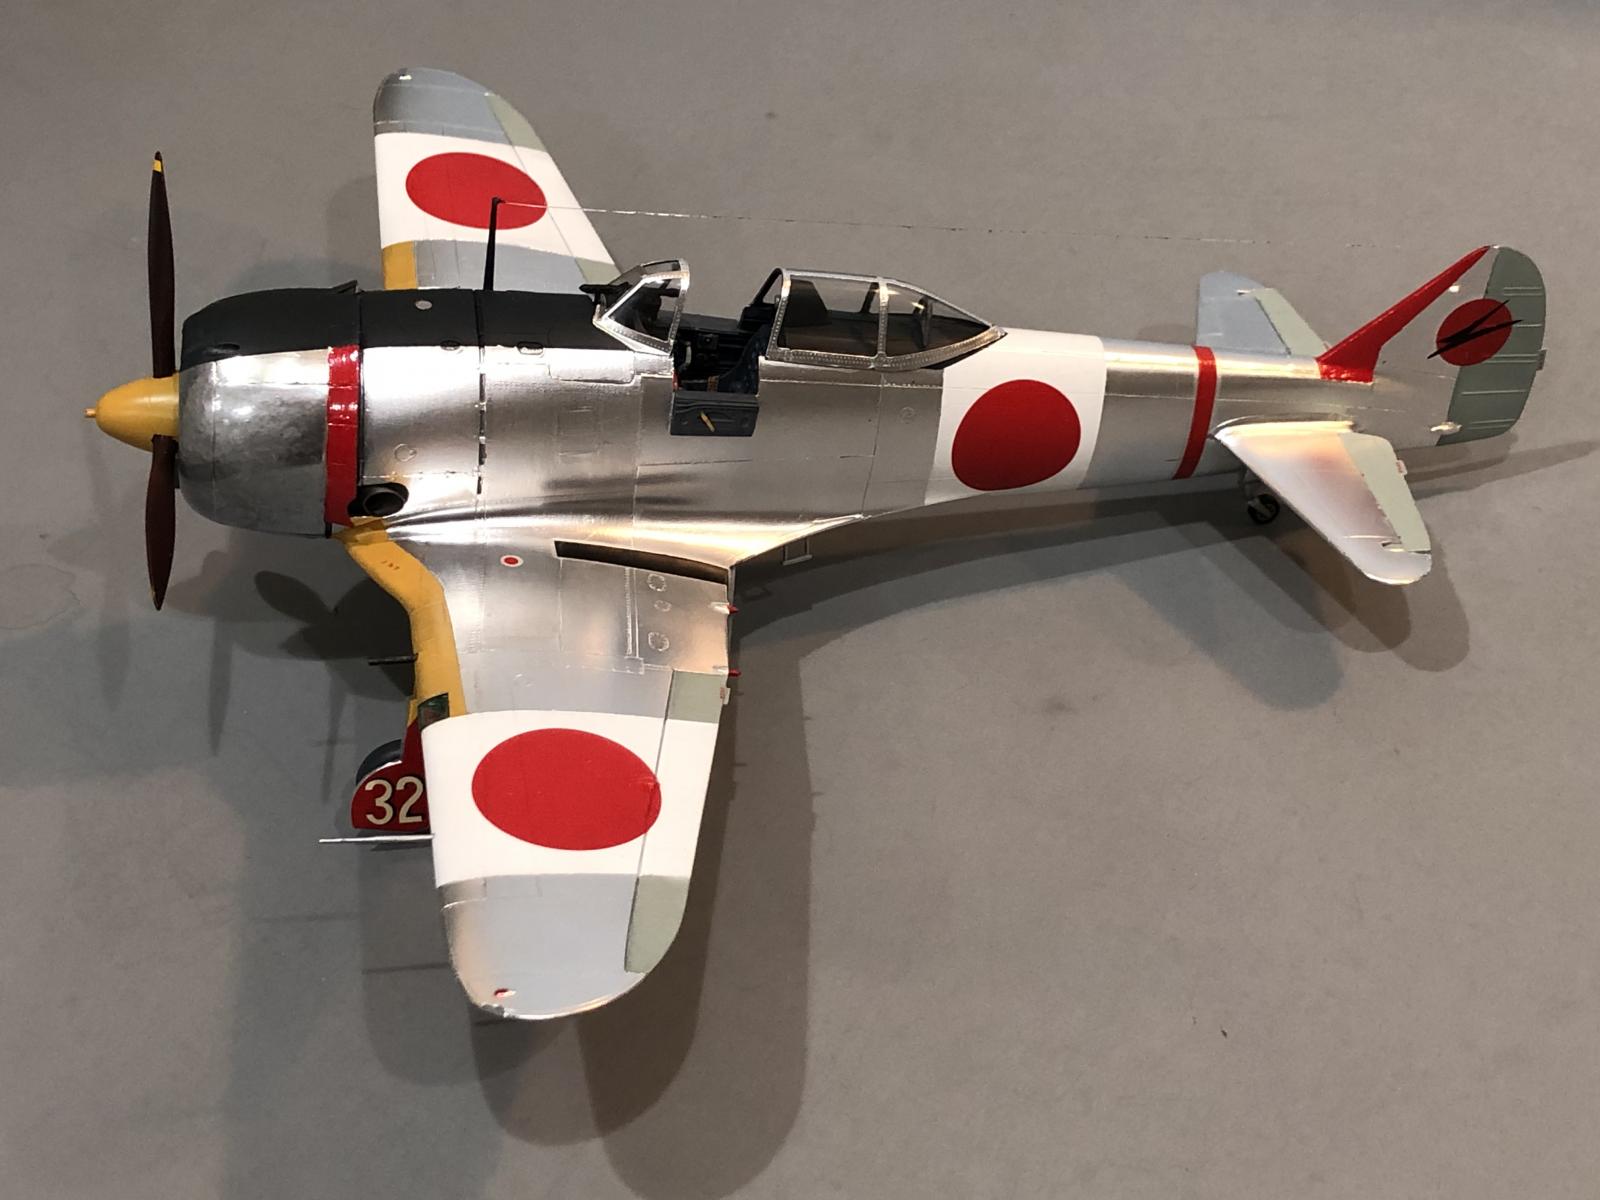
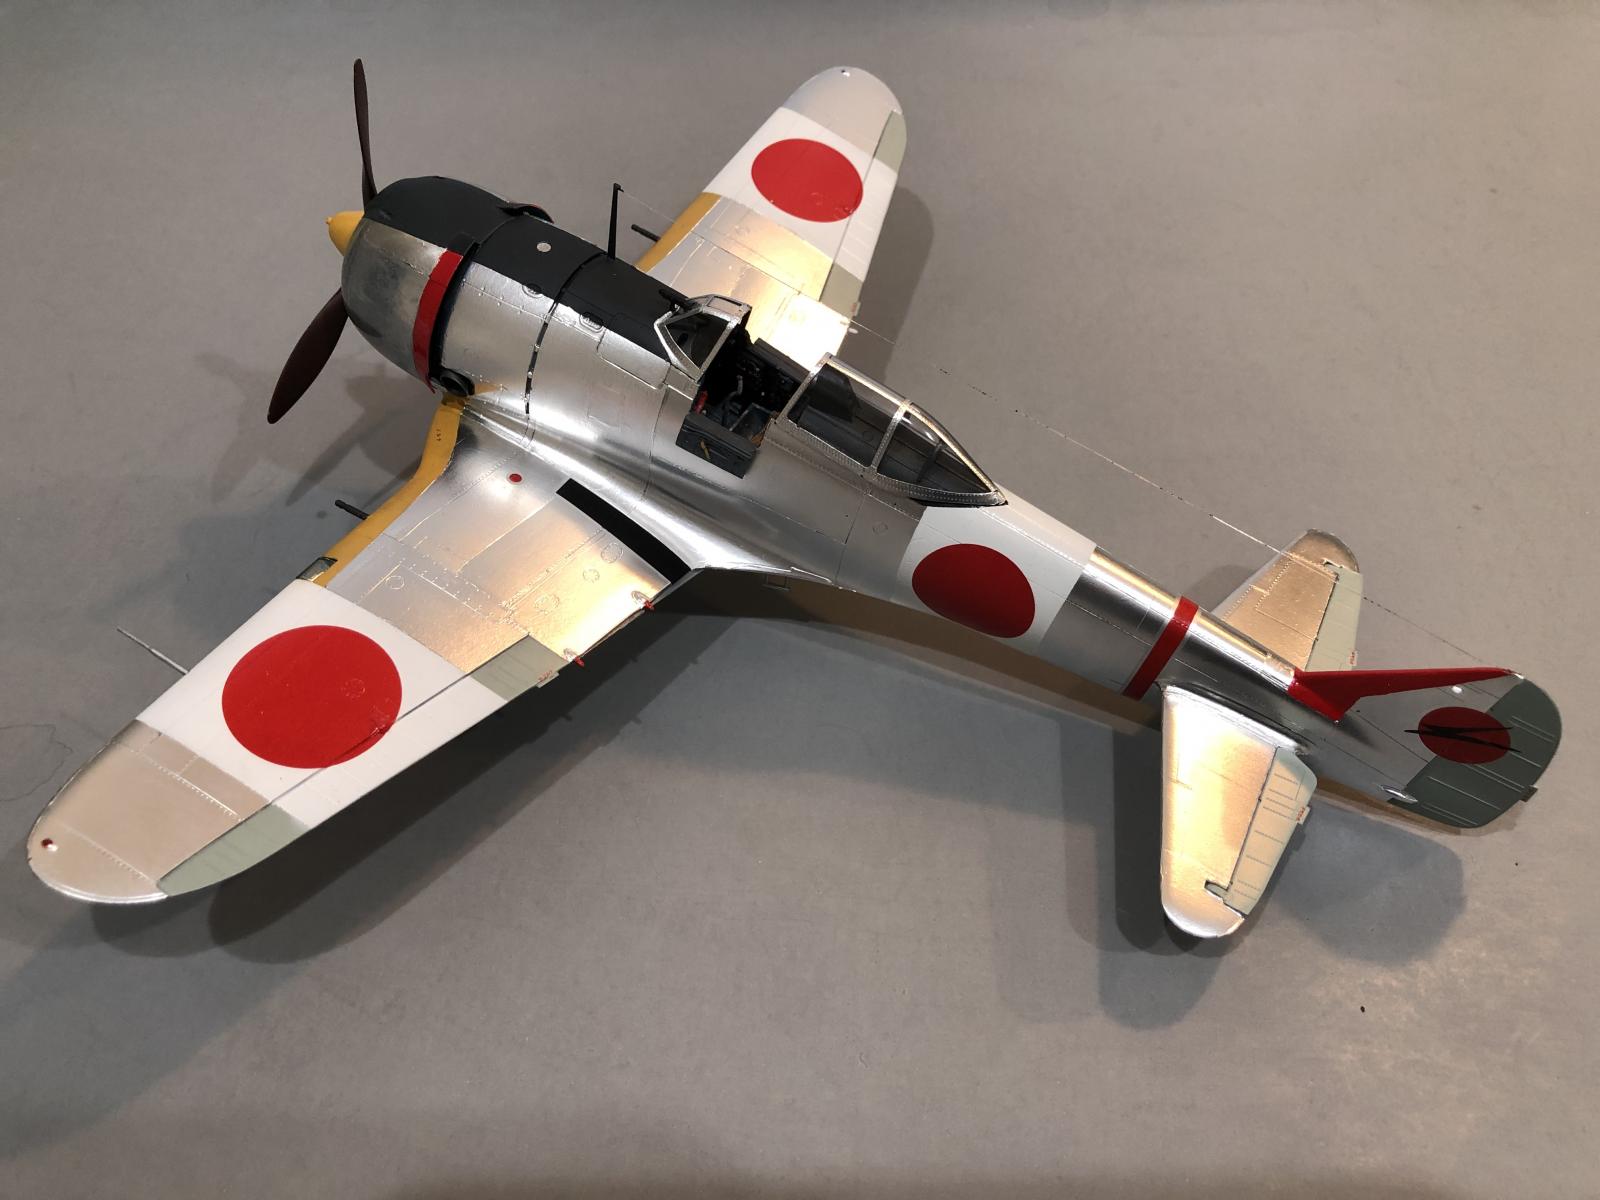
The last thing I did was I cut away the elevators and posed them in the "UP" position. I did find several photos where the plane was parked in this manner.
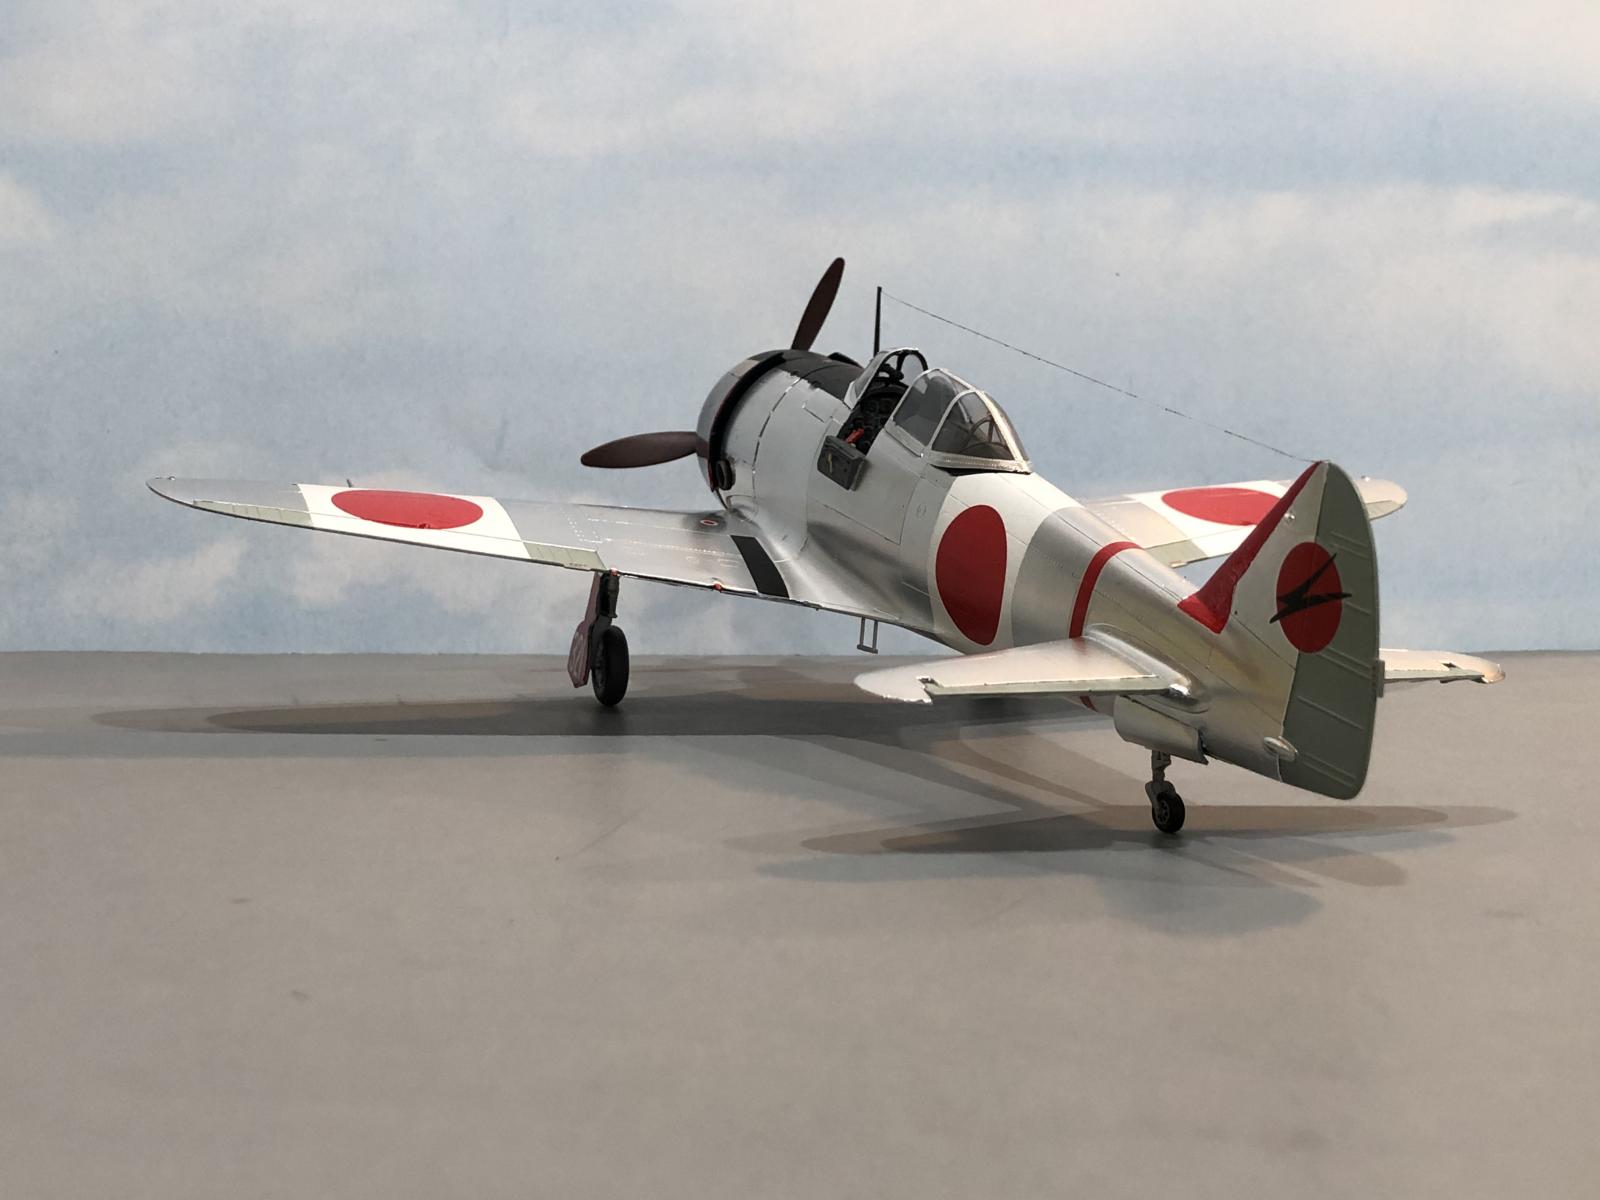
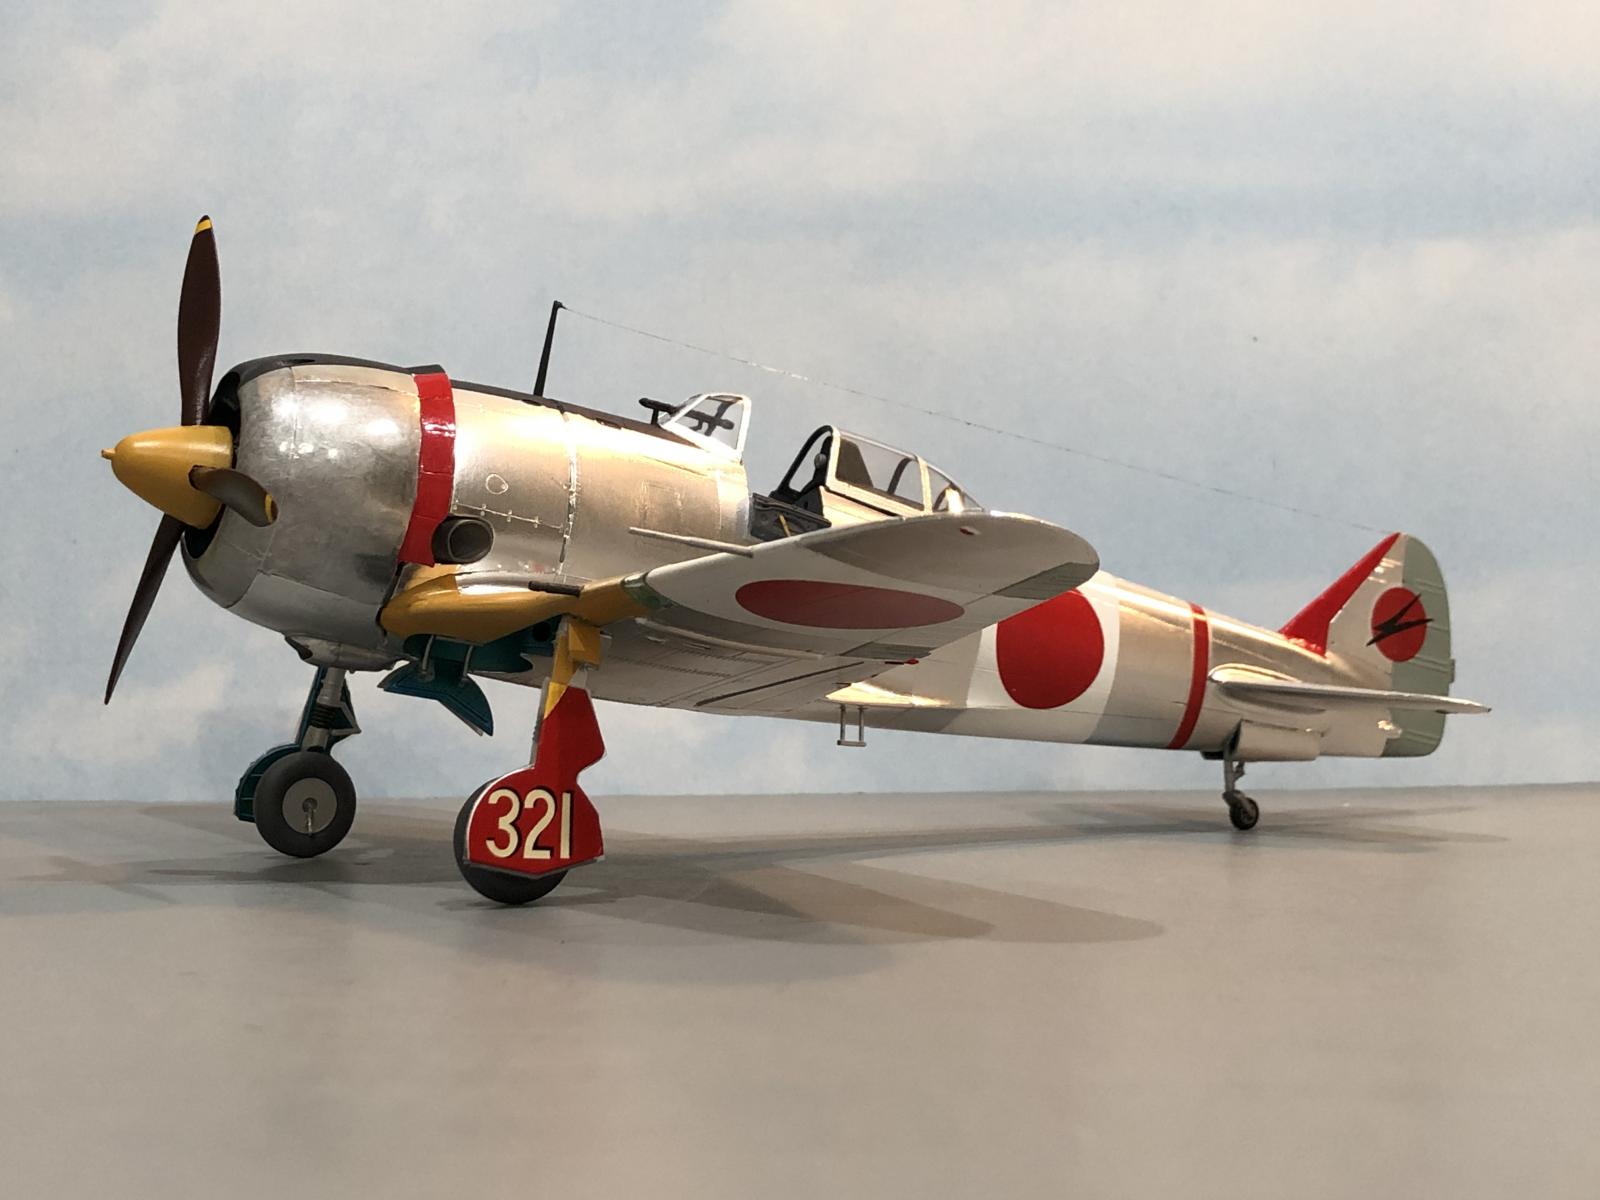
Once the model was constructed, I covered it using Bare Metal Foil. I used primarily the color "Matt Aluminum" for the exterior. Some small sections located just behind the exhaust were covered using "Ultra Bright Chrome". They say as part of their advertising that "It looks like bare metal, because it is metal"... or something like that. 🙂

This was done to replicate the exhaust panel which was most likely made from stainless steel on the real plane. Otherwise, the aluminum panels look to be very similar in appearance when you take a closer look at existing black and white photos. I did orientate the "grain" of the foil to give each one a slightly different look.
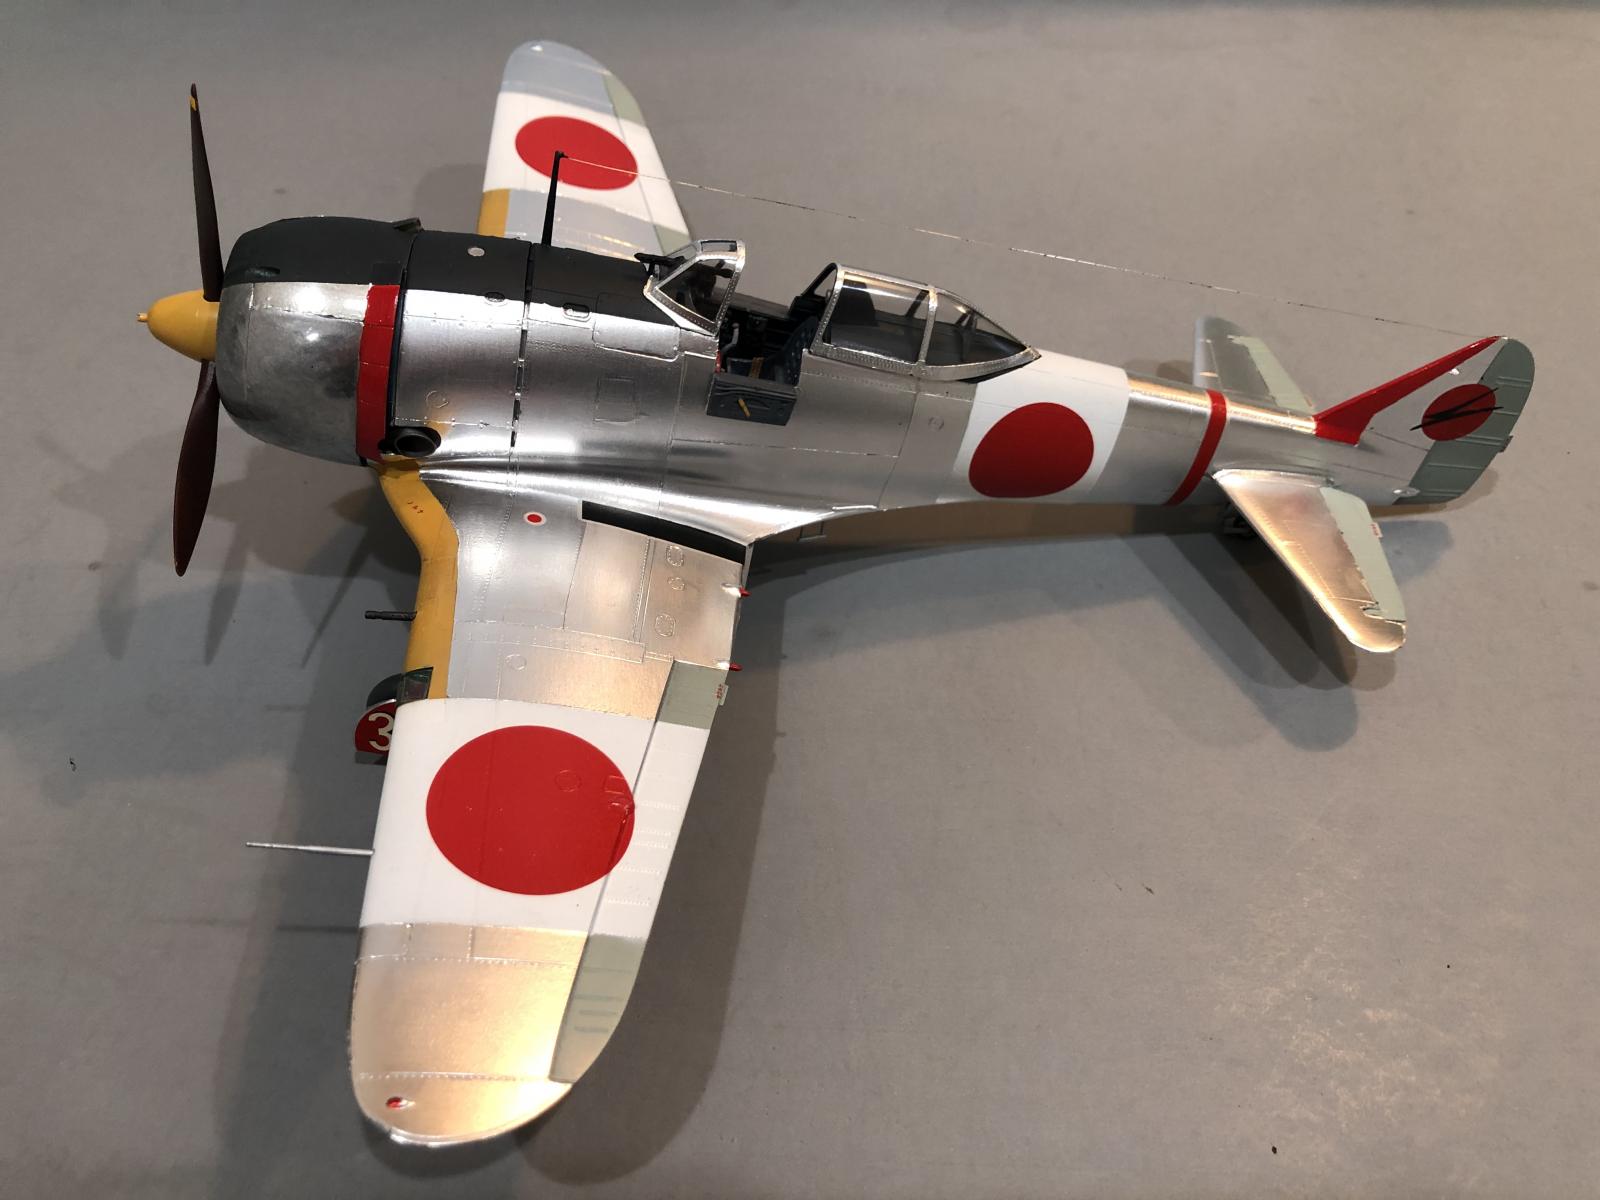
The grain is what causes light to reflect differently. I used a Molotow chrome pen to paint the cowling, since this area was very prone to wrinkling as I applied the foil. So far I am very pleased with the results. Afterwards, I found out that you can buy a refill for the chrome pens, and this stuff can be sprayed on using an airbrush... Maybe next time.
The interior was painted using a custom mix of blues and grays, coming up with a color that is close to what the Imperial Japanese Army used on the early built Ki-44's. I did a lot of online research, and read a lot that has been written about the various cockpit colors that were used on the Ki-44 during it's production run.
It seems the early machines were finished in the IJAAF #3 Hai Ran Shoku, known as "ash indigo color". This color was specified for use in the cockpits of Imperial Japanese Army Air Force aircraft, in accordance with the 1936 requirements set out by the Imperial Japanese Army.

This color was changed to a "yellowish green" color on the later built Shoki's. It's also possible that the good old standby of "Aotake Blue Green" or even bare unpainted metal could have been used on some of these Ki-44 planes.
There's a lot of information available on this fascinating subject over at Nick Millman's "Aviation of Japan" website. Nick has probably forgotten more about this subject than most of us know...

Even more information can be found by taking a look at Jaircraft.com Please do yourself a favor, and check out these two websites, if you have an interest in anything that is Japanese aircraft related.
There's another common misconception about these planes, and most of the Japanese planes from this era. Many would have you believe that all of the fabric covered control surfaces were painted using a common color that is a light greenish gray in appearance. This color is formally called #1 Hai Ryoku Shoku or "ash green color".
This is true on the early built machines, and this applies to the Ki-43 "Oscar" as well as the Ki-44 "Tojo". But somewhere around the end of 1943 or early 1944 as a good "guestimate", the Japanese began using Aluminum colored dope on the fabric control surfaces. On the Ki-61 "Tony" and subsequent ki-100's, these aircraft had the fabric controls painted using aluminum dope color in place of the "Ash Green" color.
This becomes evident if you take a close look at pictures of these planes I mentioned. Some will have it very obvious, and the surrounding metal will not match the fabric controls... while on later production variants, the aluminum shade of "dope" was used. When this happened, the fabric controls are a very close match to the unpainted metal parts that are nearby.
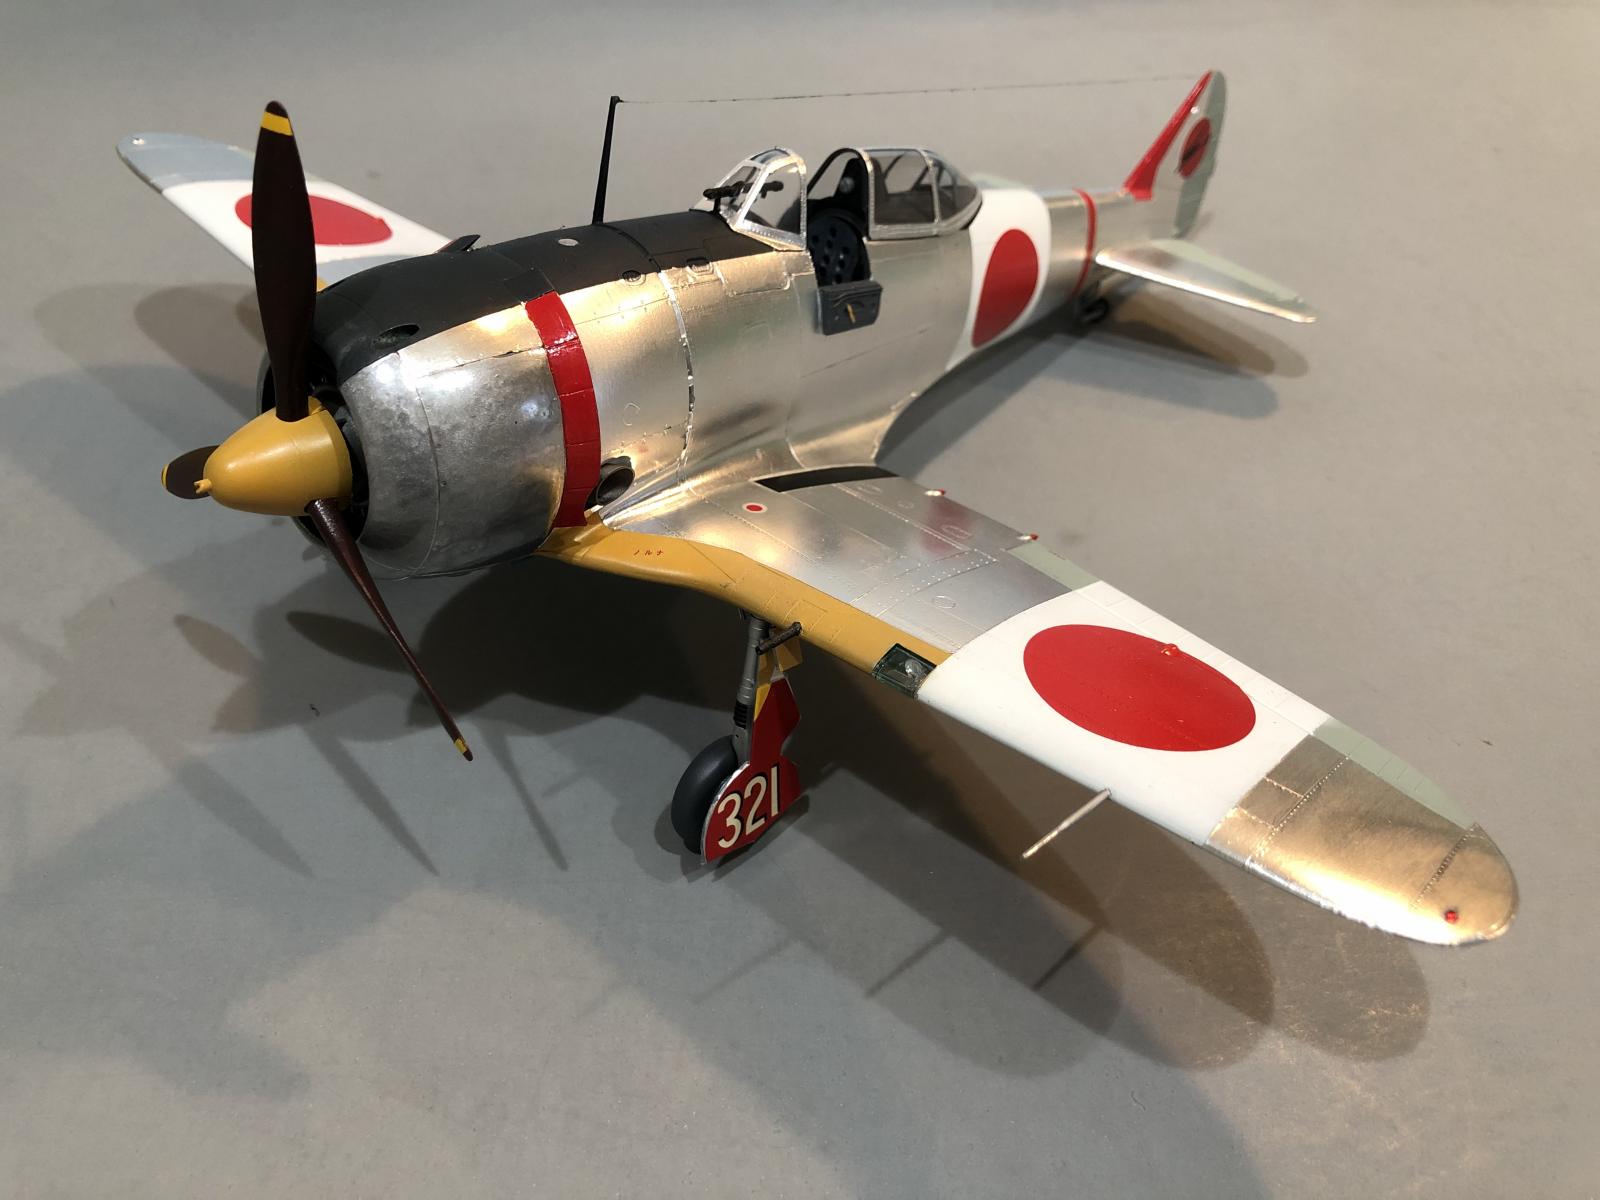
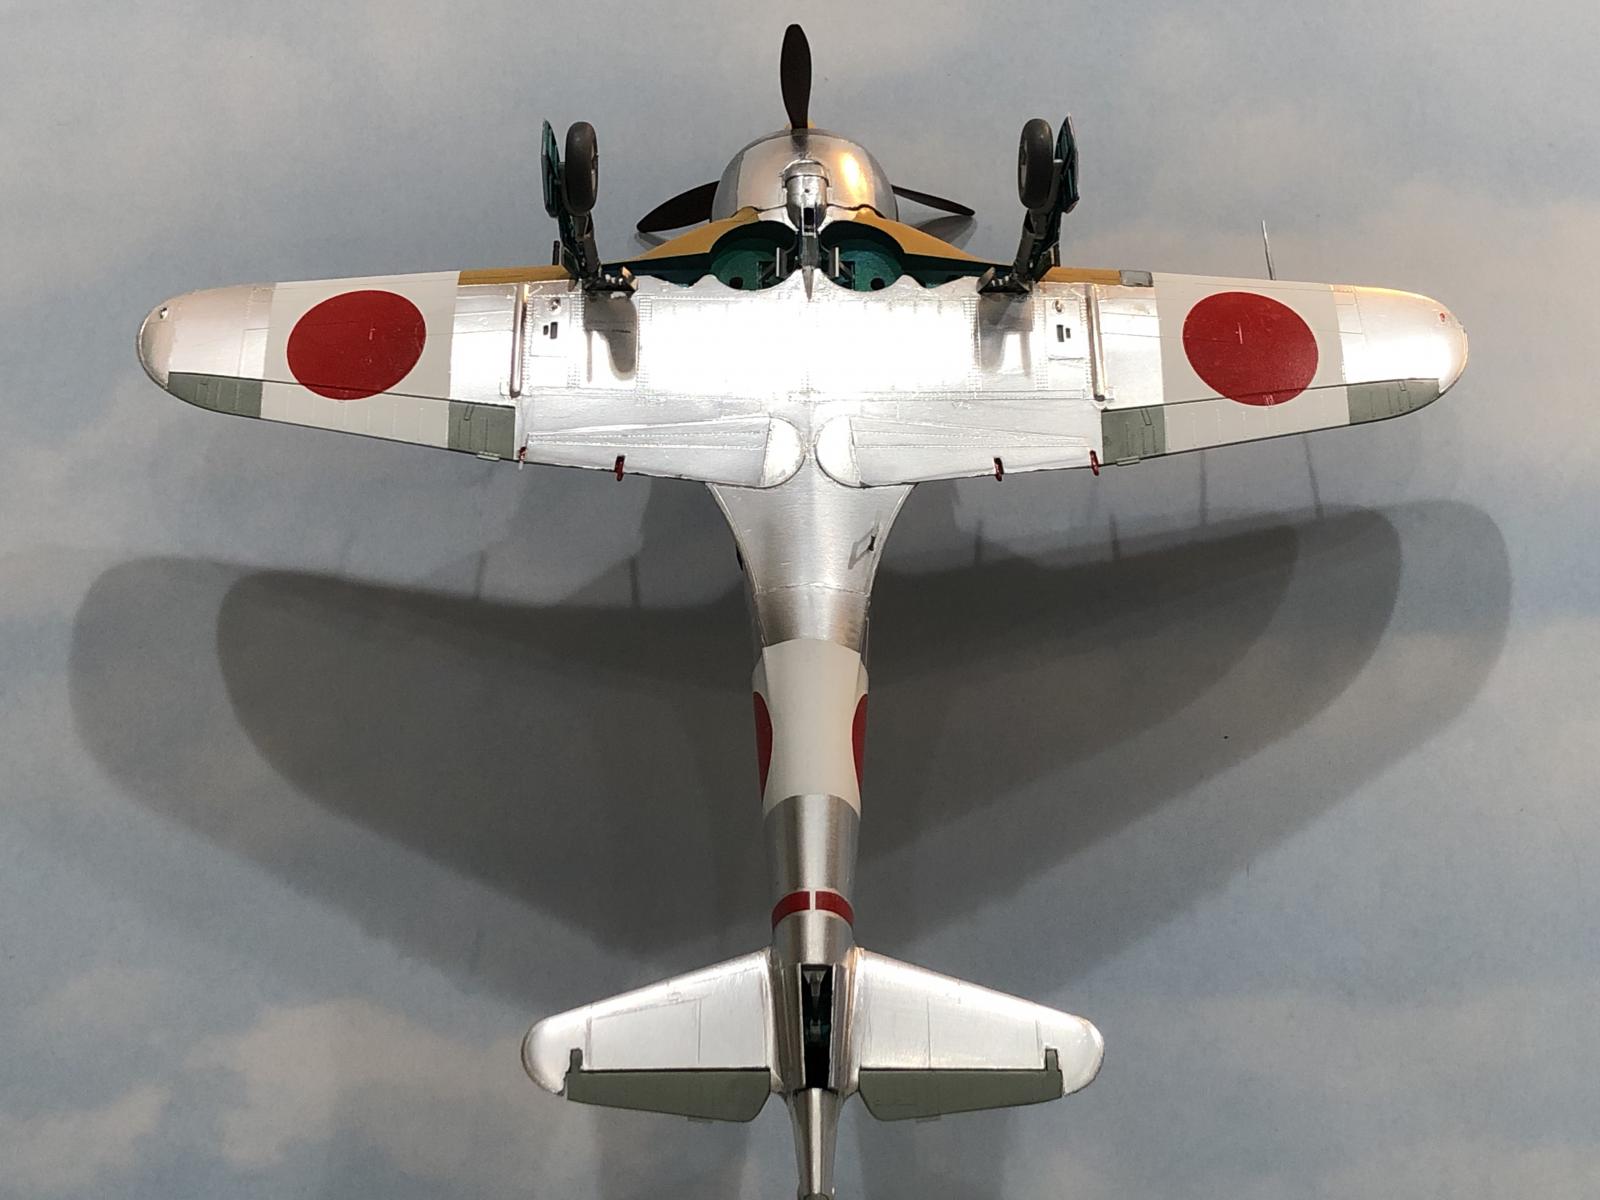
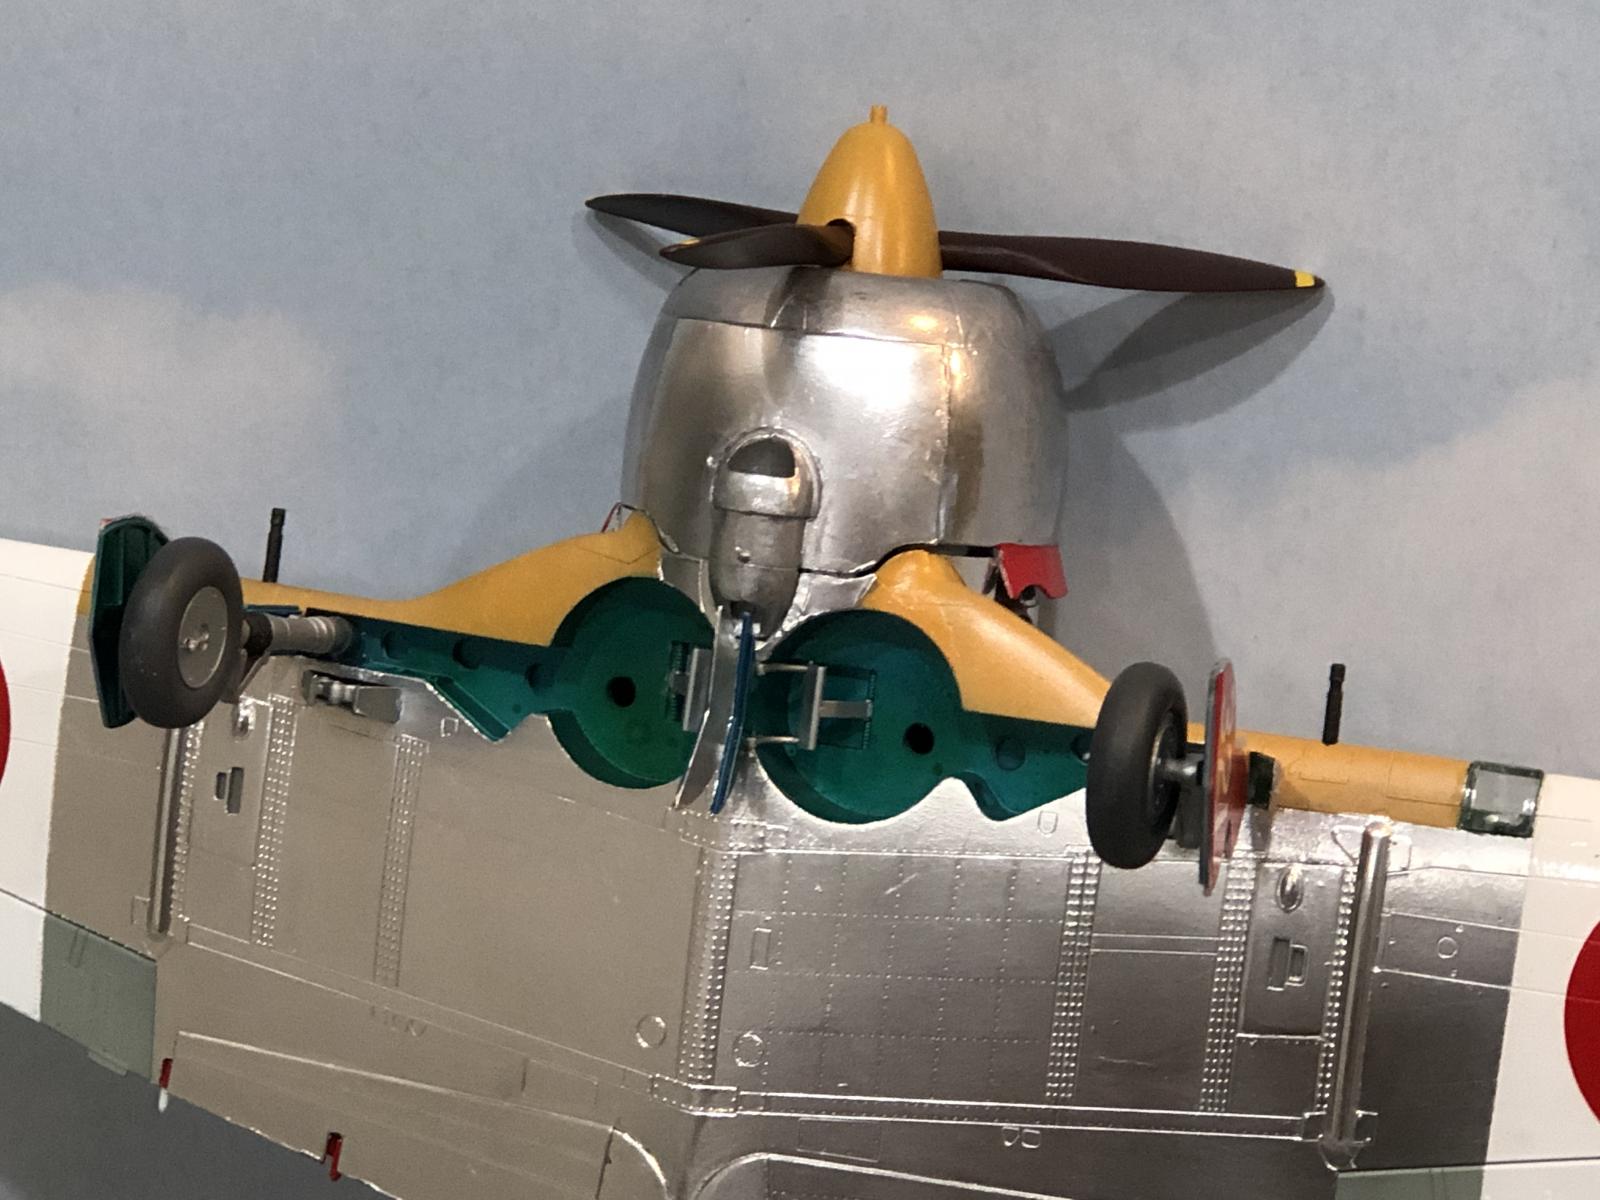
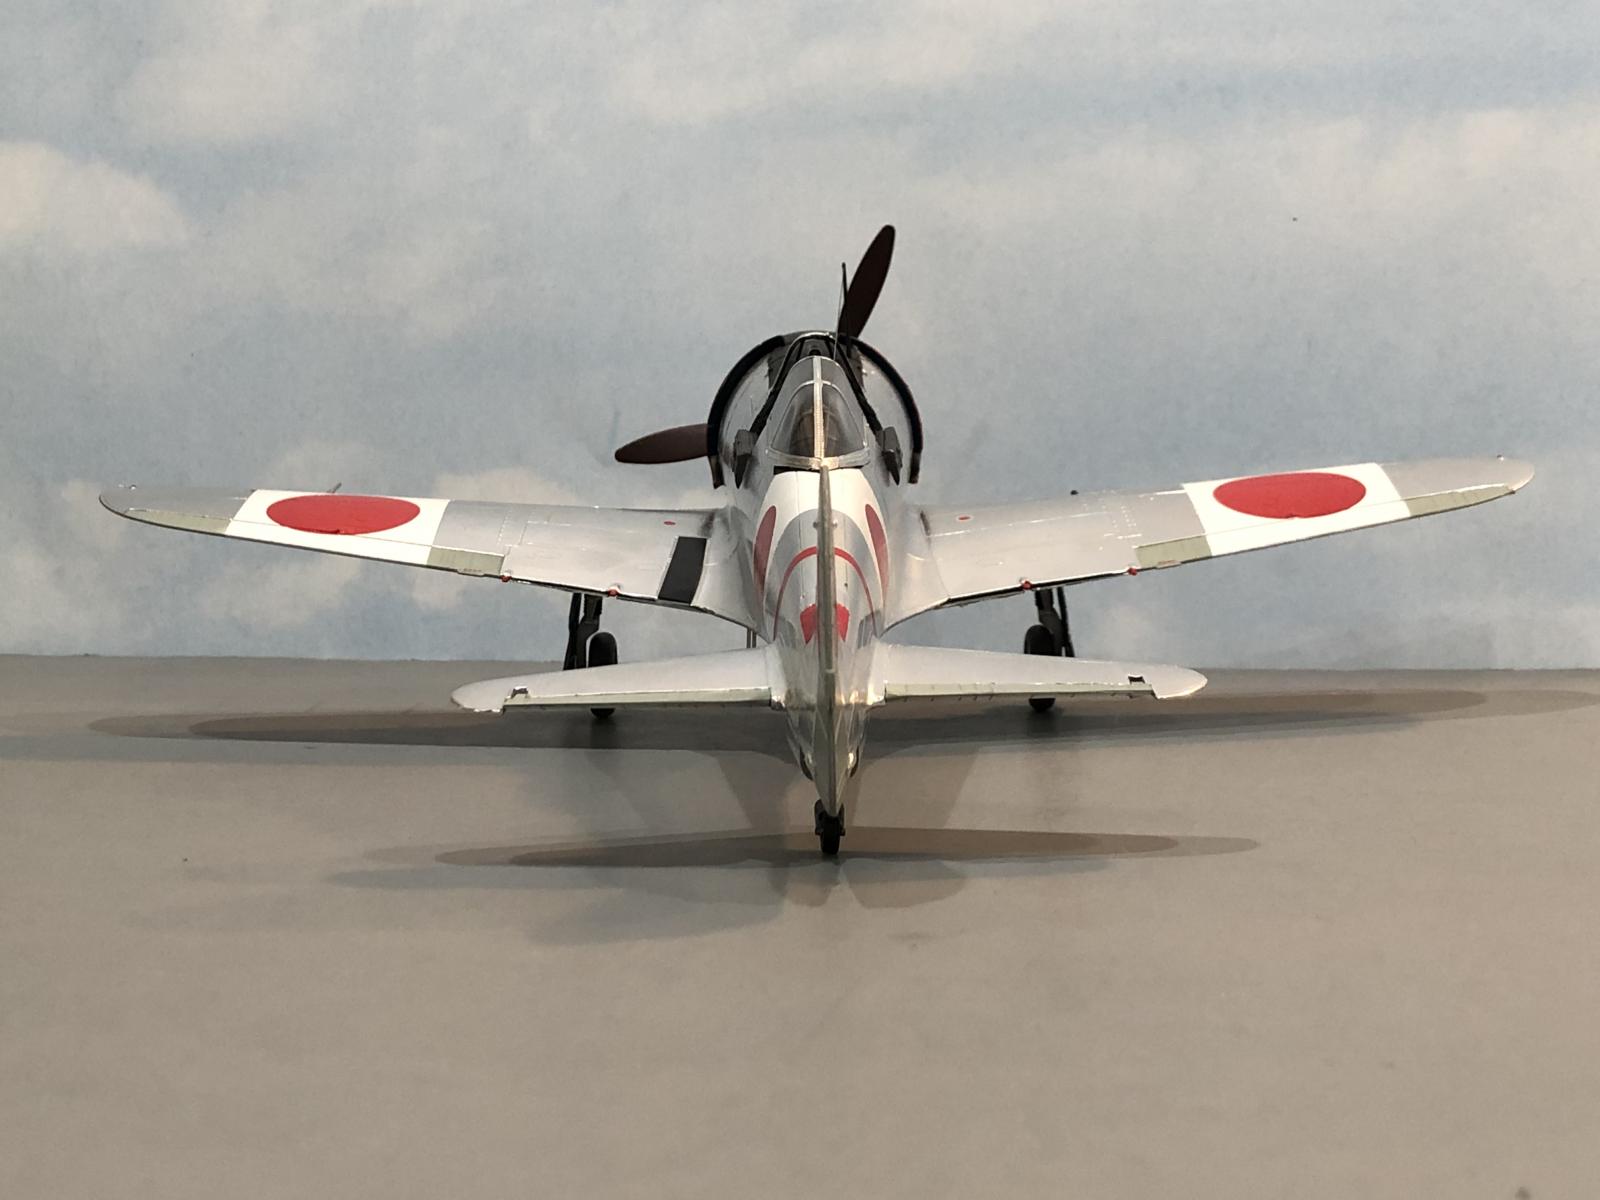
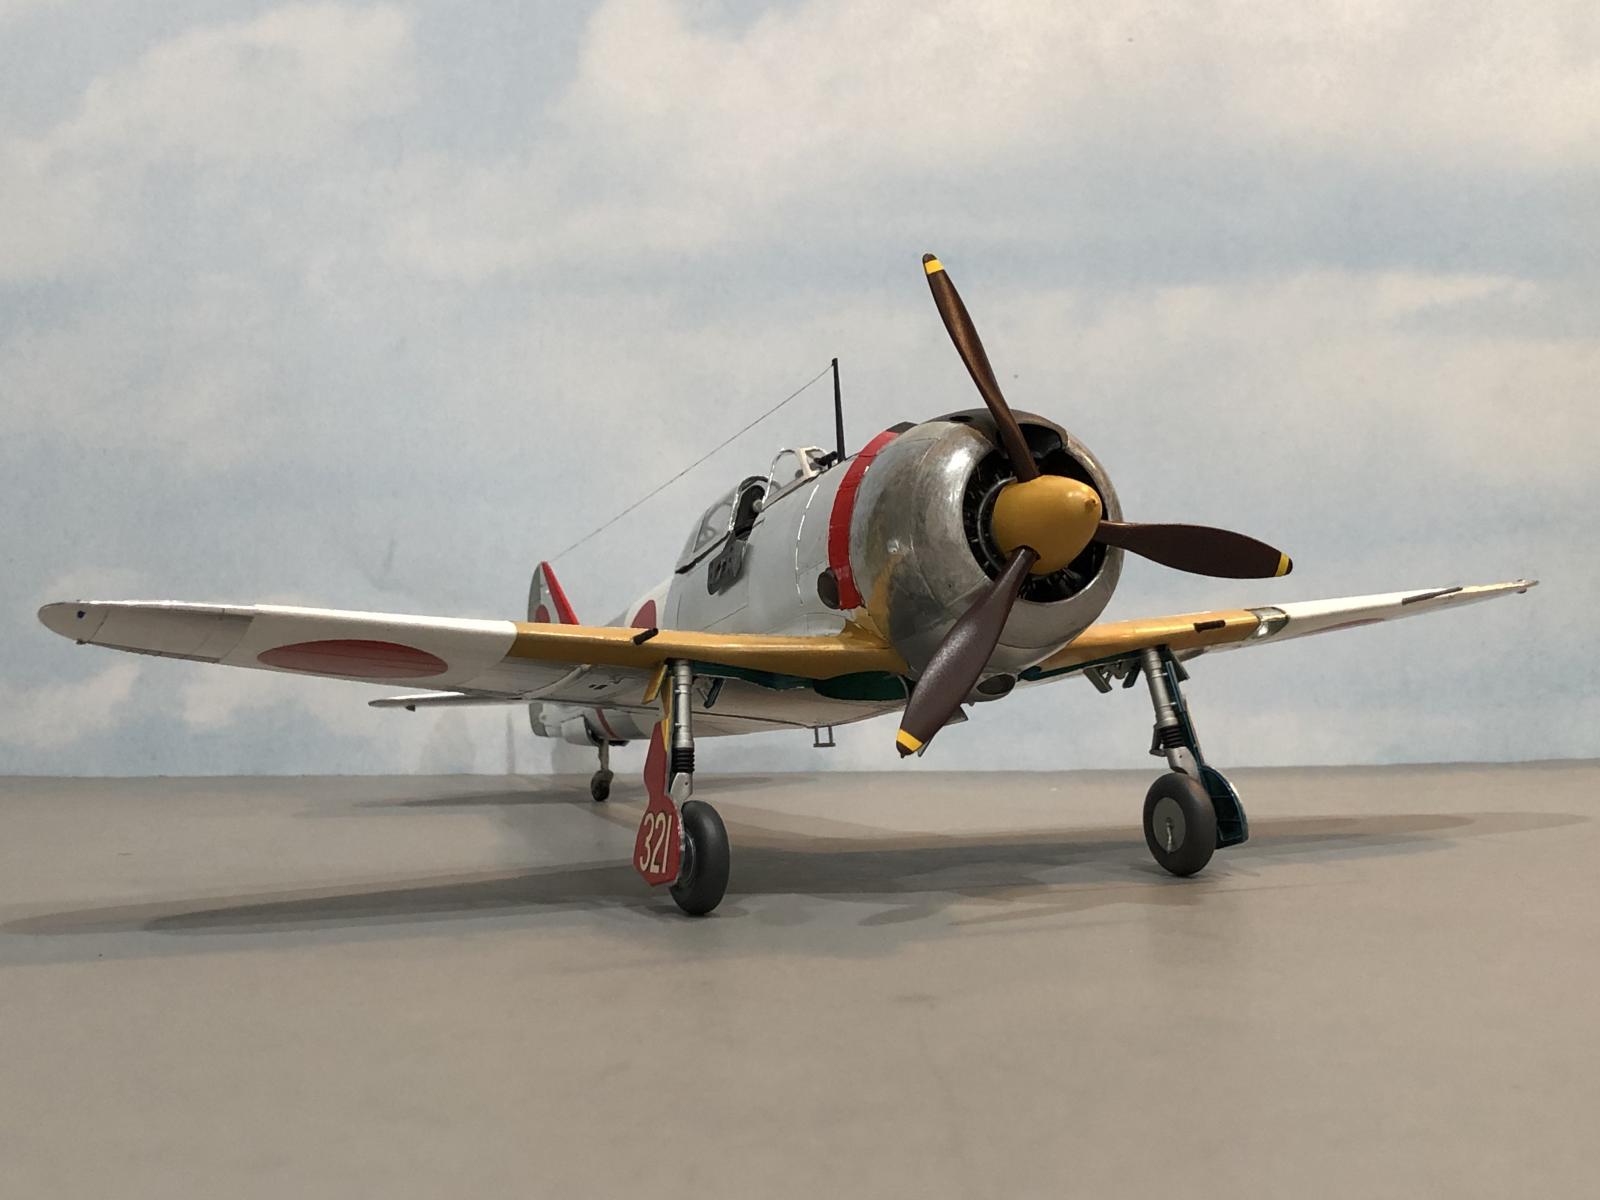
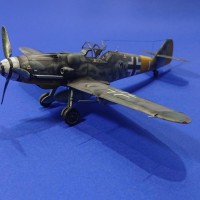
The Ki-44 looks like it's all engine, combined with a small elegant wing
This becomes very obvious when viewed from the front.
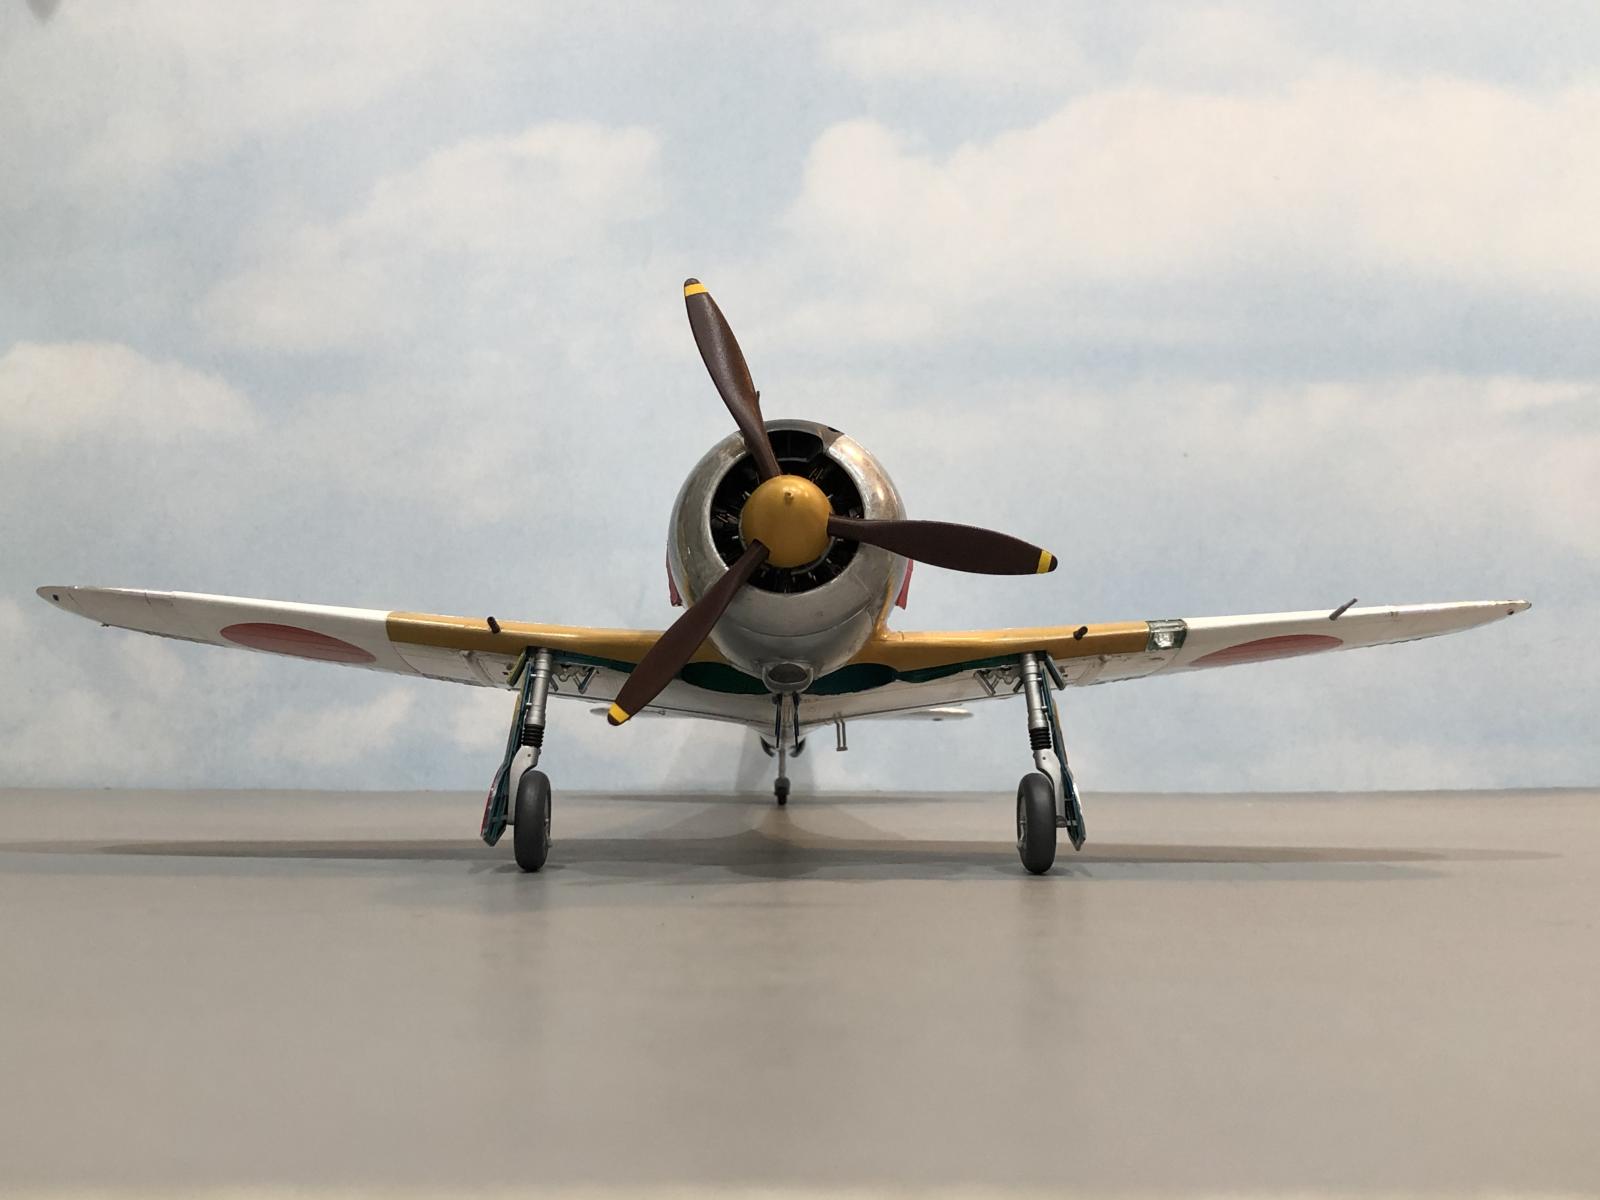
Here's where it pays to have a photo of the actual plane you are building. I know it's not always possible... but I did manage to find one of the plane I built.

I tried to pose my Shoki in a similar manner. I took a picture of it,

Then converted it to "gray scale". This is how it looks in Black and White. Pretty close I think, other than not having a pair of drop tanks.

Had I taken these pictures outside, the results might have been even better. I didn't want to clutter my build up, so I decided not to add the drop tanks under the wing. I know the one in the original picture had drop tanks, but I like how it looks better without them.
Anyhow, I hope you have enjoyed reading about how I built this plane. I hope you might have learned something new as well. I know I did... 🙂
As always, comments are encouraged.

Followed this in the group build @lgardner. Fantastic result!
Thank you Tom @tcinla
I appreciate the compliments.
Very nice looking machine Louis
Thanks George ! @blackadder57
Next to the Ki-61 Hien, it's my favorite Japanese fighter.
Beautiful build. Great contrast between the NMF and the red and white.
Excellent Louis! Really well done. "Liked".
Fantastic result, Louis.
The NMF did really turn out great.
The engine is indeed big compared to the rest of the plane.
All your diligent research, and modelling skills, have resulted in an excellent model, definitely liked.
Excellent build Louis. The Bare Metal finish is outstanding.
Well, Louis you are leading the group by example. The sprue goo is certainly working its magic and your bare metal finishes are second to none. Wonderful work! Museum level stuff!
So, you drop the box on the floor, and voila!, a gorgeous aircraft appears! Couldn't resist, Buddy.
All your hard work certainly paid off...looks fantastic! That one will stand out on the shelf.
I like the way Gary S. put it! LOL!
Hey Buddy! @lgardner I think this is the best model of this (IMMHO) "not very good looking" aircraft I've ever seen. Plus, I learned many things. While it may not look all that great - to ME (engine too big; tail too small) - it IS an important addition to any collection of WWII aircraft.
Your foil work is the way I hope to have mine look, when I get around to actually building something good enough to show here!
Thanks for sharing this great miniature with us. "So, you drop the box on the floor, and voila!, a gorgeous aircraft appears!" Indeed!
Yeah, Jeff. We've going at it all wrong for all these years. I actually thought you had to build the models...LOL
That turned out great, Louis. I think foiling is best suited to larger scale planes and you really made this one shine!
Congratulations Louis @lgardner!
This is a absoloutely stunning result!
It oozes of modeling quality in every of its aspects!
Your research is also outstanding!
I personally like it with the two small doors in "open" position: one can admire the amazing cockpit ever clearer.
i had the joy of following along your thread. I was continouly impressed by the progress, the bare metal foil being the icing in the cake!
This is such a cool addition to the fantastic Empire of Japan GB!
Louis Gardner, the BMF master! You did it again mate, that foil looks terrific, perfect for a larger scale like 1/32. and I agree, adding the hydraulic pipes to the gear legs is always a realist touch and fairly easy to do. It’s a very eye catching “Tojo”
Thumbs up Louis!
Great looking Tojo, Louis - that finish is so bright that I gotta wear shades!
Great entry to the EoJ Group Build!
Wowee, Louis! What a great looking plane! I followed this build, and I enjoyed every update. Thanks for hosting the EOJ GB, by the way.
Now that is what I'm talking about. Attention to detail, I believe this is the largest project you have built using the foil method. Though I know you have that B-24 project on the back burner but too date this one has ended up with an excellent result, patience and passion shows on this build Louis, excellent. Thanks for sharing.
Louis, your Ki-44 looks terrific with all those small details you added. Really buffed it out. Thanks for getting the EOJ group build going. It was a big success and it got me to build something different. Amazing the different planes everyone turned out.
Beautiful build! You definitely have a knack for BMF finishes! I'm going to have to get around to building one of these soon - such a monster-looking aircraft with that dominant engine.
Louis,
I really like what you did with the engine and the ignition harness. The cowling work or the sheet metal work . . . the foil adds to the appeal of this build. Yeah, the Ki-44 was a turning point in Japanese design in following the current trend of the time in matching the smallest airframe with the biggest available engine. One wonders if an airframe had survived and it where matched with a big radial and stripped of all the extra weight what it would do at Reno.
Two thumbs ups.
Superb result on your Shoki, Louis, as I commented in the Group Build. I want to also note how interesting it has been to follow your research efforts on period paints and metal finish. Modeling can be great detective work when going for accuracy. Thanks for taking the time to share this.
Looks superb! ,Louis! I never tried bare metal foil, you make it look great.
That black and white shot is superb! No way to tell that's not 1:1 - a testament to your skill in building, painting and photography.
Hi ya Louis,
Wow! the hard work paid off there. Looks spot on. Pics are great to. Nice big thumbs up mate.
Very nice! Very cleanly detailed.