Airfix 1/48 P-40 – Luke Army Air Field
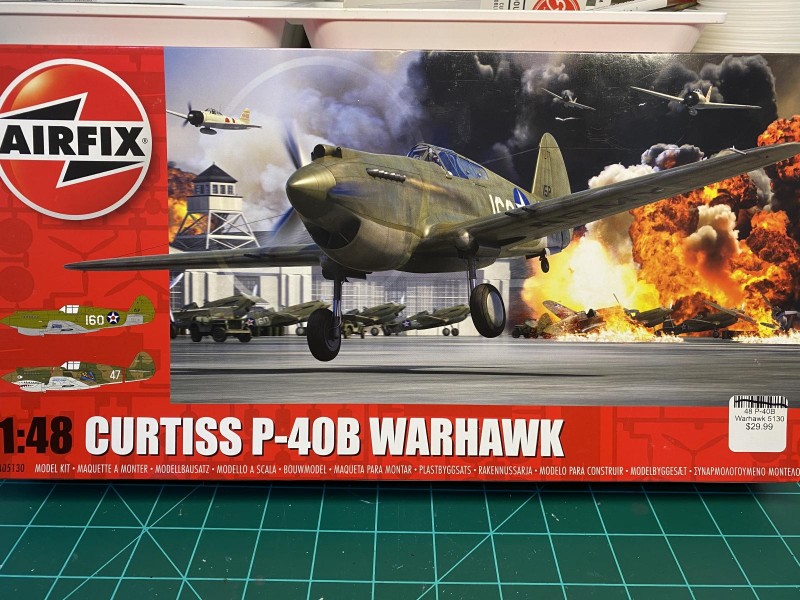
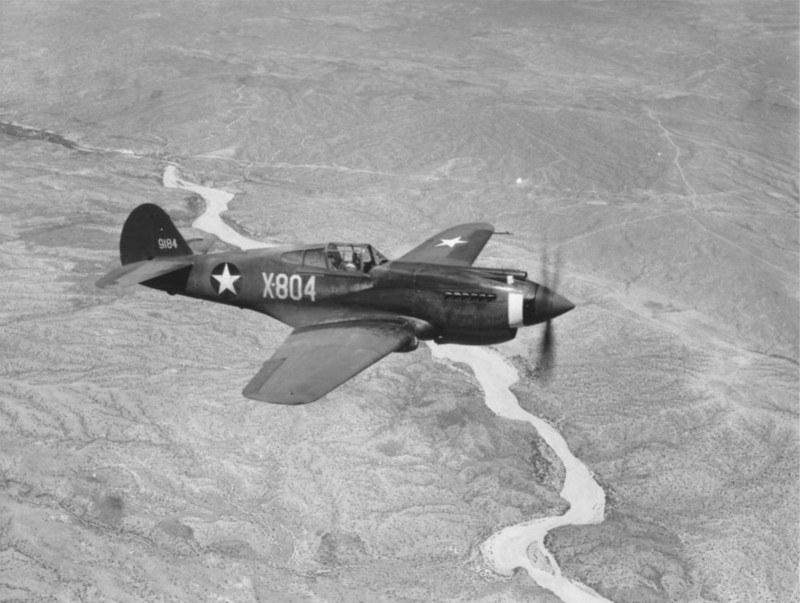
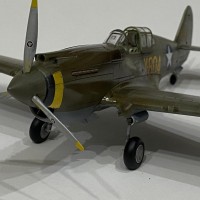
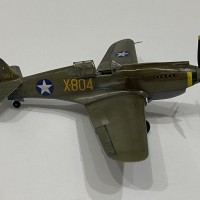
I had heard great things about this kit, and I was looking for something a little different to do with it. When you search for P-40s on the internet, one of the first photos that comes up is a P-40CU that was used as a trainer at the Advanced Fighter School at Luke Army Air Field (near Phoenix) during WW2. Having been an instructor pilot in the Air Force, building a trainer was a no-brainer. :o) In addition, I was stationed for two years at Luke in the early 1970s. I was particularly drawn to the faded paint and other weathering that you can see in the photo. You will also notice in the photo that there are no wing machine guns. Apparently they were often removed at Luke because they weren't needed for the training.
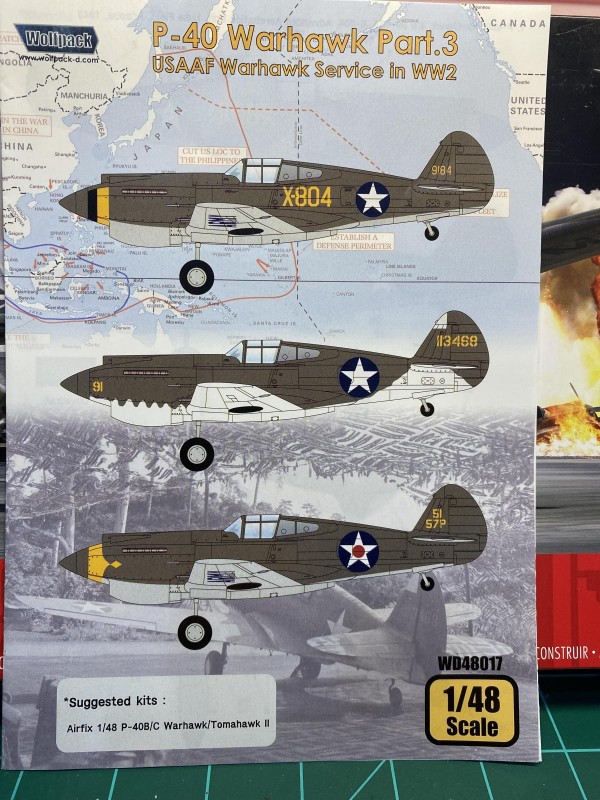
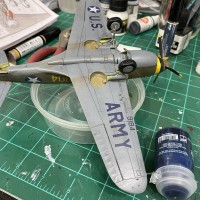
I used Eduard photoetch for the interior, and a really nice set of decals from Wolfpack. The weathering was done using a variety of methods, including artist oils, AK weathering fluids, AK Worn Metal fluid, watercolor pencils, and some Tamiya black and brown panel lining fluids. It was the weathering on the panels surrounding the engine that was interesting to figure out. If you look at the picture of the actual plane, the panels on the nose appear darkened and shiny. In addition, the exhaust stains fade in the shiny areas, but return in the non-shiny areas. I may be wrong, but here is what I think produces this pattern: An old, overused engine consistently throws oils during flight. This oil leaks onto the outside of the panels. Upon landing, the crew chief will check the engine, and then wipe down the new oil with a rag. This leaves the engine panels darkened by the oil absorbed into the paint, also leaving the panels shiny. I tried reproducing this look by interrupting the exhaust stains in the appropriate place, and then spraying Ammo by Mig Fresh Oil Fluid on the panels. I used alcohol on a Q-Tip to distress the exhaust stains as seen in the photo.
This was a really fun kit to build, and it was the first time I have tried to replicate a specific pattern of weathering on a specific airplane on a specific day.
Everyone stay safe.
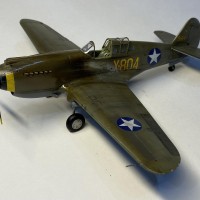
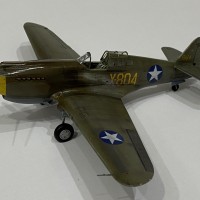
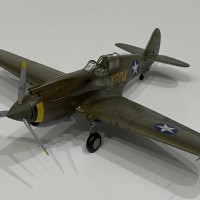
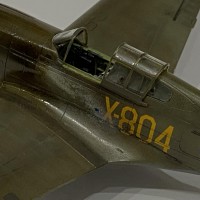
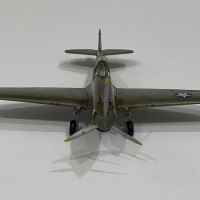
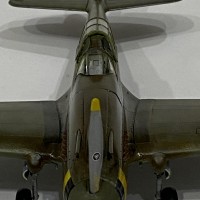
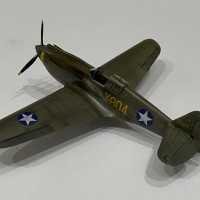
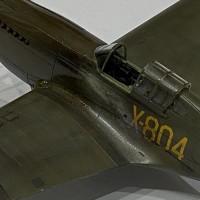
Brilliant work George! I love that oil-stained cowling, great realistic touch there!
Very nice workmanship and attention to detail ! The P-40 looks great !
A great idea in building a training aircraft, Beautifully done.
I followed your progress over in Groups, @gblair, and you've really created an outstanding piece of work. Very realistic result.
Thanks, Gary (@garybrantley), Jay (@ssgt), Robert (@roofrat), and Tom (@tcinla). I appreciate the kind words.
Really nice result, George. Great job on that oil stains and exhaust!
Thanks, John (@j-healy).
It really turned out fantastic, George @gblair
All the weathering made a perfect replica of the original plane.
Thanks for sharing all your steps in the thread, I definitely learned a lot from that.
I built this kit (although not as well as yours) and it is a fun kit to build.
I really like the weathering.
Fantastic work George, @gblair. I enjoyed following your progress and learned a lot. Thanks for sharing
This is an amazing result out of this good kit, George!
Your build thread was really enjoyable; your weathering is fantastic.
Thanks for the kind words, John (@johnb), Dan (@dbdlee), Yann (@yann), and Spiros (@fiveten). This is a really nice kit with everything in scale, especially the pitot tube, which I managed to knock off a couple of times.
Great job replicating the model to look as the aircraft in the photo!
Thanks, Dale (@dtravis).
Great looking Warhawk! I was born at Luke when my dad was stationed there...
That's cool that you were actually born at Luke, Greg (@gkittinger). It was a very fun area to be a new, unmarried Second Lieutenant, but I am sure it has all changed since I was there in the 70s. I was there from 1974-1976, then I moved across town to Williams for a year of pilot training.
Great work! Wery good painting!
Neat to see another page of the early P-40 story. Something with out a shark mouth too. I was watching a television program featuring WASPs who flew during WWII. With one pilot referring to the P-40 as just another airplane when compared to a P-47. She considered the Jug as a fighter. Which kind of points out how fast the technology developed from the late 30's resulted in a fighter quickly be relegated to an advanced trainer to the early 40's and beyond.
George, I enjoyed reading your blog and seeing the end results of you fine build.
Two thumbs up.
You are right, Stephen (@stephen-w-towle). It turns out the early P-40 story has a lot of twists and turns, especially when you throw in the planes that were supposed to go to foreign users, like France, and then have them end up in Britain and other places. I imagine technology moved very quickly during the war, and pilots who could fly one fighter were assumed to be able to fly other fighters. Especially the ferry pilots, like the WASPs, who would fly a number of types of planes. My wife is a retired Air Force pilot, and she was pretty knowledgeable about the WASPs. It is interesting that you mentioned the shark mouth. I was almost done with this model when I found a photo of an early P-40 trainer at Luke with a shark mouth. I may need to revisit the Luke P-40s again some day and put some teeth on it.
Thanks for your kind comments, Greg (@gkittinger), @lis, and Stephen (@stephen-w-towle).
Well done George, and seriously who doesn't like to build P-40's. Looks great.
Thanks, Tom (@tom-bebout). You're right, building P-40s is cool, especially with this new kit from Airfix. It was enjoyable to build from start to finish.
how about machine guns in the wings? Barrels was hidden in wings?
Hi, @lis. I had to do some research to figure out the guns on my model. The first P-40s only had guns on the nose. They were later added in the wings, but they extended quite a way beyond the leading edge of the wing. Later models of the P-40, like the P-40E, had the machine guns more recessed in the wings. I couldn't see wing guns on the aerial photo of the plane I built, but discovered they were often removed on planes used in training.
2 attached images. Click to enlarge.
1. Early P-40
1. Later P-40
So your version has two 0,50 machine gun?
Correct, @lis. The two 50 cal machine guns were usually retained in the nose. This info is hard to dig up on the planes used in training. All the info you could ever want is available for the planes used in combat, but info on the planes used in training is scarce. I got the impression that the guns in the nose were retained so the students could practice gunnery. The extra firepower in the wings wasn't needed in training and wasted ammo. I found one source that said the wing guns were "often" removed in training, and the photos I could find of this plane didn't show the wing guns. It did cross my mind that these photos could have been "doctored" by wartime censors. You might notice that the diagram that came with the decals does show the wing guns in place on the trainer, as well as the fighter versions. In the end, I think you could argue both sides. Cheers.
Brilliant work on the oil staining, George. I like how you reasoned it out and also applied some new techniques to achieve it accurately. The build overall is first class. I like how the early paint scheme helps us appreciate the clean lines of the P-40B. It is very challenging sometimes to make a single color camo (on the upper surfaces) look interesting and tonally varied. You have certainly achieved this. I am impressed with how quickly you got this done in spite of the meticulous work you have done. Great build.
Thanks, Colin (@coling). I appreciate your kind words. The scruffy finish was partly due to an unexpected discovery. I wanted to try Mission Model paints, mainly because they had several variations of Olive Drab (OD, faded OD 1, faded OD 2, etc). I had heard these paints were fragile, but the folks at my local hobby store said that MM made a Polyurethane additive that would make them more durable. I added the "poly" and figured everything would be OK. I wanted to have some chipping, so I painted some silver areas, then used some chipping fluid, and then applied the OD. I then wet the wings with water in preparation for the chipping. I discovered that one stroke of the wet brush was removing some of the OD paint. Since I had used several different colors of OD, I was able to carefully lift some of the paint and got some interesting effects. I plan to do some experimentation with this and see what I can do. I'm thinking that if you seal a layer with clear flat, then add layers of MM paint, you can get some interesting effects without worrying about exposing plastic.
You really made the most of this Airfix kit, your weathering and finishing are exceptional, definitely liked.
Thanks, George (@chinesegeorge). I appreciate your comments.
Great work George! Wonderful weathering and colours, a lovely build!
Thanks, David (@davem). I think the next time I build this kit I will do an early RAF machine in North Africa. Cheers.
George, @gblair
You have done a wonderful job here. It looks very realistic, and I think that you have captured the "look" of a well worn Stateside training plane very nicely. It has been a pleasure to follow along with the progress of your WIP build.
You know I definitely pressed the "liked" button.
Thanks, Louis (@lgardner). I appreciate your comments.