Review: 1/48 Great Wall Hobbies Mig-29 9-12 Early Review
INTRODUCTION
The MiG-29 9-12 aka MiG-29A “NATO Code Name: Fulcrum” was originally thought by NATO as the lightweight companion fighter to the Su-27 in the Soviet version of the F-X fighter program and the equivalent of the F-16 in terms of performance and cost. Like the F-117 (aka the F-19 Stealth fighter), the reality turned out to be less than capable than its fictional counterpart in Tom Clancy's Red Storm Rising.
It is equipped with two powerful Klimov RD-33 turbofan engines, armed with six air to air missiles and a laser guided 30mm cannon for close in work as well as an airframe designed to handle up to 12Gs of hard maneuvering. The 9-12 Fulcrum was equipped with one of the best doppler air to air radar sets that the USSR designed at the time as well as a helmet equipped IR sight to allow off bore firing of AA-11 Archers (NATO designation) or as it is known to the USSR/Russians as the Vympel R-73 which some analysts gave the dogfight advantage to the Soviets.
However, Western Air Forces discovered that the MiG-29 was limited in capability when the West Germans took over flying East German Fulcrums in the early 1990s. The cockpit was similar in layout to the MiG-23s (which wasn't all that great to begin with) and even with its great aerodynamic performance had the similar mission to the original MiG-23 which was a point air-defence interceptor. Despite having the best visibility of any MiG fighter at the time, the bubble canopied MiG-29 had a very bad blind spot right at six o'clock which could allow maneuverable fighters like the F-16 to gain a serious advantage in a short range dogfight. The poor control layout, limited mission capability, weak electronic systems and visual blind spots limited the situational awareness of the pilot vs contemporary Western designs. Throw in limited fuel capacity and the inability to fire the cannon while carrying the centerline fuel tank made the MiG-29 much less of a superfighter than imagined.
The newer versions of the MiG-29 have dealt with a lot of the complaints except the range which makes it more like the F/A-18C Hornet than the later versions of the F-16.
THE KIT
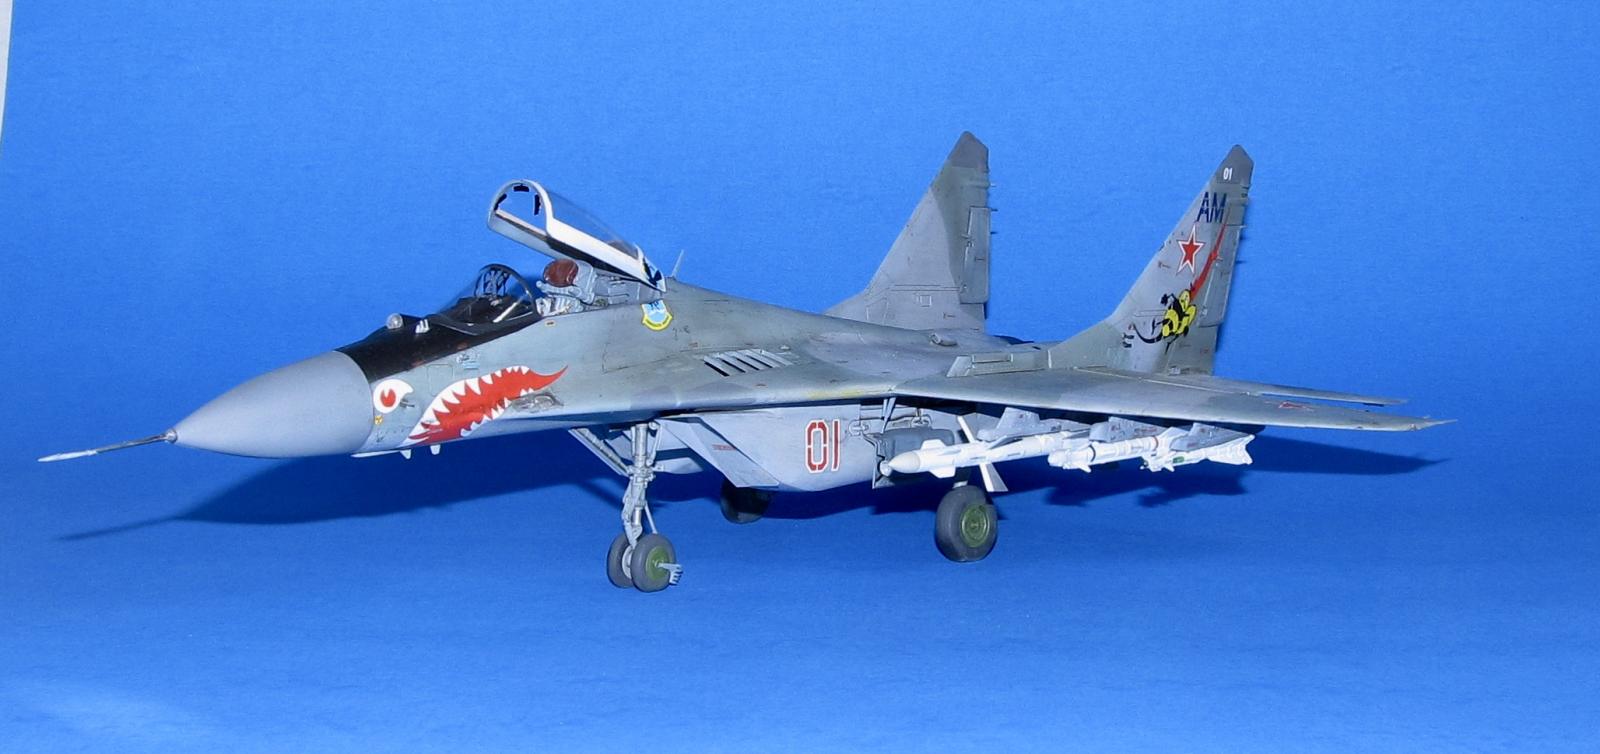
Despite its performance failings, I like the look of the 9-12 MiG over the later ones that have a thicker spine (for electronics and fuel) which gives the Fulcrum a dumpier Hunchback of Notre Dame look. In the 80s numerous model makers created inaccurate kits which is understandable considering they didn't have access to a real MiG-29 till the Cold War ended.
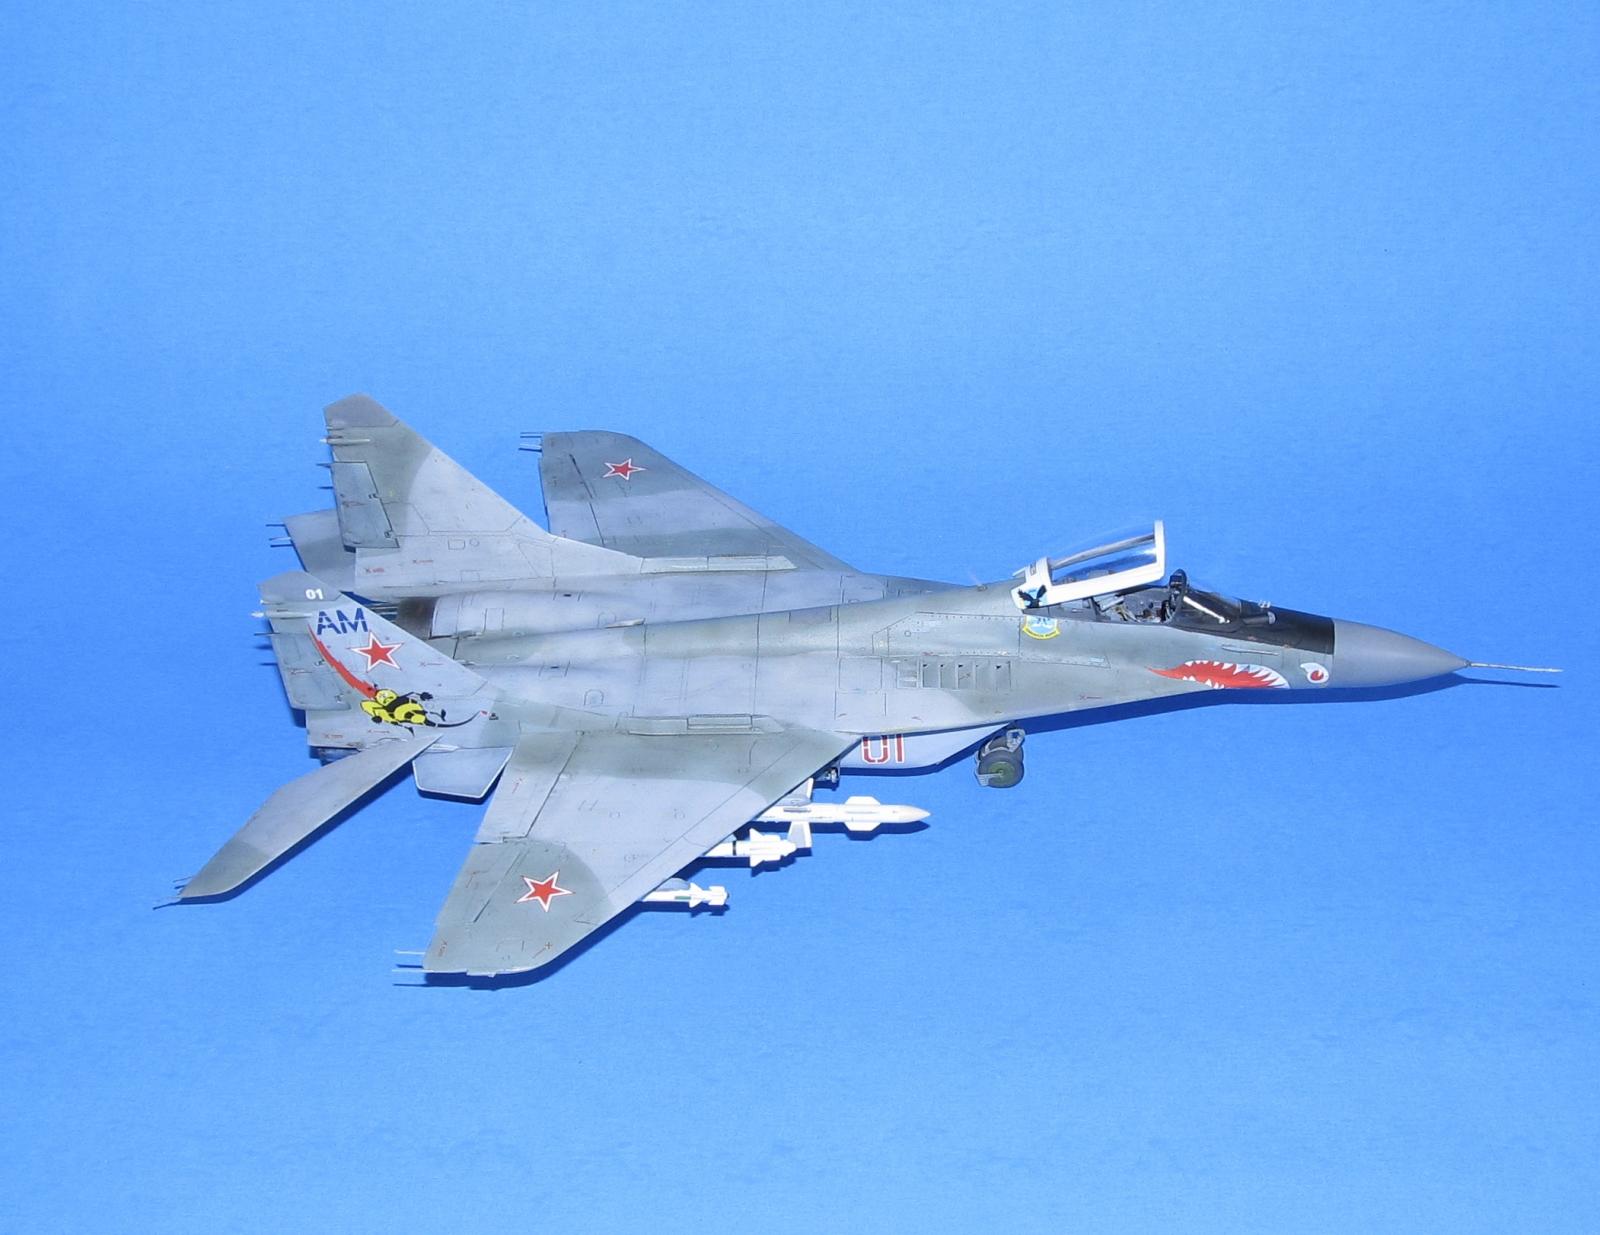
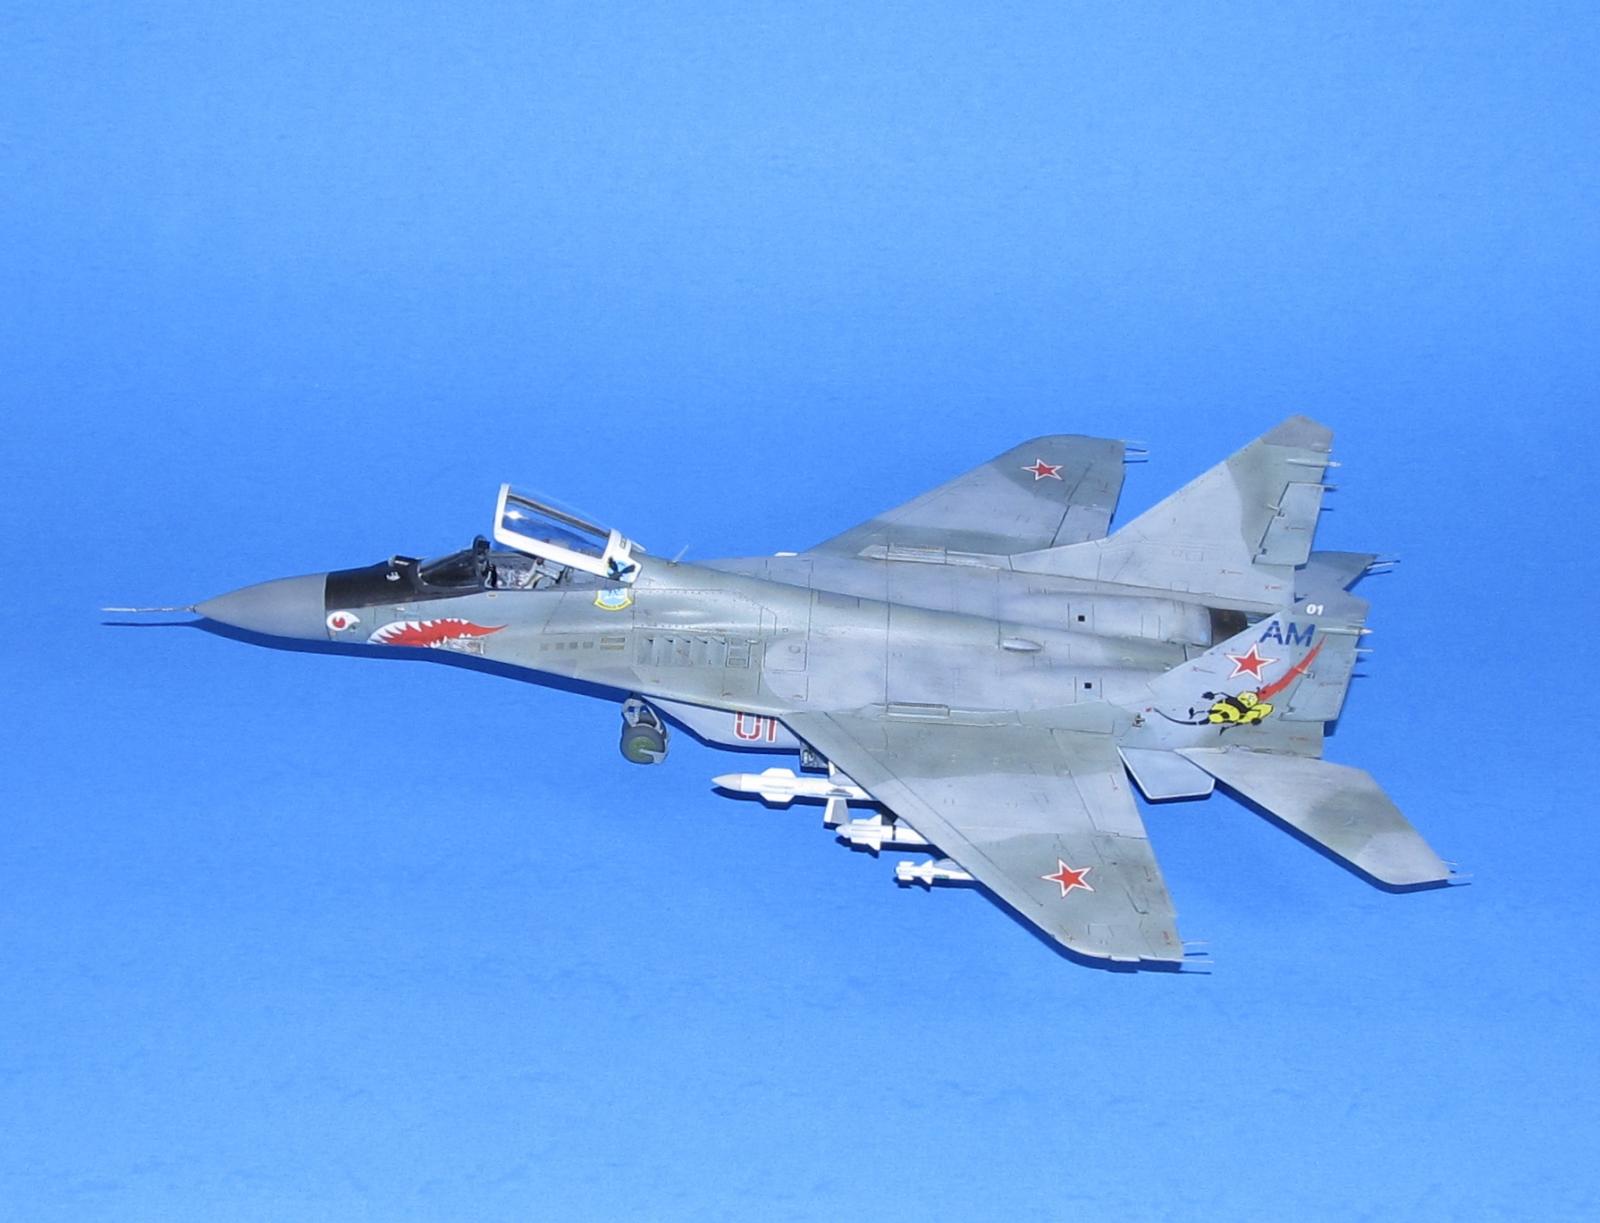
The Great Wall Hobby kit comes with a detailed instruction booklet, 16 grey plastic sprues (12 unique ones and 4 duplicates for weapons and fuel tanks, one photo-etch sheet, one clear sheet, one clear sprue for the canopy (with a touch of distortion) and two very dense decal sheets. The parts are mostly crisp with some flash and mold seams. It comes with a full war load of missiles (2x semi active radar homing AA-10 Alamos, 2xAA-11 all aspect infrared dogfighting Archers and 2x older rear aspect infrared dogfighting AA-8 Aphids) that are molded in one piece with slide mold technology to allow for open exhausts and details to be captured. It comes with markings for three different MiG-29s and a whole lot of stencils.
Also comes with a mousepad based on the cover art.
CONSTRUCTION
This kit started off with painting the cockpit. Unlike the MiG-21 and MiG-23 series, the early MiG-29 cockpit has the same color as the older MiG-15/17/19 series which is a dark blue grey unlike the bright turquoise blue color. I didn't have the exact color (which is available from AKAN paints) so I used Xtracrylix Medium Grey FS 35237 instead for the main cockpit parts. I painted various colors with a fine tip brush for the remaining cockpit details. The instrument panel (IP) was painted gloss black and the dial/placard decals used which went on okay for Chinese made decals.
I glued everything together except the K-36DM ejection seat and control stick and jammed it into the upper half of the fuselage.
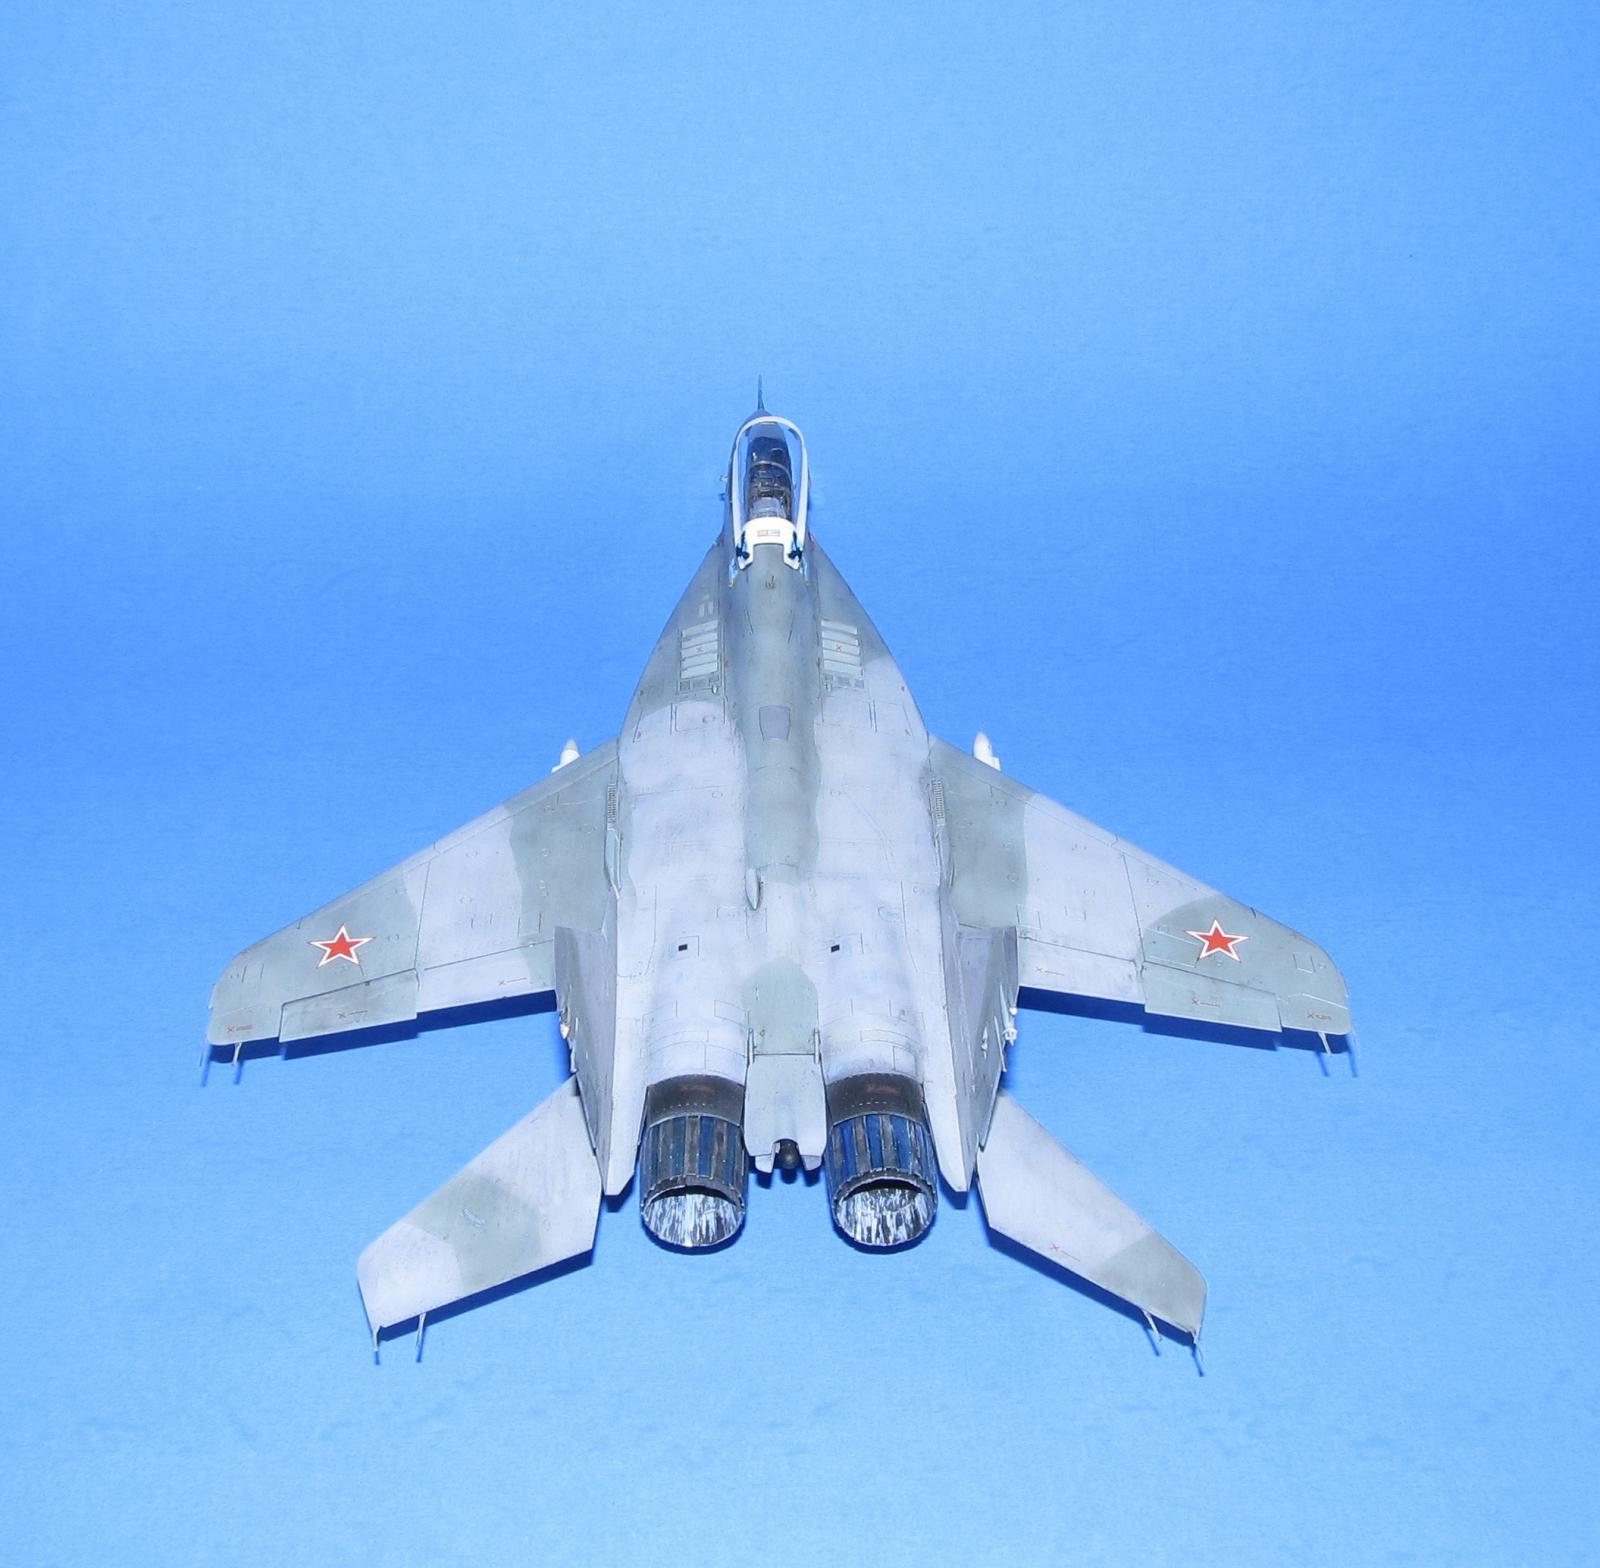
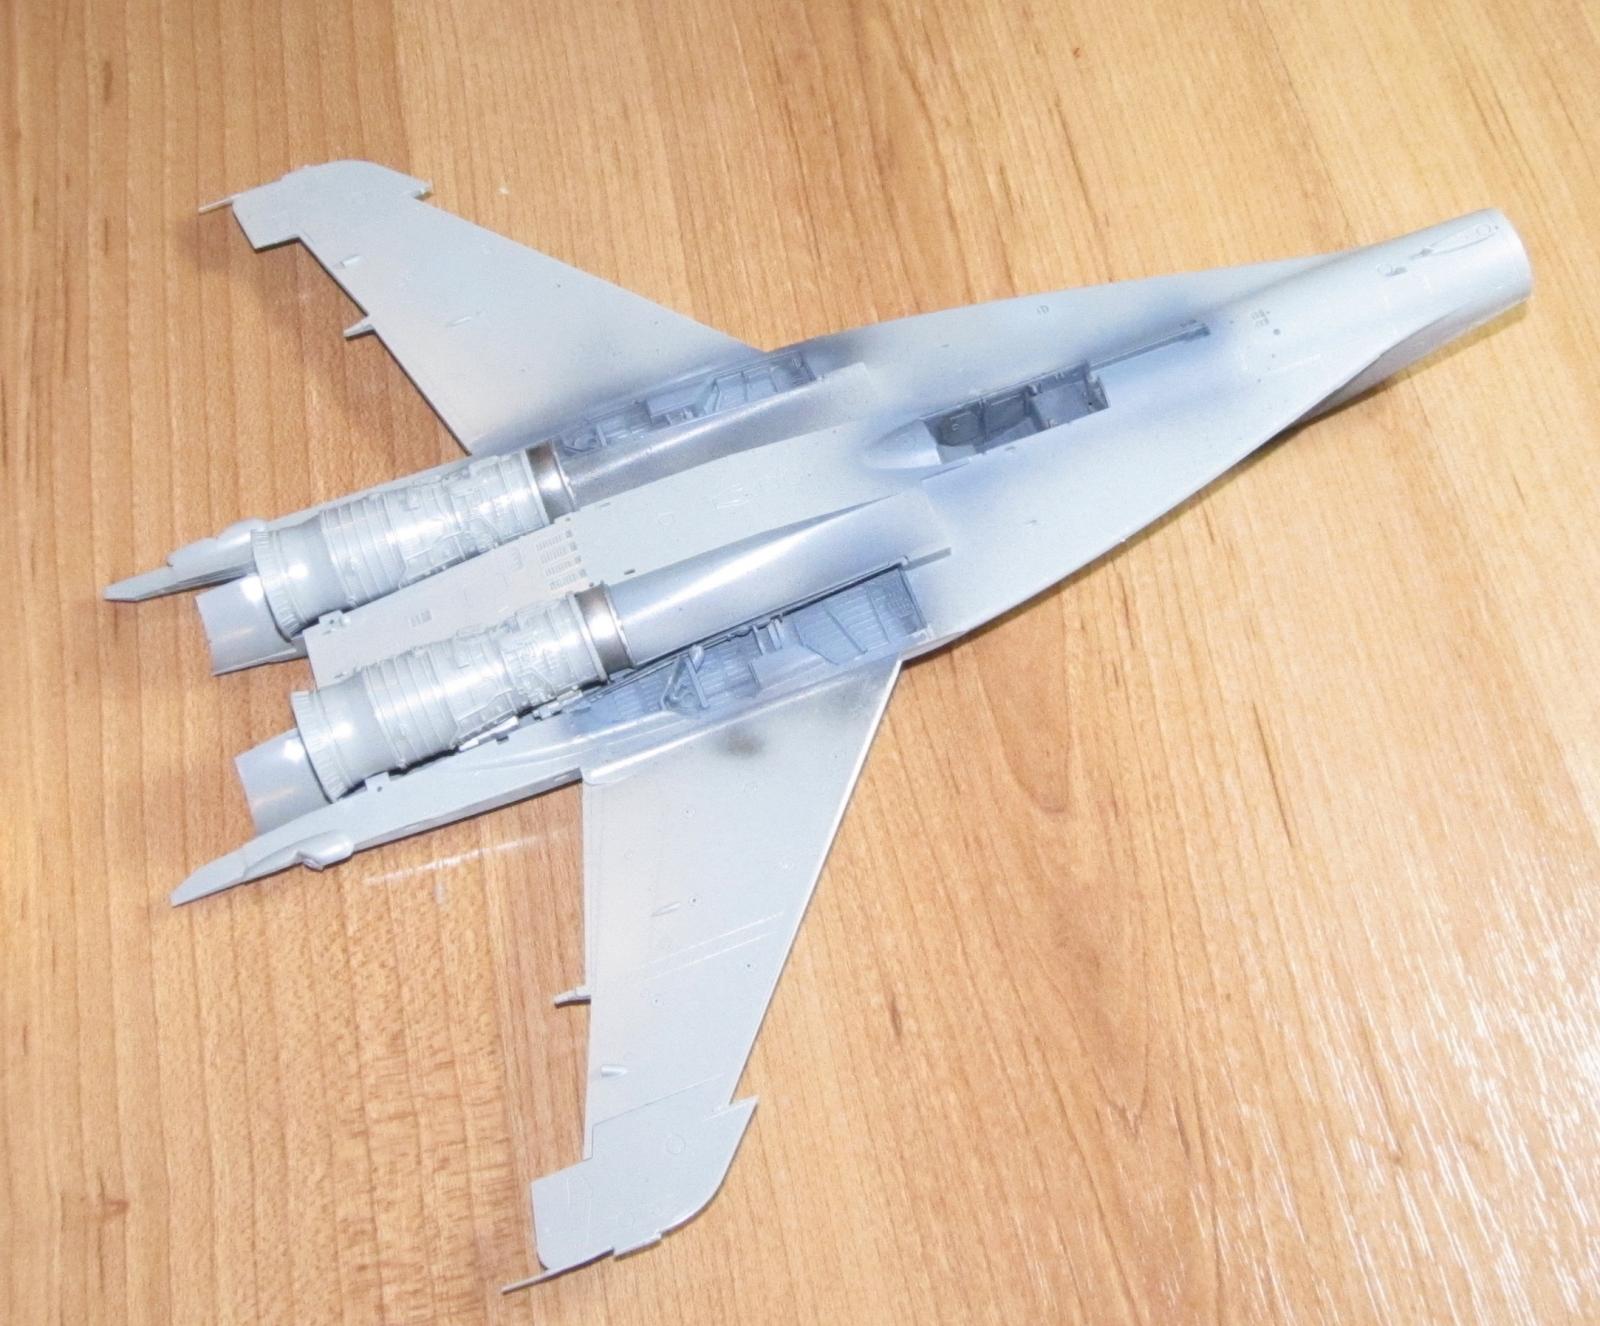
Next the kit comes with two complete Klimov turbofan engines including allowing one to be displayed outside of the Fulcrum, but I only installed what parts I needed to attach it to the airframe leaving off the remaining external engine parts. I painted the interiors of the engines to avoid any issues painting, but didn't add the exhausts till the end of the build.
The upper and lower intakes were next. I opted for open upper intakes as I was closing up the main (lower) intakes due to the seam lines as well as added the PE grills. The lower intakes needed a lot of filling/sanding as the alignment for these parts weren't all that great. I ended up having to rescribe a lot of the details I sanded off.
Once everything was done, I added the upper and lower fuselage halves together. CA glue for the external seams and Tamiya Extra Thin Cement for the internal attachments/seams. I then attached the intakes and engine covers. These parts don't fit all that great. I had to trim the attachment tabs down so that the intakes and engine covers would fit better, but I still had some gaps that required Perfect Plastic Putty to fill between the joins. I was not very happy about the fit, but it wasn't a big deal to fix so not much to scream about there. I added the PE intake doors in the closed position to hide the internal seams and non existent intake detail.
Next I sanded away the seams along the leading edge and fuselage before I added the twin rudders. I also added the chaff dispensers along the spines of the twin rudders. The markings I wanted to use probably didn't have those, but I added them any way because it looked cooler than without.
Despite being one piece missiles, there were some prominent mold marks that needed to be sanded away.
The nose cone was slightly sanded (mold marks and sprue nubs) and then a gigantic fishing weight was glued in place before the nose cone was added to the fuselage.
Lastly, I masked over the cockpit in preparation for painting.
COLORS AND MARKINGS
Painting
The airframe and various parts was primed using Badger Stynylrez Black primer.
Once the airframe was dry, I loaded up my airbrush with FS 25237 and sprayed the wheel wells with it. I masked off those areas using sponges.
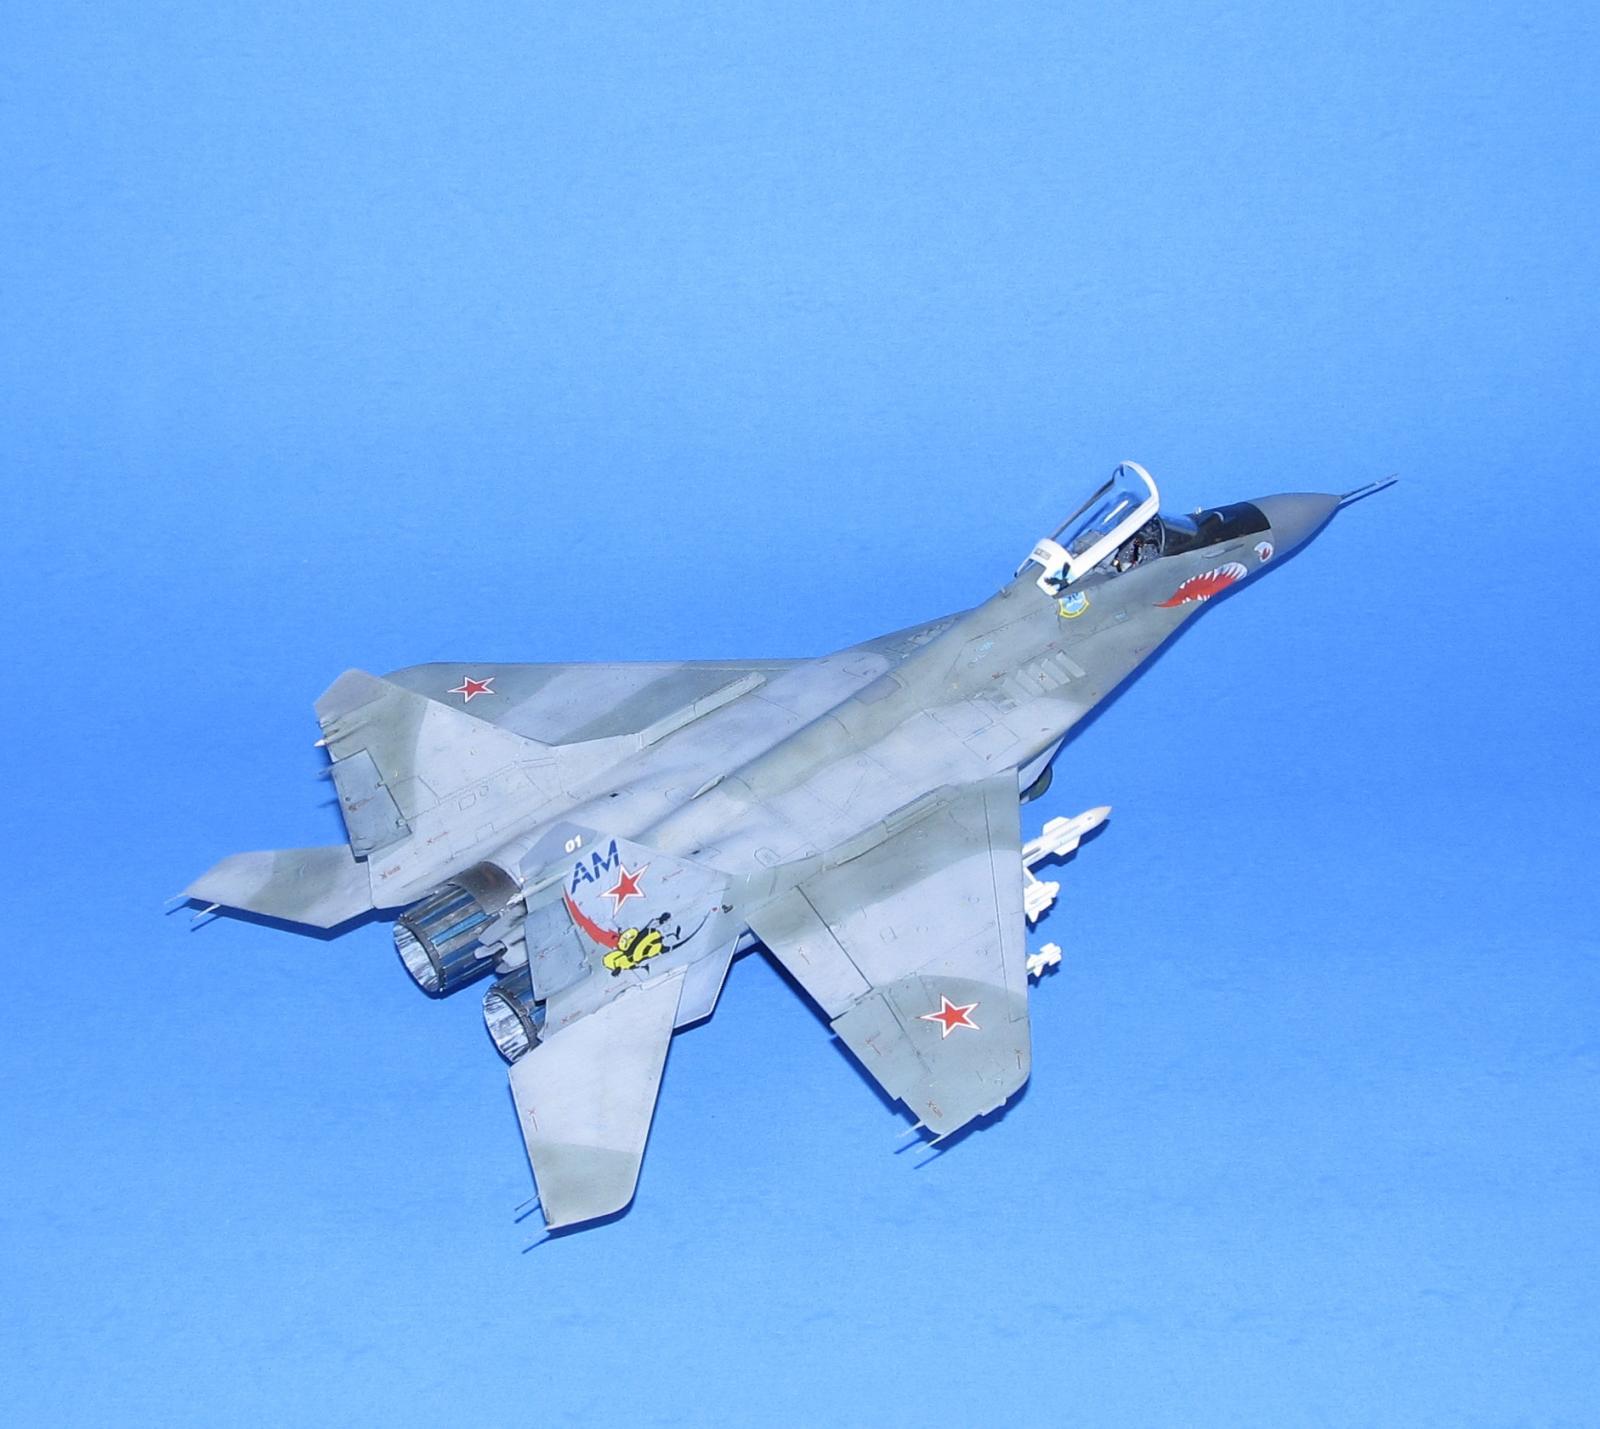
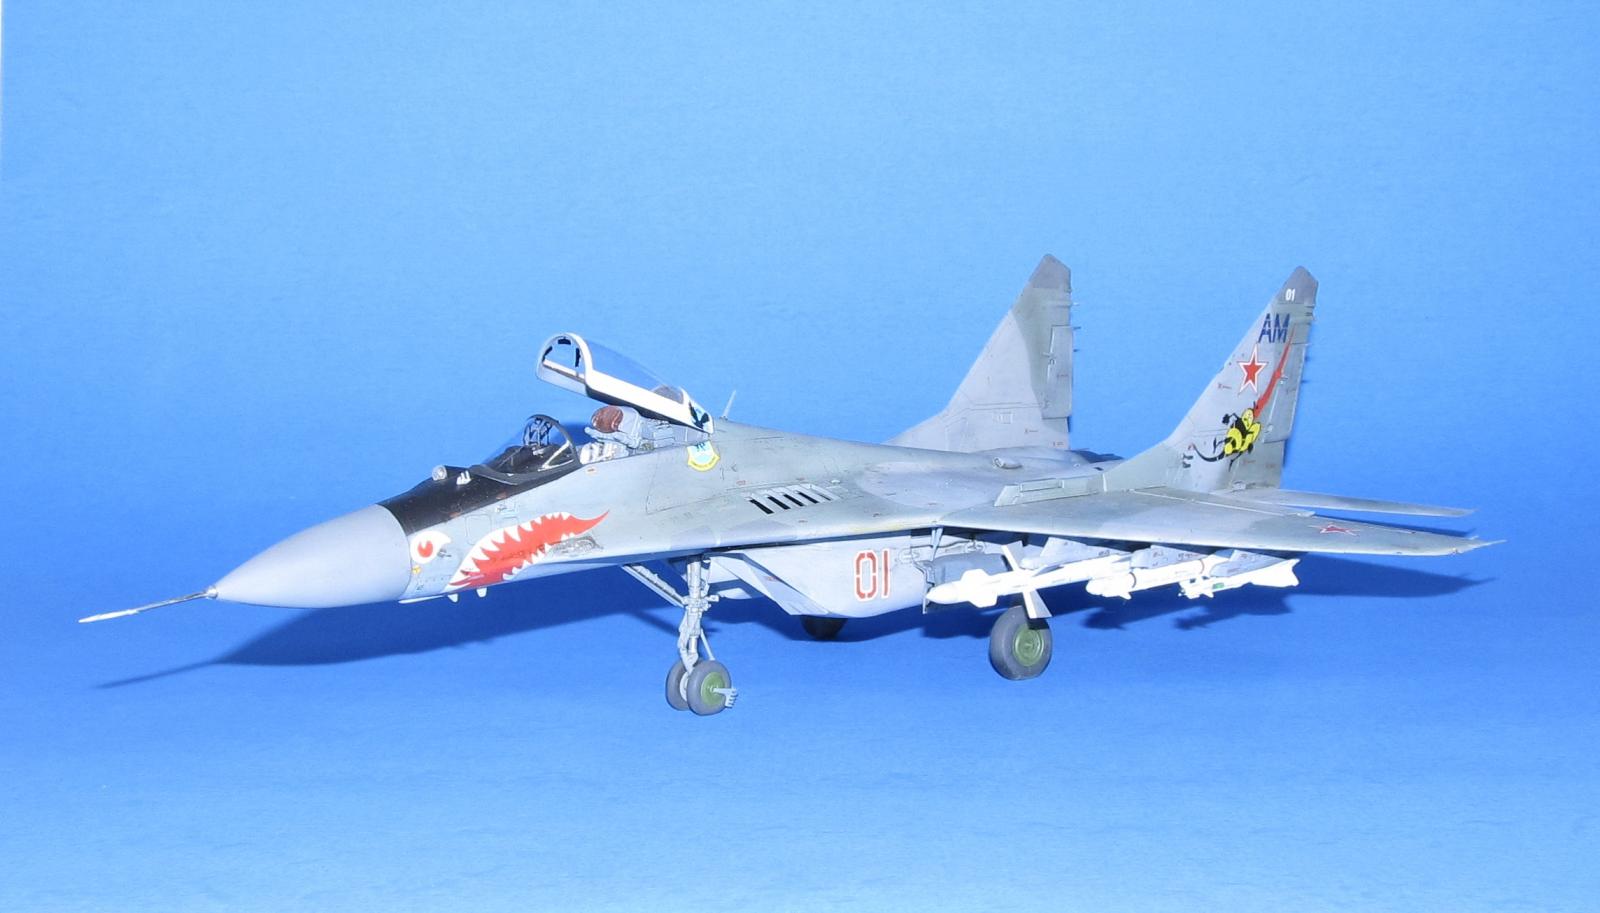
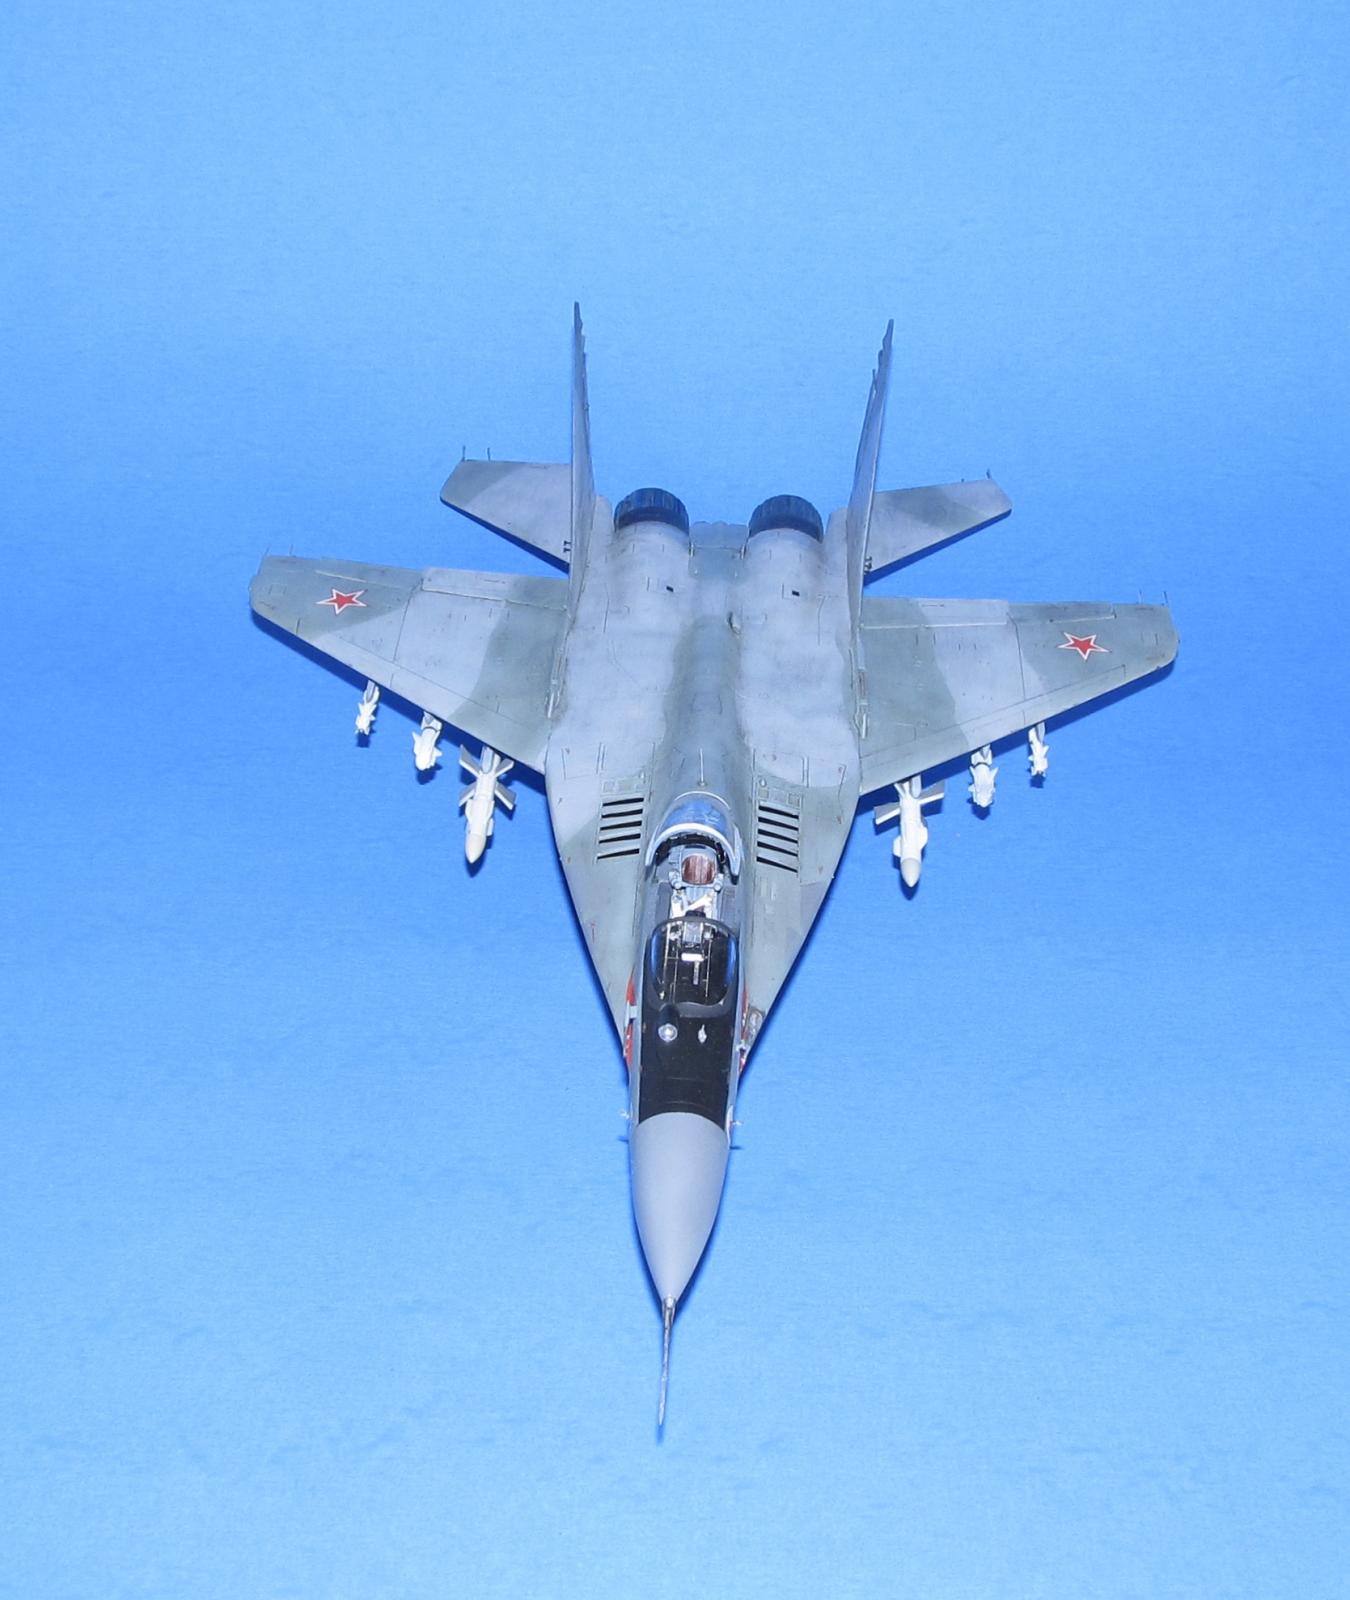
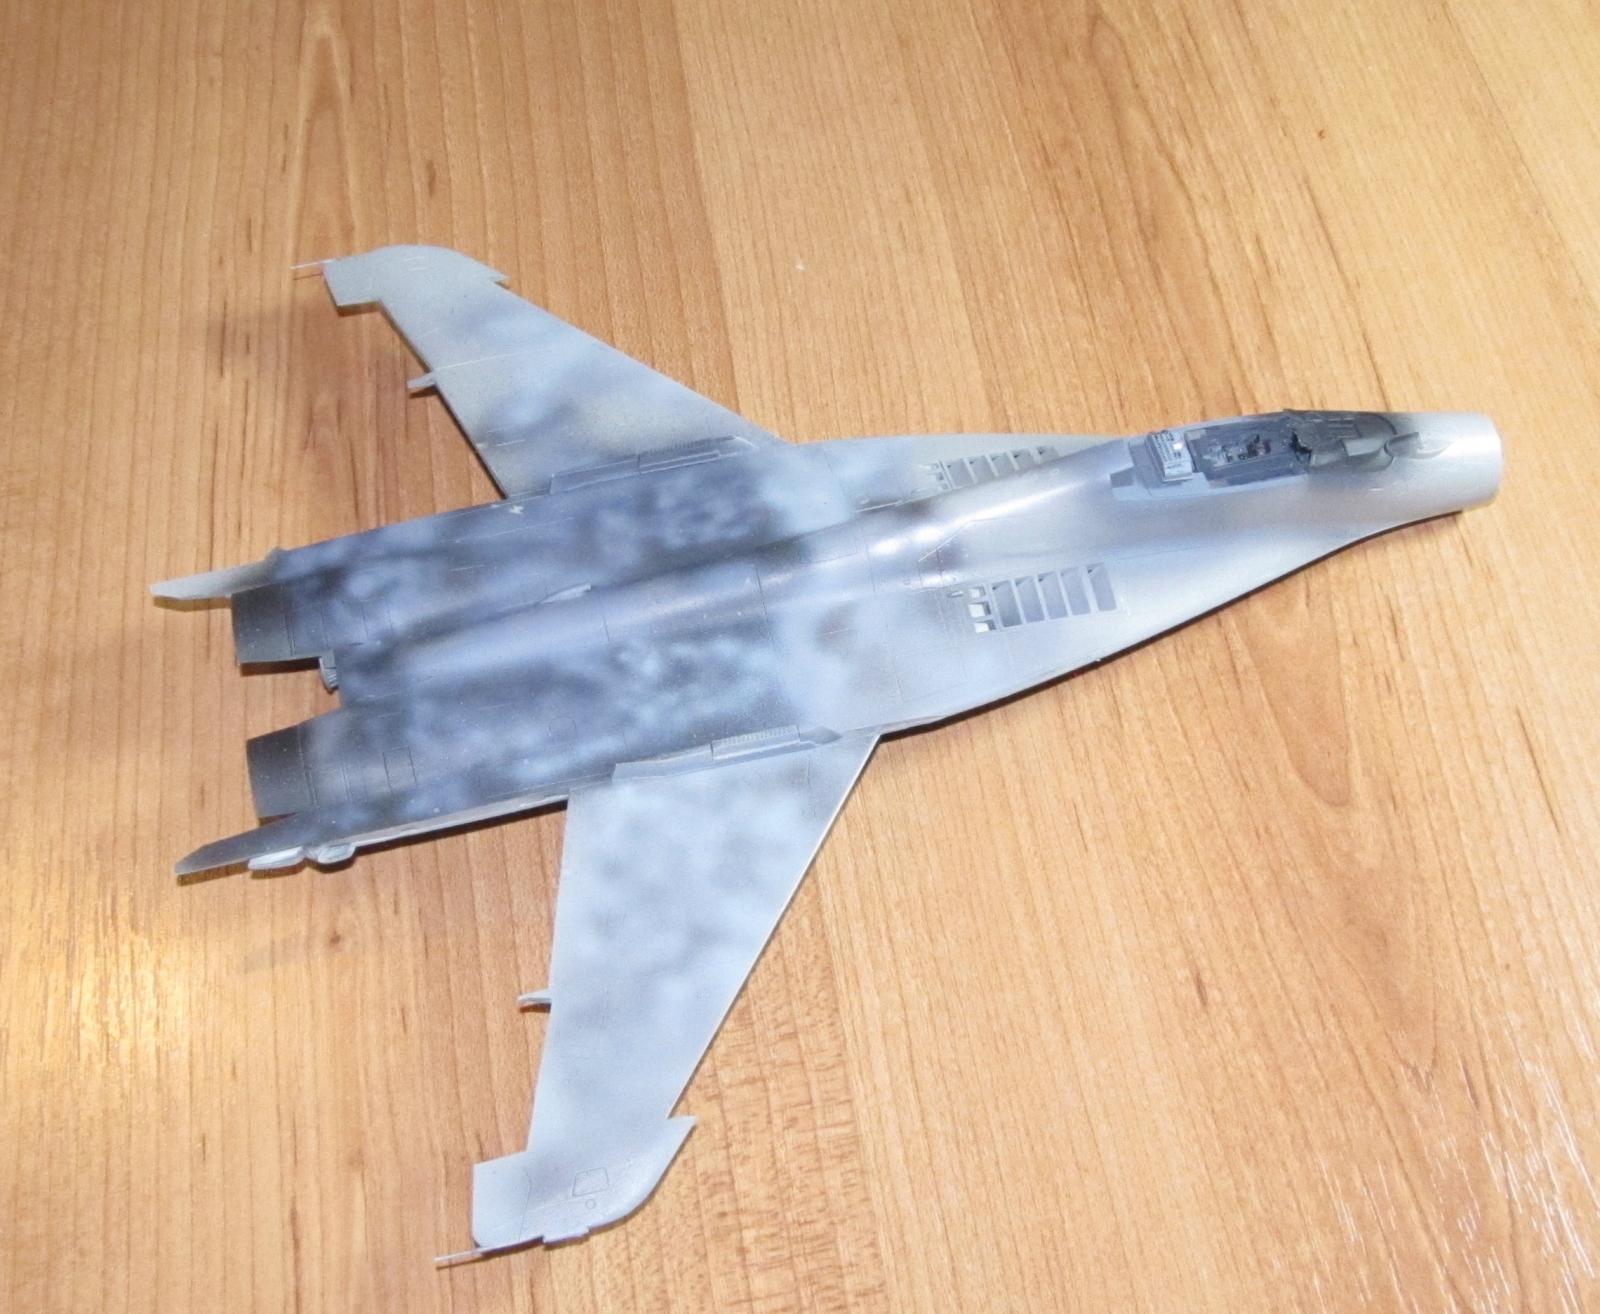
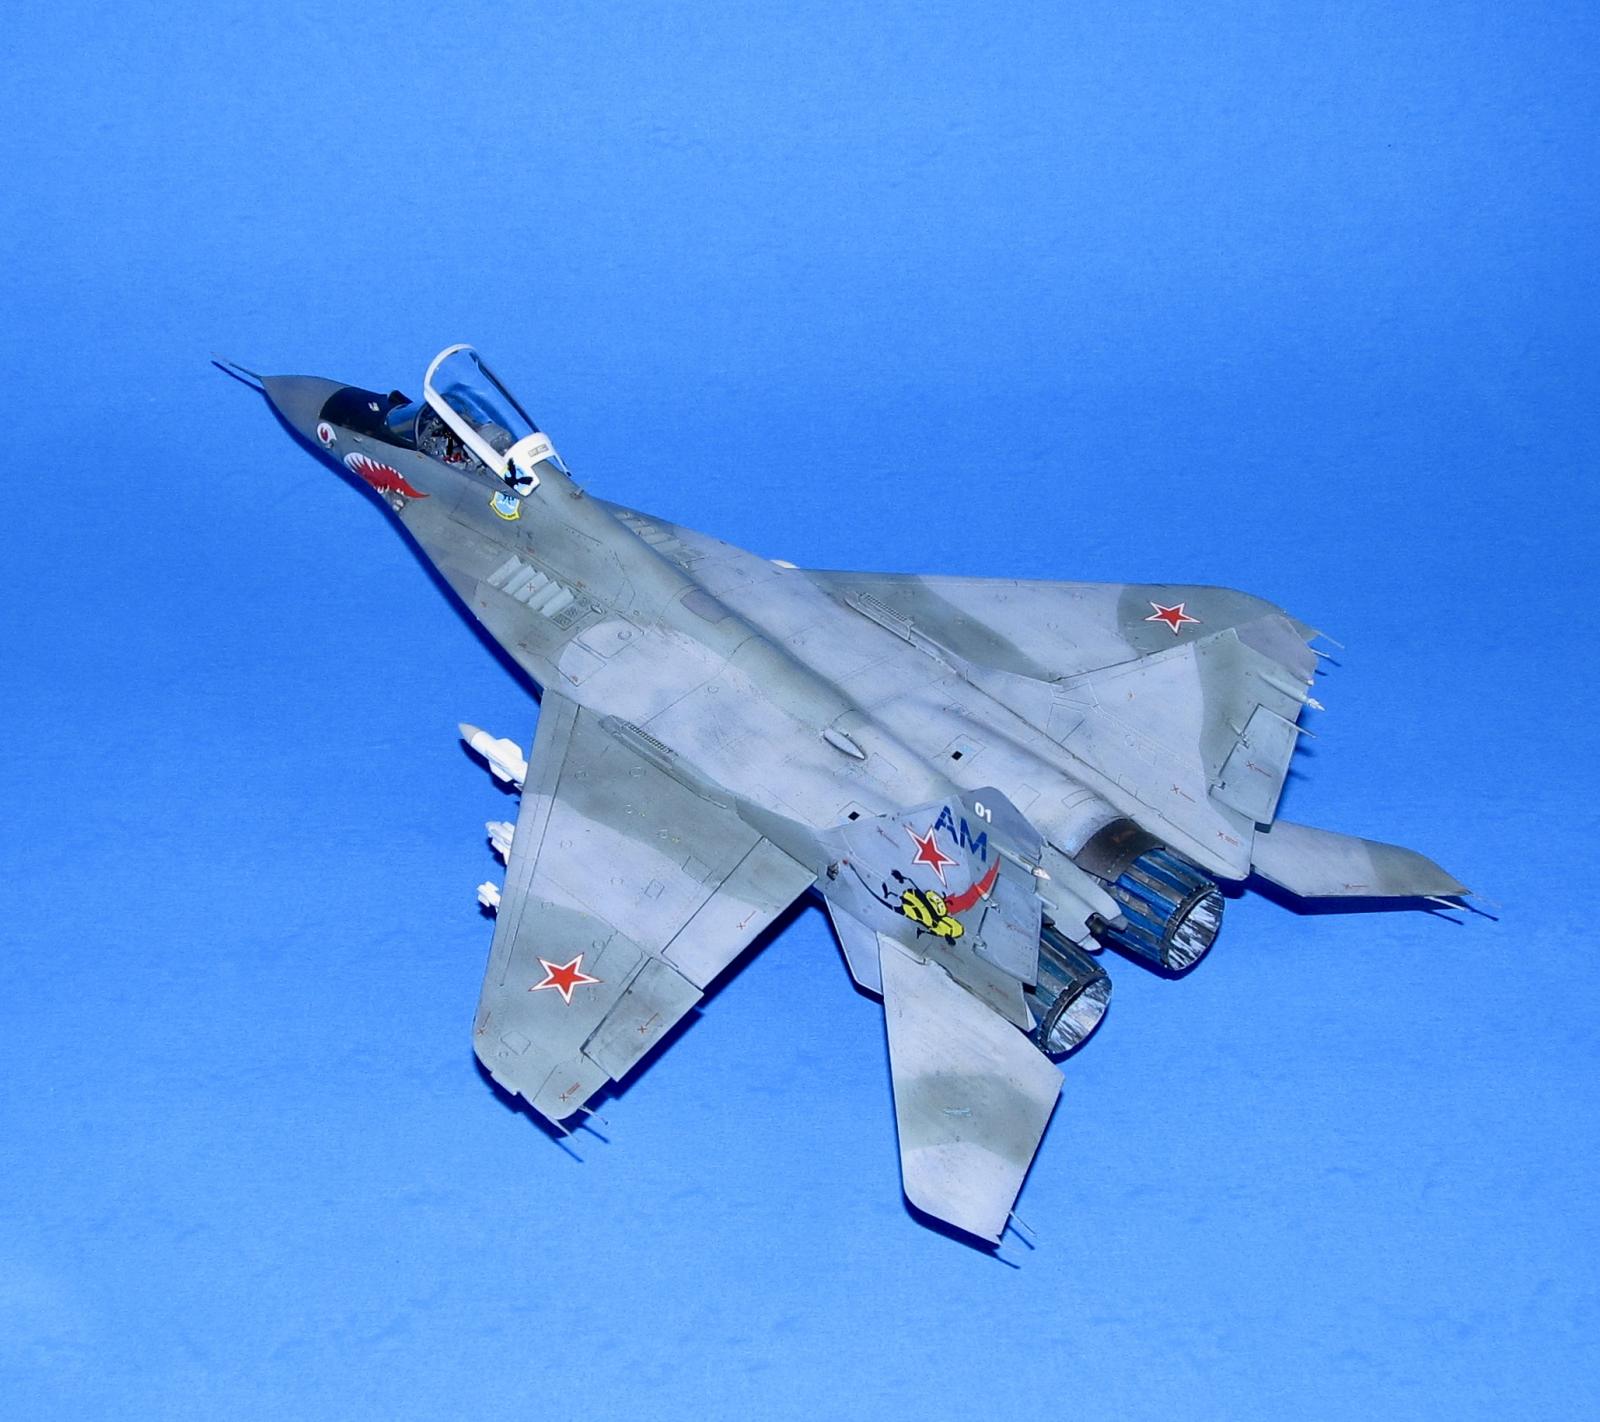
Next I sprayed on AKAN's accurate light MiG-29 light grey (topside then the underside) using a painting technique that is known as black basing, but it is what I've normally done when I paint 'modern' jets. I sprayed the AKAN paint in random patterns with small amounts of paint. I let it build up till I get the paint looking blotchy and worn.
I made cut tape masks to mask off the areas to be covered by AKAN MiG-29 grey green and did the same thing. The blotchy effect in the green area wasn't as pronounced as the grey areas so I looked around in my paint collection to find a darker grey green (black would have been bad) that would emulate the darker blotchy effect on the grey side. I used Tamiya German Grey Green (RLM02) because it was much darker than the actual MiG-29 grey green. I thinned the Tamiya paint with the ratio of roughly three parts of thinner to one part paint and sprayed it in random squiggles and blotches. I tried to avoid darkening the grey green too much rather it looks like random dark areas on the grey green paint.
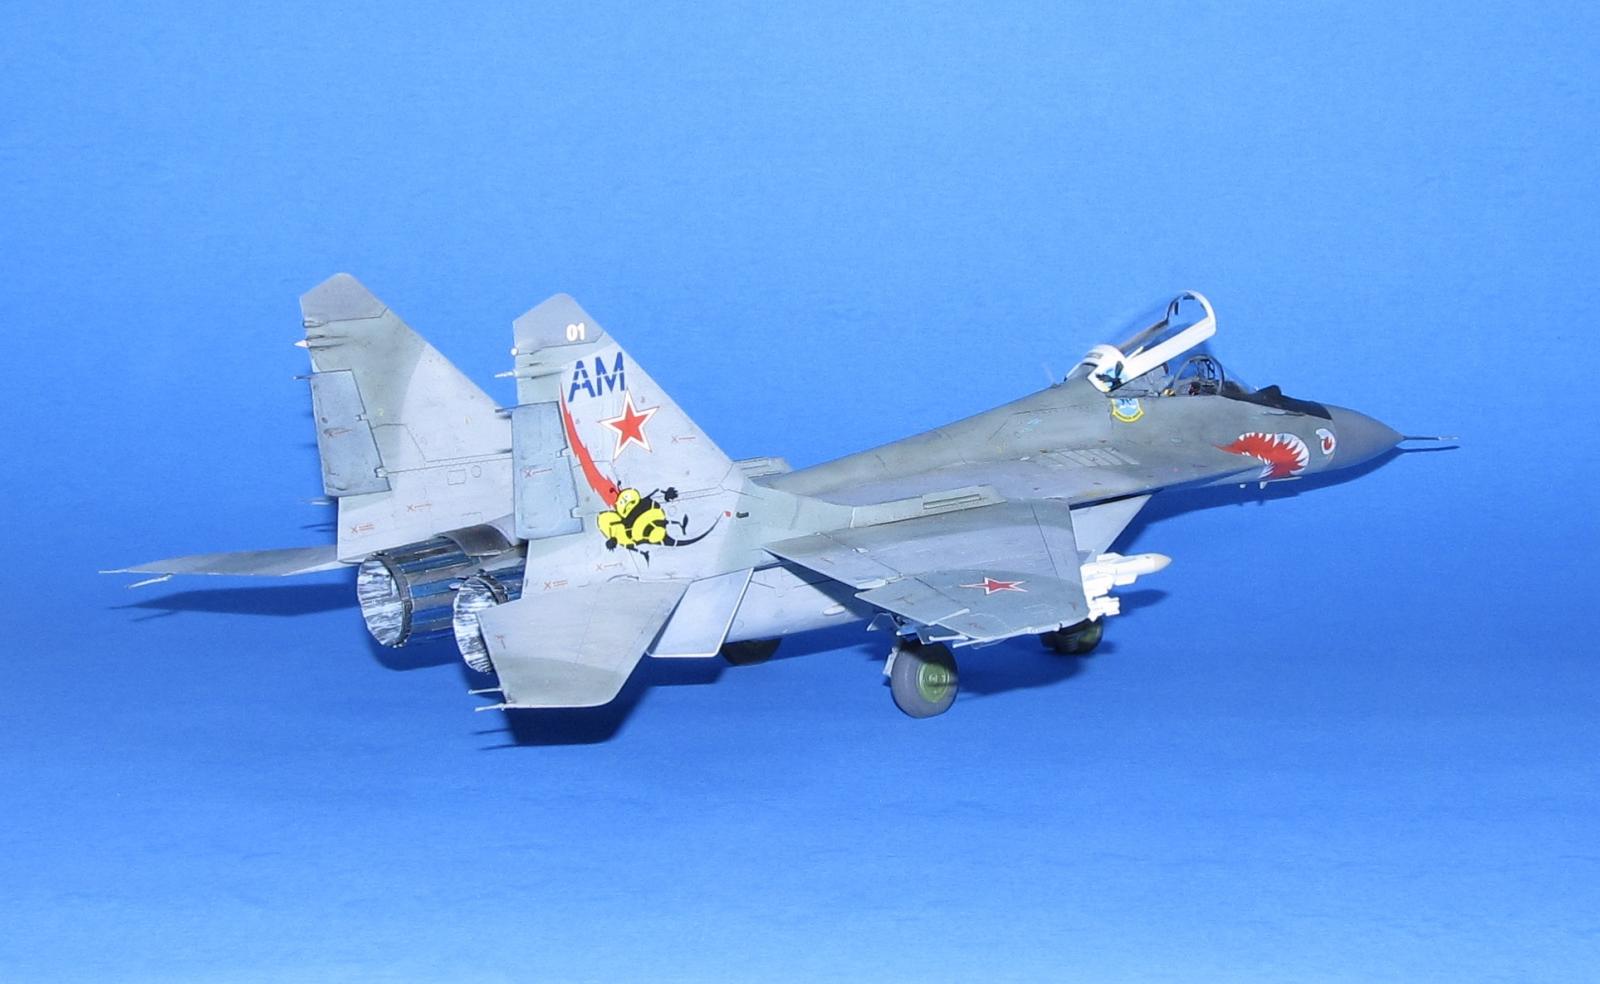
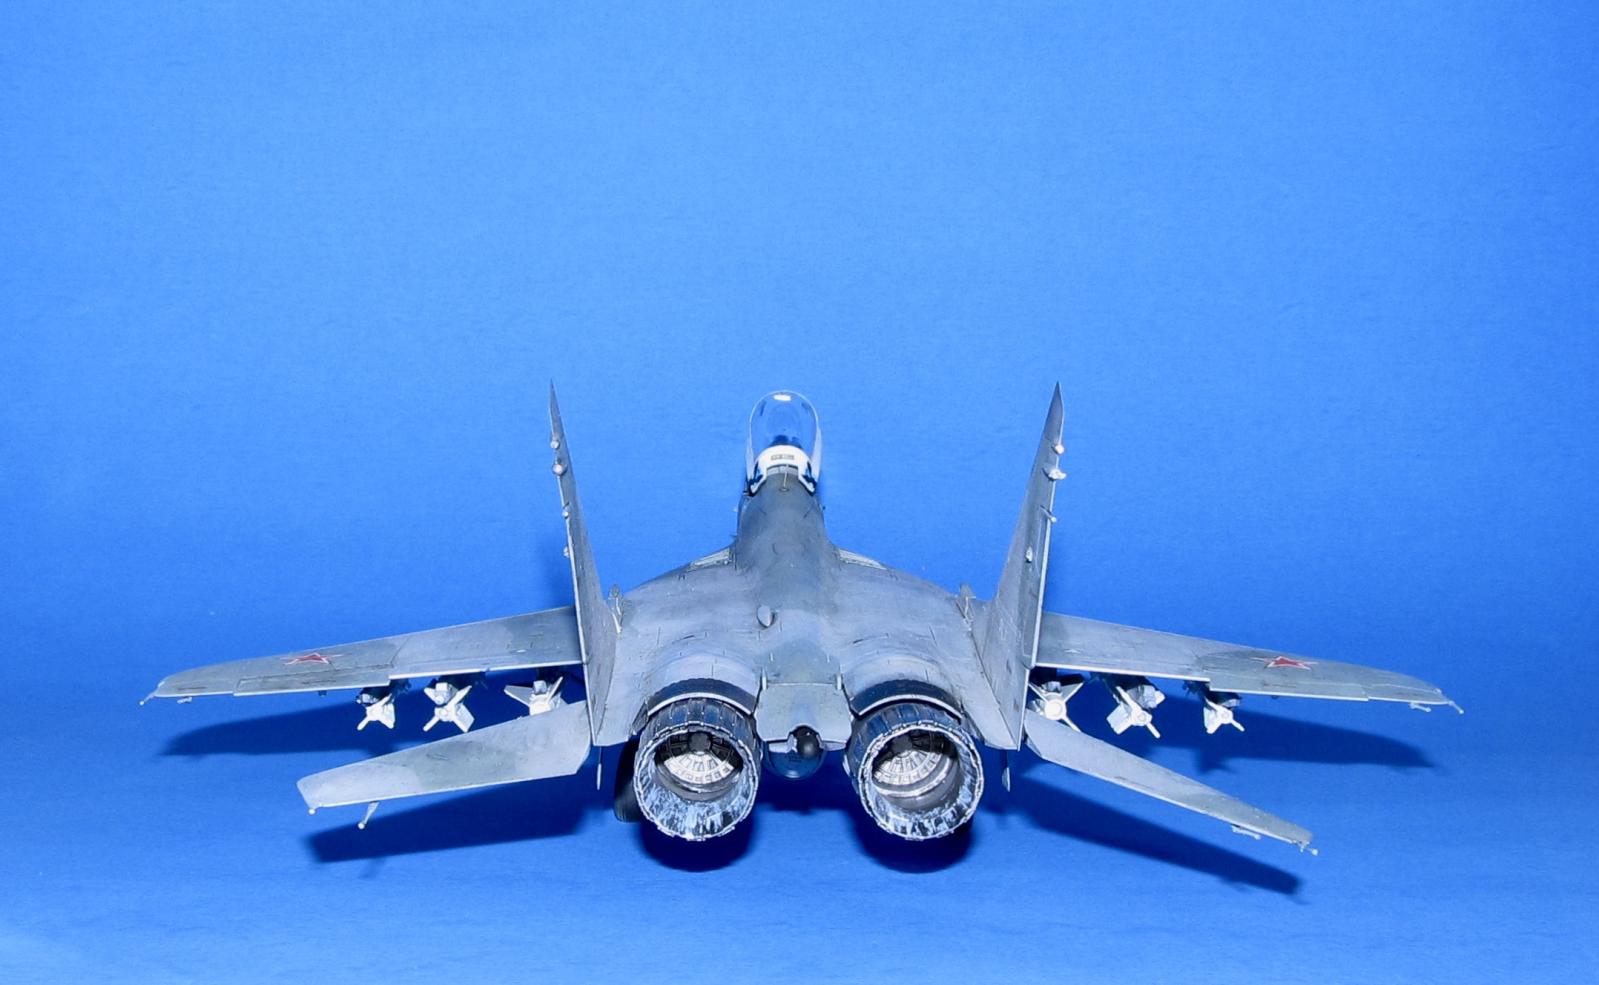
Next the exhausts were sprayed with various shades of Vallejo Metal Colors including pale burnt exhaust, steel and magnesium. Next I masked off every other turkey feather and sprayed on Tamiya Clear blue. It didn't look all the great compared to photos of the real thing. The blue metal areas on the exhausts actually had to be darker so I used Vallejo Clear Blue instead which is a much darker blue. The interiors were brush painted flat white to emulate the scorch marks on the metal. I used a worn brush and dry brushed metal stains in each of the clear blue areas in a very rough approximation of how it looks in real life.
The nose cone was masked off and painted FS36118 as well as certain dielectric panels using masks from NewWare (they have branched out to making masks as well as resin space craft kits.)
The canopy was masked using the New Ware masks. I primed both sides using grey primer and then sprayed the interior Medium Grey FS35237 and the exterior gloss white as per the markings I was going to use. Next I used the masks for the canopy liner, masked off all the white areas and sprayed on Vallejo Off White. I actually goofed the order they were supposed to be used in the instructions, but it worked out for the better as Vallejo needs a primer to stick to plastic and lifts off with low tack tape. The windscreen was done in a similar manner.
The missiles were painted using a mixture of white primer, flat white and Vallejo Off White. The Alamos have a more complex paint scheme which required a lot of masking (dark grey fins with white trim) and radome tan nose cones.
The wheels and landing gear were next. The separate wheels were painted German Grey and the hubs painted Gunze H320 Green. Various landing gear parts were painted FS35237.
Lastly, the underside fins were primed, painted AKAN MiG-29 light grey and then the edges of both fins were masked off so that I could spray flat white on the edges.
Decals
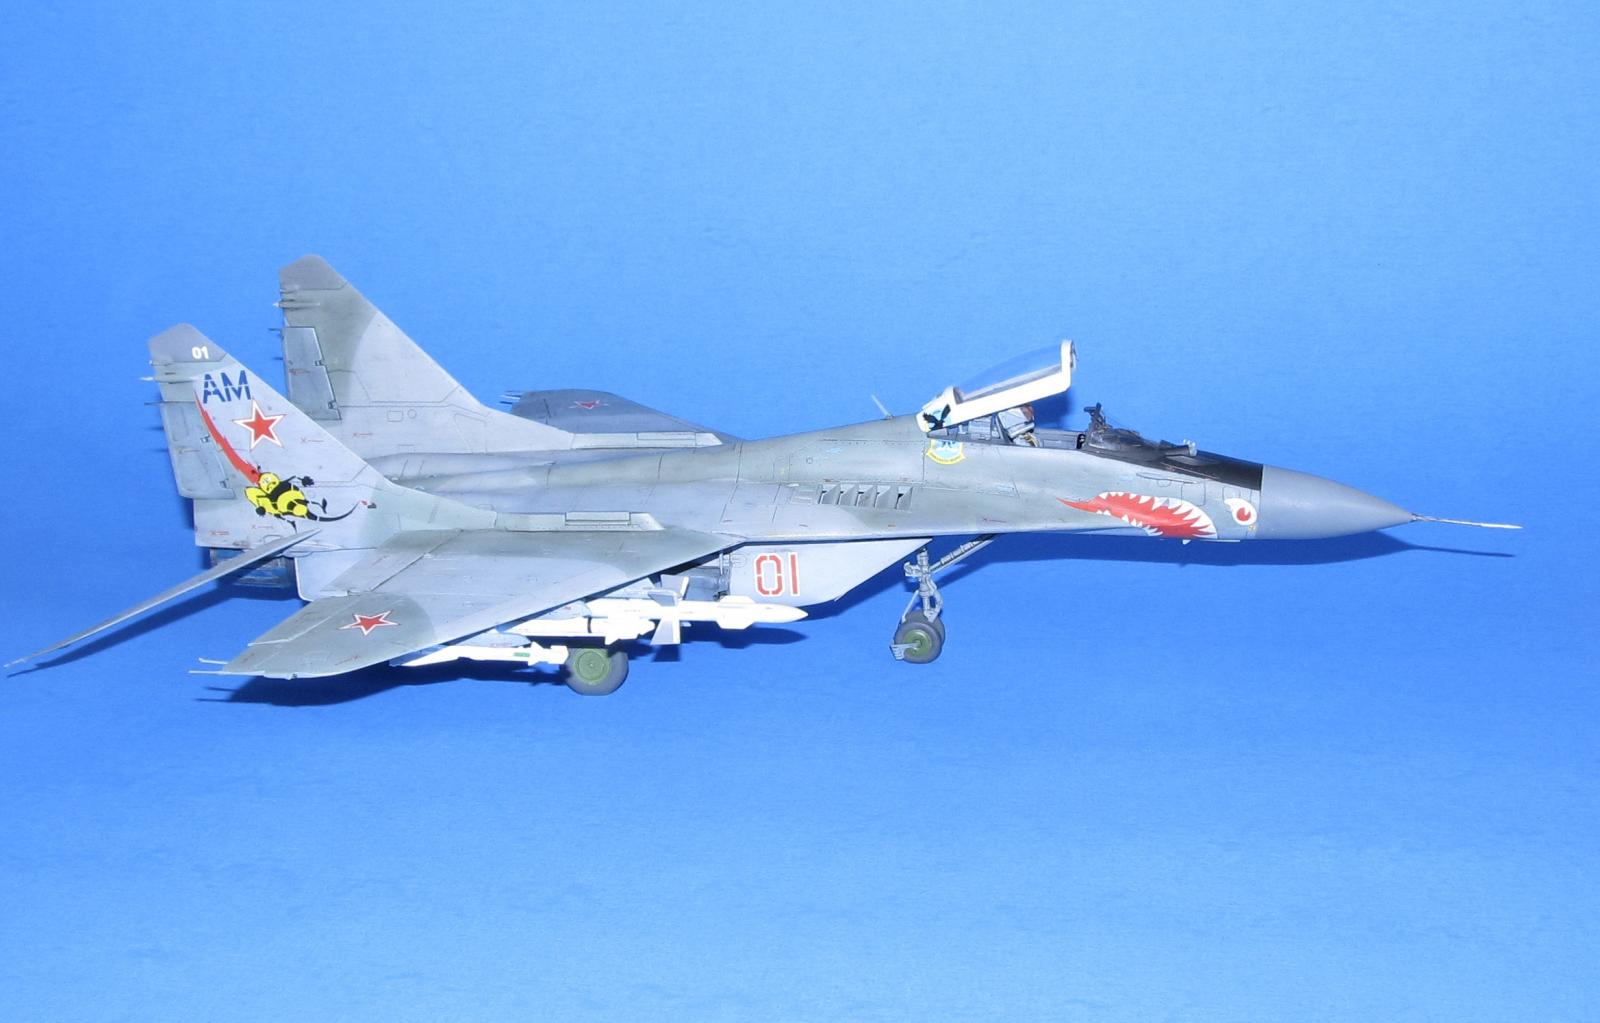
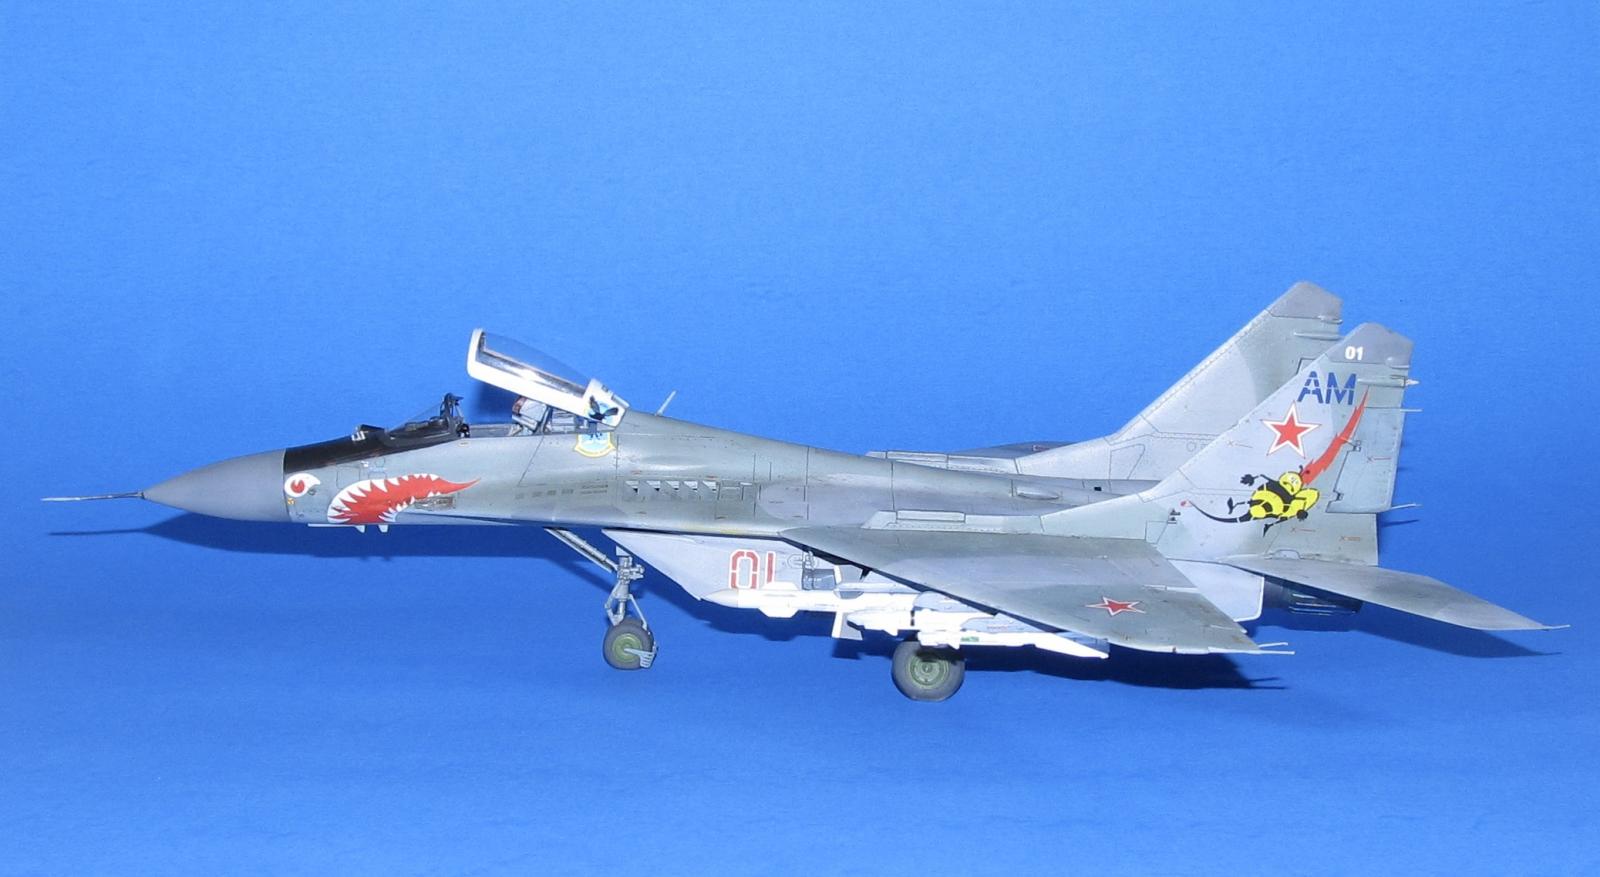
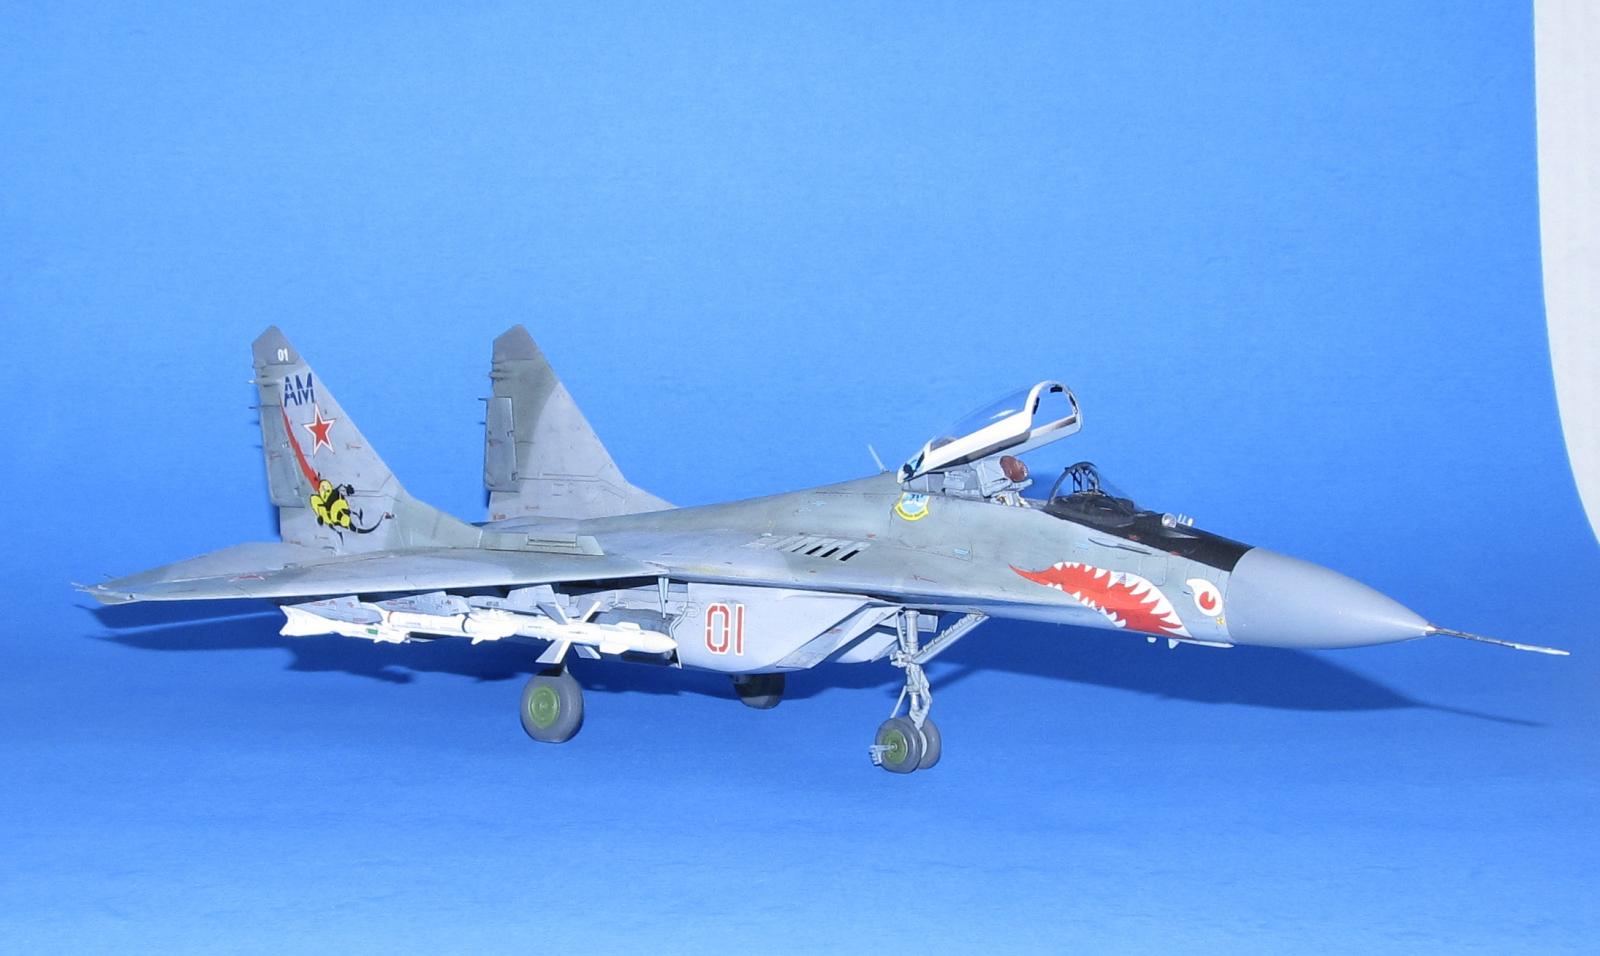
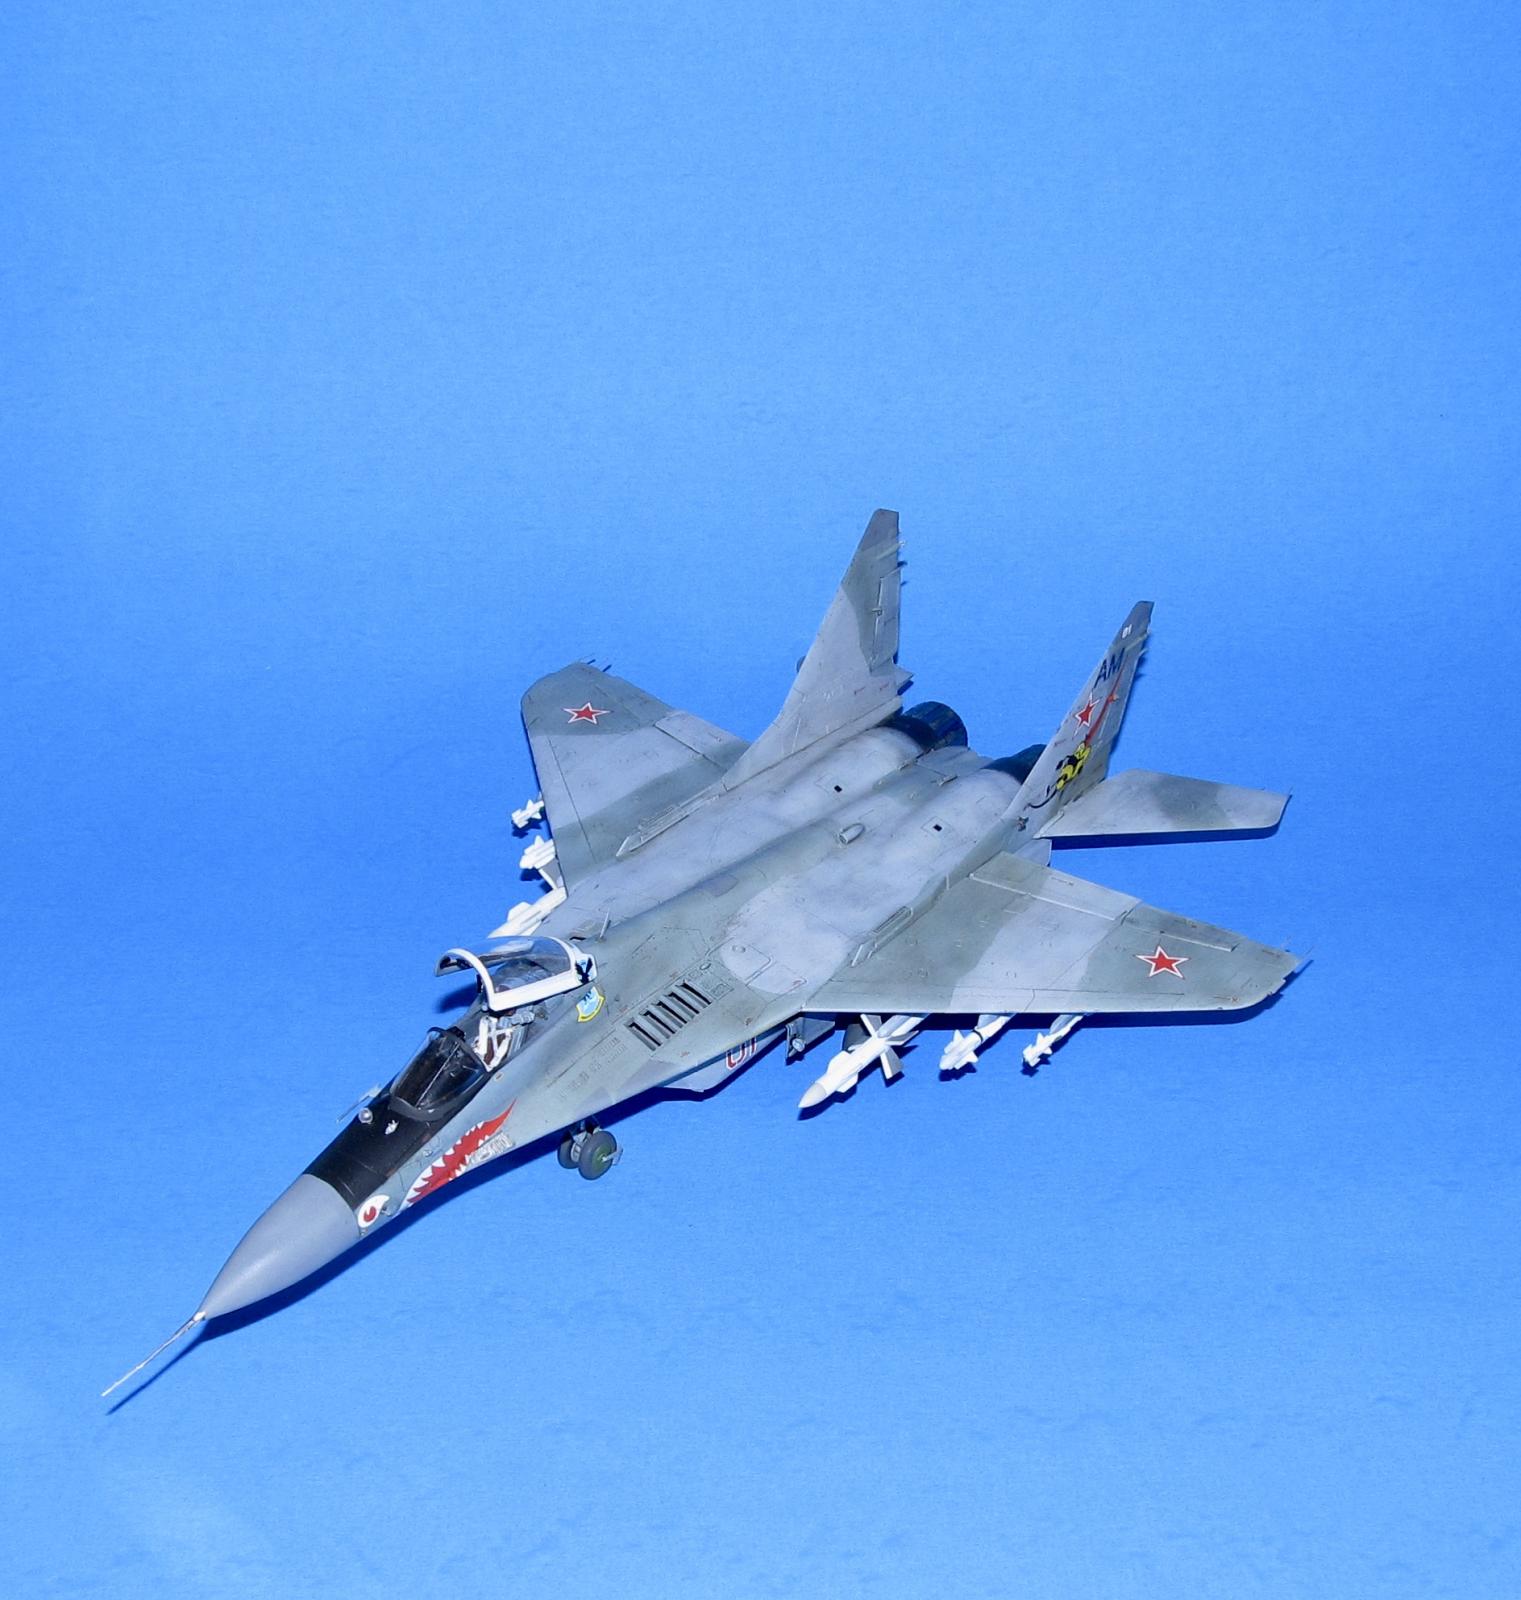
The MiG-29 comes a multitude of decals on two sheets. This was the most tedious task of the build. I would complete a section of airframe or two missiles at one sitting to keep my eyes from glazing over. It took two weeks of work to get all the decals I needed on the model. I selected the Top Gunski markings from 1991. The smaller decals settled down nicely while the bigger ones had issues with silvering and not wanting to stay down properly. I guess I've been spoiled by Cartograph decals because this was my least favorite part of the kit. Great Wall decals are still better than Hobby Boss or Trumpeter decals, but I am not a big fan of Great Wall's decals either.
I did have to trim two of the decals. The air combat school emblem is not completely on the canopy so I had to measure and cut the decal into two sections. The top 2/3s went on the canopy and the remainder was put on the fuselage.
Weathering and Final Coat
I used a watercolor wash (two drops paint black and one drop burnt umber, two drops of dish soap and eight drops of water) instead of oil paint for this one as I wanted to use the softer watercolor wash over the harsher oil one. The watercolor wash excess was removed using damp Q-Tips. When it was dry, I sprayed on Tamiya Flat to seal everything in.
FINAL CONSTRUCTION
The various doors, struts and wheels were glued in place. The main landing gear doors were tricky and delicate so I used CA glue to mount them instead of Tamiya Extra Thin Cement. I used tiny dabs of CA glues to mount the missiles and launch rails, plus the various other pre painted sensors, handles and rear airbrake assembly.
One thing, please make sure the main landing gear lines up as the mains are a bit fiddly to install. I was fortunate to spot this misalignment before the glue set so I got them aligned properly. Also the wheels are keyed to be put them in the correct alignment which is quite important as the bottom of the wheels are flattened.
The underside fins were added using Tamiya Extra Thin.
The ejection seat was assembled and painted. I think the kit PE restraints could be better as the instructions were kind of vague where things should go and it was more complex than it needed to be (who wants a four piece harness when only one piece should do?) If I build another GWH MiG-29 then I'll use a resin seat or Eduard PE restraint set instead. I added the various PE mirrors to the rear canopy securing them with white glue. The canopy itself comes with a support when it is in raised position. The canopy assembly was a bit too heavy to let it set with Tamiya Extra Thin so I used a dab of CA glue instead to secure it in place.
I thought I was being clever leaving the pitot tube off till the last steps. When I was moving the MiG, I accidentally broke it and ended up having to repair it anyway. It just reinforced why I end up buying brass pitot tubes in the first place. Will probably replace the plastic part with a brass pitot tube in the future.
The engine exhaust nozzles were added. I also used CA glue to secure them in the correct angle.
Lastly, I glued the centerline fuel tank, sanded the seams, and painted it AKAN MiG-29 light grey. It had a lot of decals to add. Next it was weathered using oil paints and glued in place.
CONCLUSION
The Great Wall Hobby MiG-29 is a decent modern kit. It's reasonably accurate (a more exacting builder will get more detailed exhausts and ejection seat) and it builds into a nice looking kit without a huge amount of effort. The number of stencils and the mixed quality of the decals is probably the worst part of the kit. Overall I enjoyed building this Cold War fighter jet. I don't consider this kit for beginners as it will be a challenge for less experienced builders to build.


Very nice work on this, Dan. Super result.
Thanks Tom.
Excellent completion and an equally impressive post ( here and on M/M).
I’m sorta relieved to see I’m not the only one who has problems with pitot tubes breaking off, and thanks for the water wash info - I’m gonna give it a try!
Thanks for the compliment.
Two things you should remember about water wash:
1) It's fragile so I'd avoid using watery gloss or flat coats (like Xtracrylix) which cause it to run. I'd spray on a thin coat first to "seal" it before spraying on a thick coat.
2) Some water color paint doesn't react well with certain acrylics (especially Tamiya Flat white.) I've had a couple of near disasters with it that way.
Otherwise, I prefer it to oils because the white mineral spirit/Turpenoid gives me a headache and (outside of Tamiya flat white) it can be easily adjusted.
A great work of art, Dan.
The scheme is awesome, love the sharkmouth. Never saw this on a Fulcrum before.
Neither did I. I'm not sure if it is accurate, but I like the colorful markings (especially for a Soviet plane.)
Looks great! All the paint work paid off with a nicely worn look. Well done.
Thanks, I'm really happy how it turned out. I think it is one of my best paint jobs.
Excellent build on the not un-challenging GWH kit, Dan.
The review is, as usual, superb.
Congratulations!
It shouldn't have been that challenging, but it was more than I expected. Thanks Spiros.
Very nice, Dan (@dbdlee). I have tried weathering with watercolors, but I still prefer the effects I get with artist oil colors. If you ever want to try oils again, use odorless turpenoid instead of mineral spirits. It is a little less aggressive than mineral spirits, and it has very little odor.
I discovered that Turpenoid gives me a headache too. I do use oils, but not often and only when I can ventilate the house.
They do work better than watercolors and tougher.
Great result.
Thanks very much.
One mean looking Mig! Looks great.
Thank you, it is one mean Mig.
Great write-up, Dan, really enjoyed reading it, and the model turned out very well, too, definitely liked.
Thanks. I always like adding a bit of background to every build review.
Nice!
BUILD:
Thank you Samo
Great description Dan of this mythical airplane. I did not know much about that except that in the hands of an experienced pilot it blew the socks off the audience at Airshows. Your model looks Super. Many steps well explained and noted.Thanks for showing.
Thanks, I always try to point out where the model can be difficult. Good point about the Mig29's maneuverability but it is only one component of what makes a good warplane.
🙂 ... Greetings ... 🙂 :
A visually striking representation of a Fulcrum Dan.
Very sharp and keen build.
Nice work on the camouflage painting.
Thanks! I'm glad you enjoyed it.