1/48 Tamiya/Special Hobby F4U-4 Corsair “Black Sheep” – Korea:the Forgotten War GB
The Airplane:
The ultimate Corsair to see service in the Second World War was the F4U-4. The first prototype XF4U-4 took flight on April 19, 1944, followed quickly by four other prototypes. The airplane was powered by the R2800-18W, an excellent high-altitude engine that gave the airplane outstanding climb and speed performance up to 35,000 feet, which was what was needed for a fleet defense interceptor. The airplane was equally capable as a fighter-bomber, equipped with two 1,000 lb. bombs or eight 5 inch HVARs. With a top speed of 446 mph at 26,000 feet - a 50 mph improvement over the F4U-1D at the same altitude (the F4U-1D's best rated altitude was 20,000 feet), the F4U-4 was competitive with any other fighter in the world. Production models began arriving in late 1944, and 1,856 had been delivered by the end of the war in August, 1945. The last of 2,056 was delivered in April 1946, and the F4U-4 became the standard fighter-bomber of both the Navy and the Marines.
The Korean War was where the F4U-4 really got to show its chops. Operated by both Navy and Marine squadrons from carriers ranging along the Korean peninsula, as well as on land by the Marines, the F4U-4 Corsair provided the definition of "close air support" to UN forces.
The Korean conflict had gone on for ten days when MacArthur let it be known he needed serious reinforcement, following the defeat of the two regimental combat teams sent to Korea by the North Korean People's Army.
The Marines were ordered to send a regimental combat team and support to Korea on July 10. Ten days later, the 5th Marine Regiment, with supporting artillery and armor battalions, now the Provisional Marine Brigade, went aboard ships in Long Beach and San Diego.
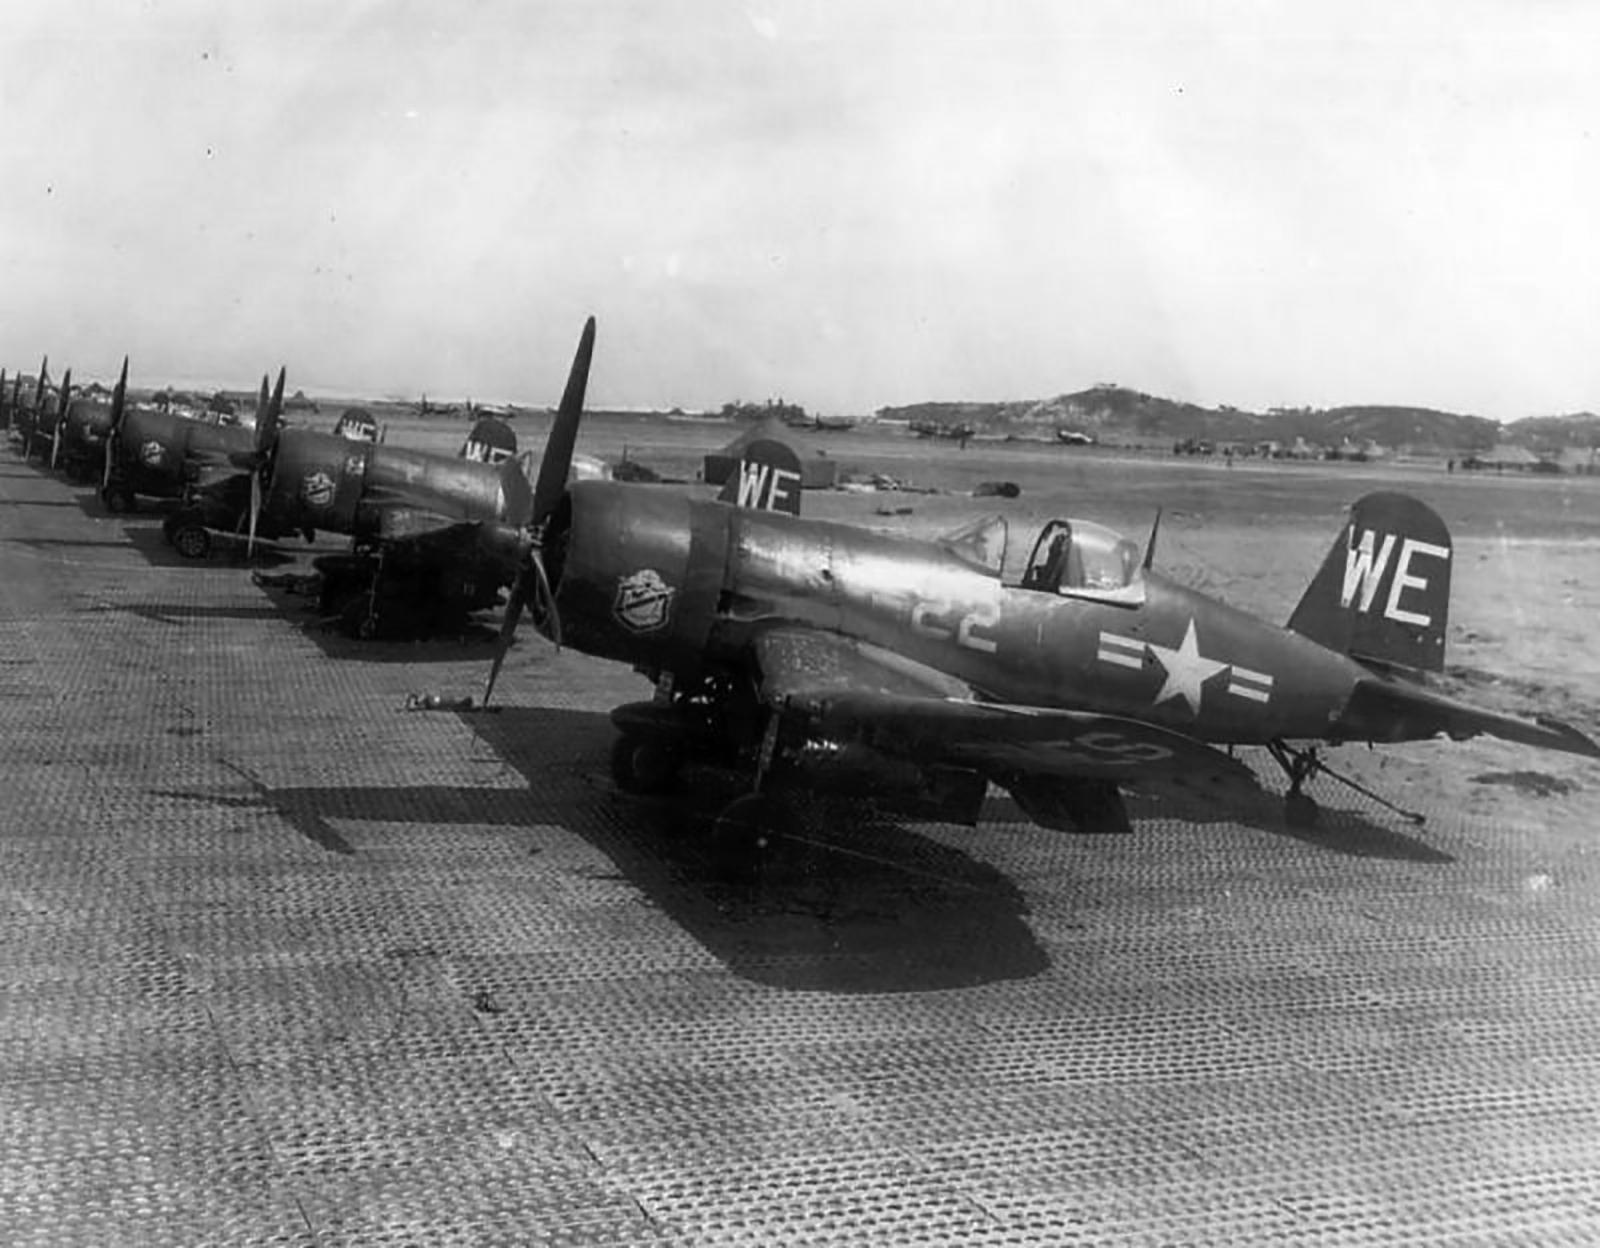
At the same time, the F4U-4 Corsairs of VMF-214 and 323, and the F4U-5Ns of VMF-513, all from the First Marine Air Wing, were put aboard the escort carrier USS Badoeng Strait, which had been recalled from a midshipman's cruise to transport the aircraft.
The convoy arrived in Kobe at the end of July. By this time, the UN forces had withdrawn to the Pusan Perimeter, and were in danger of being pushed off the peninsula altogether.
The Corsairs were offloaded and cleaned up from the cocooning done for protection during the trans-Pacific voyage. Pilots tested them and by August 2, VMF-323 went back aboard Badoeng Strait while VMF-214 went aboard the CVE USS Sicily, commanded by Captain John S. Thach, which had been operating at Guam and rendezvoused in Japan.
The two carriers arrived off Korea on August 4 and the first strikes were flown on August 5. The Corsairs were on “airfields” only 30 minutes from the front lines, and could remain overhead for over an hour at a stretch, a far cry from the Air Force air support flying from Kyushu that could remain overhead for 20 minutes. With the Marine specialty of close air support, the two squadrons changed the outcome of the First Battle of the Naktong, when the North Koreans attempted to cross the Naktong River which UN forces were holding as their front.
The Provisional Marine Brigade arrived at Pusan on August 5, and went into action on August 7, eight years to the day from their landing on Guadalcanal.
The Marine ground force, supported by Marine Air, literally turned the battle of the Pusan Perimeter around.
Before the outbreak of the Korean War, the Air Force was trying to take naval aviation, while the Army attempted to take “the Navy's army.” After carrier aviation saved the day with the Pyongyang strikes on July 4-5, 1950, and the Marines saved the Pusan Perimeter, no one has ever talked about breaking these two forces up.
When the Chinese People's Volunteer Army intervened in the Korean war in November 1950, the Marine Corsairs provided the air cover that allowed the First Marine Division to be the only UN unit to escape the debacle of what Sir Martin Gilbert called “the most thorough defeat of a previously-victorious army in recorded history” and come out intact. Operations from the two CVEs during the winter gales in the Sea of Japan were difficult to say the least. The carriers were constantly swept by snow storms, while the small ships took green seas over their bows, and a pilot who couldn't land back aboard could survive in the freezing water no more than 10 minutes. One Marine ground crewman remembered that servicing the Corsairs on the hangar deck was “scary” getting up on ladders to hang ordnance, and “terrifying” on the open deck with nothing to prevent a man slipping and sliding over the side.
The Kit:
There are currently four 1/48 F4U-4 models. I'll take them in order of appearance. The Hasegawa F4U-4 first appeared in the summer of 1981, as I recall picking one up then at Valley Plaza Hobbies. This was one of Hasegawa's releases of kits originally designed by Mania in the 1970s. It has all the strengths, and all of the weaknesses, of a kit from that era. Interestingly enough, as regards overall shape accuracy, it is still the best kit available, though it is far from contemporary standards and requires things like a resin cockpit (increasingly difficult to find) and aftermarket decals to get something acceptable. Louis certainly demonstrated what can still be done with this kit.
There is the Academy kit, which I think is definitely in the running – if not the leader – for Worst Copy Of Someone Else's Kit Design. Appearing in the mid-80s, its original inspiration is obviously the Hasegawa kit, but the designers badly botched their copying, coming up with a fuselage that is oversized and results in a model that is, at best, “Corsair-ish.” To me, it barely qualifies as the proverbial doorstop. No matter what one does to improve it, the result is “putting lipstick on a pig.”
The next two are from Hobby Boss – the F4U-4 and F4U-4B. These kits are scale-downs of the Trumpeter 1/32 F4U-4, and retain all of the problems as regards accuracy associated with that kit. The cowling isn't the right shape, the fuselage isn't quite right, the wings aren't at the right angle of dihedral, the cockpit is deficient, the gear wells and their doors are misshapen. From several feet away, glancing at one, it appears to be an F4U-4. With a lot of effort, it can become “less wrong,” but that's as far as it goes.
The Project:
There is a fifth alternative. It's a project for which there is a need of “some modeling skill required.”
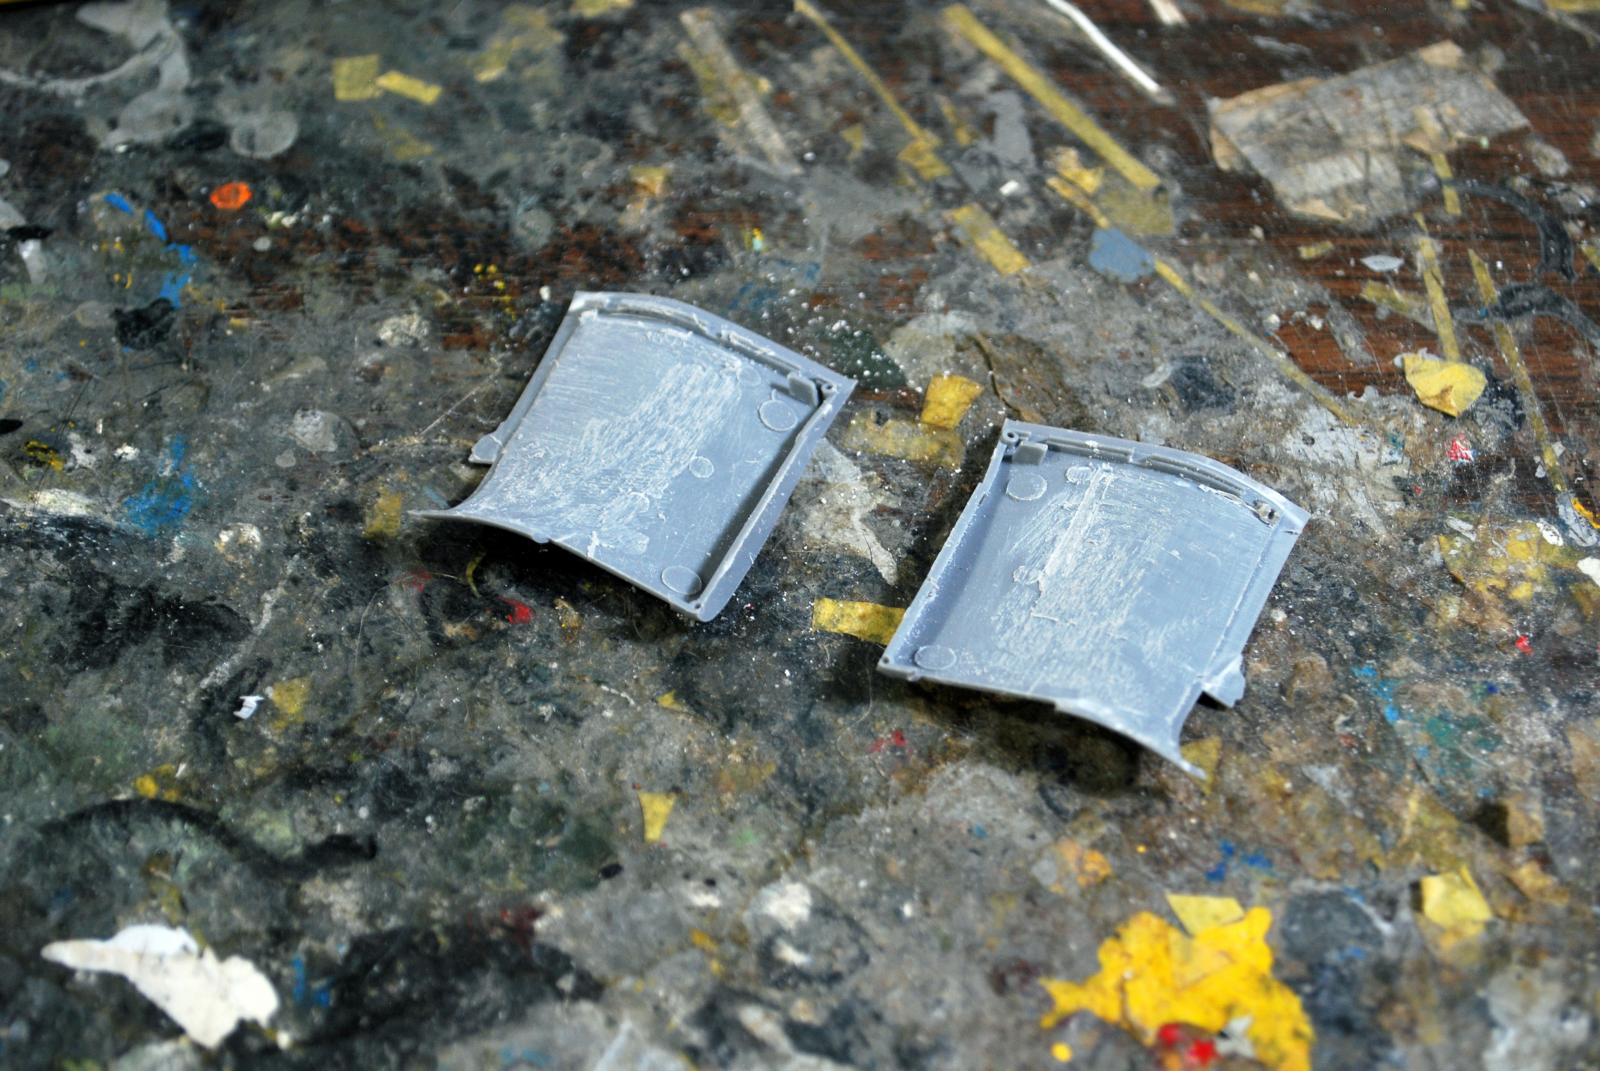
Around 2003, Czech Master's Kits (CMK) released a conversion set to create an F4U-4 from the Tamiya F4U-1D. The conversion consists of a well-molded resin cowling and cockpit, a forward engine accessory cowling and different lower wing mid-section, along with photo-etch parts for the cockpit and a vacuform canopy. It also includes resin horizontal stabilizers with separate elevators and a separate rudder, to pose the control surfaces dynamically. A set of decals is included that attempt to do the well-known Glossy Sea Blue/Gull Grey and White F4U-4 from NAS Olathe in the 1950s, and a Korean era Corsair from VF-114.
The canopy is best replaced by either the standard Tamiya canopy for the F4U-1D if the modeler is making an early-version F4U-4, or the Squadron vacuform canopy for the F4U-4 if making the later version with the flat-pane windscreen, but that is only available any more from eBay dealers.
If you find yourself interested in doing this conversion, the conversion set still costs only $24.00 at Special Hobby, and they have some 15-20 sets left.
As to the decals, there are better decals for an F4U-4 available from both Aeromaster, SuperScale and Meteor; these are all OOP – the Aeromaster and SuperScale sheets can be found at eBay dealers and used kit sites, while the Meteor sheet (the best) is available in limited numbers and at a premium price at Dave Klaus' Fine Art of Decals website.
I built a conversion using this back in 2003 and got a good result. However, I made a mistake in how I assembled the wings, and when the kit got dropped a few months after it was completed, it exploded and turned itself into spare parts.
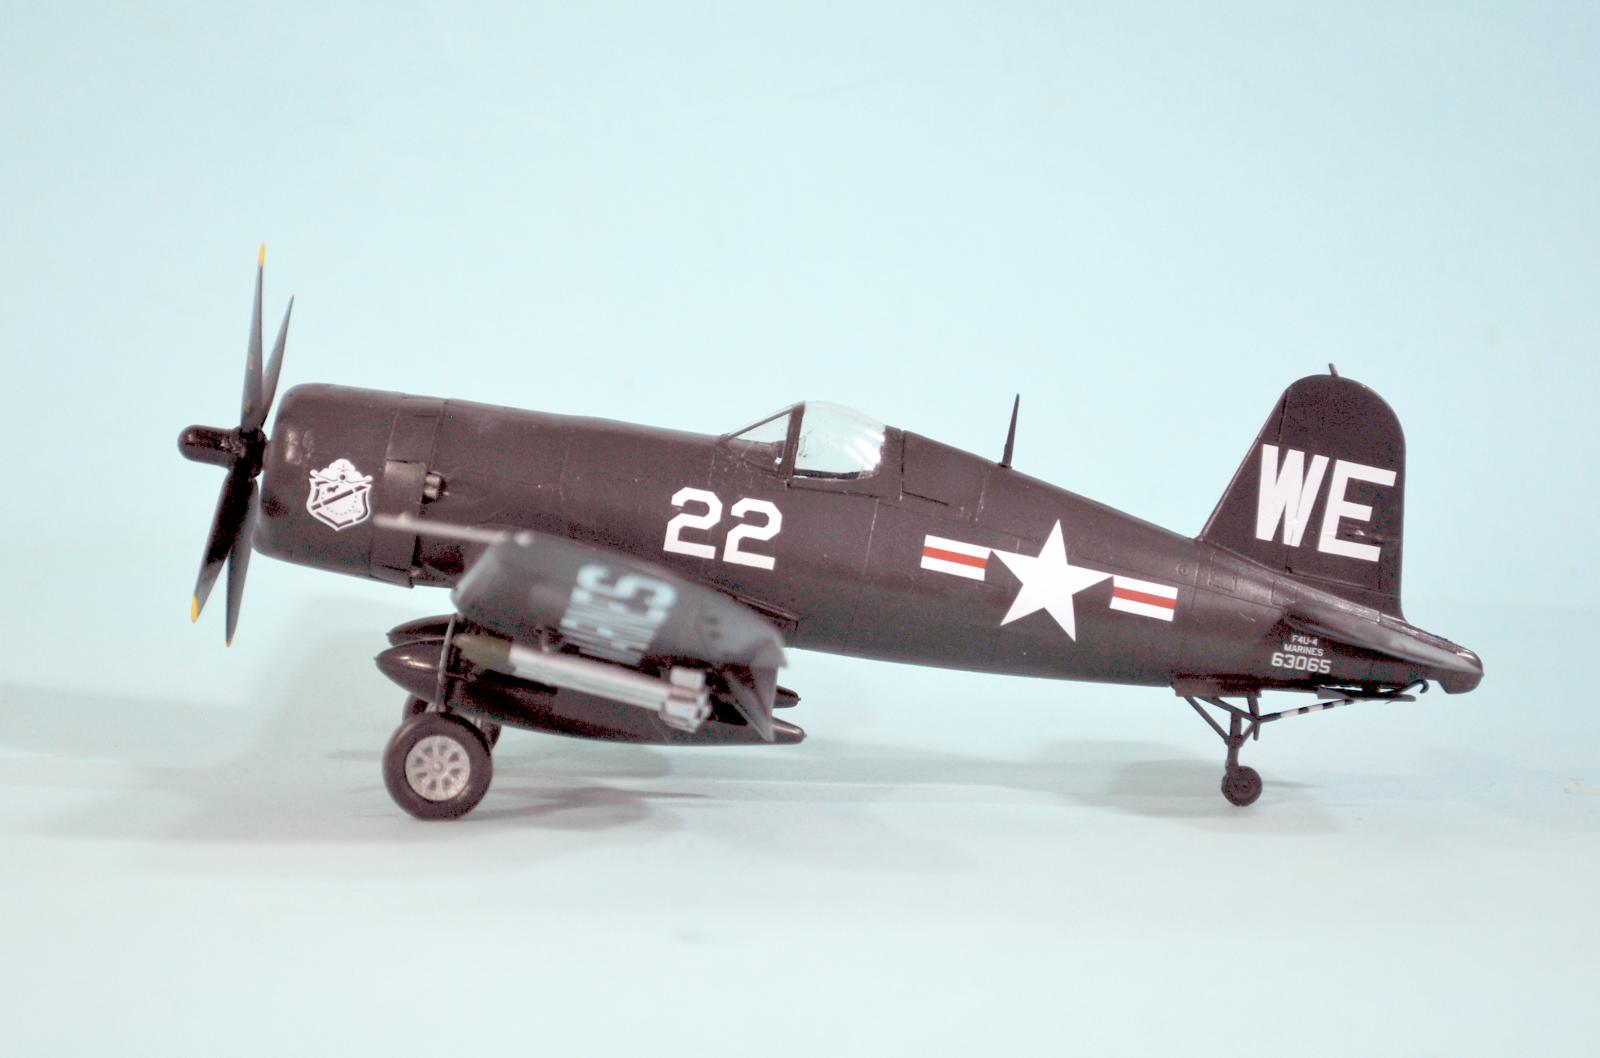
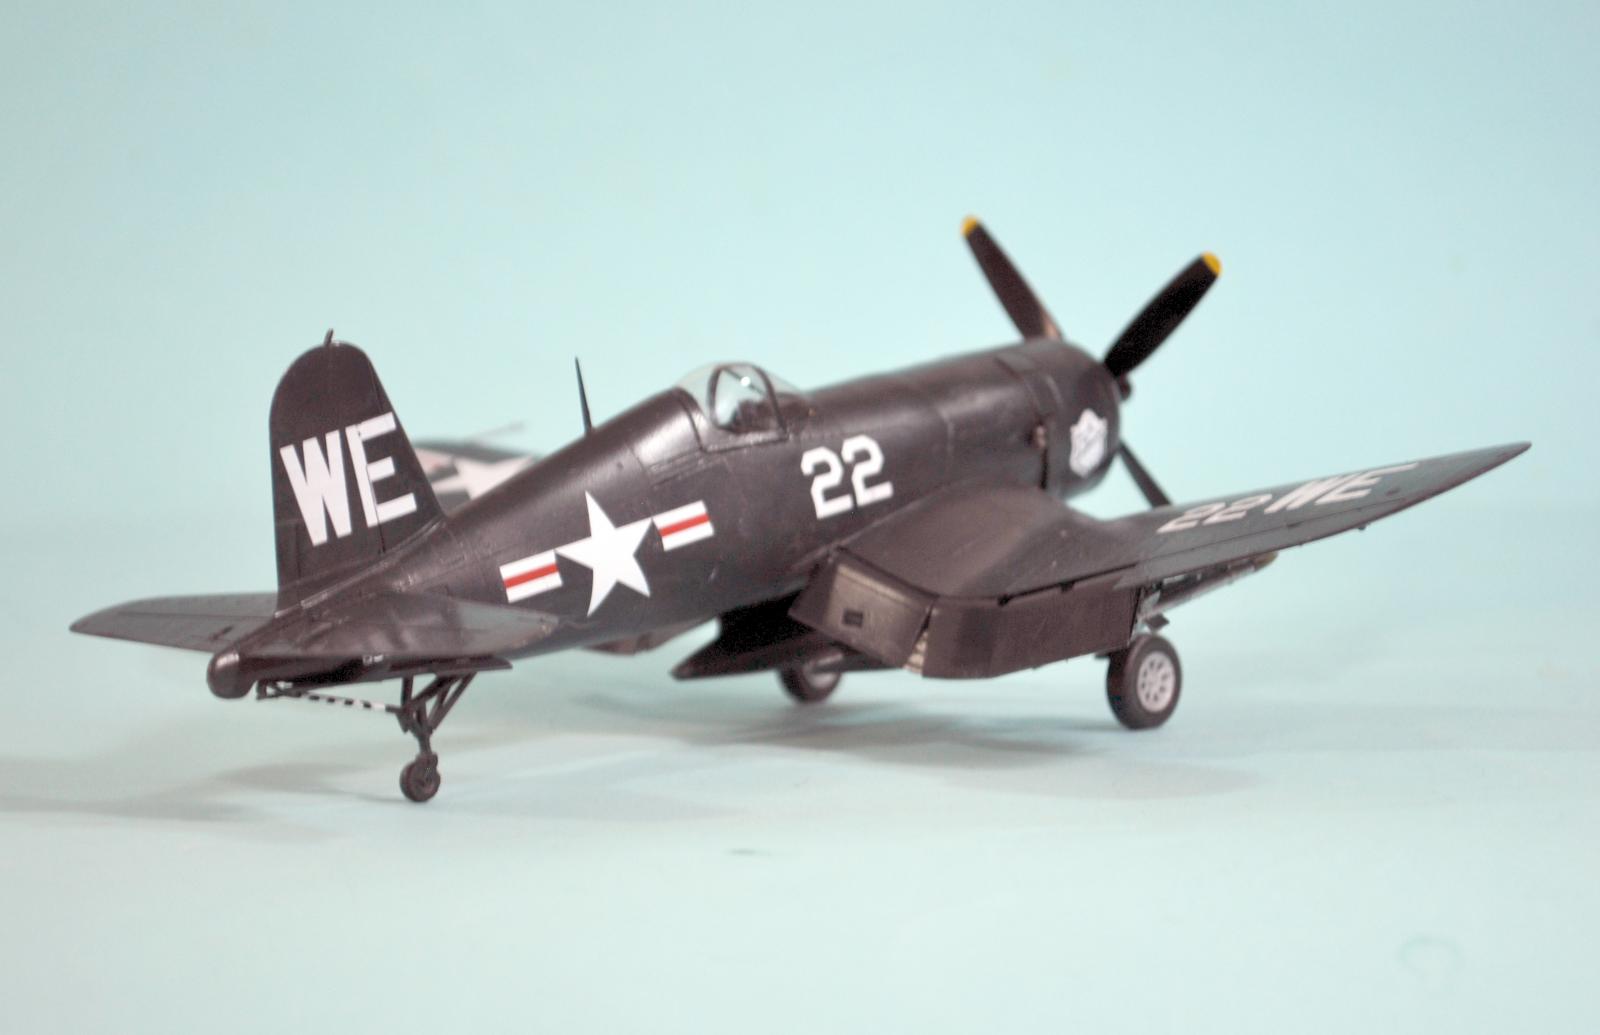
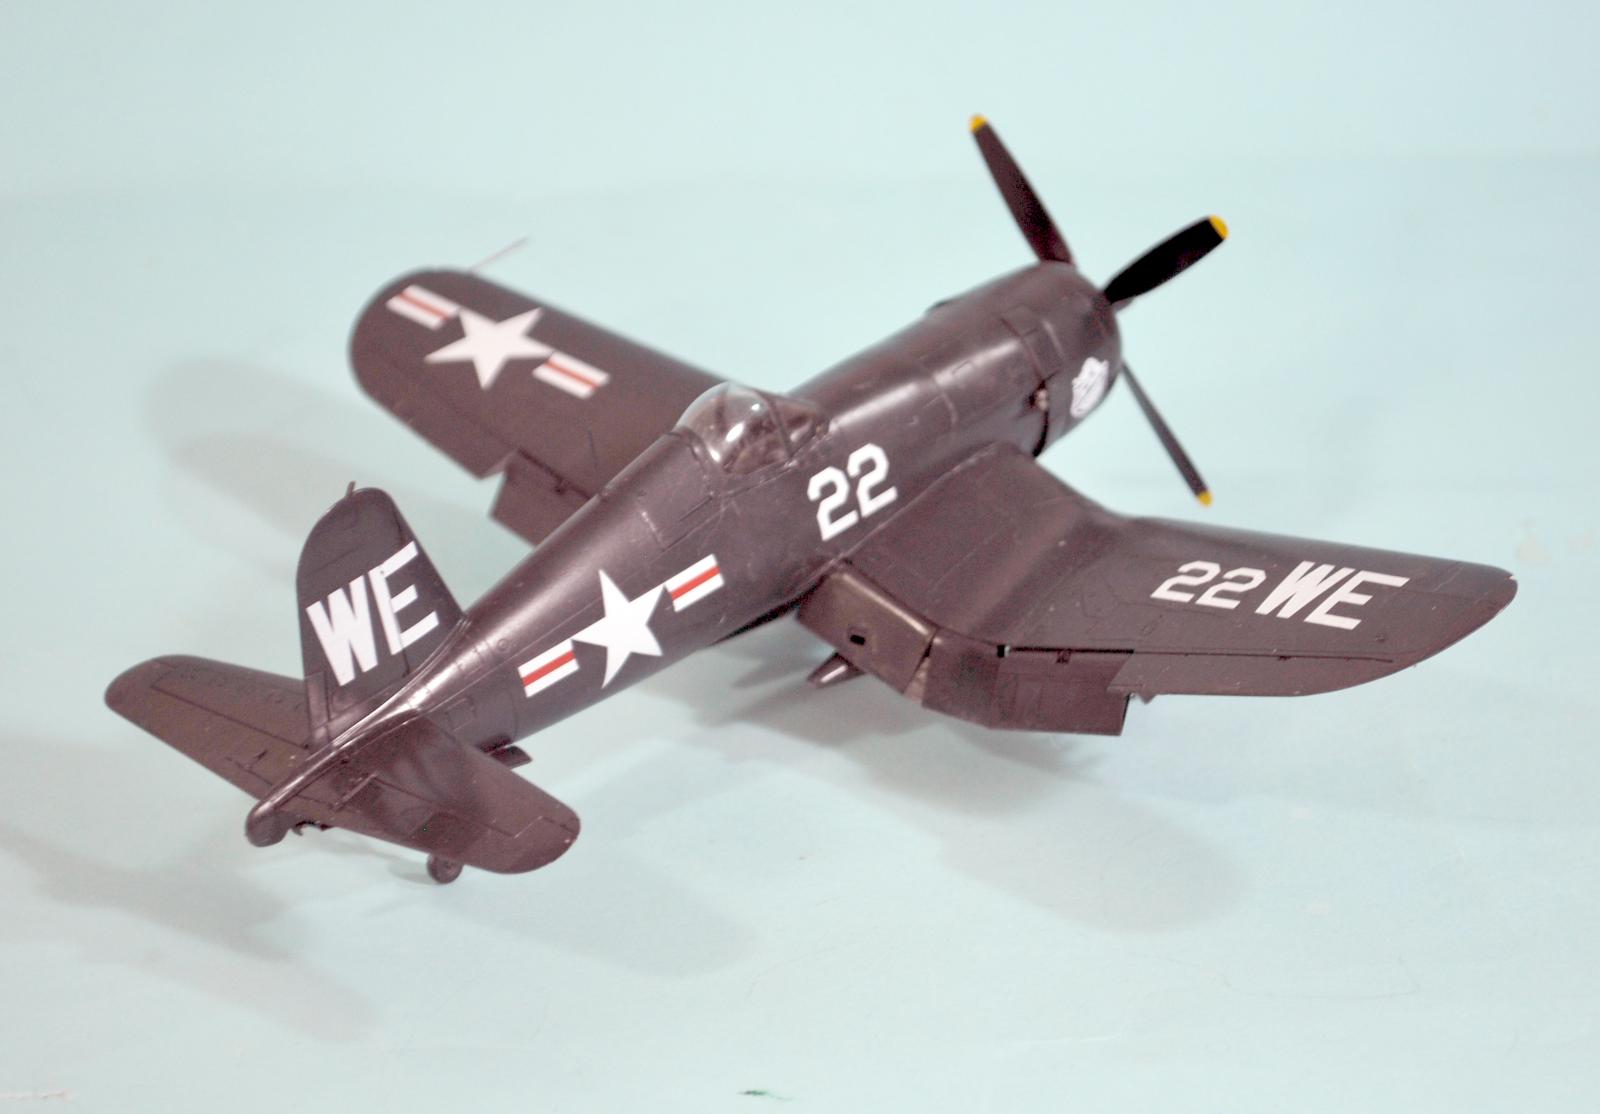
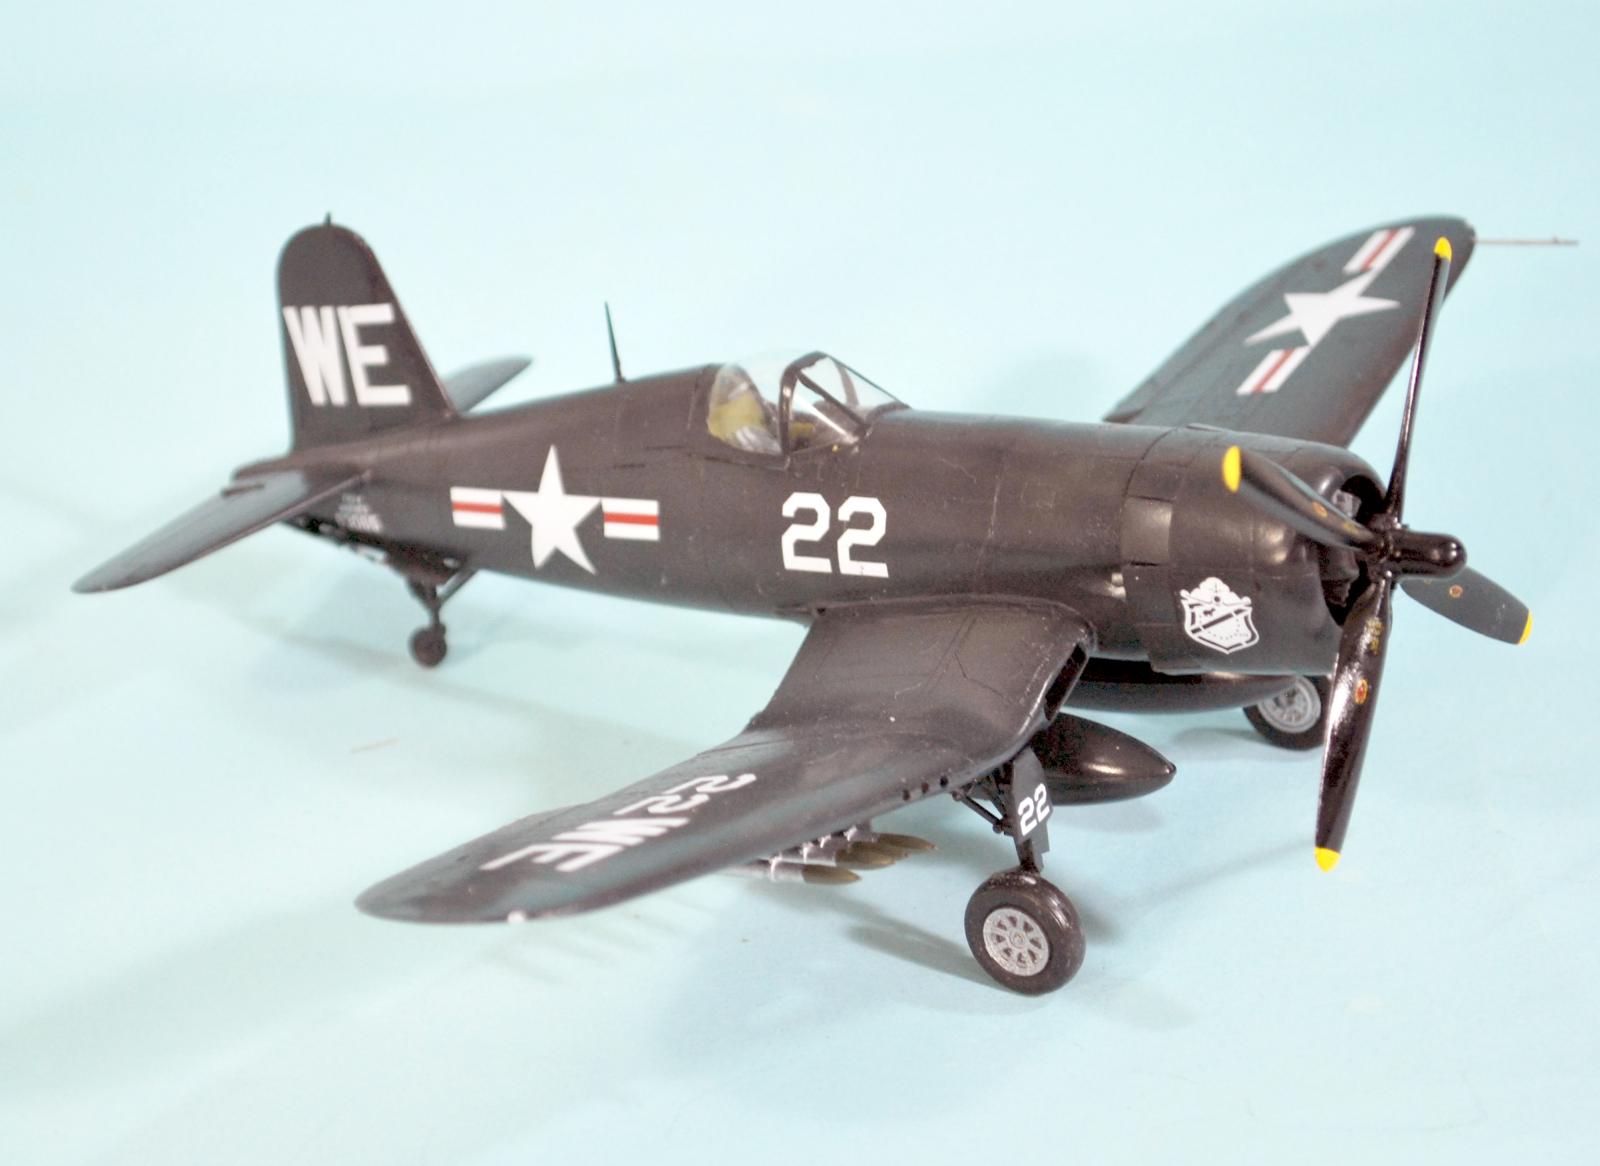
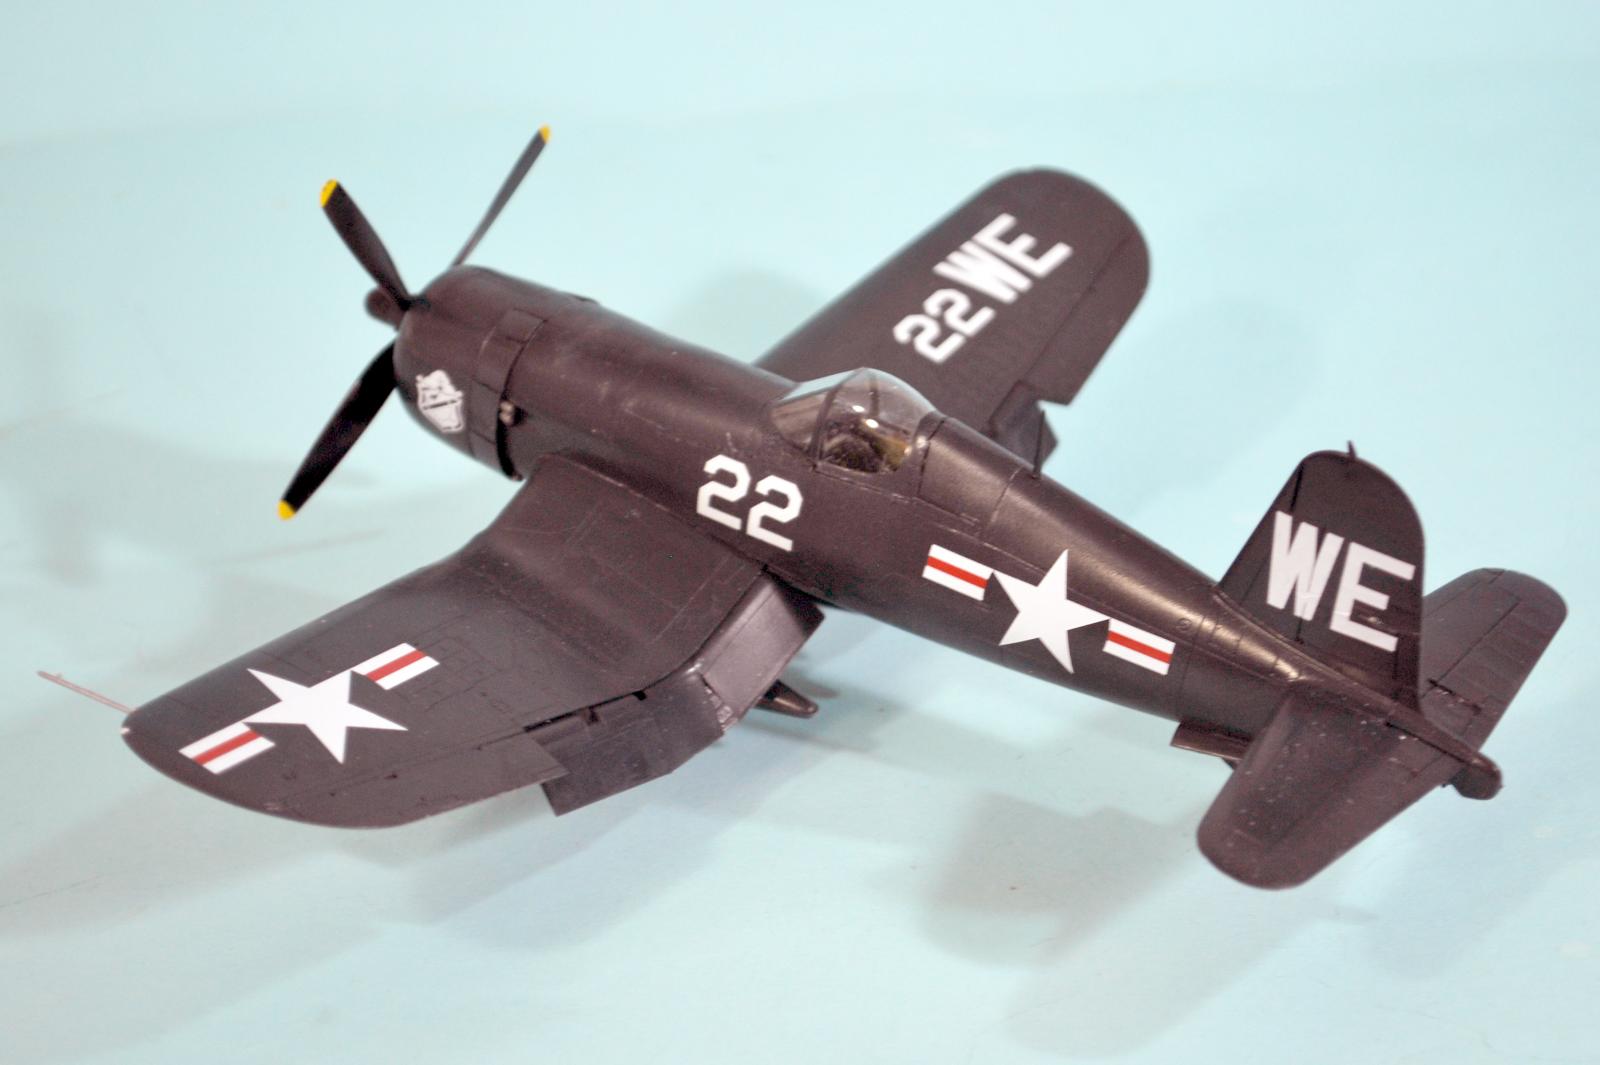
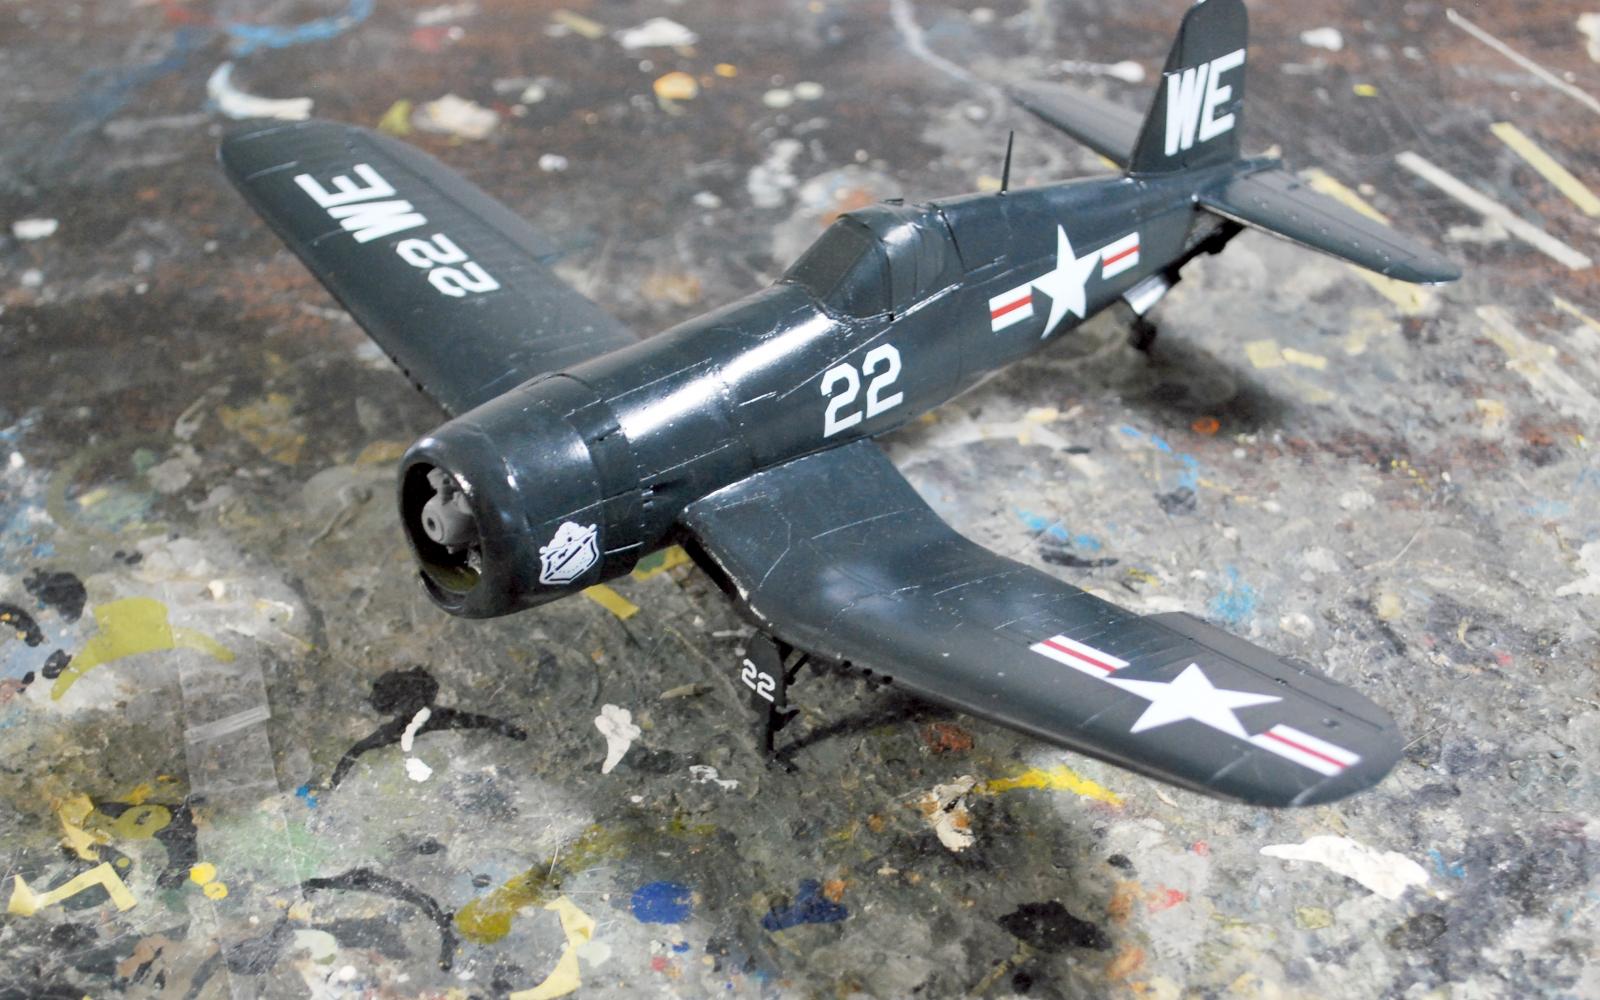
Recently, the question “Will there ever be an accurate F4U-4?” started going around sites on the net. I discovered Special Hobby still has the CMK conversion set in stock. In anticipation of its arrival, I found a Tamiya F4U-1D at Amazon for $25 with free delivery for Prime members and grabbed it. I dropped by Dave's site and picked up one of his F4U-4 sheets which has a Corsair flown during the opening of the Korean War and the Chosin Campaign by VMF-214 “Blacksheep.”
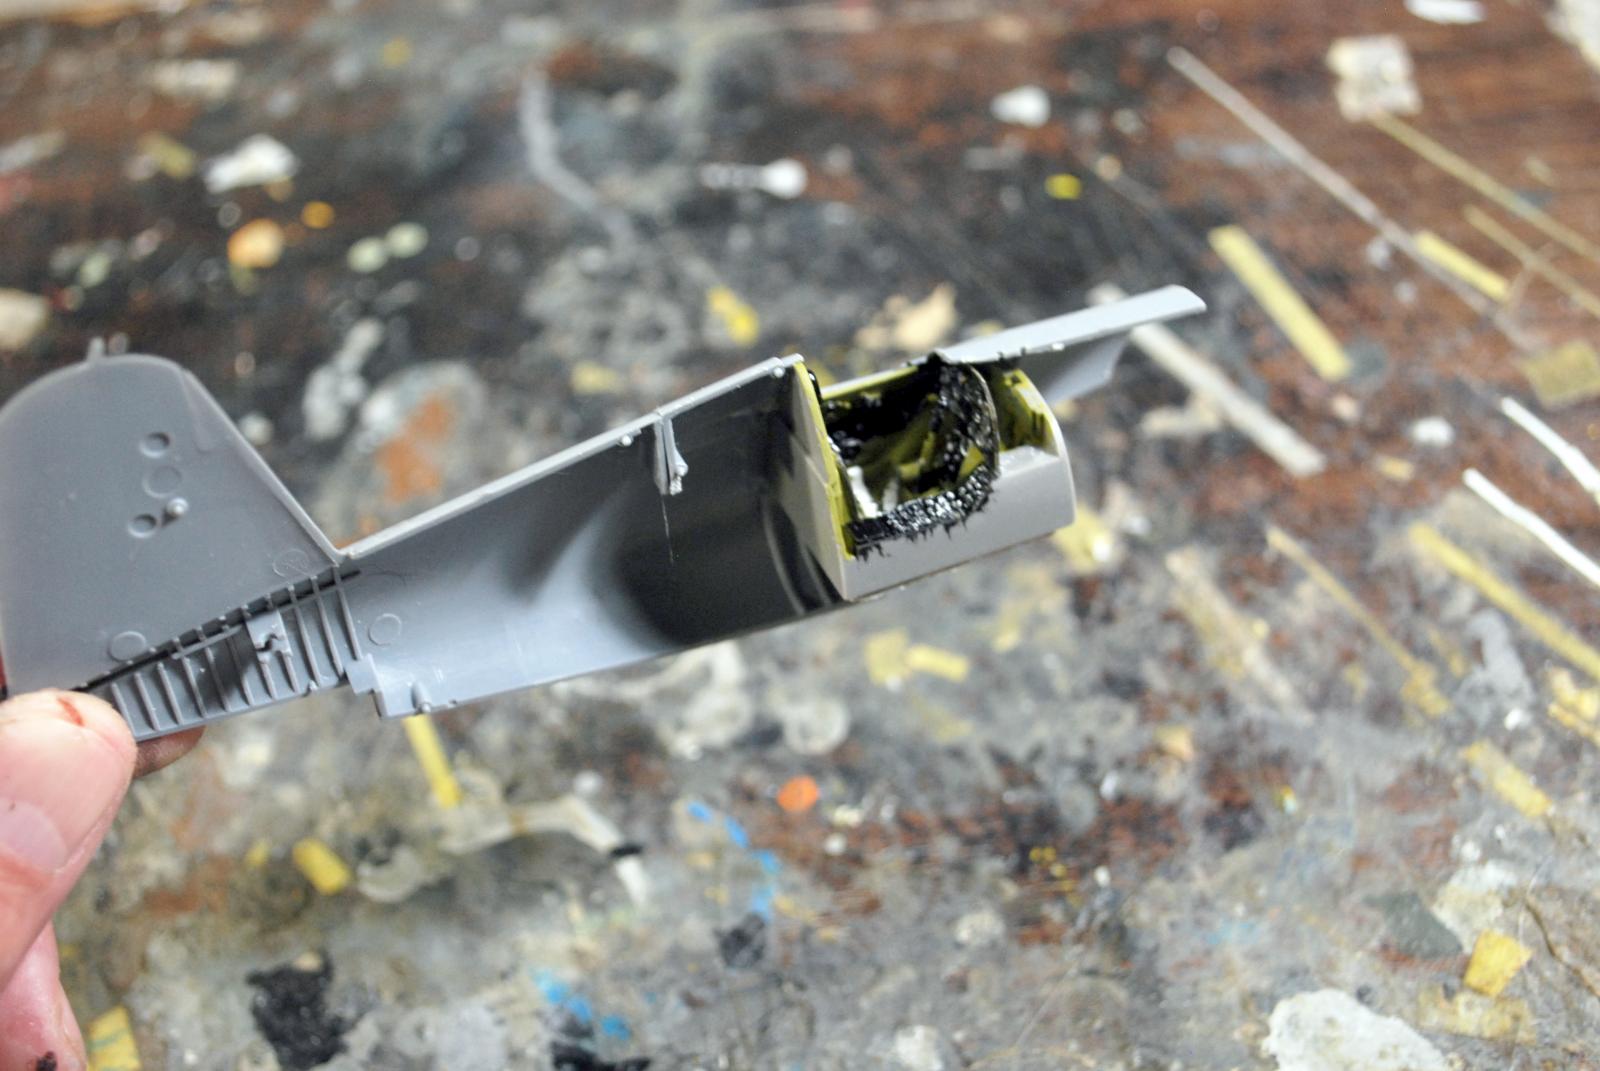
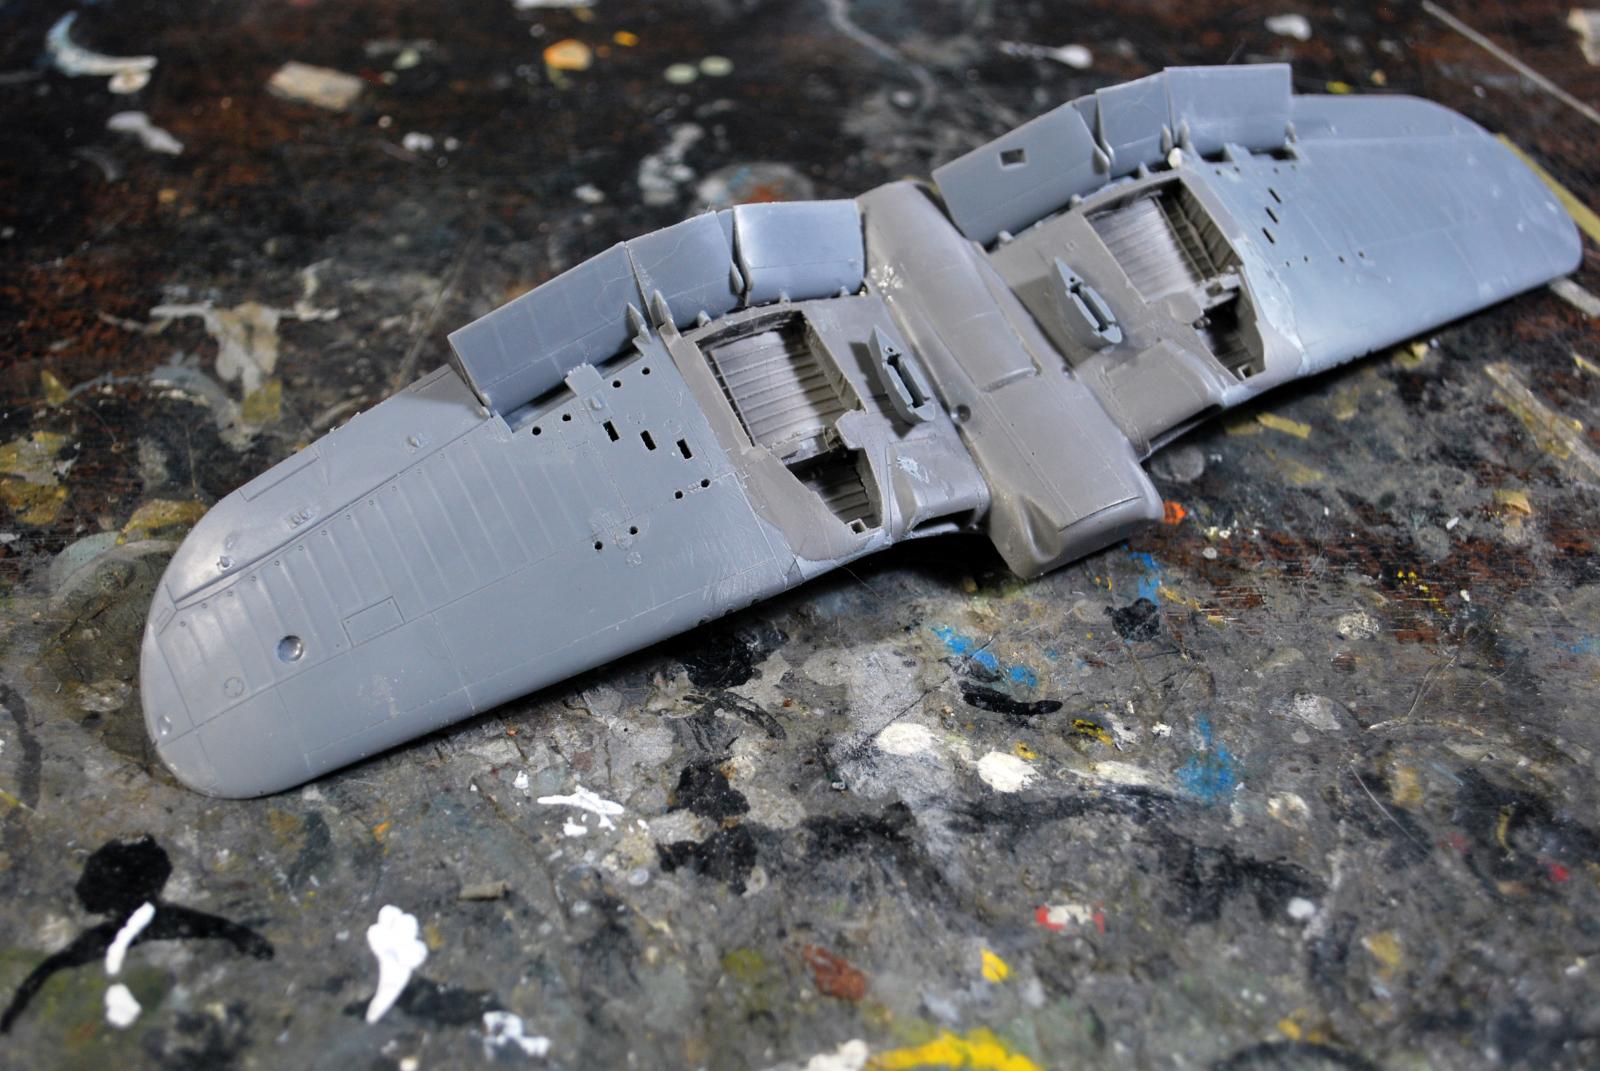
Once the set arrived, I took a long look at it after I separated the parts from their molding blocks, and it suddenly dawned on me how to assemble the wing and get the result one normally gets with a Tamiya Corsair: do some cutting and filing of the resin interior of the lower center wing/fuselage part, to allow installation of the Tamiya wing spar part, suitably modified. With that, the whole project becomes relatively simple.
The main “secret” to doing this conversion is to fix the spar of the Tamiya kit so the wing is secure, and after that everything is just part of the process of doing a standard resin conversion.
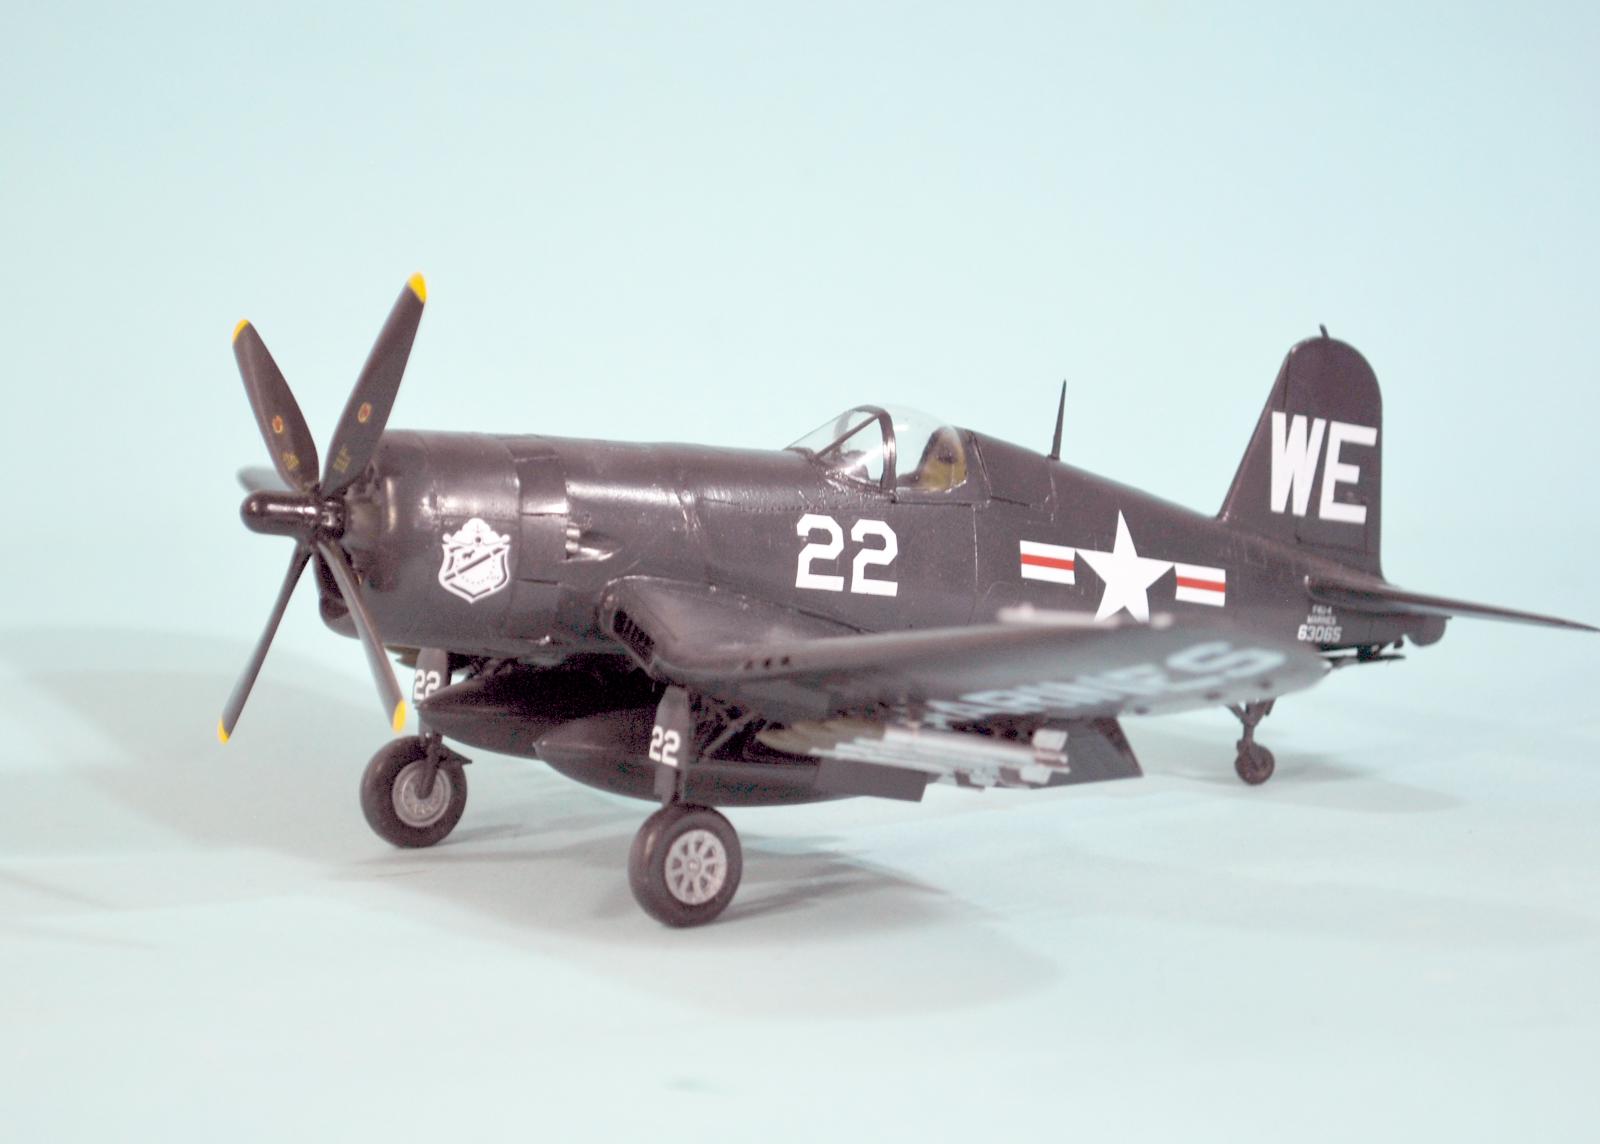
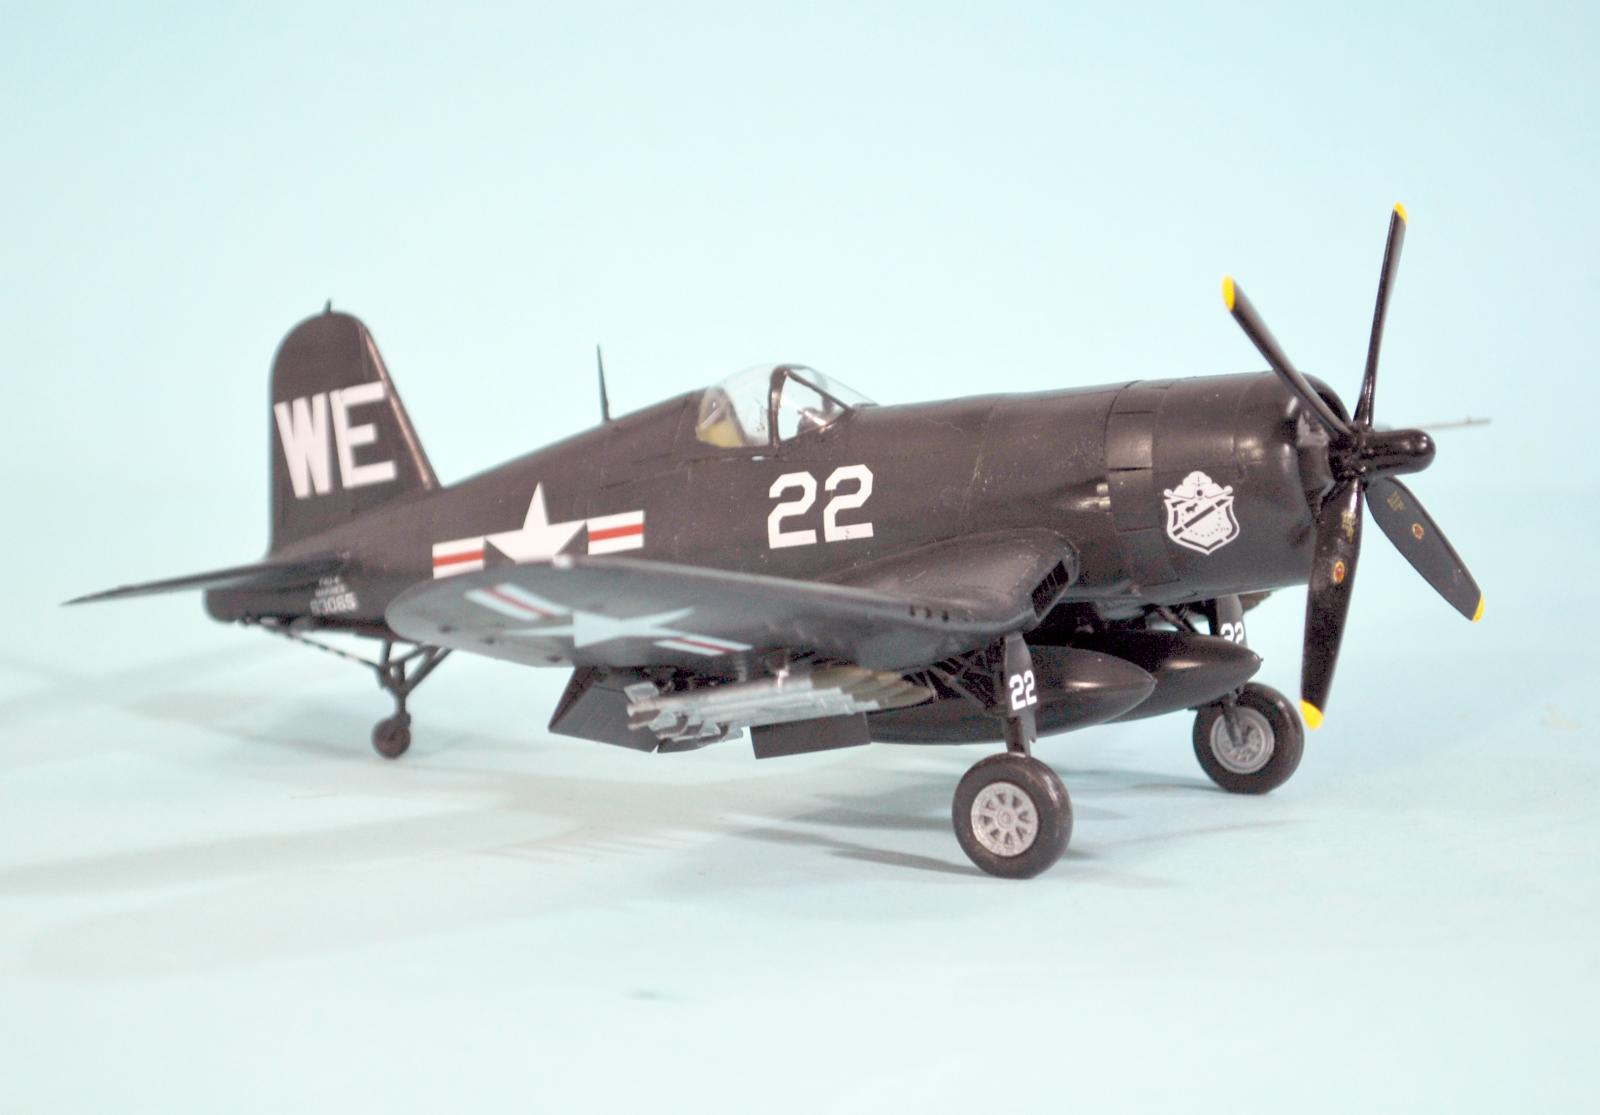
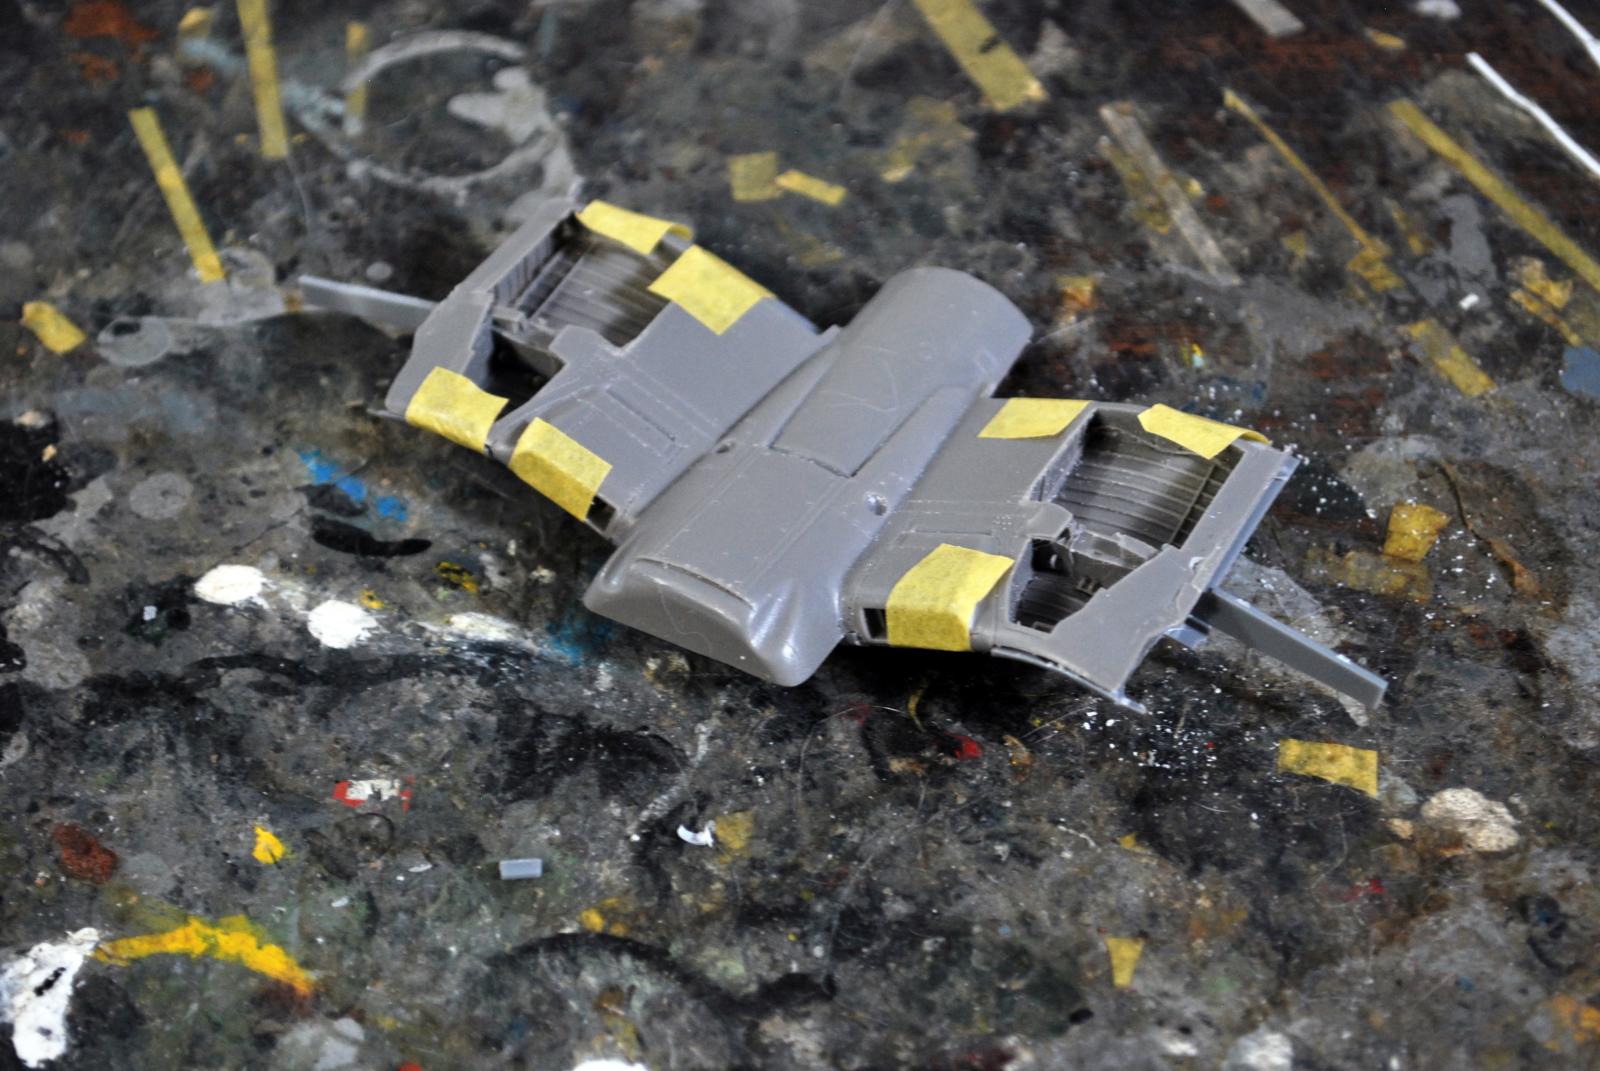
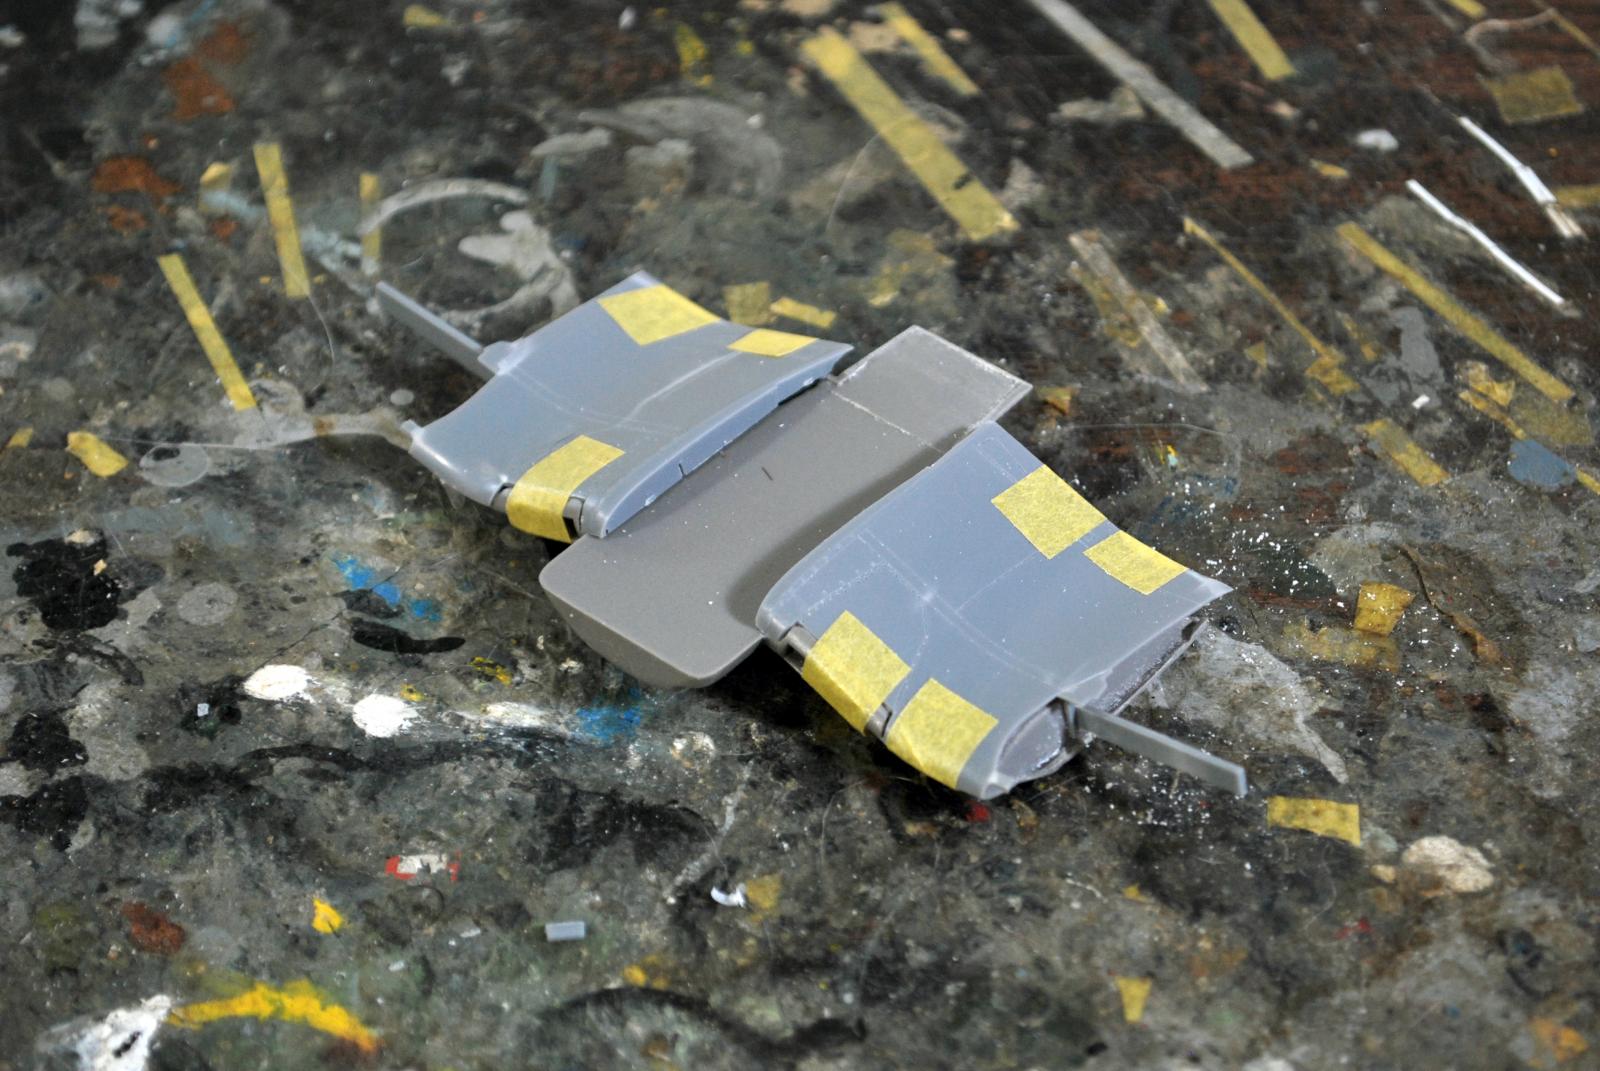
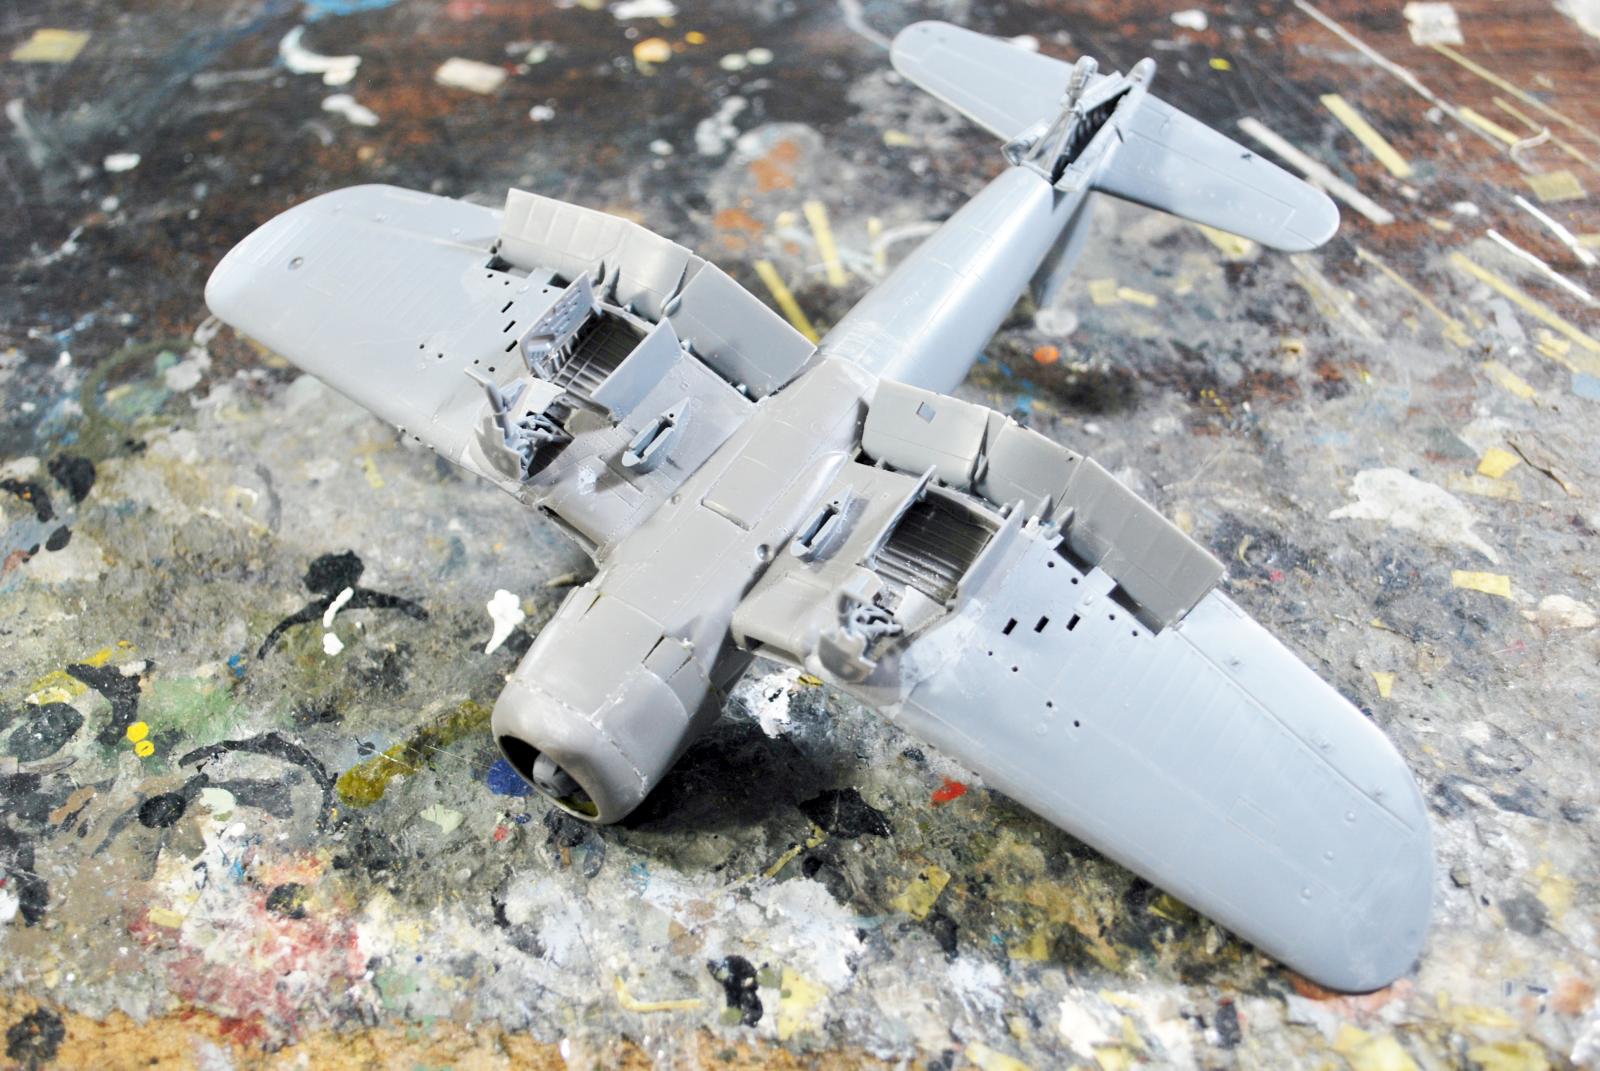
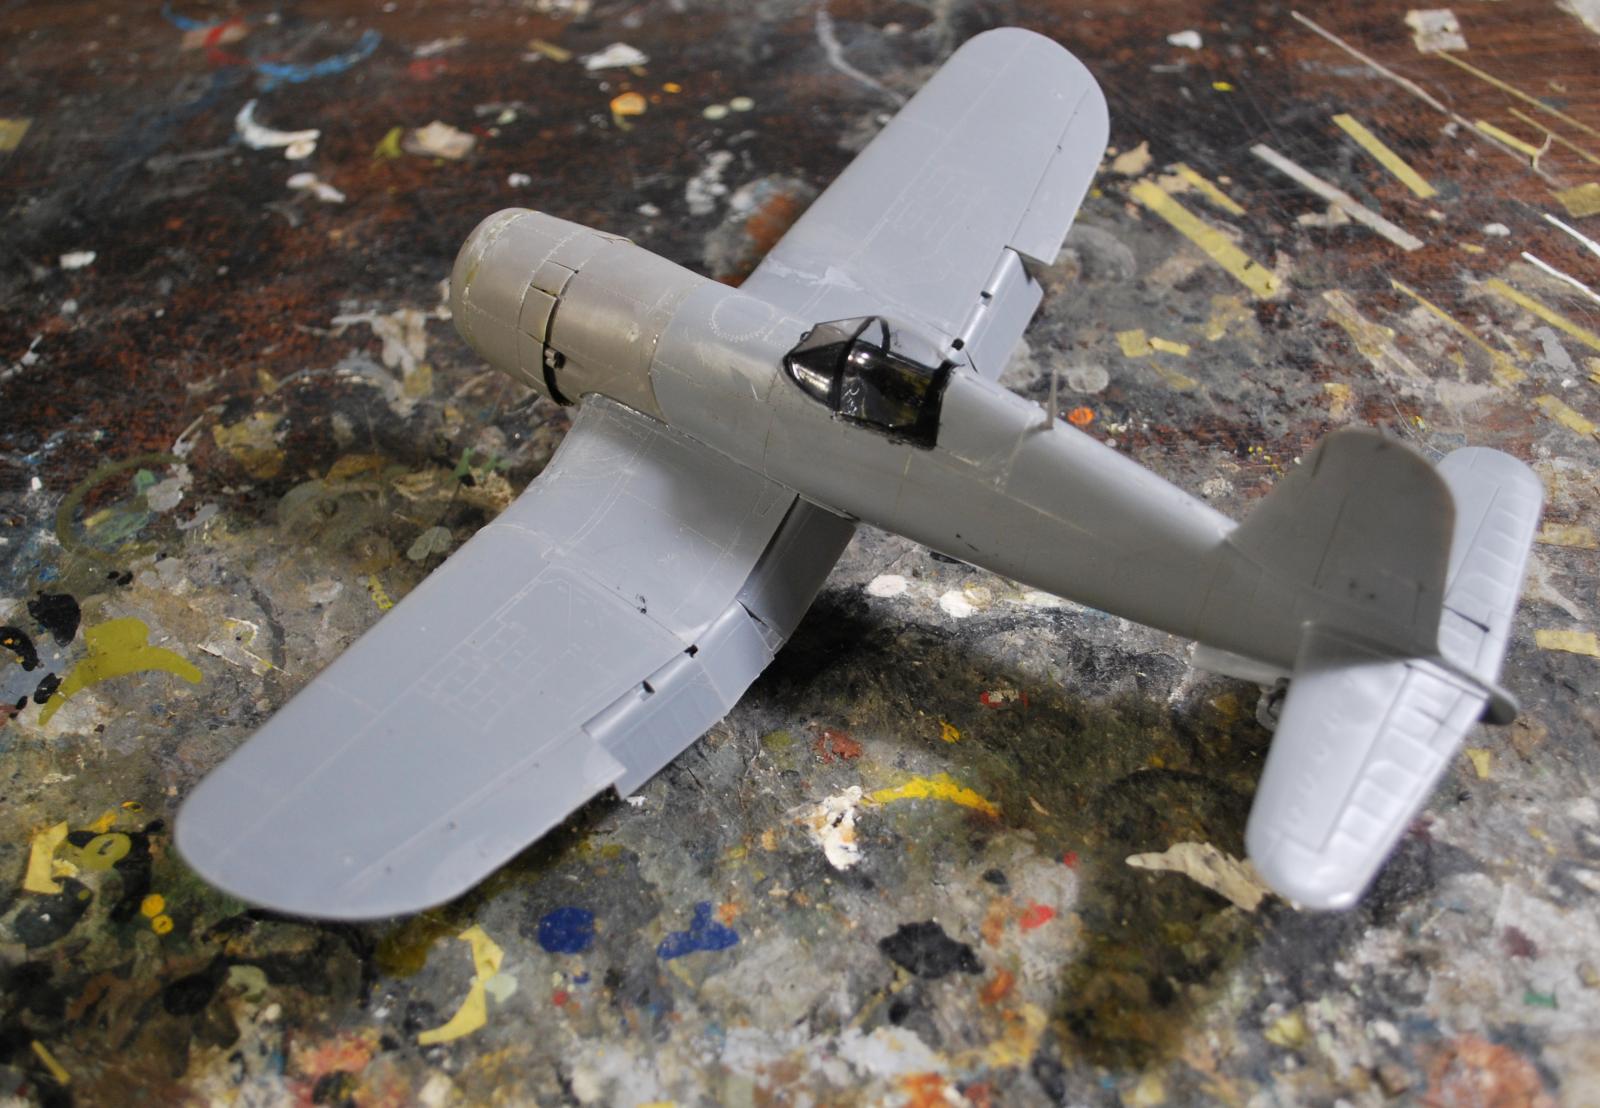
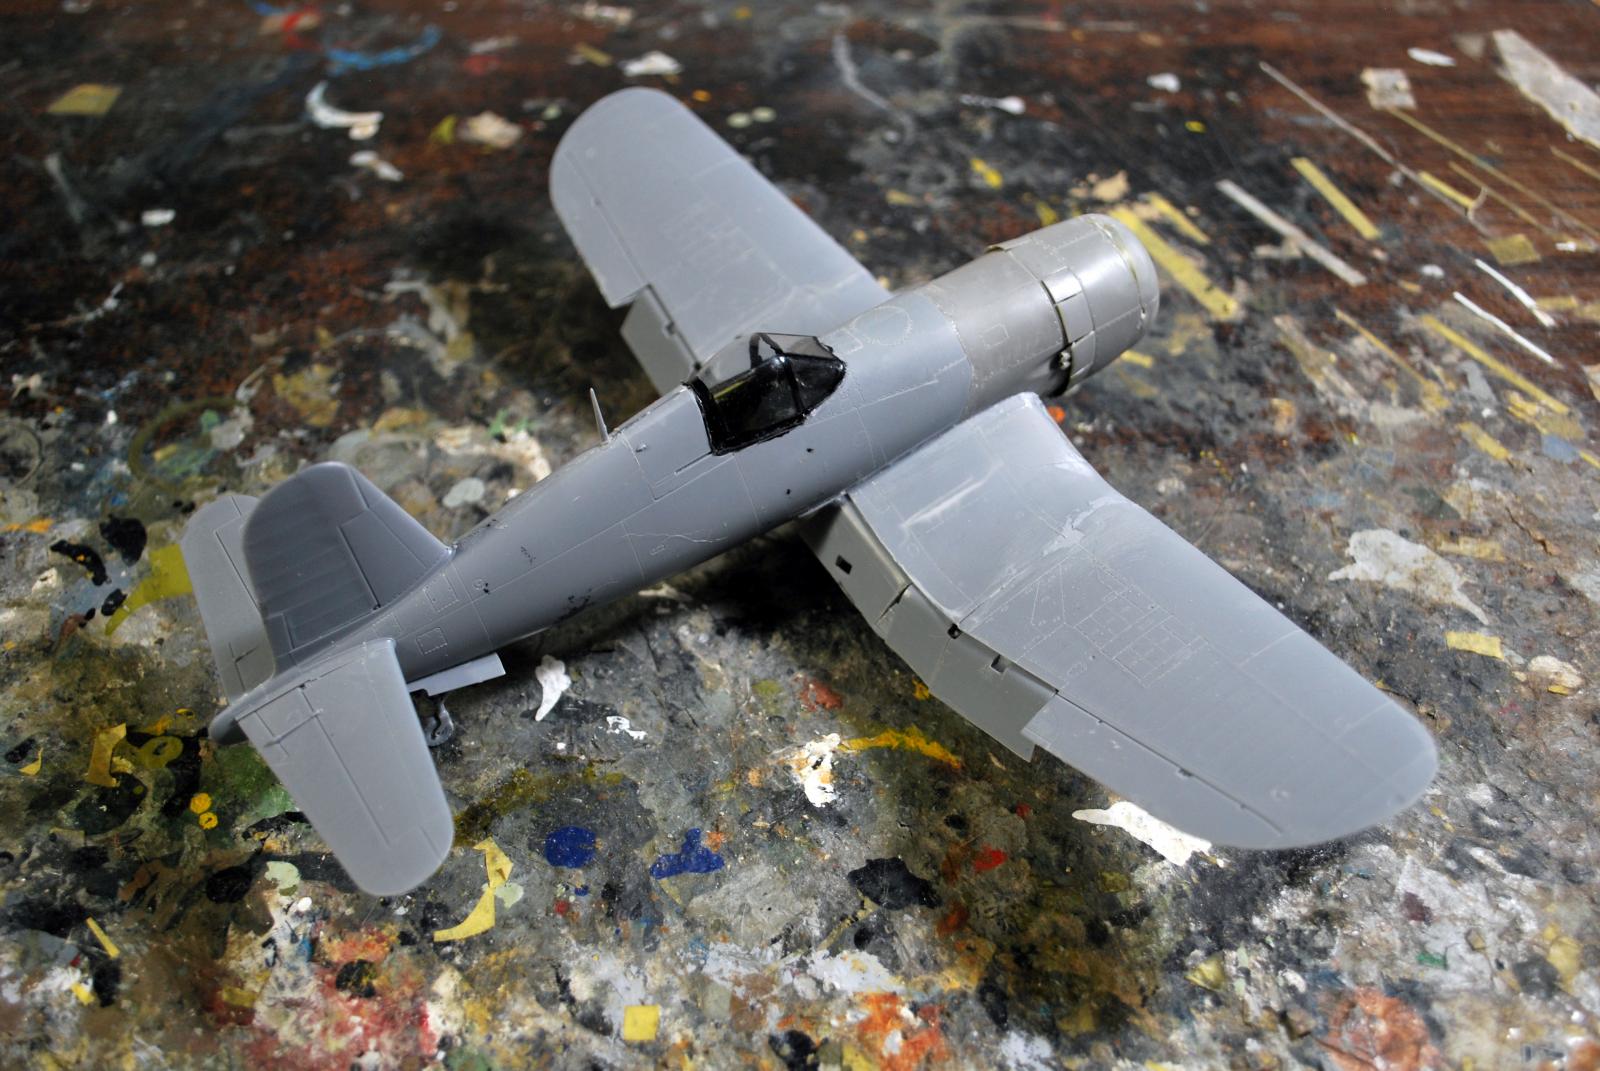
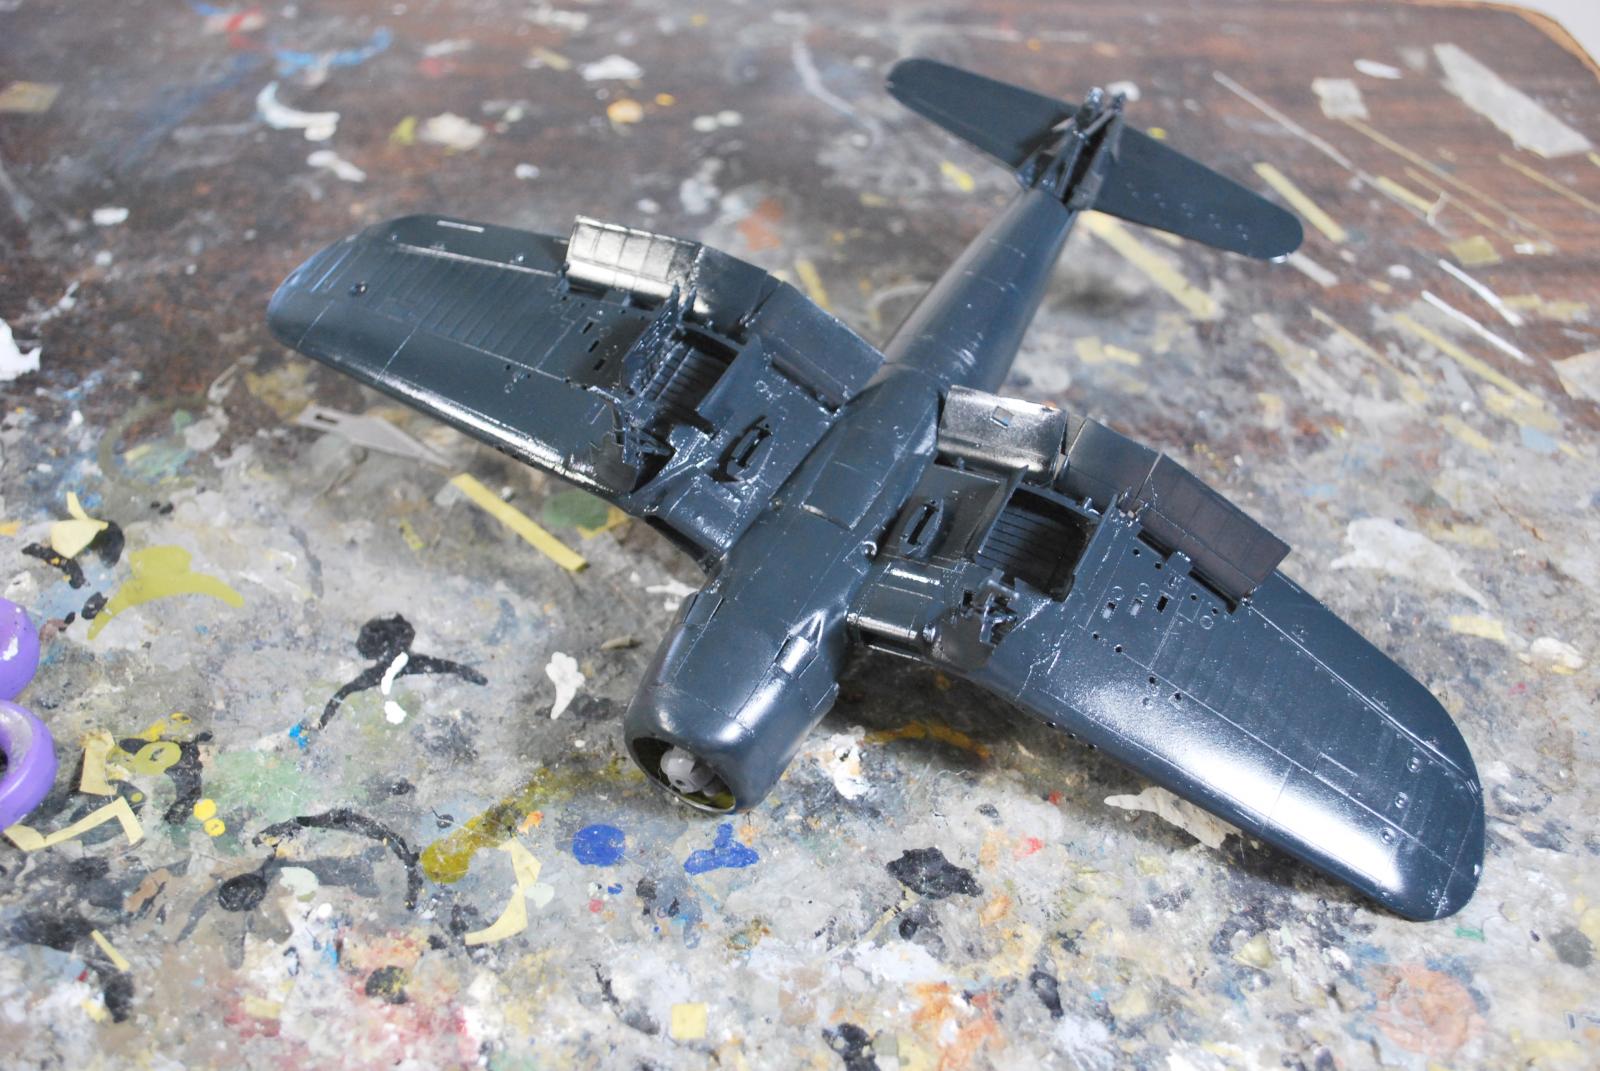
Once the interior of the inner upper wing parts have had the interior moldings dremeled off, you need to do a bit of test-fitting and dremel the resin part around the edges to get a good fit. I then filed an attachment point for the spar into the resin interior of the lower wing conversion part and glued the spar in with epoxy. I then glued the upper wing parts to the conversion part. The outer wings slid on and were easily positioned. I then epoxied the outer wing to the spar, and glued the edges of the inner and outer wings together with cyanoacrylate. I had a good solid wing. I also measured and attached the underwing center pylons and drilled out the holes for the rockets. I used rockets from the Eduard P-51 kit.
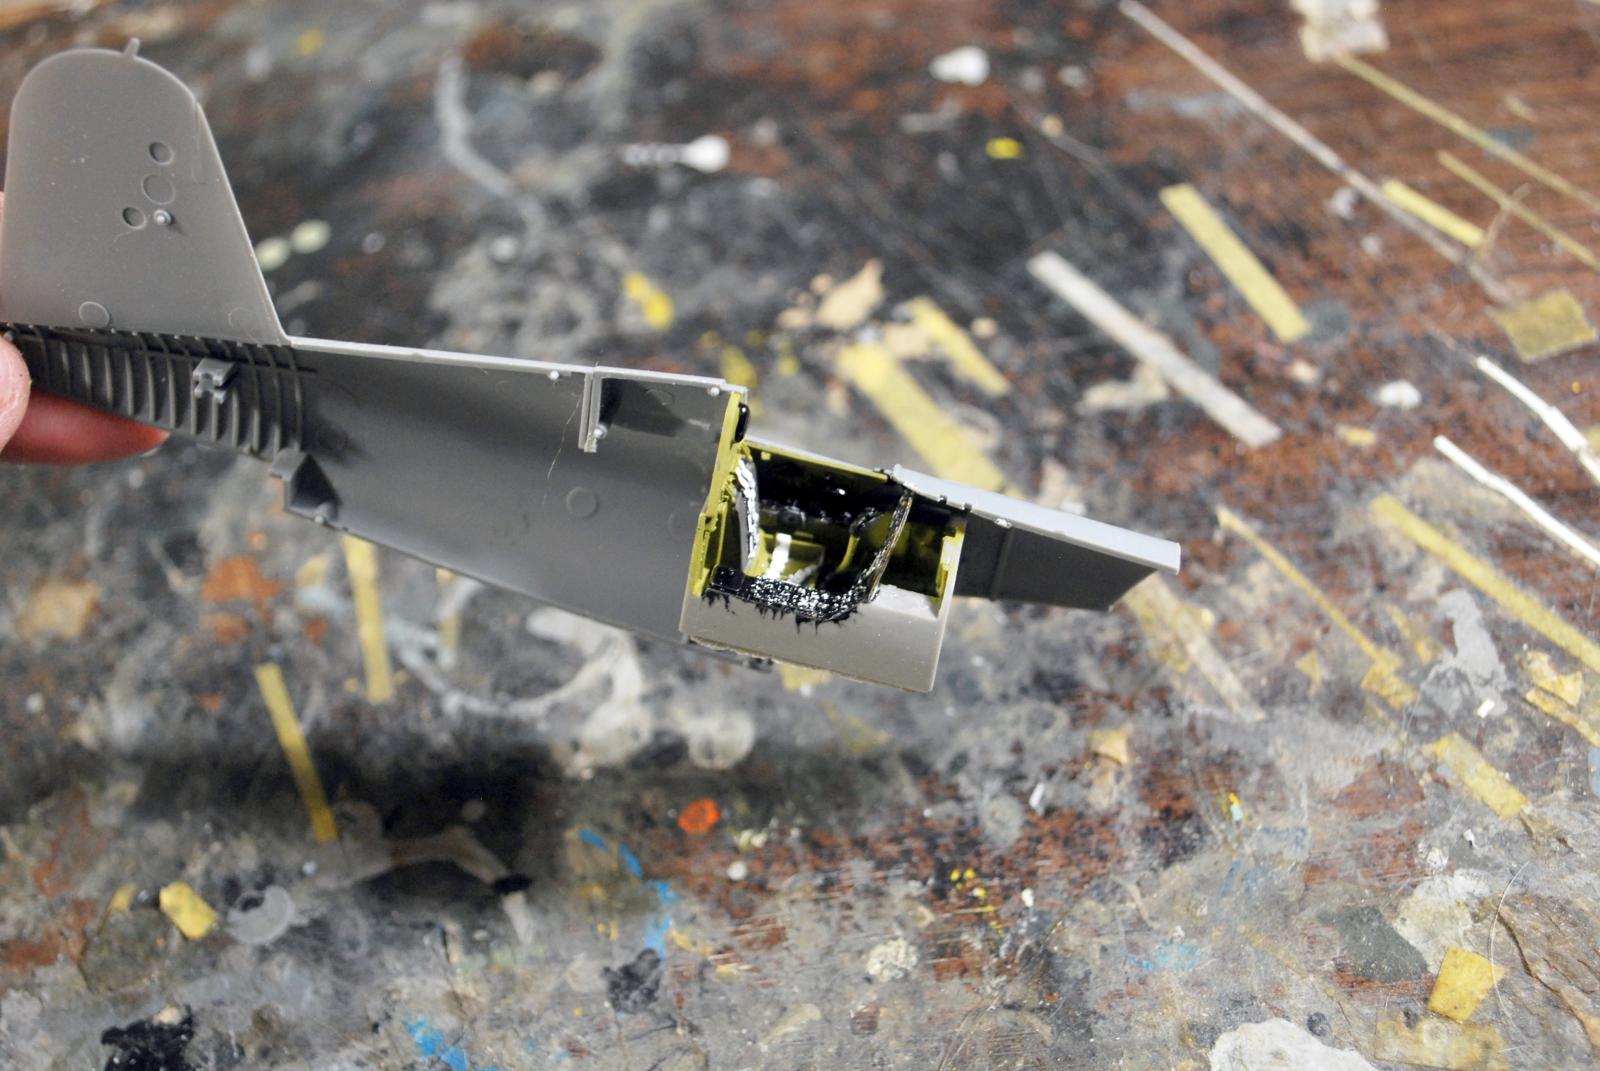
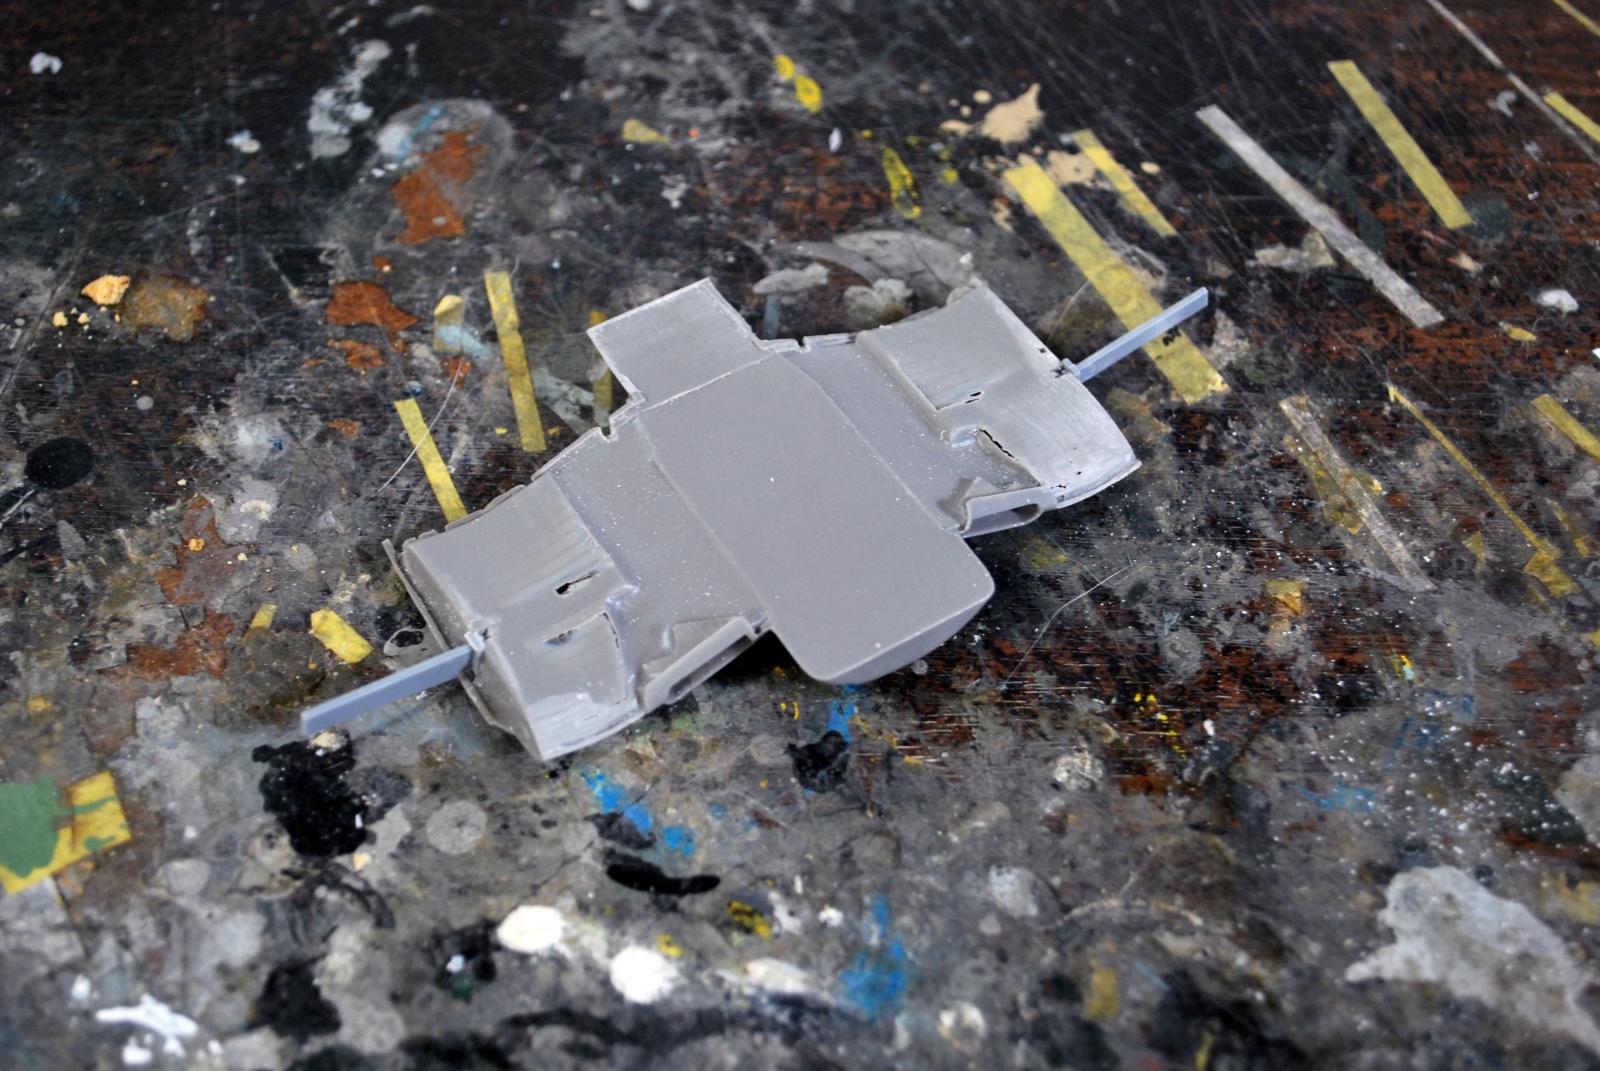
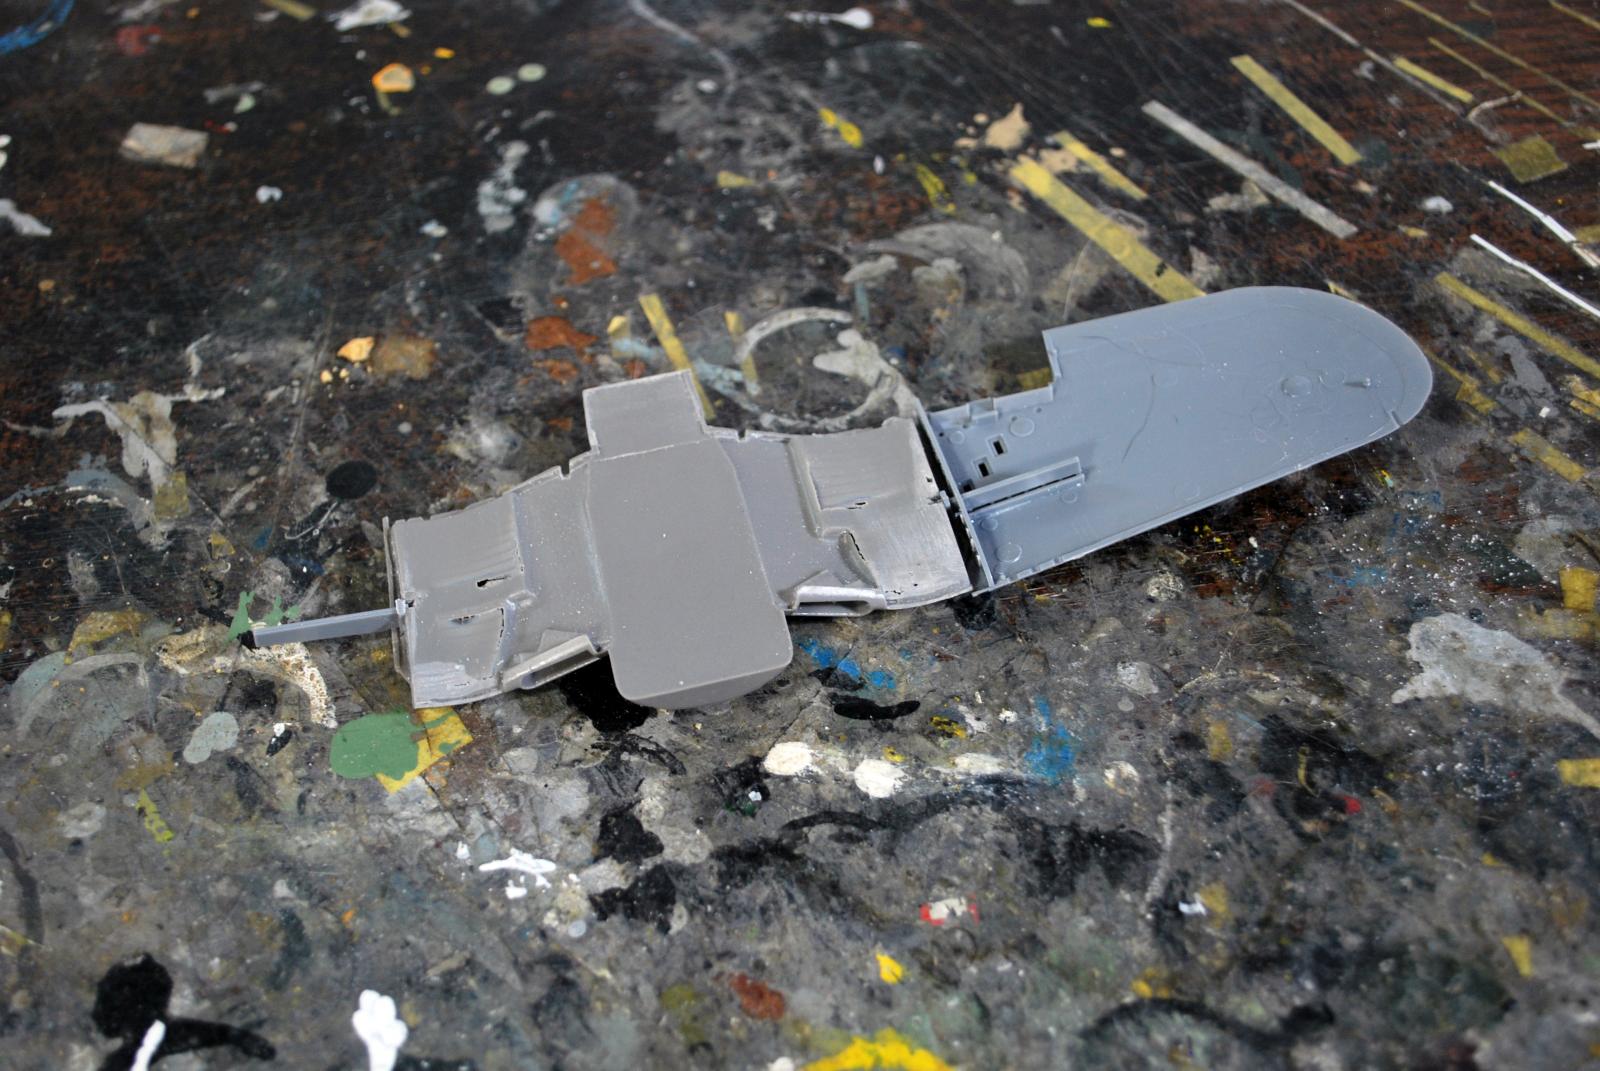
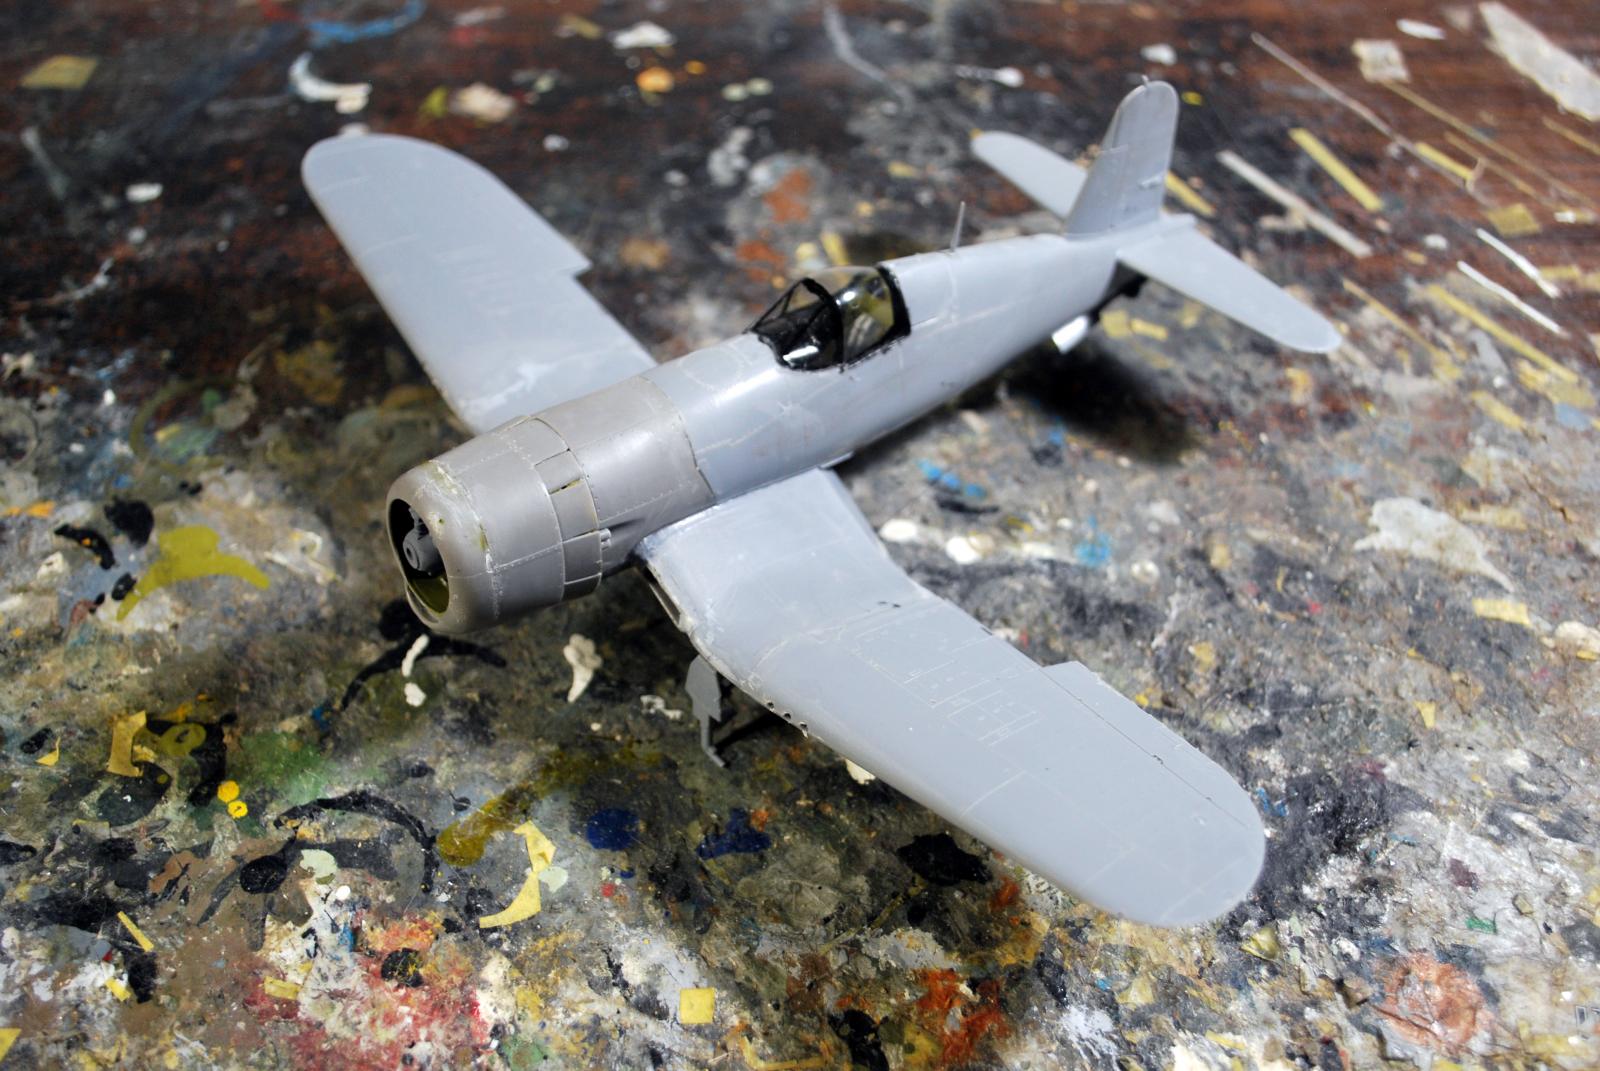
The forward fuselage conversion part fits along a panel line, which makes modifying the fuselage easy. You need to dremel out the interior molding of the cockpit area of the fuselage to allow mounting of the resin cockpit; none of this is difficult.
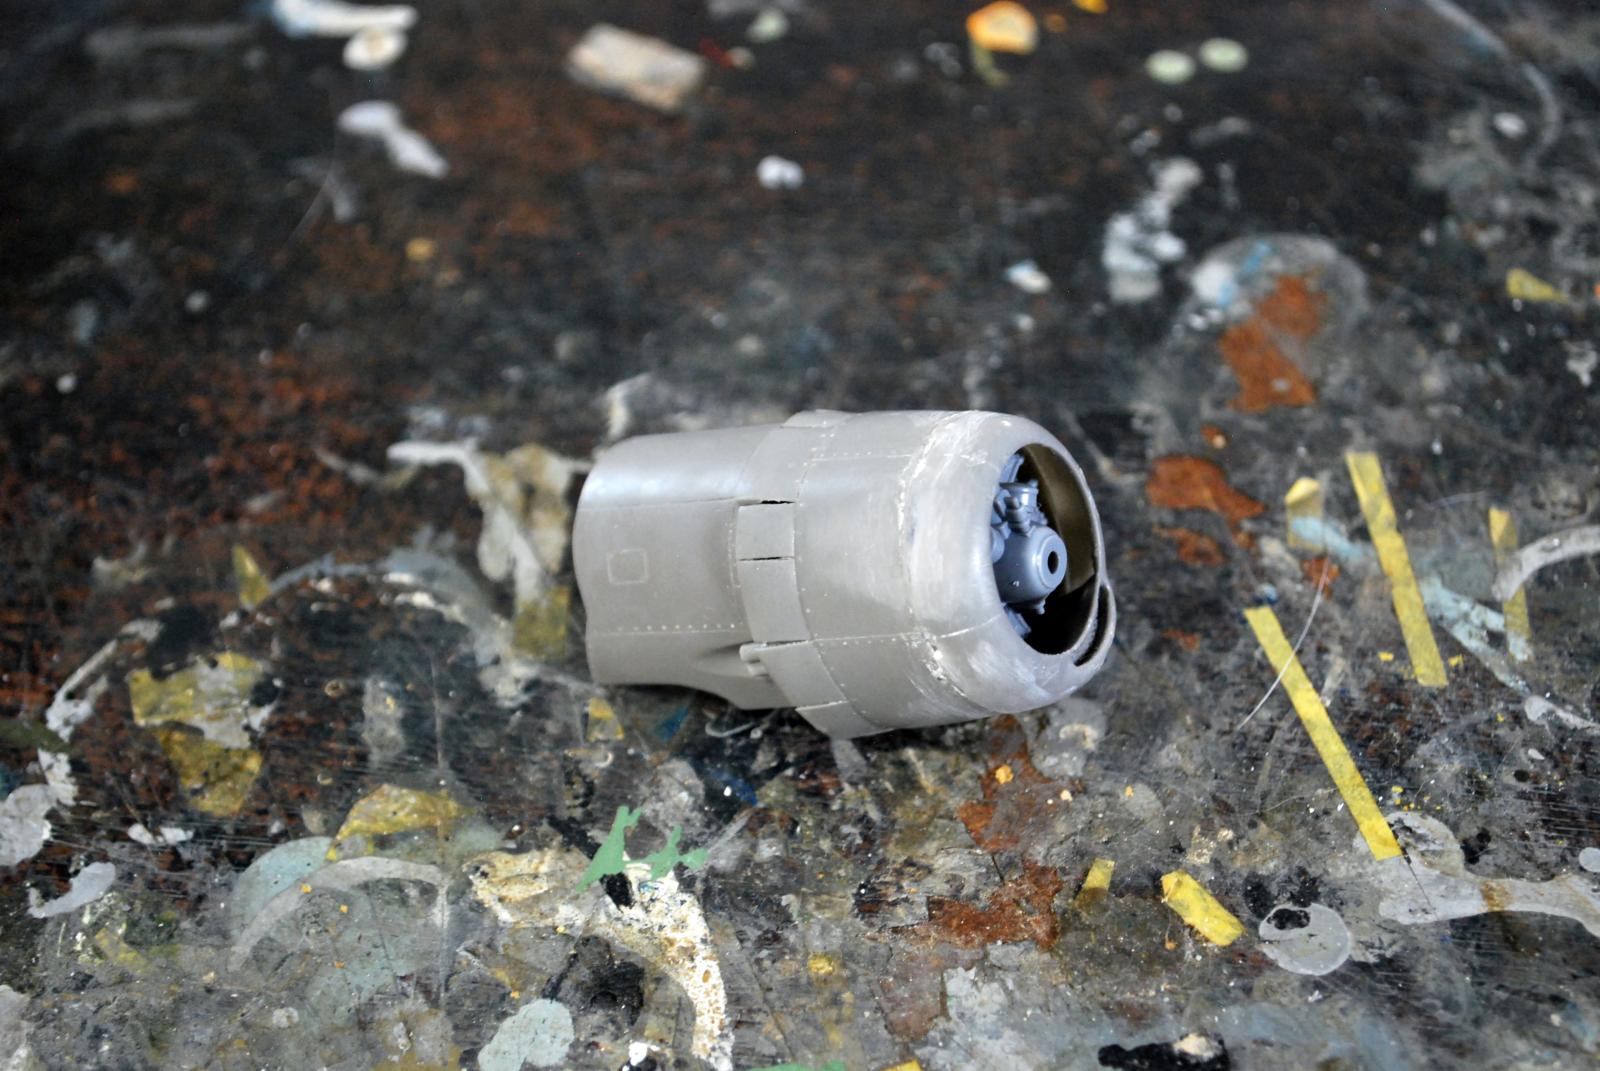
The two-piece resin cowling is iffy, because it is very thin. The first thing I did was glue those parts together. I attached them at the wide area associated with the intake on the lower cowling, then worked around the rest of the attachment, applying a bit of CA glue, holding the parts in proper position to each other, and hitting that with Zap kicker to speed up holding, after which I sanded that area smooth with several increasing fine-grit sanding sticks. Done right, the cowling easily fits around the kit engine and easily attaches correctly to the forward fuselage resin parts.
I painted the resin cockpit and installed it in the left fuselage half, then assembled the fuselage and attached the resin forward fuselage conversion part. I then attached the fuselage to the wing. Gluing began at the rear, letting that set up, then at the front and letting that set up, then filling gaps along the upper wing-fuselage join, then sanding everything down smooth, then rescribing. There was minimal sanding to get a smooth join between the resin forward fuselage and the kit fuselage, as well as the lower rear fuselage-wing joint. I then attached the flaps.
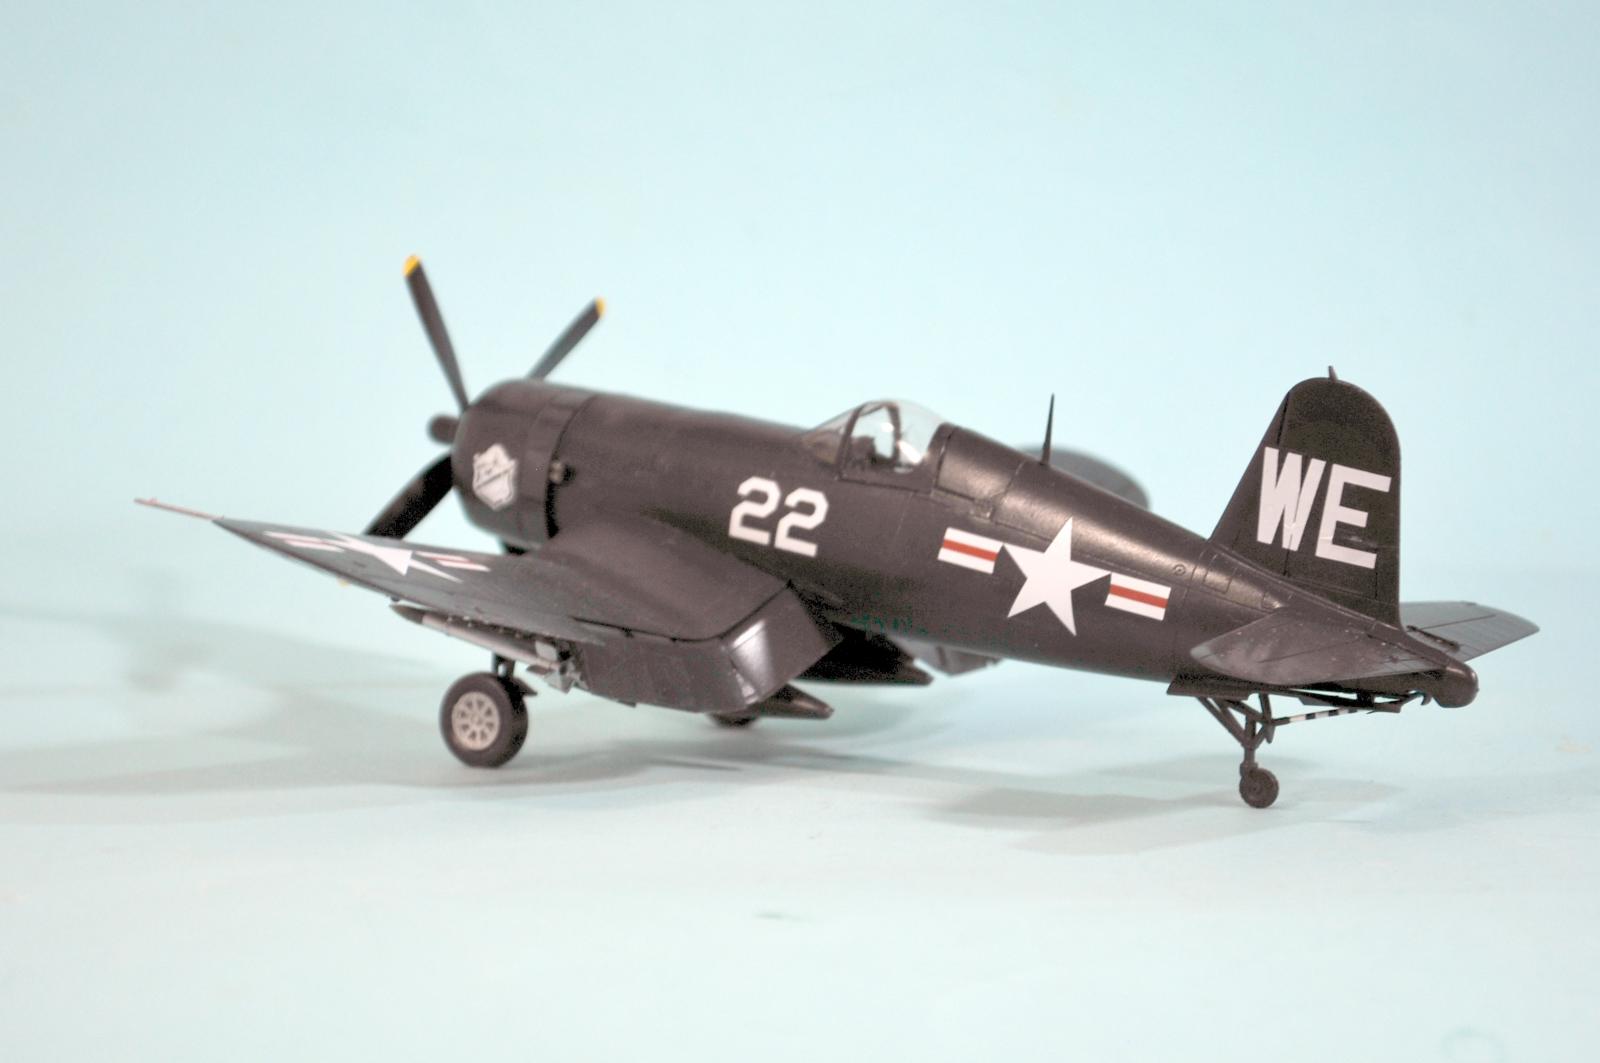
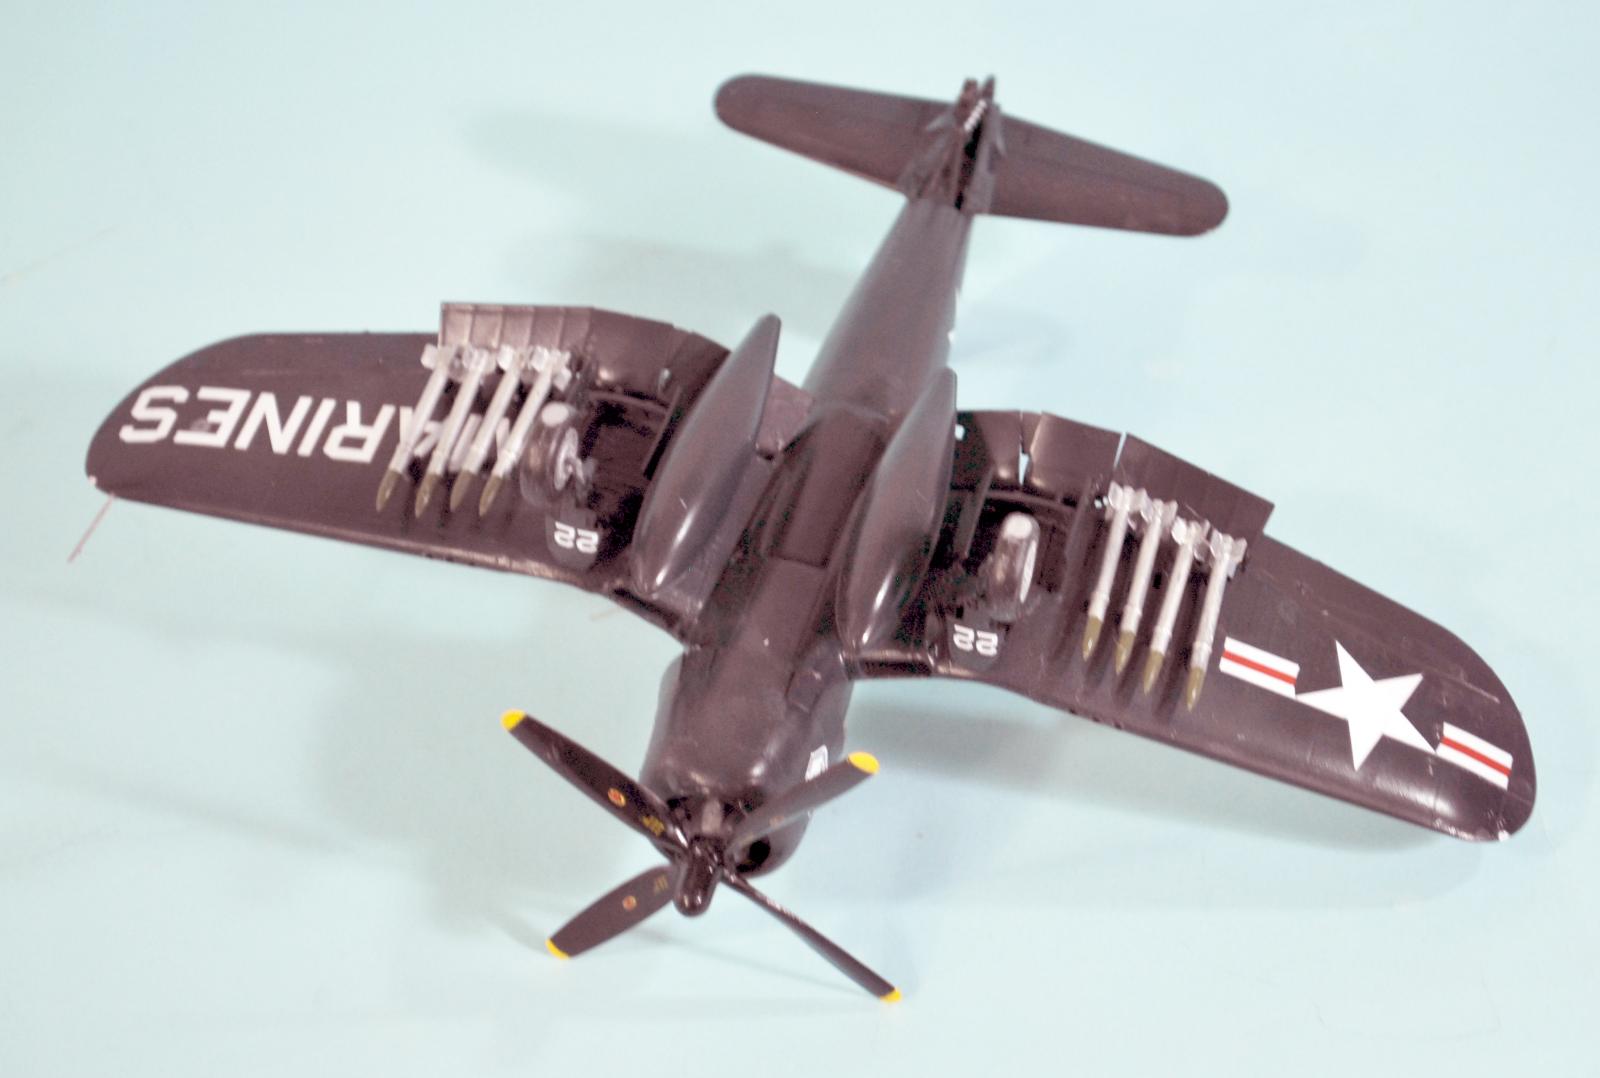
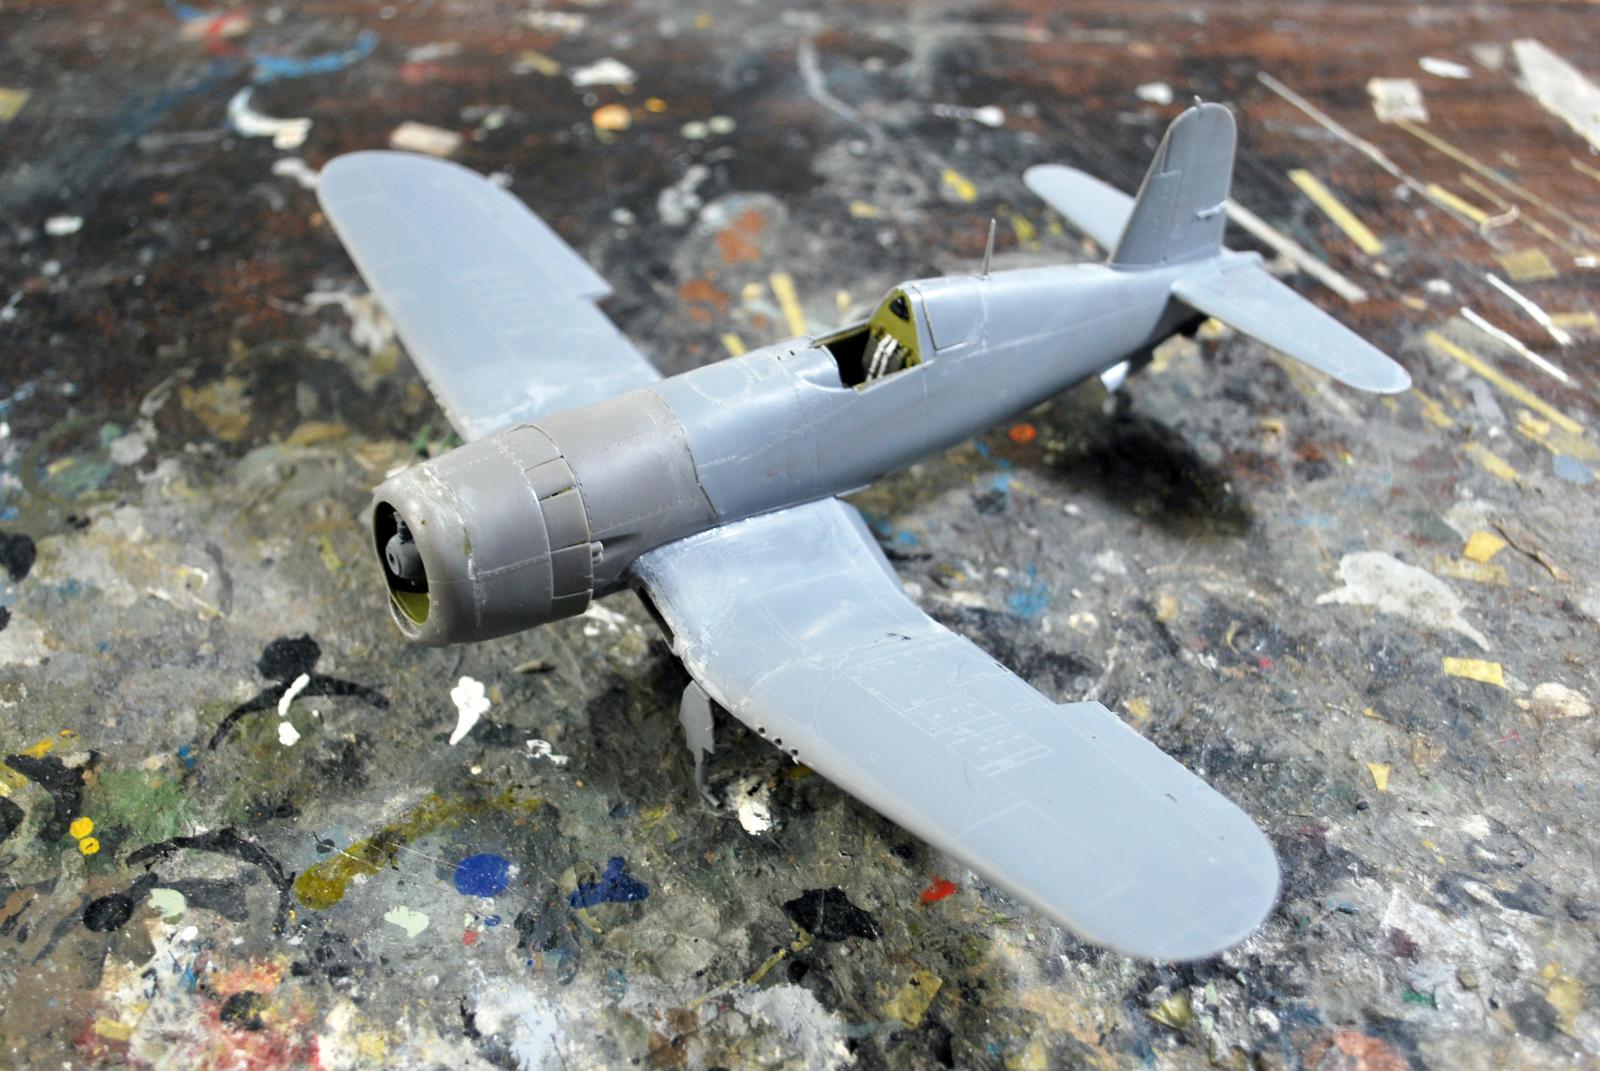
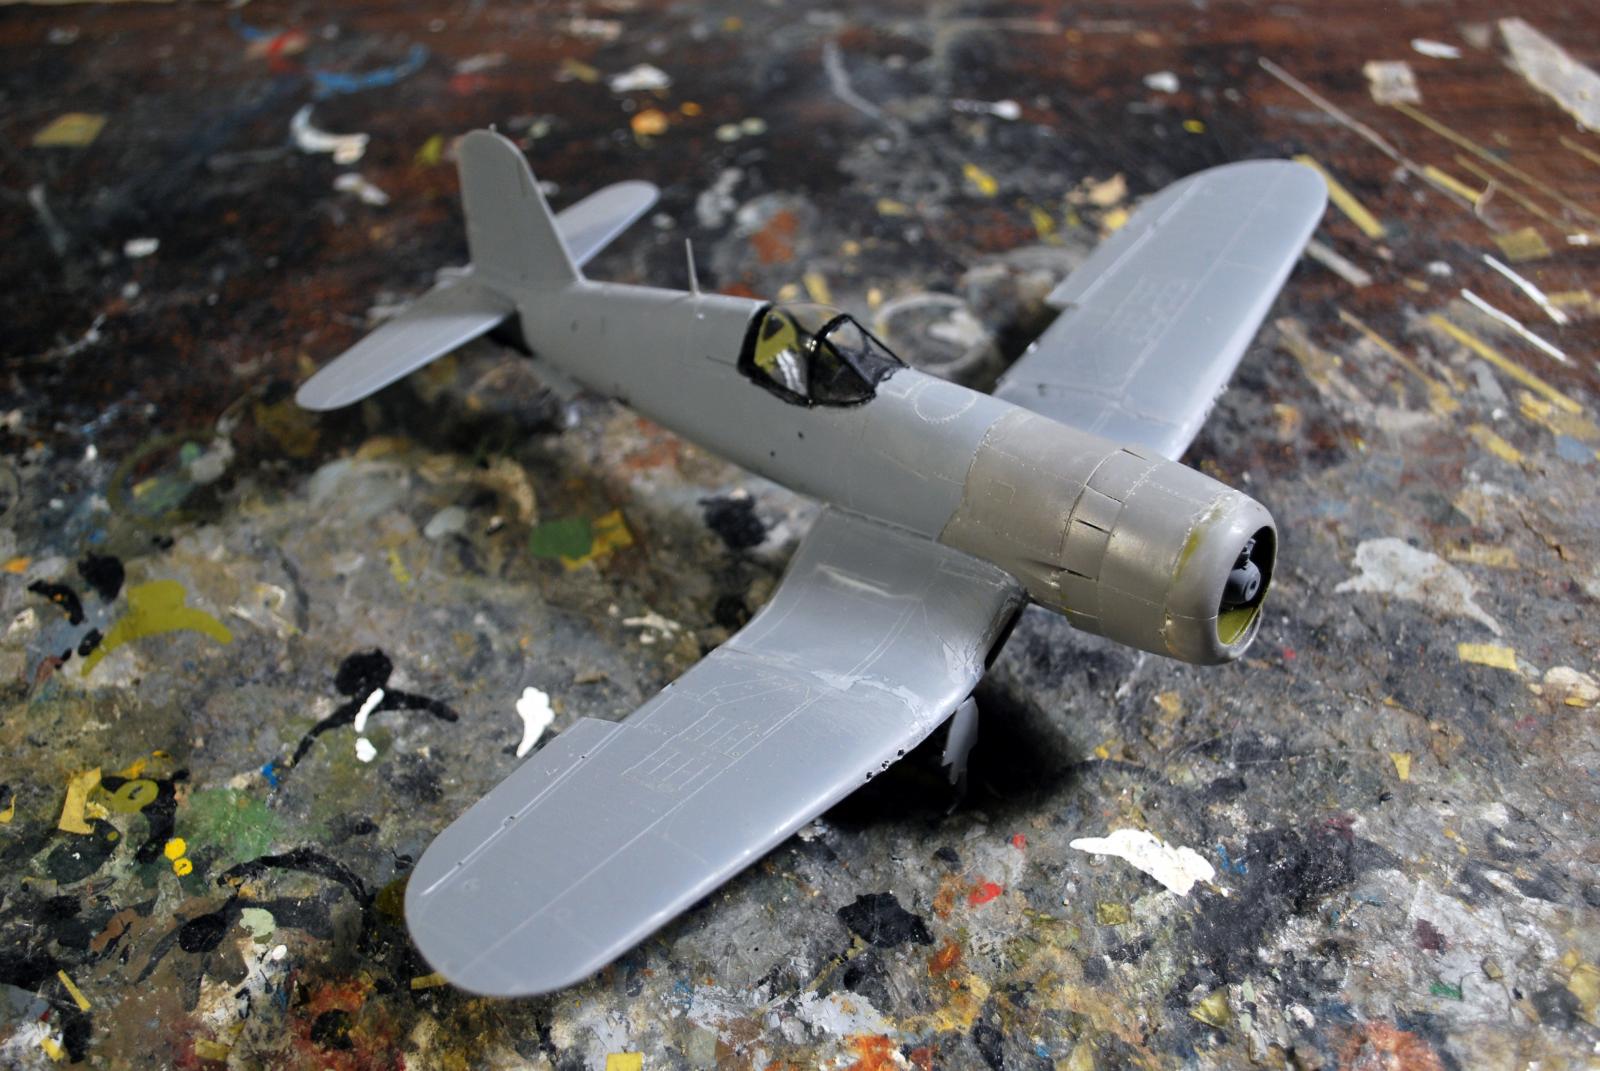
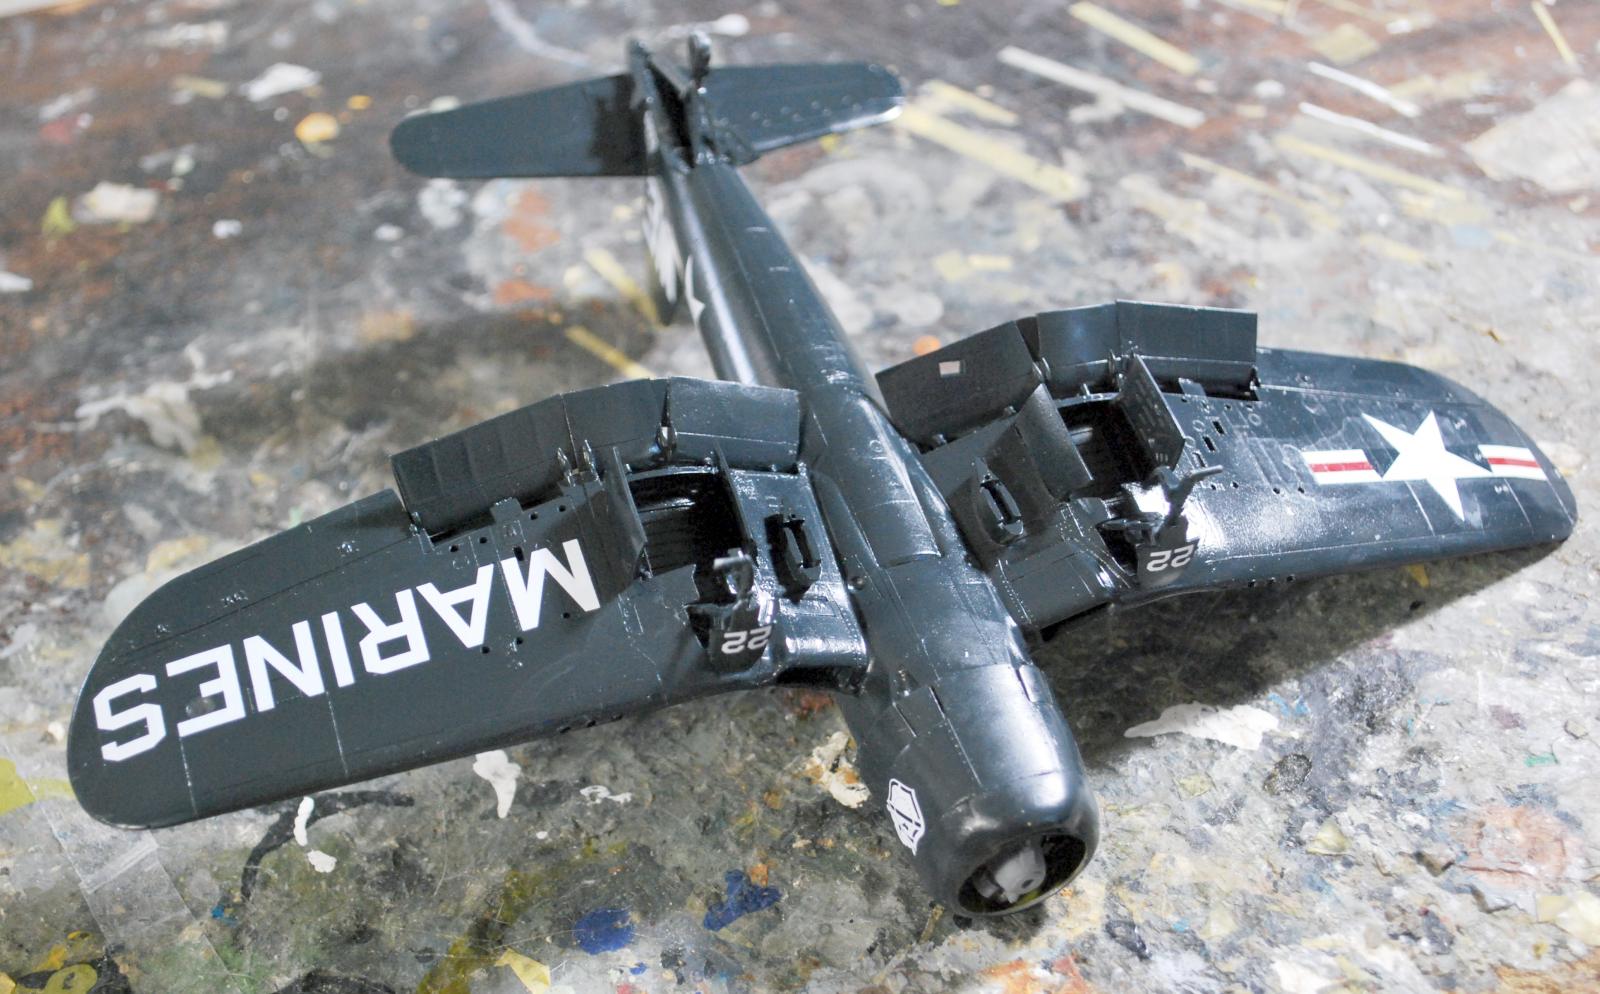
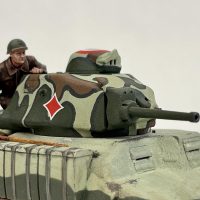
The photo I had of 22-WE showed this F4U-4 had the later canopy with the integral armored glass windscreen. I was able to source a Squadron vacuform on eBay. This was so clear once I dipped it in Future that I decided I would attach it in the closed position. With a good vacuform canopy, you can close it up and see all the detail in the cockpit, which isn't always the case with an injection-molded canopy.
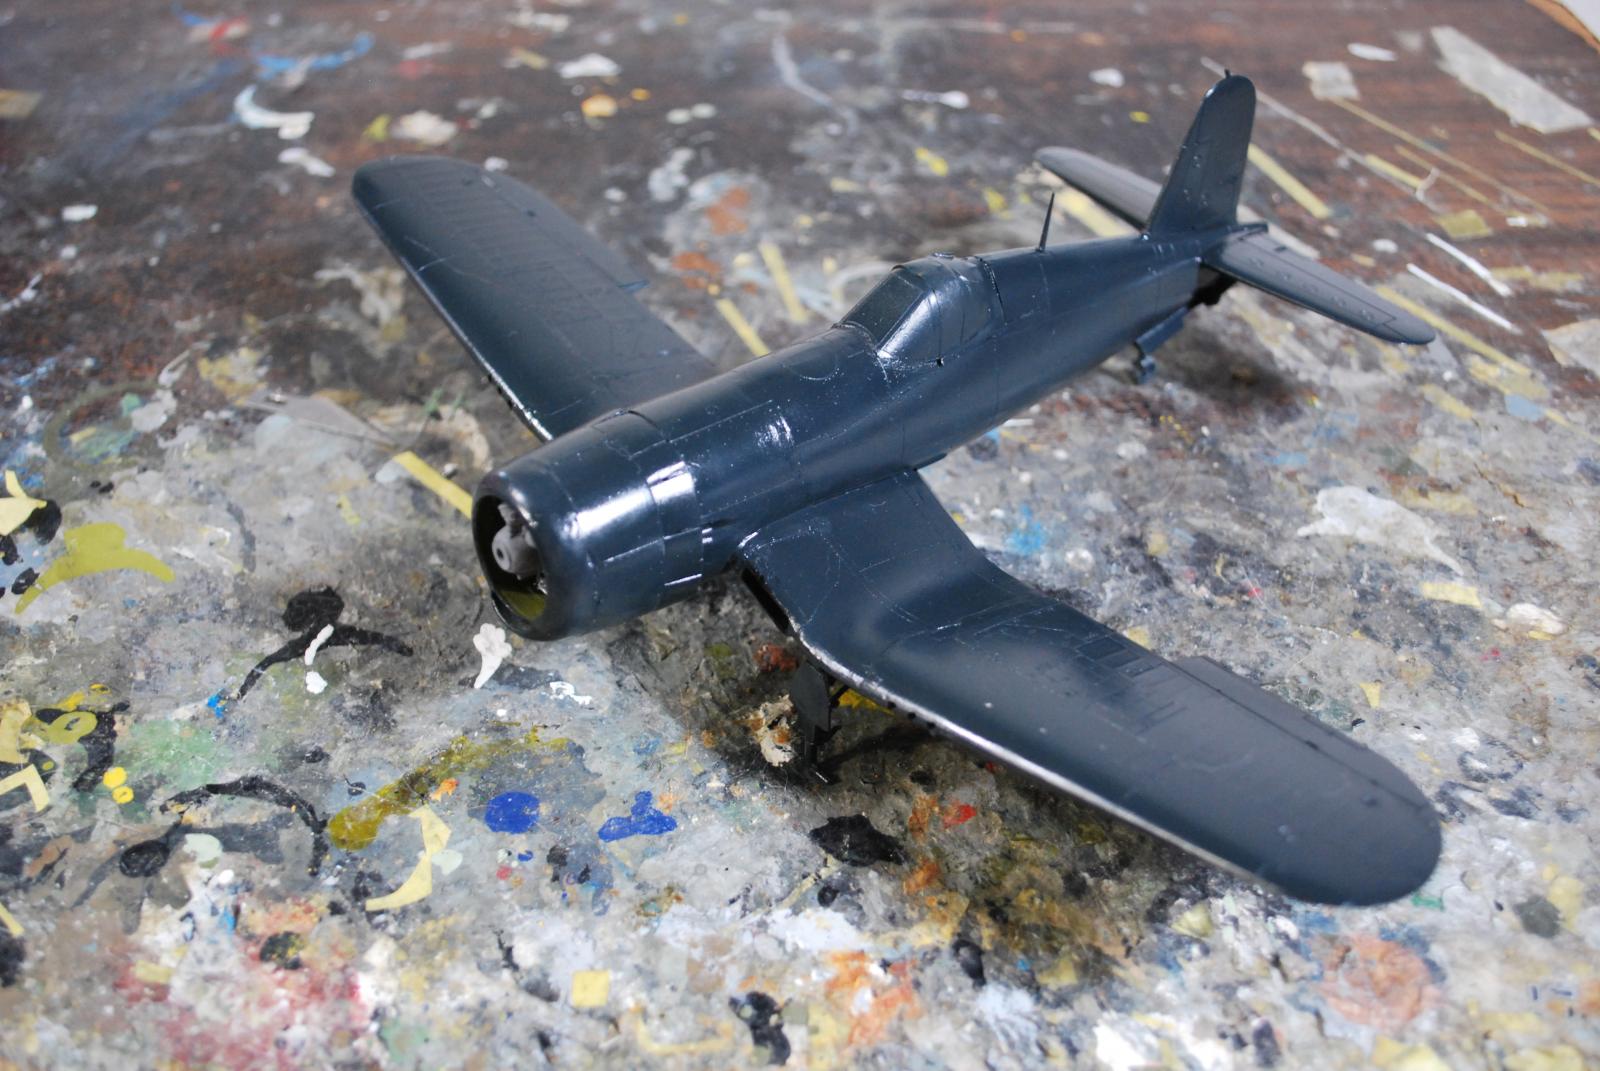
With the canopy masked, the model was ready to paint.
Painting:
I decided to use my Xtracrylix Glossy Sea Blue, since that is the most accurate rendition of this color. Xtracrylix doesn't need a primer, but it is less likely to get dinged or scratched if it's applied over a coat of another paint, so it has something to grab onto. I gave the model an overall coat of Tamiya XF-54 Dark Sea Grey, which also allowed me to check everything had been smoothed out in construction. Then I applied a coat of the Xtracrylix, which dries to a nice eggshell finish. I applied a coat of Clear Gloss to protect it.
Decals:
The Meteor Decals went on without a problem.
Final Finish and Assembly:
I attached the rockets and the drop tanks. I also attached the main wheels and the prop, then unmasked the canopy. At that point I declared victory and considered it finished.
Overall:
This is not a difficult conversion for a modeler experienced with resin sets who isn't afraid to take a razor saw to a kit. Figuring out how to get a solid set-up for mounting the outer wing was the hardest part of the project, but the model is solid enough it can be picked up by one wingtip. Recommended for Corsair fans unhappy with the Hobby Boss kits who want something better than the old Hasegawa kit.
Review kit from my wallet. Thanks to Special Hobby for the conversion set.


Loved reading the "History" and the whole article. Enjoyed a lot, not only the finished excellent result, but also the nice (yes, at "lightning speed...) build thread, @tcinla!
Yet another great build and description, Tom @tcinla
Very nice subject.
Nice conversion build, Tom.
Nice work with the conversion, Tom.
Looks like a very busy time getting things together and lined up,
Great Looking F4U-4 and an equally impressive write-up.
Superb work Tom
Looks good Tom!
Really nice conversion, Tom (tcinla).
A great build!
Excellent work Tom...thanks for sharing the build results and aircraft history with us. Two thumbs up.
Very nice Tom, it turned out just fine. Nice choice of markings too. One of these days we may get a Tamiya-quality kit of the F4U-4 by one of the major manufacturers. I think it would be a hot seller. Your evaluation of the currently available F4U-4 kits was spot on.
Beautifully done, Tom! I always enjoy the historical information you include, too.