A Special SpAD
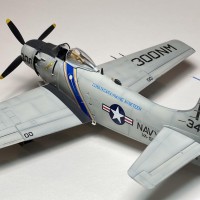
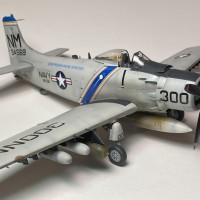
The Tamiya A-1H Skyraider is one of those must-build kits if you have any interest in the Vietnam War and model in 1/48th scale and an example for the collection has been on my personal radar for quite some time but I'd always managed to find something else to build instead, at least until recently. I had the kit, and had the motivation, but was substantially lacking in inspiration when I remembered that a friend of mine, Steve Birdsall, had spent some time on the USS Ticonderoga during 1966 photographing combat operations off North Vietnam and they had VA-52, a Skyraider squadron, embarked with the Air Wing. A quick email to Steve resulted in the electronic transmission of several images of the specific airplane I wanted to model and the stage was set!
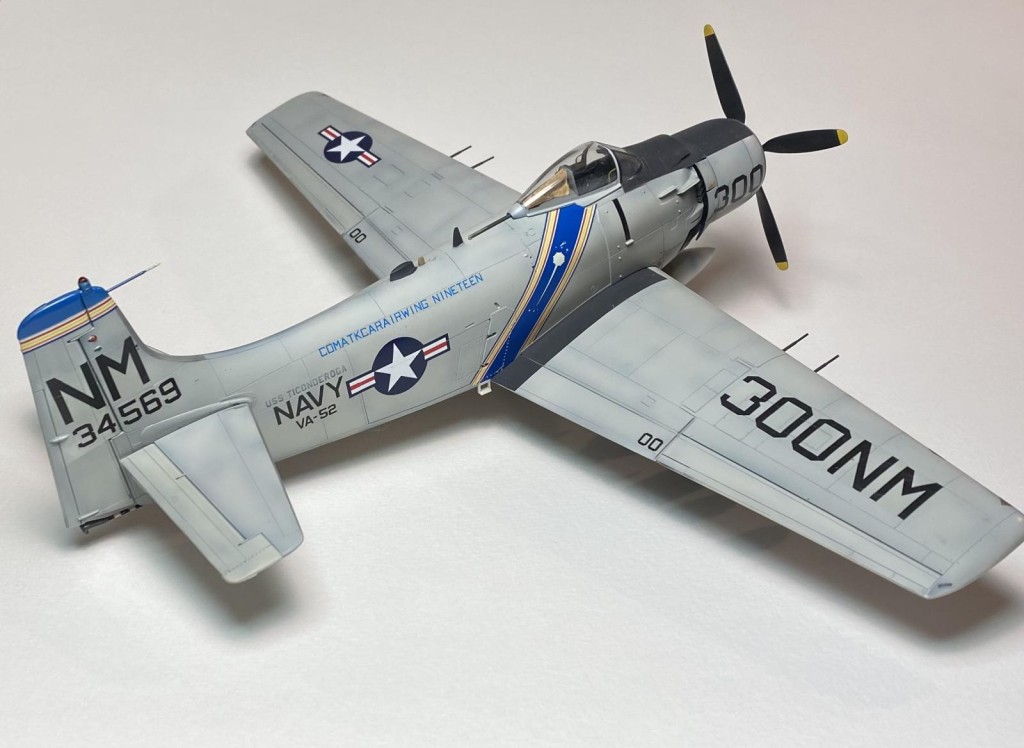
The object of my affection in this instance was A-1H BuNo 134569 (NM300) from VA-52, a conveniently superficial task because the exact airplane I wanted to model was covered on the Tamiya decal sheet that came with the kit. Unfortunately, things weren't as simple as they seemed because the kit decals were, and I presume still are, inaccurate for that particular airplane! There were ways around the issue, however, and the project was duly begun.
The actual construction of the model was simplicity itself because the Skyraider is one of The Big T's better 1990s-vintage kits, sufficiently accurate for the most part and easy to construct. A tiny amount of photo-etch from a primordial Eduard set was used to enhance things here and there and a bit of tissue soaked in white glue was used to simulate the canvas cover behind the seat's headrest, but otherwise the model is pretty much box-stock. (I should have scratched up a Yankee Extraction System seat for the model as well but I didn't! Shame on me!)
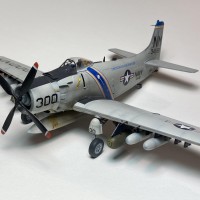
Painting was easy, Light Gull Grey over White with a blue fin tip to match the color on the fuselage sash. Paint was also mixed up to approximate the Corrogard found on the leading edges of flying surfaces during the time period in question. At that point it was time to have some fun. The specific airframe I was modeling had apparently gone through a heavy maintenance cycle at Nippi Aerospace in Japan prior to VA-52's 1966 war cruise and a couple of things were off just a little bit. Specifically, the wing pylons (but not the one on the aircraft's centerline) had been left in Glossy Sea Blue, which implies they had been taken from stored GSB-painted components and not repainted. The propeller was nonstandard as well; compare the prop-tip striping on the model with photographs of SEA-vintage Navy A-1s and you'll see the difference immediately. In the Pacific Fleet aviation community's parlance of the time the airframe had been "Nippi'd", their term for any non-standard paint and markings applied at that facility during the course of maintenance or overhaul. The anomalies add a bit of interest to the model so the prop tips and pylons were duly painted in the appropriate non-standard manner after which it was time for decals, which takes us to a major issue if you choose to build the VA-52 bird on the kit sheet.
A couple of things stand out on those factory decals that are worth noting. First, they appear to be way too thick when they're on their backing paper, but they're appropriately thin once they've been applied and they settle down nicely as long as you use Tamiya's proprietary setting solution. That's the good news. The bad news is that Tamiya somehow managed to misunderstand the colors on 569 because they provided the "COMATKCARAIRWING NINETEEN" lettering that appears on the fuselage spine in red, when it was actually painted in blue! A quick email to Gerry Asher at Fox 3 Studios saved the day for me, however---besides producing an excellent line of resin accessories and conversion parts Gerry also dabbles in short run decals from time to time and I was able to persuade him to do a set for my A-1! (He still has a couple of extra sheets left if anyone else wants to model this particular airplane.) Some other minor markings issues were addressed---the ship's name found above the NAVY legend on the fuselage was lightly overpainted but still visible, for example, and the model was completed.
One more thing should probably be mentioned regarding the Tamiya Skyraider, and that's the smaller bombs offered in the Navy version of the kit. They've been largely decried within our hobby as being totally inaccurate imaginary bombs but they're not; they replicate the AN-M57 250-lb general purpose bomb with low-drag fins and are reasonably accurate. There's no reason not to use them on a model of a Navy Skyraider should you feel the need, although I didn't do it in this instance.
At any rate I was happy with the completed model and hope you like it too. Many thanks to the guys who helped with it during the research and construction stages; Steve Birdsall, Jim Sullivan, Gerry Asher, Mark Aldrich and Don Jay all helped out with the photography that made an accurate model possible. We never do this stuff alone, right?
phil
Very good looking build!
Sharp looking build, Phillip.
Those are beautiful markings and the build is quite impressive looking. Kudos to the photo guys as well.
Your informative text will surely ease my build once I pull the box off the stash shelf and dive in. Inspiring, Phil. I’m looking at the instructions right now.
A nice looking Spad. I did this scheme as well, but used the kit decals in whole, realizing that the red text was wrong, and otherwise ignorant to the other details you mentioned. I really think it is a great looking scheme, regardless. I also like what you did with the tissue and glue. 🙂
Amazing result, Phillip, beautifully researched! It was great that you were able to get your hands on pictures of the actual bird. Also, the specifics (anomalies) of this plane and your rendition on them, only adds to the modeling excitement.
Once again, a masterpiece.
Congratulations!
You're lucky you didn't do the Yankee system, because most USN Skyraiders didn't have it - just the few ATKRons using the airplane at the end of its time in the Navy.
You certainly got a great result with this.Good catch in the painting details.
Great looking Skyraider, the finish really came out nice. Great job!
Beautiful result on this Skyraider, Phillip @phillipfriddell
Great weathering, for example the fuel stains on the droptank. Amazing.
Well done.
That's one nice looking Spad Phillip.
Nice work, Phillip. Great research and attention to detail regarding the anomalies.
Phillip, it's great to see a Skyraider with out a Bumble Bee or a load out that is more practical and not filled with every hard point having 500 Ib bombs. Digging deeper (the history) into a subject being offered by the manufacture is always of interest and adds to the interest of looking at the model.
Some strong work in the subtle painting of this model. It works.
Well done, Phil, very well done.
Thanks for your kind words, guys, and special thanks to Steve Birdsall for planting the seed way back when. The Skyraider is a special airplane to me and here's a shot of a VA-25 bird taken by Tom Hansen over the Gulf of Tonkin to prove it! We truly do get by with help from our friends!
phil
1 attached image. Click to enlarge.
Excellent work Phil!
Outstanding, makes me want to build one too!
That's a great looking Skyraider! Love it.
Thanks again, guys!
I contacted Gerry Asher yesterday to see if he still has any of the VA-52 decals left---he's got 3 sheets left if anyone is interested. You can contact him at gmasher@netzero.net if you'd like a set. The decals are ALPS printed, very well done, and are for that one airplane only.
phil